How To Make A DIY Wood Countertop (easier than you thought!)
Create your very own DIY wood countertop and even add a little “faux” aging if you like! It’s so much easier than you thought!
Hey Friends! I’m back today to share another tutorial for the recently completed –>> “Coastal Farmhouse Laundry“.
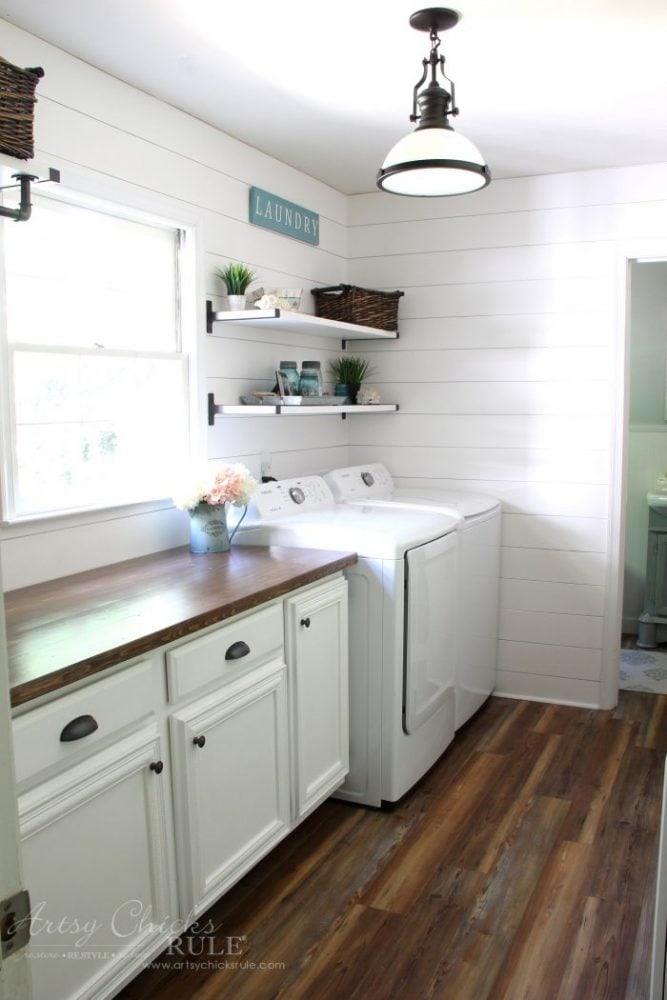
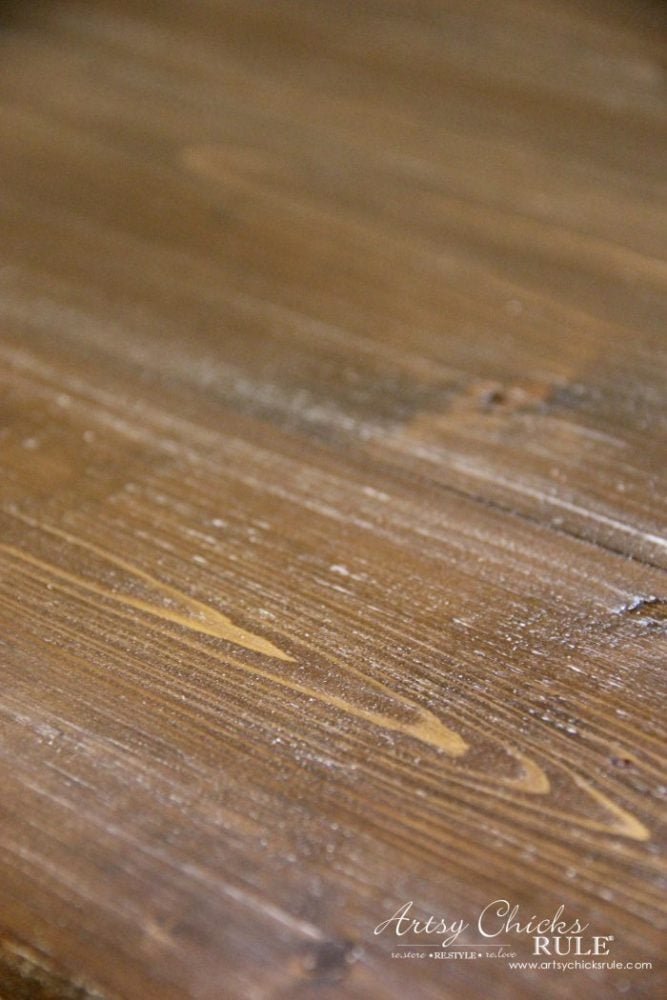
How to make a DIY wood countertop and how I gave it a tiny bit of “aging” too.
You can see the aging just a bit in this photo.
I wanted it to have a bit since the floor also looked “aged”.
Have you ever considered putting a wood countertop somewhere in your home? Bathroom? Kitchen countertops?
Or do you have a wooden countertop already? Butcherblock countertops are very popular.
It really was not hard to do at all. But it was a little hard to wrangle because it was so long.
Other than that, not so bad!
They can be just as durable as other materials if they are finished correctly. Plus is nice to have another option besides laminate, marble and granite, right?
MATERIALS LIST
- 5 – 2x6x8 white pine boards lumber
- biscuit joiner (we have a Ryobi brand but this one is similar)
- biscuits
- sandpaper
- wood glue
- driftwood stain
- antique walnut stain
- white paint
- gel top coat
- chip brush
(Want to see even more of my favorite DIY supplies??? Take a look in my very own curated shop, here!)
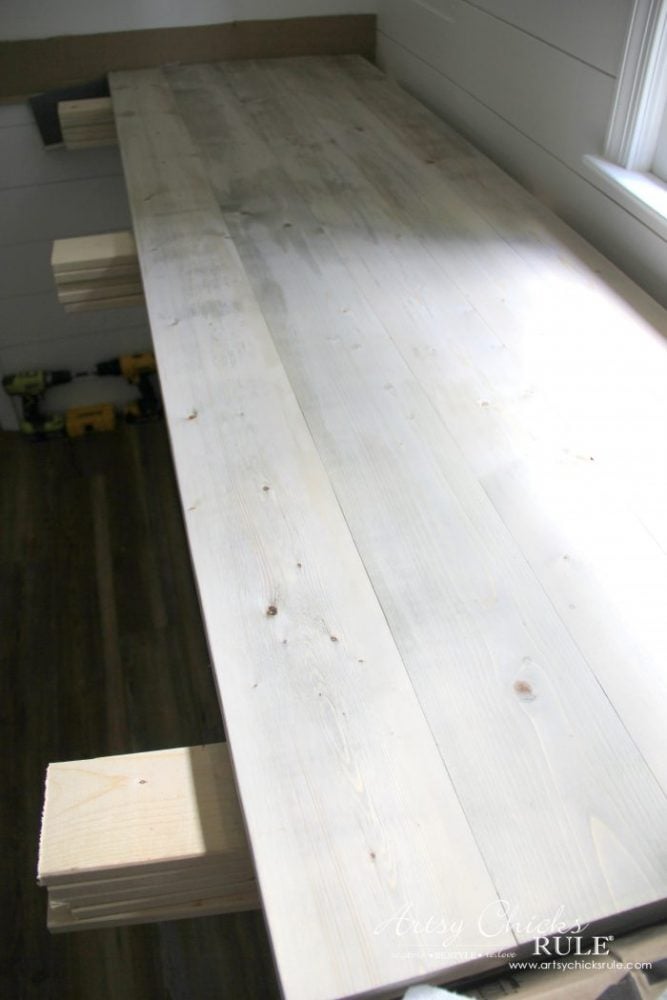
Ripping Wood
We started out by ripping each side of the boards by 1/4 inch, which totaled 1/2 inch for each board.
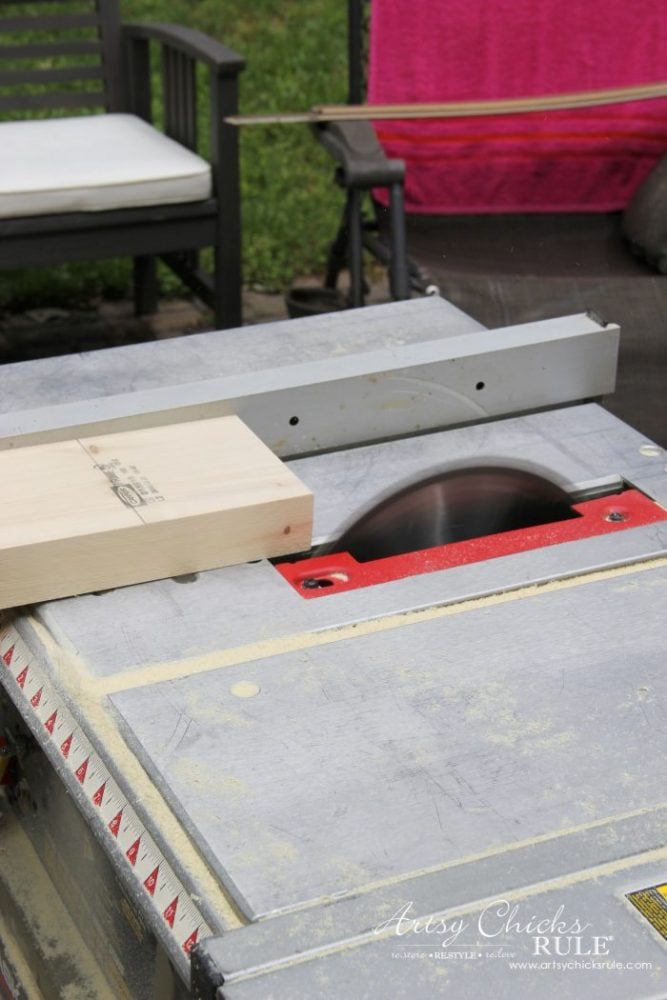
That did 2 things, it created smooth sides to meet up and it made the countertop the right depth.
We could have left the sides as they were but they come a bit beveled and I didn’t want that look.
I wanted to have it pretty smooth going across the top.
Plus I wanted the boards to be all the same size.
Want to see some of these projects in “live” time? Hop on over and follow along with me on INSTAGRAM. I’m always sharing in my stories as I’m doing projects, finding new furniture, fun finds….just all the day to day behind the scenes.
Cut Slots For Biscuits
Next, my husband cut slots with the biscuit joiner to join the boards together…
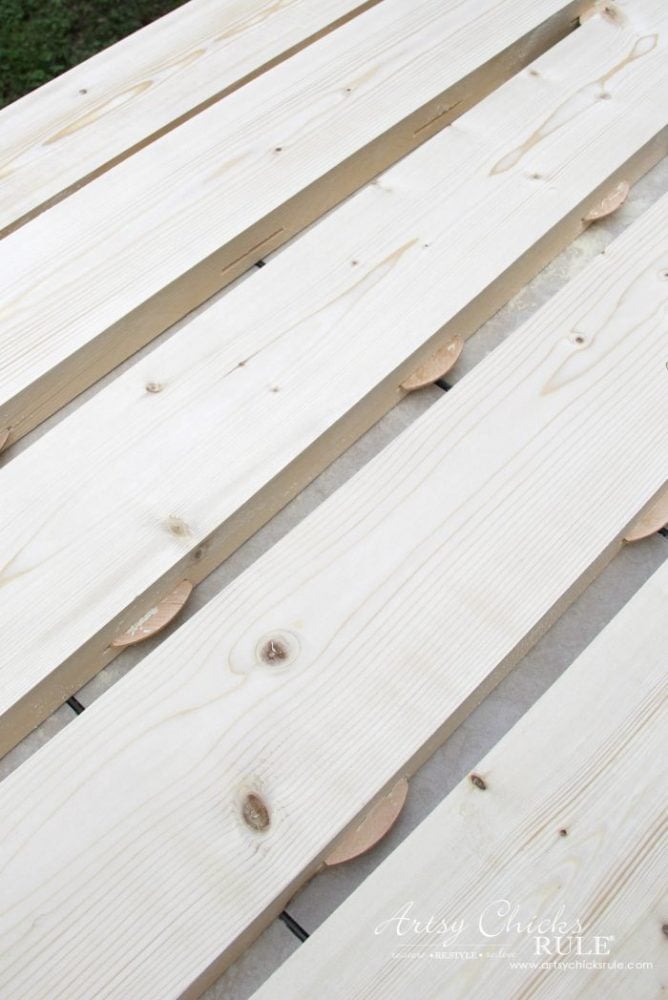
He pulled it apart so I could take a photo.
I would have had more detailed photos of this whole process but we were on that crazy ORC schedule.
He put these back together and then sanded them smooth…..outside.
You can also use something like a Kreg Jig with pocket holes too.
I wish I had taken a photo of how the pine boards looked before we ripped them down on each side.
It wasn’t bad, it just wasn’t nice and smooth going across the top. The wood dipped down in the seams.
If you like that look, then you can skip the “ripping down the wood” step.
We used pine because that was the look we were going for. But keep in mind that pine is soft and may scratch or dent more easily. You can use other hardwoods like maple, etc., instead.
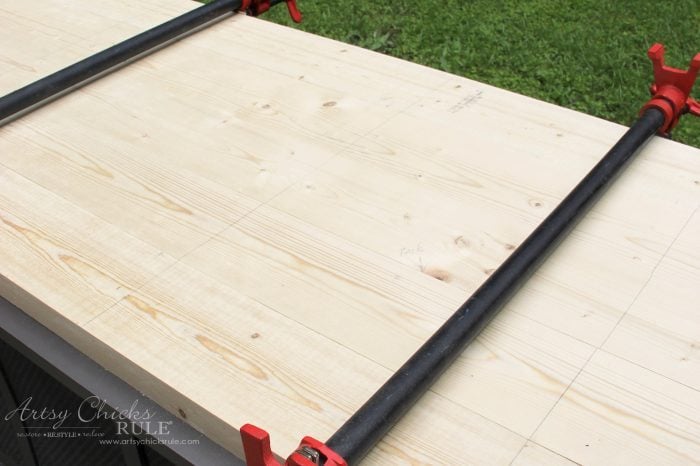
Glue and Clamp in Place
Next, we brought it in and pieced it back together to slide it into place.
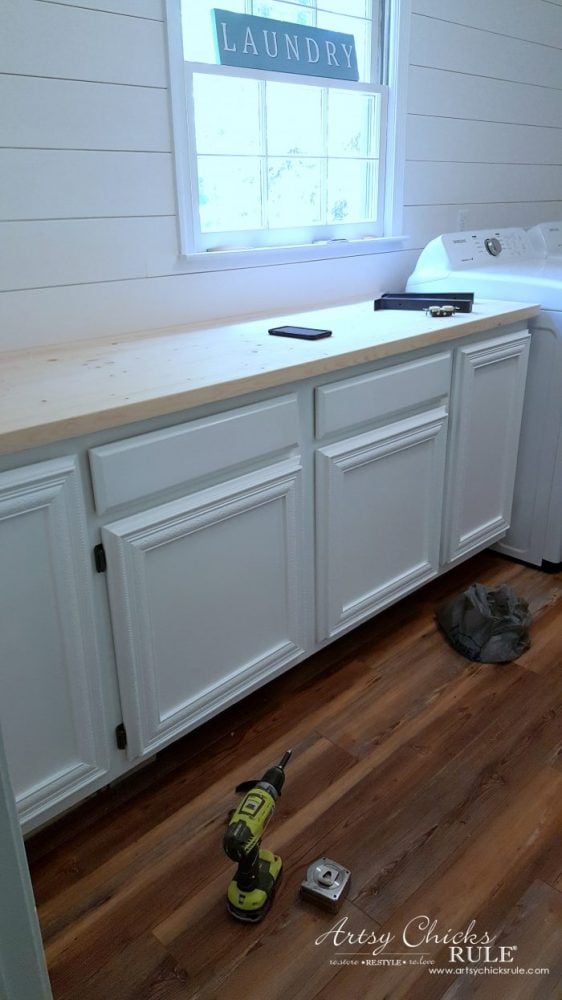
Sadly, I don’t have a photo of it clamped (with 4 – 3 ft clamps) here but this is where we clamped and glued it together.
We didn’t want to risk moving it again.
This photo was taken after it was dry and the clamps were removed.
By the way, be careful when you glue that it doesn’t seep up into the top of the wood.
Any area that has wood glue will not accept the stain and you’ll be left with unfinished-looking spots.
Decide on a Finish
For the finish, I had created so many samples that my head was spinning.
This is what I narrowed it down to…
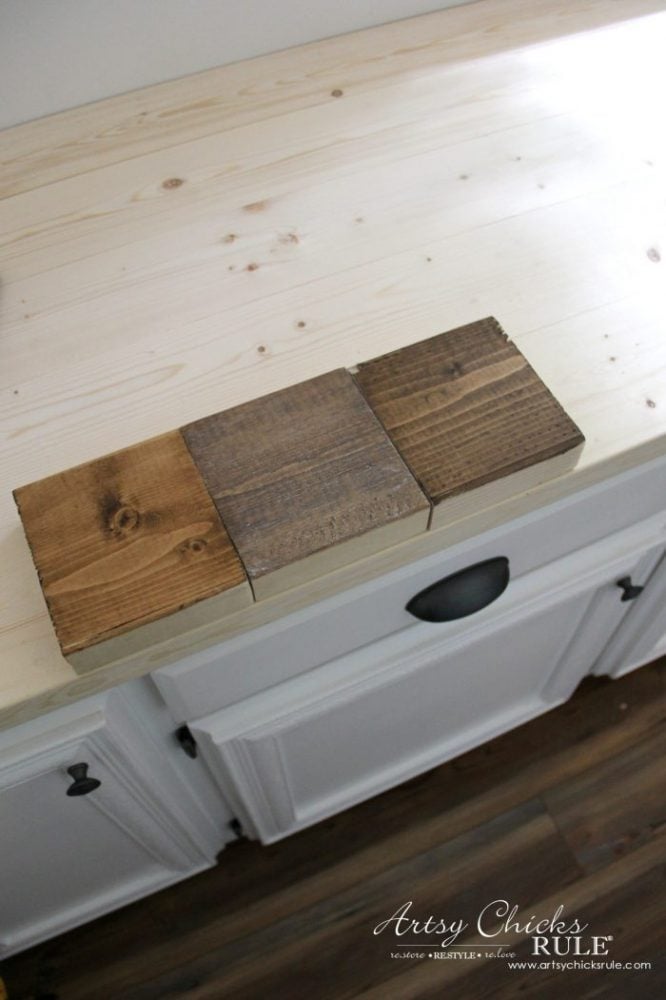
I just could not decide what to do with this with our DIY wood countertop.
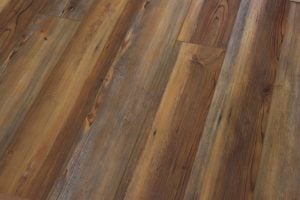
That flooring was the main attraction and everything just looked wrong next to it.
You can read all about our awesome flooring, here. (I love it and am so happy with it!)
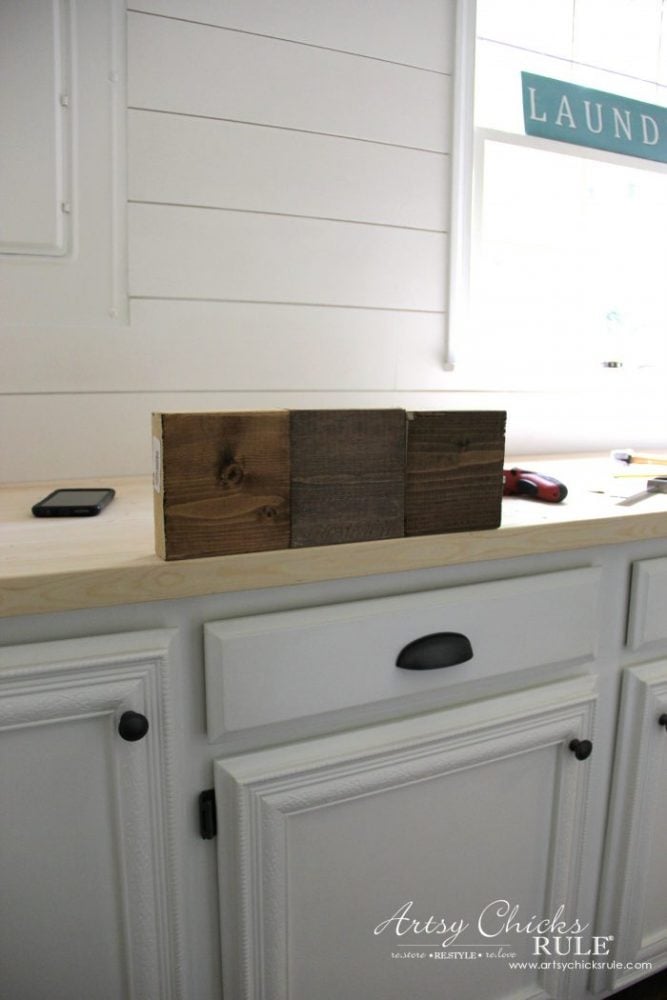
I finally decided on a variation on that center block.
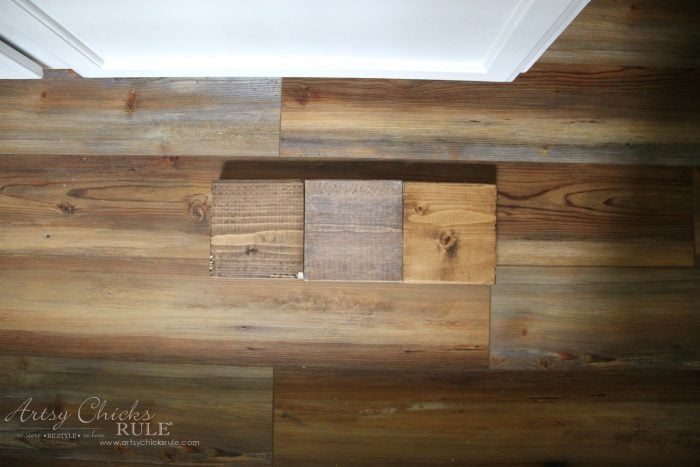
I have to say though, those 3 blocks sure match that floor well!
I typically use Minwax Pre Stain Conditioner anytime I stain raw wood but I wasn’t liking how it was turning out.
It was ending up too dark.
I had done a few samples with my favorite driftwood stain to see if I liked that look. (I didn’t)
So I grabbed one of those and rubbed my stain right over it.
Yes! That kept the stain from grabbing too dark plus it changed the shade of the stain just a bit.
So that’s what I used as a “pre stain”. Weird, I know, but you do what works.
Here is the wood with the driftwood stain applied. (and lifted so as not to get stain on the cabinets and surrounding areas)
Another view of the driftwood…
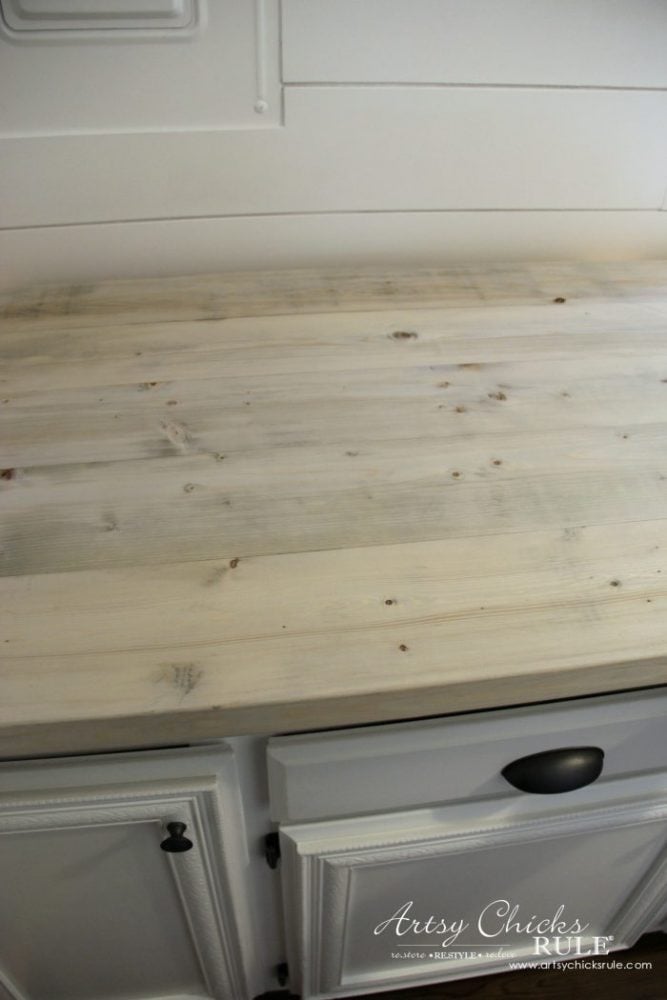
It’s pretty subtle but that’s because it takes a bit for the driftwood color to develop.
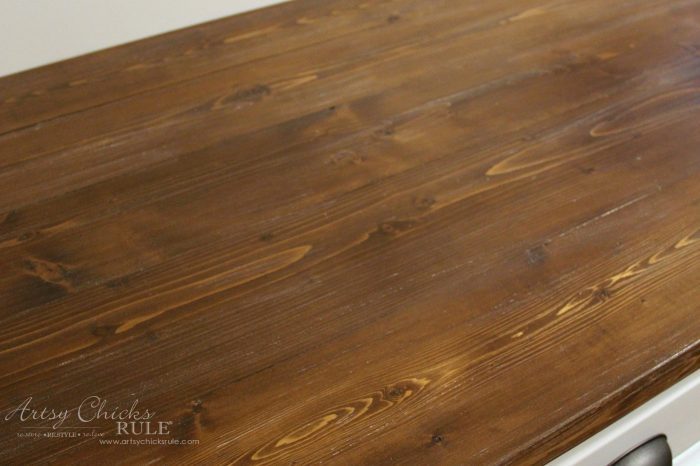
Once it was dry, I applied my antique walnut stain.

Perfect! Exactly the color I wanted. Not too dark and not too light.
I wanted it to have a bit of an aged appearance so I knew I was going to apply some white dry brushing as I did on the sample board I chose.
But…I didn’t want to ruin all this work if for some reason the paint when on too thick or something.
So I decided to apply one coat of poly first. (easy to wipe up if you make a mistake after)
Once it was dry, I came back and very lightly went over the whole top with my chip brush and white paint. (in a very dry, dry brush technique)
Remember though, light strokes.
Drybrush For Aged Look
Want to see a VIDEO on exactly how to dry brush? All the ins and outs, here >>> “How To Dry Brush – Video“
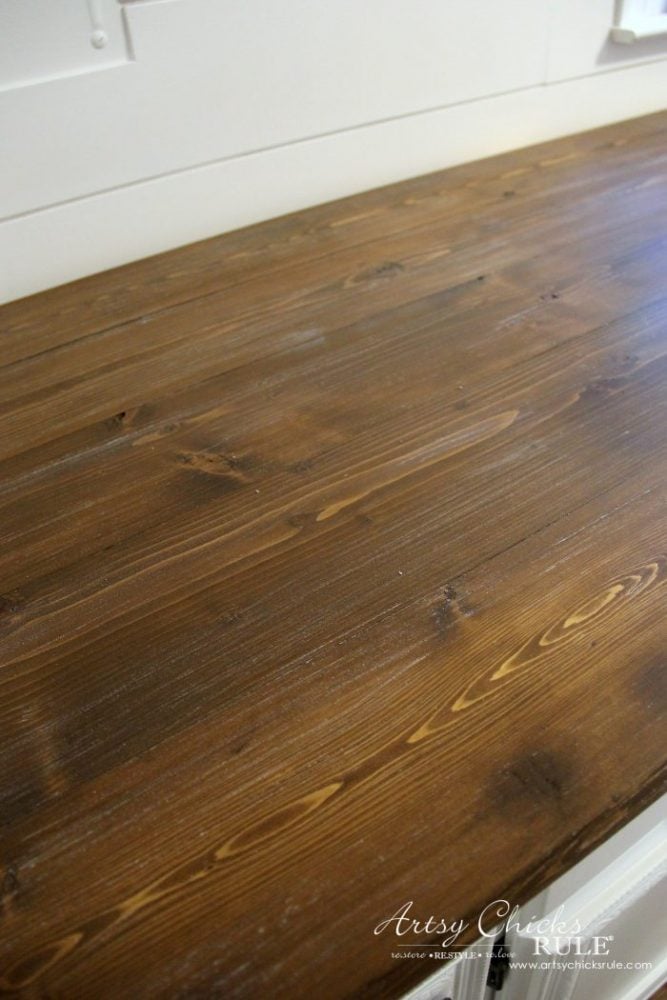
I love the look it gave our DIY wood countertop.
When we were done with the staining, etc., we screwed it in place from the underside of the cabinet.
Sealing With Poly
I sealed that with another coat of polyurethane. Some people apply Waterlox, I just used regular poly since it’s not in a bathroom or kitchen. You can use the sealer of your choice. (I have linked the one I used above)
Once that was dry, I gave it a light sanding with fine grit sandpaper and applied a bit more white here and there. Be sure to remove all of the dust with a tack cloth before applying another coat of poly.
Then I gave it another coat.
I will probably give it another coat or two but that’s it, all done!
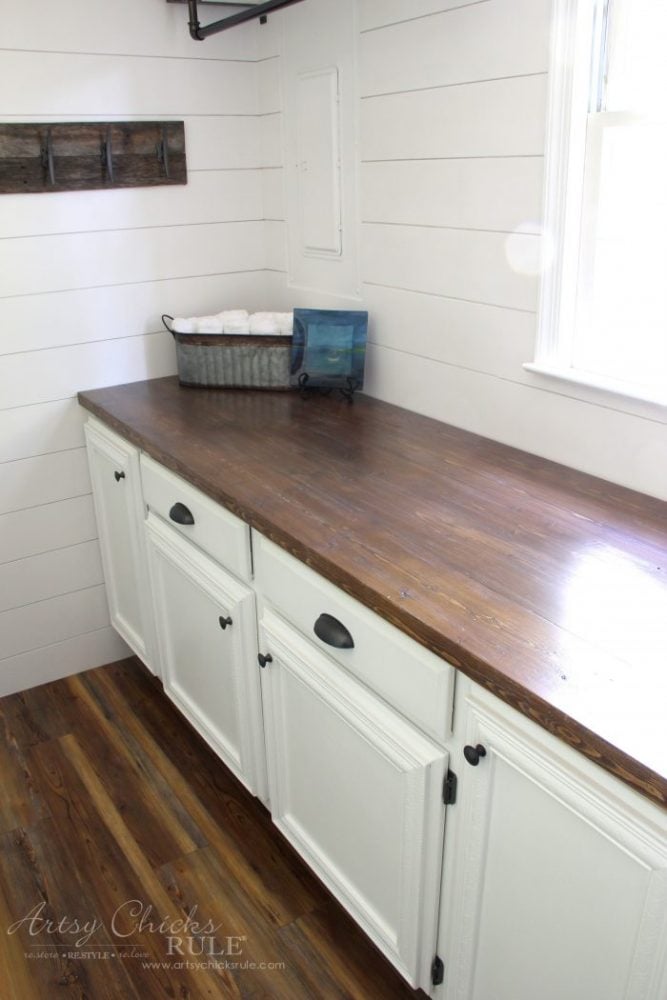
Much easier than we expected it to be.
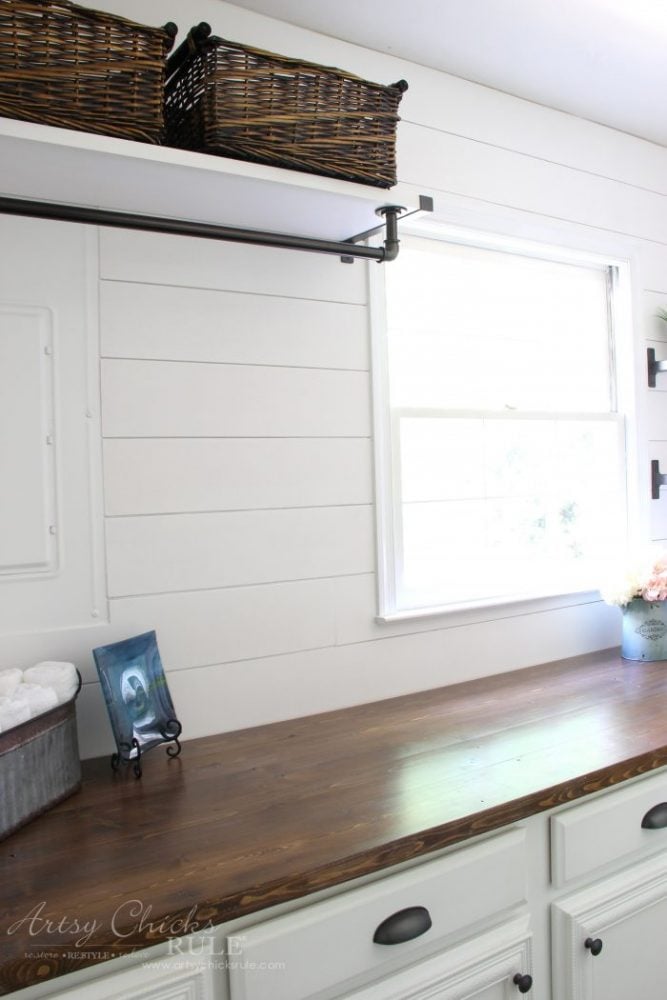
And I love the warmth and contrast it gives to the room.
Plus I think the tiny bit of “aging” I gave it goes nicely with the flooring.
PIN this DIY Wood Countertop to save it for later!

Now I want to put a DIY wood countertop somewhere else!
Too bad I have nowhere else to really put one. Maybe in the next house!
More home DIY tutorials we have shared here:
- DIY Faux Shiplap (get the look, without the expense!)
- DIY Faux Board & Batten (simple and quick!)
- How To Make a DIY Wood Countertop (you are here)
- Build Your Own Kitchen Island With Big Box Store Cabinets
- How To Install Laminate Flooring (tips and tricks)
- DIY Crown Mold (easy way to get that wide custom look!)
- Build Your Own Built In Bookcase – Tutorial
- Chalk Painted Kitchen Cabinets
- How To Use Gel Stain On Your Stairs
- How To Paint Light Fixtures Without Removing Them
- How To Build a Permanently Attached Wall Coat Rack
- DIY Floating Shelves Tutorial
- How To DIY a Tile Backsplash
- How To Build a Custom Closet
- Remove Popcorn Ceilings The Easy Way
- How To Remove Peeling Paint
- DIY Wood Mantel
- How To Paint a Tile Floor (it works!)
- How To Hang Peel and Stick Wallpaper
You might also like to see how we installed “shiplap”, the easy (and inexpensive!) way:
See it, here!
I hope you all have a wonderful holiday weekend!
xoxo

Here are a few of the other projects seen in this post:
")

")


")

Nice job!!
Thanks Anne! :)
I love your combo of vinyl plank floor / wood countertop in you new laundry room . I’ll be copying it when we get to our remodel of our laundry room . Thanks for sharing your redo !
Thanks Shelby! :) We are so enjoying it! And yay! Know you will love it! xo
This looks amazing, Nancy. I’ve got an area where I’ve been wanting to do this and will be using your tutorial. Thanks for sharing how you did it. Pinning! ~ Angie
Thanks Angie! :)
Love this! I see you did it in the laundry room. I’m considering a wood counter on an extension I add to my kitchen – but I’m wondering if this would hold out with that kind of use. What do you think? Butcher block is sooooo expensive!
Thanks! :) I actually considered doing this in our kitchen so I wouldn’t hesitate to do it. But with that, I haven’t had it in a kitchen on the daily so can’t say for certain. :)
Love it!!
The young couple that lives in my rent house did this in the kitchen. Someone had used Rustoleum for countertops and ruined them. This handy guy built new wooden ones and we’re all happy.
We will be interested for updates on how well it wears.
OH yay!! That’s awesome. I am really loving he warmth of it. And yes, I’ll be sure to update mine here. :)
I love this!! I have been wanting a wood countertop in my kitchen. Now I know how to do it!! Thanks so much for sharing all your talent!!!
Yay, thank you Lynn! :) I’m so enjoying the warmth and beauty of that countertop in there. xo
Beautiful! I think using the pine in a laundry area is fine because it won’t be used as much by as many people (and not seen by as many either) as a kitchen counter top is, but I would use hardwood for a kitchen. Great job!
Thanks Dawn!! Yep, you are right about that! You could really use any wood you like. I love pine for the “farmhouse” feel it gives and a little beat up is even better! ;) xoxo
Hey there, how did you secure the countertops to the cabinets?
Hi Amanda,
We just secured it from underneath with wood screws, through the base to the cabinet. Being careful to use screws long enough to secure but not go through the top. :)
Really nice Jo’s Nancy!!!
Thanks Rene!! :)
This is lovely and exactly what I’d like to do! Great job :) can I ask how much the project cost in total? You may have mentioned it above but I didn’t see it. Thanks!!
Hi Lindsay, I don’t remember exactly but it wasn’t much! Basically the cost of the wood and that’s it. We already had the biscuits to join them and stain/poly. Pretty simple project cost wise and labor wise. :)
I love the style “coastal farmhouse”!! This is exactly what I have been trying to explain to my husband. Definitely trying the counter in our laundry room space. Thanks
Aw yes! :) Good luck with the counter! We had been thinking about adding a wood counter somewhere (kitchen or laundry) for several years. It wasn’t so bad at all! And we love the look. xo
Has anyone done this in the entire kitchen yet? Like under and around the sink area? I love the beetlekill pine form the mountains and would like to use it. It has it’s own beat up, aged look already!
Oh yep, I’ve seen many! I haven’t personally done one though. Search around a bit on the web and you should find a few! :) There are varying ways that people have finished them out from water based poly, to oil based to marine type poly.
How did you get the new wood on the counter? What material did you use to secure it?
Hi Ariel,
We just secured it from underneath with wood screws, through the base to the cabinet. Being careful to use screws long enough to secure but not go through the top. :)
I LOVE the counter ! I need to replace my kitchen counter. In your opinion, do you think this would be a good choice ? We can D.I.Y. just about anything (we built our home) but I’m not sure if this would be a good, durable choice.
Thanks so much !
Charlene
P.S. Thanks for fixing the problem with share-a-holic from a few months ago. I LOVE your ideas.!!!!!!!!!!
Thanks Charlene! :) We actually considered doing this a few years ago, in the the kitchen. I know many who have! Just keep in mind, something like Pine is a softer wood so won’t hold up as well. If I were to do it in the kitchen, I’d go for a harder wood. I never got very far with our plans since we changed gears, so am not 100% what we would have sealed it with. I know some seal with the marine finishes because they hold up to so much. But I can’t speak to those since I’ve not done it myself. :) But yes, if I still wanted to do the wood in the kitchen, I would! ;) And you are so welcome, that share-a-holic is long GONE! :) Have a great week!! xoxo
What brand/type of poly did you use?
It is beautiful!! Wanting to do a wood counter in the bathroom.
Hello!
I used Gen Fin Gel top coat. I have the exact one linked in the post under “materials list”. :) And thank you! xo
Is the countertop food safe? I wonder about the stain and poly if the top is being used regularly for food prep.
Hi Amanda, I’m not an expert on that, but it is my understanding that most polys are food safe once they have fully cured. I personally would have no problem using this in a kitchen. :)
I know I am late to the party but love these! Did you have to use a planer on the wood?
Hey Ashlie!
No, we didn’t because we sort of wanted a rustic look. You most certainly can though! xo
Nice work! Did you have any issues with the 2×6 boards twisting to warping? And if so did screwing it to the base cabinets take care of it?
Hi Andy! Thank you!
No, we haven’t and yes, screwing to the base will help that somewhat if you do have an issue with it. Planing the boards would help too. We were just very careful in our selection of boards from the store. :)
This is so beautiful! I have seen this from kitchen in the 1930s, and I want it so bad in my kitchen! But my husband has not seen it out there yet (he’s a builder), so I have to convince him that it’s an upward trend. Help! ?
Thanks Maggie :) We were originally going to do this in the kitchen. My husband wasn’t so sure in the beginning but he got on on board finally! We did end up going in a different direction in there but absolutely LOVE it in our laundry! And yes, it’s a thing, tell him! lol Good luck! xo
Did you put it on top of a layer of mdf or other similar flat surface? My main concern is warping with the soft wood but maybe having them joined together solves that problem. We are doing something similar in our kitchen and we had to rearrange our cabinets so we can’t just use the old countertops as a base. I’m curious to see how it lasts long term. Butcher block is ridiculously expensive for something you can diy much cheaper. Great job!
No, we didn’t do that but you certainly could if it is a concern. I think the wood is thick enough that that shouldn’t really be a problem. We have had no issues so far! And I totally agree with you on how much cheaper it is to DIY it. MUCH! :) Good luck with your remodel! :)
How did you secure it on? From underneath? With?
Hello! I actually applied this one with 3m strips for the photos only since I wasn’t planning on leaving this where it’s at. There are several ways you can hang it though. You can use the loop hooks on each side of the back and put 2 screws in the wall for them to hang on. That would be pretty secure. If you want it really secure, you can screw 2 to 3 screws straight through the board where the knobs/hooks will be on the front. Then attach the hooks and done! My husband and I completed a DIY coat rack build before Christmas and that’s exactly how we did that one. I’ll be sharing that project here on the blog soon. :) xo
Thank you! I can’t wait to try this with my girls! I bought some remnant pieces to practice. I am going to try dowls instead of biscuits to bring them together. I don’t have a saw, so I will level them with a block plane.
Hi! I love the look of your counters and we are hoping to recreate something similar this weekend. I have two problems, 1. We don’t have a table saw, so I’m wondering if it can be done without? I understand why it’s done and love the clean edges but it seems impossible without a table saw? 2. We do not have a biscuit joiner but we were going to use pocket holes, do you think that would work as well? Thanks for sharing your work!
Hi Meghan! A table saw would probably be best…and easiest but you could use a circular saw with a guide to do the cutting down the sides, etc. Or get The Home Depot cut them for you but I’m not sure they do that type of finish cutting. You do want to make sure they are square so they line up together properly. And yes, you can use a pocket hole jig on the bottom side of the boards and screw each board into the next to secure them together. We love our countertop! Good luck with yours, I know you’ll love it too! :)
We’re looking to do this in our kitchen but don’t have a lot of the tools you showed, especially the one to finish the edges so there’s no gap between planks. Could you use stainable wood filler?
I imagine you could also use stainable wood filler. Of course, I do think having no gap would be the best look but I completely understand not having the tools to do that. It should be fine especially if you use a darker stain.
Hi Nancy great job on the countertops! Hubby and I am definite DIYers I’m the one with the inspiration and he’s the “honey -do that can follow-thru”! I think I’ve decided to go this route instead of using a Kia but your block countertops since we have one part of the counter that is wider like 38 inches because of the foundation downstairs . After all better not let his tools go to waste I’ll post a picture when I have it all done thanks for your inspiration !
Thank you so much, Linda! That sounds like the perfect partnership! ;) And yes, that sounds like a good plan. Do send a photo, would love to see! xoxo
Could I use this technique for an island? I want one with a 15″ overhang on 3 sides, so it would just require some L brackets right? I feel like this is our cheapest diy option for our island top. (We’re planning to use base cabinets and drawers for the bottom)
thanks!
Yes, absolutely! You would need some bracing with that kind of overhang though as you mentioned. We did the exact same thing, base “big box” store cabinets for our island too. (retro’d a little, you can see it >>> here) Great plan, budget-friendly and it’s going to look amazing! :)
I was wonder what size biscuits you used to join the boards together.
Hello! If you go to the post, I have all the links to the products I used (including the biscuits :) ) Just take a look inside the gray box that says “materials list”!
I love this look! My husband also built us hardwood flooring in our living room and it looks amazing. This is a great idea and I think I’ll share this with him and get him going again, lol!
Thanks!! Yes, get him going!! I do the same over here! ;)
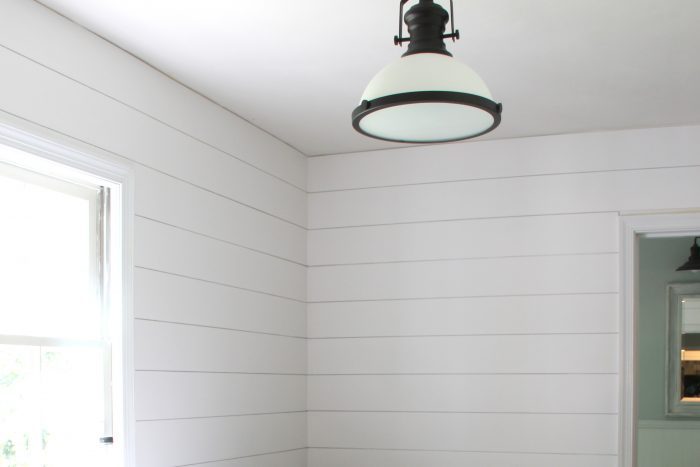
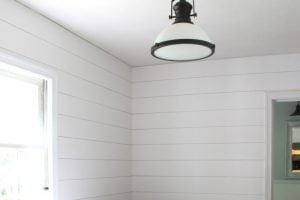
I love this so much! How has it held up over time? I would love information on your light fixture!! The fixture was the first thing that caught my attention..
Thanks! It has held up great. It looks basically like it did when we first did it. And we are not super careful with it. There are one or two dings in the wood but that’s it. That just adds more character though. ;) There is a link to the light fixture in this post… but unfortunately I don’t think they have it in stock any longer. (you might be able to find it elsewhere by googling the description though!)
if i did the math correctly, you have 27.5 inch countertop. I have 24″ cabinets so you have an overhang of 3.5 inches correct?
Hi John!! No, we only have a 1 inch overhang. The boards are called 2×6 but actual size is 1.5 x 5.5. (all boards are like this, 2 x 4’s are actually 1.5 x 3.5, etc) So, when we cut them down by 1/4 inch on each side, that equaled 1/2 inch per board, which brought it down to 5 inches per board. 5 inches times 5 boards comes out to 25 inch depth for the countertop. 24 inch cabinets and a 1 inch overhang. Hope that helps! :)
LOVE THIS!! My question is, i recently used pine on a project just like this and it dents sooooo easily! Even with 9 coats of poly! A friend of mine said not to use pine wood, as that’s probably the issue, but you used pine in this project..I’m so confused! If you could help a girl out I would so appreciate it!
Thank you!
– Sophia
For those of you who want to make sure your wood counter top stands up to abuse (like in a kitchen), google or check Amazon for epoxy, pour on finish. This is as close to indestructible as you will get in a pine counter or table top finish. Keep in mind, it WILL scratch, and you cannot put hot pans on it! But if you insist on wood counter tops in your kitchen, this is one sure way to go!
Great tip! I don’t have many dings or scratches on ours but it’s not in the kitchen or I suppose I would. I don’t mind the few I have though. I just call it “character”! ;)
how and where did you get the wood counter top?
Hi Barbara, my husband and I built it. Is that what you mean? The directions are here in this post.