How To Paint A Tile Floor (steps for success!)
How to paint a tile floor in 5 simple steps!! Easier than you think!
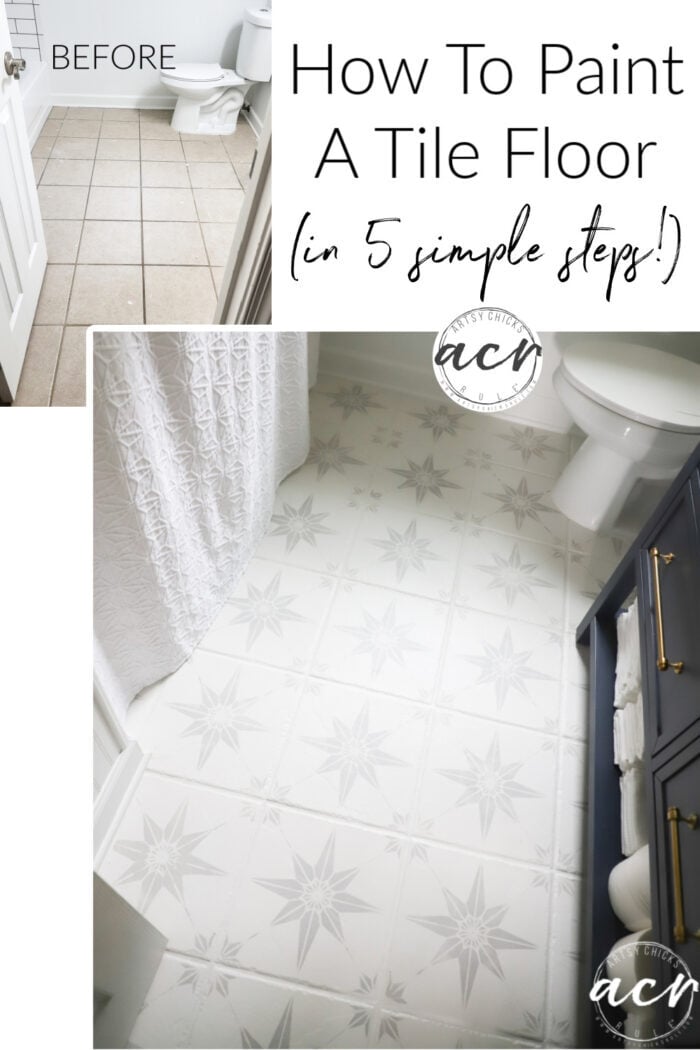
Hey friends!! Let’s talk tile.
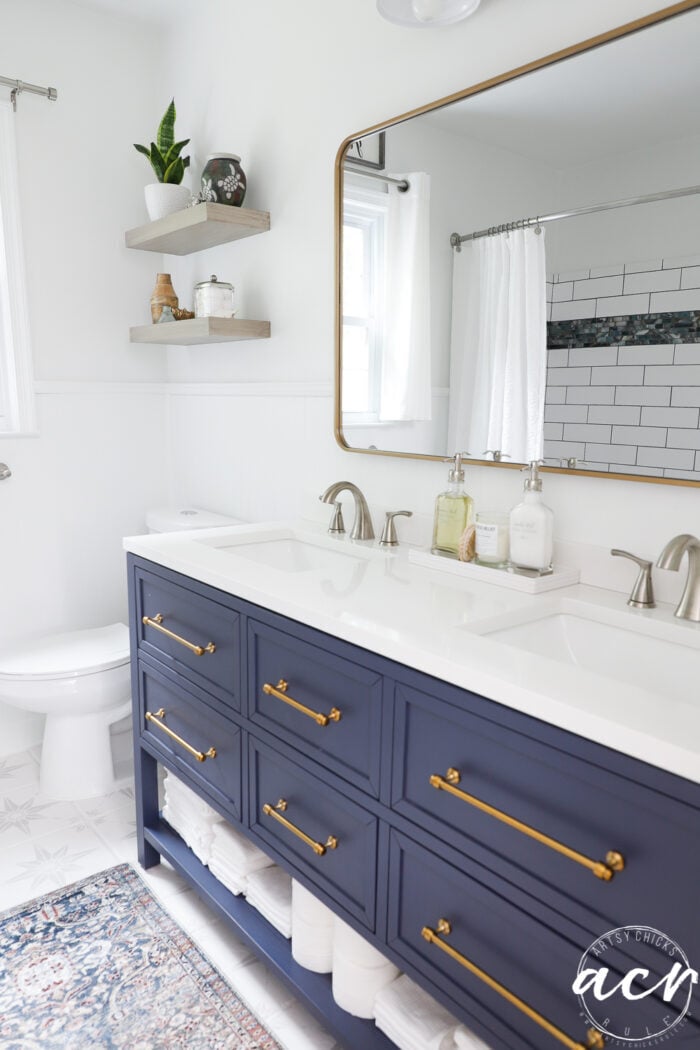
Last week I shared our hall bathroom remodel reveal. We are so thrilled with how it turned out AND just the plain fact that we are DONE!!
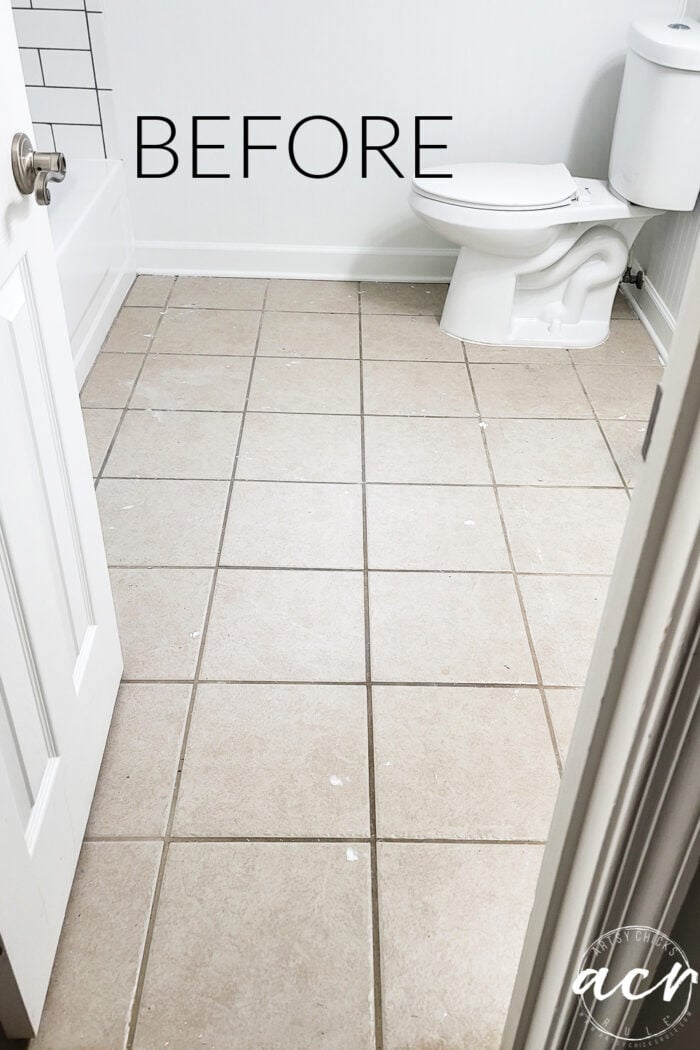
I mentioned in that post that I had painted our floor tiles. Say what?
Yep, I sure did!! lol
They turned out amazing. I don’t even have any doubts that they will hold up well either. But time will tell, right?
And you know I’ll be reporting back on that in the future.
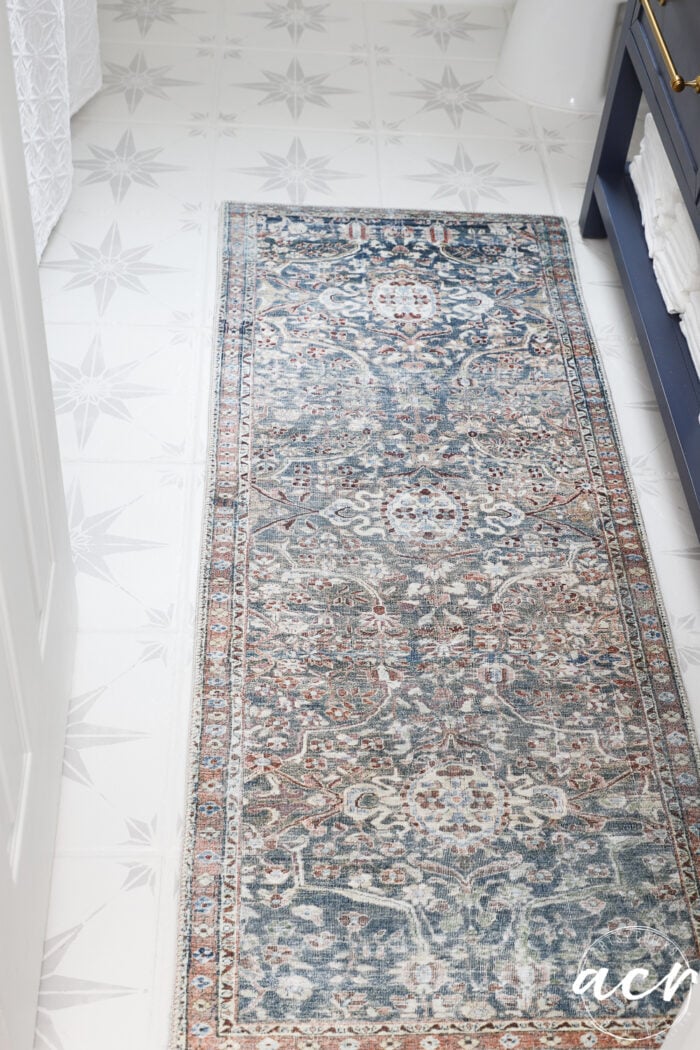
Love the rug?? Here’s the link!
How To Paint A Tile Floor
So how did I do it?
Was it hard?
Well, the answer to the second question is surprising, no, not in the least bit. Definitely a home DIY project anyone can do.
I will tell you that I believe in good prep and good products, however.
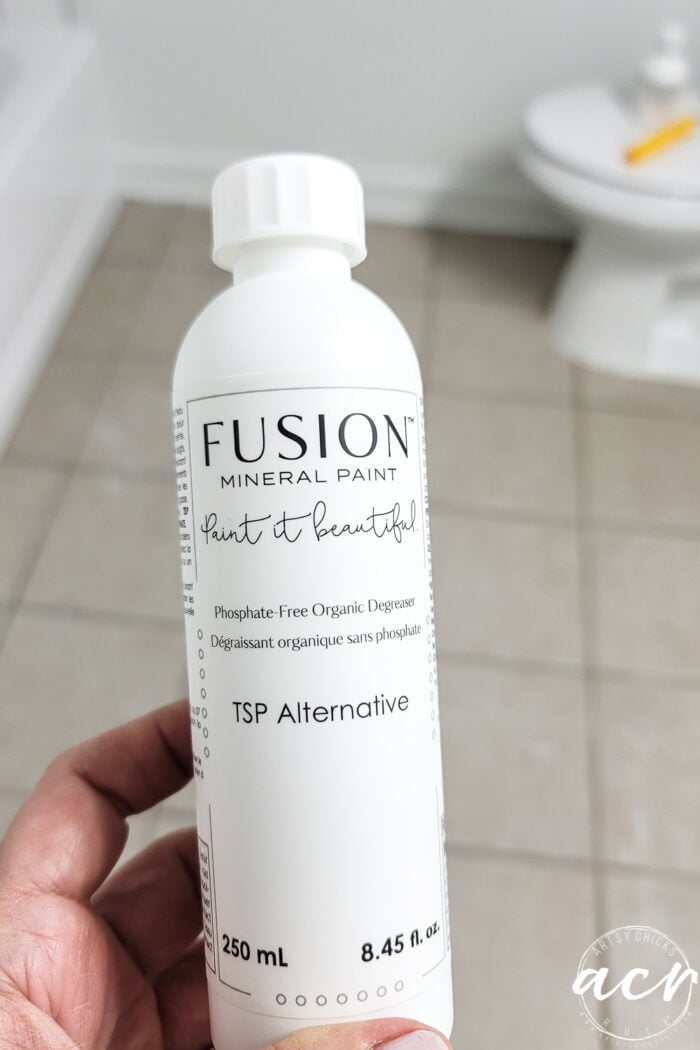
Here are the products I used to paint the ceramic tiles:
MATERIALS LIST
-
-
- TSP Alternative
- Ultra Grip
- Microfiber Roller
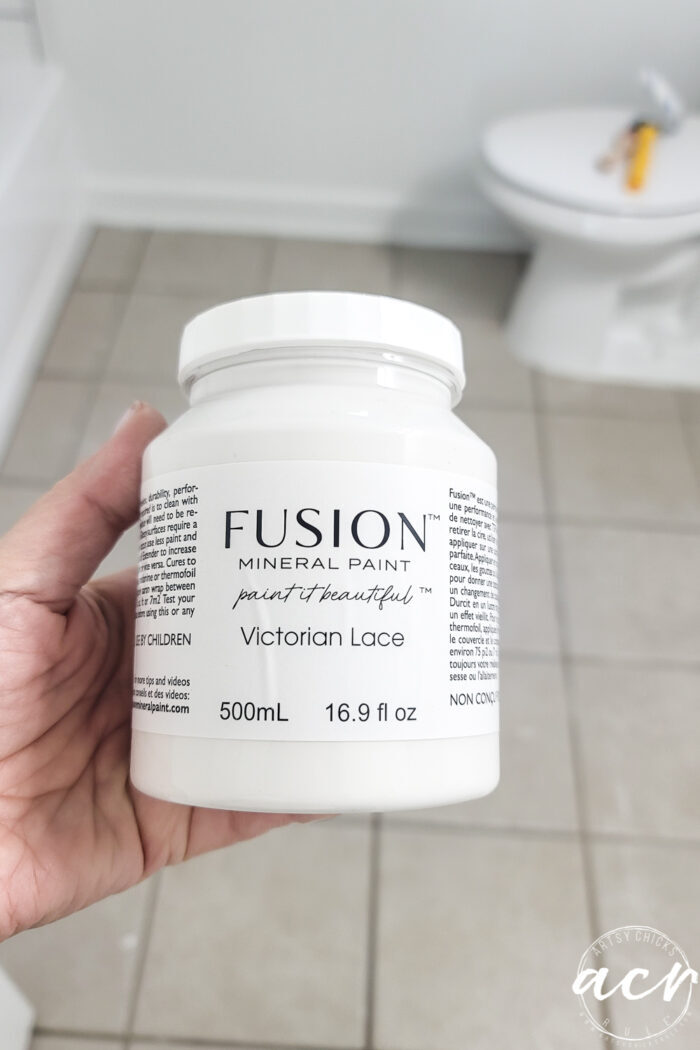
- Gray Paint (a mixture of Little Lamb & Victorian Lace)
- Victorian Lace
- Stencil (set of 2)
- Matte Topcoat
-
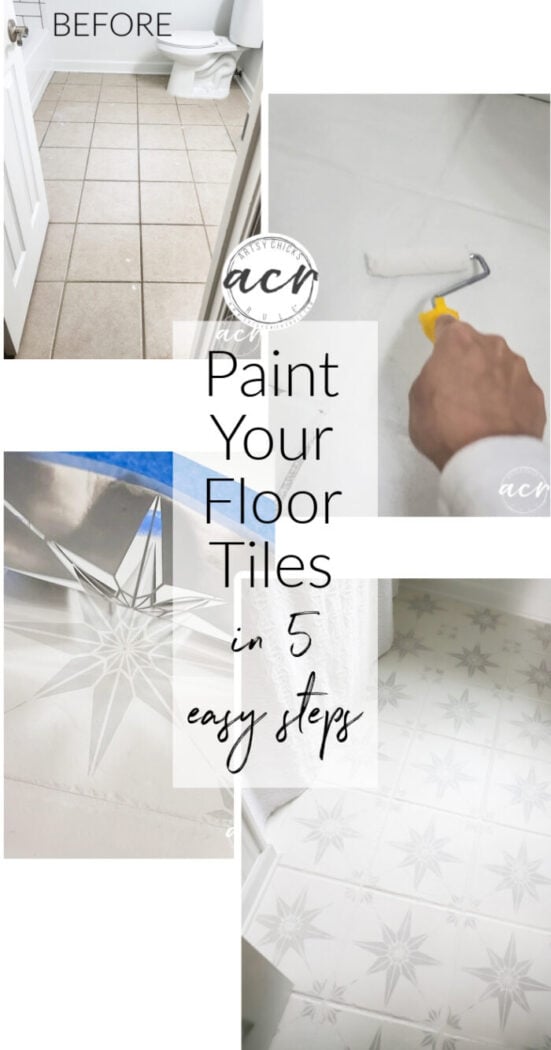
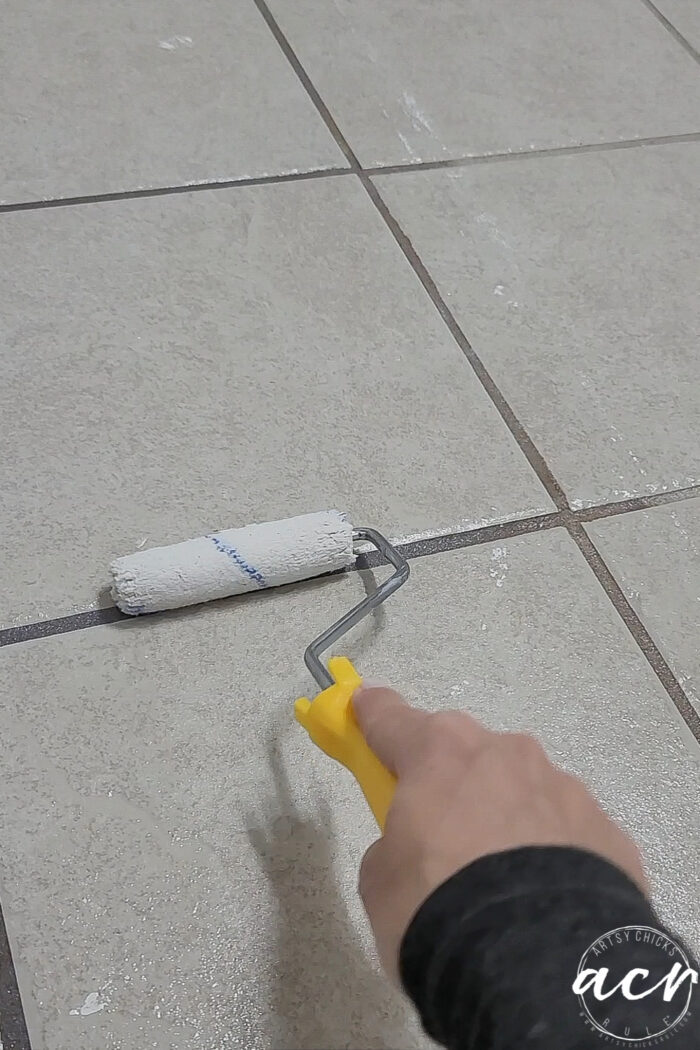
Step 1
Clean the floor very well.
I used TSP Alternative and it worked well.
Step 2
Next, and once it is dry, apply the Ultra Grip with a Microfiber Roller.
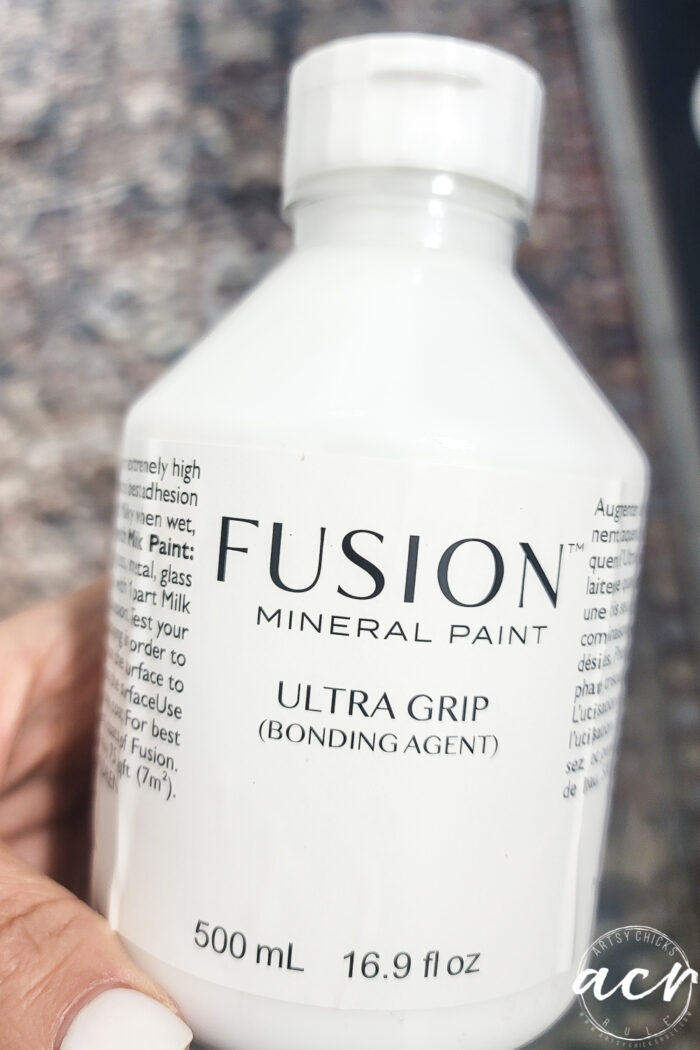
Let the Ultra Grip dry overnight. Then begin painting. (all products I used are linked in the box above)
Step 3
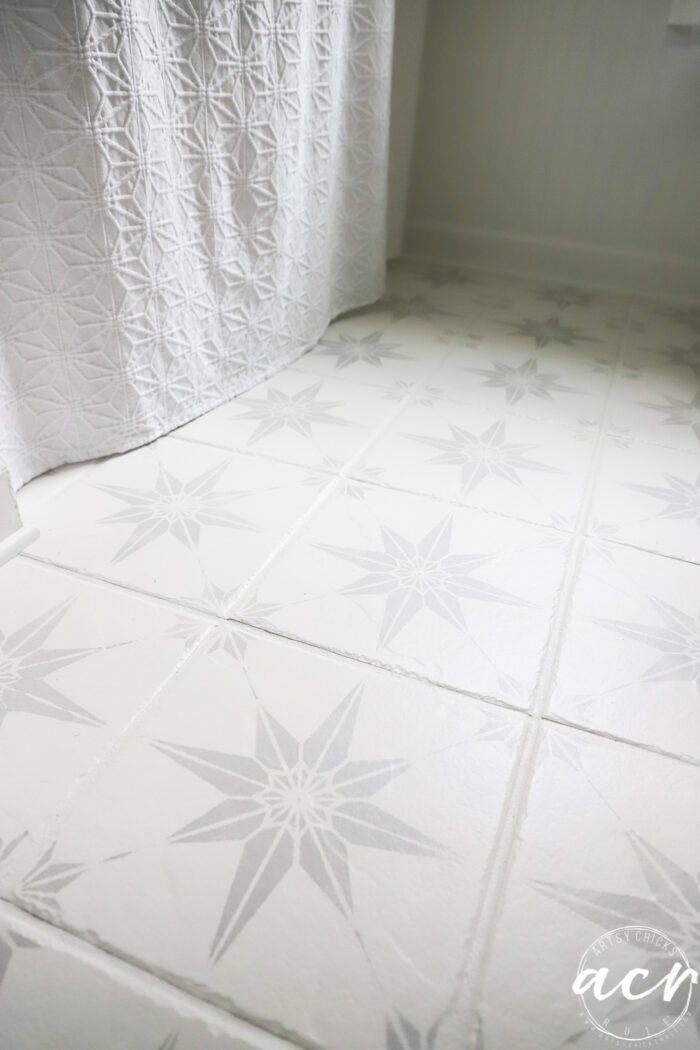
Let’s paint the floor! Grout and all.
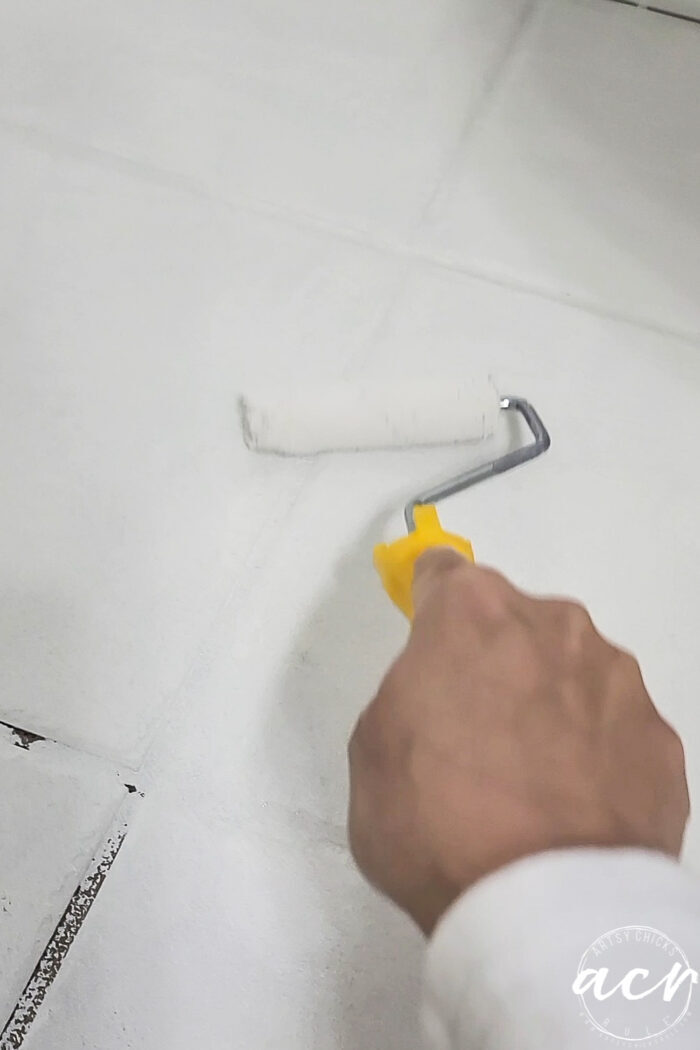
I used the Microfiber Roller for this as well. It leaves a very smooth finish…love these rollers!
I applied 2 coats of paint, drying overnight in between.
Step 4
Stencil time.
I mixed up a very pale gray because I didn’t want the floor to be the main focus of the bathroom. I wanted it to be more muted in the background so made the stencil a little more subtle with a lighter color.
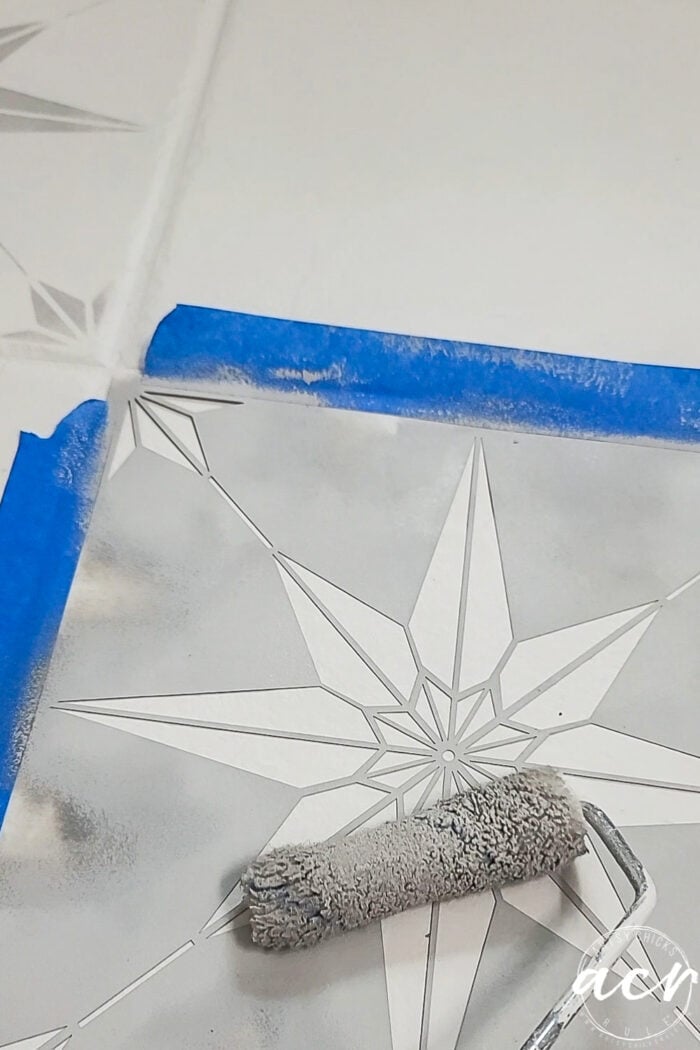
You don’t need or want a lot of paint on the roller for this part. I rolled it in paint and then used a plain paper plate to roll off the excess before each application.
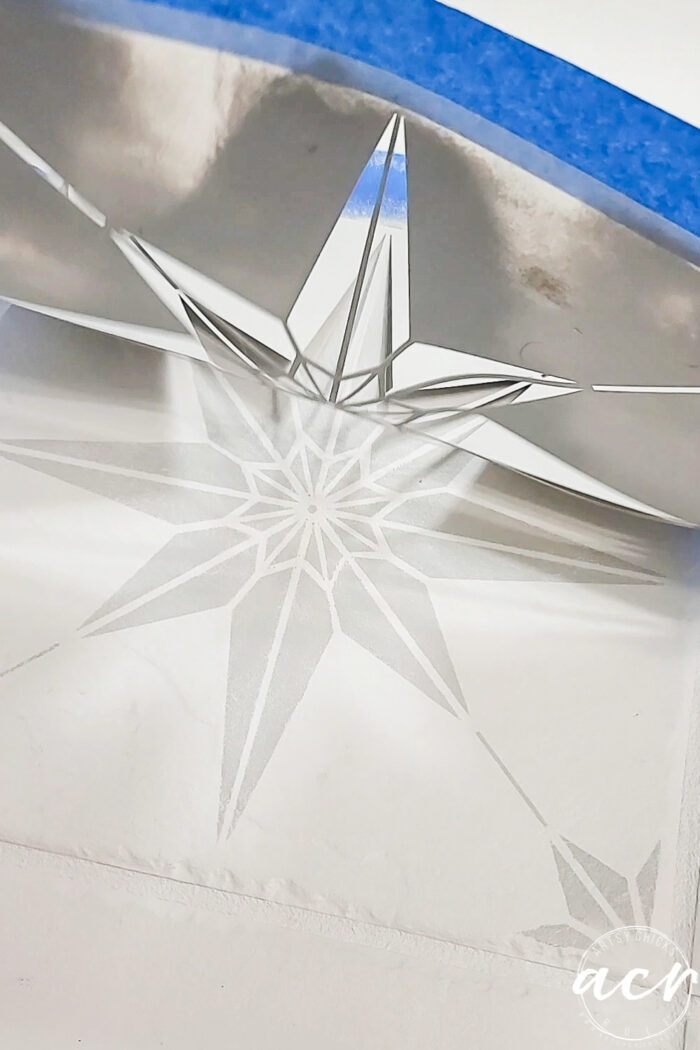
You are not necessarily going for perfection here or full coverage in every single spot. It’s okay, in my opinion, for each one to have its own unique look.
Meaning, a feathered edge here or there, etc. It gives it character and also doesn’t make it look painted.
When painting the tiles, you’ll want to stagger them so as not to mess up any that are not dry.
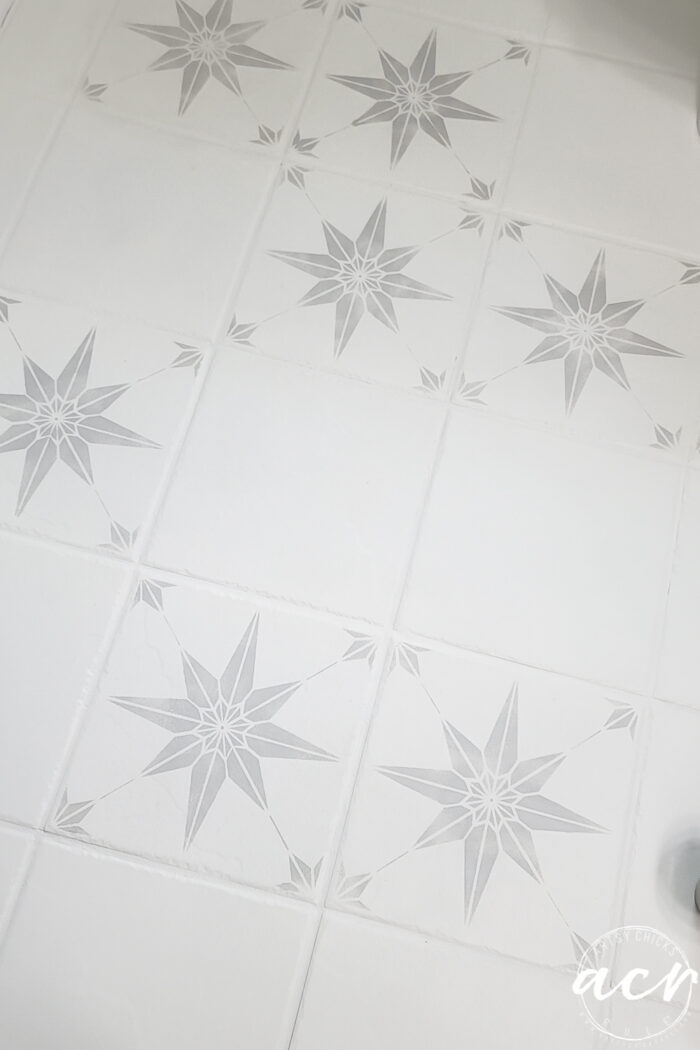
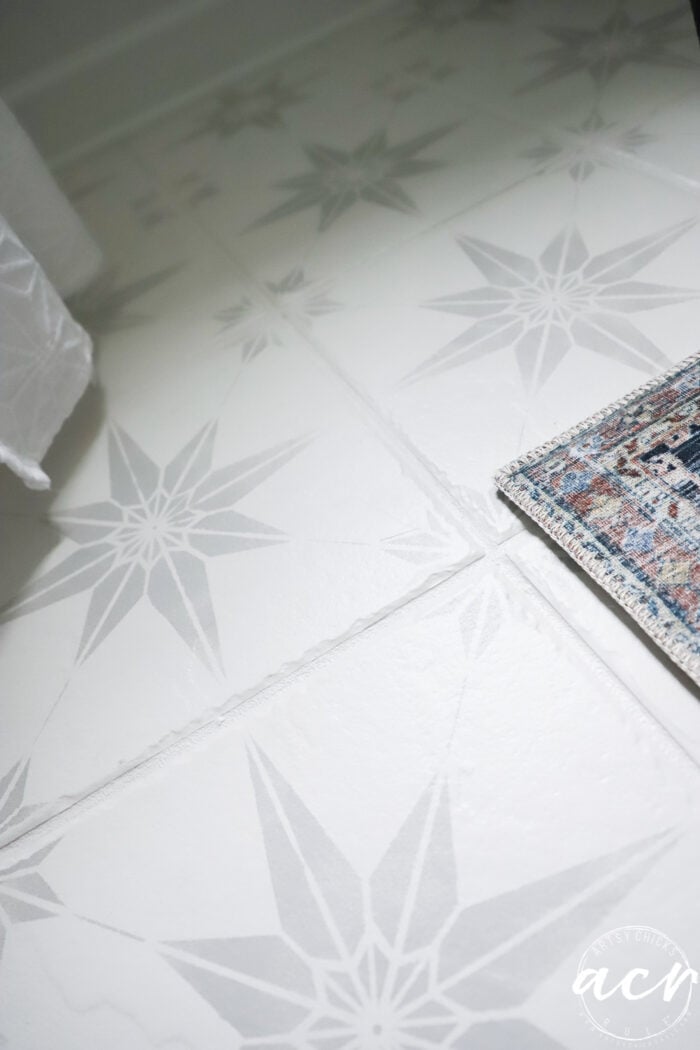
See how each of those has its own varying look?
Just remember to think “less is more” in this step.
Let sit overnight before moving on to the next step.
Step 5
Apply a finish coat to protect it. I used a Matte Topcoat, 2 coats. Drying overnight between coats.
The Matte Topcoat is the perfect finish. Love it.
And that’s all there is to it!
So happy with how this turned out and I wouldn’t hesitate to do it all over again.
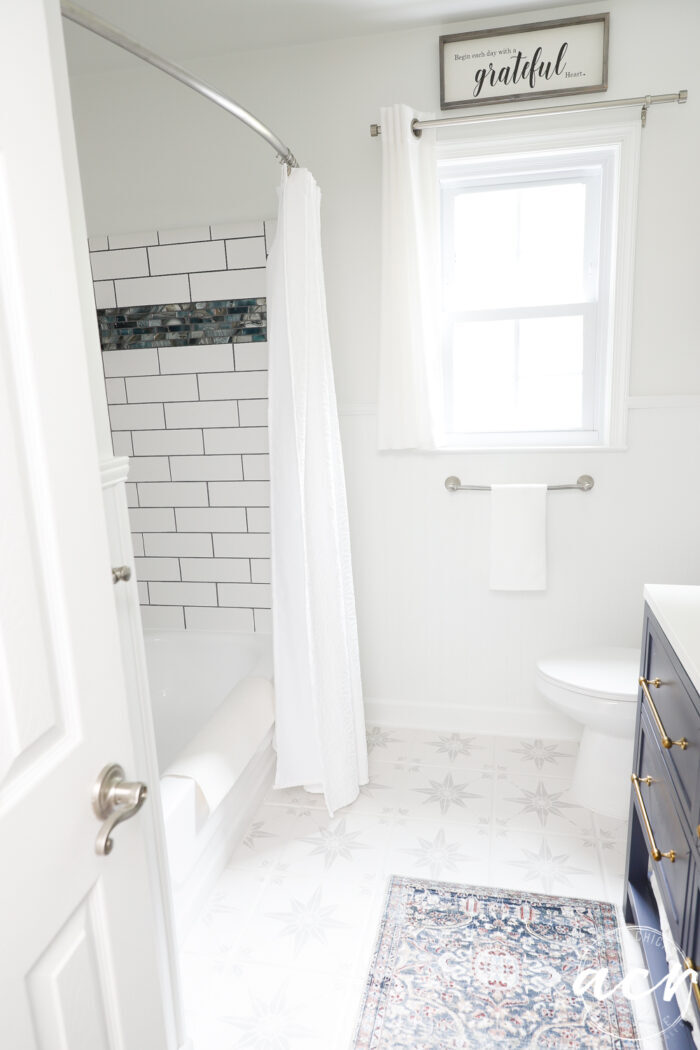
The perfect finishing touch to our bathroom remodel.
I wanted to mention that I did a lot of “drying overnight” in these oh-so-simple steps. I would say most are not required (except the Ultra Grip overnight, I do recommend that).
But, you can probably go shorter on time, if needed. I wanted to be absolutely sure everything was very dry before the next step. I mean, hey, we are painting a tile floor here! ;)
I hope this “how to paint a tile floor” tutorial is helpful to any of you who might give this go too. Or maybe you never even thought to do this…or did…but were too afraid to try.
Maybe this is the push you need to just do it! You know I’m a DIY enabler, haha!
PIN it to save it!
More home DIY tutorials we have shared here:
- DIY Faux Shiplap (get the look, without the expense!)
- DIY Faux Board & Batten (simple and quick!)
- How To Make a DIY Wood Countertop
- Build Your Own Kitchen Island With Big Box Store Cabinets
- How To Install Laminate Flooring (tips and tricks)
- DIY Crown Mold (easy way to get that wide custom look!)
- Build Your Own Built In Bookcase – Tutorial
- Chalk Painted Kitchen Cabinets
- How To Use Gel Stain On Your Stairs
- How To Paint Light Fixtures Without Removing Them
- How To Build a Permanently Attached Wall Coat Rack
- DIY Floating Shelves Tutorial
- How To DIY a Tile Backsplash
- How To Build a Custom Closet
- Remove Popcorn Ceilings The Easy Way
- How To Remove Peeling Paint
- DIY Wood Mantel
- How To Paint a Tile Floor (it works!)(you are here)
- How To Hang Peel and Stick Wallpaper
Think you’ll give it a shot? Have you already tried it? Let me know below!
UPDATE!! Now TWO full years later and it’s holding up great!! I wouldn’t hesitate to do it all over again!
xoxo


")


Looks great! I would love to know how this holds up to traffic.
Oh yes, I will do an update post down the road sometime. :)
Any update after 2 yrs??
Hi Katrina! Still holding up well! I will try to do a full “update” post soon. But, yes, I am beyond happy with it and wouldn’t hesitate to do it again!
Would you do this same method for kitchen tile? I have huge tiles and big grout lines.. I hate the tile but cant change my flooring.
Hi! Yes, and I would! And why not if you hate what’s there?! Give it a go! Just like anything else that is painted, you’ll want to be mindful and make sure you don’t let standing water sit for hours on end, etc. But if for some reason you do have to “touch up” anything, that is easy to do as well! I’d go for it. (still loving our bath floor!)
Your floor looks great! I would definitely try this. Your bathroom has similar tile which are porcelain. How much of paint was needed? Also it looks like you removed the cabinet first?. Or just managed a partial stencil beneath it? You are inspiring!
It’s hard to say how much paint you will need without knowing the size of the bathroom. But I would imagine one would be plenty for a regular-sized room. Yes, we removed the old cabinet to make way for the new and I painted while it was out. :)
This is amazing and looks easy! Could the same be done for tile on the walls?
Yep, walls too! :)
This looks amazing. Just curious how it will hold up in high traffic bathroom with a lot of water getting on it and dampness?
You will have to give us an update.
I will definitely post an update down the road a bit. :)
Thank you for this inspiration! It’s a wonderful solution to getting new floors without getting new floors! You did a great job!
Yes, exactly, Celia! :) Thank you!! xo
Gorgeous! I’ve been wanting to paint the GOLD tiles in my shower. (UGH!) Maybe this process will work!
Thanks, Robyn! Hmm, I’m not sure how well it will hold up to constant water like that in a shower. Maybe paint a small section and test it out before you commit to the whole thing?
I am so amazed at how incredible it looks! The floor is one of the first things I noticed when you revealed the bathroom. I still have our master bathroom to redo, and wow, what a savings it would be to be able to paint the existing tile! We do have it in our shower too though…hmmm something to definitely look into though! Yours is gorgeous! XOXO
Yes! It was SO easy! (and quick too…much quicker than tearing out tile and redoing it) Thanks, Christy! :) xo
We are planning to redo our master bathroom this summer & you’ve given me a great way to redo the tiles, versus tearing them & replacing them! I love to redo things & help our over-flowing landfills!
I’m wonder how much of each of your listed products did you use?
Yes! I needed less than one bottle of everything for this size bathroom. :)
I love it! Thank you for the tutorial. Pinned!
I want to do the fireplace surround. Any differences, do you think? Love your pattern and color! I have builder beige tiles so not sure gray would do well, but love the color you used. Nice job!
I don’t think so really. You want to be mindful of the heat though. And thank you, Tess! :)
My tiles are really textured. I wonder how I could smooth them, sandpaper?
Mine are actually pretty textured too. I don’t think sandpaper would smooth them out really but you could to rough them up a bit!
You did a great job and I like the look.
Keep on doing projects to improve your home and surrounding area. It is well worth it.
Thank you so much, Beverly! :) xo
AWESOME JOB!!!! Looks GREAT!!! Time will tell….PLEASE LET US KNOW!!! Love the pattern you picked out too!!!
Thanks so much, sweet friend! Yes, I will definitely! xoxo
I love, love, LOVE this!!!! I see how it goes with the shower curtain as well lol. I would love to know about that rug!!!! Beautiful!!! I am now looking for a tile floor in my house that I can paint as well….maybe the laundry room : )
Yes, it does, huh?! lol Thank you, Wendy!! I have a link to the rug in the post. :) And I say yes, do it!! xoxo
Looks great, Nancy! I do want to try it on my kitchen floor.
Thanks so much, Dalila! Oh yes, I have seen many do their kitchens too! :) xo
Hi Nancy, Do you have a source list?
Hi Kathy, I sure do, it’s in the post inside the gray box that says “Materials List”. :)
I use a steam mop. So I’m curious what to clean floors with and/or if you’d think the top coat would stand up to it. We are in the midst of an unexpected bathroom remodel so trying to up cycle as much as I can.
Oh, yes, I don’t think a steam mop would be your best bet on a painted tile floor. However, I have cleaned it with a mild soap with no issues. Just want to make sure it dries well and you don’t use too much water. It’s holding up wonderful so far to regular use.
Curious, is it super slippery when wet?
thanks
No, not that I have found.
So pretty. How is it holding up a year later?
Hi Monica! It is actually holding up wonderfully. I wouldn’t hesitate to do it again!
This is lovely! Do you know if you have to use the stencil on each tile separately? my tiles are so small – like 4×4 and I fear that if I did a stencil on each tile it would be too busy. Also, I don’t know when you wrote this – but is it still holding up?
Thank you!! And no, that is up to you! You can choose to only apply it to select ones in a pattern and leave some blank if you like. Using a more muted color for the stencil part will help it to not look too busy also. We did it about a year and a half ago and it’s holding up great!
Hello,
This is beautiful! Looking forward to trying it. Should I purchase 3 microfiber rollers for the 3 different times you used them?
Thanks!
Hi Sue! Oh, no you don’t have to do that, you can just wash and use the same one. (they are resuable as long as you wash well after each use) But you can purchase extra to have on hand if you like. Have fun! We love our “new” floor!
Love this! Stumbled upon this post and am so glad I did.. I’ve been wanting to change our hall bathroom tile for some time and love an economical DIY project. Thanks for the clear step-by-step directions. I see a project in my near future. :)
Hi Melissa!! So glad you found this project helpful and inspiring. We definitely love a good economical DIY too. And we’re loving our floor!! Have fun with your project! xo
How did you do the stencil around the toilet? Purchased all the products you recommended and am following your directions completely! My bathroom tile is exactly like yours and a very similar sized bathroom. Thanks for the inspiration. So excited!
Hi Kaitlyn!! That’s awesome, I know you will love it! I simply “bent”, for lack of a better word, and held the stencil around the toilet base as best I could. I know some stencils are more flexible than others so that will come into play.
Howdy! Just wanted to double check. Did you use the microfiber roller for the matte topcoat also? Love the finished product and thank you for your tutorial!
Hi Madison! Yes, I sure did. And you are very welcome, we are still so happy with how it turned out!
Looks fabulous! Did you mix the gray and Victorian Lace to make a lighter gray? I’m asking because I just love the muted color you have and would love to have that exact look. TY!
Hello!
Thank you! Yes,I sure did! I don’t have exact measurements, however. You can definitely come up with something very similar though. :)
How long do you let it dry before removing the stencil?
You don’t wait for it to dry, very carefully lift it up as soon as you roll it.
How often do you clean stencils in between squares?
I typically don’t clean except to wipe off any excess on the backside of the stencil in between rolling the squares.