How To Paint Leather (easy with the right products!)
Hello beautiful friends!
I have a really fun post for you all today! It’s something that I have been wanting to do for a long time now.
And I finally found a piece to do this one…yesterday! Hah!
I got this project done so quickly. But that just goes to show you how absolutely easy this is. Of course, it was not a huge piece so something larger will take a little longer.
But I am telling you, it was EASY!
What was it?? Painting leather.
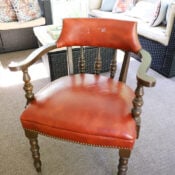
I’ve been known to paint anything and everything. Remember this chair I painted years ago??
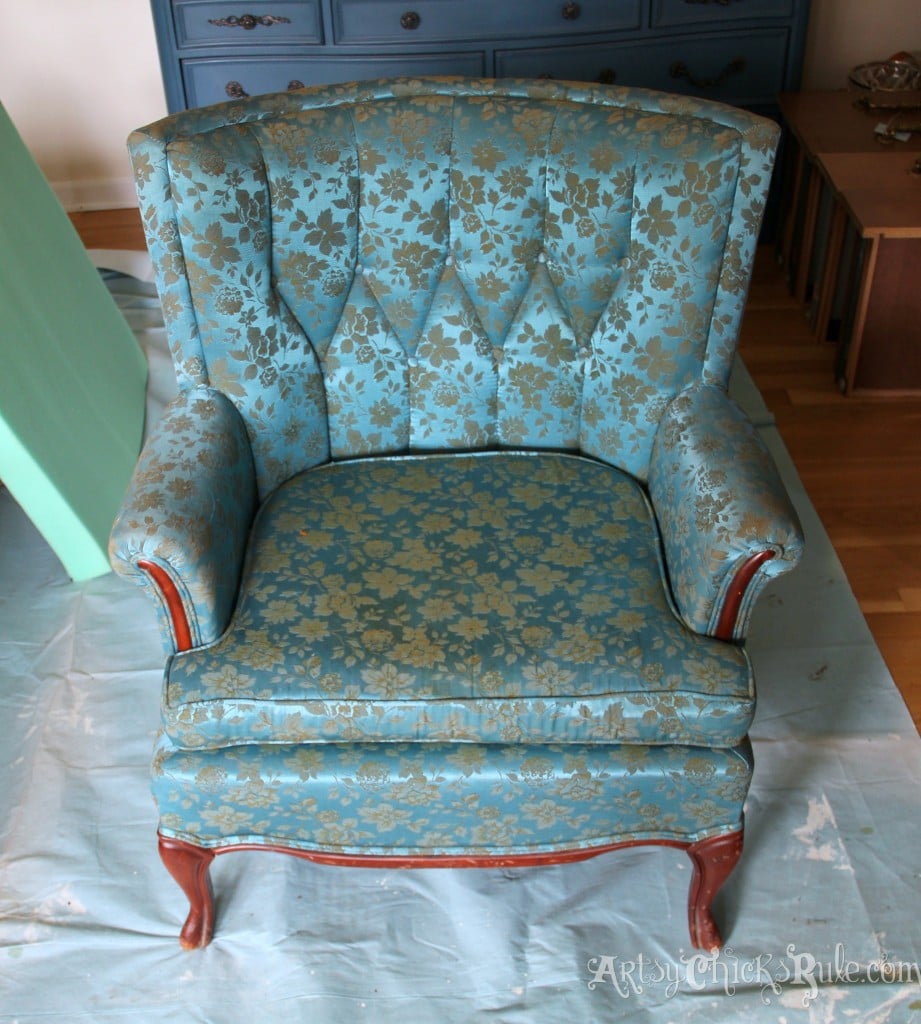
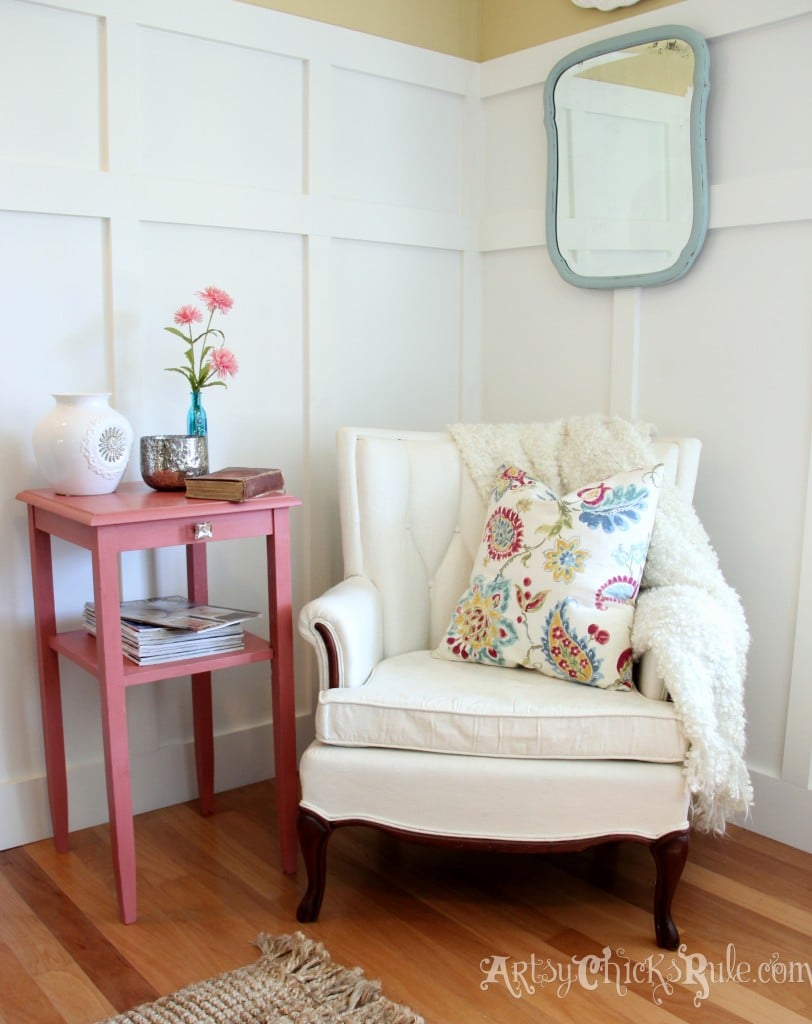
All the paint details for this chair are here.
It turned out so well, I did it again a couple of years later…
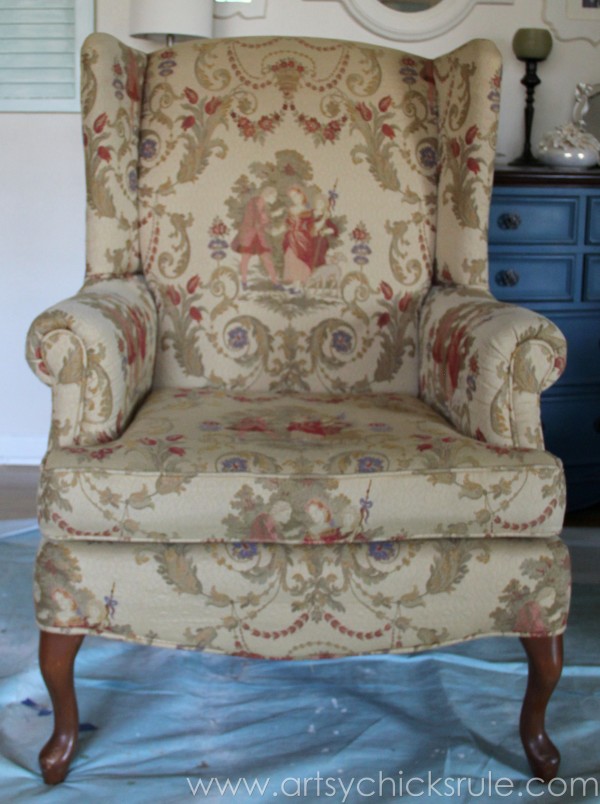
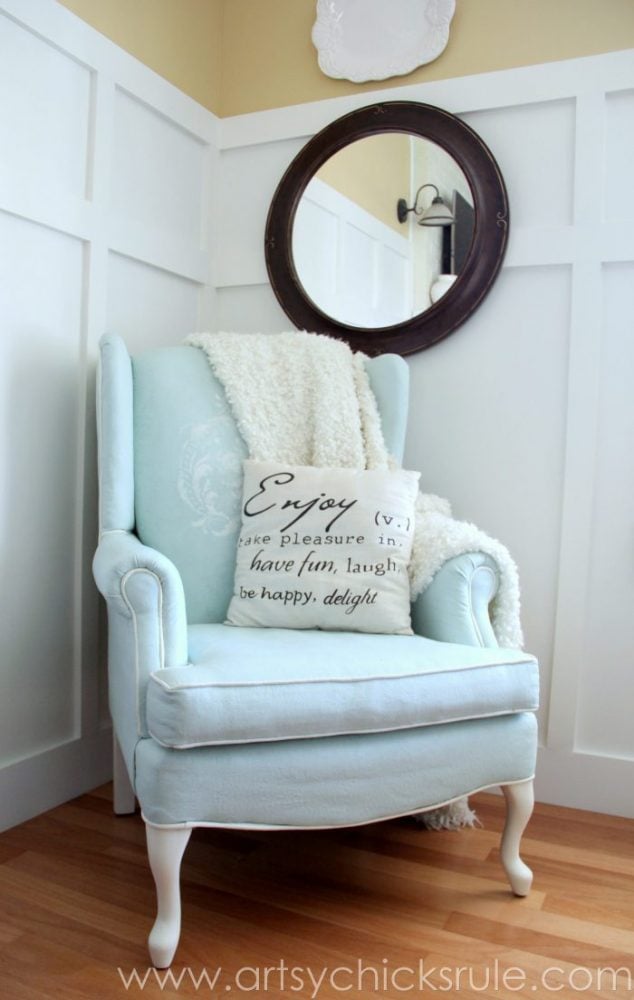
All the paint details for this chair are here.
Both of them held up great!
I also painted these fabric seats…
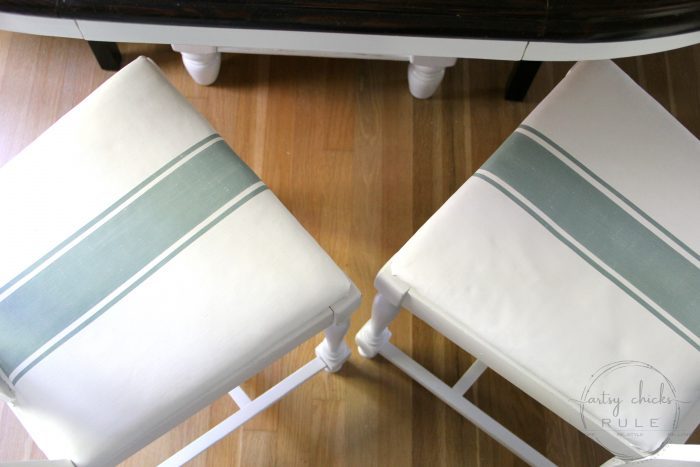
So clearly I am not afraid to paint it all! lol
Chair cover paint details are here.
**If you are interested in painting fabric/upholstery be sure to hop on over to those tutorials I linked for each above. The process is a little different than what I did below. I used chalk-style paint on the painted fabric projects above. I would not use chalk-style paint to paint leather.
With that, I have not tried Fusion paint on fabric but will have to do that next.
However, I had heard that the paint I love and use (and sell in my shop) Fusion, worked very well for painting leather. I’d been wanting to try it for a good while but never came across anything leather worthy of a makeover. I certainly didn’t want to buy an entire sofa to do it on. Ideally, something small like an ottoman. And yay, I finally came across one yesterday at the ReStore.
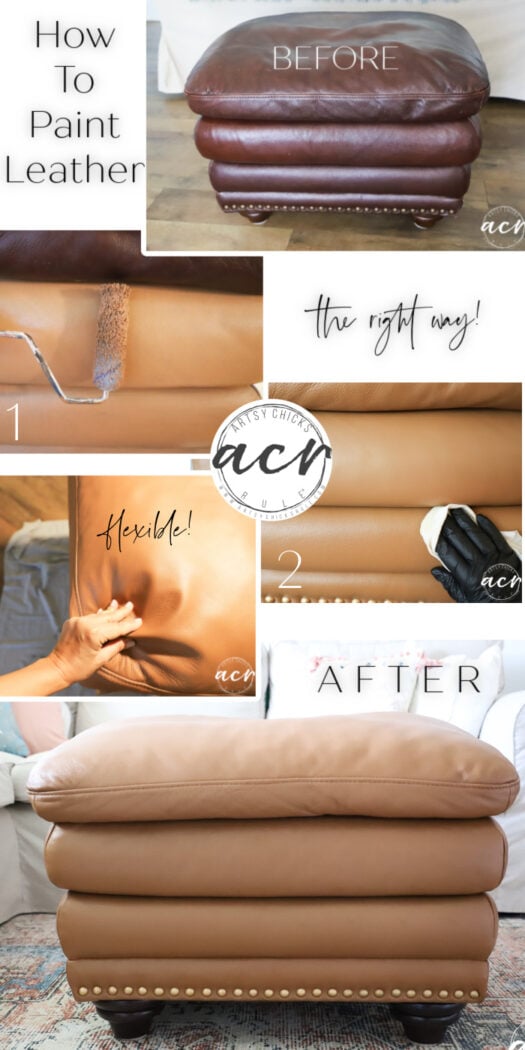
How To Paint Leather
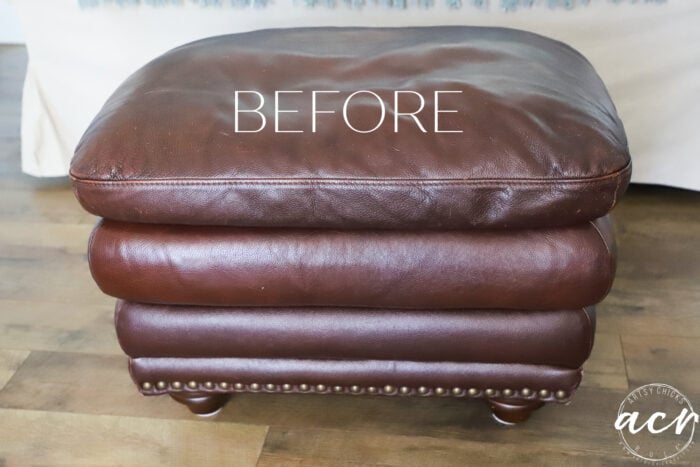
When I say this was simple, I mean it. It really and truly was.
And it went quickly.
I picked this up yesterday afternoon and got to painting!
Before we get too far along, here are all the materials I used for this project in case you would like to try it too.
MATERIALS SOURCE LIST
- Mustard Paint
- Chocolate Paint
- Cranberry Paint
- Paintbrush
- Microfiber Roller
- Bronze Gilder’s Paste
- Cappuccino Stain & Finishing Oil
- Beeswax Finish
- Old T-shirt or other soft lint-free cloth
Edited to add: We have two brand new paint colors that would be perfect for this colorway! No mixing required! You can check them out here: Chestnut Mare and Iron Clay
(Keep in mind these are similar, not an exact replica of my mix. Chestnut Mare is the closest but a lighter shade. Add a tiny bit of Chocolate, if desired for depth)
Clean
I began by mixing up some of the TSP Alternative and began by wiping down the top section.
Unfortunately, I quickly noticed that the dye was coming off. Oops! I’m not kidding when I say I almost always have an oops or run into a hitch on my makeovers. So if you do too, don’t beat yourself up, it happens. And it happens often!
So, I used water only and a tiny bit of dish soap on the rest.
Paint
Next, I pulled out these 3 colors (Mustard, Chocolate & Cranberry) and began mixing.
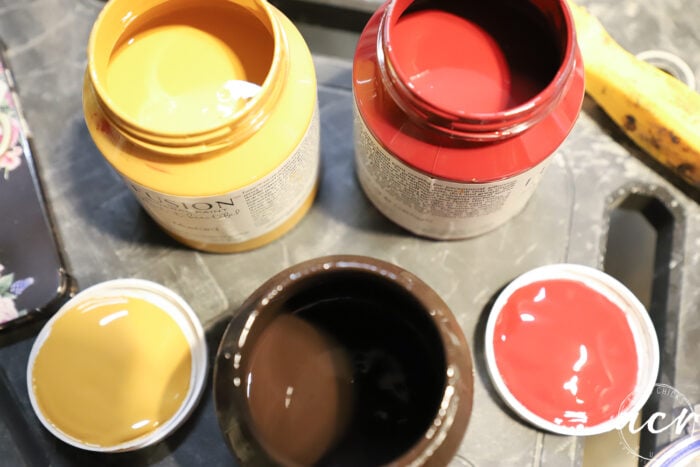
I wanted a color like “cognac tan”, etc.
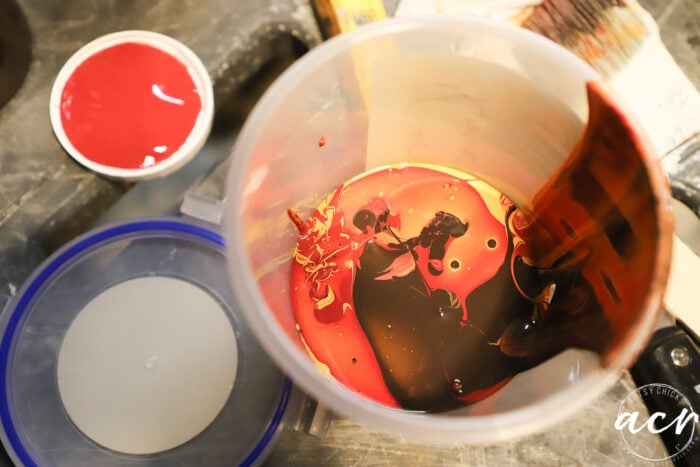
I started out with equal parts.
Nope! Way too reddish-brown. I should’ve known better as the Mustard color is actually the closest to the color I was trying to achieve.
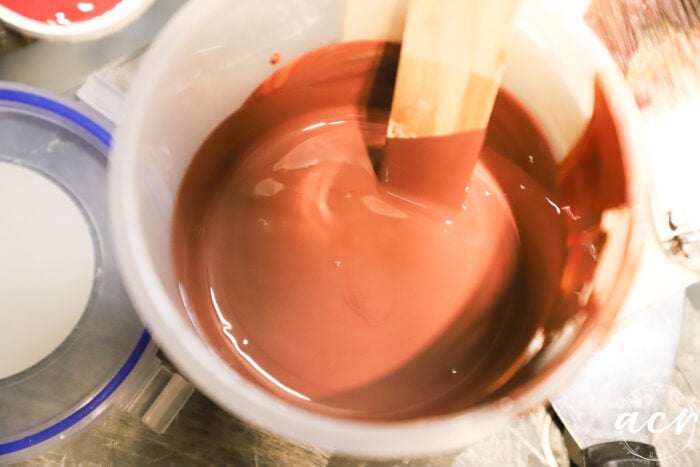
Which means I would need more of that than the rest.
So I kept adding more (and more) Mustard. What I ended up with as far as a formula, if you like this color, was 5 parts Mustard to 1 part Chocolate and 1 part Cranberry.
I began on the sides and worked my way to the top.
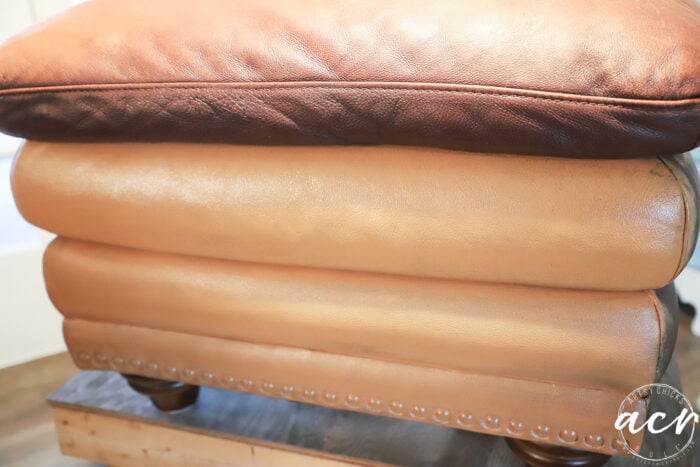
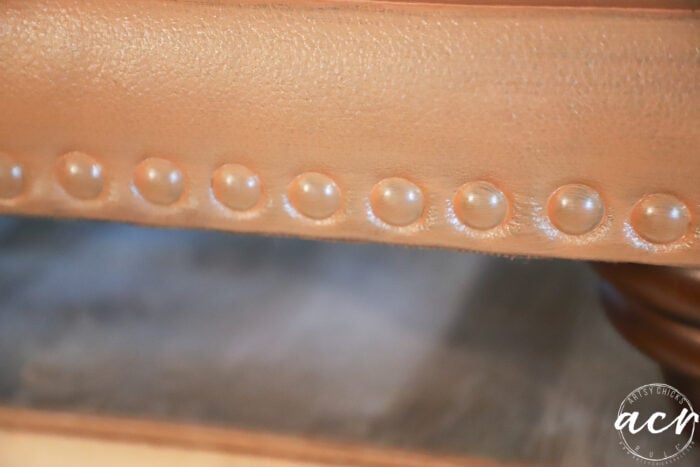
I ended up painting right over the tacks as they were not coming out. I’ll show you what I did with those further down.
I brushed on the paint and then went back over it with this microfiber roller.
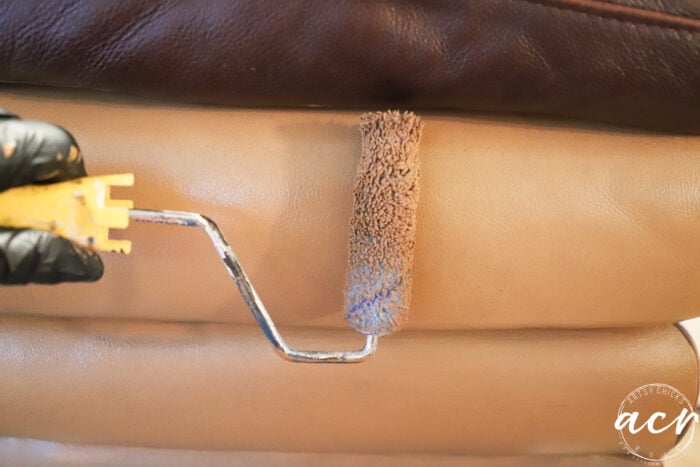
TIP: Don’t apply the paint too thickly. You want to apply a thin, even coat. Then apply subsequent coats as needed, drying for about 4 hours in between.
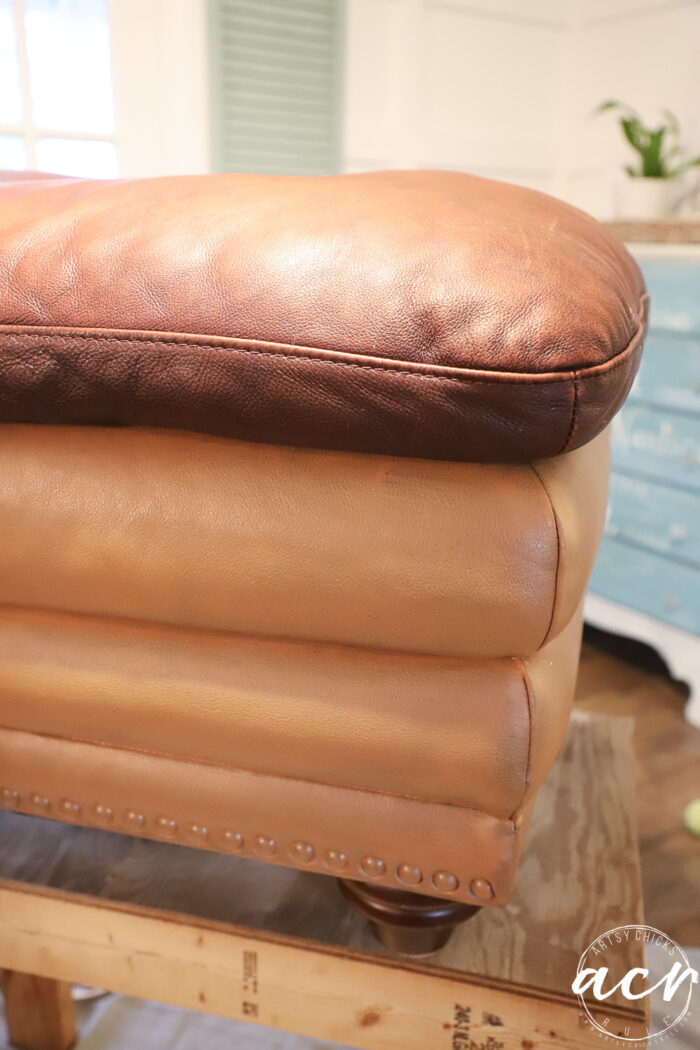
You can see the difference in color where the dye came off below.
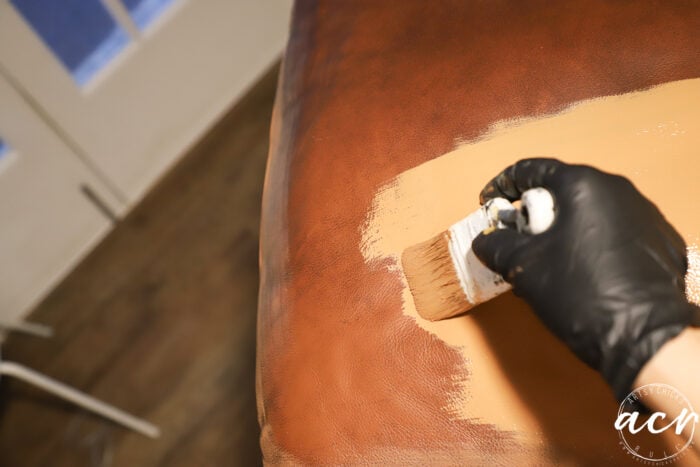
After the whole thing was covered, I let it sit for 4 hours before giving it a second coat.
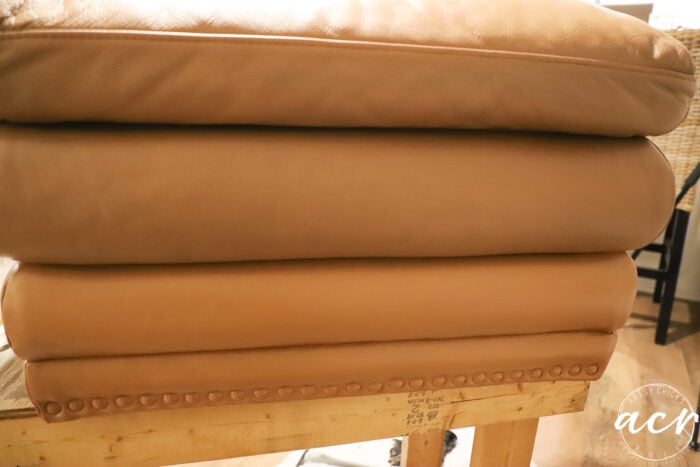
Which was all it needed, 2 coats and done!
You can see where I’ve applied the second coat above and the full coverage it gave. (the bottom 2 sections)
TIP: Let the paint dry at least 4 hours in between coats.
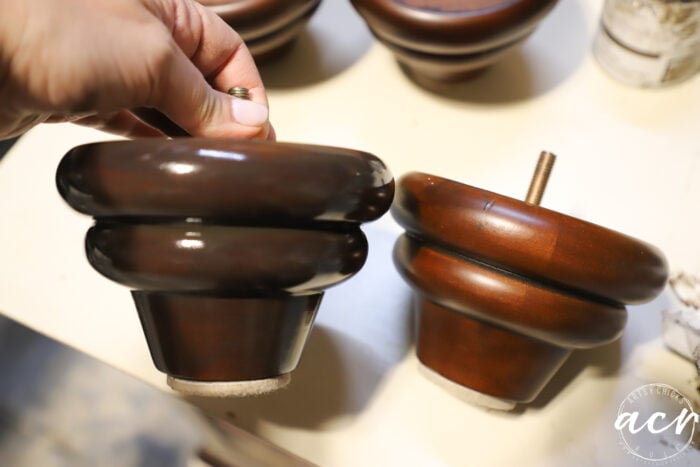
I did also remove the feet as it was easier to give them a new look apart from the ottoman.
They were sort of a reddish brown colored stain and kind of clashed with the new color.
I felt like they needed to be more brown. I didn’t want to try to sand them with all those curves and such, so pulled out my Cappuccino Stain & Finishing Oil and applied a coat of that. It toned down the red perfectly.
I must tell you, that I was highly impressed by this point. The paint went on like a dream and covered SO well. Even that dark color underneath.
And this morning it was so flexible too! Wow.
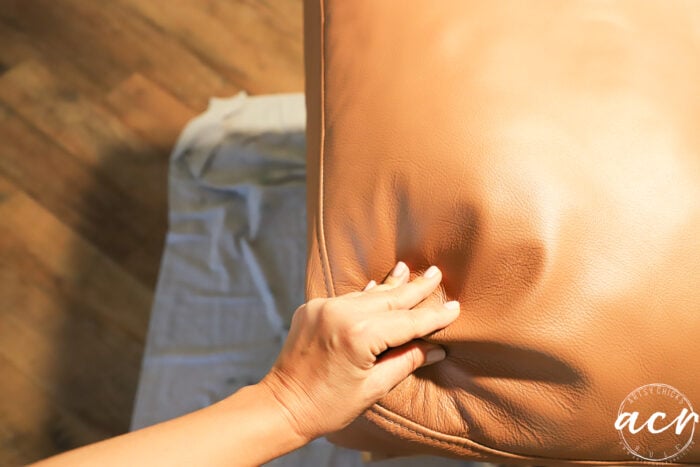
Isn’t that amazing???
Gilder’s Paste (Upholstery Tacks)
So remember those tacks??
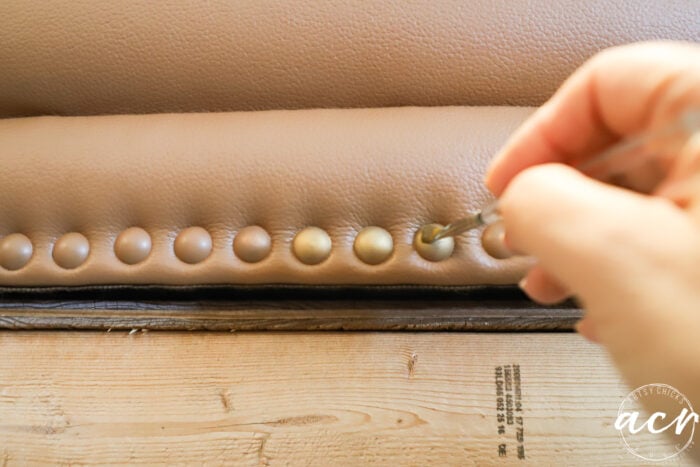
I simply pulled out my Bronze Gilder’s Paste and brushed it on each one.
You can see here the difference it made.
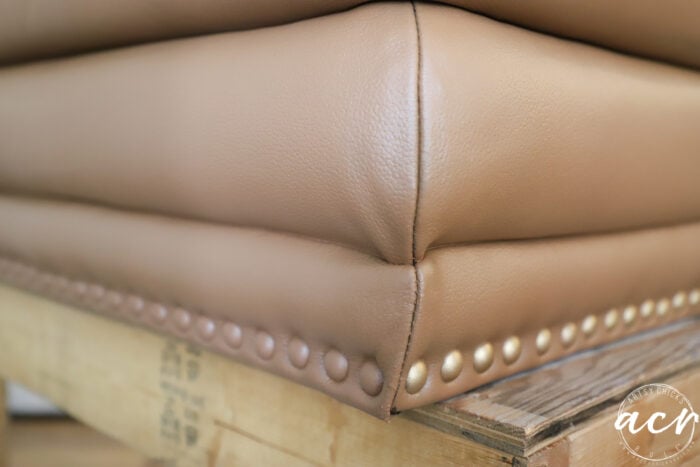
So easy as well! Did take about 45 minutes to do them all but not too bad.
Certainly better than trying to remove them and put them back. Yikes.
Wax/Finish
Lastly, to seal it and give it a softer finish, I used our Beeswax Finish. However, I’m not 100% convinced it even needed it. It was already soft and very flexible and Fusion does not require a seal/top coat. But I figured it would help protect it so went ahead and applied it.
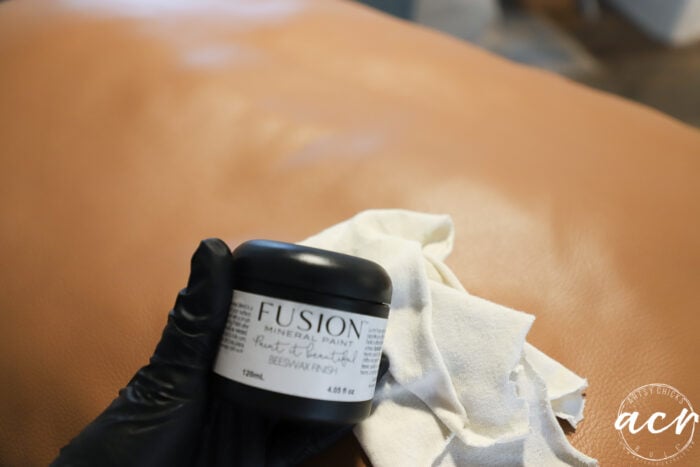
I used an old t-shirt to apply.
I simply rubbed it in all over…
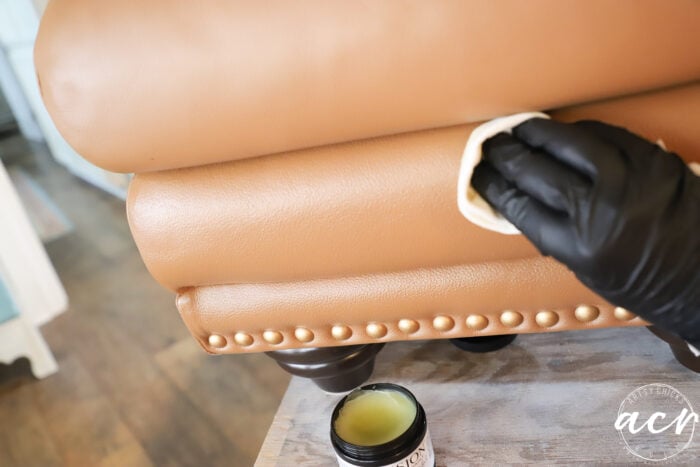
You can see the difference the wax makes (besides giving a nice, protective layer). The top two sections have yet to be waxed in the photo.
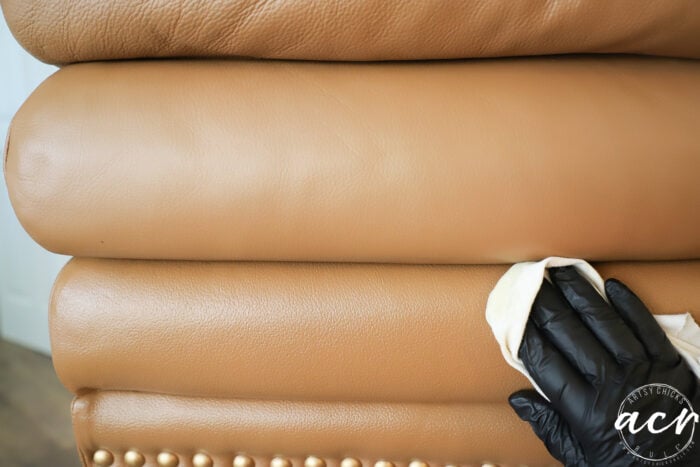
Then went back over the whole thing with another clean cloth to wipe away the excess, if any.
And done!
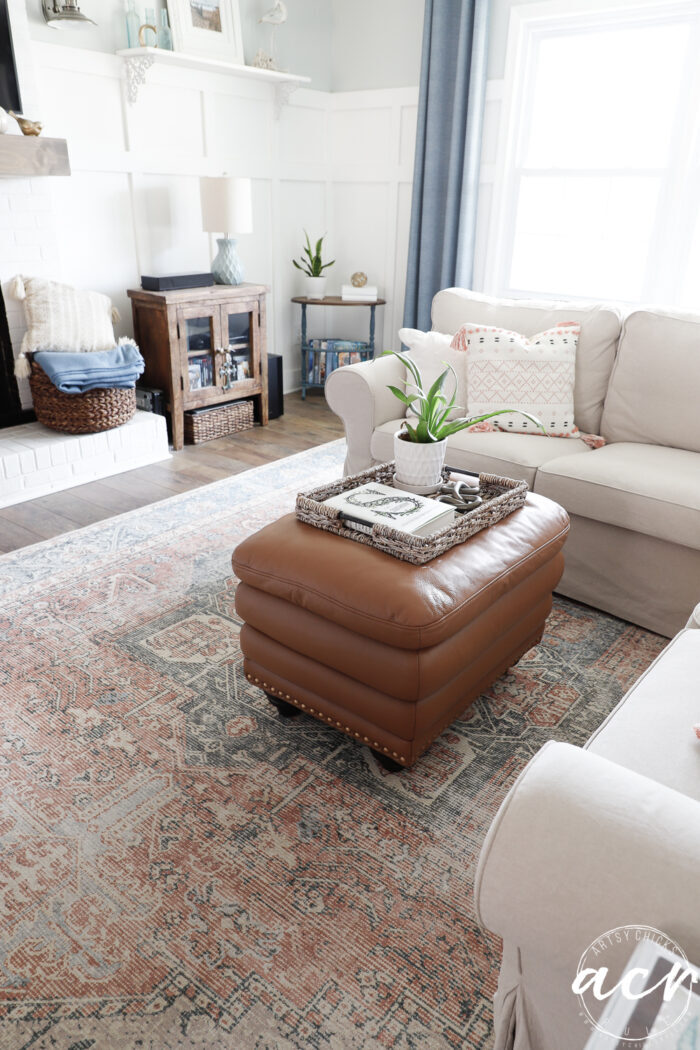
For those interested in the rug, you can find it here.
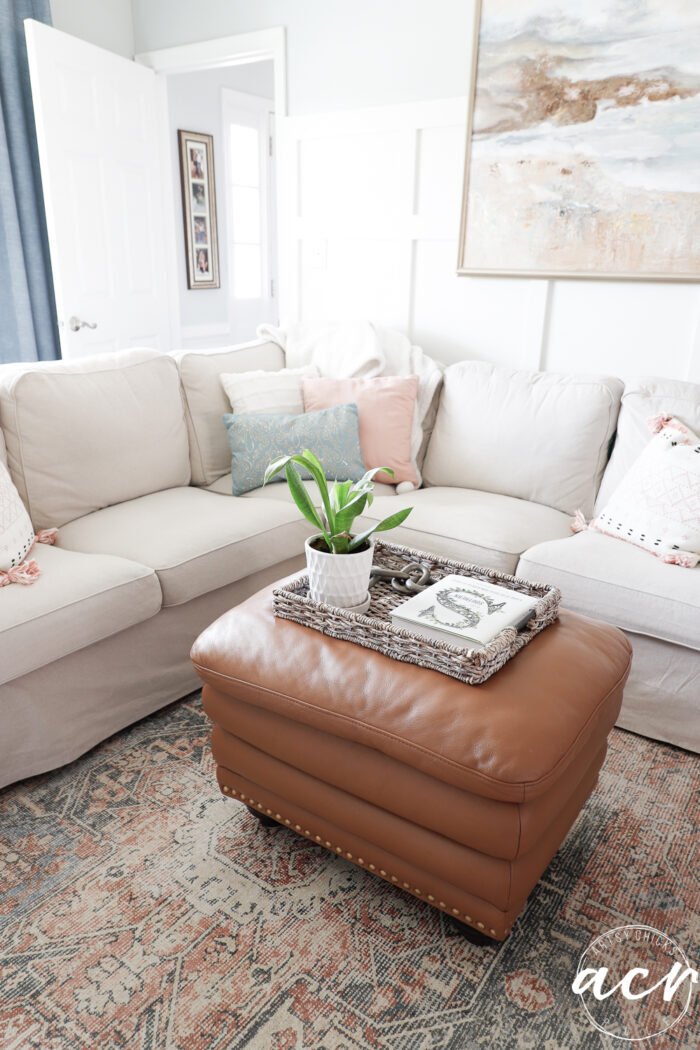
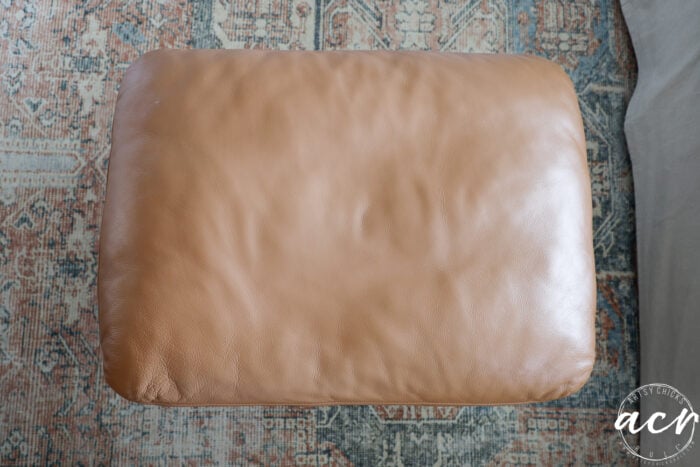
Those pictures above make it look a bit more orange than it does in real life.
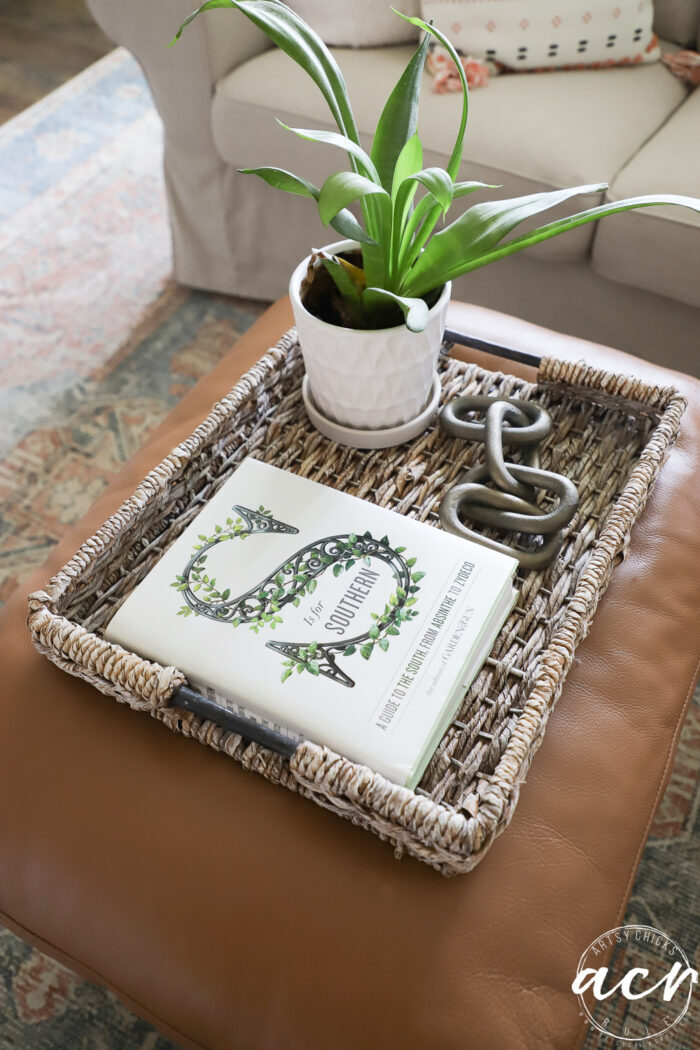
It really looks more like this…
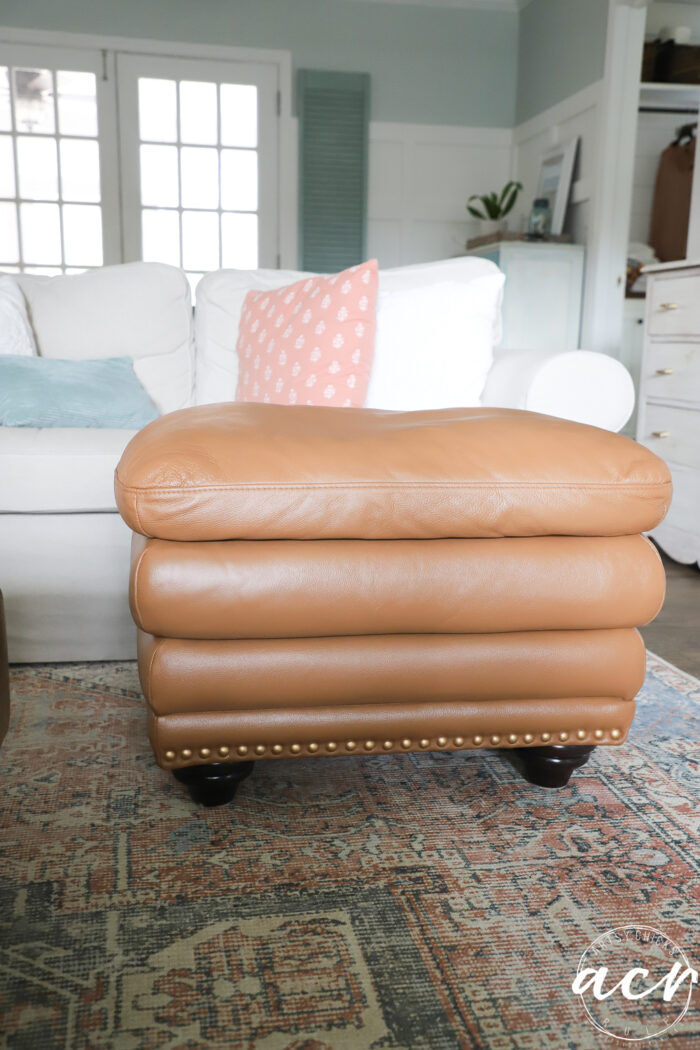
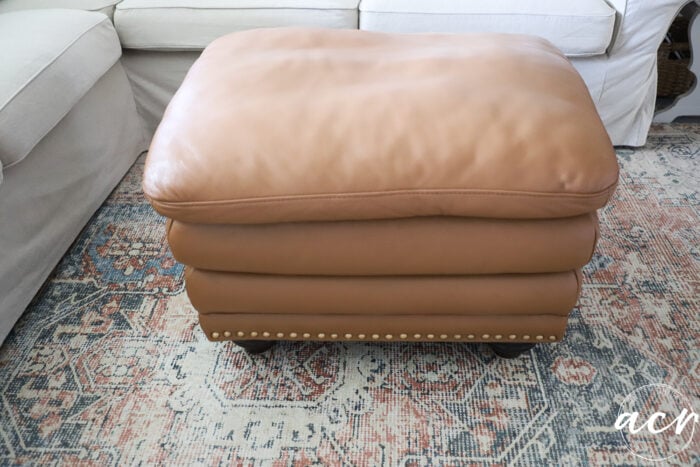
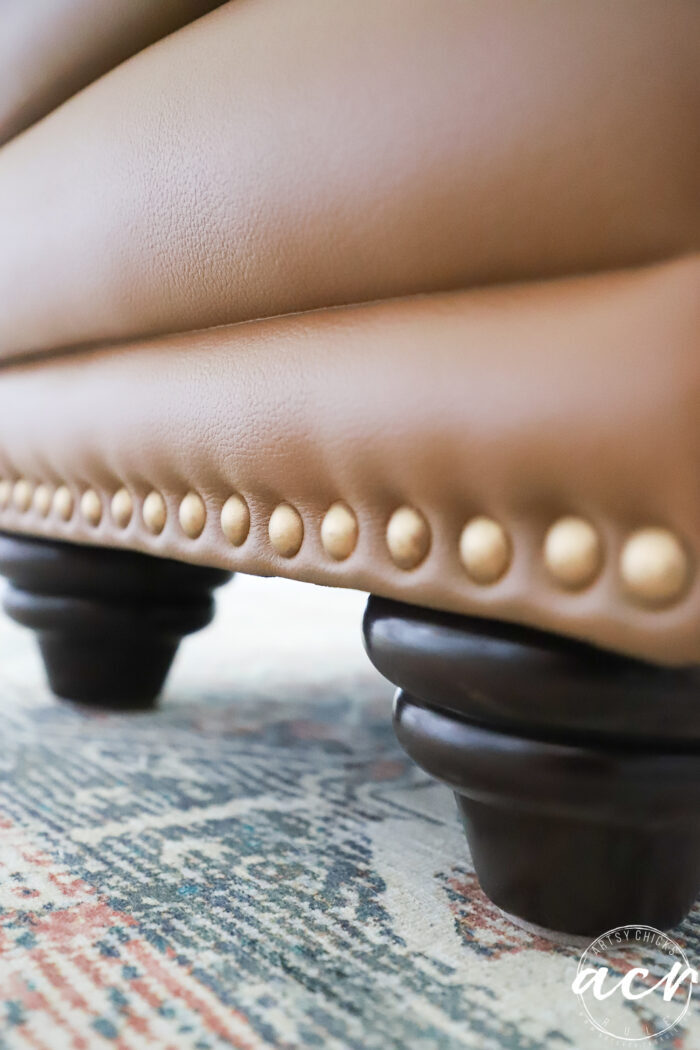
Up close of the tacks and feet.
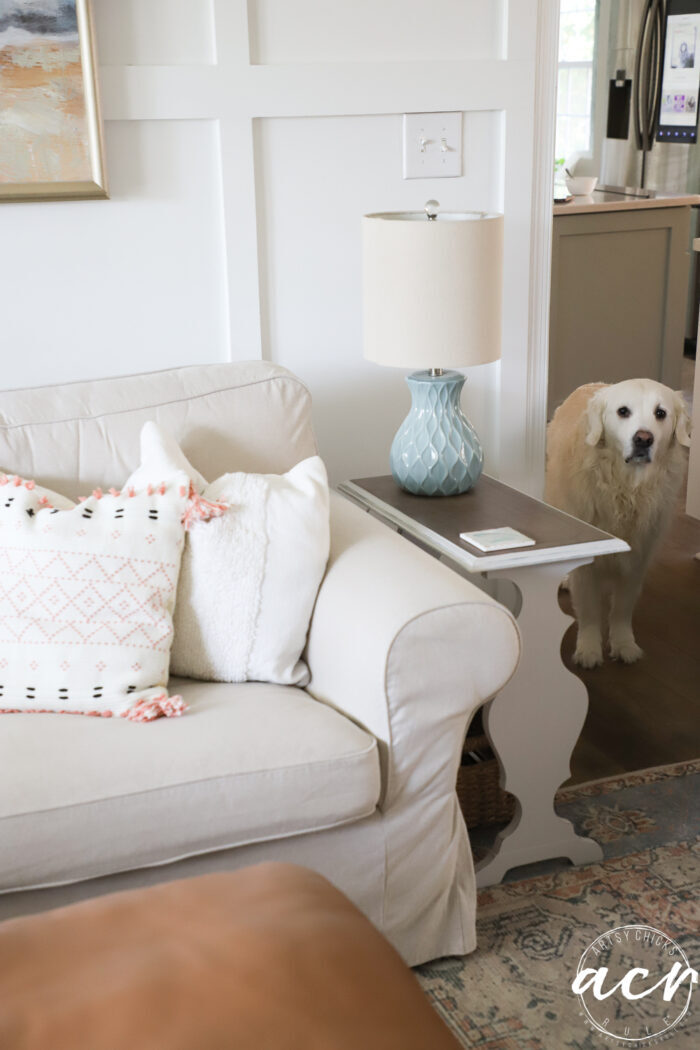
And that cutie, Ryder, begging to come in here where I’m at.
Oh, I give up, Mom, I’ll just wait here.
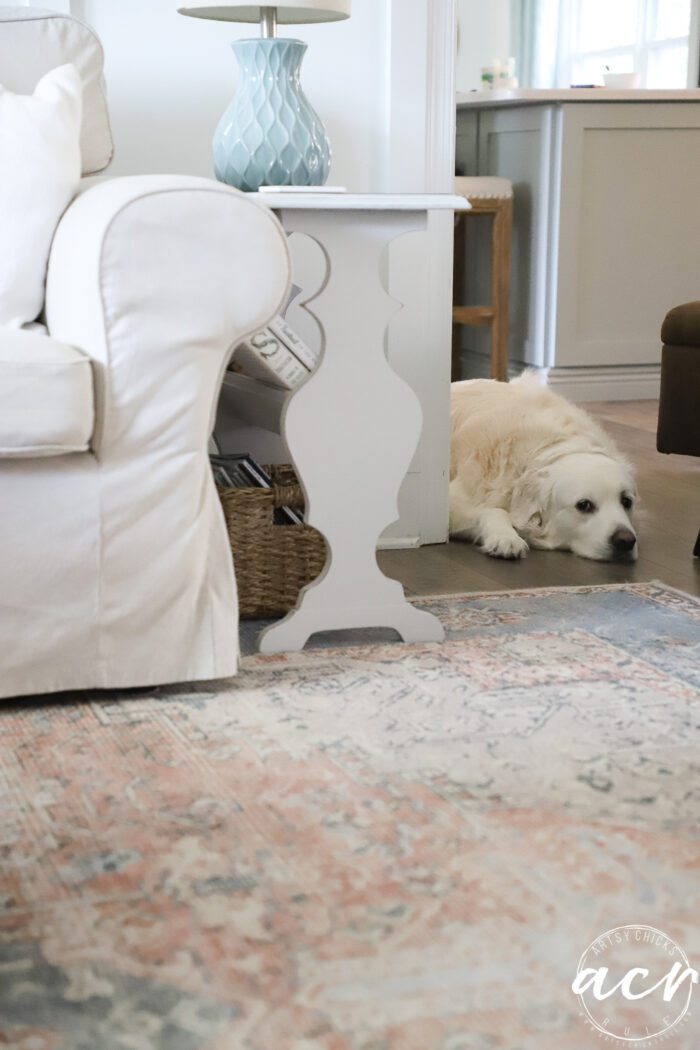
He’s the best boy.
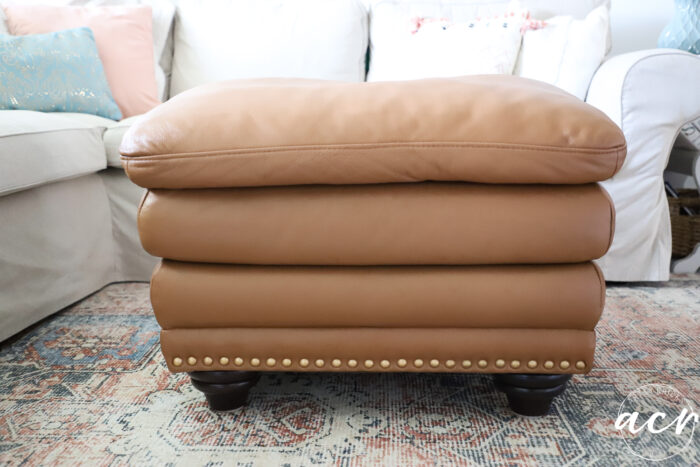
Isn’t she a beauty now?? I sure think so!
I LOVE this color leather. But you could also do brown, red, black, etc.
Whatever your heart desires!
Think you’d give painting leather a try???
OH! I also meant to show you my shoes!
Before I found the ottoman, I actually did go ahead and try it on a pair of my own shoes. They were leather but not a color I loved so they didn’t get worn much in the last few years of owning them. So I thought, I’ll give it a go!
Here they are “before”… (well one of them, not sure why I didn’t photograph both lol)
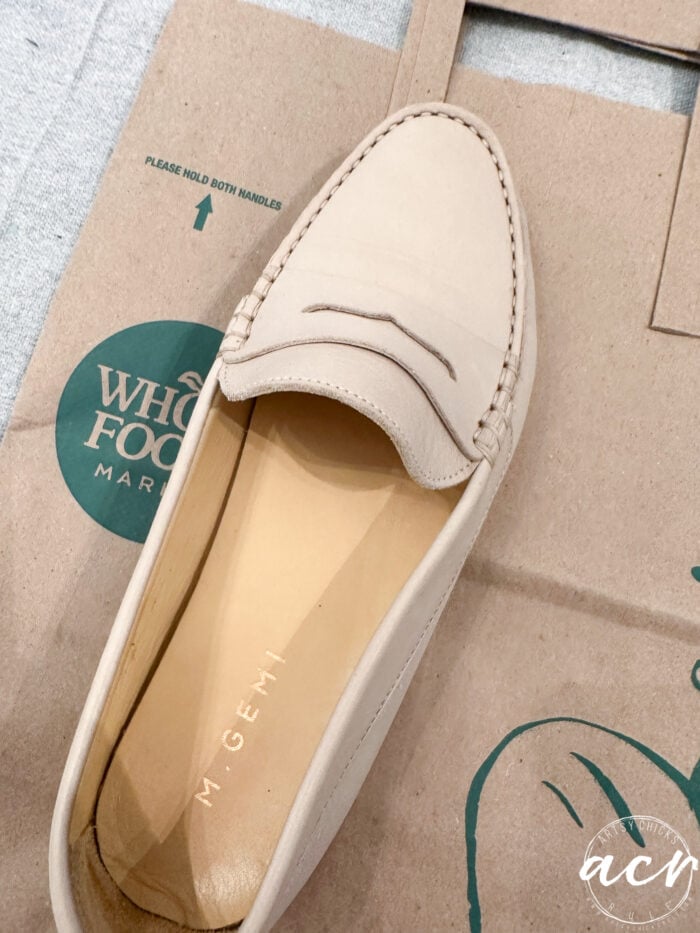
See, it’s just a very pale beige color that didn’t go with much. You’d think so but not really.
The color I wanted at the time (Cognac-ish) was out of stock so I settled for these.
Well, I was determined to make them that color! And I did…and I’m in love!
So I mixed up a small bit of color and came up with this…
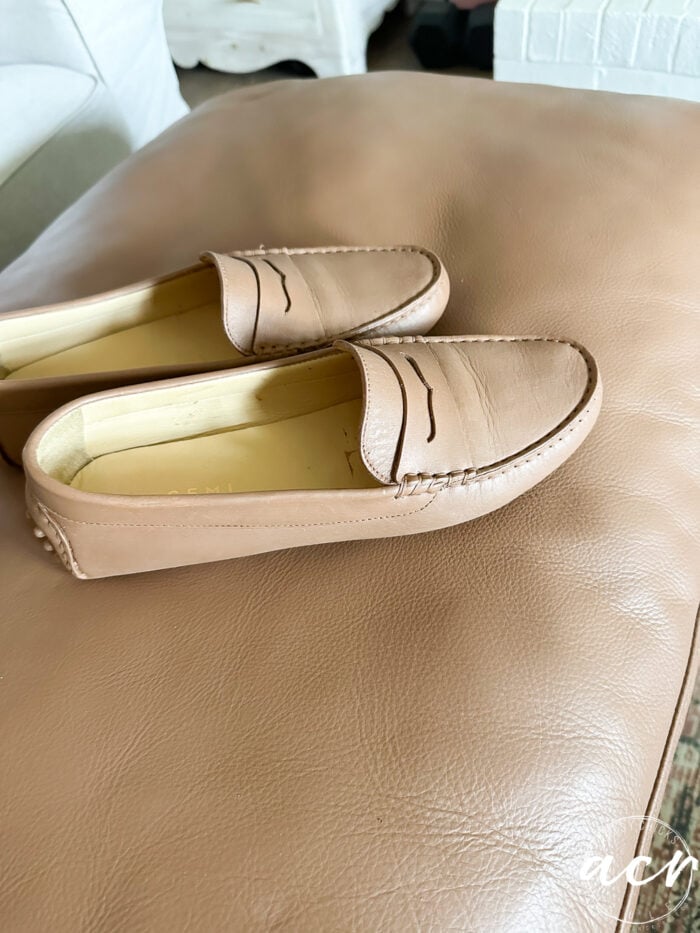
Funnily enough, I did not measure anything when mixing that first small batch of color. But when looking at the two mixes (the ottoman and shoes) they look almost identical!! Too funny.
Aren’t they so pretty now?
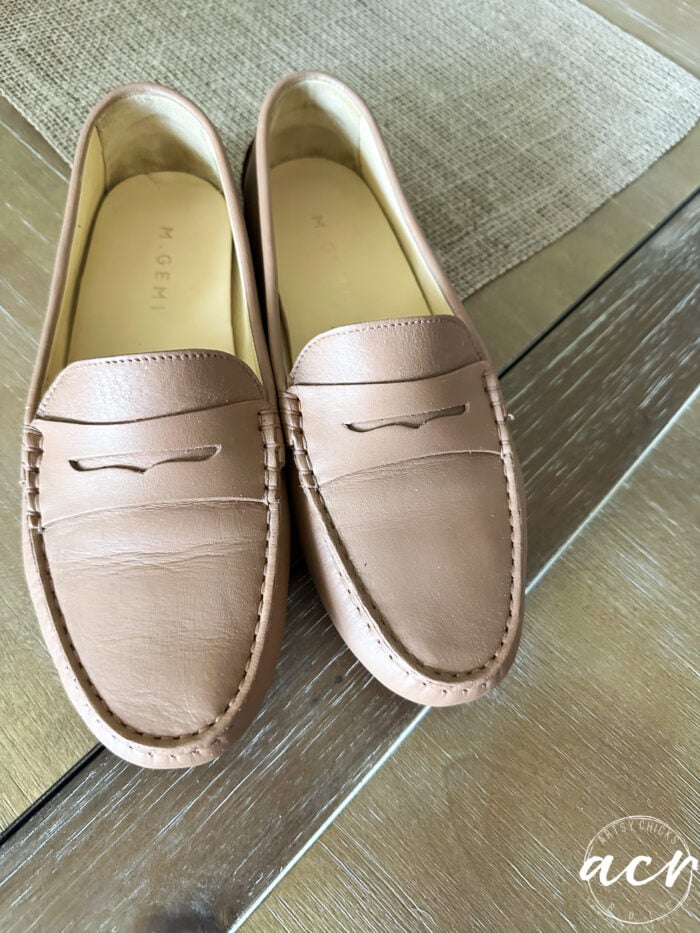
A Final Note:
If you have fake leather, “pleather” or vinyl, just know that yes, it can also be painted with Fusion Mineral Paint, however, you may run into a couple of challenges (that can be overcome). One, some vinyl products may resist the paint. If you see the paint bead up, then you will need something like Ultra Grip underneath before painting.
Also, sometimes after painting faux leather, you can have a sticky finish. If you do, you can add a coat of Tough Coat Topcoat. That should alleviate the issue.
Now, those are recommendations I have read, not what I have personally done as of yet. I think I will find a few different things done in various faux leather/vinyl just to see how it goes. I will post about it here when I do! Stay tuned.
……………………………………………………………………………………..
I’m just thrilled with this process. I can not praise it (and the paint) enough.
You all know how I am…lol…I am wanting to paint all of the leather things now!!
Nothing is safe! ;)
PIN it to save it!
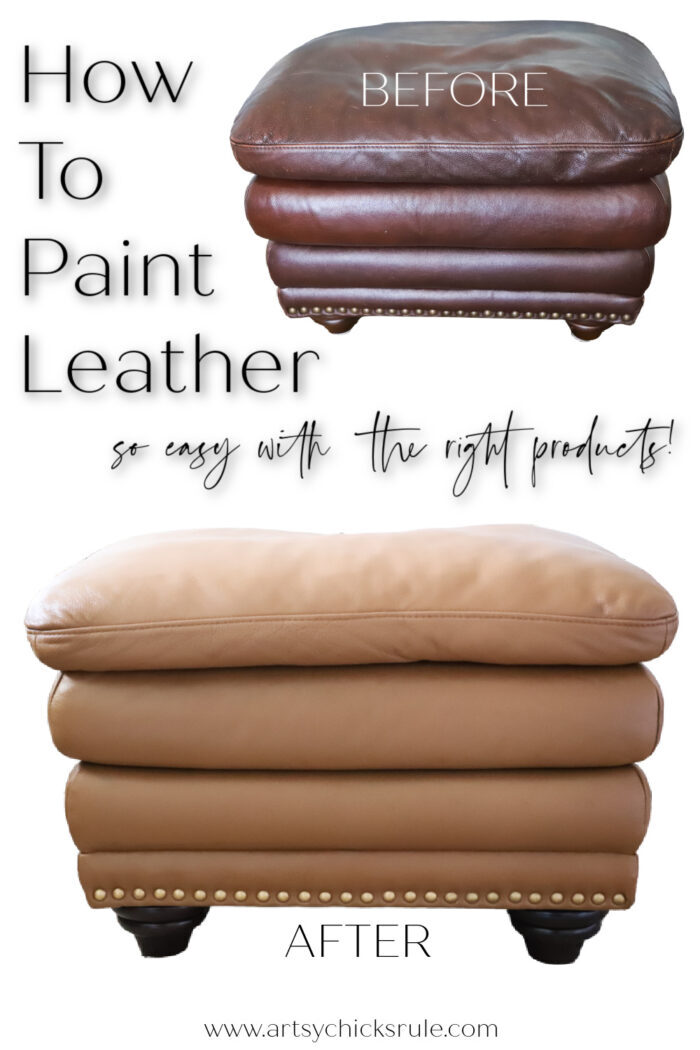
Think you would give this a try? I’ve seen full leather furniture sets done like this and they are amazing! Let me know if you try it!
See you next time with this furniture makeover!
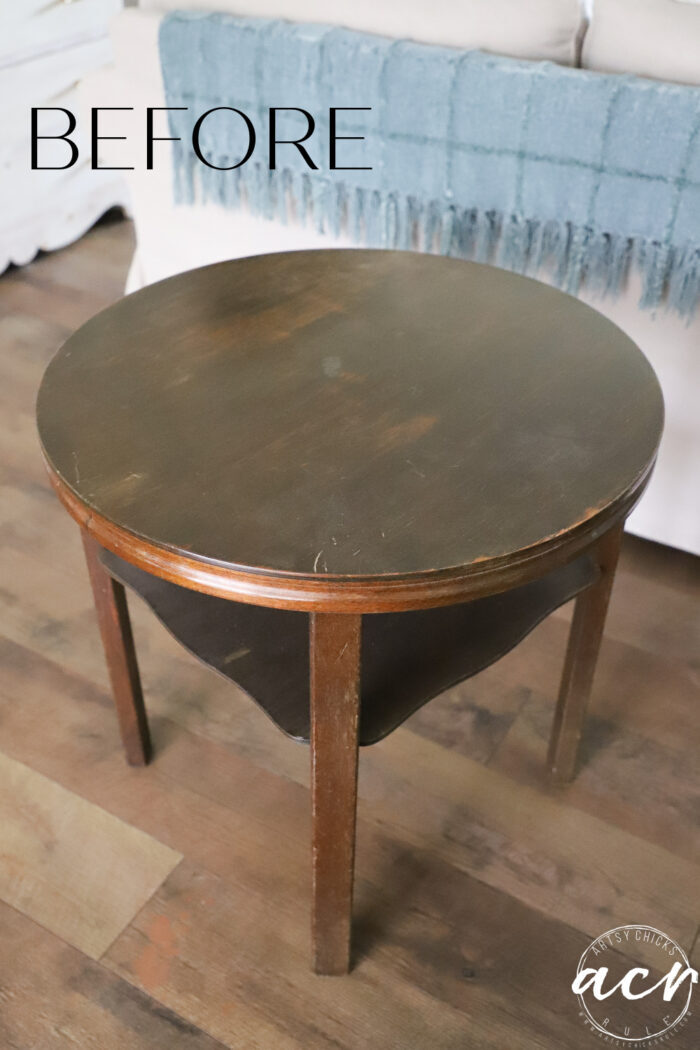
UPDATE!! Go see it here now!!
xoxo





Thank you for this post and tutorial!!! My leather sectional is losing it’s color and before I throw it away, I may just paint it instead and get a few more years out of it. It’s comfy but the leather turned out to be fake and I hate it…plus, it’s too dark for my taste now.
THANK YOU!!! :)
You are so welcome, Lilly! Fake leather or vinyl could potentially be a bit different than real leather when painting. I should’ve added that in my post, I will update it with a few tips on that!
But basically, you can still paint it but you may need to finish or prep it differently. :)
Really amazing results – thanks!
Thanks, Ruth! :)
Will the bees wax get on your clothing if you sit on it?
No, not at all, it absorbs into the leather/paint.
I love the transformation! My sectional is a dark brown and I’d love to change it up. What paint color did you use on your living room wall? (the blue-green)-so beautiful!
Thanks, Beth! The wall color is called Sea Salt by Sherwin Williams. I love it! I have it in our foyer/guest bath/living room. And in the bathroom of our beach home too! It’s the best!
Awesome tutorial! Love the way the ottoman turned out. Give you a brush or roller and you will try anything.😁 I do paint quite a bit of stuff here at home..I call it “enhanced”! My friends come around and spot something and say did u buy it like this or did you enhance this? Lol! Most times I say ..yeah I painted it. I use all different paints and stains. Love your blog.. keep up the good work.❤
Thanks, Lorri! Yes, that’s right, I will!! lol
And I love that!! Enhanced!!! Perfect. xoxo
Hi Nancy! The color turned out so pretty. So did your shoes. The only thing I have that is leather is my couch and I don’t think im ready to paint it yet and all of my leather shoes are already the color I wanted them. I’m on the search for. Small leather project.🙃. Thank you for sharing.
Thanks, Cheryl! Yes, go find you something and play!! It’s so much fun. Another thing to make over! ;) xo
Love the saddle leather color. Really terrific results. Congrats!
Isn’t that color so good?? I don’t know why, but I’ve always loved that shade of leather. Thanks so much, Cyn! xo
What a great makeover! I don’t have any leather furniture, but I have a pair of leather shoes that I want to try. I love the shoes, but I dropped a blob of hand sanitizer on them and that left a large circle of the color removed. I was about to relegate them to the “yard” shoe pile (if you live in the country, like me, you’ll know what I mean). But now, I’m going to try and fix them. Thank you so much for the additional fix suggestion!
Thanks, Gayle! Oh yes, those are the perfect shoes to try it out on! Already destined to the pile! ;) xo
I love that ottoman! It turned out really well. How did you do the nail heads?
I have a really good quality sofa that I picked up several years ago. When my friend saw it she was grateful that I was going to reupholster it because it’s in the horrid 70’s floral colors of gold, blue, red. YUCK! Never got around to upholstering it, but now I can paint it with a LOT less work.
Thanks for all your inspiration!
Thanks, Caye! Oh yes, the nail heads/tacks, I painted over them and then came back and used Gilder’s Paste on them. I wrote about it in the post but you might’ve missed it. :) Have fun with your project! xo
There’s so much to love about leather furniture. As it ages, the softness of the leather improves, and just gets cozier. The last time I was in a local thrift store, there was a small leather accent chair that would have fit perfectly in my reading nook. Unfortunately i thought
the covering was beyond hope. The bones were good, but I passed it up anyway. I’m going to go back today to see if it’s still there. Next, I have to get the Fusion paint. I think Navy will be fabulous with the yellow and green accents already in the room.
Thanks for your inspired idea of painting upholstered furniture. The chairs turned out so nice. So, I’m also going to paint my third hand thrifted sofa. She’s in great shape, except for the cushions. The springs have sprung. My whole family has found the *poky* thing poking us on a very tender body part. I thought about making slip covers, but I don’t want to get fussy with the curves or cover up the gorgeous wood accents. I’m also re-using some old sofa foam cushions to replace the current ones.
You do such fabulous things with your makeovers. Don’t ever lose your mojo.
Cherylinne.
I agree! And I think Navy would be great with those colors. Hope your chair is still there. Thank you, Cherylinne, have fun with your painting projects! xo
The chair was still there and marked down! I can’t wait to get started.
Cherylinne
Oh, yay!!! I’m so excited for you!! Have fun! xo
Hello, what do u mean by TSP alternative?
Lorrie
TSP Alternative is a cleaner to use before painting, etc. I sell it in my shop, here.
Myślałam, że malowałam już wszystko ,ale buty ? Wielkie dzięki za natchnienie :)))
Ha!! Shoes are an odd thing to paint, huh? But turned out so well, I think you should try it! ;)
Wow! It came out beautifully! Thank you for the tutorial. I must try this. I’m in the process of painting an upholstered fabric chair and it’s really turning out nice. Good paint is the best!
Thanks, Lizzy! I am so thrilled with how well it turned out. Impressed too. Absolutely agree, it all comes down to the products! Have fun with your chair! xoxo
Would love to know how well this holds up. I would really love to lighten up our leather furniture. We went with it bc we have pets. It was very expensive and also has the brads, so please let us know how it holds up. My fear is that with constant wear, the paint may wear off. I think it is perfect for an ottoman, just beautiful, but I am leery about a well-used piece. If any body has experience with using painted leather on a couch or chair, please let me know! It truly looks awesome!
Yes, I have no need for it but think I might keep it around for a bit to see how it does. I will definitely update. Plus, I will be wearing my shoes too.
I think maybe the only thing I would be concerned about would be cracking not really wearing off. (equally bad though) It doesn’t appear that it will do either. And from others I know who’ve painted couches, etc, have had good luck years on. Is there a back area that is not visible that you could try it on?? Maybe do that first to see. :)
I had no idea fusion mineral paint could be used so successfully on leather! I bought some small bottles of leather paint years ago to try on some shoes but never got around to it, but recently my husband and son took up leather crafting so I gave it to them. I will be on the lookout for something small in leather to try this! I’ve also never tried painting fabric so need to check out your tutorials for that. Thanks for sharing!
Apparently so! And it does quite well it seems. Yay!! Opens up so many more options. Yes, hop over to the thrift store and see if you can find something small to try it on! Fun fun!! :) xo
Love how that turned out!!
But I have to ask, where is your rug from??
Thanks
Thanks, Cathy!! And yes, I love our new rug! The colors are so great. You can find it here.
WOW!!! WOW!!! WOW!!!! WHO??? would ever have thought ????? And the fabric chairs too???!!!!! I am AMAZED!!! I would have thought it would crinkle off…and I would be cringing every time someone sat on the chairs!!! Do those chairs get sat on??? The shoes look great too…..don’t step in any puddles!!!
I know, isn’t it fun?! Those chairs didn’t get sat in all the time, no. I’m not sure I would paint fabric for something that would get tons of use. However, I am beyond impressed by how well the painting went on the leather. It is SO flexible! I can’t wait to see how it does over time! xo
Hi Nancy, looks great!!, as usual! 😊 One question…the Ottoman has 2-3 layers that I’m sure are attached. Did you paint a bit in between them? And if so, was it hard to get the paint to dry?
Thanks for you advise and genius talent!
Dawn
Thanks, Dawn! Yes, I thought I took a picture showing that but guess I didn’t upload it. I did paint in between them, just very thin, light coats so it would dry better. I just kept lifting and making sure it didn’t stick. Hope that makes sense. :)
Thanks for answering Nancy!
I’m glad I asked. I have a small footstool that has two layers and I wanted to try to paint it and actually thought of putting toothpicks to hold them apart. Ha ha ha.
But I think I’ll try using my hair blower on cool to help it dry a little faster.
Again, thanks for answering Dawn.
Haha! Love it and not a bad idea! Yes, the hairdryer would be the perfect solution though! I’m so glad you are going to give it a try! Have fun!! xo
AMAZING! I’m itching to try painting leather now — do you think it would adhere to a leather chair that’s been clawed to pieces by a cat?
I’m still terrified by the idea of painting a fabric chair — how does the paint not seep through into the stuffing and mildew or create lumps or something else awful? I’ve been eyeing my dated dining room chairs for awhile and wondering if I could successfully reupholster them. Painting might be easier, especially since the chairs don’t get daily use.
Thanks for the inspiration.
Yes, do! And yes, I actually do, however, it would be just like if the cat clawed the actual unpainted leather. It would mess it up but I don’t think it would make it peel at all.
I would paint a fabric chair if it was something that didn’t get a ton of use. That’s just my personal opinion. These two that I painted only got occasional use. Now, the seat of the dining chair that’s fabric, I would do that (and did!) in chairs that get lots of use. A smooth/flat surface that you don’t have to worry about much. No, it doesn’t mildew, etc, it dries pretty quickly.
Now, this painted leather I did…I wish I had a couch or something similar to try it on!! I’m highly impressed with its flexibility! Thanks, Cyndel!
Gorgeous, Nancy!
Thank you, Nancy! xo
Wow lady that is just CA-RAZY Cool, and so very exciting to see it happen. Thank you sooooo much. We have a pair of leather recliners that I have always wanted to be a darker but brighter blue. I may just have to give this a go. They do make leather dye, that you wipe on and polish off, but the sky is now the limit when you have every color under the rainbow to mix and play with. LOVE IT!
Yes, so, so, fun!! One of the most exciting projects I’ve done lately! lol And yes, do!! If they are genuine leather, just clean it up and paint! You can test it on an inconspicuous area first if you want to check it out first. I wish I had something larger to try it on. I’m so impressed with it and the flexibility of it! xo
OH MY GOSH!!! NO WAAAAAY!!!!!
That is absolutely unreal, Nancy! Who knew???? I cringed when I started reading your post thinking you were absolutely insane. Then you proved you are absolutely brilliant. WOW.
That’s a game changed, girlfriend. Pinned it. Well done, ma’am!!!!!
Yes way! :) I literally walk over and touch it, squish it, and sit on it every day, no lie!! haha! I am just so impressed. I wish I had a big ole couch to try it on! xo
This ottoman looks just like mine that goes with my sofa. I have been trying to get up the nerve to paint both with Fusion Mineral paint for years. My family thinks I am nuts and will ruin it. I may have the courage to press on after reading your tutorial. After trying to decorate around it in a room with new flooring and wall color, I may seek your advice on choosing the paint color. How would I do that before ordering from your shop, Nancy? Thanks so much.
Diane
I totally understand the family comment! Ha!! Mine are used to me by now! ;) And honestly, it does seem nuts…until I walk over and squish my pretty little ottoman! I would NEVER know it was painted if I hadn’t done it myself. Maybe paint the ottoman first to see how it goes?? That’s not a big commitment in case you don’t love it. But I think you will!
You can email me at nancy @ artsychicksrule. com or message me over on Instagram with photos if that’s easier too. xo
I’m very inspired!!! I did a couple of wing back arm chairs back before Fusion, I also waxed them. It was suppose to be a fix till I got new ones but they are still going strong. It’s time to tackle something leather.
That’s so great your chairs are going strong, I believe it! But yes, do give this a go on some leather. I am thrilled (and so impressed). I literally can’t walk by it without squishing it or sitting on it! If I didn’t know I painted it, I’d never guess!
That is amazing! About the shoes–Did you put a top coat on them as you did the ottoman?
I’d definitely start small. I have a pair of shoes I’m eying.
Yep, I did the same exact finish, Beeswax Finish. Worked very well. And created a nice waterproof finish too. I may use the Beeswax Finish on some of my other leather shoes that are not waterproof too! And yes, Ann, definitely start with shoes, I think you will be thrilled! xo
In another life, I found a similar ottoman on the curb and rescued it. Back then no one knew about up cycling leather items. Sadly, I put it up for adoption on freecycle. Where it is now who knows. Love what you did with yours. Keeping an eye open for other orphan leather pieces in need of a new home. Long live Fusion paint.
.
Aw, shoot! We also used to have a full leather set that I was SO ready to get rid of (but hubby loved it, of course!! lol) Finally got my way some time later and here we are. I told him I wish we still had it because I could paint it, then I’d probably love it! (it was VERY comfy but not the color/style I was changing to at the time) Honestly, I’d love to still have it only BECAUSE I just want to paint it for the fun of it! I’m still so amazed by this little ottoman!
That transformation is truly unbelievable! You always do such a good job at transforming yuck into yum!
Aw, thanks so much, Sharon!! :) xo
Hey! I have a leather couch with that exact color and I want to paint it the exact color you did. How is it holding up?
Hi Whitney! I have recently sold it but it was holding up great! I want to do a larger piece next time. I think it is one of the best results I’ve had painting furniture (other than regular wood furniture). It worked amazingly well. I hope that helps some!
I’d like to know how this process holds up over time. Any examples or knowledge of this?
I actually sold this to a friend of mine. I saw her recently and asked her how it was holding up and she said great!
I really like the color that the ottoman turned out. Would you say that Chestnut Mare is the closest to what you concocted combining those three colors?
Hi there! Yes, Chestnut Mare is definitely close but not exact. It’s a little bit lighter. If you really like the exact color, I would still go with the 3 colors I used and do that. But if you are okay with it lighter and a tad different tone, then Chestnut Mare will definitely work. It’s nice to not have to mix! Or you could always add a bit of Chocolate to the Chestnut Mare to deepen it somewhat if you like (less mixing!). You probably only need a small tester of the Chocolate to do that. Start with a small amount and add until you like the color…you can always add but not take away! Hope this helps! :)