Create a Vintage Look with Paint
Create a vintage look simply with paint! Very quickly add “age” to just about anything, can be used on decor, mirrors, and furniture too!
Hello friends! I know I said I would try to be back today with the nightstands but, well, we hit a snag! haha! That’s always fun, isn’t it? Not. Nope.
But it happens.
So, they were completely finished and all was well. Then they had to go up to our bedroom. They are SUPER solid and heavyweight, so we took the drawers out (as per usual when moving furniture) to move them up the stairs. Some of the drawer glides were already a little janky but they got super janky upon putting them back in. Several need replacing. My sweet husband is working on that as I type this. So hopefully we will have them ready in our room to share next week! Stay tuned.
I thought, well, I’ll make over one of the smaller finds from this weekend’s thrift store shopping. I can get it done this morning and photo/write this afternoon, right? Will surely try!
But then I realized they were still in the back of my husband’s truck. We both forgot to unload!! (it’s covered) lol And of course, he was not home.
So, take two. I’ll run up to the local thrift store here in town and see if they have something I can change up and make beautiful quick-like.
And they did!
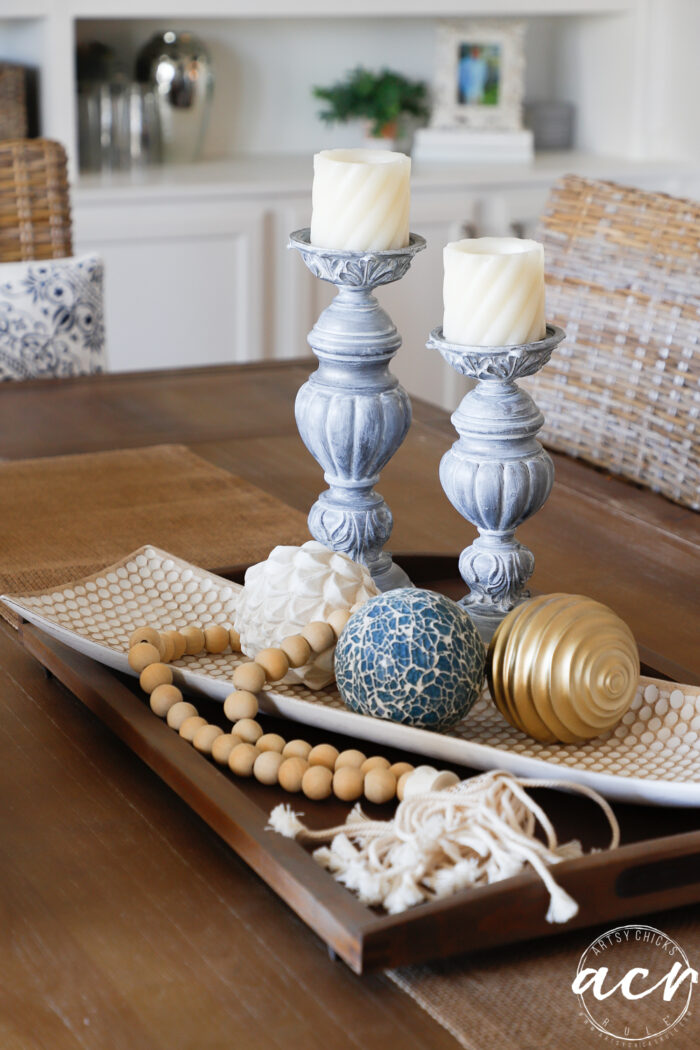
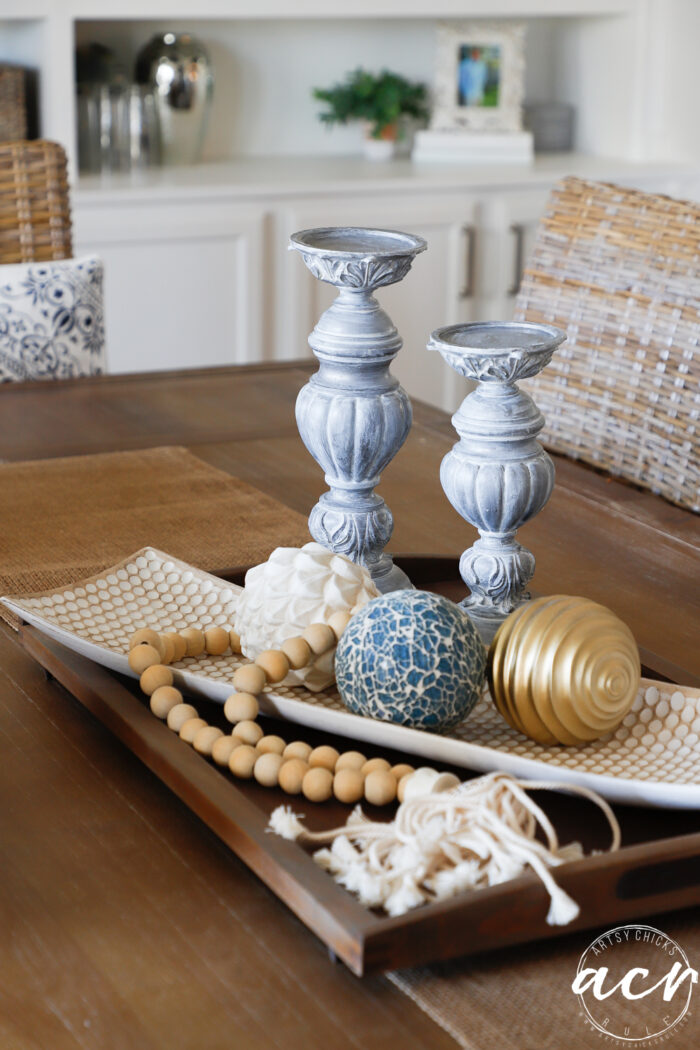
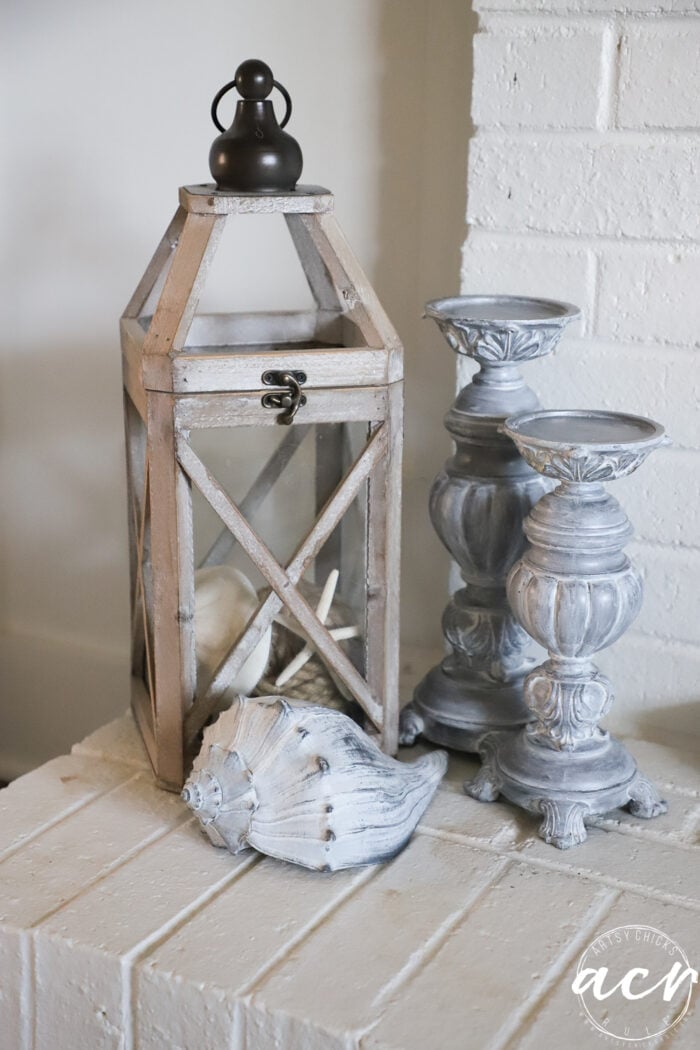
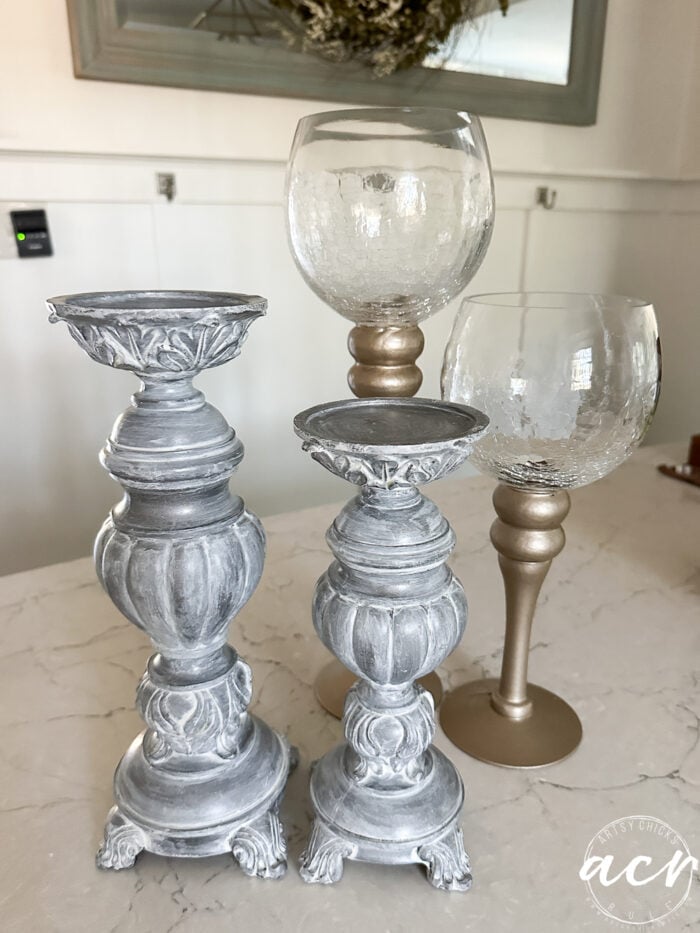
A set of 3 pedestal candlesticks of varying heights. Plus a set of two tall, glass stem globe style candlesticks. Yay!
I took them up to the register to check out and one lady took the glass ones to wrap with newspaper. The other lady grabbed the 3 pedestal ones (they are made of a resin material) and dropped them into a paper bag. (literally dropped them) They made a terrible clanking sound and I looked up with wide eyes like “Uh-oh”. And she said, “Oh, don’t worry, those won’t break”.
So I finished paying grabbed my items and started to leave. I happened to look in my bag on the way out and saw that one of them did indeed break. I was so bummed! My nice set of 3 was now 2. Boo.
Then when I got home, I was oh so carefully unwrapping the glass ones and I hit the corner of the base a little too hard on the countertop and you guessed it!! Haha! I broke part of it off.
Gosh, batting a thousand today, aren’t I?!
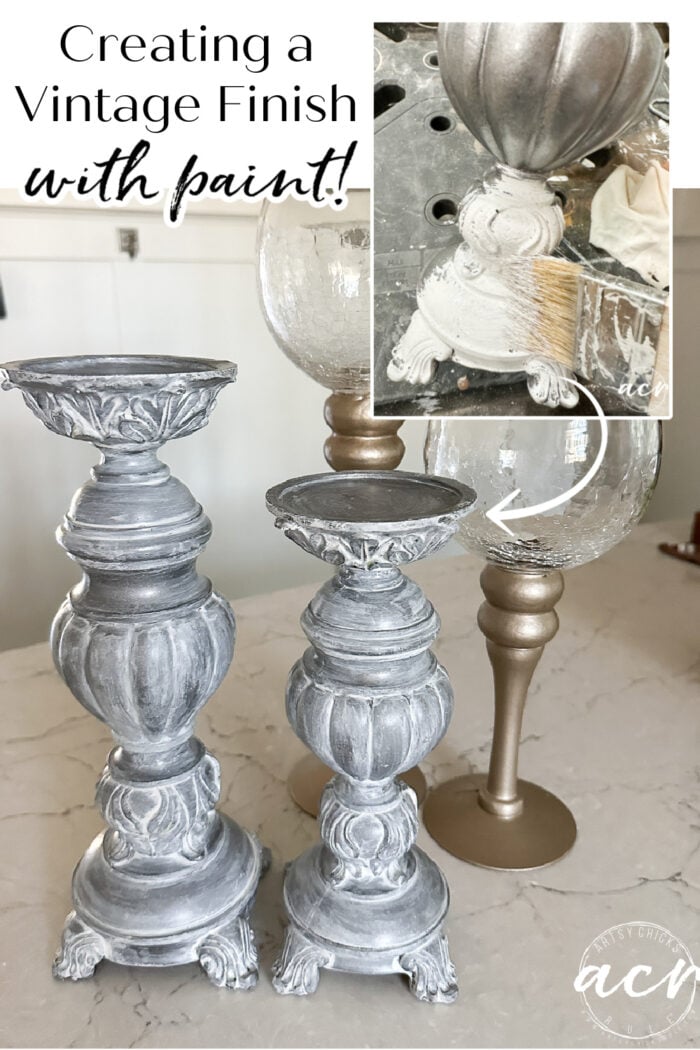
So today, I am sharing two very simple makeovers with these 2 sets of 2 thrifted candlesticks.
Create A Vintage Look With Paint
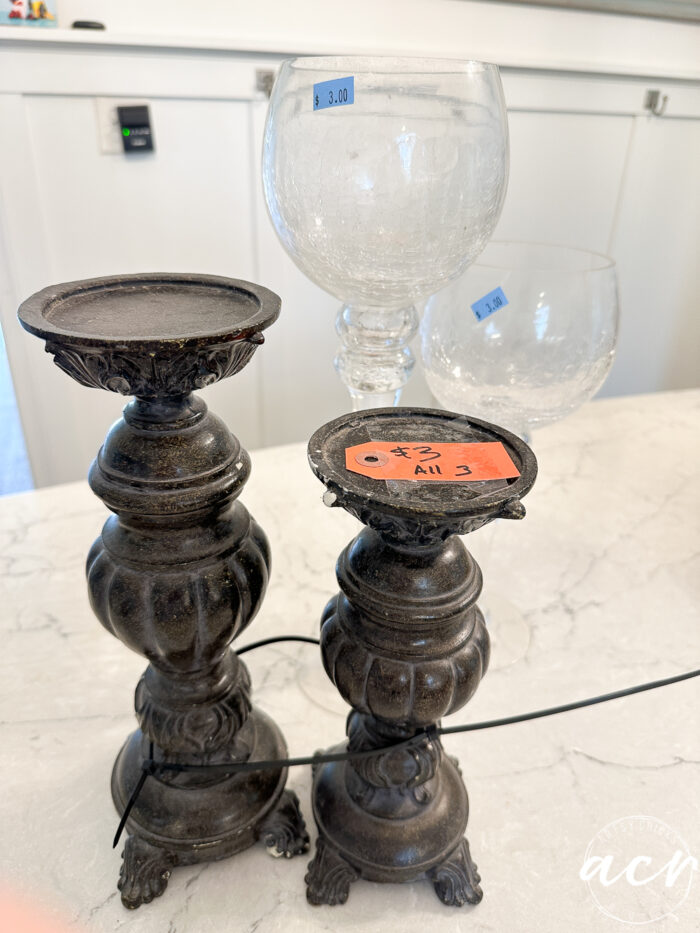
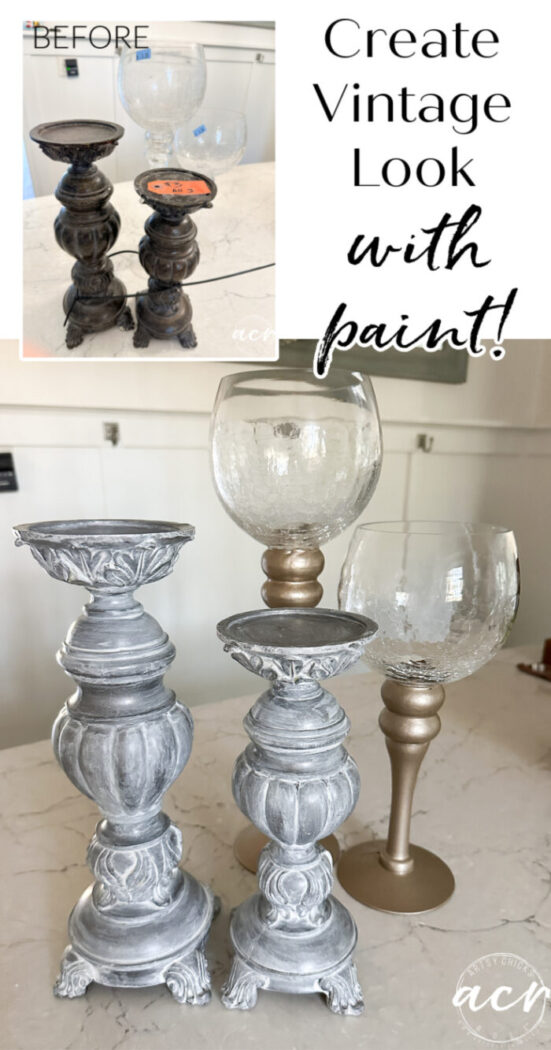
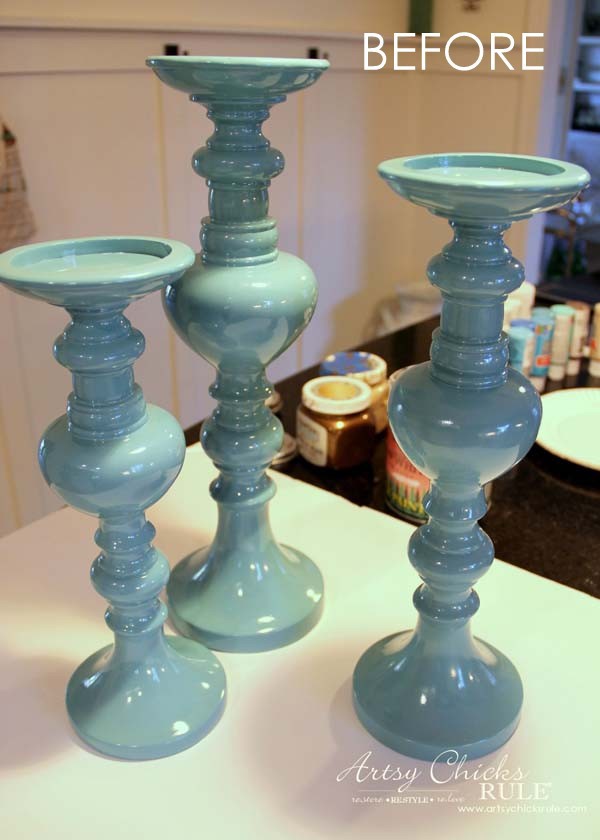
Here is how they started.
MATERIALS SOURCE LIST To Create a Vintage Look with Paint
Prefer to shop on Etsy? I have an Etsy shop also, here!
And here is the broken base of the glass one.
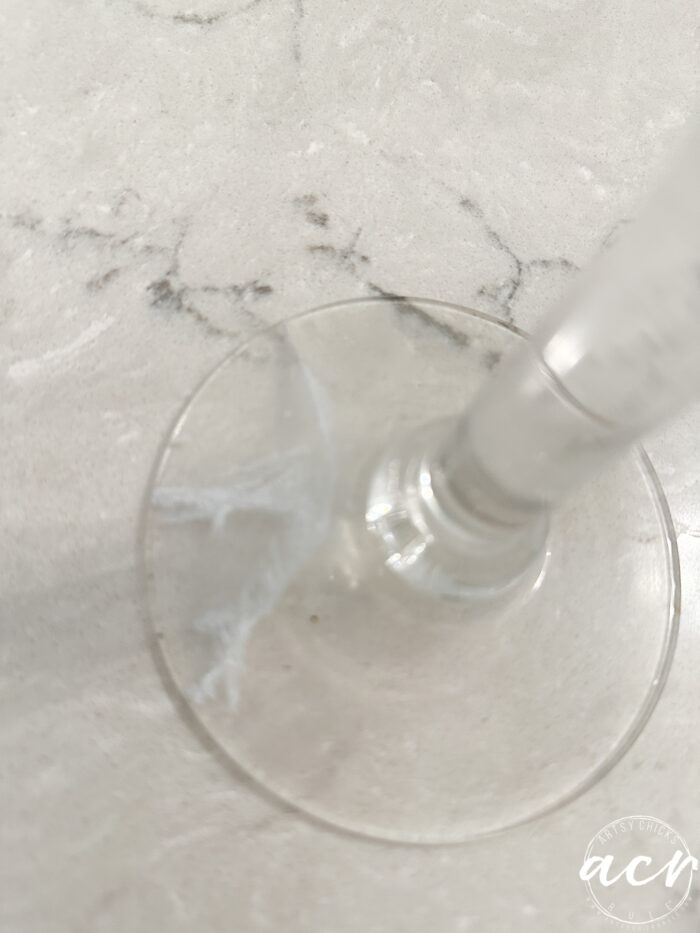
I attempted to glue it. Eh, not the best but it’ll do!
So these were pretty straightforward and definitely simple!
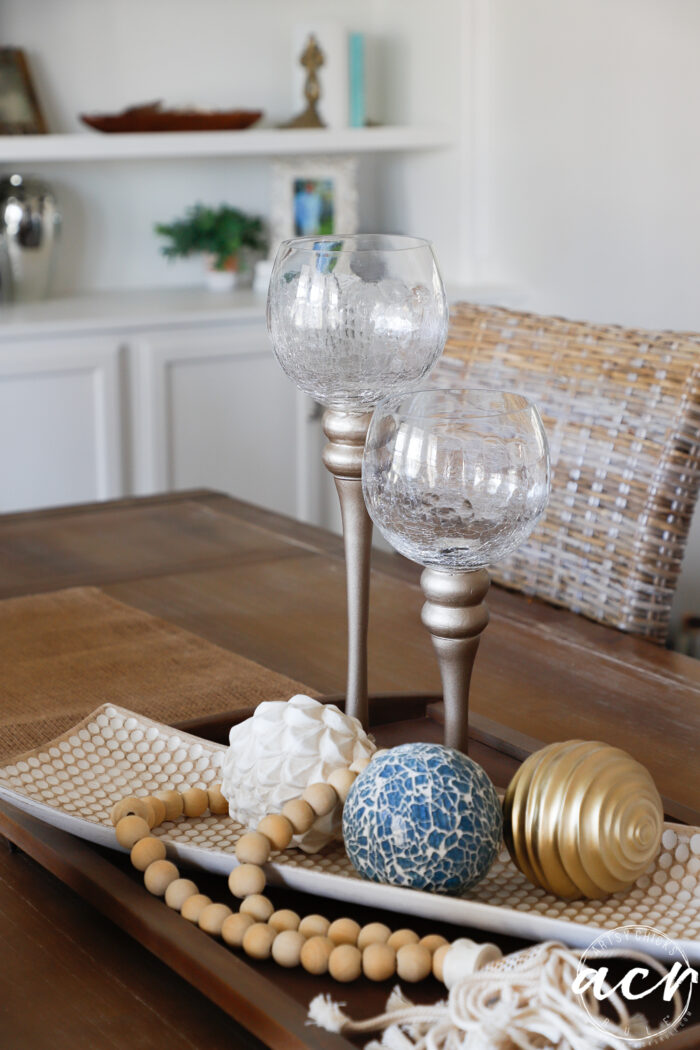
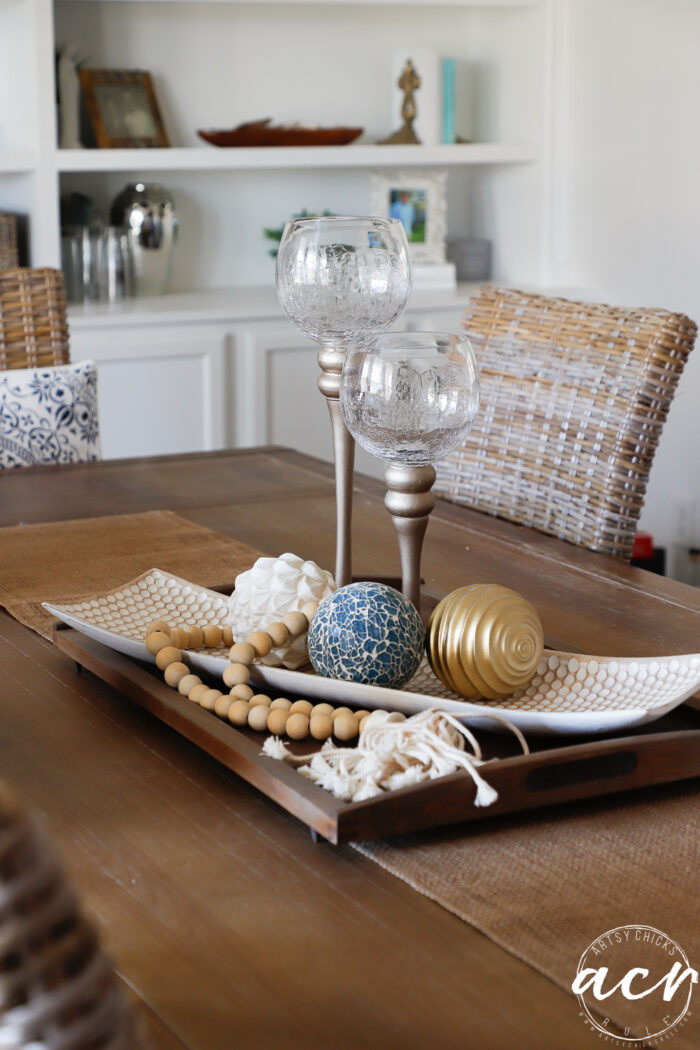
All I did with these two (besides clean them up really well) was paint the base hammered gold. That’s it!
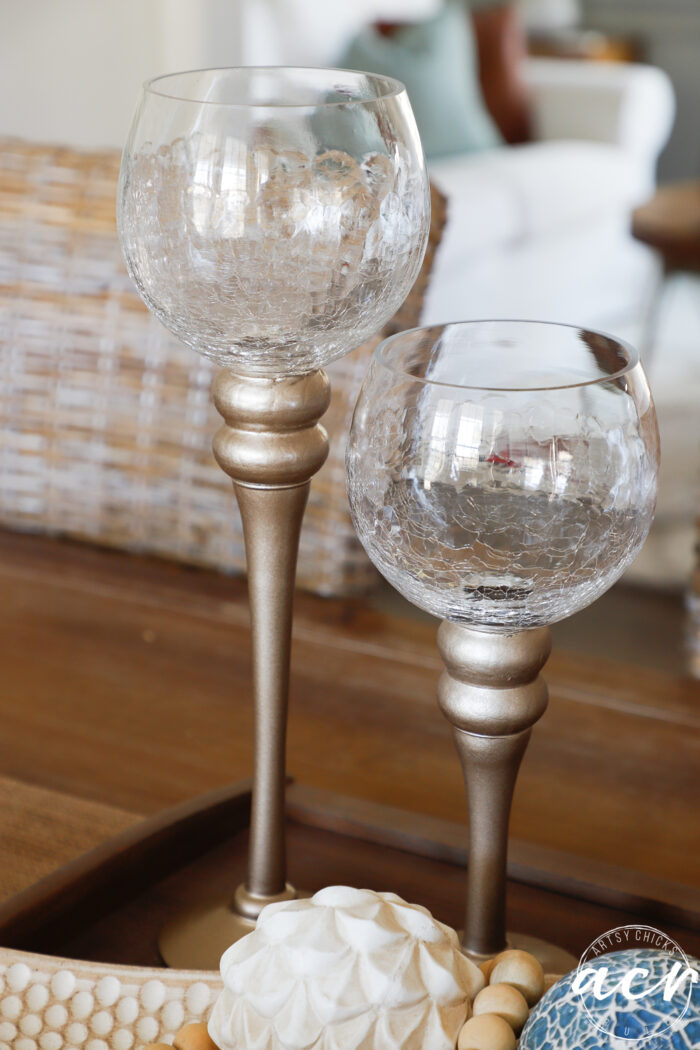
But look at how different they look now.
These were $3 each. So $6 for the pair.
I looked online to see how much these sell for and found these:
- Gold Glass Candlesticks Set of 3 $45
- Mercury Glass Candlesticks Set of 3 $69
My find was not too bad at $6! I’m guessing there were 3 originally.
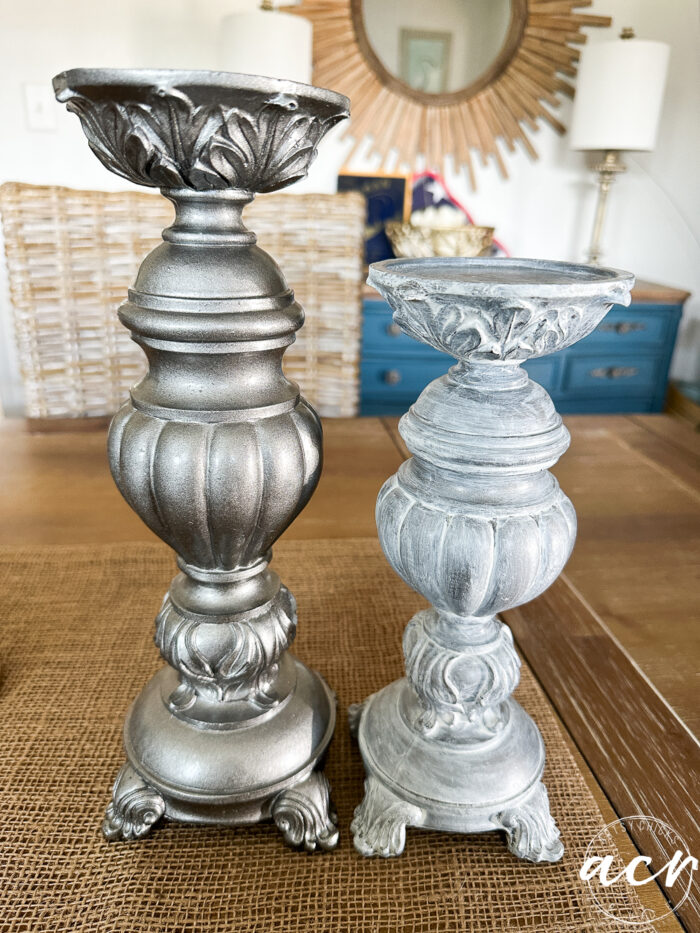
The next set got a good cleaning and then also spray painted.
SPRAY PAINT (your choice of colors, but something metallic is best)
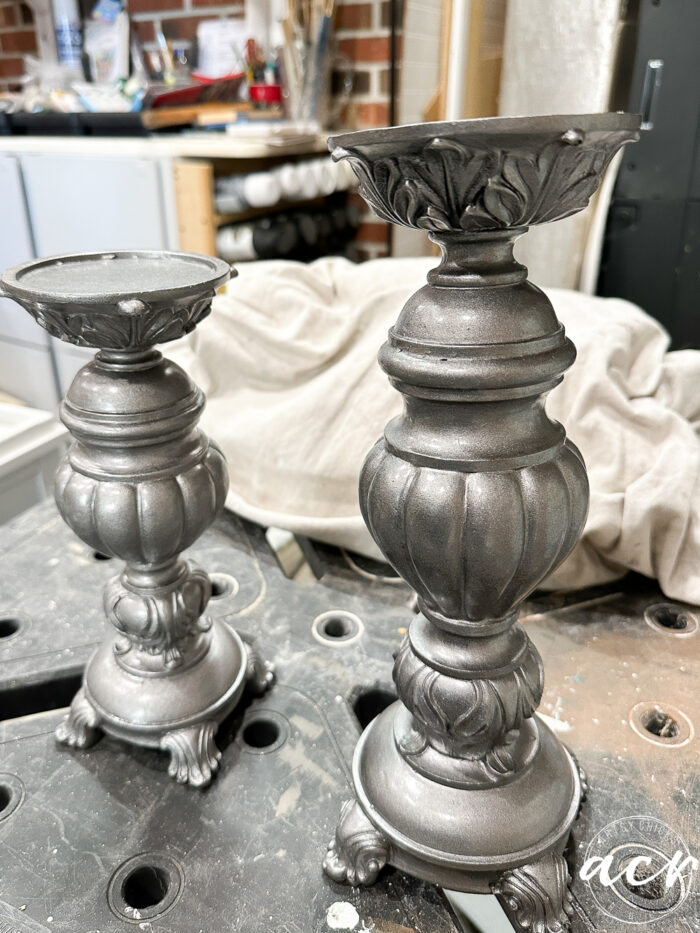
But I had a “look” planned for them and this was not it. This hammered pewter shade was just the first step…and what would end up being the “base”.
APPLY PAINT
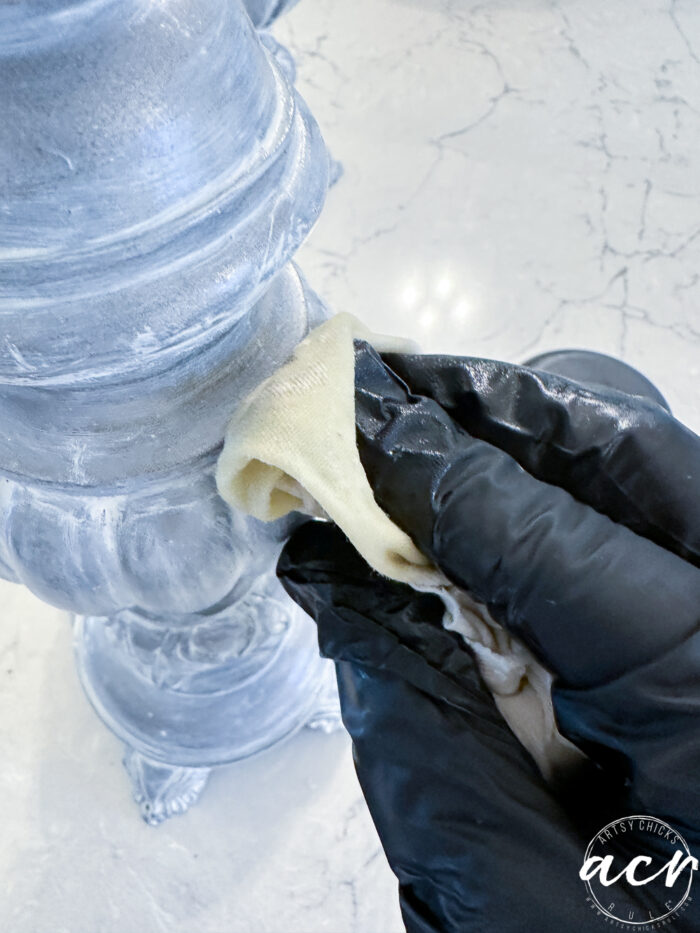
I pulled out my Parchment paint because it is a nice, cool white, and thought it’d be perfect for the cooler pewter color.

Then I simply started adding paint right over top of the spray-painted candlestick.
WIPE AWAY
I used a dry old t-shirt cut into squares to “wipe away” the paint.
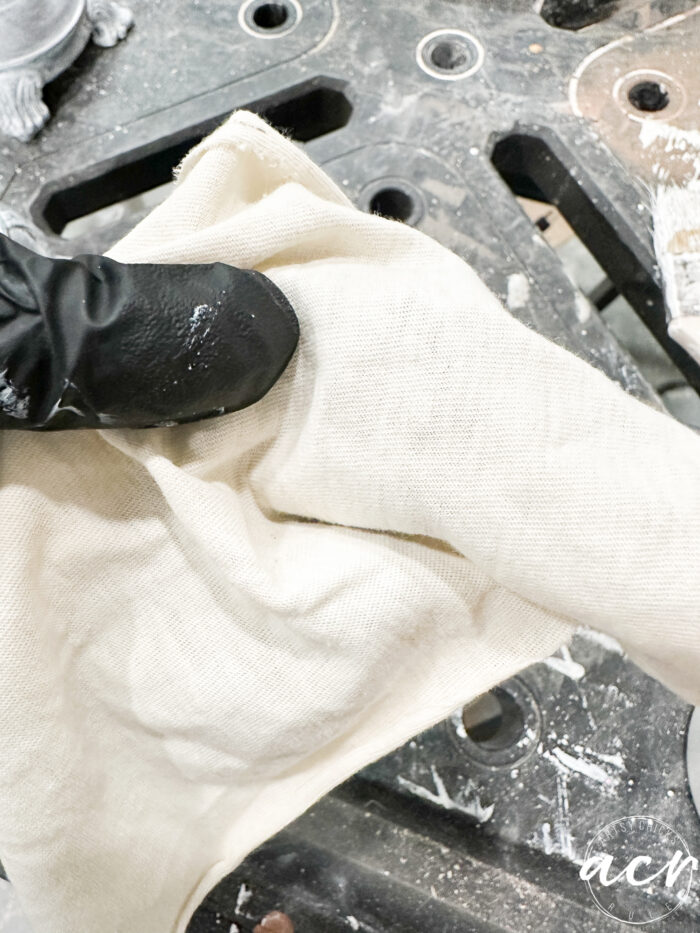
You’ll want to work quickly so that the paint does not dry before you have a chance to wipe away.

Wipe, leaving it behind mostly in the crevices but also a thinnish layer everywhere.
I worked in sections so the paint would not dry before I could wipe it away.
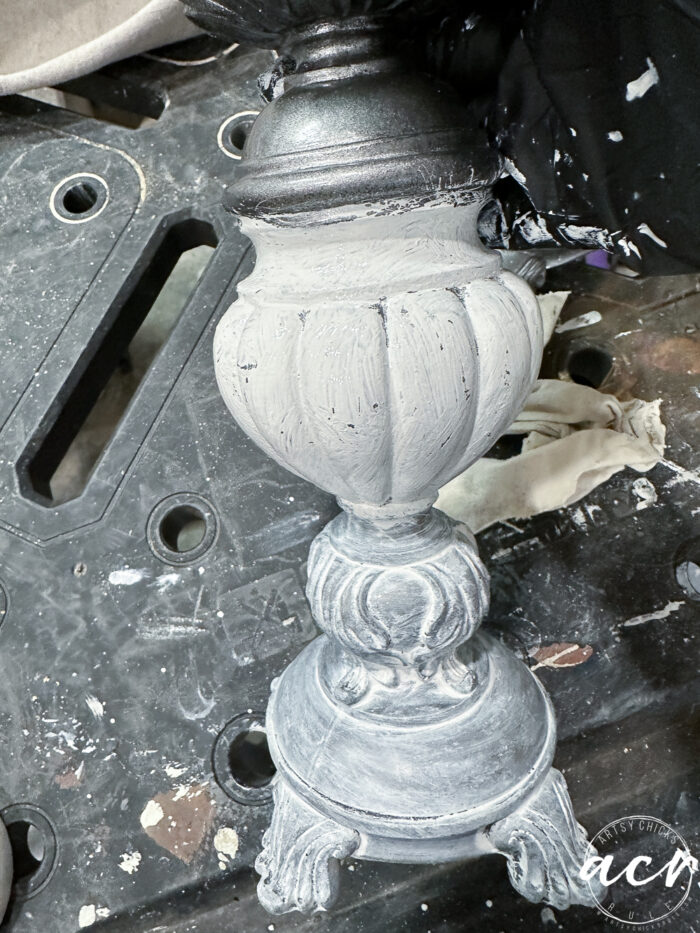
And repeat, for each section.
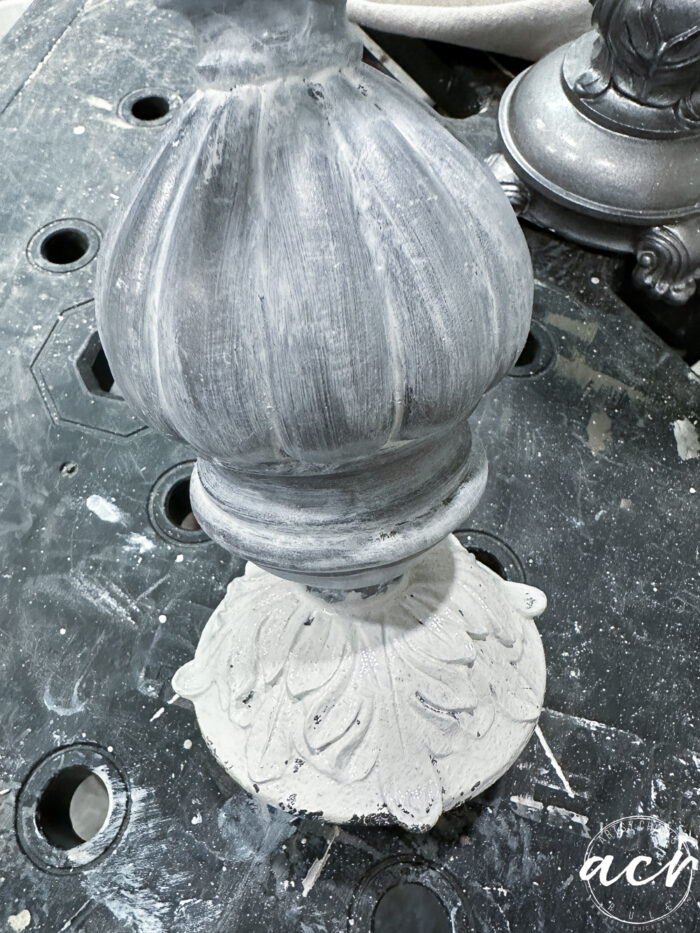
Pretty simple, really but gives it such an interesting look! And if you make a mistake, it’s so easy to just go back over it with more paint and wipe again.
A little visual for you to see how they looked “before” and now with the addition of the vintage paint “wash”.
BEESWAX FINISH (optional)
Once they were dry, I decided to add this Beeswax Finish to protect them and also to give them a little sheen. You don’t have to as Fusion Mineral Paint does not require a finish coat. However, if you use chalk paint or something similar, you will want to add a finish coat of some sort.
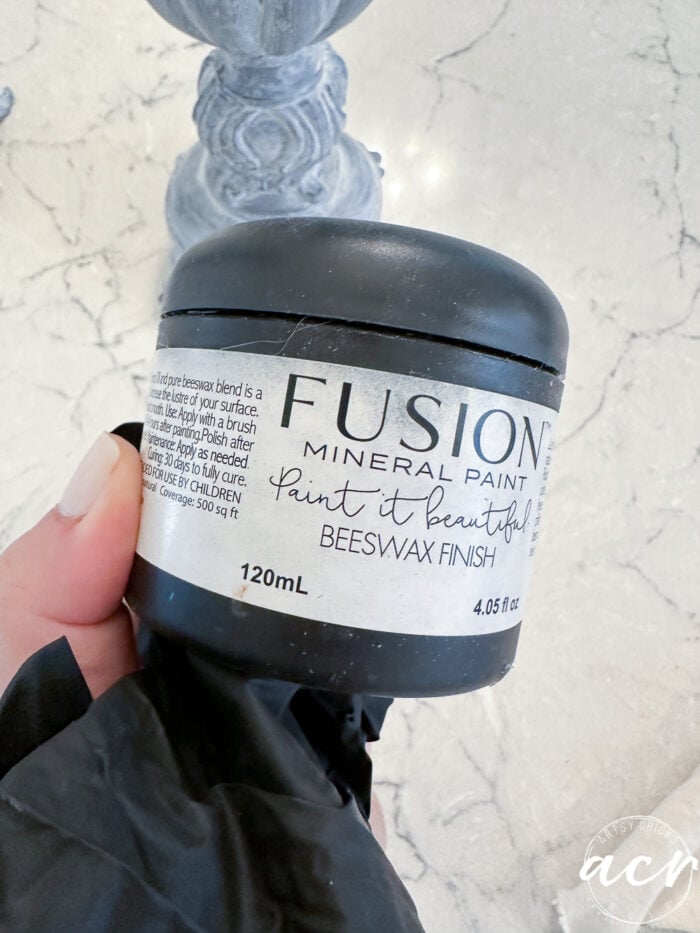
Simply apply and rub away the excess.
Then I buffed them up and done!
These were the only candles I had. And they are a solid “no” colorwise with these candlesticks, haha!
I think I need to create a vintage look with those candles too! ;)
Anyway, I did want to show what they looked like with candles on top.
A few up-close shots…
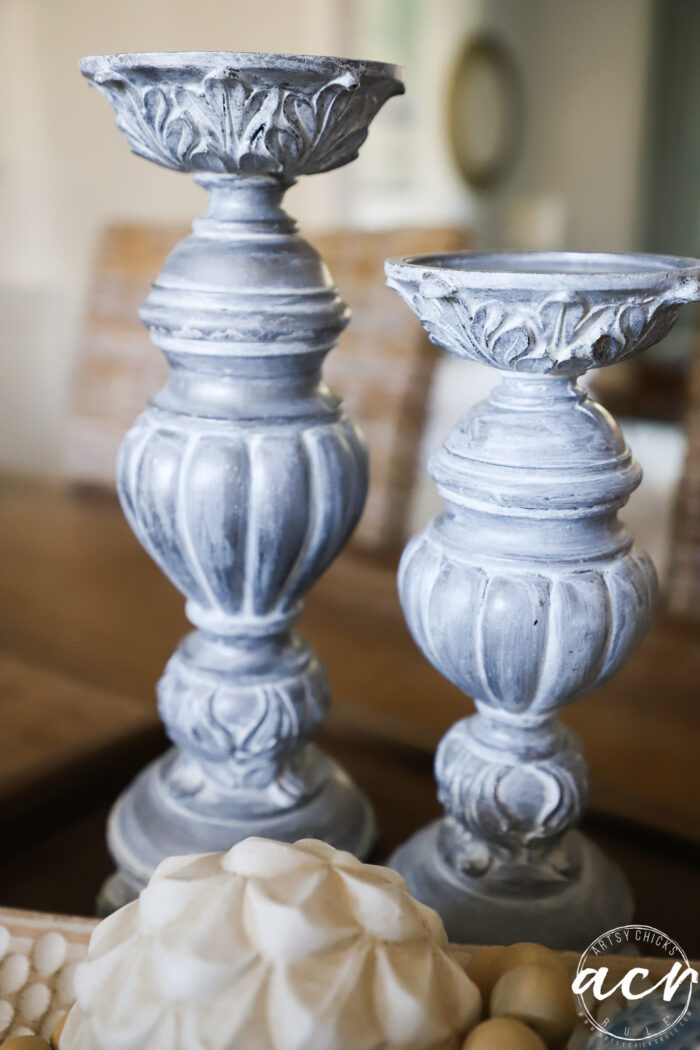
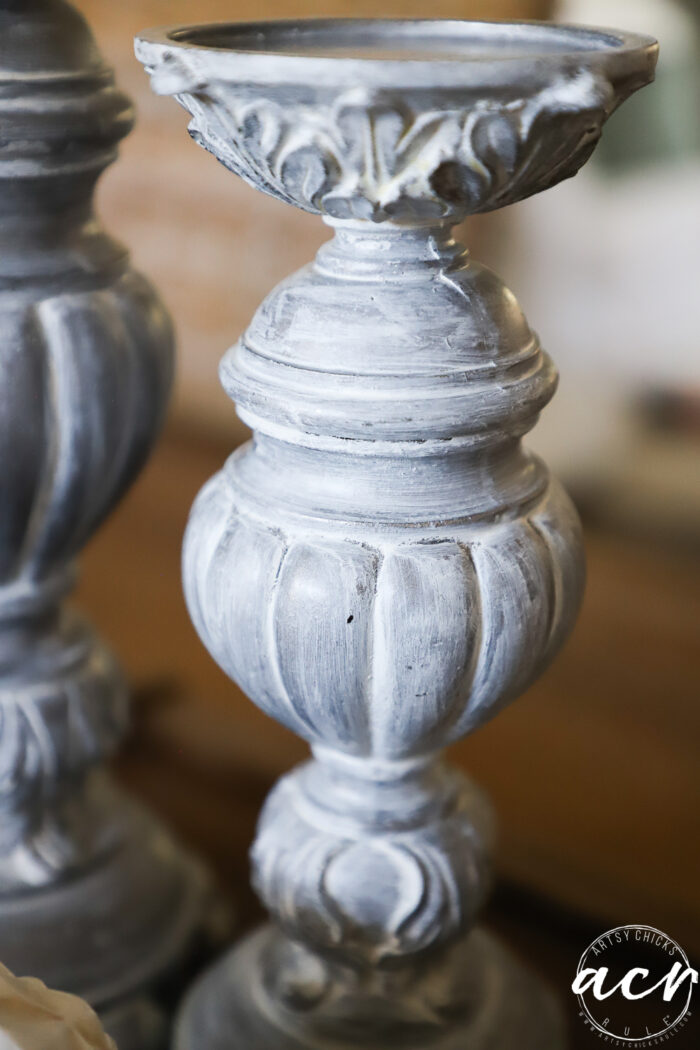
I really love this vintage-looking finish. It can be used on so many things, even furniture details.
Nice sheen they have now with the addition of the Beeswax Finish.
I looked online to see how much these sell for too and found these:
- Solid Wood Candlesticks Set of 3 $40 (sale price)
- Wood Candlesticks Set of 3 $35
Still, not bad at $3 for the whole set! (and this set actually was 3)
These were both oh-so-easy to makeover! And quickly too. Just can’t beat the savings!
Think you’ll give creating a vintage look a whirl?? Try it on something small like this. Something with lots of detail for sure.
Maybe an old mirror, perhaps??
PIN it to save it!
You might enjoy this similar project below:

See it here >>> How To Whitewash Metal
And another set I did some years back.
See what I did to them, here!
I hope you enjoyed these quick and easy makeovers today! And learning about creating a vintage look with paint.
Have a wonderful weekend, friends!
xo

")

")


")
")

Hi Nancy! I love the way the “cement” candlesticks turned out. So pretty.
Thanks, Cheryl!! And oh gosh, they do look like cement!! Might have to do this on my large plastic urn/planters that my ferns are in!! Would love the look of cement/plaster for those. Stay tuned! ;)
Both sets are so pretty. I especially like the crystal ones with the painted base. Seems to really bring out the sparkle of the crystal. Also love the ones you did previously that were aqua that you added to.
Thank you, Debra! Yes, I thought it brought out the sparkle better too!
Both sets look really great! What did you do to the broken base? I would have considered throwing out the whole glass, but you managed to save it. Great job!
A friend gave me two candlesticks that are maroon. YUCK! Can’t wait to get some paint on those babies! lol
Hi Caye! I super glued it. Worked pretty well. And oh nice, have fun making them yours! :) xo
They look so pretty. I love old candlesticks.
Thanks, Lizzy!
Happy Birthday Miss Nancy. My grandson is also celebrating his birthday today. He is 222. and the love of my life.
I hope you have a most wonderful day with lots of fun and cake.
Sue Mc
Thank you, Sue! Aw, sweet!! Happy, happy birthday to him! xoxo
Great ideas! I have some pieces I can use them on right now. Thanks! :)
Thanks, Cyndi! :)