Painted Candlesticks (instant elegance with a little paint!)
You guys know how much I love paint. You are probably here right now because you love paint too!
I just love how paint can transform, change, make better (and sometimes worse, ack! <<< never, there’s always more paint! ;) ) and beautify so many things.
It’s Trash to Treasure day and I’m not sharing the typical “trash” but just had to share this with you all.
Painted Candlesticks. So basic, right?
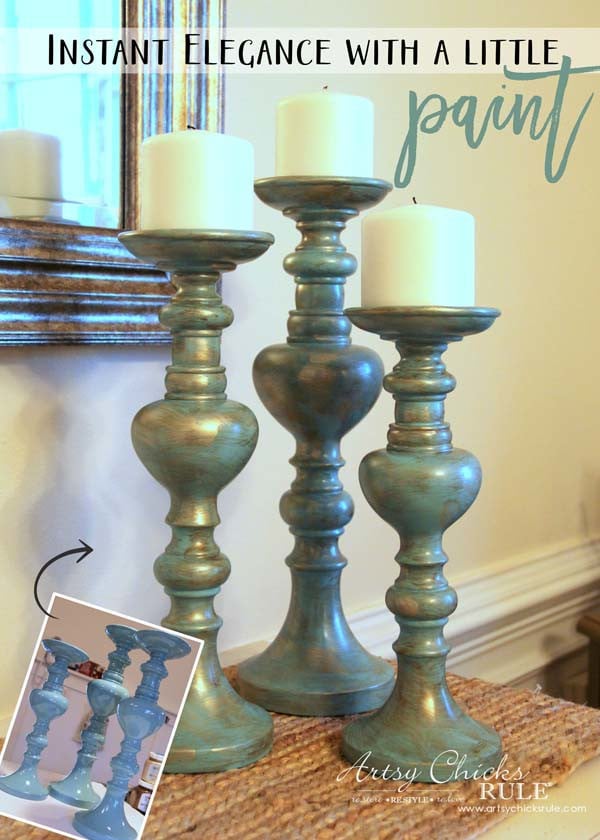
But not really.
You know how I always say “don’t pass those things up at the thrift store“?
They may be ugly or not the right color, etc. BUT you can easily transform them.
The same goes for things from a regular retail store too!
I found these candlesticks at Ross a week or so ago. (For pretty cheap! That counts as “trash”, right? Today, it counts. ;) )
Ross is always a bit hit or miss with me but I love when I come across some “good finds”!
Aren’t they just beautiful?
Although it was that absolutely gorgeous aqua color that appealed to me, it was what ended up doing them in.
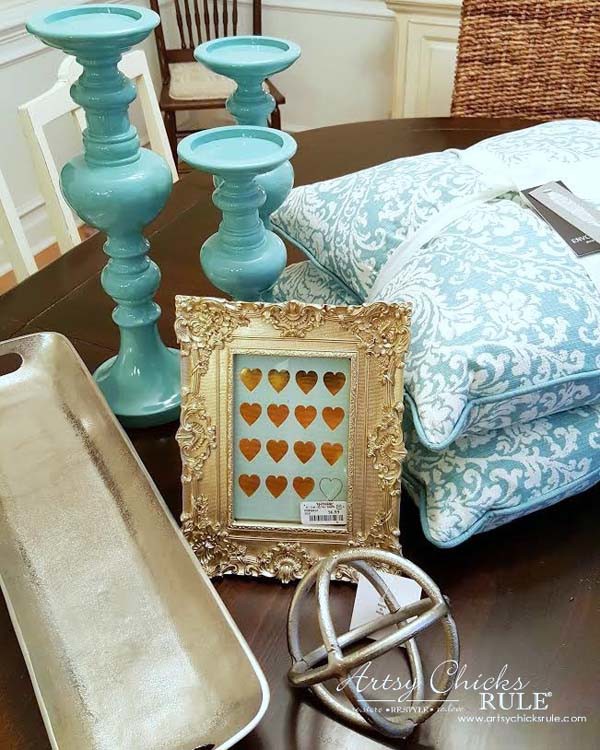
This is a photo I shared over on Instagram of the goodies I had just picked up that day!
If you don’t follow, I’d love if you did! It’s a great (and more personal) way to share the day to day.
I love interacting with you guys over there and my other blogger friends too.
Anyway, just optional, of course! :)
I’m sharing that photo because it more accurately shows the color of the candlesticks to start with.
Here is how they looked when I tried to take a “before” photo another day.
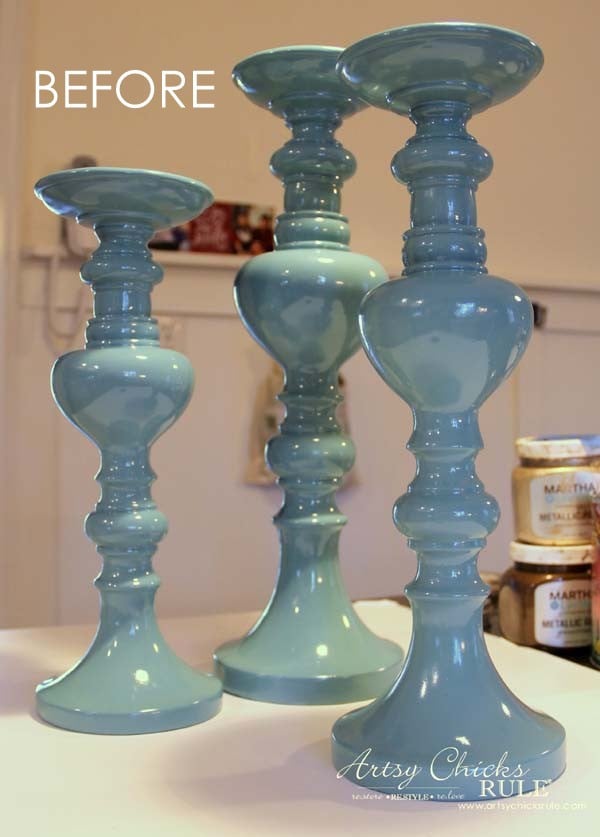
It was a weird time of day and I could not get the *exact* color, but close.
I’m going to share a few affiliate links for y’all below(for products,etc). You can see my full disclosure here.
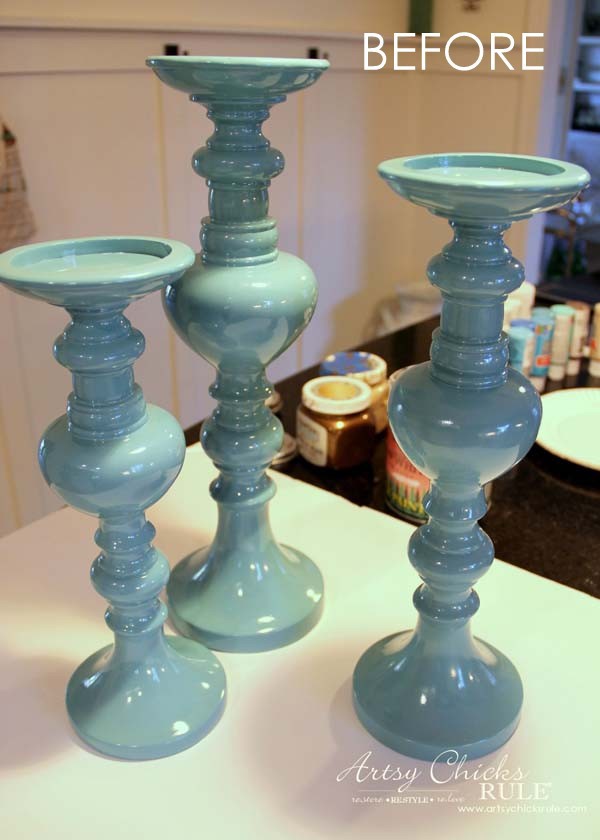
Anyway, you get the idea.
I planned to use these on the buffet in the dining room but they didn’t match in there at all.
They were so very bright and the wrong shade of aqua.
I knew I didn’t want to completely cover that pretty aqua but I needed to downplay it a bit.
I had thought I’d add a bit of bronze and gold paint along with some white in places.
Sort of sparsely so the aqua would still show through.
Kind of like these ….
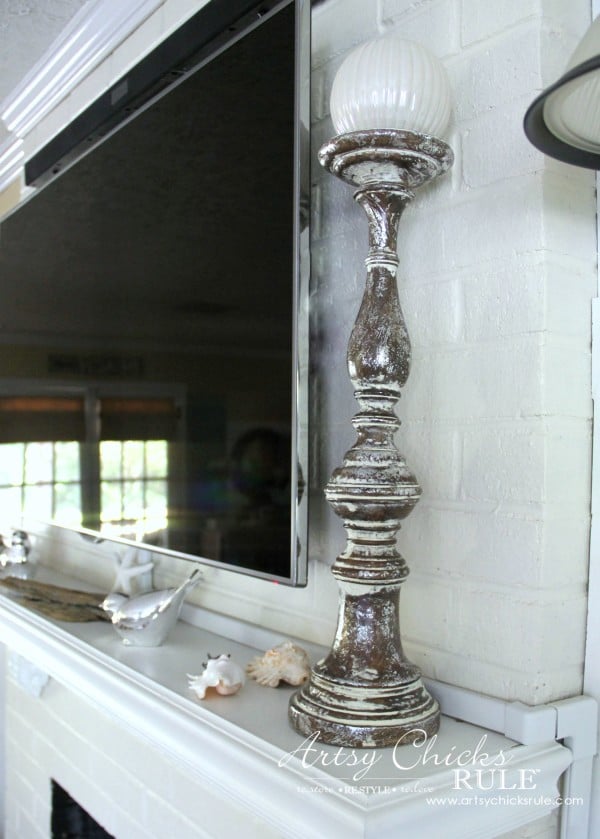
… from my Summer Home Tour.
I started out dry brushing on a bit of bronze….
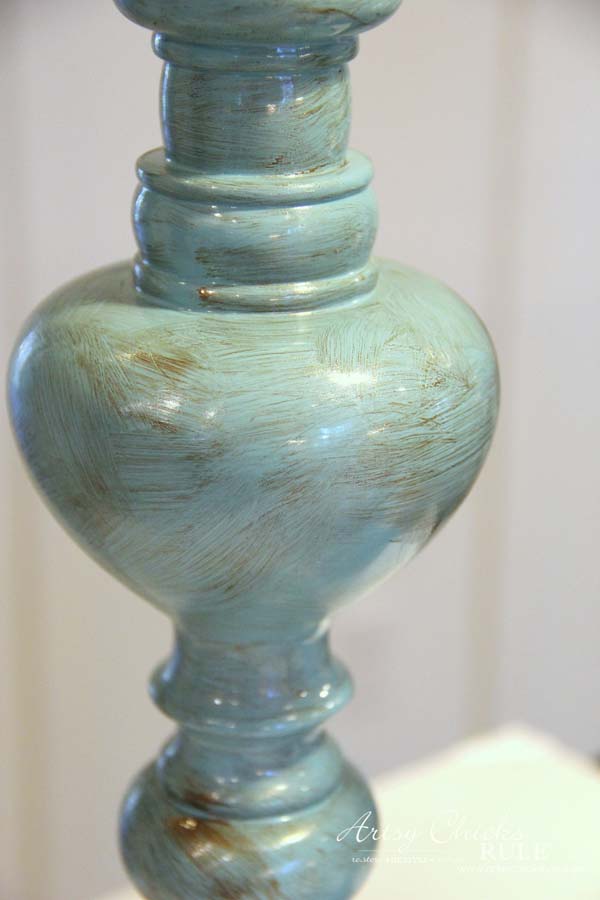
As you can see, it was just hit or miss all the way around.
No rhyme or reason, just simple brush strokes here and there. (light on the paint)
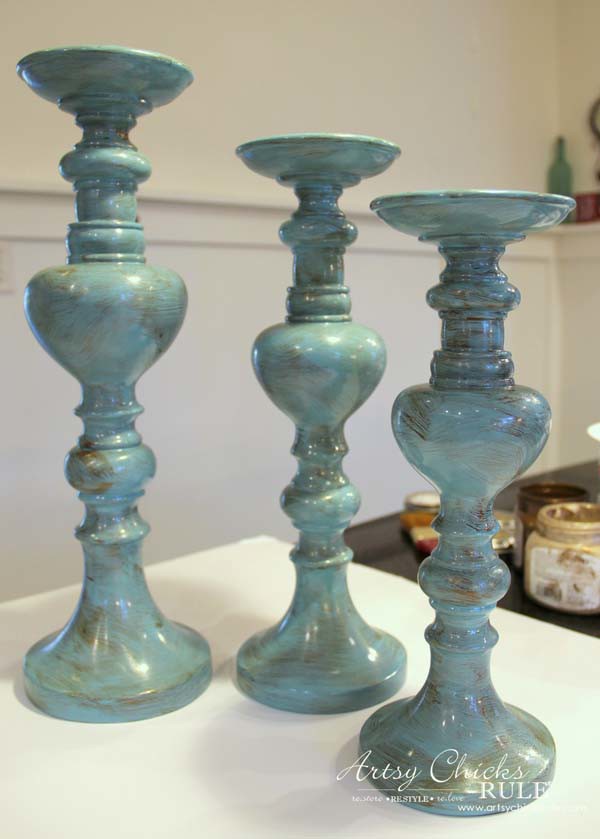
I know, they look ruined right now. ;)
Continue on….
After that dried, I added the gold over top.
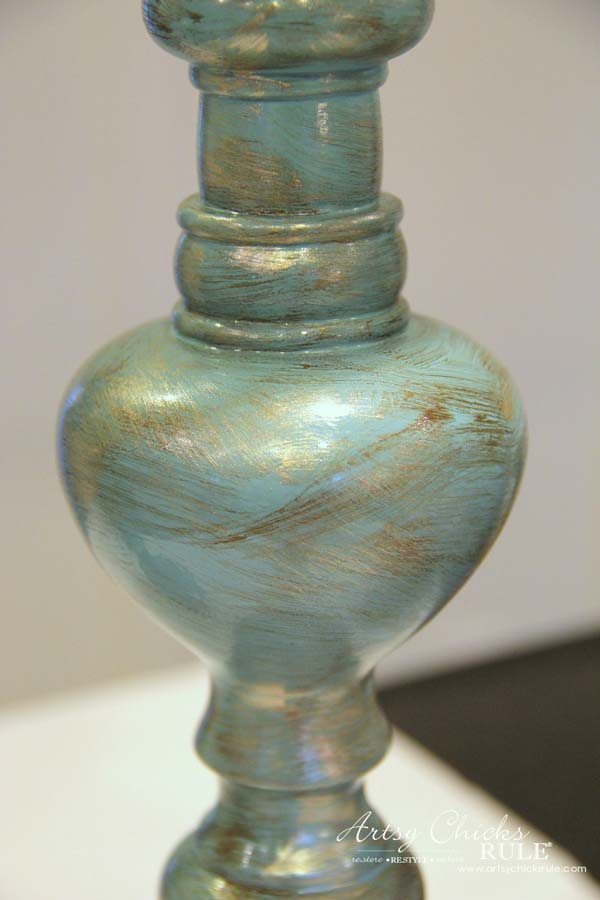
And then I realized I was done!
Want to see a VIDEO on exactly how to dry brush? All the ins and outs, here >>> “How To Dry Brush – Video“
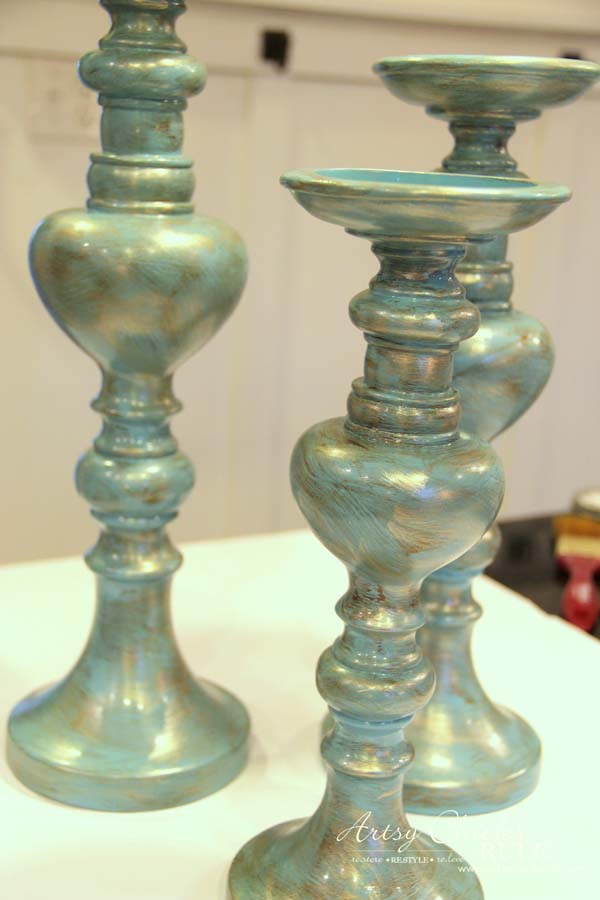
I decided they didn’t need the white.
I thought they looked totally elegant without it.
And why ruin a good thing, right?
I sealed them with a satin poly spray and done!
MATERIALS LIST:
Bronze Paint
Gold Paint
Satin Poly Spray
Those paints aren’t the exact same as what I used but they are close.
I found the ones I used (pictured above) at The Home Depot quite a few years ago.
I’m not even sure if they still sell them.
I know not everyone will love these now but I do!
I’m so happy that I can still see that pretty aqua but it’s toned down quite a bit.
These look so very good in the dining room now.
Perfect “toned down” color for the room.
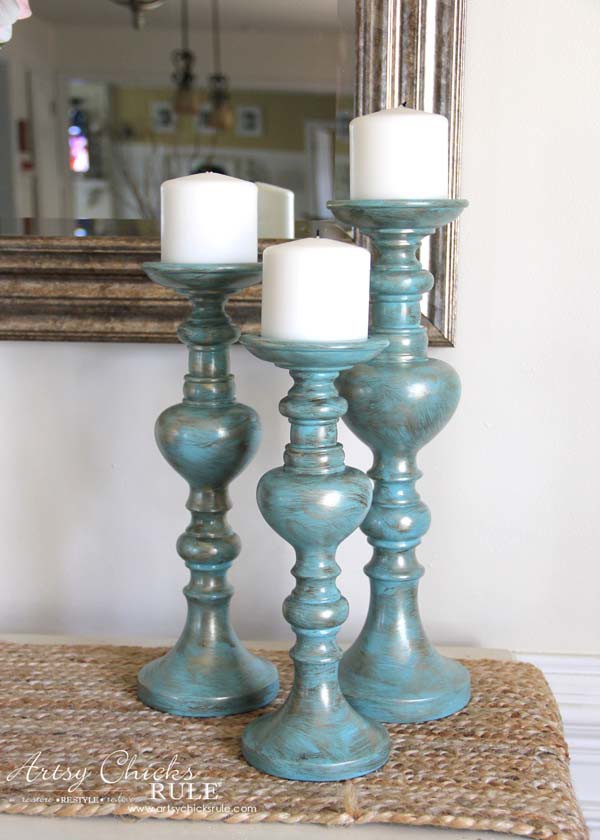
And the paint really does add an instant hint of elegance.
Trust me, they really do look much nicer than before.
And it took me all of about 2 minutes (not including dry time, of course)
They are in the dining room where I have a few projects to complete yet…..
– wood stained shelving on each side of the mirror
– wine bottle/rack over the >>> beverage/bar cart
– pallet wood frame for the “bar” print (you can see the print I’m using >>> here)
Can’t wait to finish!
We are in the middle of building a DIY “leather” upholstery stained headboard for our son right now.
Once that’s done, we are building shelves! Yay! :)
Okay, so you won’t forget, be sure to PIN this to save for later!! :)

And now let’s see what my friends are sharing this week…..
Lauren from Bless’er House had a conflict this month but will be back with us next month!
If you missed any of my previous “Trash to Treasures”…
…. you can see them here >>> “Trash To Treasure Transformations”
I’ll see you back here on Thursday with a my “DIY Hydrangea Wreath”! (and my friends are sharing theirs too, did you join in the fun too?)
xo

You might also like these projects:
Follow along! –> Instagram ~ Facebook ~ Pinterest ~ Bloglovin



I totally agree they were bright candlesticks to begin with, and I love your simple trick that made them what they should be. Great job, Nancy!
Thanks Larissa! :)
Nancy
Hi Nancy they look really pretty you are so right don’t let a good deal pass you by, a d i y can fix it. They looked pretty before but just doing something simple like adding paint changed it awesome!
Thanks so much Sandra! :) I really did love them before but they were just so overbearing in the space. Now they add to it, instead of being a distraction.
I was a little heartbroken at first (since I just loved them and the color), but it was easily fixed! ;)
Nancy
They look amazing now, but you already know I love them!! XOXO
Yes! Thank you Christy!! :)
xo
Nancy
hey girl great job! So cool!
Thanks so much Shawnna! :)
Nancy
So easy and they look beautiful now! They really blend well with your other decor. <3
Thanks Jen! :)
Nancy
They look just beautiful!!!!!
Thanks Lynda! :)
Nancy
Love the candlestick makeover. I am wondering if a grey- brushed w/ silver ( or vice-versa ?) would mimic pewter ? I would appreciate your opinion ! Thank You very much !
Hi Jeannie,
Thank you!
I’m thinking if you have a dark gray candlestick, I’d brush with silver and maybe a little black or dark gray. (black or dark gray first, than silver over top)
Nancy
Ms Nancy… I’ve only just now bumped in to you world… So right this moment I’m just… Kinda…. Just… Standing here…. Eyes and mouth popped open…I won’t stand and gawk long…I wouldn’t dare want to hold up the gawki’n line… I’ll move on along… Much like a chubby lab puppy moves along when she spots her favorite human about to walk by her… So when you stop abruptly and feel a bump above your ankles… That’ll be me… Just following you as any fascinated puppy would… But for now… I’ve got serving trays to design… And a host of other outstanding designs to give my best futile attempt to replicate… Before I go Charlie Brown digging in my studio closet…I must thank you and tell you that you are remarkably motivating… An outstanding mentor… Instructor… Trainer… Coach… And a superb visual writer… And I appreciate you sharing your techniques and skills… I do so look forward to growing in to my clumsy paws and I promise not to widdle on your floor until I’m properly trained…????
Hi Velda!! Thank you so much for the very kind words! And thank you for taking the time to write to me. By the way, I love your writing style! So fun. :) So happy to have you around and look forward to sharing a bit more with you. Hope you have a wonderful weekend! xoxo