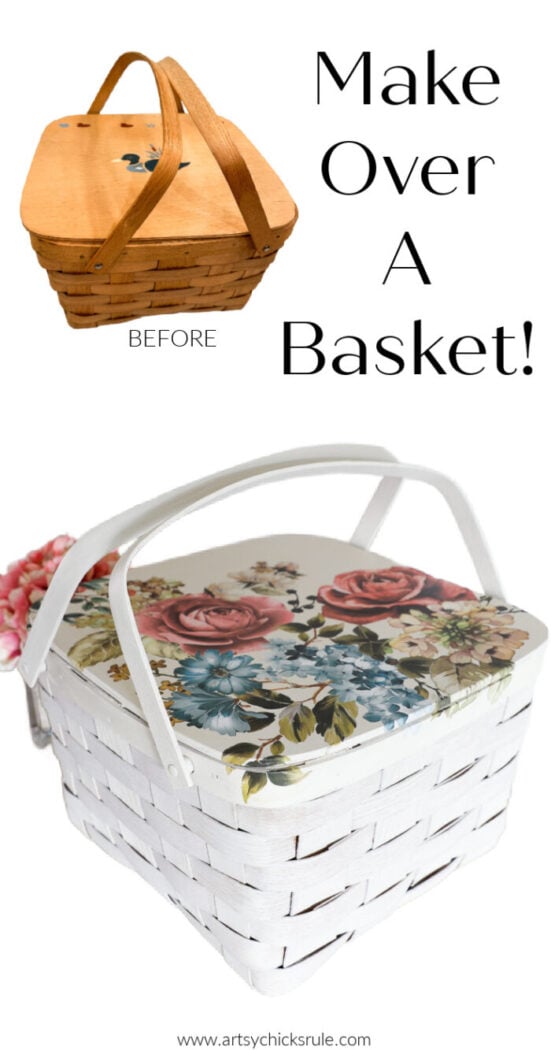
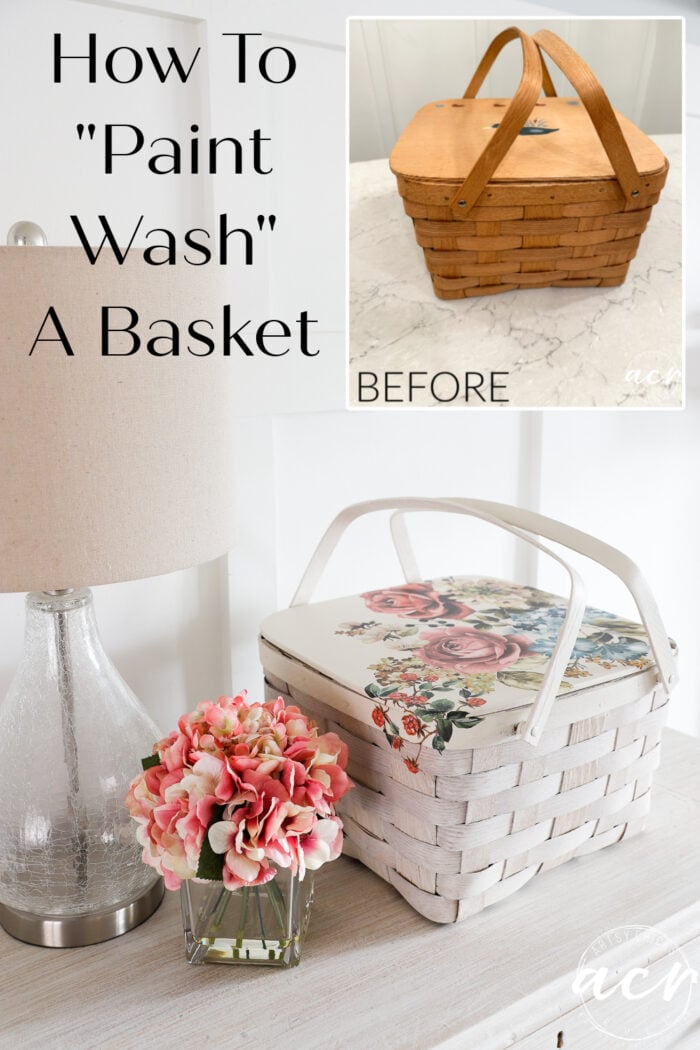
Learn how to simply (and oh so easily!) paint wash a basket! Transform your old baskets and get rid of the orange!
Hello wonderful friends and happy Thursday! Thank you so much for all the emails and comments on my question about our bedframe in Tuesday’s post. Lots of great ideas! I’ll update you once we decide what to do.
Before I talk about today’s makeover, I have to say a big, happy birthday to my husband! Today is his birthday and he is a big part of what I do around here, especially the home DIY, of course! But much more than that, behind the scenes helping me when I need it. Moving furniture, cutting wood, really, anything I need or ask of him. Such a great husband, father, partner! Happy, happy birthday, love!
Alright, let’s get to it! I am sharing a brand new makeover today. A basket makeover. I just love baskets, especially baskets with wood lids. I found two different size/shape baskets, with lids, on my last outing. Yay!
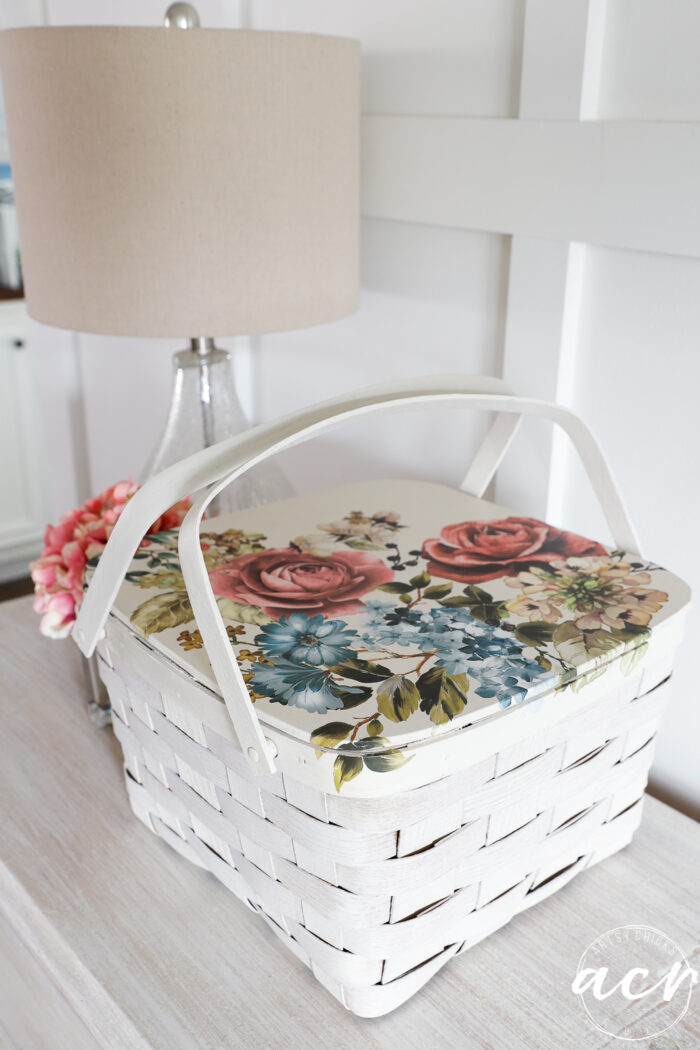
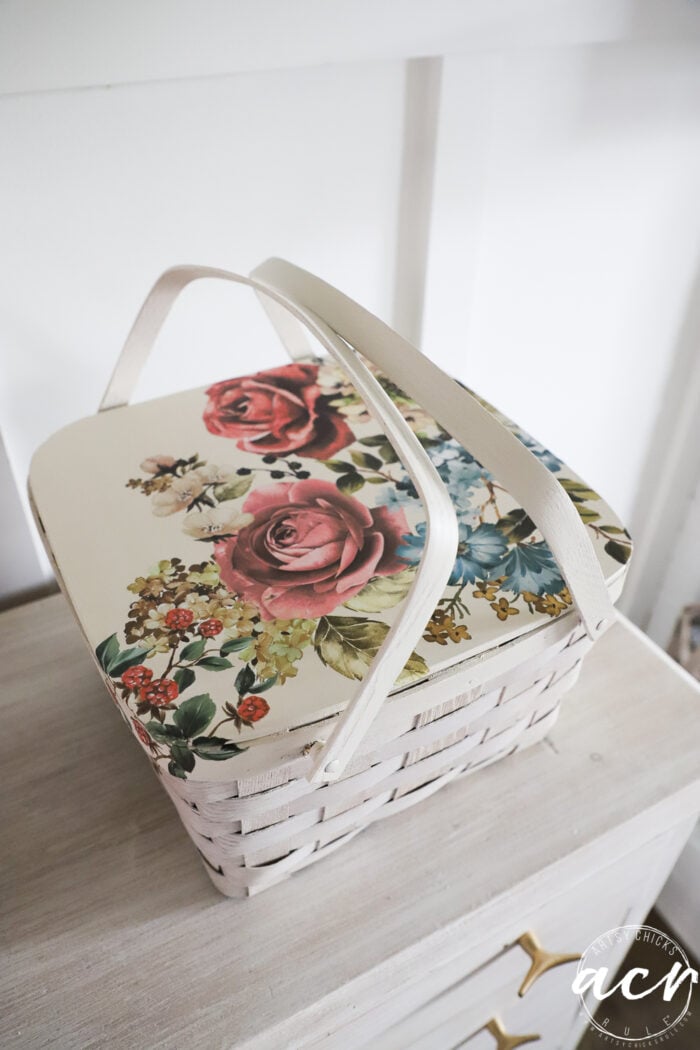
Today I’m sharing the smaller one and how I use a paint wash to “stain” the weave. It works so well and takes all of that icky orange out. And did I mention how absolutely easy it is too?
How To Paint Wash A Basket
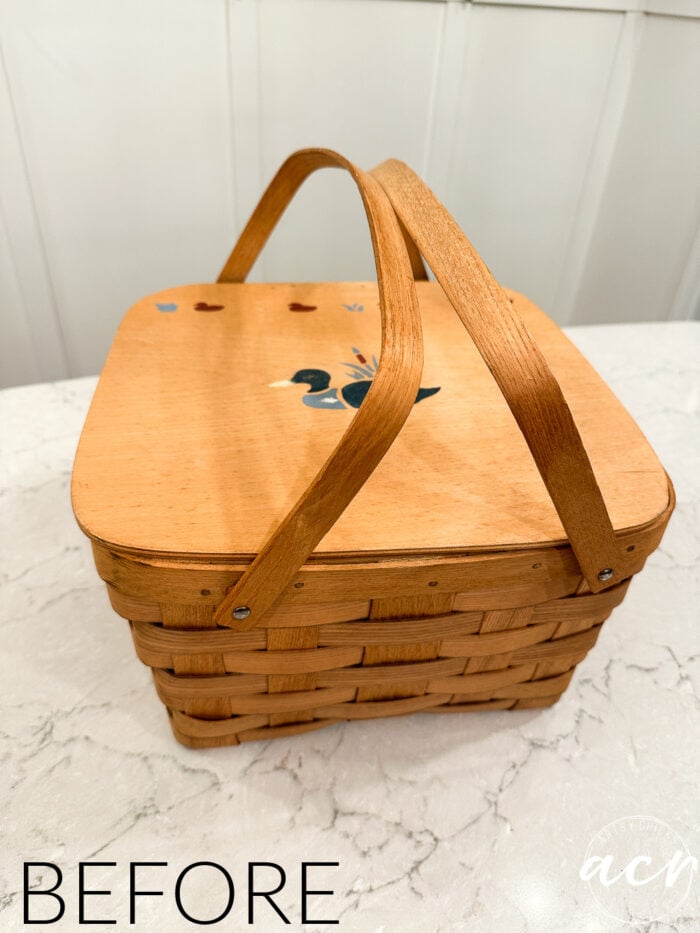
Here is how it looked when I found it.
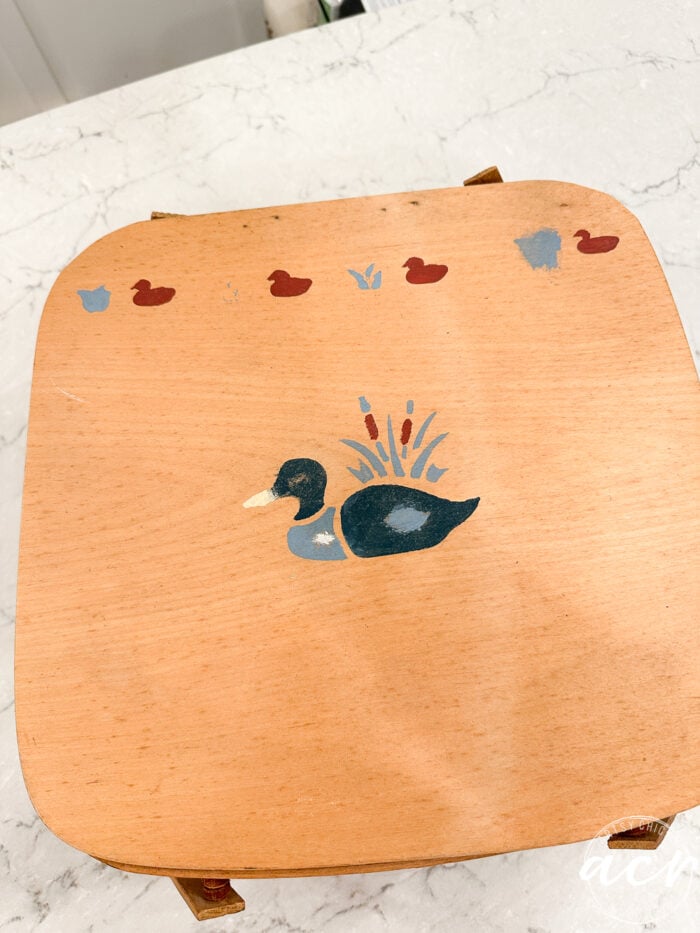
Typical orange basket but also with ducks! ha!
Tell me this is from the 80s without telling me it’s from the 80s. Or maybe early 90s. lol
No worries, it’s going bye-bye. Sorry if you love it! ;)
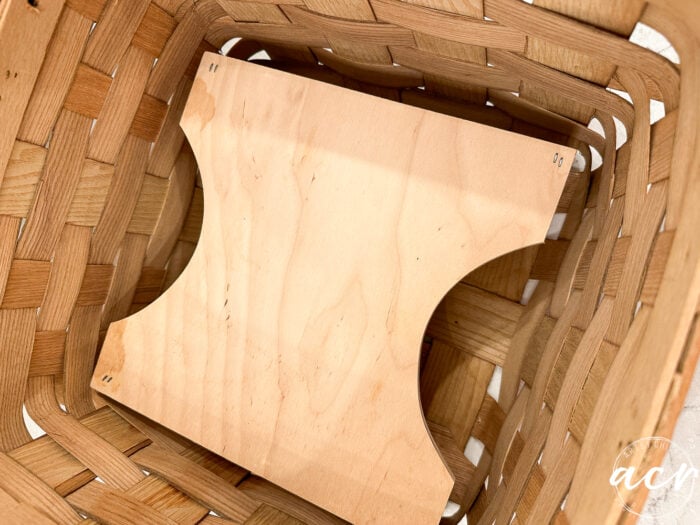
Oh! Here is the inside…
It has a stand. Nice basket!
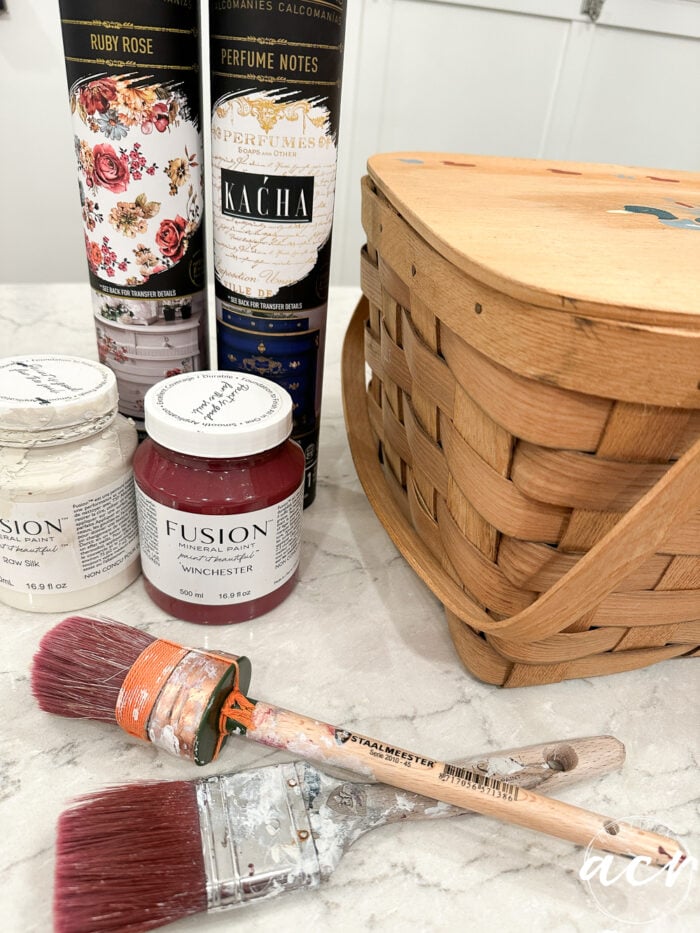
MATERIALS SOURCE LIST FOR “HOW TO PAINT WASH A BASKET”
Prefer to shop on Etsy? I have an Etsy shop also, here!
This is what I pulled together when I started. I thought I might paint the bottom half the Winchester shade to compliment the florals.
However, I decided against that. (By the way, don’t mind my messy paint jars or brushes…lol…I’m a messy painter!)
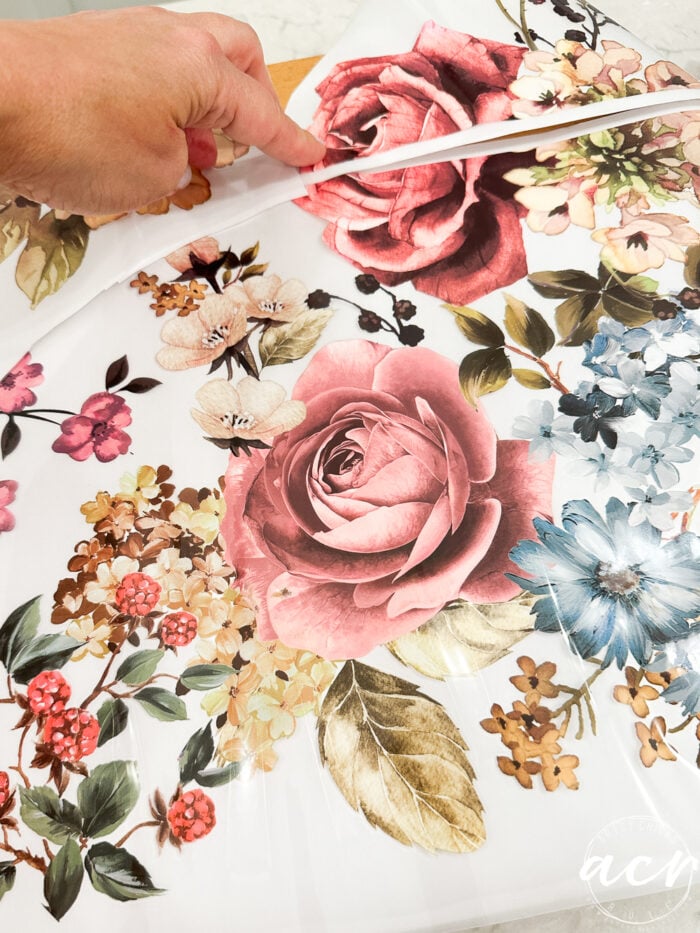
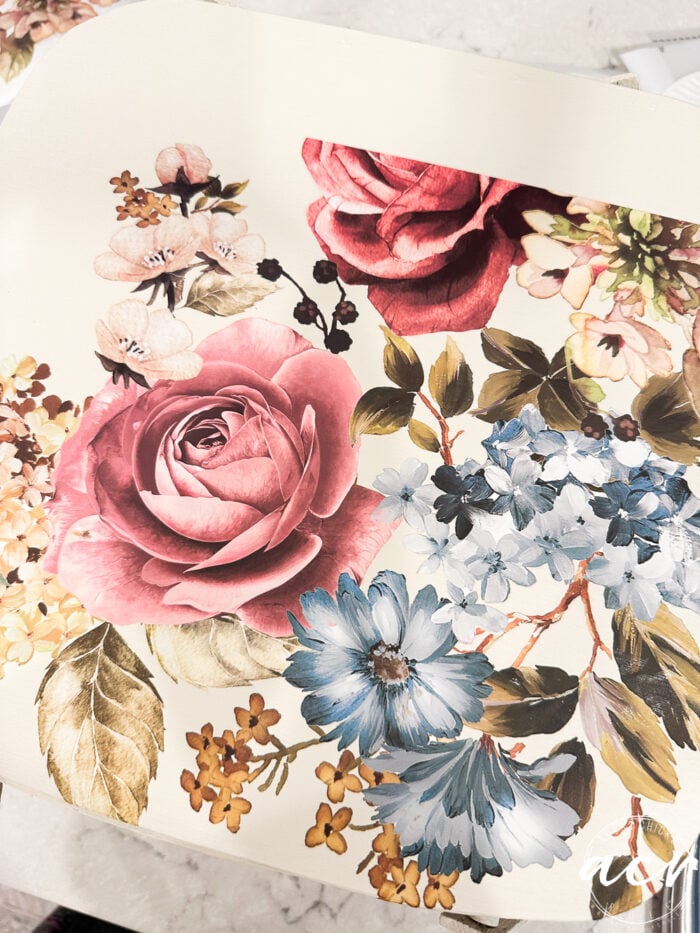
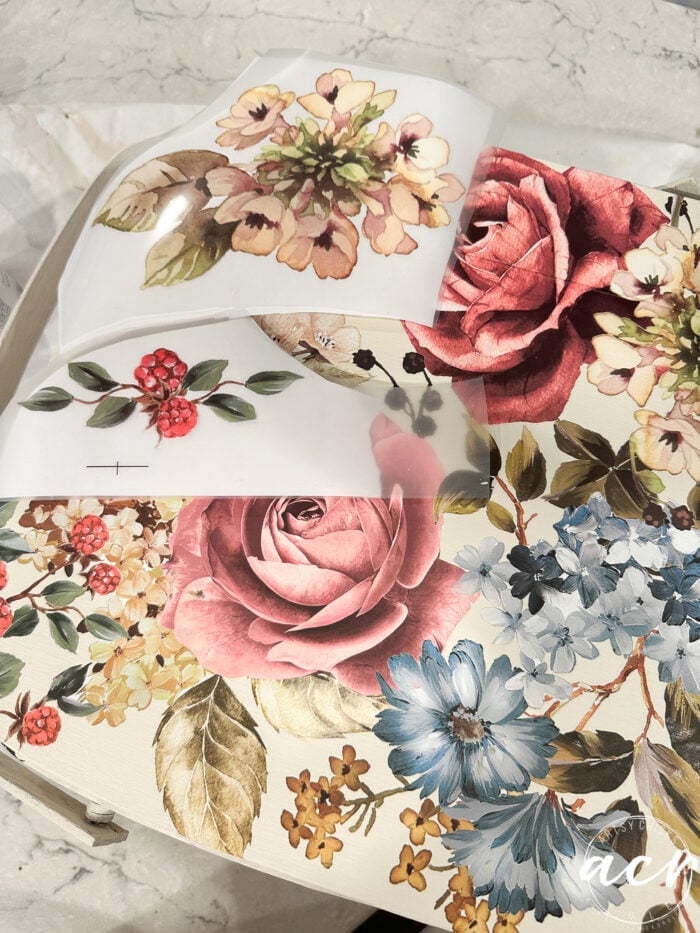
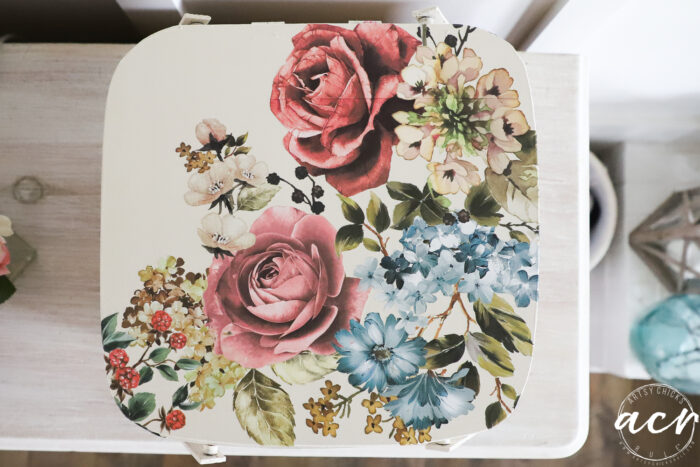
Ruby Rose Transfer for the win though. Here I am laying out the design.
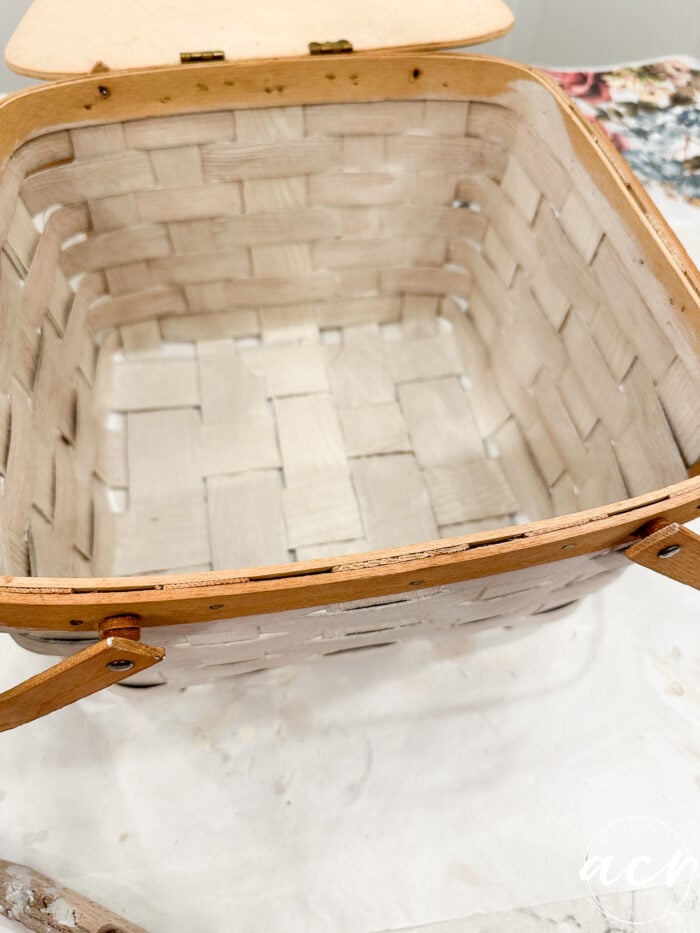
MIX WATER/PAINT – PAINT WASH
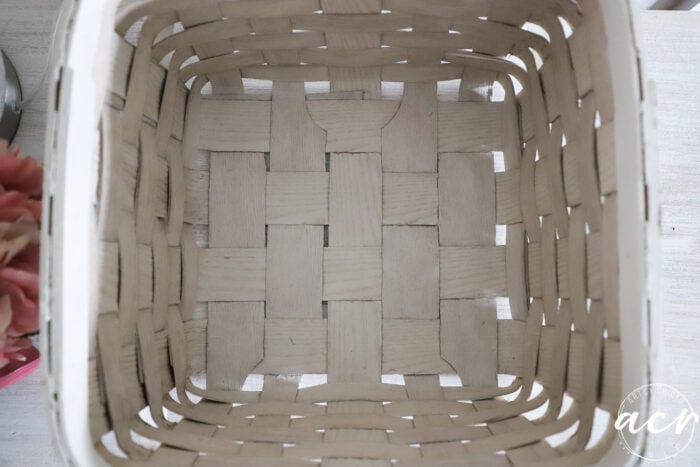
I lightly sanded over the top to make sure it was smooth where the stencil (ducks) were applied. Then I mixed my paint and water, about 50-50. (you can go heavier or lighter with the paint addition, it all depends on how sheer you want it)
Simply brush it on and let it soak in. It looks more opaque when it’s wet. But will dry more sheer.
Inside and out. (and the bottom too!)
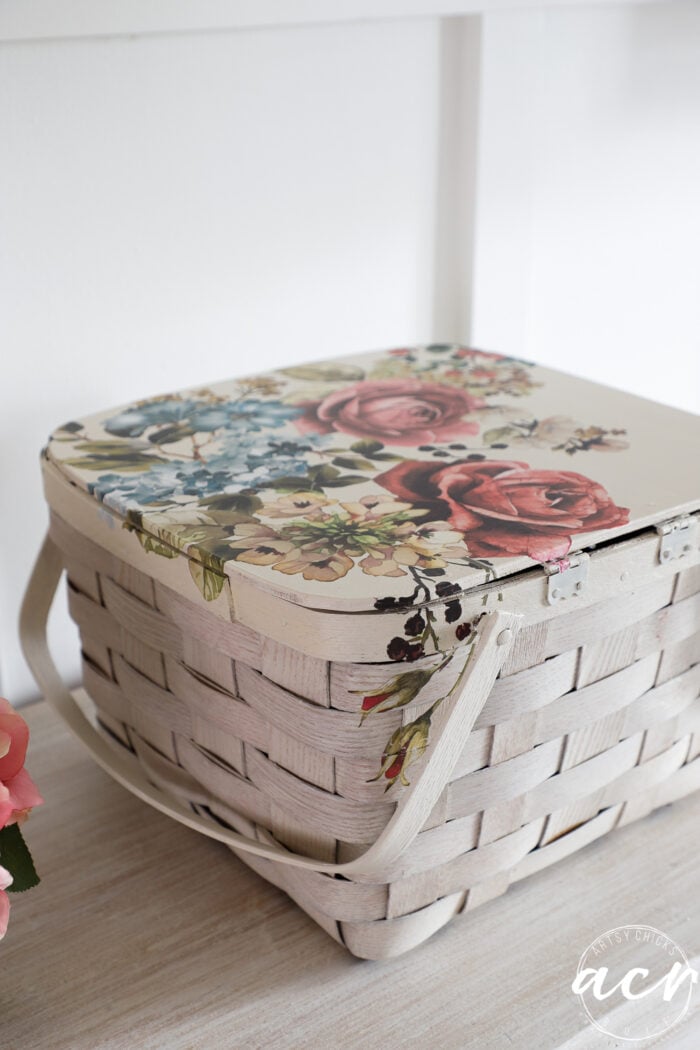
I didn’t paint the wood edge, handles, or top with the paint wash.
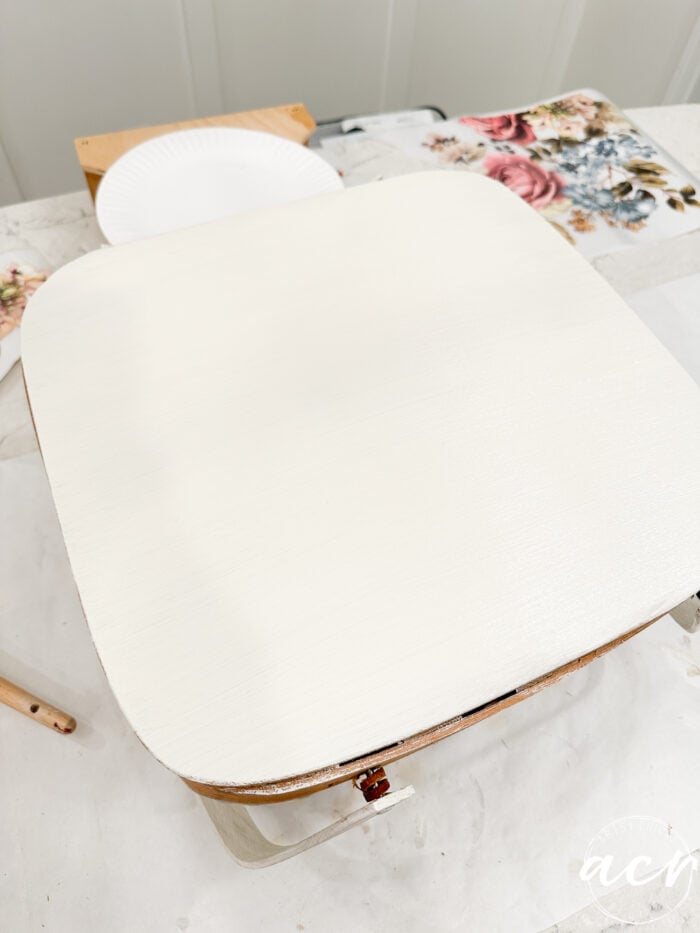
PAINT LID & HANDLES (full-strength)
I used full-strength paint for the solid parts.
I decided on Raw Silk because it is a nice, creamy off-white shade that would go perfectly with the floral transfer I chose.
One coat covered very well. I thought for sure the ducks would show through. They did not.
I did do two coats though just in case.
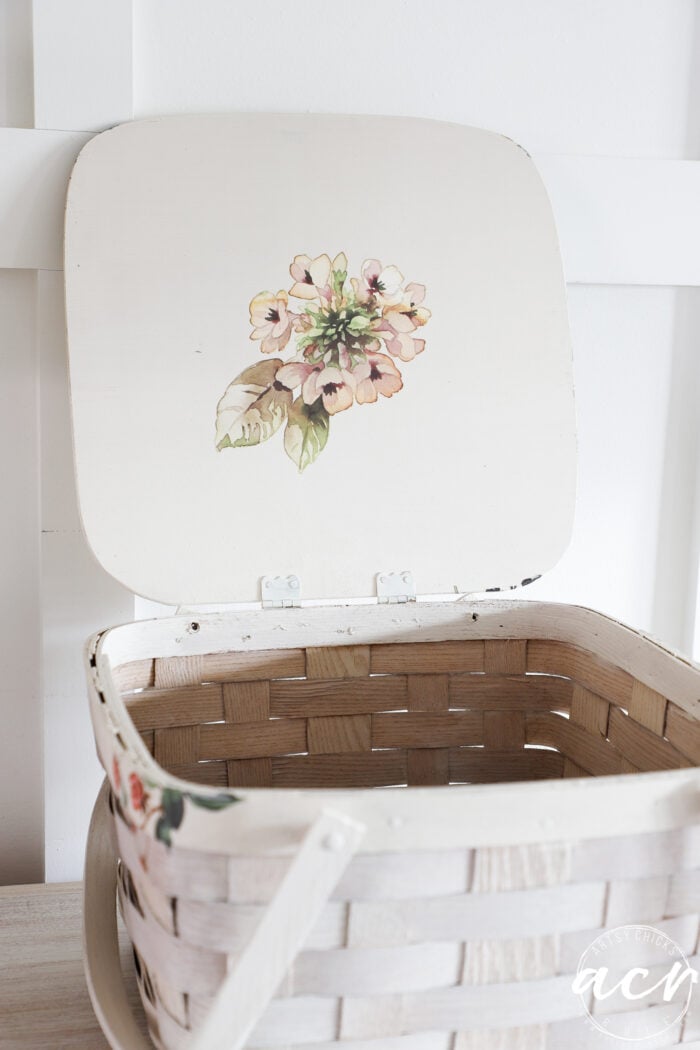
APPLY THE TRANSFER
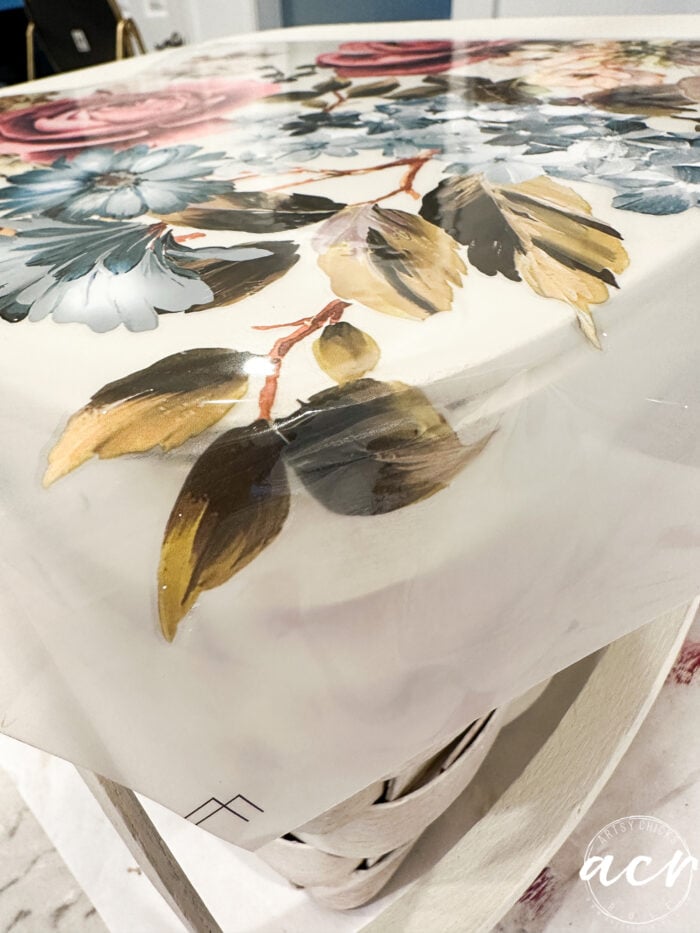
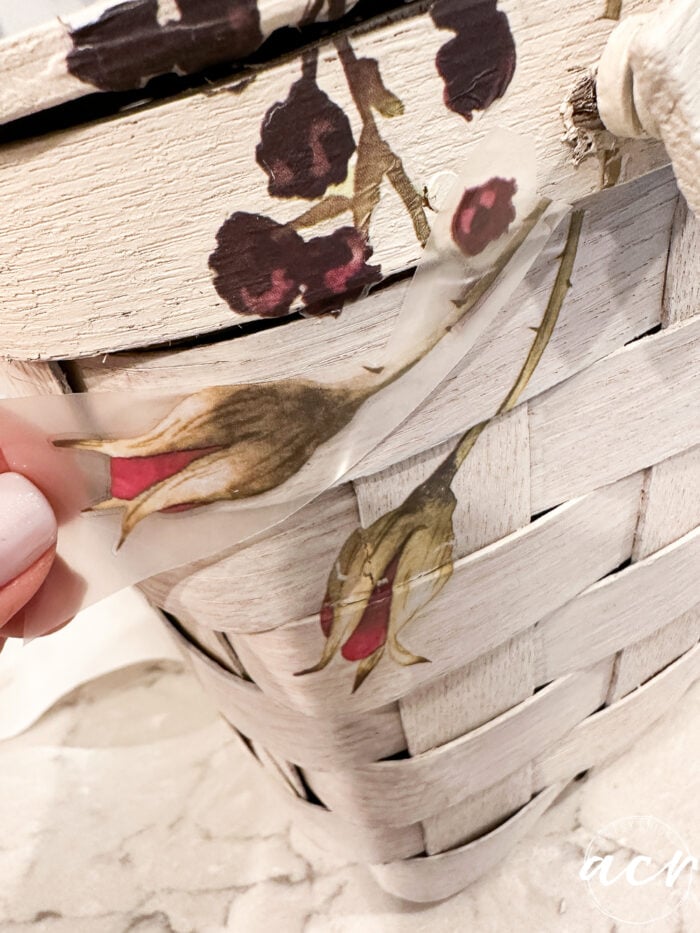
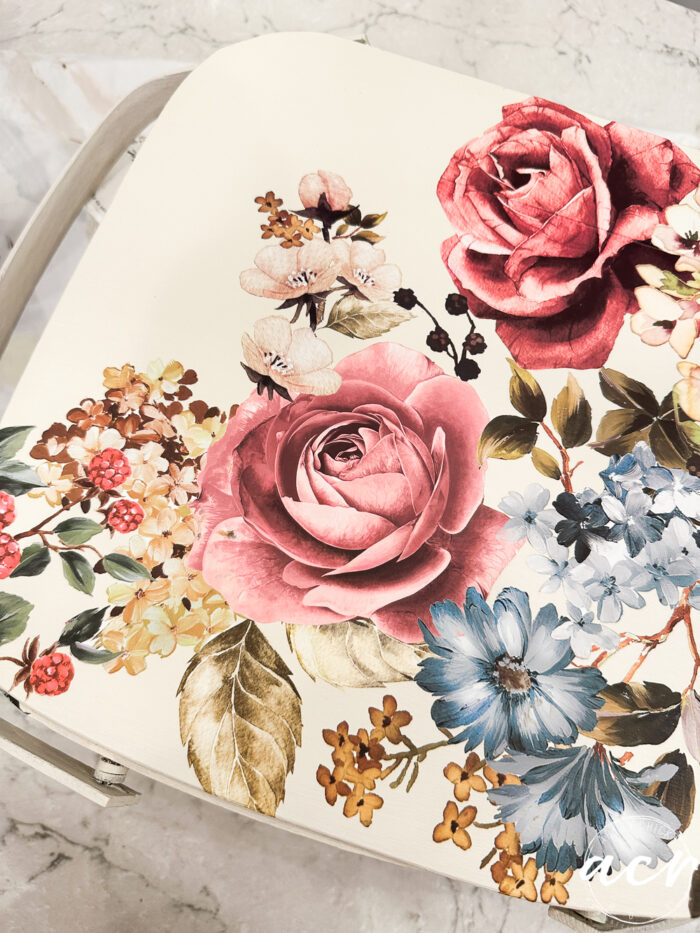
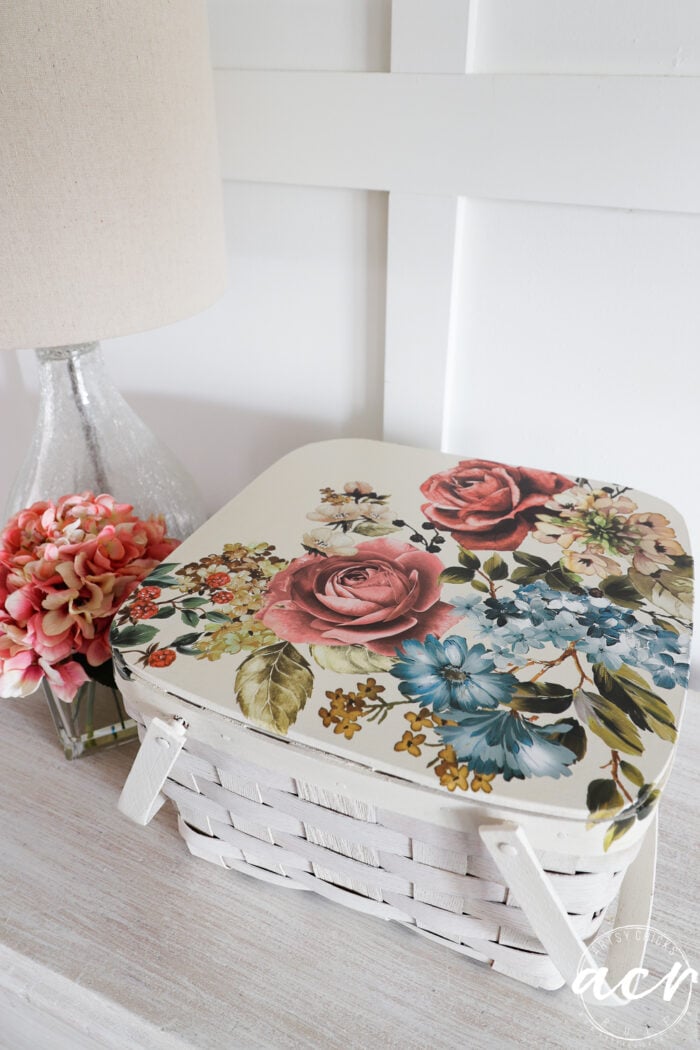
Once everything was dry, I laid out the first transfer and applied it to the top of the wood basket lid.
See how it’s spilling over the sides?? I love it when they flow naturally like that. One of my favorite things with these transfers, actually.
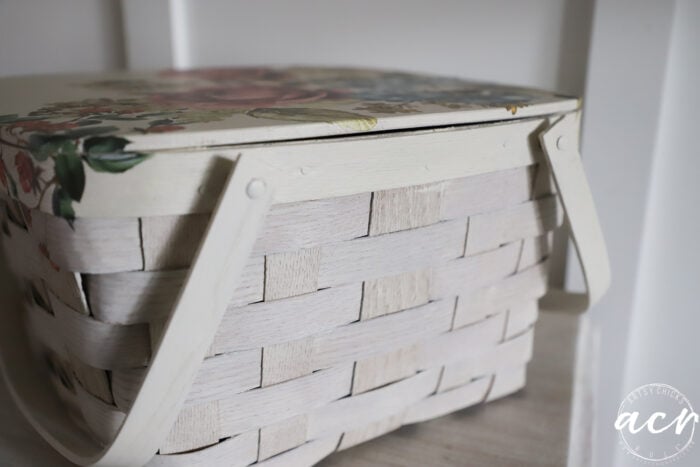
All attached and wrapped around the sides of the basket.
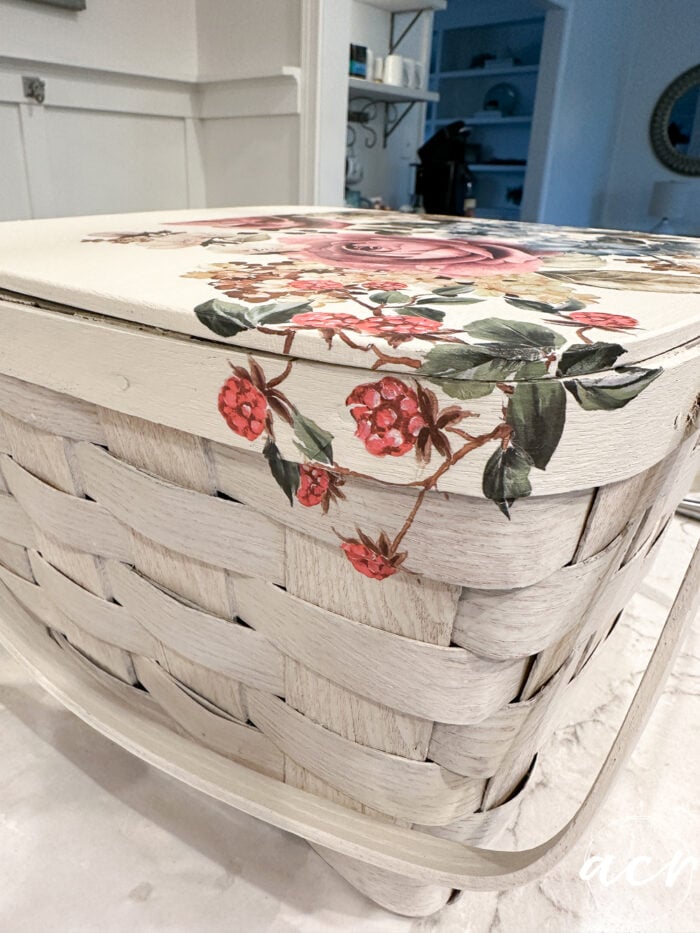
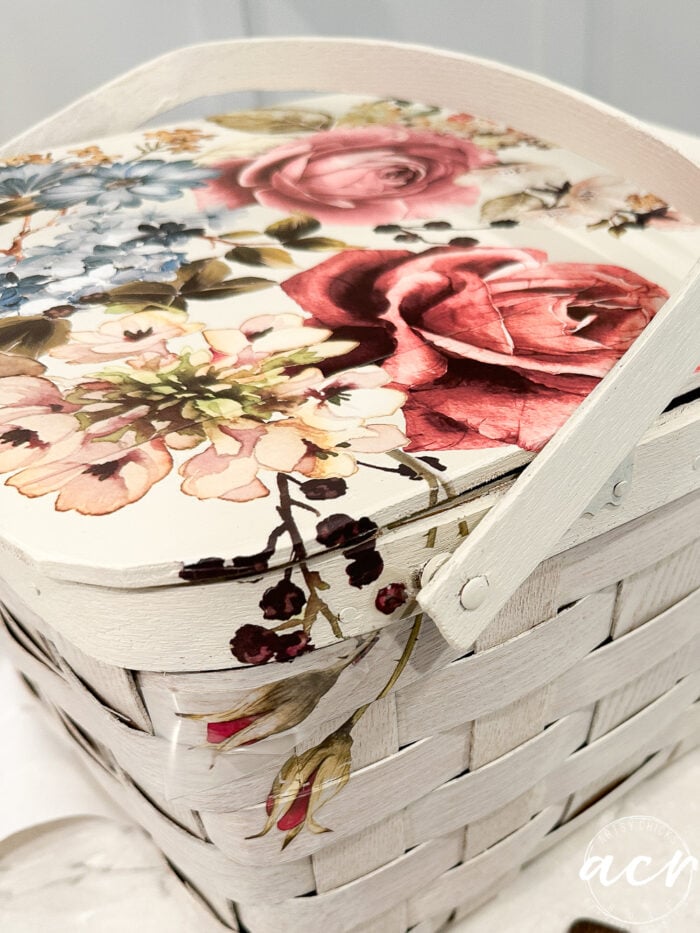
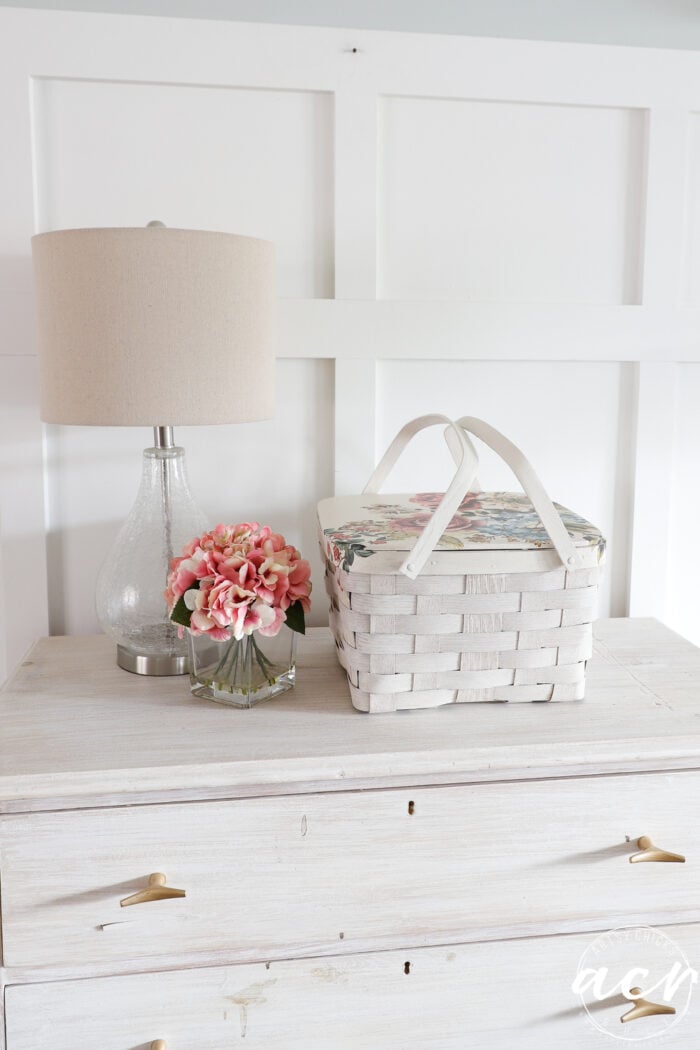
See how the paint wash on the sides looks more like a stain?? And how the grain shows through? It completely changed the look (and camouflaged the orange color) of the weave.
And the other side…
When I applied the other half of the rose section on the top, this side spilled over to the back.
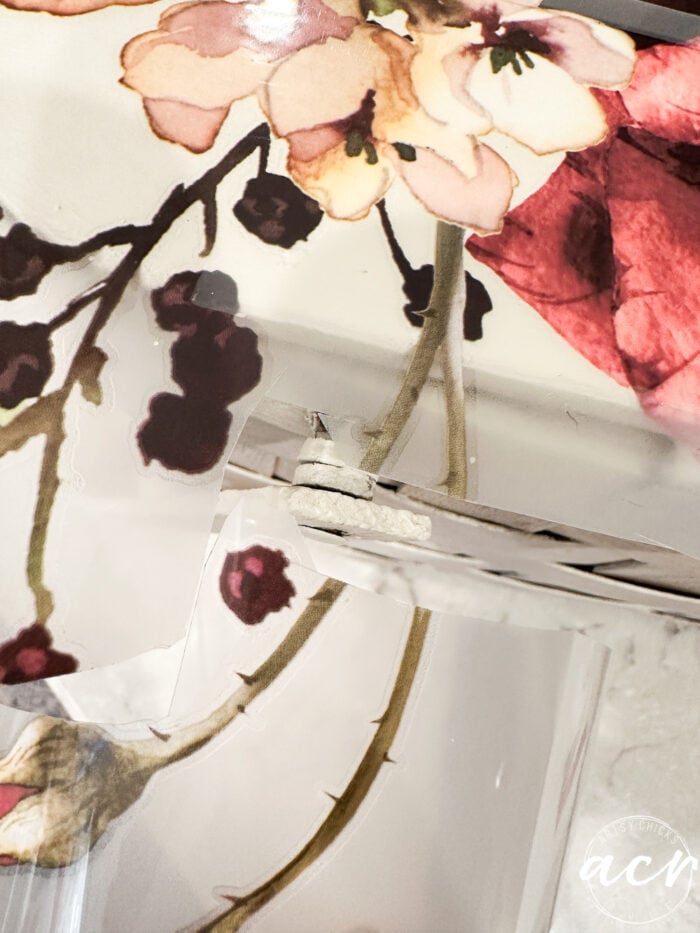
I had to cut the stems there to get around the handle.
I did one bud and then ended up having to cut the other bud away and do it separately.
Sometimes you’ll have to cut them like this to get them in there properly.
I originally thought I’d use all of these on top and fill in the whole thing but…
…it was too much. I liked the small area of well, nothing. And how the rest spilled over the sides.
So instead, I put them elsewhere.
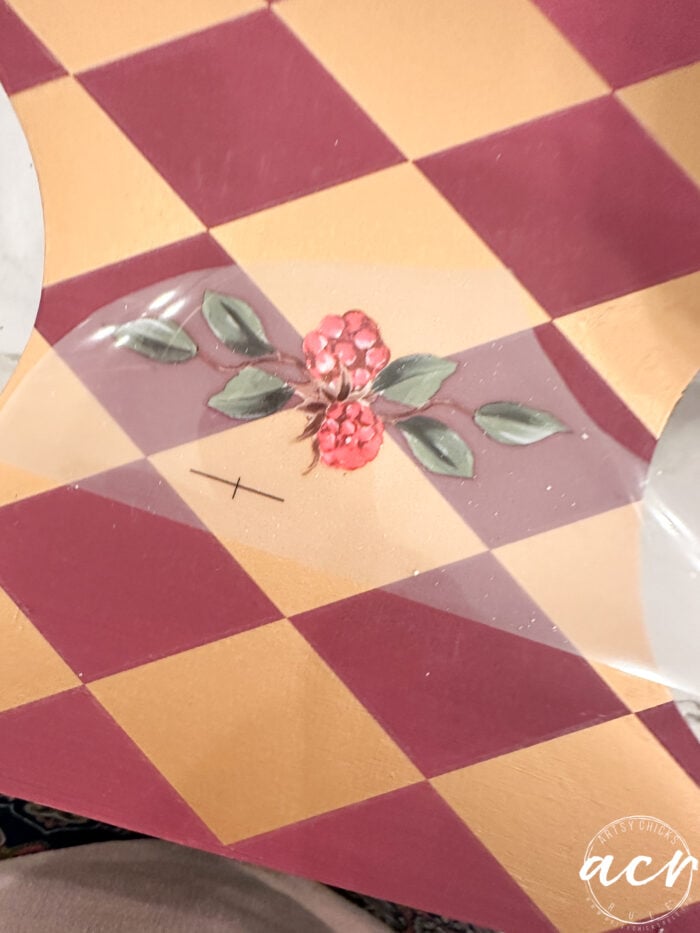
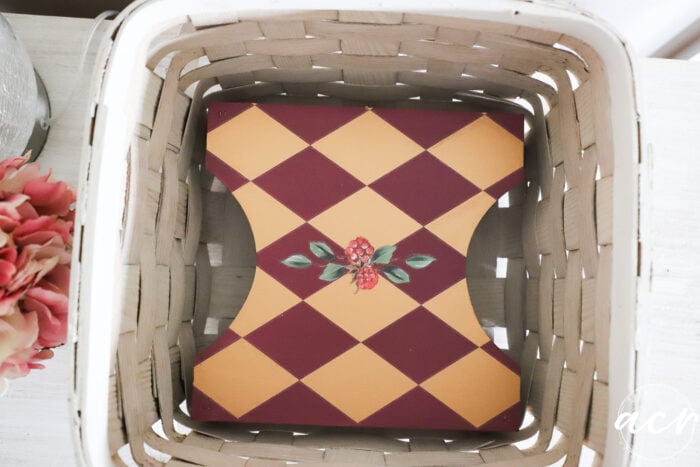
The little stand inside is where I added that Winchester pop of color.
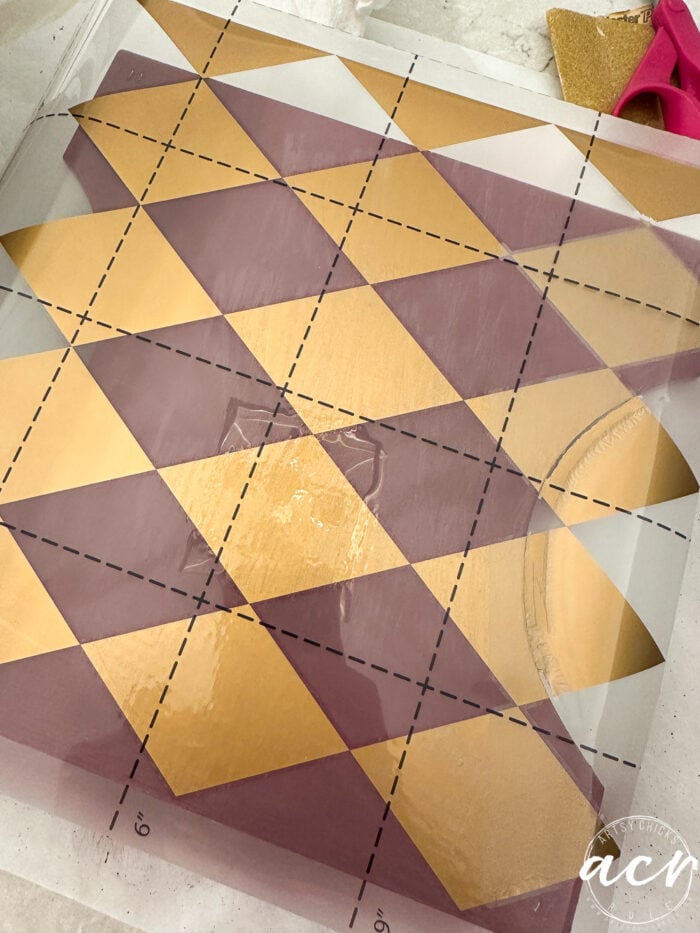
I decided to make it even more fun by adding this gold Harlequin transfer to it.
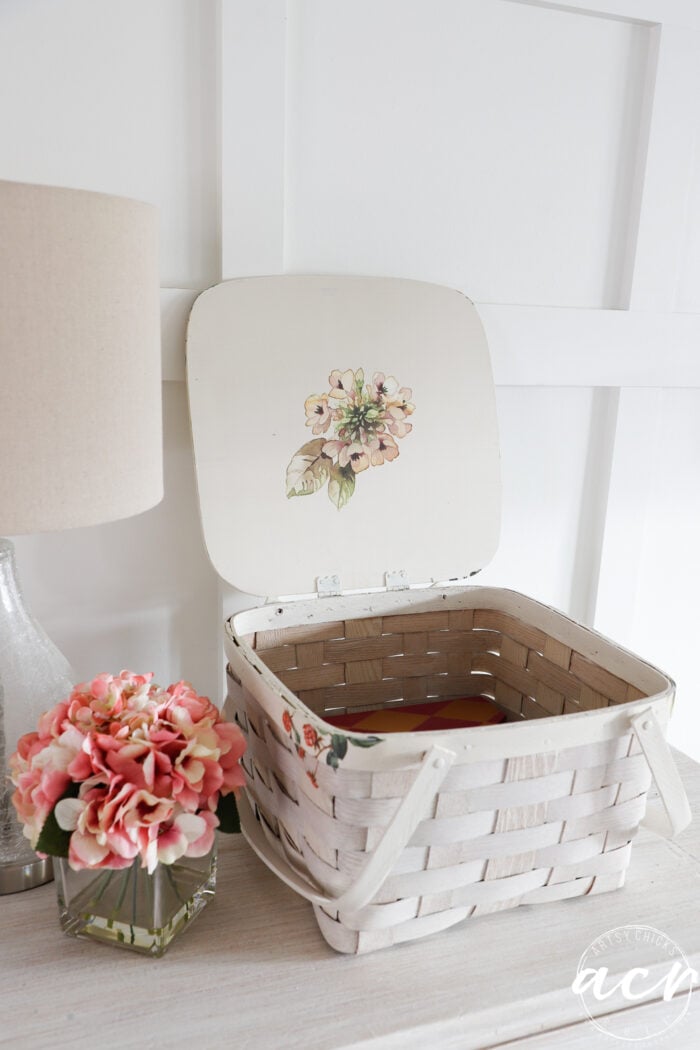
And a little surprise when you open the lid, the finishing touch.
So instead of using those two extra pieces on top, I used one above and one below on the inside of the lid.
Isn’t that pretty?? I am so glad they went inside instead of on top!
**Okay, and also, in the following photos, the basket weave looks white like the top, etc. See the inside up above here? Well, it actually looks a little darker than normal too, but looks more ‘stained’! But, keep in mind the basket weave area looks more like the photos above where I talked about the paint wash (more like a white stain, not white paint) than they do in the following photos. More of a ‘wash’. Unfortunately, when I lightened up the photos in editing, it made the base just look painted white, which it is not.
SEAL
I only sealed the top areas where the transfer was. Our Fusion Mineral Paint does not need a topcoat or sealer so I didn’t do the rest. If you are using a chalk paint type of paint wash, then I would use some sort of sealer over that, either poly or wax, etc.
I tried to leave a few photos darker so you could get a better, more accurate, view of the “stained” paint-washed basket.
The inside…
And that other little extra on the inside of the lid.
Sweet. I just love the colors in this transfer.
The inside without the tray.
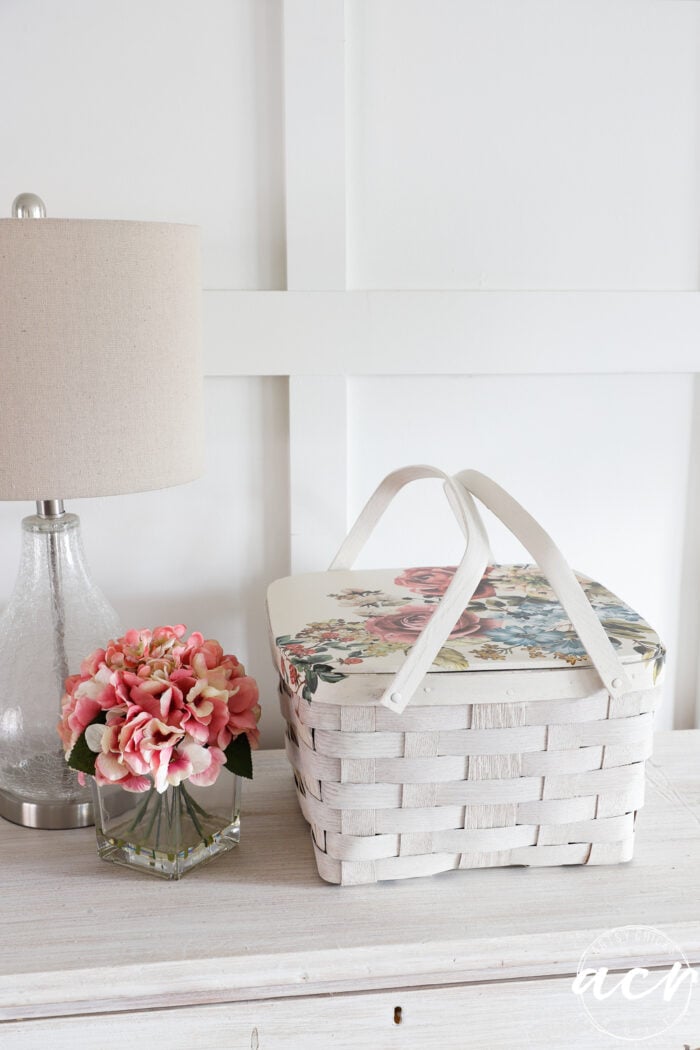
This is very close to what the outside looks like in real person. (above and below)
You can so simply and easily paint wash a basket, any basket like this! And completely change its look.
You don’t have to use a creamy color like this, you can use blue, green, or whatever you like.
Have you painted baskets before? This paint wash style of makeover is super easy and keeps the “grain” if you like that look. I love it! And who doesn’t love a pretty transfer to top it off?
An older basket brought up to date. So pretty! I am a basket addict; can’t bypass one. I have painted several but never tried transfers. Now I have to try one. You keep inspiring me.
Totally refreshed. :) I’m loving the new trend with paint washing.
Great to re tone the old orange, yellow and deep reds of older wood stains, but still lets the natural wood texture shine.
Very nice !
Beautiful Nancy – you make wonderful updates!
I just saw this the other day on another website. Supposedly the tray inside is to put a pie on, ie. a pie basket. I learn something everyday!
Thanks, Michelle! So kind of you to say!! And yep, that is exactly what it is, a pie basket! I have a few Longaberger ones from years past. :) Not sure this one ever had a pie in it though, it was quite spotless! lol xo
What timing lol. So I was looking at my large Longaberger baskets I have on top of my kitchen cabinets. I have vaulted ceilings and the extra tall cabinets but wanted something up there so when I had redone my kitchen and nowhere else to put these huge baskets I bought when a friend was selling them (LOL) that’s where they ended up. (Wow sentence and a half there lol) Anyway yesterday I’m looking at them thinking I am so tired of those baskets. Plus some are from the Christmas line so they are trimmed with green and burgundy. I have a corner hutch that my husband made out of very nice cherry and burled maple wood. I wish I could paint it but the wood is too nice and cost him a lot to buy. So was thinking maybe I could paint the baskets and put them on top of the hutch instead. I know LB baskets values have decreased but I’m thinking if I paint these, they’ll lose what value is left as far as collectibles. I have small ones I’ve already painted. So I see this post and how you made this basket sooooo pretty that I decided I must paint them lol. I have 2 questions. Do you think the paint wash method would work ok over the green and burgundy weaving strips it has? Also, do you think it would look as nice if paint washed in a soft color. I think I’d rather add a pop of softer color other than a white. Thank you and I apologize for this very long comment lol.
Hey Debra!
Okay, so the red and green would still be visible, probably muted a bit but still visible as this particular technique is more of a wash. I have found that the Longaberger baskets really don’t have much value (which is surprising to me) so my thoughts are do with them what you will and enjoy them! Right?! And I totally think a soft color wash would be so pretty. I have another basket and may do just that on that one! And no worries at all on the long comment, I love to chat and help when I can! :) xo
It’s beautiful now, Nancy! I like that you left some white space on the top instead of covering it completely, love when transfers go over the edge. And the surprise inside makes it more fun 😁
Thanks, Marcie! Yes, me too. Sometimes you just have to stand back and look at things before jumping in! Have to be flexible on the original plans too, I know I have too! I’m always changing it up! lol!
Want to be inspired, learn new skills, discover all the tricks to furniture makeovers, creating new out of the old and more? You'll also receive my FREE ebook "Creating Fabulous Finishes" PLUS access to my private Printables Resource Library, too!
Sign up to get the Weekly Newsletter! Our emails include an unsubscribe link and you may opt-out at any time. Your information will *never* be shared or sold to a 3rd party.


")

")

")

")

Amazing !
Thank you!!
The basket is beautiful. So much detail both inside and out. Great job.
Thank you, Barbara! xo
This is so adorable!!! I love the Harlequin and berry surprise inside!!!!!
Thank you, Audra! So fun! :) xo
An older basket brought up to date. So pretty! I am a basket addict; can’t bypass one. I have painted several but never tried transfers. Now I have to try one. You keep inspiring me.
Yes, thank you, Shirley!! Me too! I love baskets. It’s hard to pass them up! And yes, transfers up the game for sure! xoxo
Amazing job as usual, Nancy! Love it all and the little surprises inside. Good on you!
Thanks so much, Caye! I just kept going and going with this one! ;) xoxo
Totally refreshed. :) I’m loving the new trend with paint washing.
Great to re tone the old orange, yellow and deep reds of older wood stains, but still lets the natural wood texture shine.
Very nice !
Yes it sure is, p! Thanks so much! xo
Wow- that is beautiful
Thank you, Renee! xo
Beautiful Nancy – you make wonderful updates!
I just saw this the other day on another website. Supposedly the tray inside is to put a pie on, ie. a pie basket. I learn something everyday!
Thanks, Michelle! So kind of you to say!! And yep, that is exactly what it is, a pie basket! I have a few Longaberger ones from years past. :) Not sure this one ever had a pie in it though, it was quite spotless! lol xo
What timing lol. So I was looking at my large Longaberger baskets I have on top of my kitchen cabinets. I have vaulted ceilings and the extra tall cabinets but wanted something up there so when I had redone my kitchen and nowhere else to put these huge baskets I bought when a friend was selling them (LOL) that’s where they ended up. (Wow sentence and a half there lol) Anyway yesterday I’m looking at them thinking I am so tired of those baskets. Plus some are from the Christmas line so they are trimmed with green and burgundy. I have a corner hutch that my husband made out of very nice cherry and burled maple wood. I wish I could paint it but the wood is too nice and cost him a lot to buy. So was thinking maybe I could paint the baskets and put them on top of the hutch instead. I know LB baskets values have decreased but I’m thinking if I paint these, they’ll lose what value is left as far as collectibles. I have small ones I’ve already painted. So I see this post and how you made this basket sooooo pretty that I decided I must paint them lol. I have 2 questions. Do you think the paint wash method would work ok over the green and burgundy weaving strips it has? Also, do you think it would look as nice if paint washed in a soft color. I think I’d rather add a pop of softer color other than a white. Thank you and I apologize for this very long comment lol.
Hey Debra!
Okay, so the red and green would still be visible, probably muted a bit but still visible as this particular technique is more of a wash. I have found that the Longaberger baskets really don’t have much value (which is surprising to me) so my thoughts are do with them what you will and enjoy them! Right?! And I totally think a soft color wash would be so pretty. I have another basket and may do just that on that one! And no worries at all on the long comment, I love to chat and help when I can! :) xo
Hi Nancy! The basket turned out so pretty! I have used this transfer in several things. It’s an oldie but goody. One of the best.
Hi Cheryl! Thank you!
Yes, it really is a goodie, for sure! xo
It’s beautiful now, Nancy! I like that you left some white space on the top instead of covering it completely, love when transfers go over the edge. And the surprise inside makes it more fun 😁
Thanks, Marcie! Yes, me too. Sometimes you just have to stand back and look at things before jumping in! Have to be flexible on the original plans too, I know I have too! I’m always changing it up! lol!
What a beautiful transformation, Nancy! That transfer is stunning.
Thank you, Michele!! It’s one of my favorite transfers! xo
Did you use shellac on the basket to prevent bleed thru before the paint wash?
Hi Deb! No, I didn’t need to. I would only usually use Shellac with very dark or red toned stains or woods.