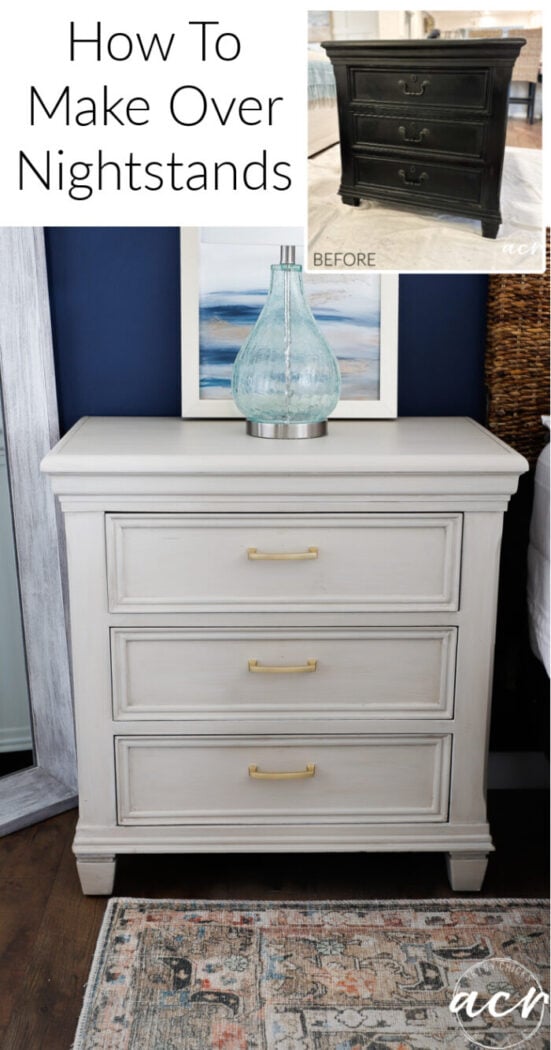
Learn how to use a wood graining tool to create a realistic wood grain pattern. So many options for the faux wood look!
Hello, amazing friends!
I hope you had a wonderful weekend! We spent some time at our beach condo. Yippee! The weather was out of this world. So warm, felt like summer. I couldn’t believe we had temps in the 70’s in January. I’ll take that anytime!
By the way, if you happen to click over to our beach condo at the link above, keep in mind that is how it looked when we bought it back in 2019. We have completely remodeled it (minus the kitchen but that’s coming this year hopefully!). We are getting new appliances put in next month. (it’s taken 3 months since we ordered them) I will be doing an update post and will share it after they get in. We still have the cabinets and countertop to replace but after that, it will be 100% done!
Today I’m sharing all about the nightstand makeovers I mentioned last week. And the snag we hit…which was several of the drawer slides/tracks that needed replacing.
But they are all done and in place, yay!
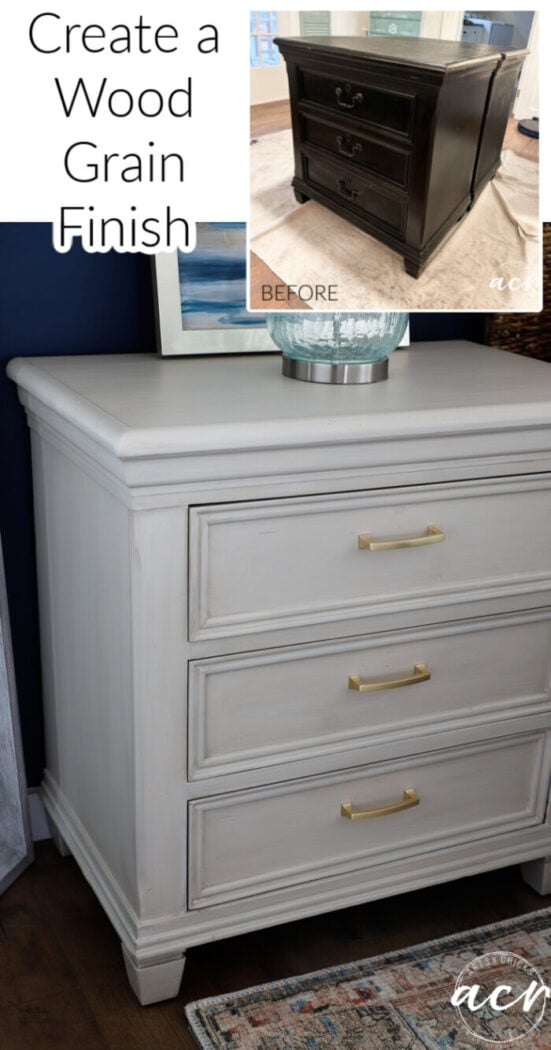
How To Use a Wood Graining Tool (to create a faux wood finish)
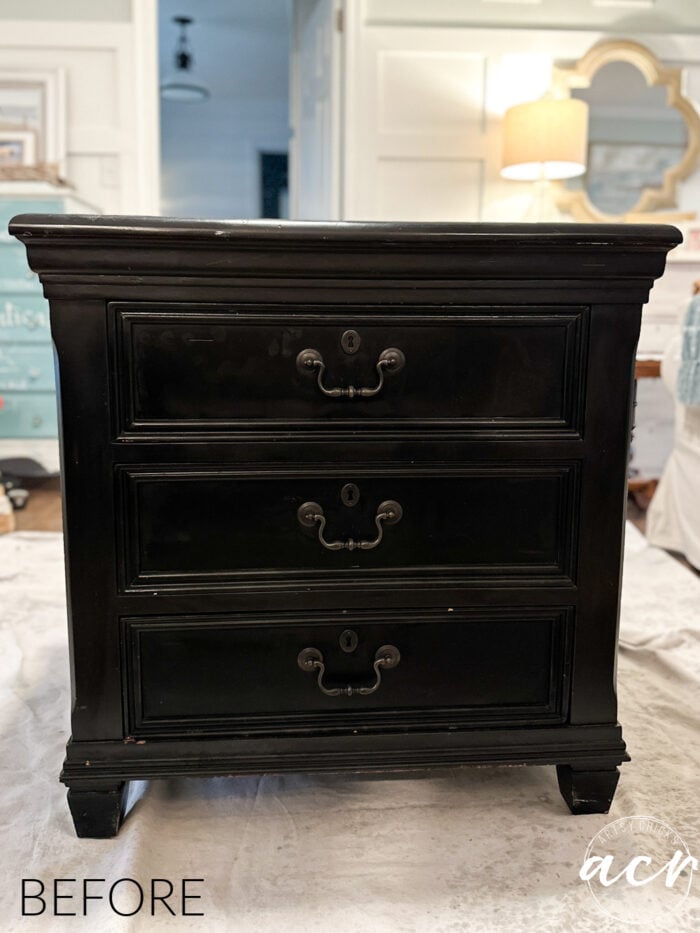
BEFORE
I paid $60 total. Which is a steal as they are heavyweight wood and large. (tall, which is what I have been looking for)
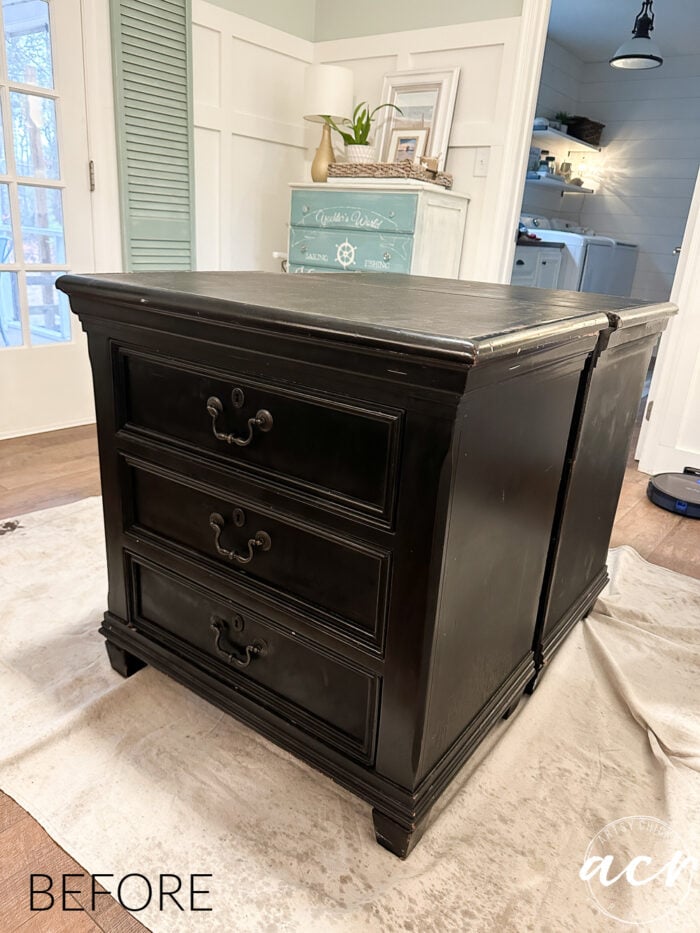
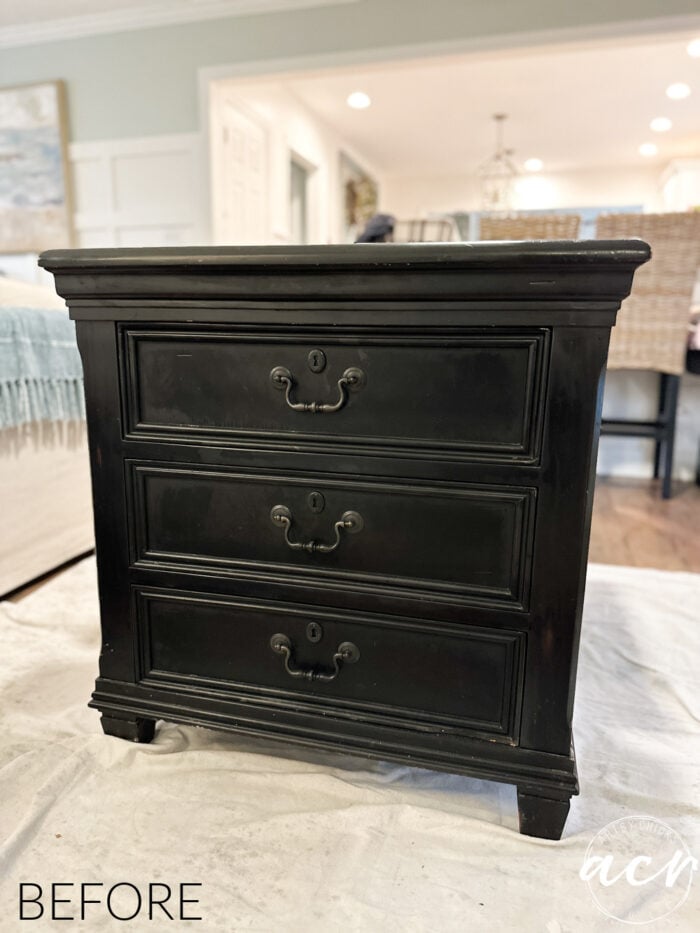
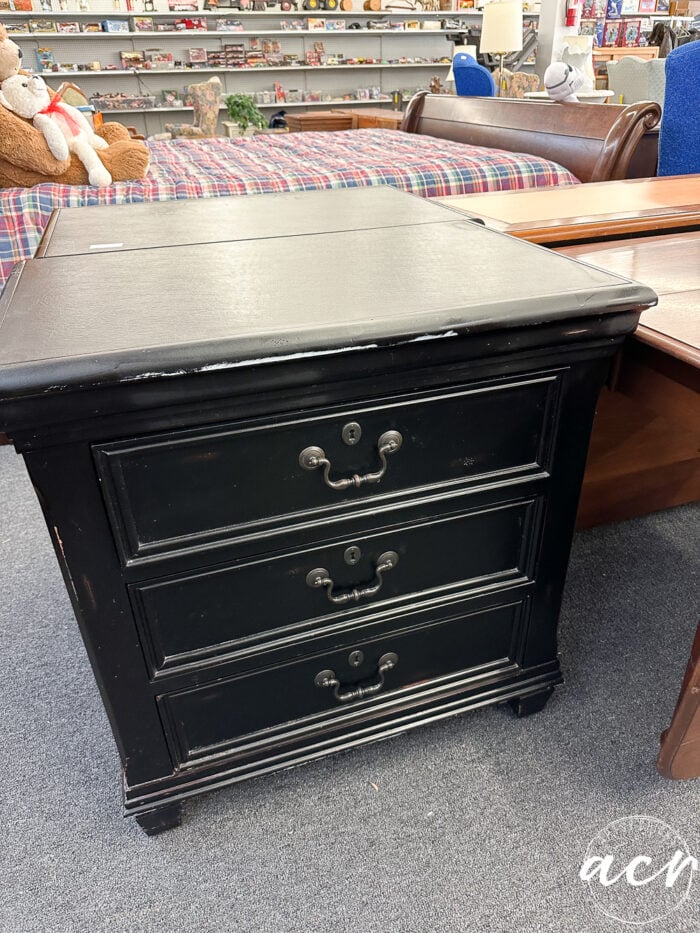
Remember the set from last week that I found at a completely different thrift store months later?
Same exact set!! So crazy.
Also a steal of a deal.
Both sets were pretty evenly beaten up. I do wish I had found this set first as you’ll see in a bit. But not a biggie, really.
Prefer to shop on Etsy? I have an Etsy shop also, here!
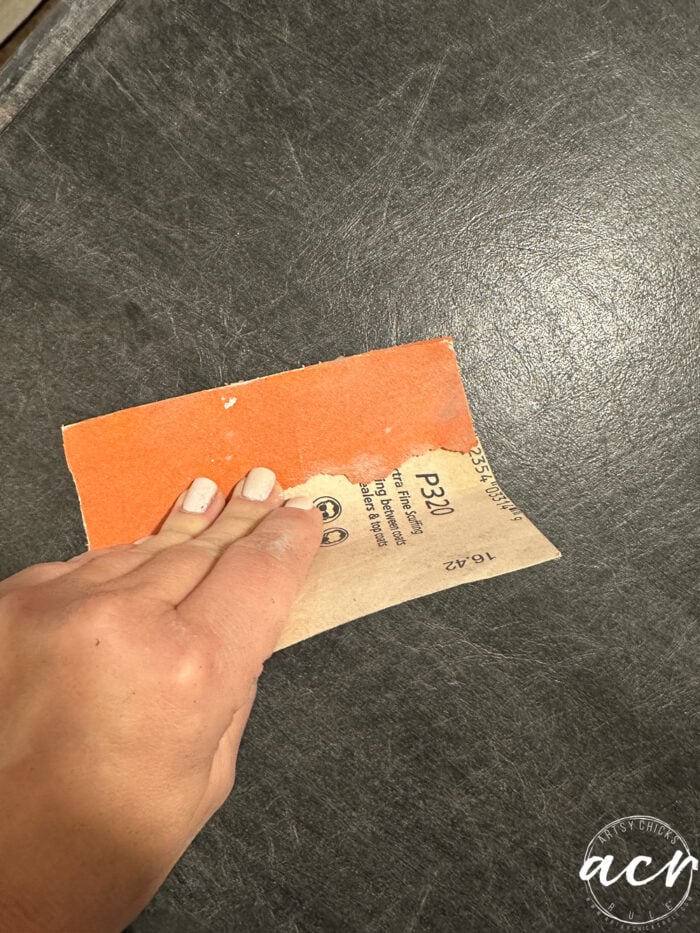
SAND
Next, I lightly sanded both nightstands. Mainly to smooth out chips in the paint and the top which was not wood but a leatherette-looking finish.
I wanted to make sure the paint would adhere very well since these will be used daily.
CLEAN
Be sure to clean them well. I used our TSP Alternative to clean them up.
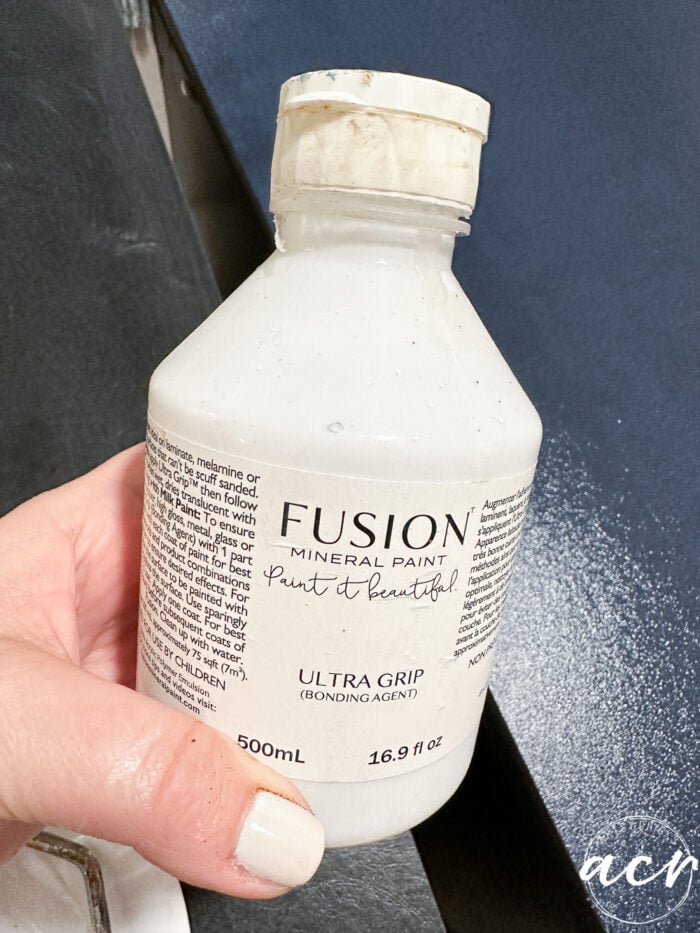
PRIMER
For that top area, I used Ultra Grip just for some added bonding.
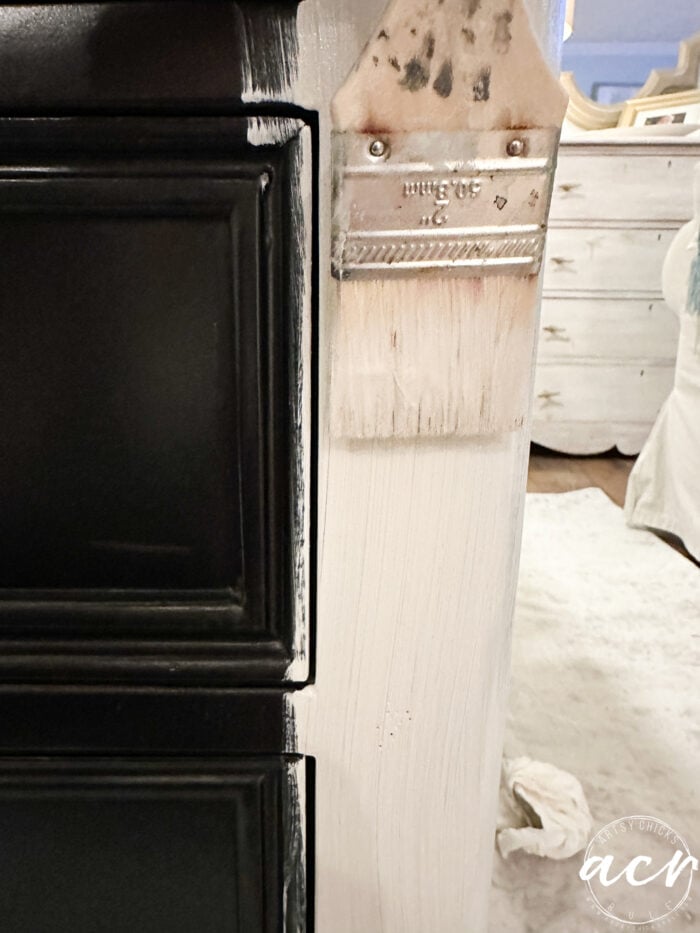
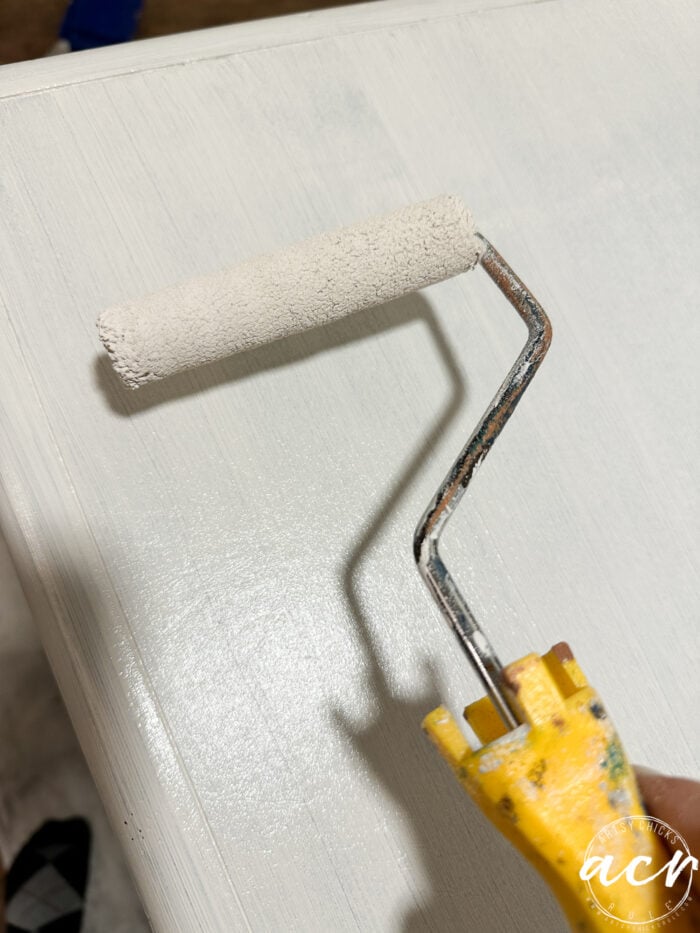
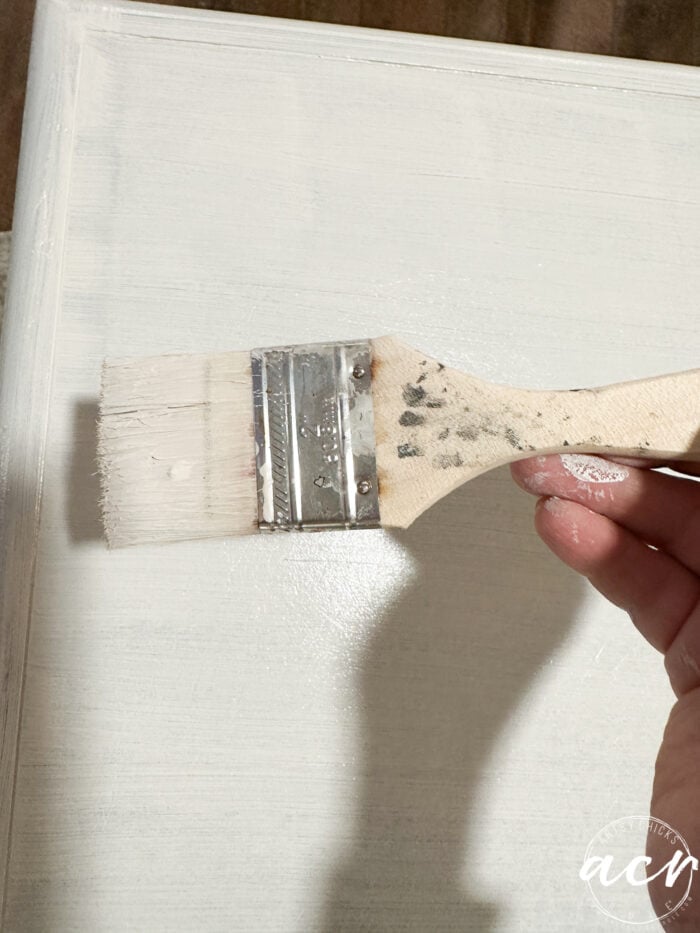
PAINT
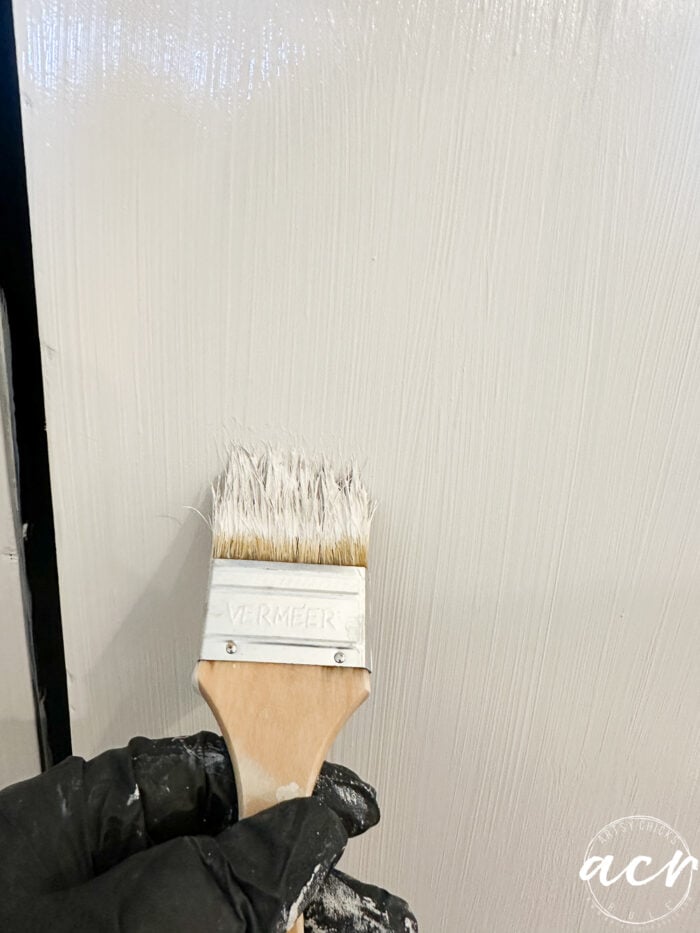
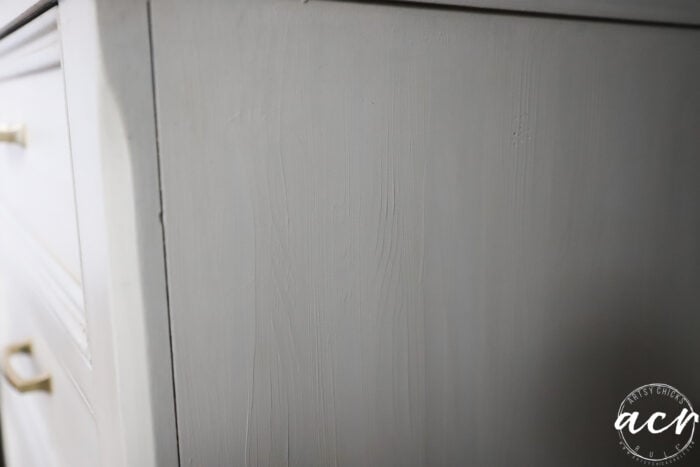
I wanted these to have a “wood grain” finish so I purposely tried to have some very small brush strokes here and there.
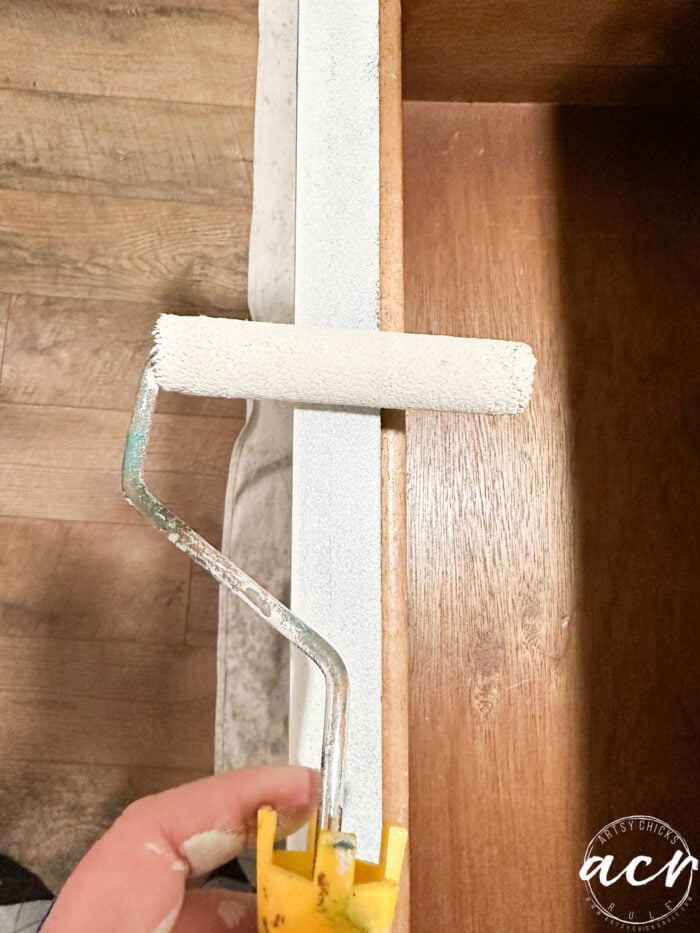
You can roll the paint with our microfiber roller for good coverage.
Then I would go back over with the small chip brush.
I rolled in places like this, however.
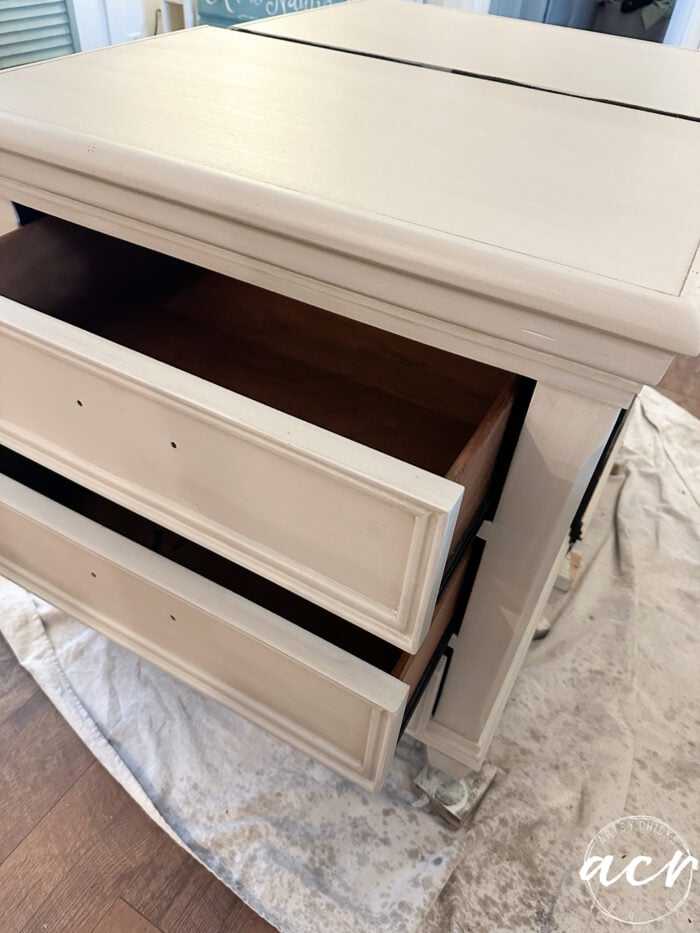
See the interior of the drawers? All of them are in great shape like that and I did not do a thing to them except clean them up!
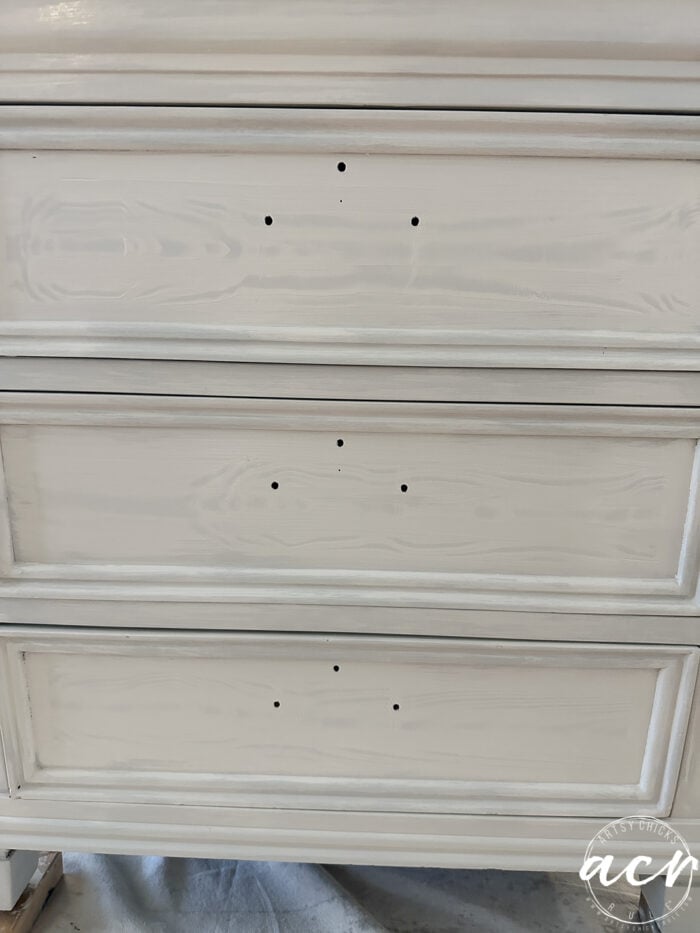
I painted two coats of Cashmere. Just love this color.
Again adding some texture.
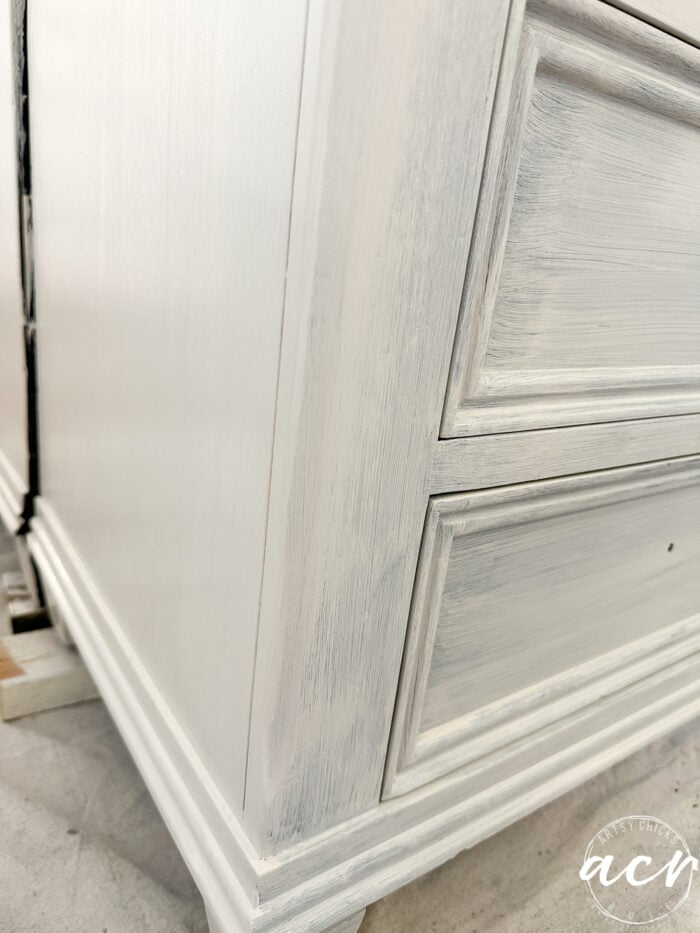
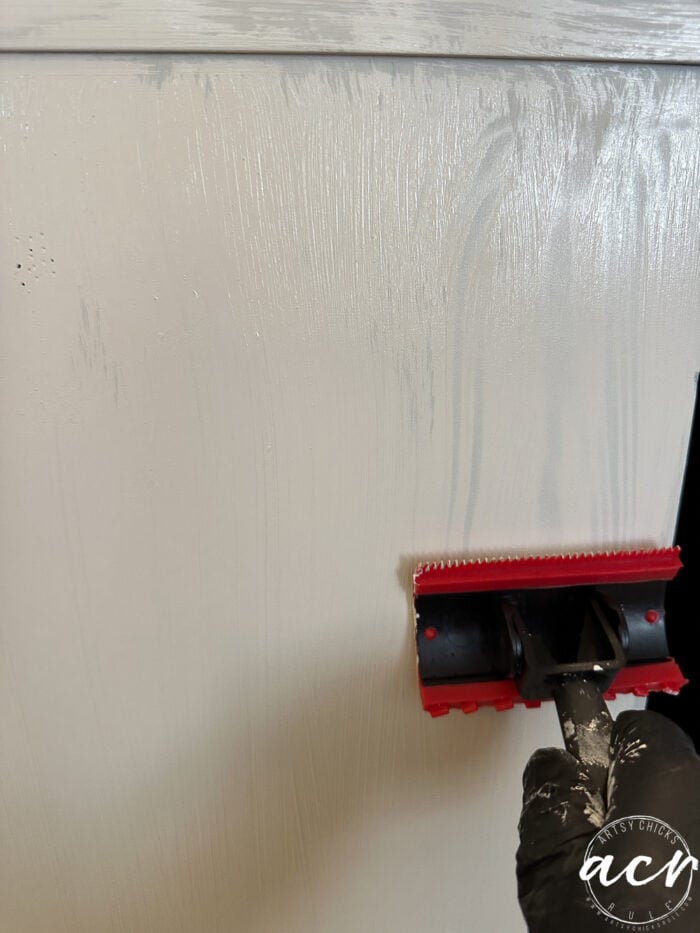
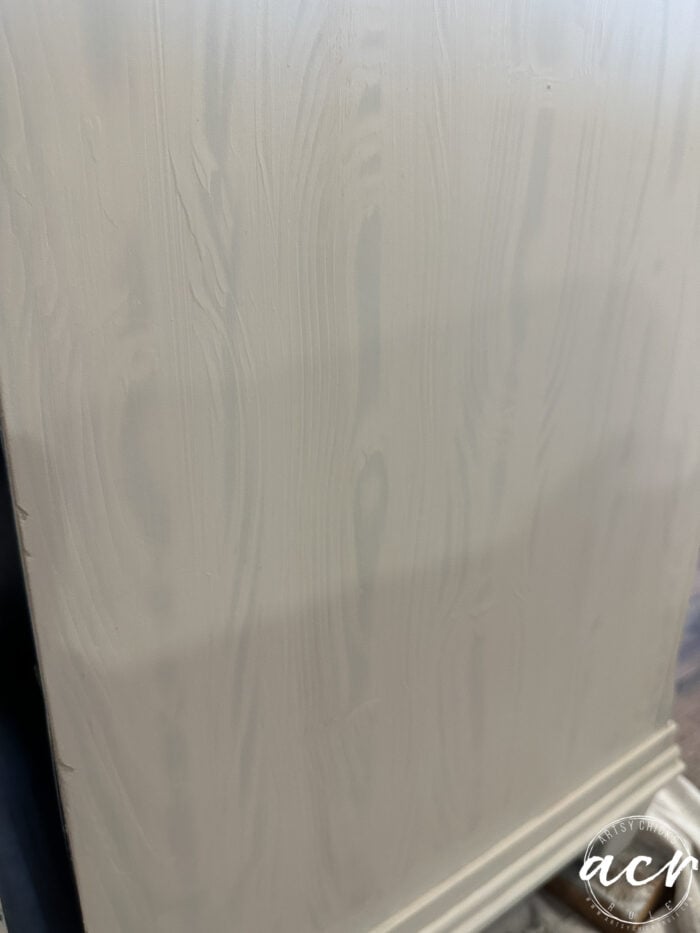
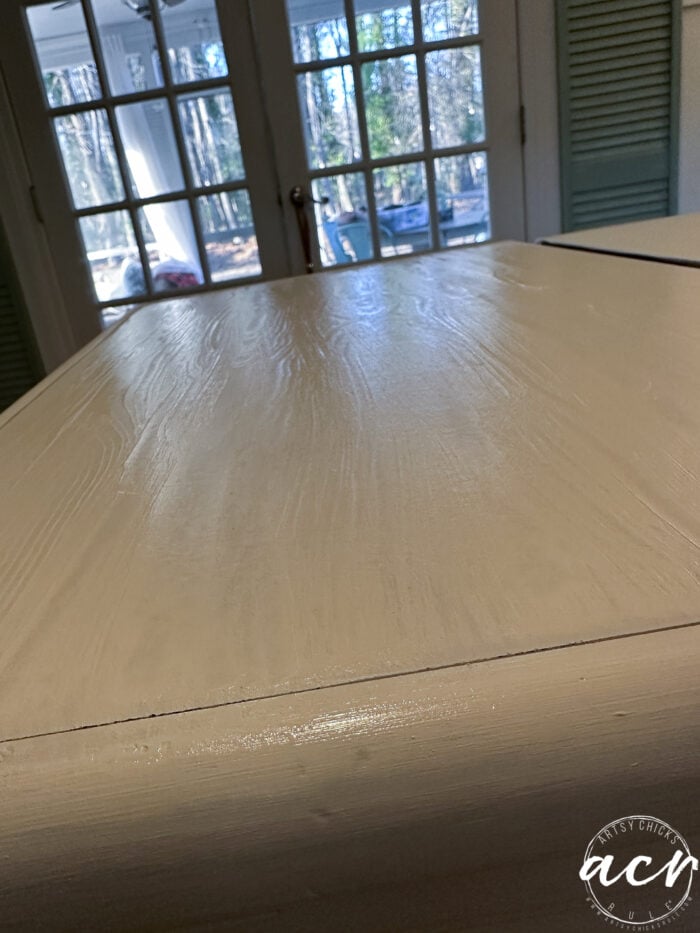
I decided I wanted more texture in the form of wood grain. So I found this wood-graining tool and got to it!
How To Use A Wood Graining Tool To Create A Faux Finish
WOOD GRAINING TOOL
I applied a thin coat of paint and ran the wood-graining tool over it. It was actually quite easy!
And fun!
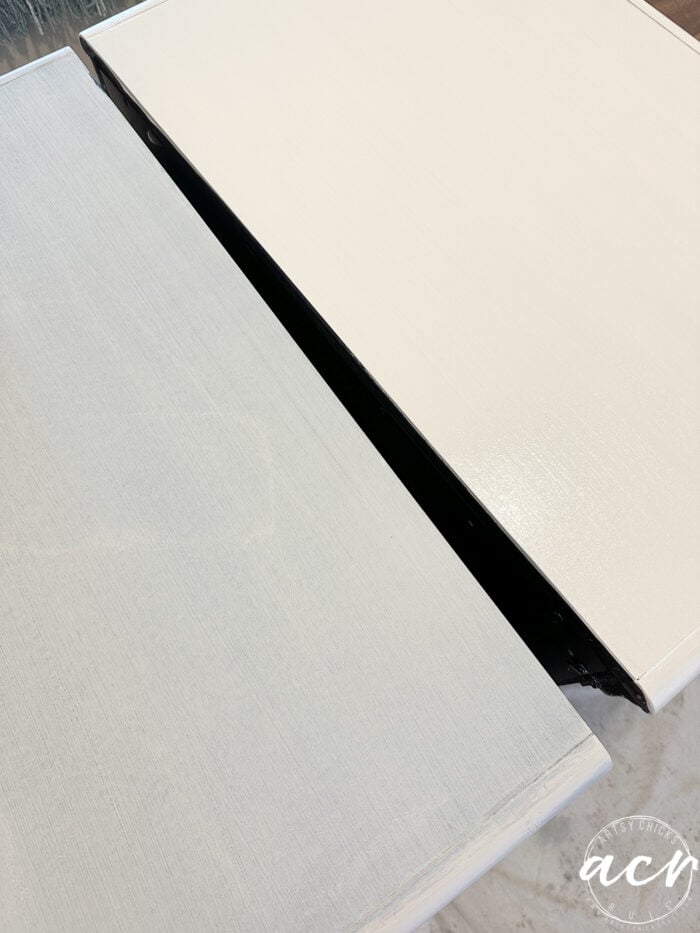
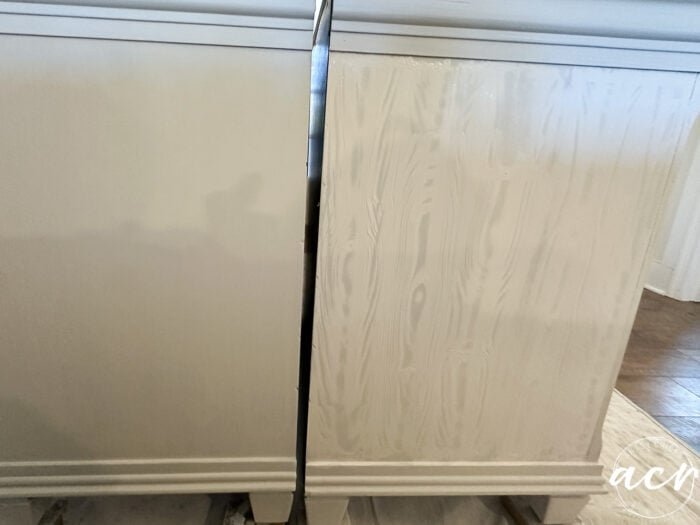
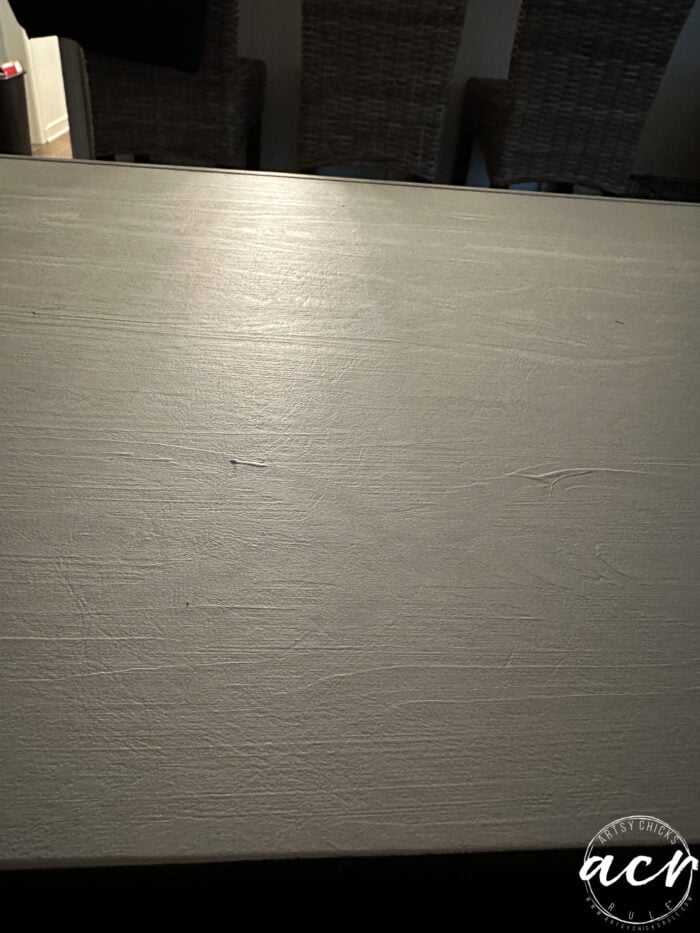
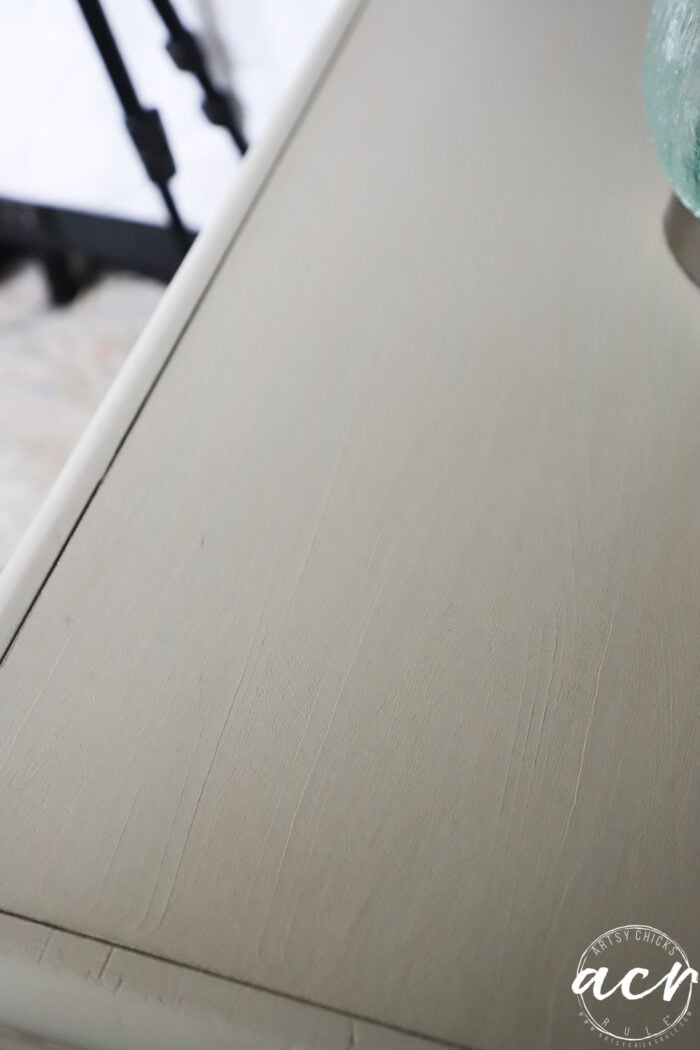
The left has not been done, the right has.
Isn’t that neat??
You simply run the tool across the paint, pivoting it as you go. You get the hang of it quickly.
Love it!
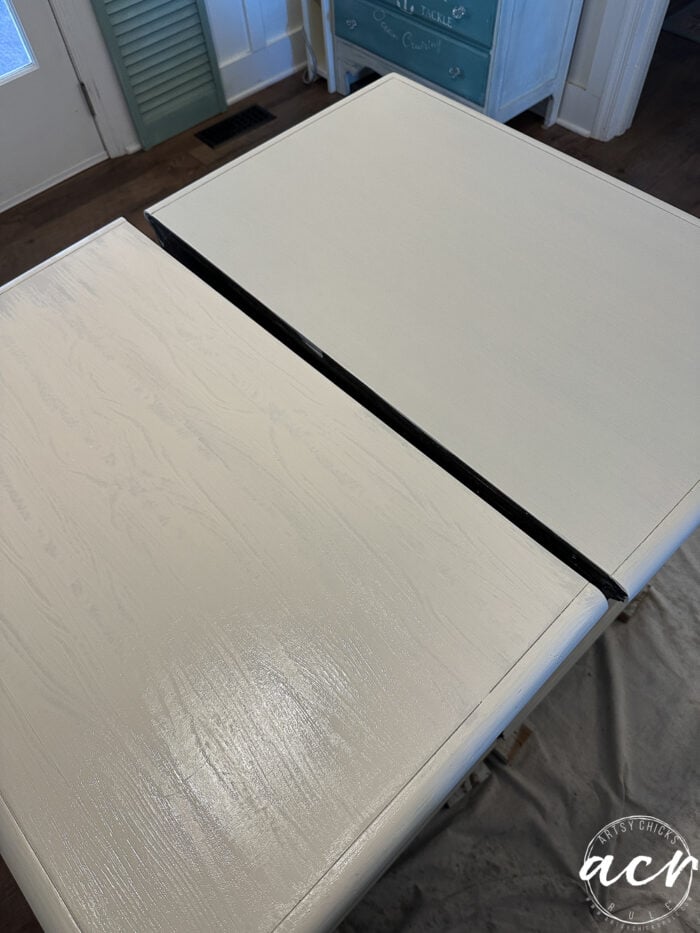
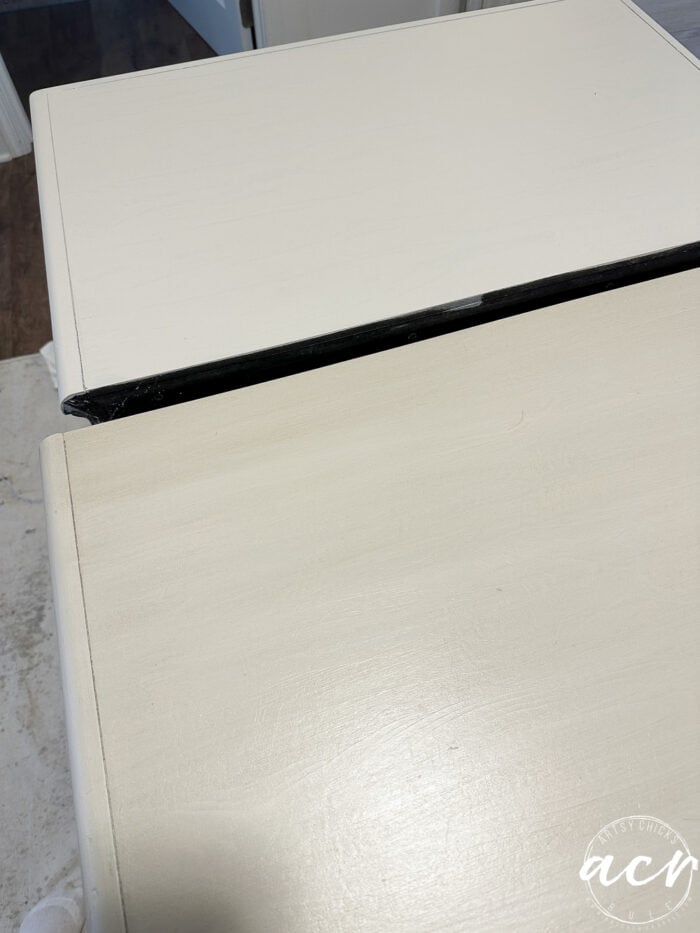
The left top is done, but the right top is not done yet.
It worked especially great on the top because the top was not wood but now looks like it is!
It’s very subtle but could be much more pronounced with different colors. Such as, darker underneath then apply a lighter color and run the wood graining tool through it. In this way, it would leave areas of dark and light so the wood texture would be much more visible. Whereas mine looks like a painted wood texture. I plan to do more projects with this tool so stay tuned!
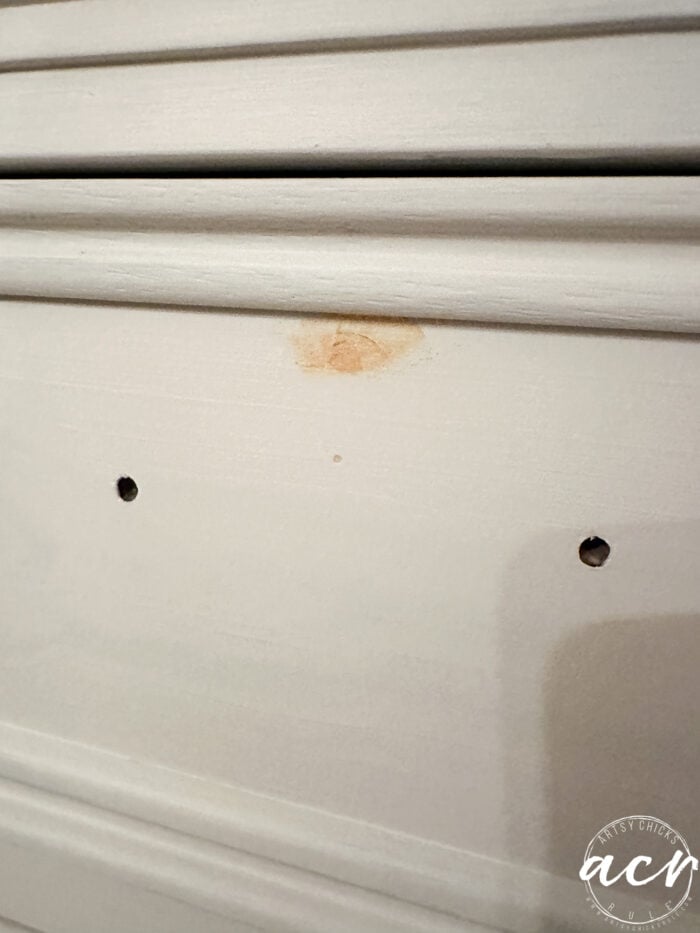
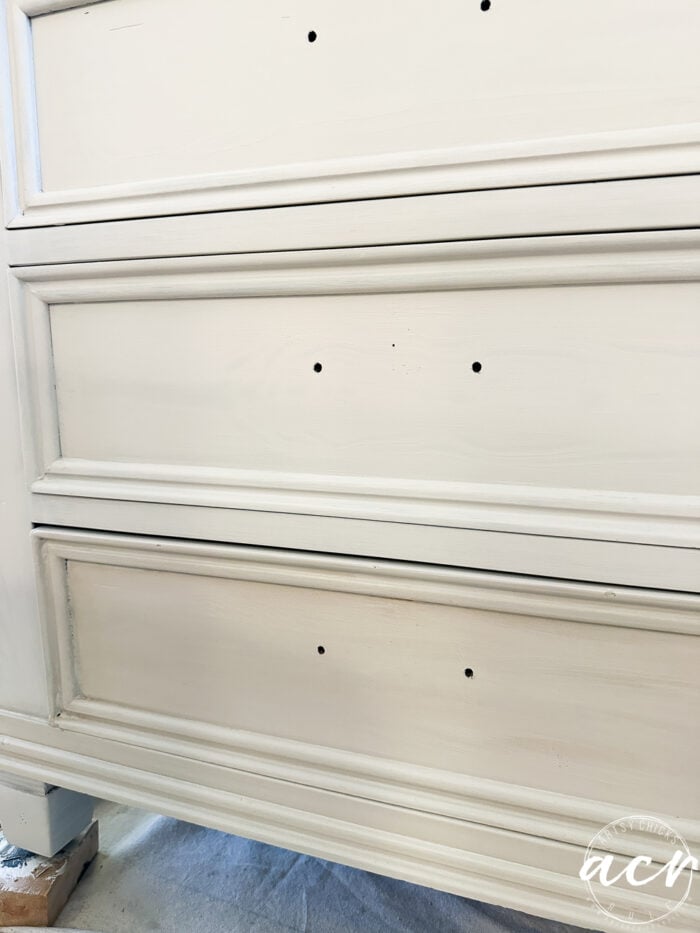
And just like me, I originally planned to use the same hardware (faux lockplate and pulls) but decided against it at the end. So yep, I had to fill the faux lockplate holes after I’d done all the wood graining, haha! Oops.
It’s okay, it’s all going to be okay. lol
STAIN
And it was! Can’t even tell.
You can see above also how it looks with the stain and without. The bottom drawer has been stained, the rest has not.
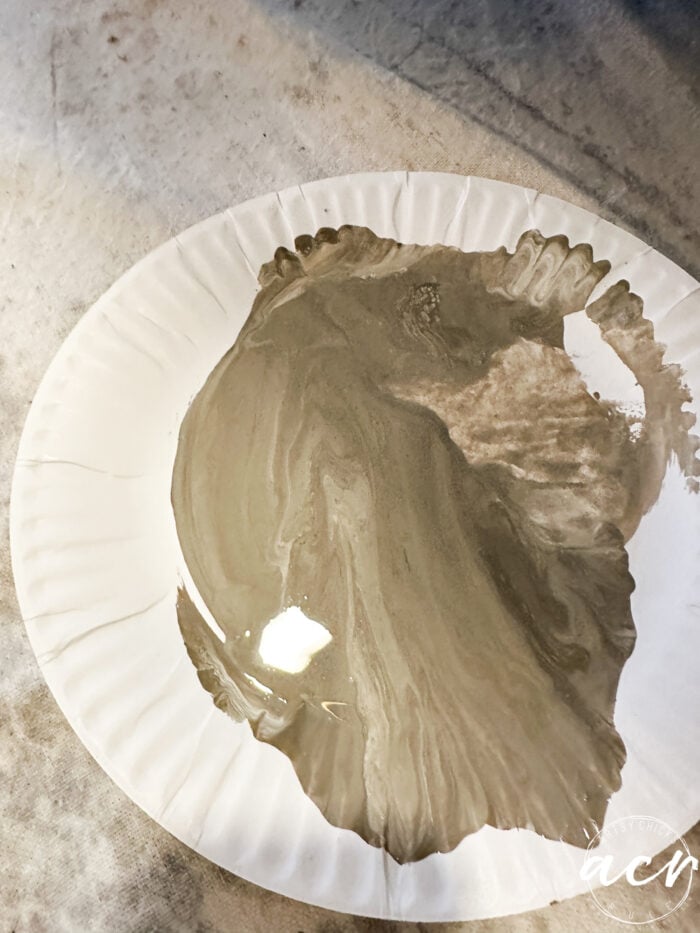
I mixed together (about equal parts) Driftwood and White stains because I didn’t want it as dark as straight Driftwood would’ve been.
I applied it with an old t-shirt, then wiped away the excess with a separate clean, dry t-shirt.
The top is not done, the bottom has stain applied. It just gives it a nice richness and grabs onto that wood grain here and there.
NOTE: The Stain and Finishing Oil is perfect for a layer of protection on these as well since the finish coat is built in. If using over paint, you will want to wait several days in between so that all the water from the paint evaporates before using the oil-based stain.
All done here. I forgot to take an after photo of the insides of the drawers, but again, as you can see, they are in great shape!
Final thoughts…
The wood graining tool is perfect for adding texture and realistic wood grain patterns. I enjoyed using it and it really was easy to do.
In my opinion, it’s fairly easy to “catch on” how to use it. There are a variety of looks you could accomplish. Real stained wood looks depending on the paint colors you choose. You could even paint a medium beige-toned base, for example, and use a darker stain over the top and run the graining tool through it.
As I mentioned above, I will be using it on more projects to come!
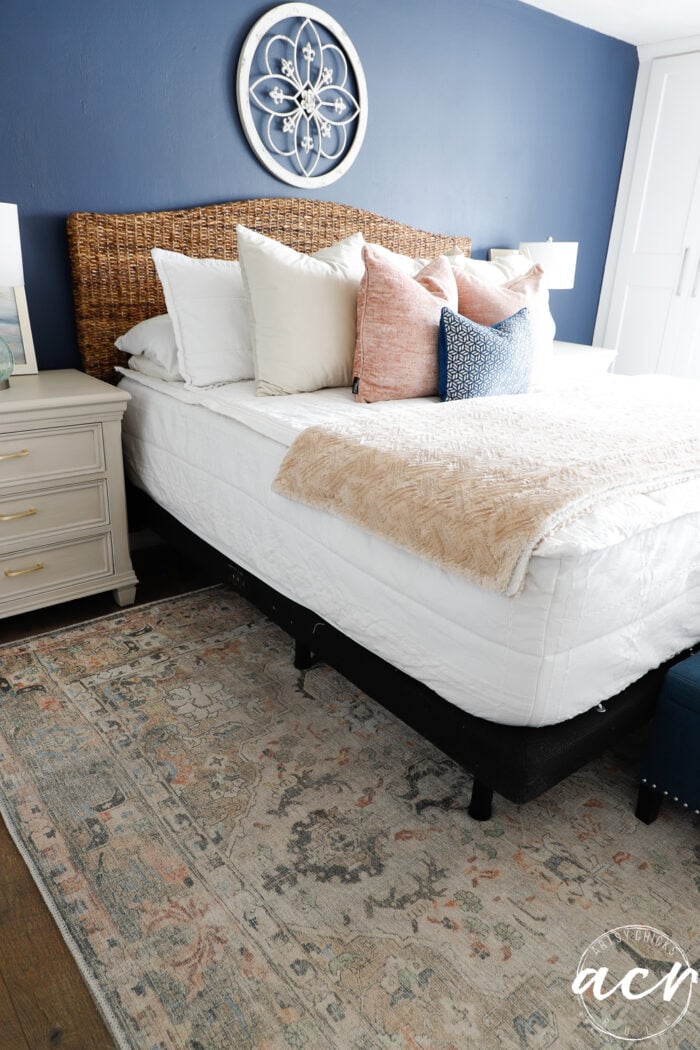
AFTER PHOTOS
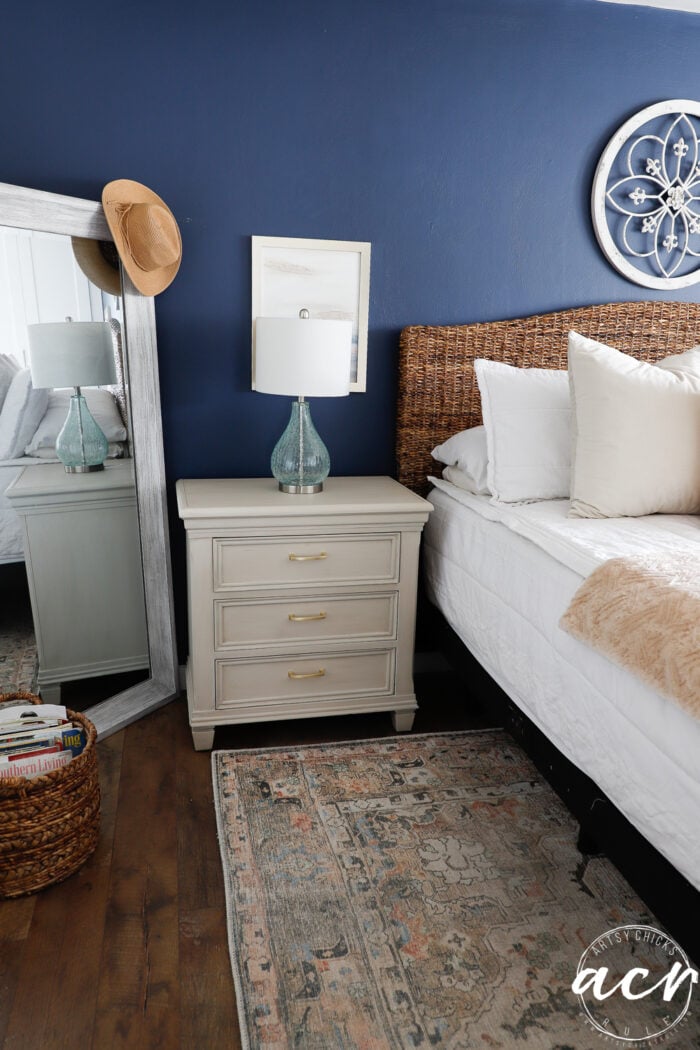
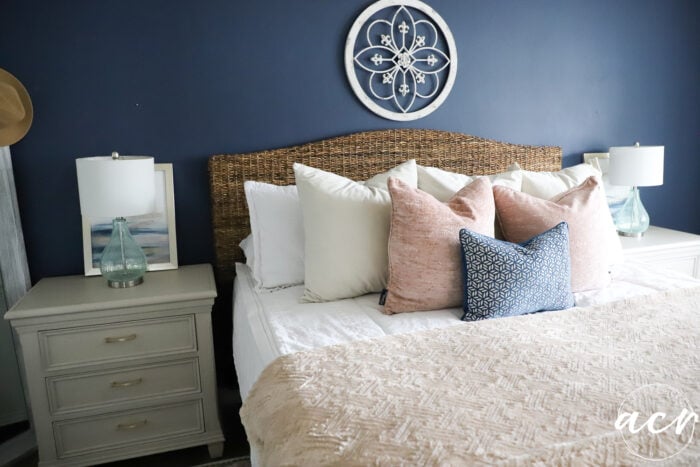
Before I share these photos, just know that our bedroom is a “work in progress” …again. lol The artwork I created to go above our previous nightstands is not at the correct height any longer. We also have a new headboard so may change out what’s above our bed. I’m considering changing out the bedside lamps to something different as well. Plus, we have new bedding (that we love!) so I’m contemplating what to do with the bed skirt area. I had a bed skirt there previously and I hated it. I really (really!) love the clean look of no bed skirt but I can’t leave it as-is with that adjustable bed frame. Not attractive.
I need something to cover the bed frame. We’ve talked about making some sort of wood frame that just covers that area and sort of sliding it on. I just don’t know. If you have any ideas or know of a way to cover it, etc, (no bed skirts) please comment or email me! I’m all ears!!
I really don’t love the blue as much as I did but don’t feel like painting the wall right now! lol So it will stay for the time being…or forever. haha
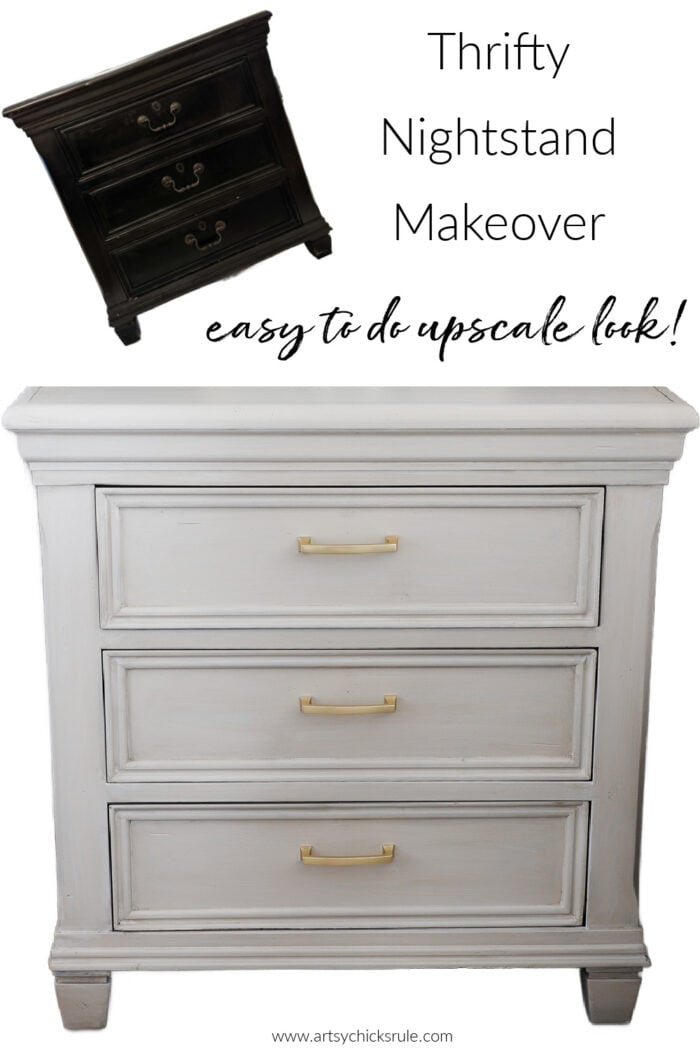
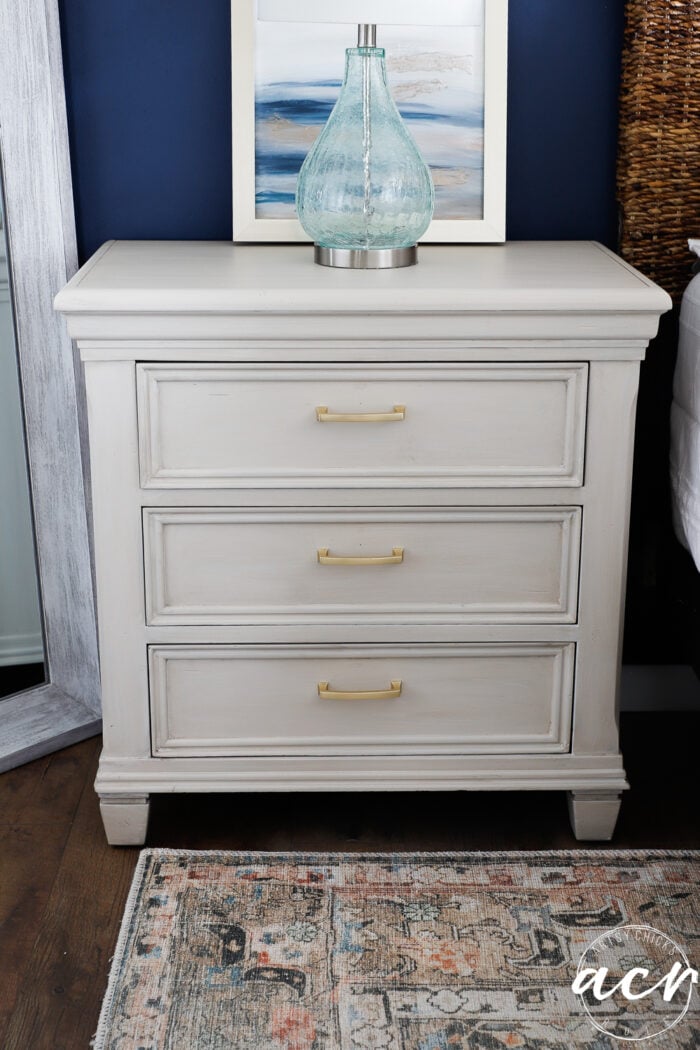
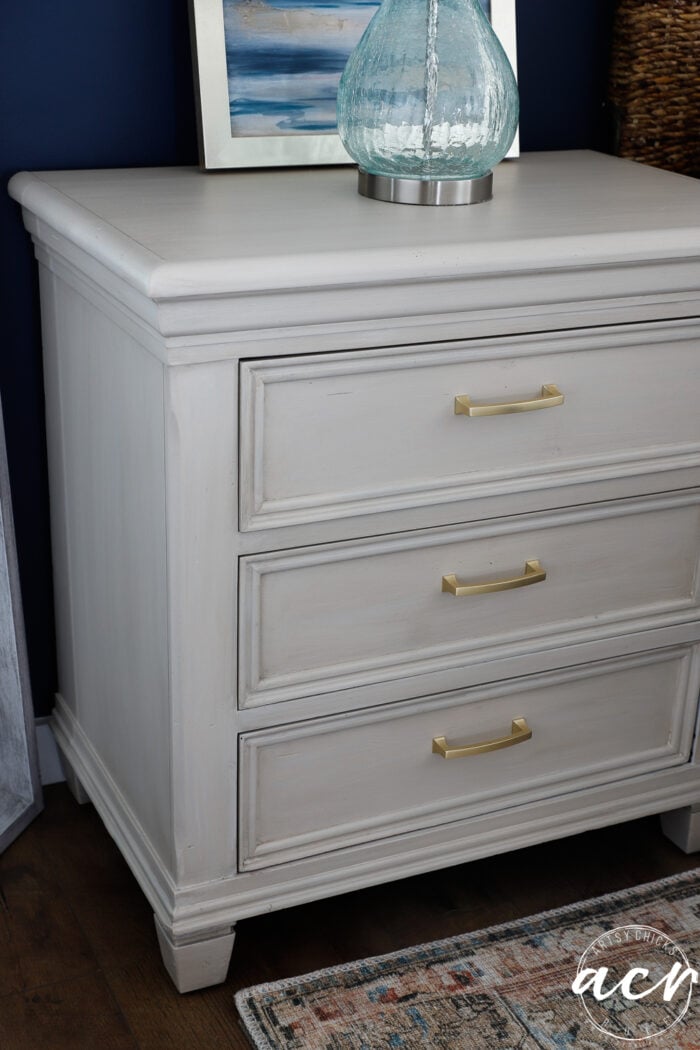
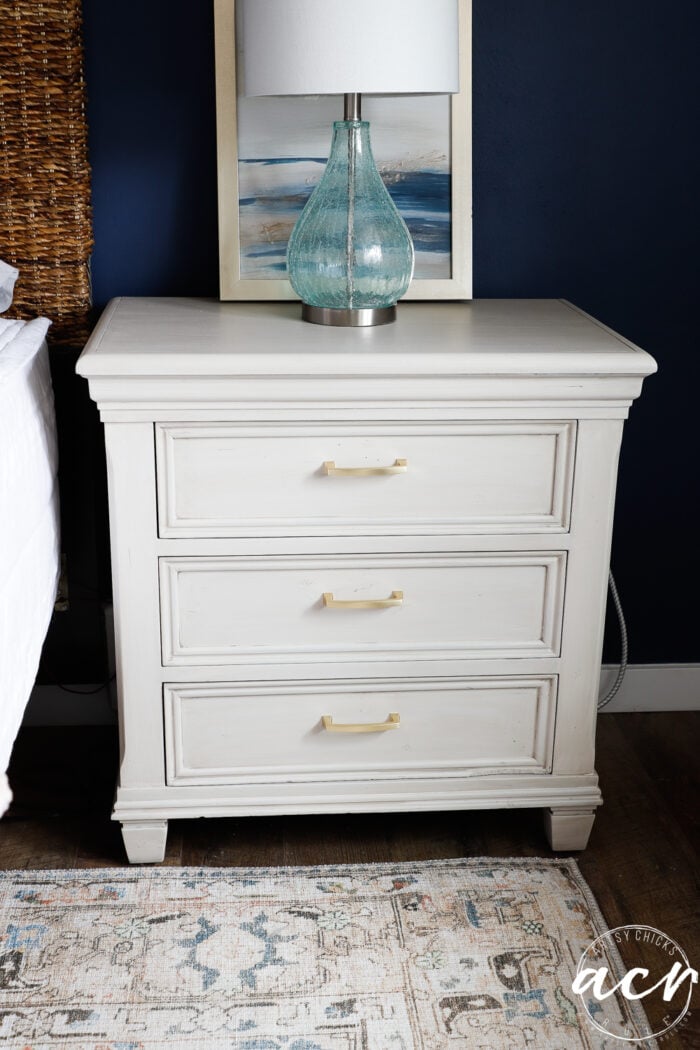
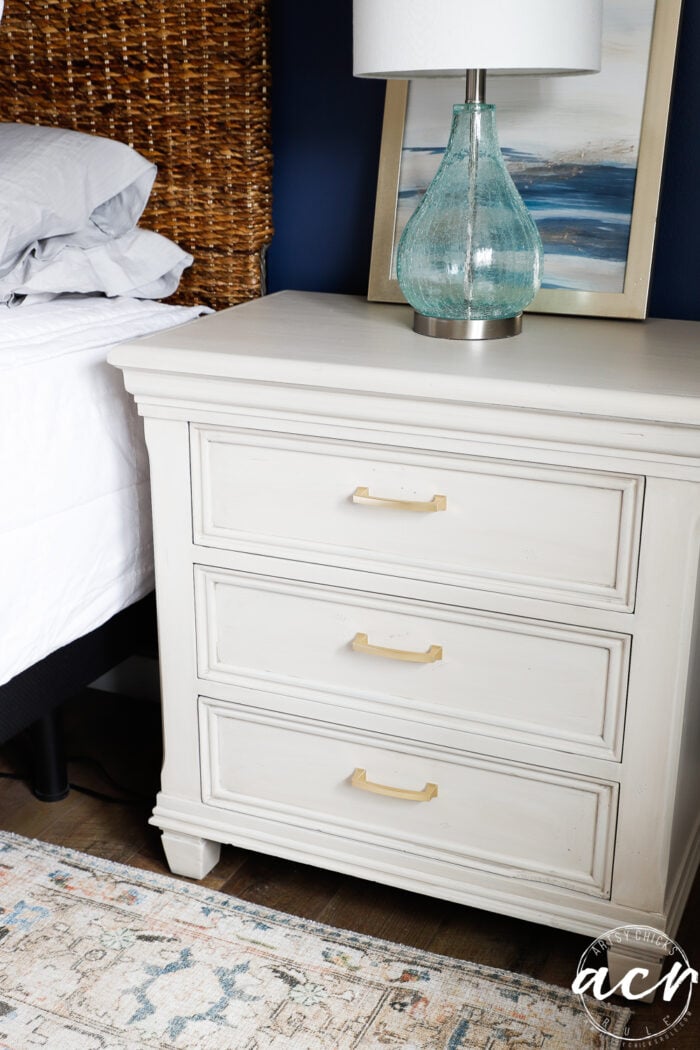
Anyway, here are the new nightstands. I LOVE them. And I absolutely love that they are bed height!
My husband’s side.
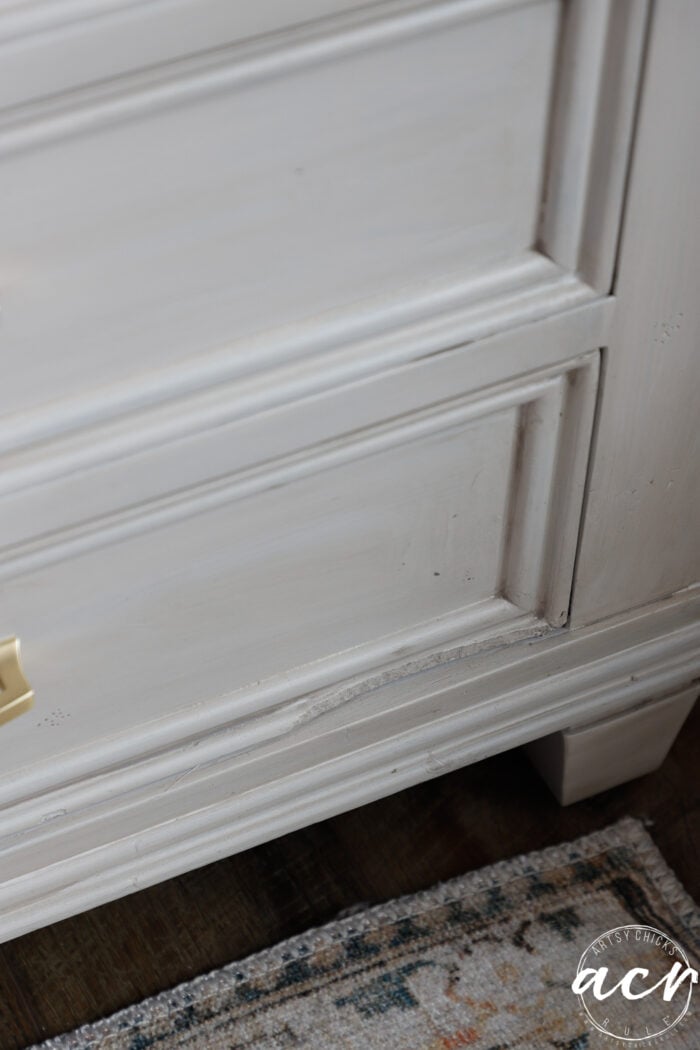
There was a piece of trim broken off on the bottom drawer there, do you see it?
I considered trying to fix it but in the end, I decided to leave it. This is one reason the other set I found would’ve been a better choice! Believe me, I considered going to get them and doing the same makeover to those and selling these. But I didn’t. I’m okay with it as the only people who will ever see it is us. And all of you… and the whole world wide web!! haha!!
I love the wood grain though! It’s more noticeable in person.
I might put round decorative mirrors behind the lamps and some pretty new artwork over the bed. I don’t know. I might keep the artwork I made and just adjust them on the wall now that we have taller nightstands. We’ll see!
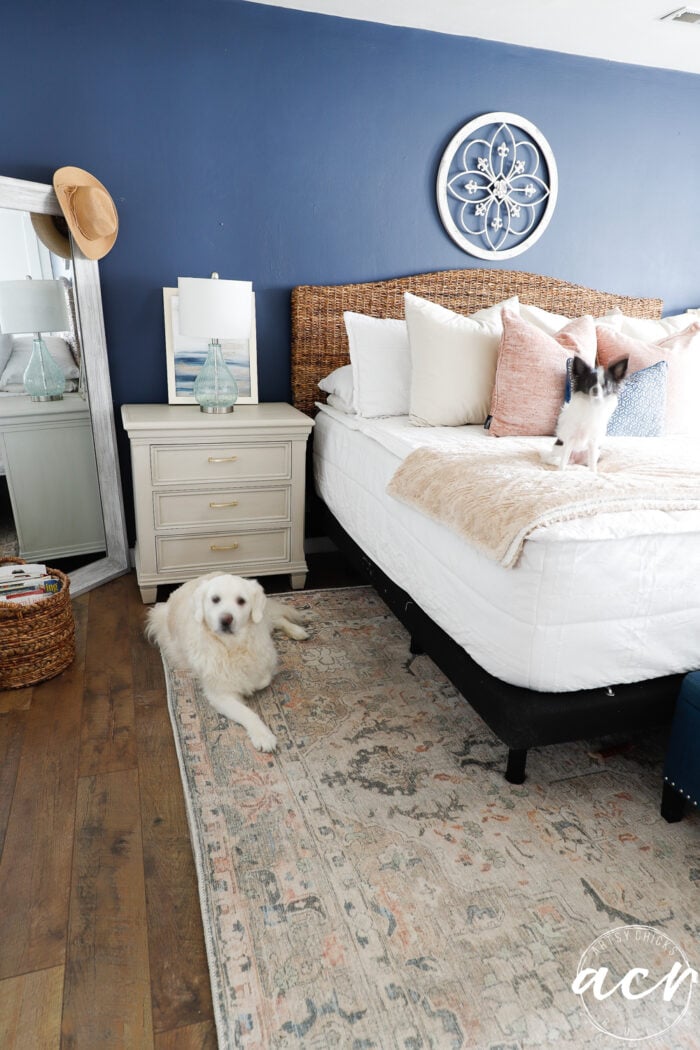
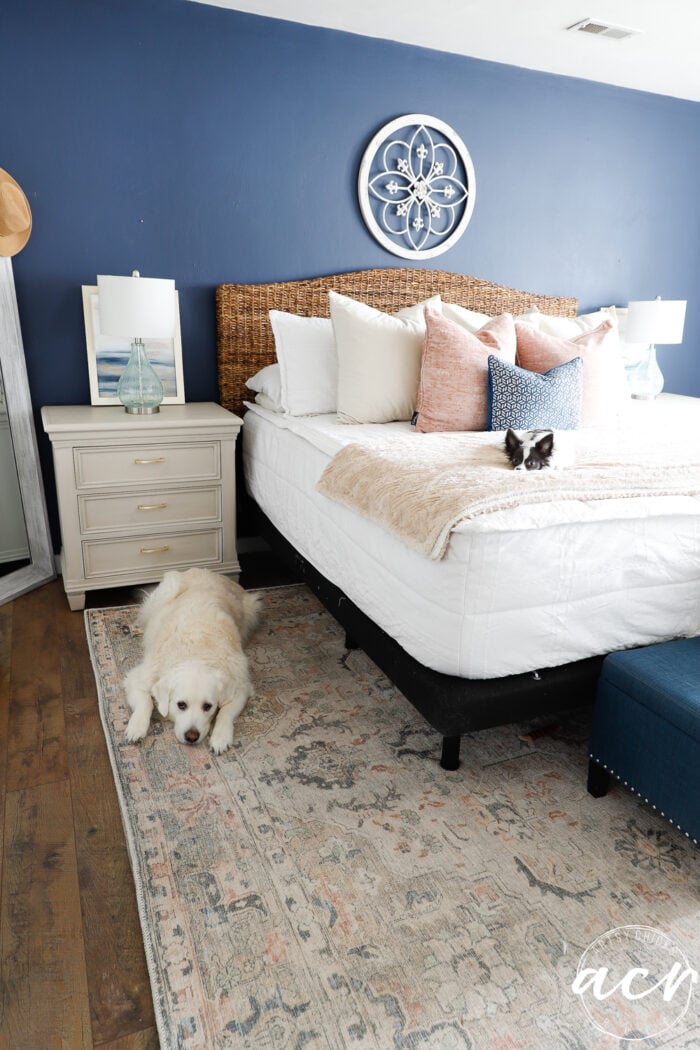
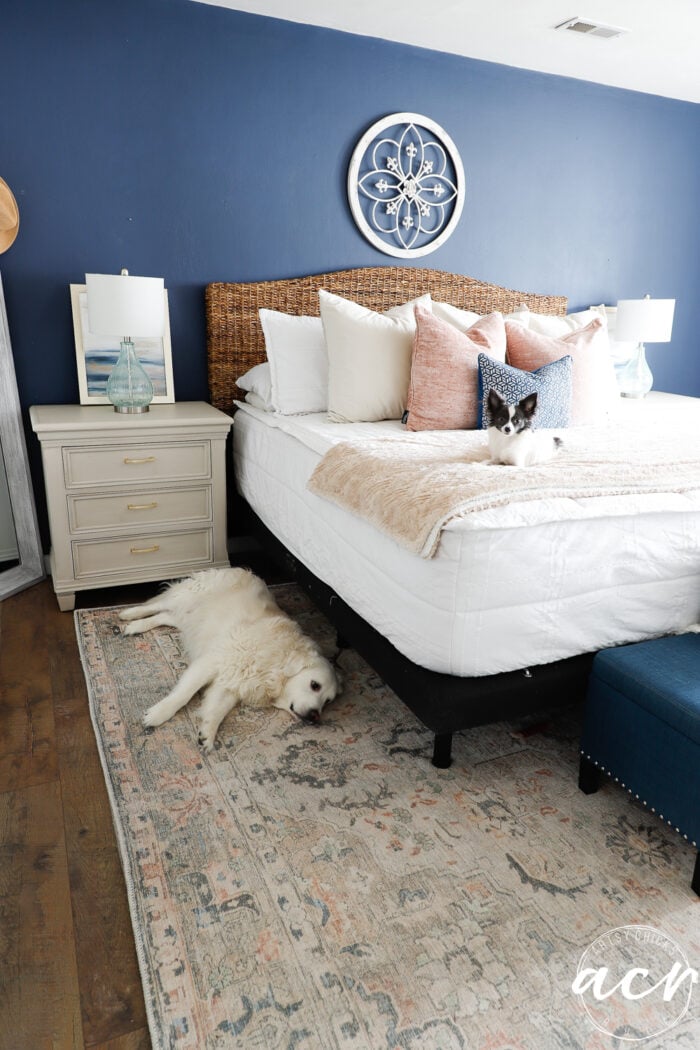
And the photos wouldn’t be complete without Ryder and Piper!
Hard to get them to stay still long enough for a non-blurry photo! I try! lol
Funnily enough, I told Ryder the “head down” command, which he was taught and knows and Piper also put her head right down!! haha!! She has not been taught that command so it was so funny. The only command she has learned so far is “sit” and she does it like a champ now! lol
It was short-lived, she popped her head right back up and Ryder said he’d had enough of all this and rolled over to go to sleep!!
And of course, I had to get a close-up of our pretty girl.
Have you ever used a wood-graining tool before? I remember playing around with one, oh gosh, I feel like sometime as a kid growing up in the 70’s-80’s. Remember that old “faux” wood finish they gave everything?? Ugh!! It was not attractive and sometimes you’ll find pieces with it thrifting but it was really popular there for a while. lol This is the “grown-up” version of that, I think. If you are like me and saw these grain tool things and thought “Oh ya, I remember those things, no thanks” think again! They can create a really cool finish done the right way.
These night stands are absolutely wonderful. What a great job on the wood graining.
You are a very talented young lady. Thank you for sharing your talents and how to
‘with the rest of us. I look forward every week to the beautiful turn overs from you and Christy
Awesome makeover as usual! Here’s a thought…instead of changing the blue wall pick up the coral color from the rug and get creative adding it in. Not just in a pillow but with paint or picture or something substantial. Those colors in that rug scream coastal vibes and are still stunning. Just sayin!
Thanks so much, Debora! I do have another piece on the other side of the room that I want to paint. Hmm, I had thought a very, very pale aqua but maybe a pale coral might be what I need. Thanks!! xo
Thanks, Marcie! Yes, I did like it too and I had already painted it and everything. Then changed my mind! Imagine that?! haha! I did keep them so you might see them on something in the future! xo
Love the nightstands! Check out White Cottage Company, Mary Yoder on YouTube. She has a video of their bedroom makeover where they made a frame for their adjustable bed. Looks quite nice!
Your night stand are gorgeous.
I had a similar problem with a bed frame I had a few yrs ago. My bedding was mostly white so I painted the bed frame and wheels white. It turned out great.
Cynthia
Thank you, Cynthia! I would consider that but it’s cloth so don’t think that is going to work for me. I think I need to cover it in some way. Wish I could! xo
Ohhhh!!!! That Piper!!! Soooo cute!!!
I think it came out great!!! If that missing piece bothers you why didn’t do a
“fake fix” like how you made the fake knob on the blue dresser/buffet? It is not noticeable and I personally like some flaws in second hand furniture, as long as it is not a disaster. It gives it some character…like it had a former life….which it did. It’s good.
You did a fabulous job on those, Nancy!!!! They’re amazing – and what a great deal for well made tall ones. I absolutely love them in your pretty bedroom, too. They look great against the blue walls!
Thanks so much, Michele!! Such a great deal for tall ones. They are SO hard to find! I’ve been looking for years. SO so pricey! I was so happy when I finally found some that checked all the boxes! xo
Nancy, I love this beautiful nightstand. It looks really cool with the brass handles, and I like the subtle difference after each layer is applied creating a classy finish. Excellent work as always!
I love the finished nightstands – they look wonderful especially with the wood graining you added. I really like the blue wall, especially with the headboard and the nightstands against it. If it were mine, I would keep the oceans photos, however instead of placing the lamps directly in front of them I would move the lamps closer to the bed and offsetting the art far away from the bed so you can see it better. I think if you put them up above the lamps, they will visually compete with the circular wall art above the bed. For the adjustable bed frame – can it be spray painted? White would make it disappear into the sheets set, or you could use a color similar to the wicker headboard, or whatever colors might be in the new comforter. Admire all your work and creativity. Thank you for inspiring all of us!
Thanks, Nancy! That’s a great idea about off setting the lamps. (I just have the artwork sitting on the nightstands for the time being) I don’t really think I want to put them above the lamps for the reason you mentioned so the offset might be a good compromise. I considered doubling them up and putting them over the bed and maybe mirrors behind the lamps. Just don’t know! The bed frame can’t be spray painted as it is fabric unfortunately. I will need to cover it somehow. Thank you for your ideas!! xoxo
I bought an oak cupboard years ago at a consignment store. I’m guessing it had been painted over the years, then someone wanted it to look like oak again. It is painted with a graining tool, but the contrast of paint colors make the cupboard look like a large rectangular tiger. I always refer to it as the tiger cabinet. I hope I can strip it someday and do it up proud.
Your night stands have given me a new appreciation for the painting technique. They look great.
I love your night stands; you did a terrific job as usual. I also love the area rug in your bedroom. It would be perfect in my bedroom. Would you please share where you found it?
Hi Diane! Thank you! Here is the link to the rug (it and the other decor source links are at the bottom of the post if you are looking for any others :) ) xo
Want to be inspired, learn new skills, discover all the tricks to furniture makeovers, creating new out of the old and more? You'll also receive my FREE ebook "Creating Fabulous Finishes" PLUS access to my private Printables Resource Library, too!
Sign up to get the Weekly Newsletter! Our emails include an unsubscribe link and you may opt-out at any time. Your information will *never* be shared or sold to a 3rd party.


")


")

")

These night stands are absolutely wonderful. What a great job on the wood graining.
You are a very talented young lady. Thank you for sharing your talents and how to
‘with the rest of us. I look forward every week to the beautiful turn overs from you and Christy
Thank you, Sue! I’m so happy to hear that! :) xoxo
Awesome makeover as usual! Here’s a thought…instead of changing the blue wall pick up the coral color from the rug and get creative adding it in. Not just in a pillow but with paint or picture or something substantial. Those colors in that rug scream coastal vibes and are still stunning. Just sayin!
Thanks so much, Debora! I do have another piece on the other side of the room that I want to paint. Hmm, I had thought a very, very pale aqua but maybe a pale coral might be what I need. Thanks!! xo
They look great, Nancy! I liked the old hardware, but the new pulls make the nightstands very glam.
Thanks, Marcie! Yes, I did like it too and I had already painted it and everything. Then changed my mind! Imagine that?! haha! I did keep them so you might see them on something in the future! xo
Love the nightstands! Check out White Cottage Company, Mary Yoder on YouTube. She has a video of their bedroom makeover where they made a frame for their adjustable bed. Looks quite nice!
Thanks, Linda! Oh, yes, I definitely will! Thank you so much! xo
Such a transformation! So pretty. Love the hardware you chose for them.
Thank you, Debra! I am loving the brass too! xo
That is the most amazing faux finish I have seen in a long time. Thank you.
Aw, thanks a bunch, Renee!! :) xo
SO much better. Great transformation!
Thanks so much, Lizzy! So happy with them! And thrilled I didn’t have to pay a fortune for a new set too! xo
They look great – you did a fab job! My dad used to do wood graining like that back in the 50s. I guess nothing is really new!
Thanks, Marion! You are so, so right!! xo
Your night stand are gorgeous.
I had a similar problem with a bed frame I had a few yrs ago. My bedding was mostly white so I painted the bed frame and wheels white. It turned out great.
Cynthia
Thank you, Cynthia! I would consider that but it’s cloth so don’t think that is going to work for me. I think I need to cover it in some way. Wish I could! xo
Ohhhh!!!! That Piper!!! Soooo cute!!!
I think it came out great!!! If that missing piece bothers you why didn’t do a
“fake fix” like how you made the fake knob on the blue dresser/buffet? It is not noticeable and I personally like some flaws in second hand furniture, as long as it is not a disaster. It gives it some character…like it had a former life….which it did. It’s good.
Isn’t she?! I just adore her! And thank you, Addie! The missing piece doesn’t bother me a bit!! haha! I love it, character, yes!! xo
You did a fabulous job on those, Nancy!!!! They’re amazing – and what a great deal for well made tall ones. I absolutely love them in your pretty bedroom, too. They look great against the blue walls!
Thanks so much, Michele!! Such a great deal for tall ones. They are SO hard to find! I’ve been looking for years. SO so pricey! I was so happy when I finally found some that checked all the boxes! xo
Nancy, I love this beautiful nightstand. It looks really cool with the brass handles, and I like the subtle difference after each layer is applied creating a classy finish. Excellent work as always!
Thank you, Darlene! You are so sweet! And yes, I agree, all the layers are subtle but add to the final look. :) xo
I love the finished nightstands – they look wonderful especially with the wood graining you added. I really like the blue wall, especially with the headboard and the nightstands against it. If it were mine, I would keep the oceans photos, however instead of placing the lamps directly in front of them I would move the lamps closer to the bed and offsetting the art far away from the bed so you can see it better. I think if you put them up above the lamps, they will visually compete with the circular wall art above the bed. For the adjustable bed frame – can it be spray painted? White would make it disappear into the sheets set, or you could use a color similar to the wicker headboard, or whatever colors might be in the new comforter. Admire all your work and creativity. Thank you for inspiring all of us!
Thanks, Nancy! That’s a great idea about off setting the lamps. (I just have the artwork sitting on the nightstands for the time being) I don’t really think I want to put them above the lamps for the reason you mentioned so the offset might be a good compromise. I considered doubling them up and putting them over the bed and maybe mirrors behind the lamps. Just don’t know! The bed frame can’t be spray painted as it is fabric unfortunately. I will need to cover it somehow. Thank you for your ideas!! xoxo
I LOVE your blue wall! Nightstands too!
What brand name and paint color is your blue wall?
I always enjoy your makeovers!
Thank You!
Thank you, Marcia! I’m so happy to hear that! :) The color is Sherwin Williams Indigo Batik SW7602
Thank You, it’s the perfect color for my kitchen island!
I like the night stands , but just wanted to say who couldn’t love that face . Both dogs are big hams lol
Aw, thanks, Teresa!! I couldn’t agree more! xo
I bought an oak cupboard years ago at a consignment store. I’m guessing it had been painted over the years, then someone wanted it to look like oak again. It is painted with a graining tool, but the contrast of paint colors make the cupboard look like a large rectangular tiger. I always refer to it as the tiger cabinet. I hope I can strip it someday and do it up proud.
Your night stands have given me a new appreciation for the painting technique. They look great.
Oh yes, I totally understand! I have seen some pieces this was done on years ago. I am planning another makeover using it soon. Stay tuned! :)
I love your night stands; you did a terrific job as usual. I also love the area rug in your bedroom. It would be perfect in my bedroom. Would you please share where you found it?
Hi Diane! Thank you! Here is the link to the rug (it and the other decor source links are at the bottom of the post if you are looking for any others :) ) xo