How To Create Texture (vase makeover)
Learn how to create texture and bump your projects up a notch with one simple product! And it does more than that! Stay tuned…
Hello beautiful friends! Happy Thursday!
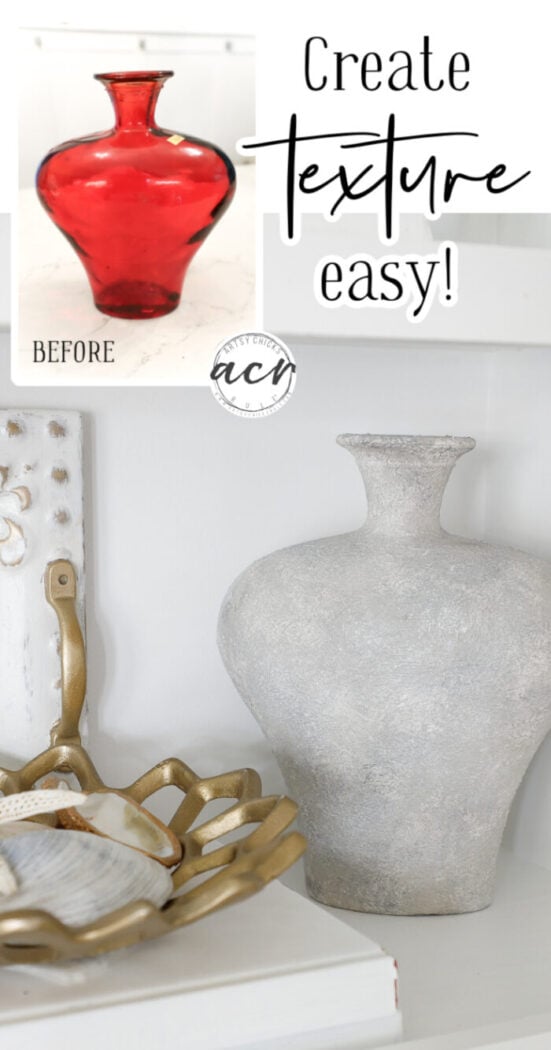
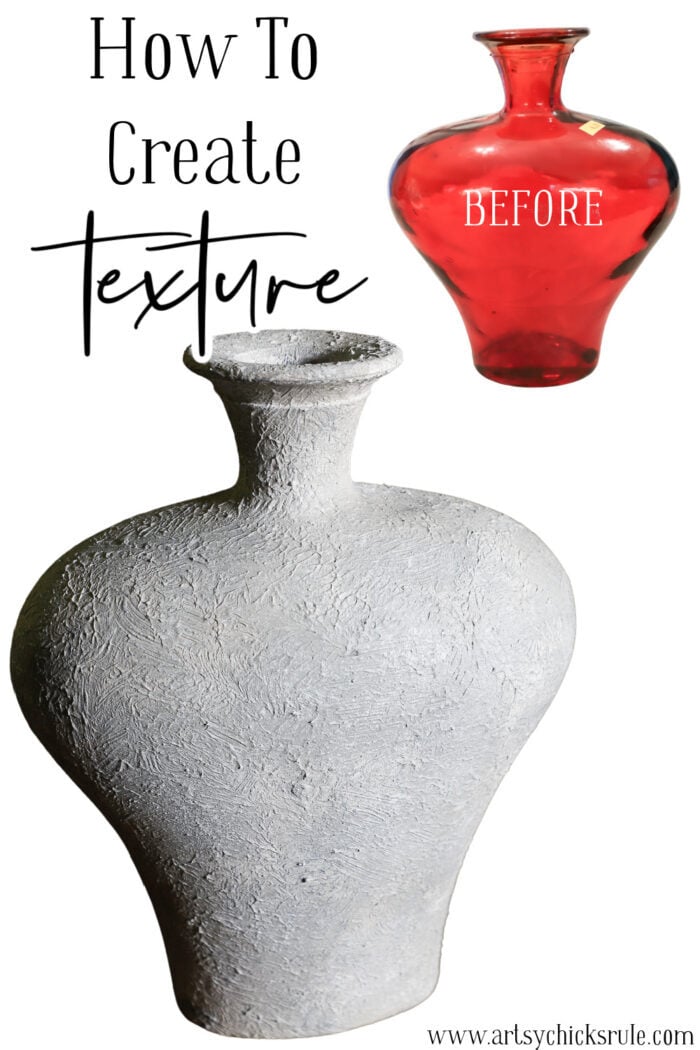
I’m back today with a super fun makeover. I found an old RED vase (circa 70’s-80’s) and thought I’d give it a whole new look.
And I’m going to show you how to create texture just like I did because not only is it no longer red, it has a super fun finish.
Here is how it began…

$4 and a little dated. I have nowhere and I do mean nowhere to display a red vase like this.
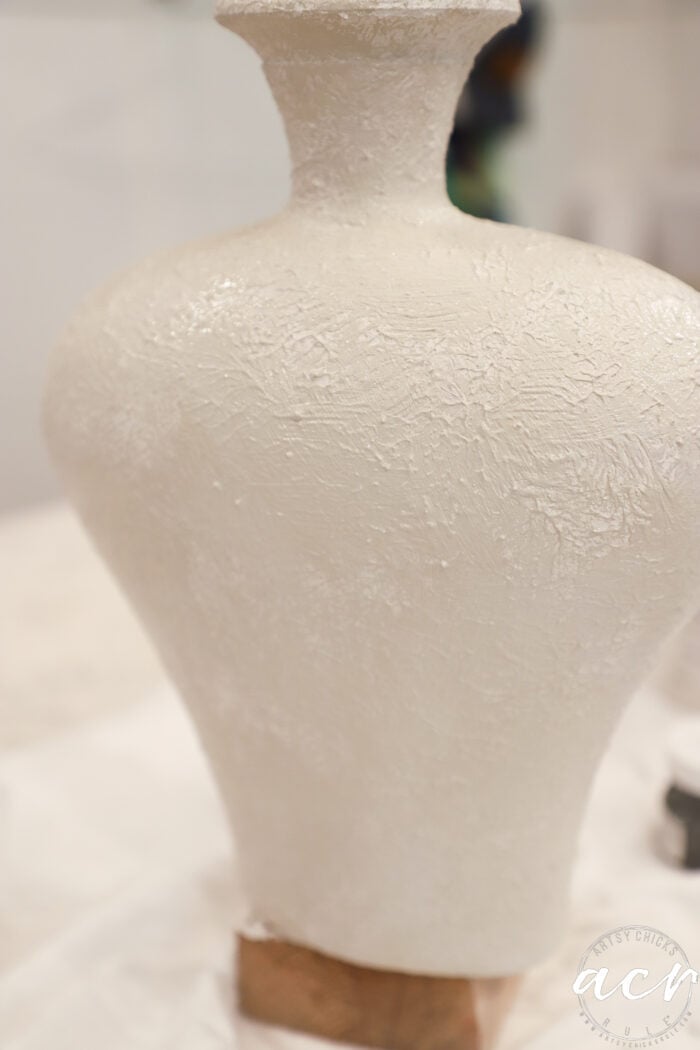
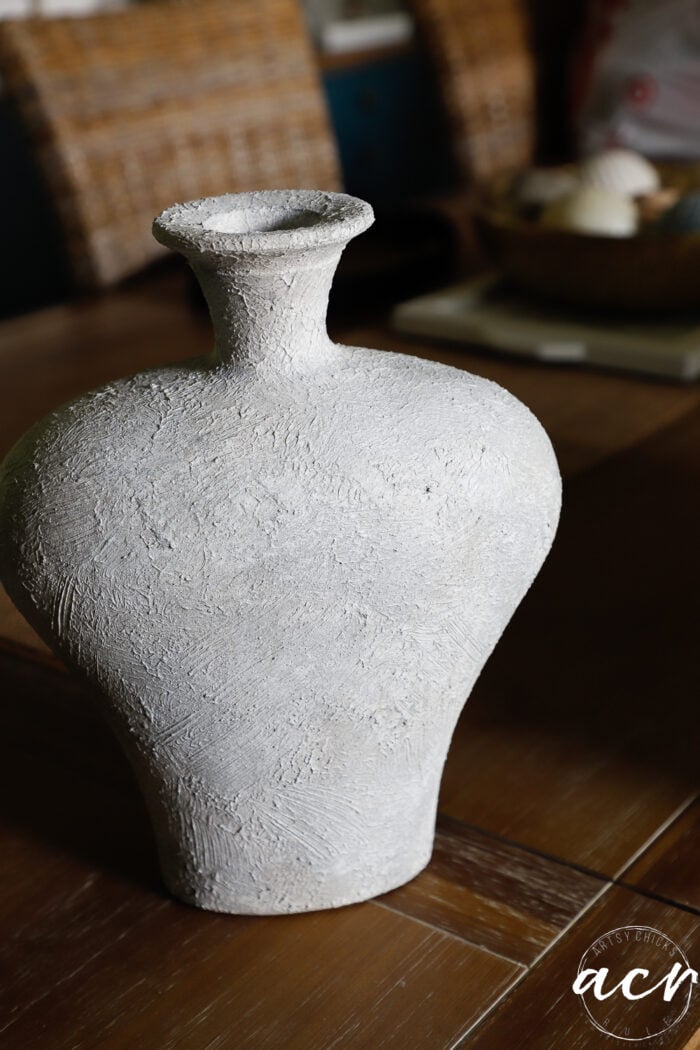
So, I gave it a whole new look by creating a fun, textured finish.
How To Create Texture
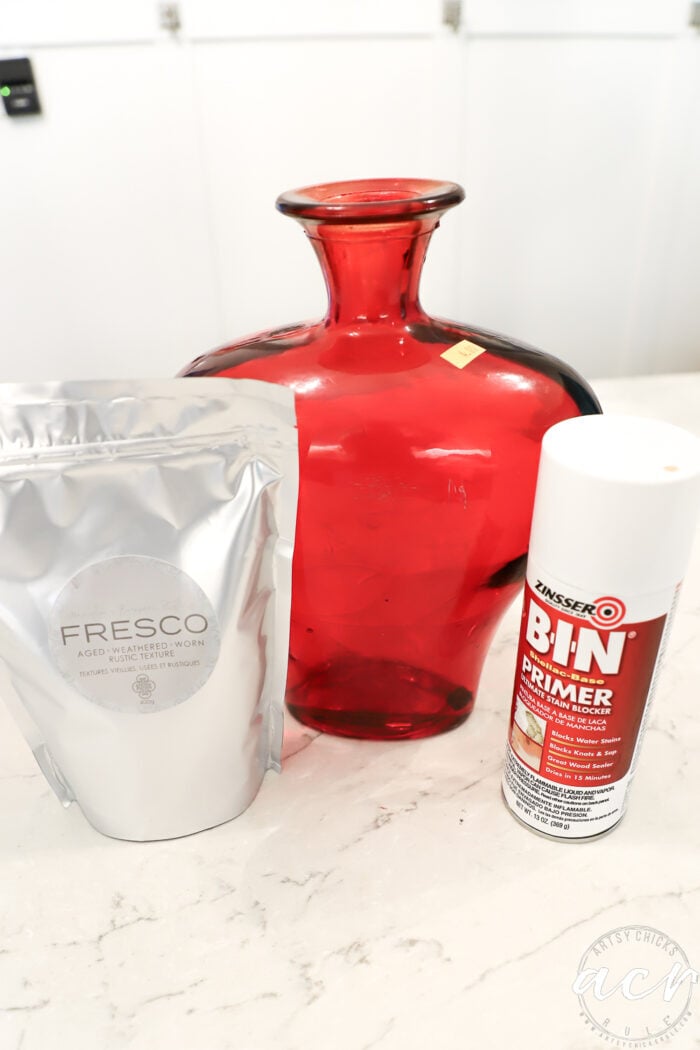
So, I began by cleaning the vase well with TSP Alternative and then spraying it with BIN Primer.
MATERIALS SOURCE LIST
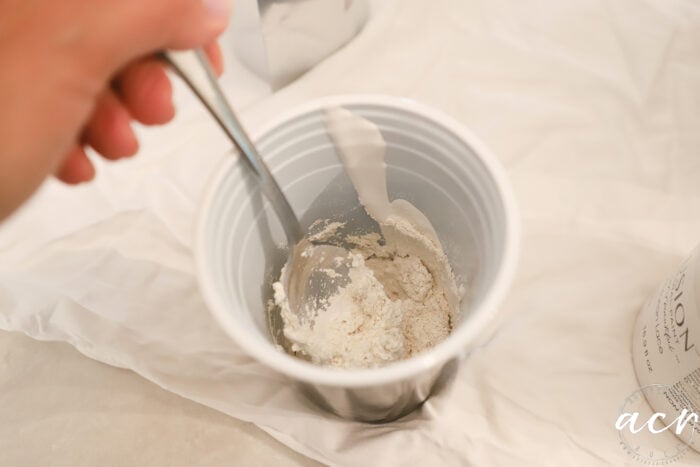
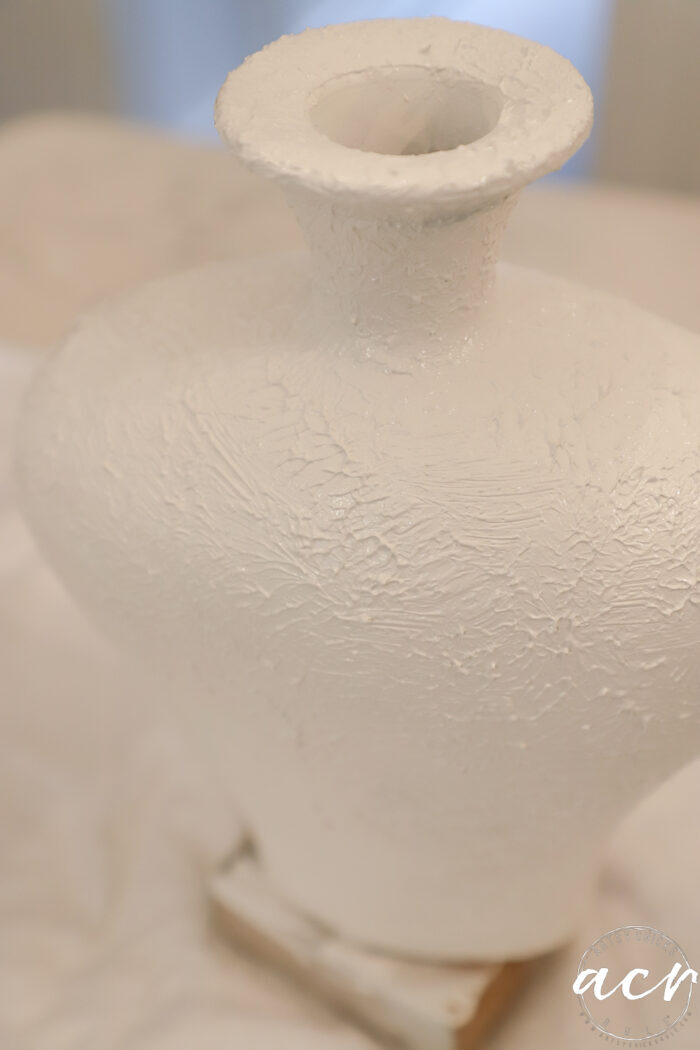
Once that was dry, I mixed up my Fresco with the Victorian Lace paint.
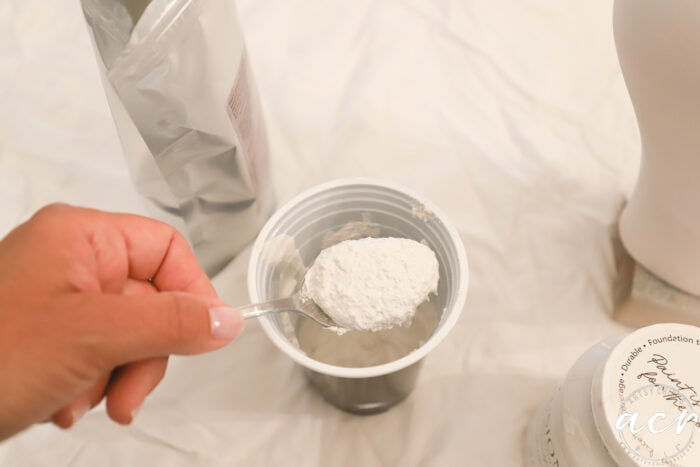
For texture, you would use equal parts.
Side note: You can also use Fresco to create a matte, chalk-style finish too. So, if you are looking for that type of finish, this is your product for that.
Mix well.
Then I used a chip brush to apply it.
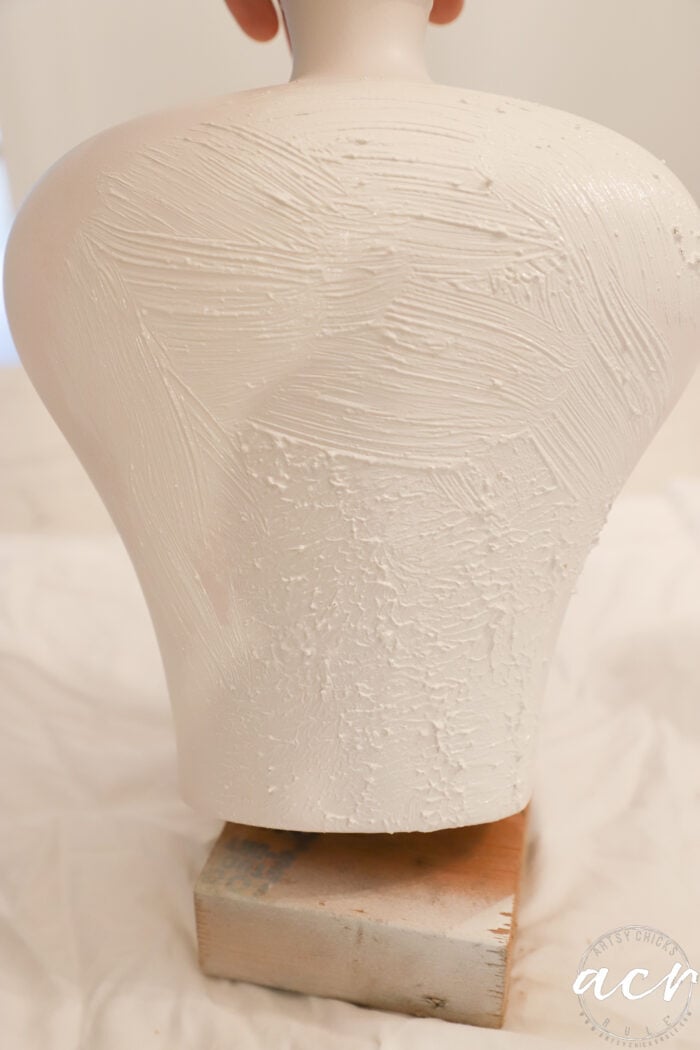
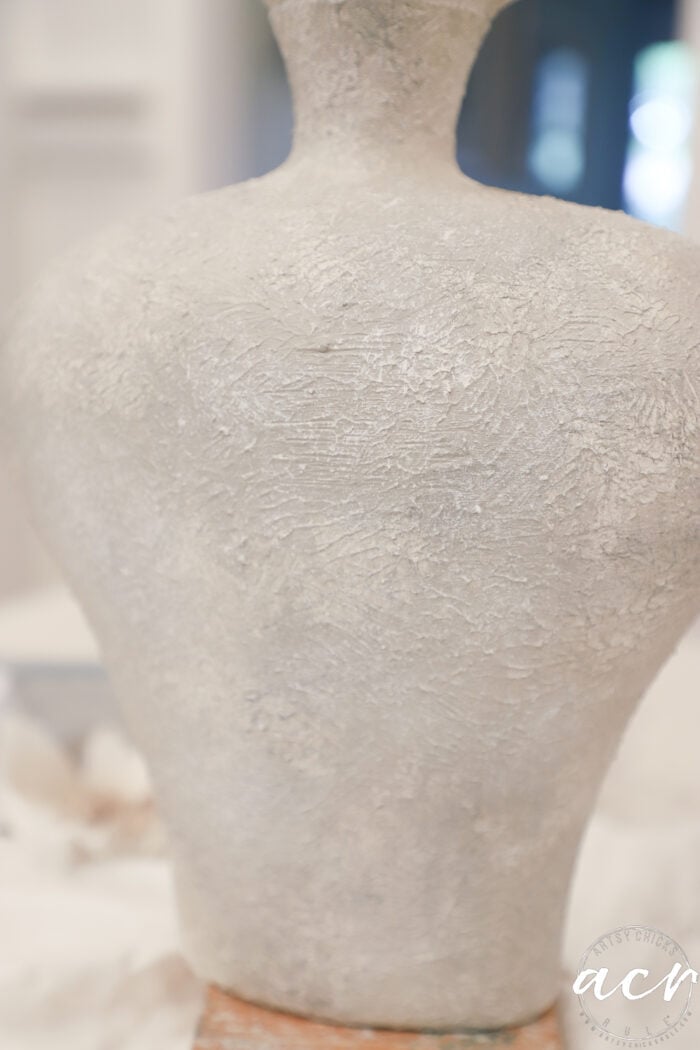
I brushed it on (see the top section), then patted it a bit with the side of the brush and some with the tips. (see the bottom section)
I purposefully left some small brushstrokes here and there, though. (see above)
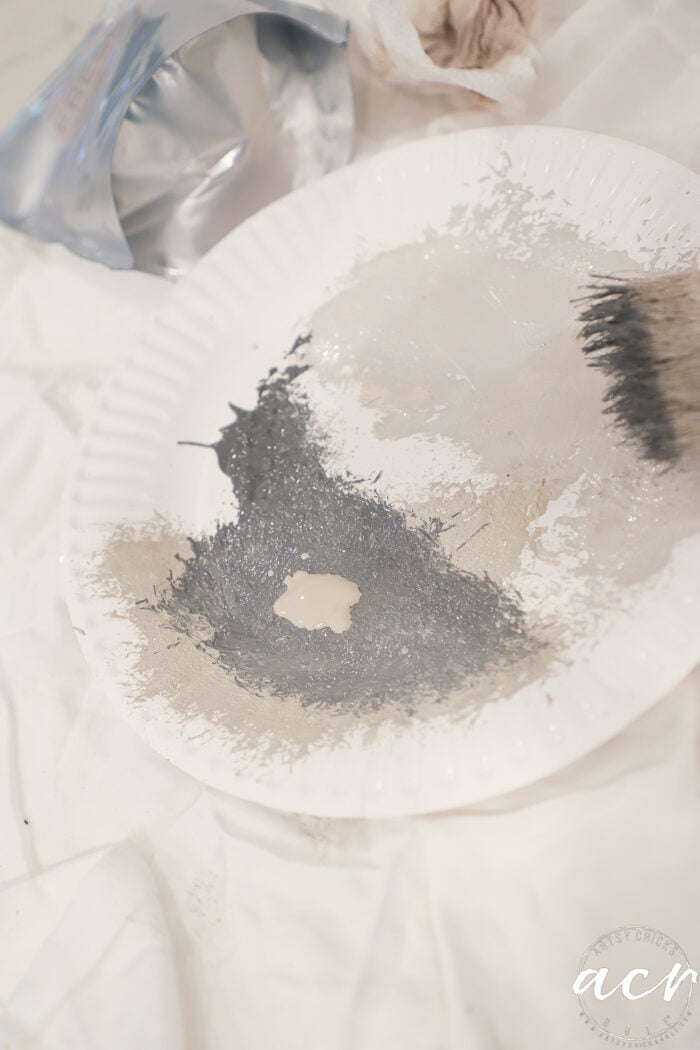
Once it was fully dry, I began to add texture in different ways, through varying colors.
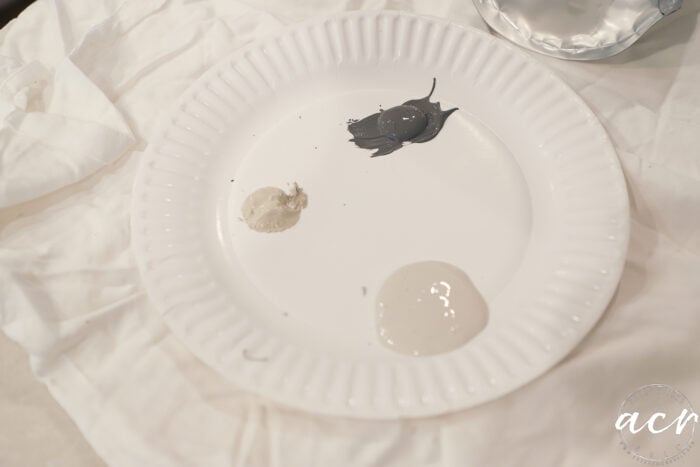
The colors are Cobblestone, Putty, and Soap Stone. Just some I had already opened and figured they would do the trick.
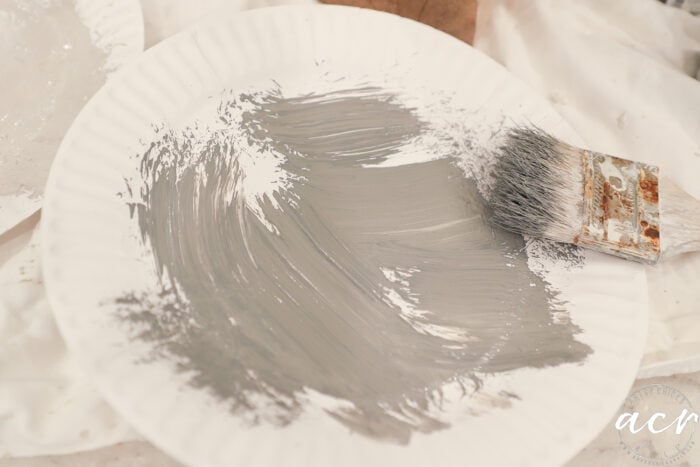
I started with the lighter, beigy Cobblestone color.
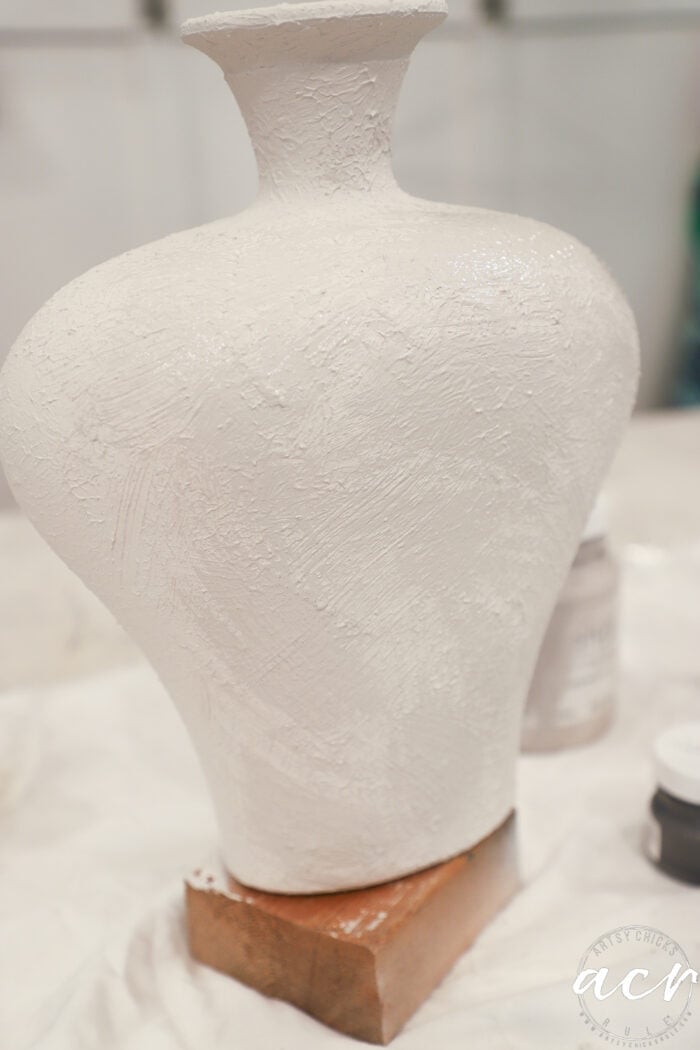
It’s hard to tell, but you can see above where I’ve applied the slightly darker Cobblestone. I purposefully didn’t apply it fully, leaving some of the Victorian Lace (white) shade showing through.
Next, I went over that with the slightly darker Putty.
Oh, hi, Ryder!
My little helper. lol
And finally, I decided to lighten up the Soap Stone with more of the Putty color.
I wiped off most of the color and applied it in more of a “dry brush” style.
Want to know more about “dry brushing”? Watch my video here.
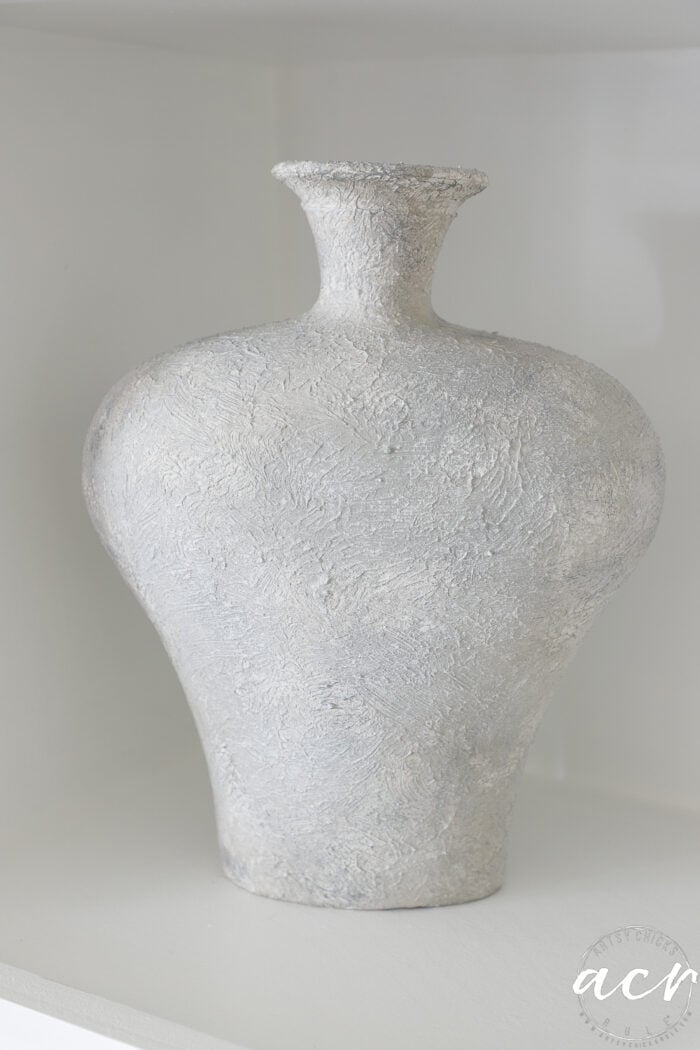
See how it is very subtle that way?
And do you see how not only did the Fresco add texture and dimension, but so did the varying paint colors?

The key here is to try to get all of these subsequent coats in while it’s still wet. You want it to blend a little as you go.
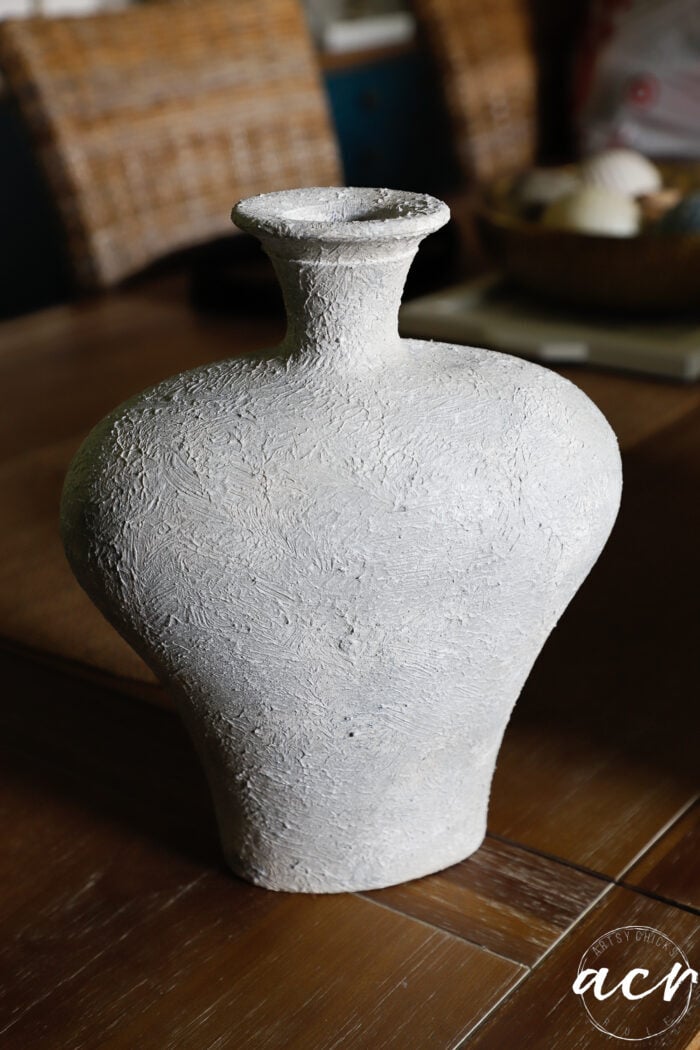
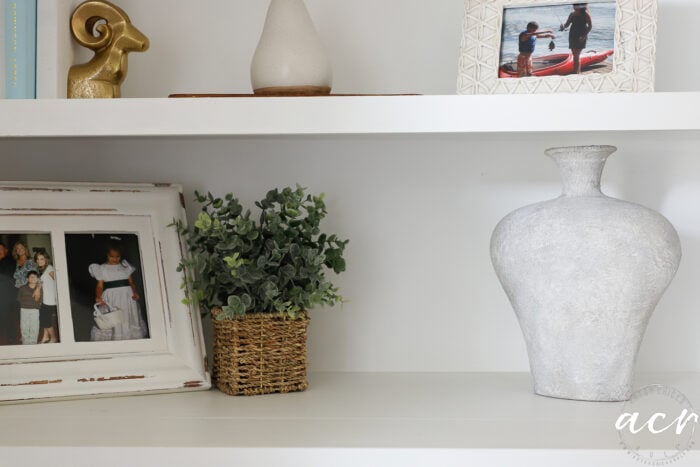
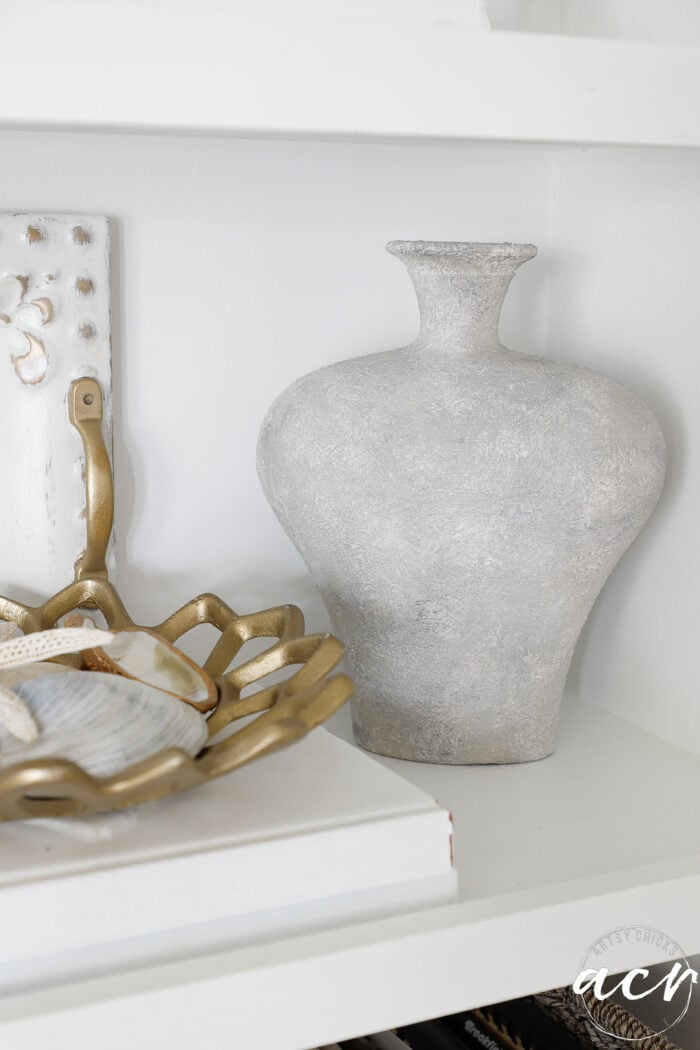
I just love that look. So much more interesting than when it was red!
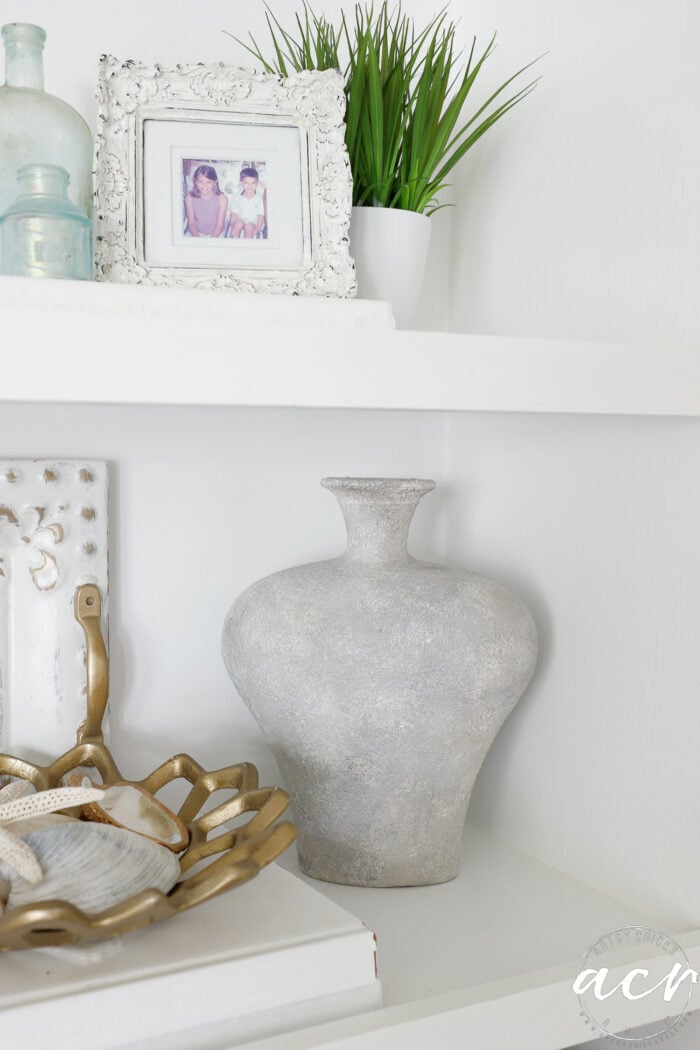
Looks completely different now.
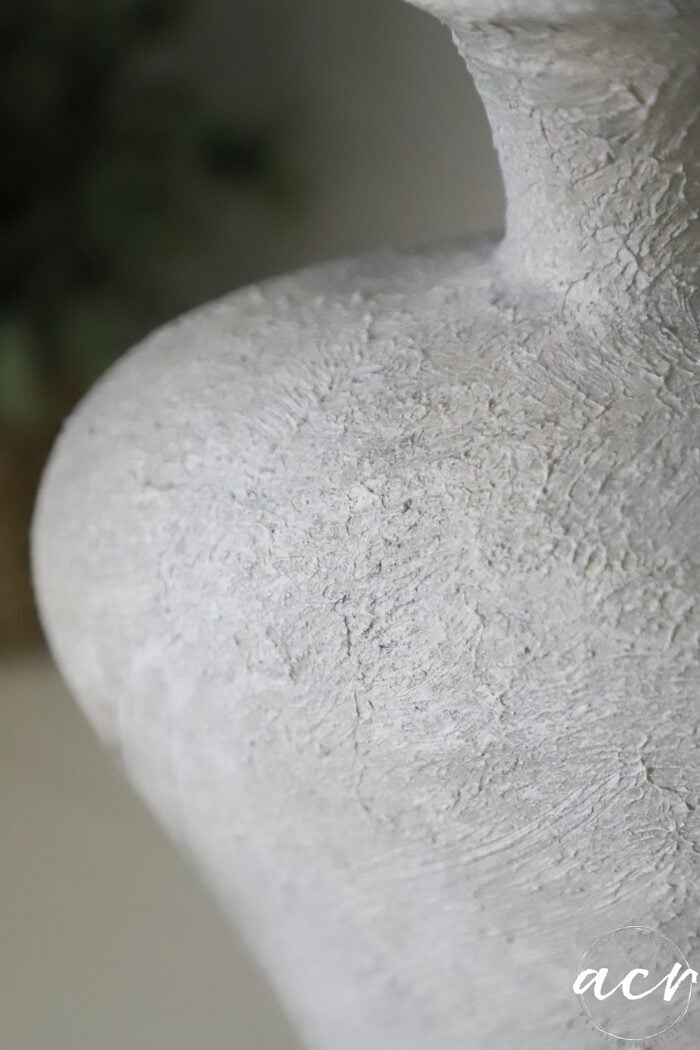
It’s hard to capture the varying shades and dimensions in the photos…
The camera wants to “white” it out.
The other side. Hopefully, you get the idea.
Let’s try an up-close shot…
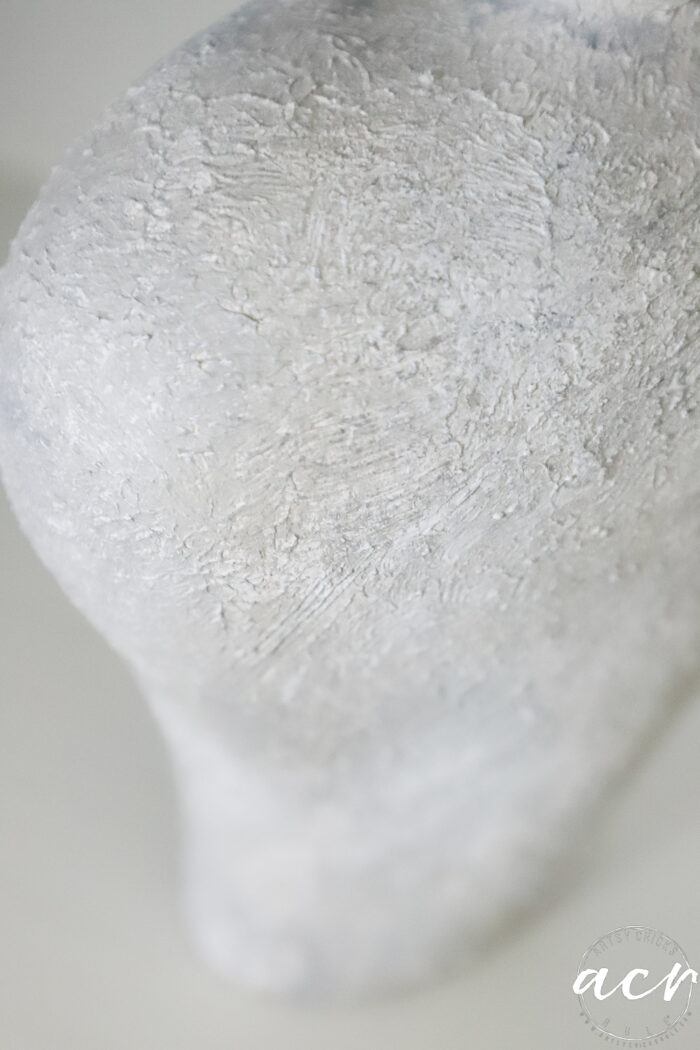
Can you see the different shades a bit better here?
Not bad for $4! Right?!
Here are a few you can buy, but for quite a bit more! ;)
And you can see a lamp I gave some ‘texture’ to recently, here. (but with a different product)
I’ll have to try out the Fresco as a matte finish. Can’t wait to see how that looks.
PIN it to save it!
I’ll see you back next time with this!
UPDATE!! See it now here!
xo

")


I always enjoy your artistic makeovers and appreciate your teaching others. I’m not familiar with Fresco but now will try it. Is this glass vase makeover something you would sell in your booth? If so, how would you describe it on your tag; “pottery look” vase? Thanks 😊
I’m so glad, Marjie! I forgot to put the links in the post to the Fresco (and the other items) but I’ve edited and added them. Sorry! And yes, you sure could sell this. I would describe it as a “stone” look or “pottery” look (and feel). :) xo
It’s hard to believe there’s a glass vase under there, Nancy. What a great idea!
I know, right?! You would never know! :)
Hi Nancy! It turned out so pretty. I love making faux concrete vases or pottery barn dupes. You gave me some new tips though. Thank you!
PS. Ryder is the prettiest white color. I bet he is so soft.
Thank you, Cheryl! OH yes, so fun isn’t it?! It really changes them up completely. xo
I love the makeover of the red vase! You are always so creative with your ideas and what you have done with all your previous makeovers. I have several lamps from my late mother’s house that need some work to renew them. The same with the vases. You have given me several ideas over the last few years as to what can be possible. Thanks, too, for your detailed descriptions. That really helps. Thanks for sharing. Enjoy your weekend. BTW – I always love seeing Ryder!! That is always a sweet surprise!!
Yes! This would be perfect for them. Give them a whole new look, Sue. And yes, I love sharing him with all of you! :) xoxo
Love it! Awesome job … You so smart! :)
Aw, thanks!! :)
WOW!! Before – maybe for Christmas or Valentine’s flowers as a gift…….after- BRAVO!
I’d have that anywhere in my home. Well done and tysm for sharing how you achieved this!
Yep! I was thinking it was maybe for Valentine’s since it was sort of heart shaped, maybe? Thanks so much Michele! :) xo
Oh yeah, big difference!
Thanks, Dalila! I love big transformations like this!! lol My favorite! xo
I love the new look of the vase!
Thanks, Tara! xo
It looks amazing! Love the color and texture!!
Thank you, Susan!! You’d never even know what it was before either! xo
Ahhh…this came out AWESOME!!!! I think I will be giving the side eye to different bottle at the Goodwill from now on!!!! Great job….LOVE IT!!!! Have a lovely weekend!!! xx
Yes, exactly!! Thanks so much, my friend! xoxo
That looks great! I’m going to try it for sure. Pinned!
Thanks so much, Lizzy!! I’m trying to figure out what I’ll do next!! lol xo
Do you know if that vase was a Blenko?
No, I don’t think it was.
Love the look!
Thanks!! It’s fun (and so easy) too! :)