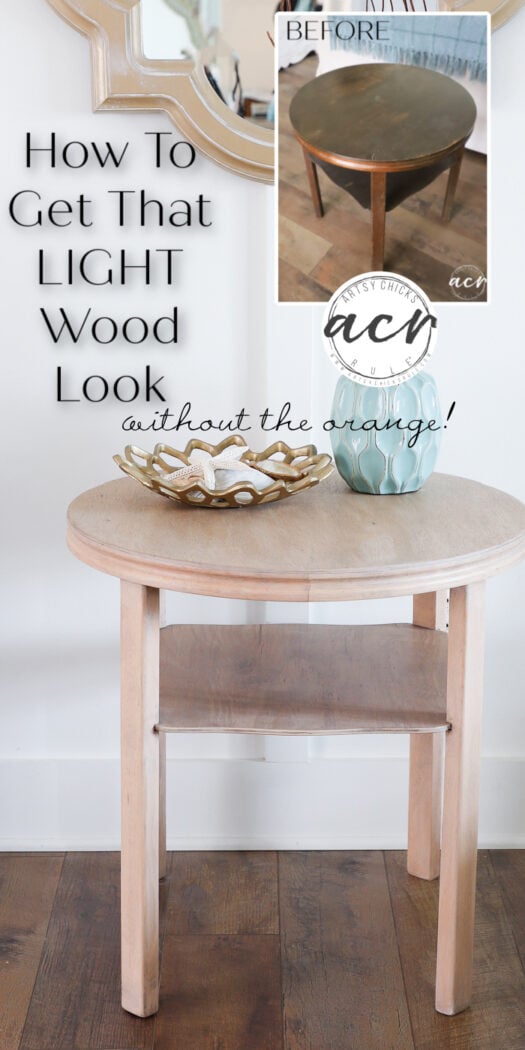
Easy DIY Light Wood Finish
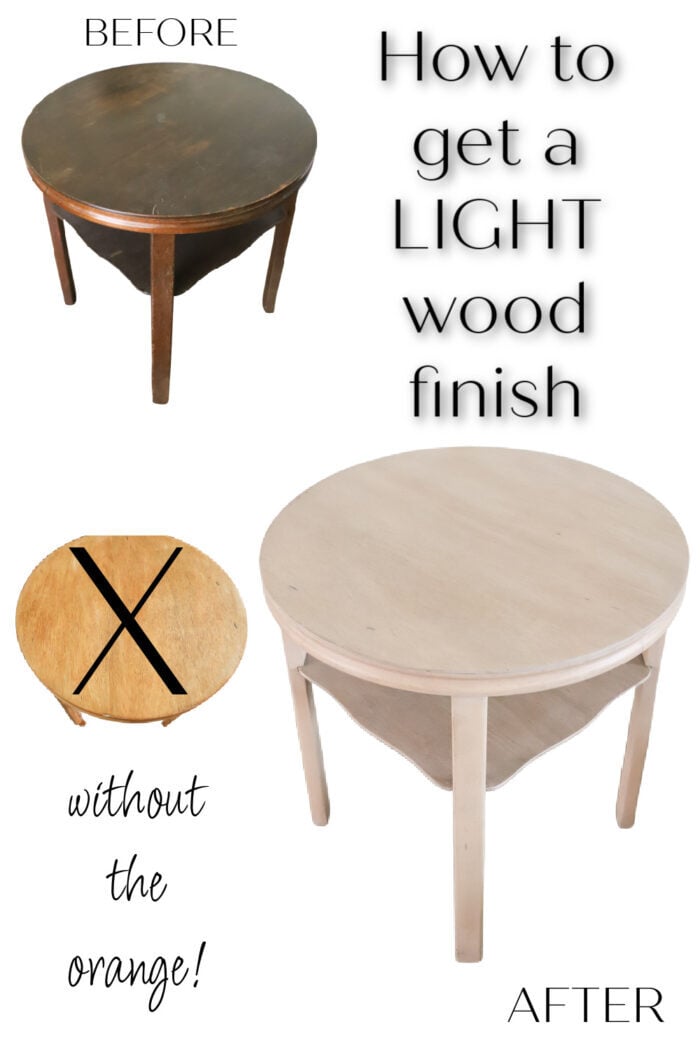
Simple (and quick) way to give your piece a pale, DIY light wood finish! Natural looking finish without the orange hue!
Hello friends! I hope you had an amazing weekend! We had planned to go to our beach condo for the weekend but decided to stay home and work! Ha!! Fun fun. No, but needed! We cleaned out and purged a bunch and it feels like a huge weight lifted off my shoulders. Don’t you love that feeling??
Today is Trash to Treasure Transformation Tuesday and I’m sharing a brand-new makeover!
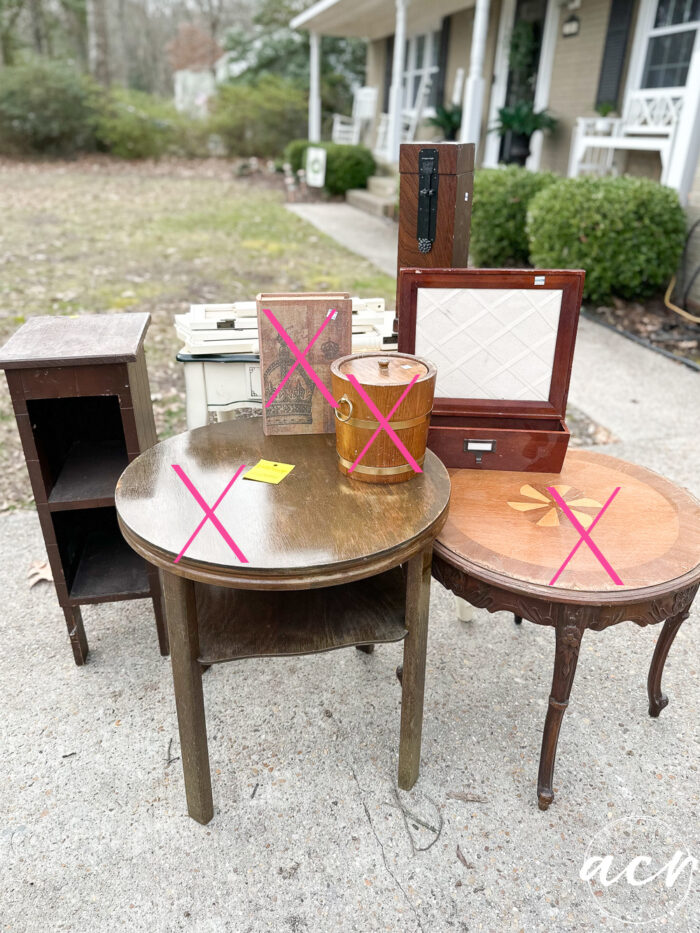
This MCM piece that is part of my latest haul here.
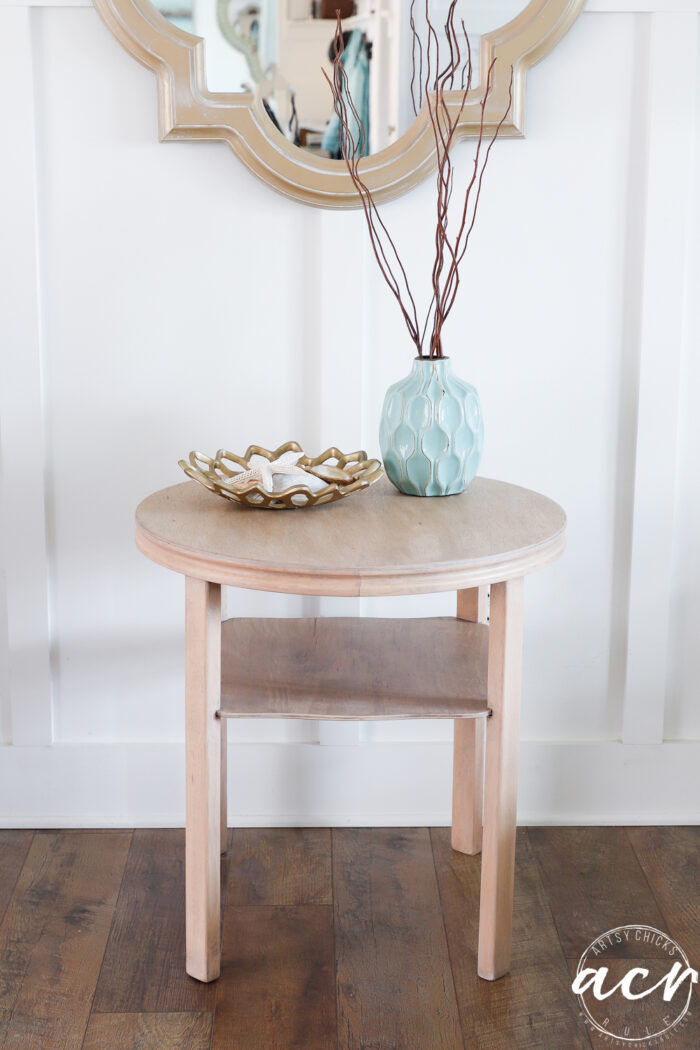
The round wood table.
If you missed the other makeovers I’ve completed, you can see them here:
- Hidden Book Storage
- Easy Way To Glaze Painted Furniture (antique round table)
- Ice Ice Baby Ice Bucket Makeover
Easy DIY Light Wood Finish
I’m going to show you how to create a nice, light finish (without the orange hue of many wood finishes). It’s the same finish I used on the drawer fronts of this dresser I recently made over.
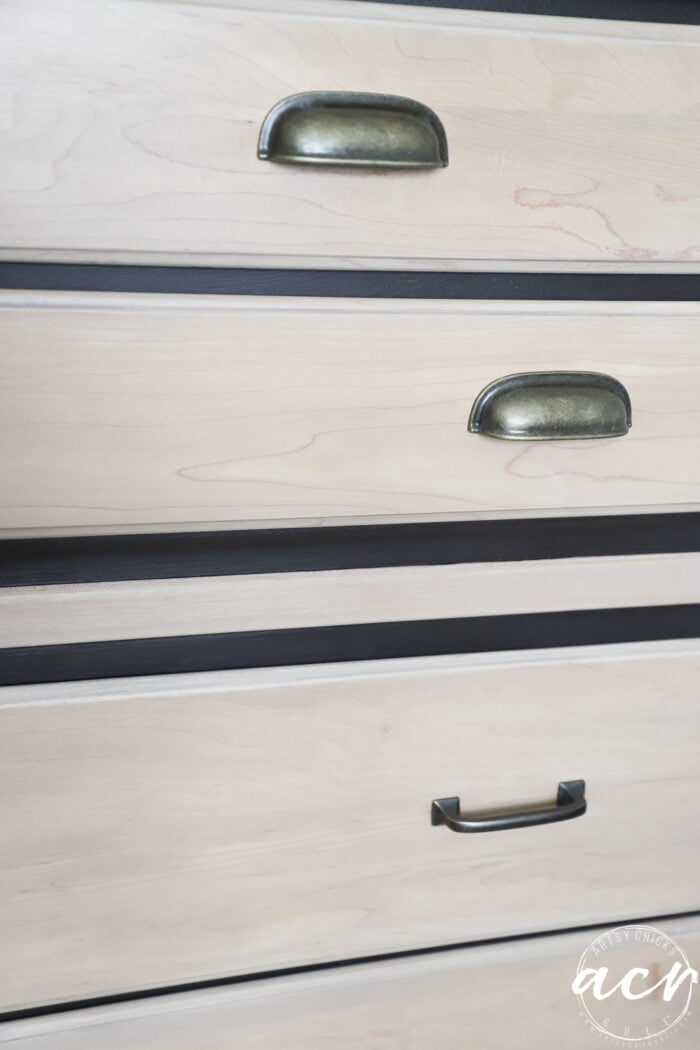
Keep in mind that different wood varieties will each finish a little differently. You can find all the details on the dresser makeover, here.
I’ve done quite a few light, pale, pickled and bleach finishes in the last few years (with varying techniques for each).
Here are some of them:
- How To Make Orange Wood Look Bleached (without bleach)
- How To Get The Bleached Wood Look (without bleach)
- Bleaching Wood For A New Look
- How To Get A Pickled Wood Finish
Today I’m getting a similar look with a very different application.
MATERIALS SOURCE LIST
I recently restocked the Driftwood Stain & Finishing Oil but it is my top seller. I sold the last can today. I have more on order and it should be here soon. Sign up to get an email when it comes in here.
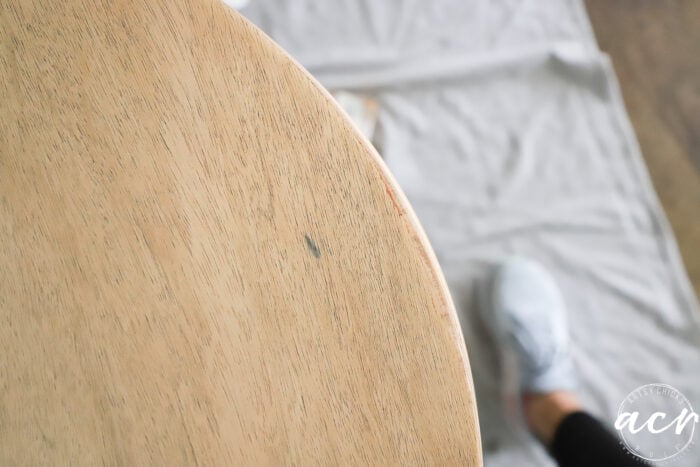
BEFORE
Here is how my little table looked before I began.
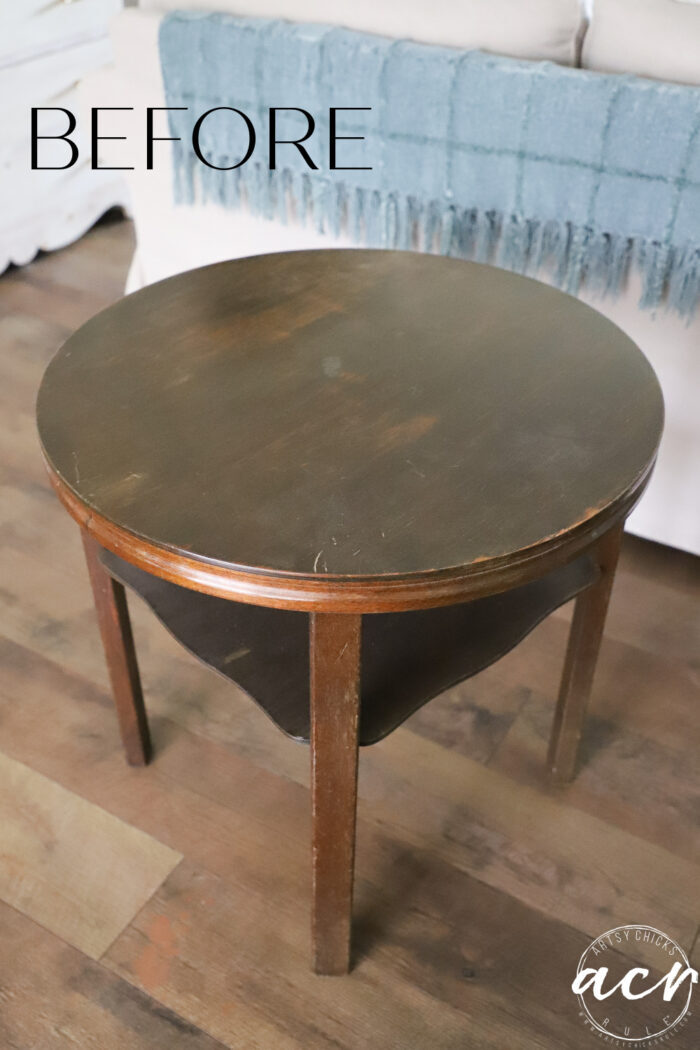
Dark stained, kind of beat up … all over.
And found this on the underside of the table.
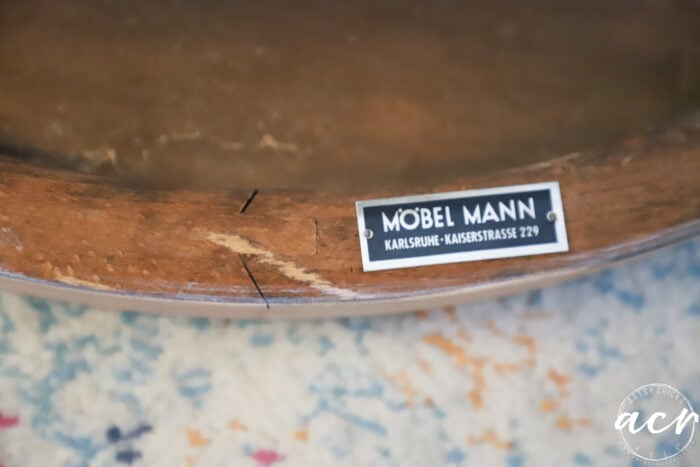
So I had never heard of this furniture brand before. I looked it up on the web and didn’t find a whole lot.
From what I can tell, it is a German manufacturer dated around the 50’s-60’s.
Upon further investigation, I did find this website that tells pretty much their entire history. (and how they eventually sold to Wal-Mart! Go take a read here)
Mainly because of the mid-century modern clean lines I knew I didn’t want to paint it and put floral transfers and such on it.
I decided fairly quickly that I would sand it down and “bleach” it out.
And after having done my son’s dresser I linked above, the drawers in the pale wood shade, I decided this was the perfect piece to try that out on again. This time not just drawer fronts but an entire furniture piece.
SAND
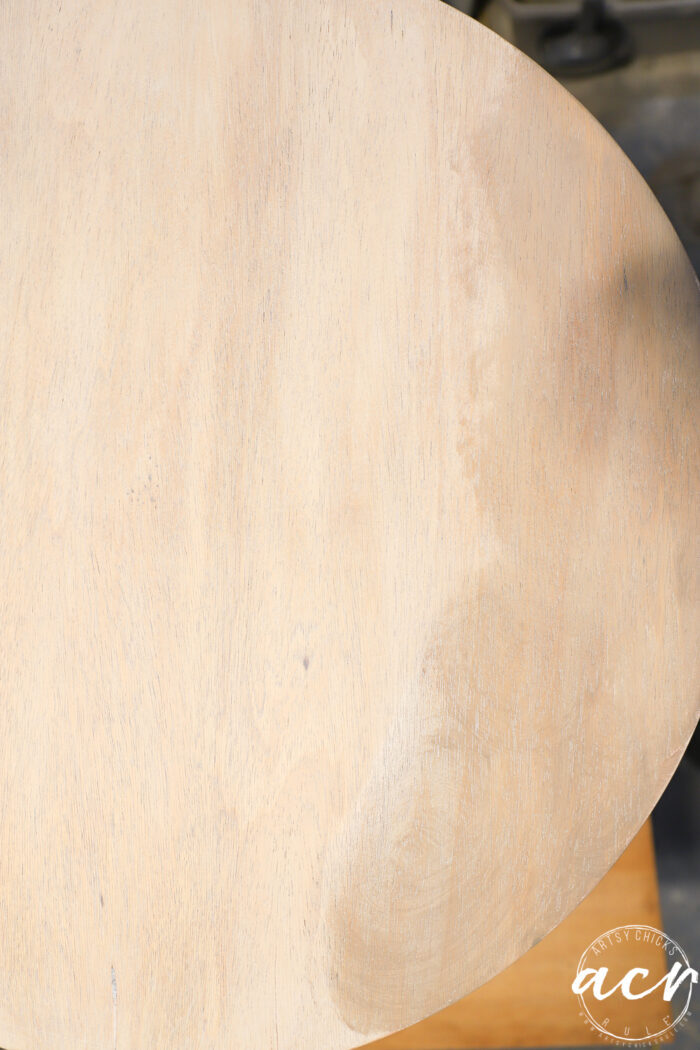
I sanded the whole thing. I considered just doing the top but really felt this entire piece needed to be sanded and done the same.
Look at that beautiful wood underneath! I HATE (really hate lol) sanding but I LOVE seeing that pretty wood revealed every single time!
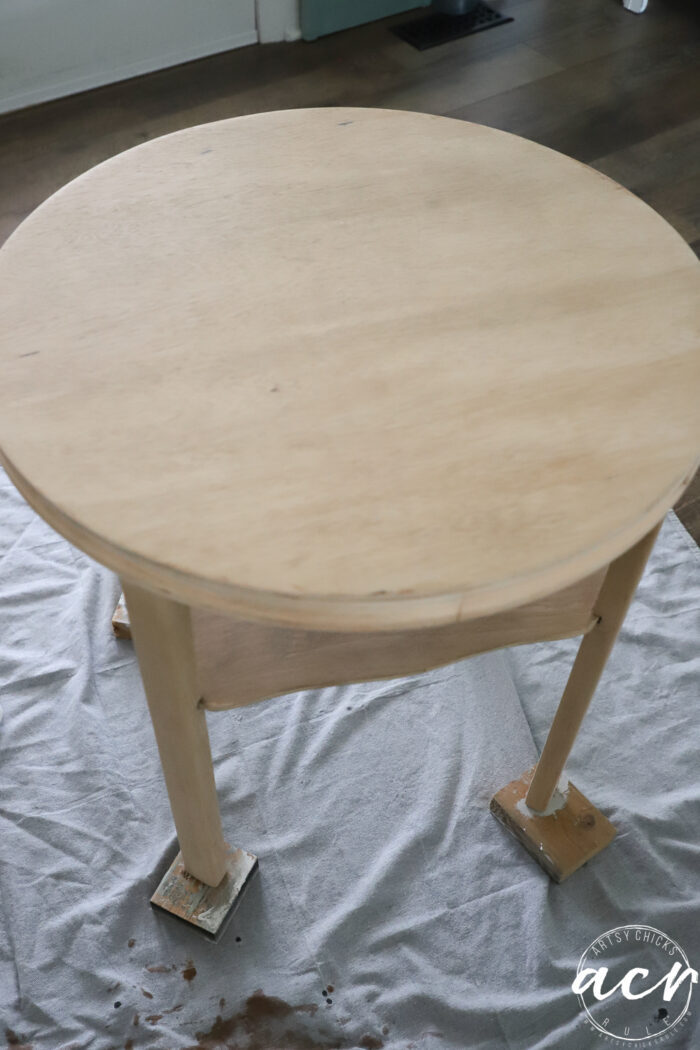
Once it was all sanded, I wiped it down very well to remove all dust.
There’s that orange. It’s almost always present in some form or another.
Oh! Two things I want to mention. The top is veneer and had chips. And then chipped more when I sanded in a few places. BOO!

See it?? I simply sanded it smooth and went along my way.
I decided we would call it character on this old piece!
I hoped it would not be that visible when I was done. And I hoped it just went along with the less fussy, unpolished look of the piece.
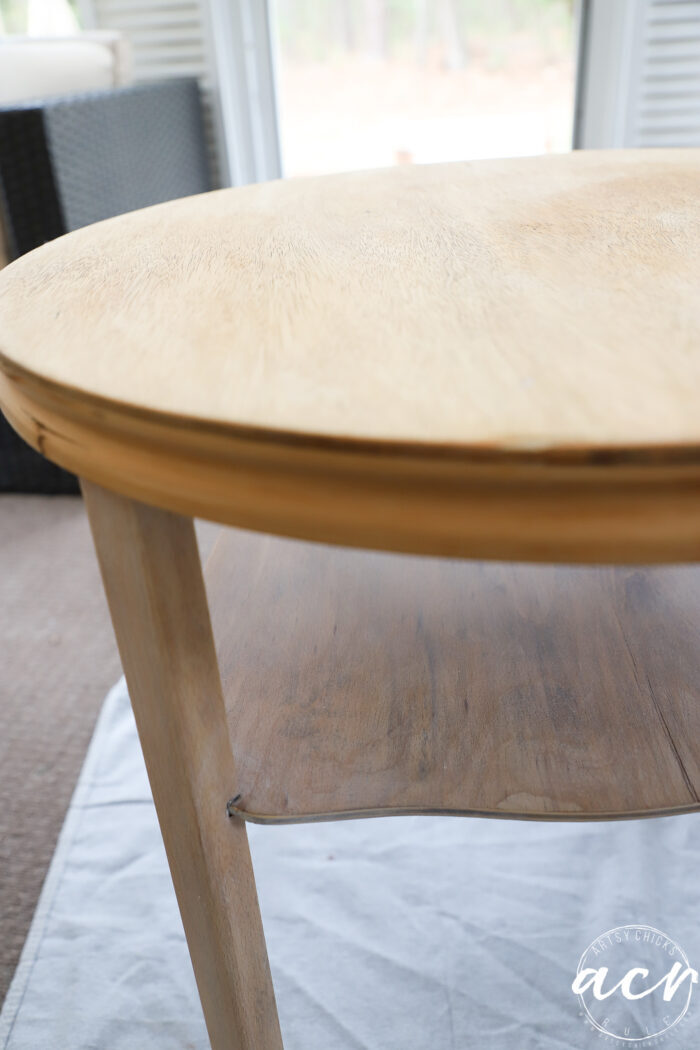
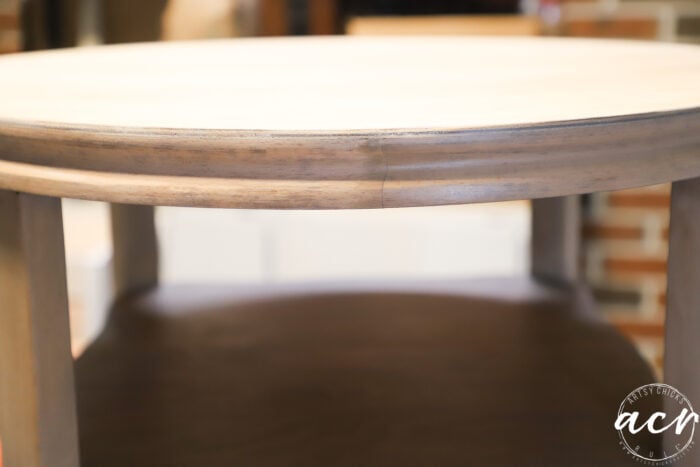
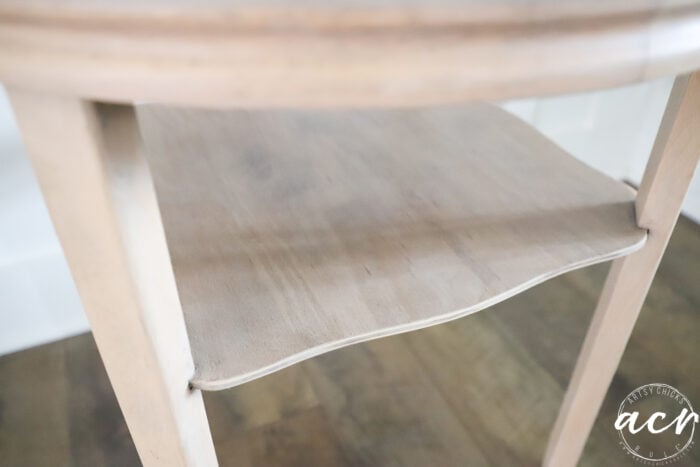
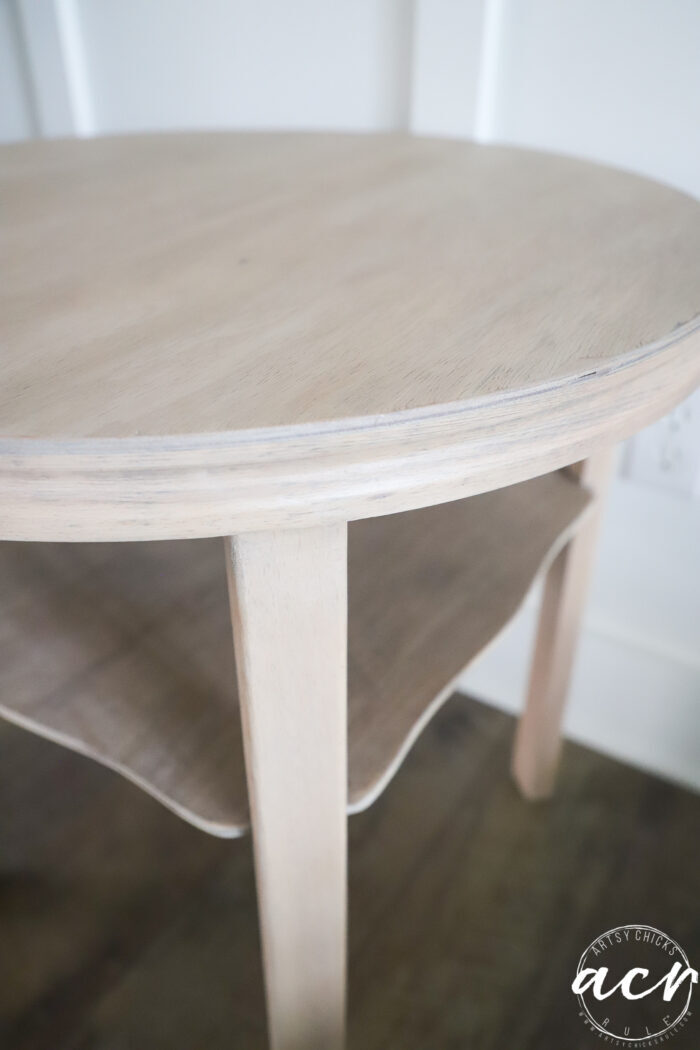
And the second thing, the shelf under the top is a different color of wood. Not sure why they did that on a stained piece except they stained it dark so maybe it really didn’t matter. But with a light finish, it will be noticeable. I almost switched gears again but again decided to leave it like it was meant to be that way. And I’m totally okay with how it turned out!
STAIN
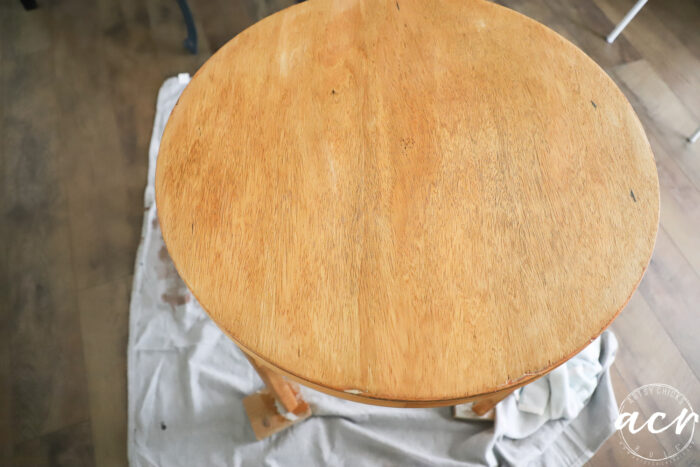
As I usually do with raw wood, I used a pre-stain wood conditioner first.
Then, just as I did with the dresser drawer fronts, I used my White Stain & Finishing Oil first.
Applying well into the wood and then wiping back within 20 -30 seconds or so.
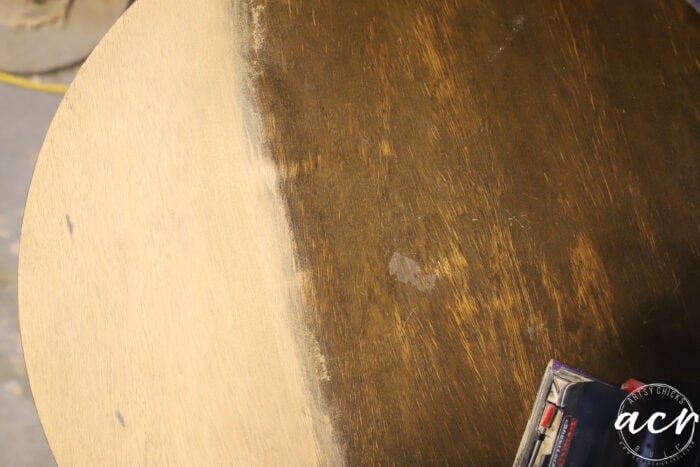
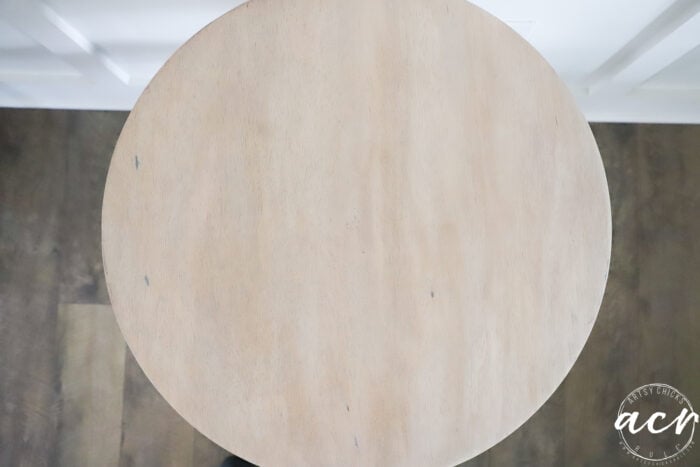
You can see in the photo above how the white neutralizes some of that orange nicely. I’ve done the second shelf and legs here.
Here is how I apply it, just rubbing it in well like below.

Then wiping most away. (although, the white stain alone is very pretty!)
Here you can see where I’ve applied the white stain on the left and the orangey finish to the right.
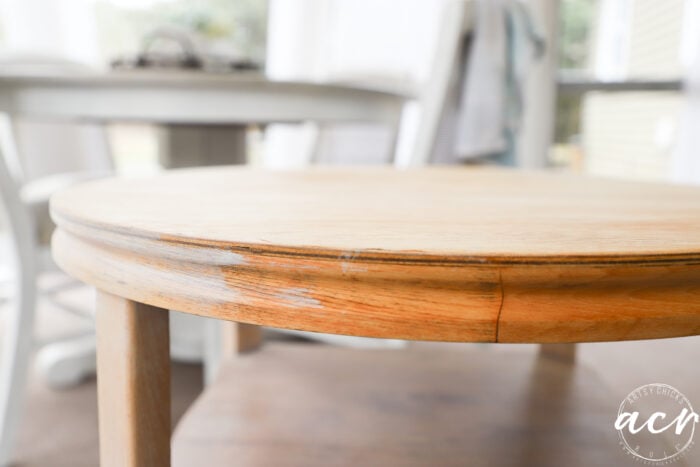
Isn’t it lovely how well it takes that orange out???
Once done with that, I leave it to sit for a day or two. Then I come back with PART 2.
PART 2 is Driftwood Stain & Finishing Oil.
I simply apply it all over in the same way, then wipe most away. You can see below where I’ve applied on the right over the white stained finish. (haven’t wiped back yet though)
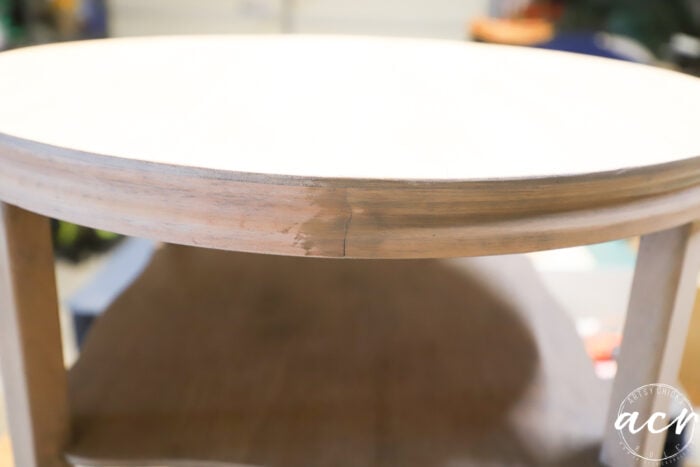
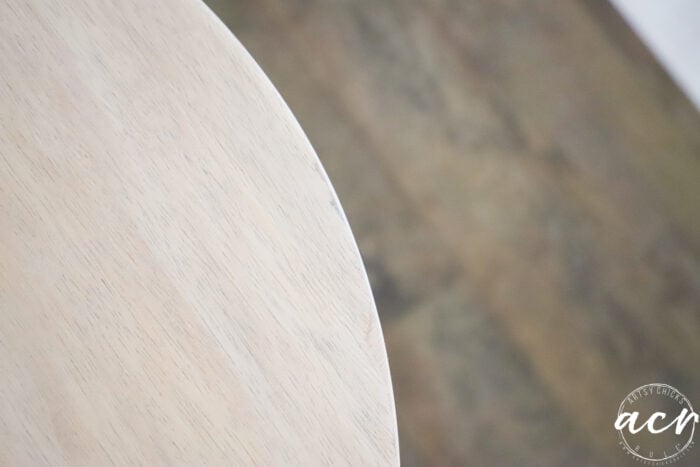
Once wiped back, it leaves the perfect hue. (and tones any of the “white” that might be too white as we are not going for a white-washed finish here)
See the difference?
Rub on…
I think I forgot to take a photo to show how it looks after I’ve wiped that back. But you get the idea of how it tones the color a bit.
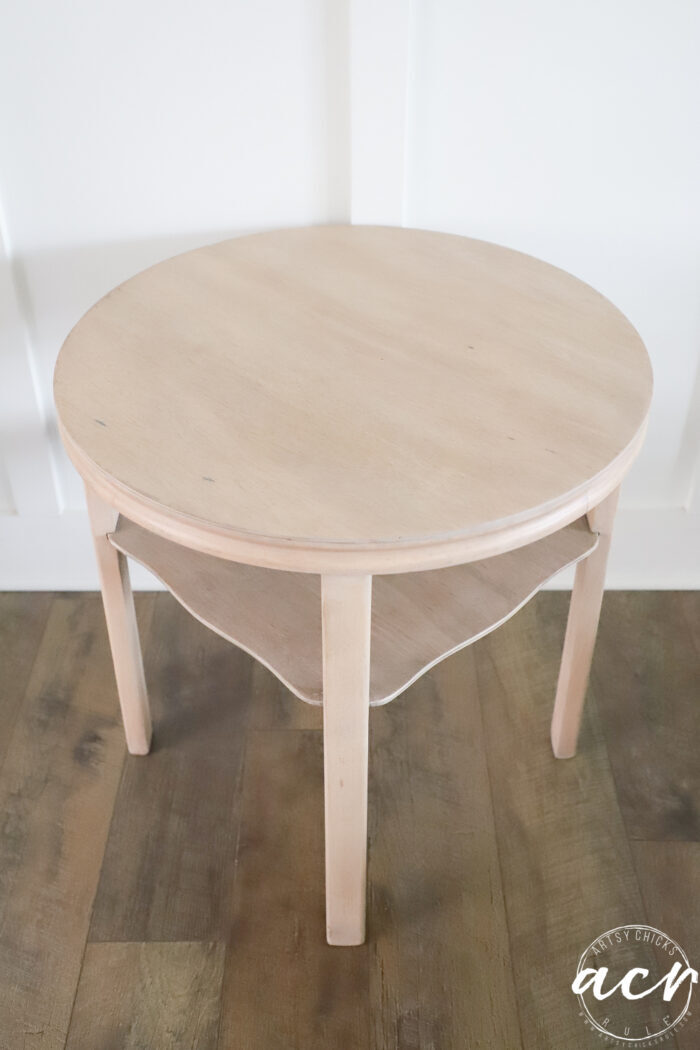
And DONE!
Since the Stain & Finishing oil has finish included, there is no need to do anything else to seal it.
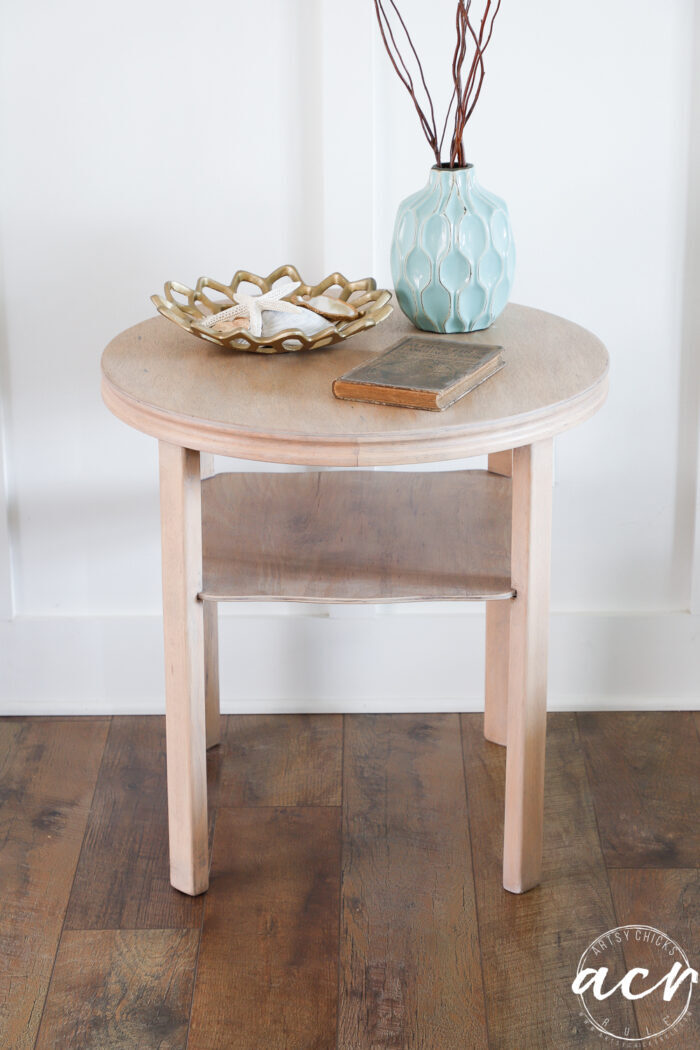
REVEAL
See that second shelf a tad bit darker??
Isn’t that a gorgeous finish??
Now, I did title this as “Easy” because this finish is probably the easiest finishes I’ve done.
BUT we all know that sanding is not necessarily hard but it’s certainly no fun and does add time to the project.
However, once the sanding is done, you will have little work to do to complete this project.
And look up close that those chipped areas…
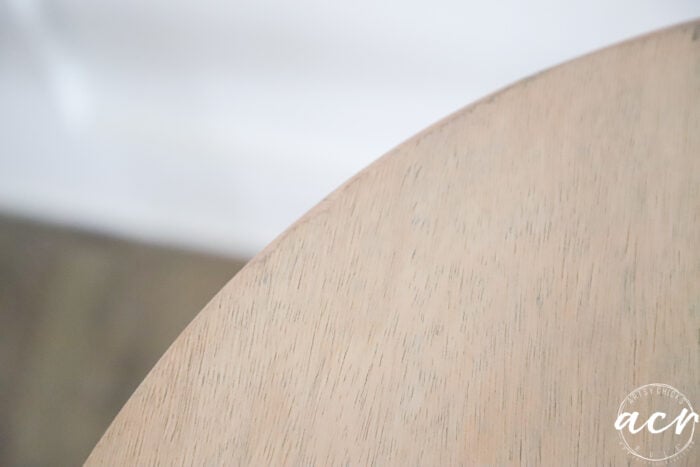
Exactly as I’d hoped!! Yippee!!
They blend because of the stains I used. And add a little character too, right? Yep.
STYLED
So, this table is two-toned but not on purpose!
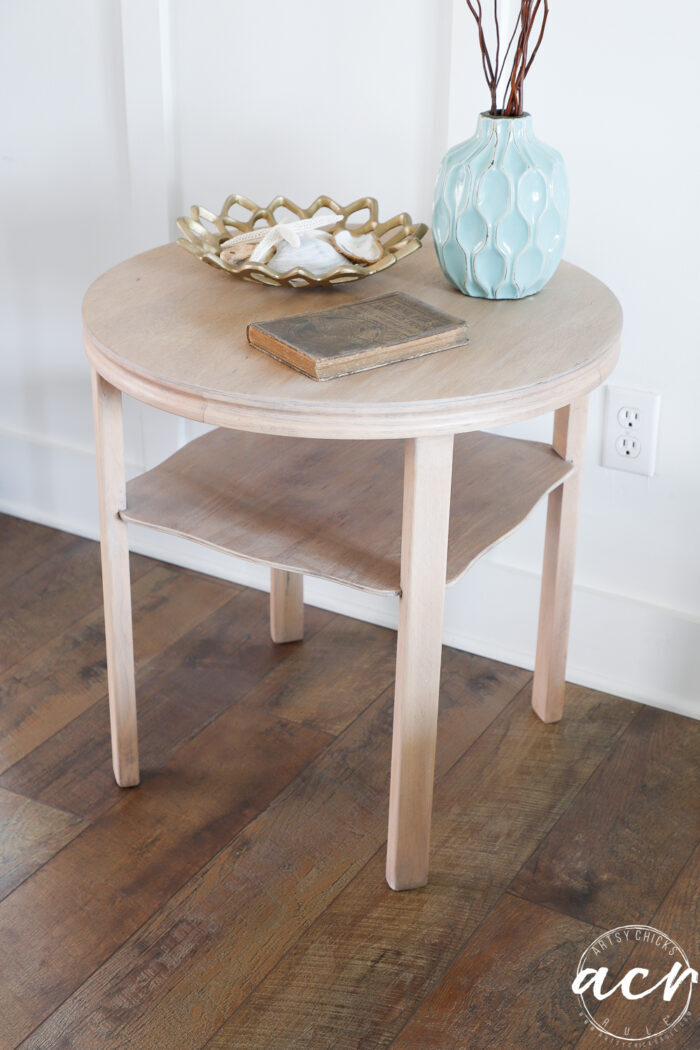
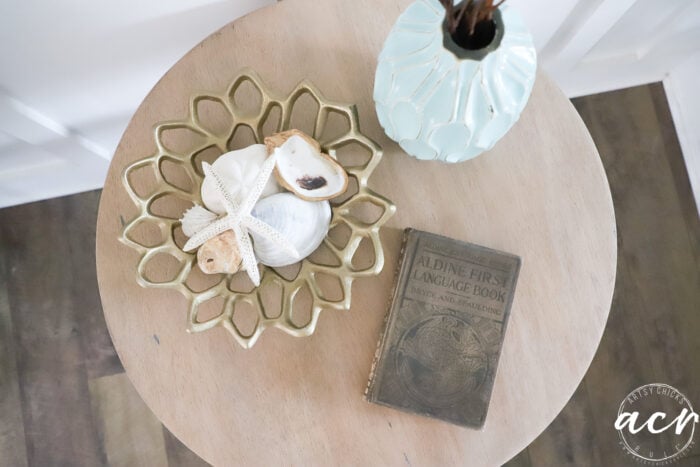
(I love old books)
Anyway, I see this little table used in a coastal-styled home. But I imagine it could go with quite a bit too.
I hope you enjoyed this tutorial today! And I really hope you try it! Let me know if you do.
PIN it to save it!
Don’t go yet! Hop on over and visit my friends’ makeovers too…
(Jen recently moved into a new home and is taking a break right now so I am sharing an oldie from her archives below)
I’ll see you later this week with another fun furniture makeover!
UPDATE!! See it here now!!
xoxo


")


")


I literally took a breath of fresh air when seeing the results. Awesome tutorial and finish, Nancy! 🩷
I wish you would show more of this sort of make-over and fewer floral decals.
Hey Leslie! Yes, I got ya! I do want to do more pieces like this too and most definitely will. But I will still share the floral/words/transfers ones to show people how to use them. :) I love those too but I understand that not everyone likes those in their homes. xo
Love that, thanks so much, Larissa! xo
You don’t strip it at all?
Hey Jen! I do strip sometimes when there is a thick finish or layer that needs removing. If not, I will just sand it off instead.
The little German table turned out really nice! You gave it a beachy feel.
Thanks, Lorrie!! Yay, that is the exact look I was going for! :) xoxo
Love how your side table came out. Beautiful piece and worth all your time and effort.
Thank you, Jayne! xo
Oh I just love the simplicity of that cute wee table. I absolutely adore that stain. One of these days I am going to try it!!!
Yes, I hope you do!! That part is SO easy!! I love easy. I wish sanding were!! lol xo
Looks great! I would like to try the stain and finishing oil sometime, sounds like a great product! I bet it sure wasn’t fun sanding that lower shelf! Thanks for sharing!
Thanks, Vicki! Yes, do!! You will love it! :) And no, it wasn’t!! haha! Especially around those legs! xo
I hear what you mean with the sanding part. It always takes me a little more time than expected BUT I always love the fresh look it gives and this little table doesn’t disappoint! It looks so fresh and updated Nancy! XOXO
Hi Nancy! I’m a huge fan of your work, and you don’t disappoint. I liked the little table its beautiful and simple. However, I am partial to the painted pieces with the transfers, especially the floral ones and the french writing ones…keep up the great work!
Hi Debora! Thank you! And also, thank you so much for letting me know! That is exactly why I will keep doing them and things like this too… because not everyone likes the same thing. I love to show a variety of makeover styles. :) xoxo
Yes! That is never fun but I feel the same! Thanks, Denise! xo
It has a Scandi-look now, which I love. So much better!
Oh yes, it sure does, Lizzy!! I love the clean look of it too! Thanks!! xo
It’s crazy how lightening this table up changes the whole look of this piece! It is so much better now, and that stain and sealer in one sounds great! XOXO
I know, isn’t it?! Thanks, Christy! xoxo
Beautiful! Art quality craft work! How, where, do you get energy/motivation/endurance!!!
Thank you, Willie! I don’t know!! Some days I don’t have it!! haha!!
Well, all blessings to you!❤️
Looks beautiful!! I would love to see more painted pieces & less decals. I do realize that this is your space to do as you please too! 😂 I just want to do more updating.
Thank you, Pat!! Oh yes, I do plan to do more regular makeovers like this too. :) xo
Nice table remake. It’s interesting that the lower shelf was made from a different wood. Decades ago I wanted to strip my childhood French provincial bedroom set and keep it in the natural wood. I asked the furniture store rep if it could be done. He said that one of the reasons why case goods were painted (in my case it was that antiqued white) was because the manufacturers used different wood species in a piece and it could become a mismatched mess. (This was in the 70’s.) I never did the project. I read the Mann article. He sold out to FedMart & in TX I remember shopping at those stores when I was a teenager.
Thanks, Robin! I know, isn’t that weird?? Especially in a piece that was stained originally. But I guess because it was a dark stain it wouldn’t show? Who knows.
And oh wow, that’s neat, I’ve never heard of FedMart! I thought the article was interesting though. Love learning the history of things!
Hi Nancy! I really enjoy your makeovers like this. They encourage me to go forth and try things I ordinarily wouldn’t do. I have a random question… My daughter picked up a rocking horse on a “buy nothing” group. It needs help, and I do too! She thinks I can do anything when it comes to helping out a project in need. Lol The wood need touched up and I’m okay with that, but the poor guy needs a new mane. Any ideas? Can I send pics for you to give me some ideas as to help this poor fellow? My granddaughter would appreciate it one soon I hope. Thanks for any help you are able to give.
I am so happy to hear that, Connie! Yes, please send me some photos. I think I have an idea but want to see what it looks like first. nancy @ artsychicksrule . com
Turned out really nice, love the new look.
Thank you, Christina! xo
Hi Nancy! I love.the way this table turned out. I have some of the Driftwood stain and I love it. I have a dining table I am going to use it on. Thank you for Sharing
Thank you, Cheryl! Driftwood is the best! Really versatile too. :) xo
I usually love the dramatic nature of painted pieces with decals, decoupage, etc., but I absolutely adore this piece!
Aw, thanks so much, Kenya!