Easy DIY Stay Salty Sign
Hello friends!
I hope you all are having beautiful spring-like weather! We are, well, we are having summer-like weather here off and on. 80’s! But I’m not at all complaining, although I would love to have more spring-like weather, please. ha!
There have been some crazy storms/weather in the middle of the country, though! Yikes! No thank you to tornadoes and such. We have to deal with hurricanes here on the coast, but not typically those, thank goodness.
We finished up most of what we were going to do (minus a couple of things) at the condo this last weekend. Woohoo!!!
So happy! Gosh, that was so much more work than my little mind envisioned. lol Ugh, I’m tired but it’s beautiful!
I can not wait to share it with you all. Keep an eye out for it next week in your inbox!
Oh! We finished the columns on our front porch. I’ll be sharing them soon too!
Today, I’m sharing a sign I made for our little beach condo.
Easy DIY Stay Salty Sign
My husband grabbed a leftover piece of wood and cut it down for me.

Being already primed makes this an even simpler/quicker project!
I lightly sanded all the rough edges to soften them somewhat.

I then gave it one coat of Casement.
I had originally planned to use “blockposters (dot) com” to print out and transfer the image and paint it in the “old-fashioned way”.
And if you aren’t sure what that means, I detail it here in this helpful post. “How To Transfer Graphics”

I printed it out, taped it together and…. decided I didn’t have the time to paint it in! We were in a crunch to get everything done and leave for the Outer Banks to get the condo done.
So, I cut it out on my Silhouette Cameo instead. (I didn’t do this first because that sometimes comes with its own headaches when printing something big like this, and I wasn’t feeling like dealing with that either! haha)
Honestly, the time I spent cutting it out and then lining it up onto the board, etc, I could’ve probably painted in the transferred lettering by hand just as quickly! I would consider both methods pretty easy to do.
All I had left of vinyl at the moment was contact paper from the Dollar Store. It works, but it isn’t super sticky, so it can sometimes be a pain.

But it worked out nicely!
Once your piece is cut, attach the “transfer tape” over the top, turn it over, and peel off the white protective backing.

Then line up your design and attach it to your project. I had my husband measure and/or hold pieces so I could place it correctly on the board. More hands were helpful with this big design.

I had a particular color in my brain that I wanted it to be, and I achieved it! Yippee!
But I mixed up several different paints to get to that color.
French Eggshell
Casement
Seaside
Renfrew Blue
Transfer Paper
Contact Paper
Silhouette Cameo
Don’t even ask me for amounts, I have no clue! lol I just mixed and mixed until I got close to what I saw in my mind.

I started out using this small roller but wasn’t liking how the paint was laying.

So, I switched to a small brush and sort of “patted” the paint on. (I was very careful to not cause any “bleeding” since contact paper is not quite as sticky as I mentioned above)

I hit it with a blow dryer to quickly dry it somewhat. I didn’t want it fully dry, just a touch. Enough so that it wouldn’t smear if hit.

Then I pulled the vinyl pieces off. By the way, that bumpy-looking edge of the letter above is what it’s supposed to look like. That particular font is “rough around the edges”.
And done!

Nothing else is needed. One of the things I love about Fusion Mineral Paint.
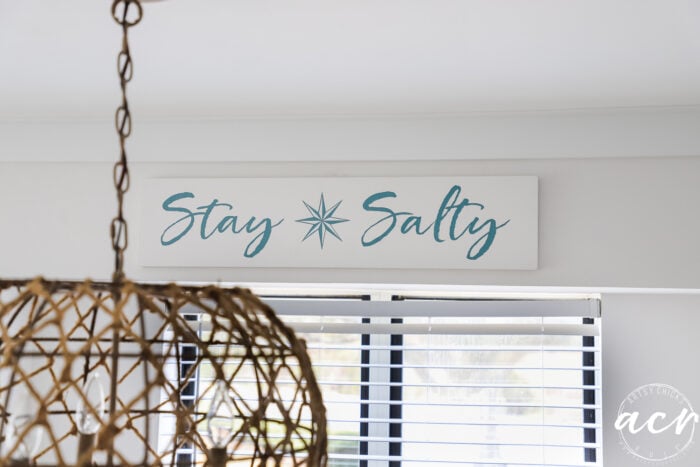
I love the blue shade it came out. Perfect for what I was going for.
Here it is up in the condo where we put it.


(a little sneak peek of the finished condo!)
PIN it to save it!

Stay tuned for next week! I’ll be sharing the full reveal and all the photos.
Have a wonderful weekend, friends!
xoxo


")

")


That is super cute for you ocean coastal folks. Can’t wait to see what you’ve been doing there. Have a happy weekend, Nancy!
Yes, thank you, Michele! Happy weekend to you too! xo
Great job on it. It’s really cute! And I would never have thought of using contact paper like this.
A great inexpensive way, for sure!
Great sign, looks good in the spot! Looking forward to seeing the reveal and also your house columns!
Thanks, Vicki!! :)