Bleach Wood With Stain (2 tone dresser)
“Bleach wood” and paint! The best of both worlds with this modern two-tone look!
Hello friends! Hope you all had an amazing weekend! We were busy, busy with our daughter and her hubby. They just closed on their first home on Friday and we helped them move in. So excited for them!! And we have lots of fun plans for their new house too. Maybe I’ll share some of it here.
Well, if you remember, I told y’all I was working on two large furniture pieces, a dresser for our son and another one … an antique cabinet.
I finished up the dresser yesterday and will be finishing up the antique cabinet this week. If you want a sneak peek of it, hop over to my Facebook page…it’s the blue one I’m showing with pretty napkins (that I’ll be doing something fun with for it)
Since this dresser I’m sharing today is for our son, it’s a bit masculine. No fluff. lol
But I did share a fun look for it…2-tone. And with a neat bleach wood look done with stain instead of bleach. It was super easy to do but did require sanding of course. As do all bleach projects. But what it didn’t require was bleach! Win, because who wants to mess with that??
I’ve done several “bleached wood, bleaching wood”, etc., projects without it. And some with, well, bleaching products, not actual bleach.
You can check them out here:
- How To Get The Bleached Look Without Bleach
- How To Make Orange Wood Look Bleached (without harsh chemicals)
- Bleaching Wood For A New Look
- How To Get A Pickled Wood Look (adding this one in because it’s a similar look)
- Easy DIY Light Wood Look
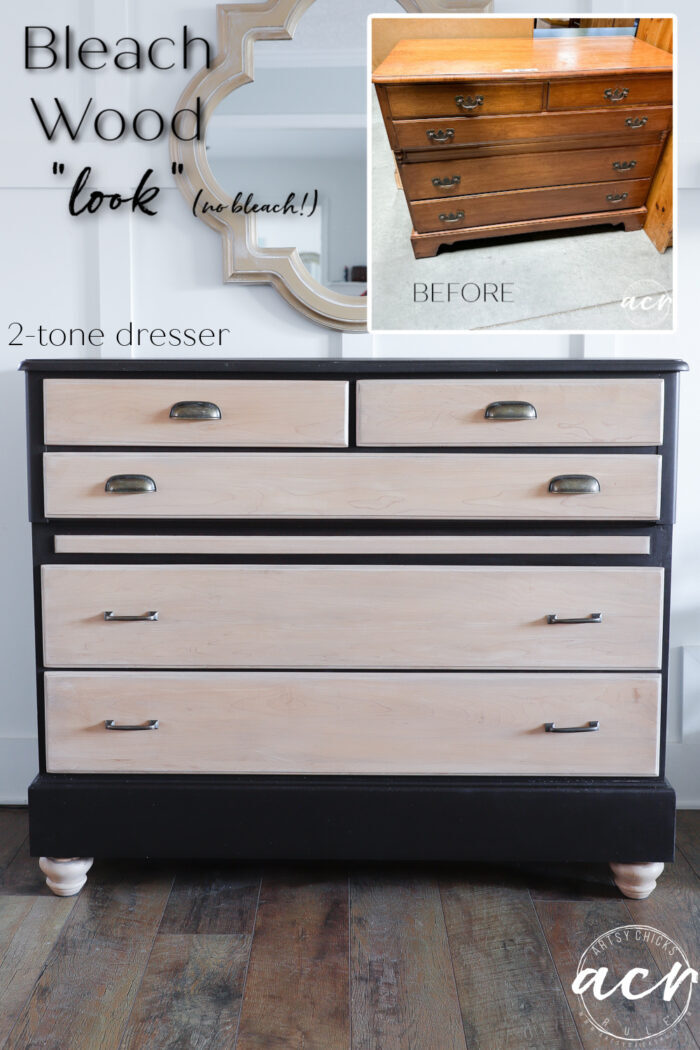
Bleach Wood With Stain
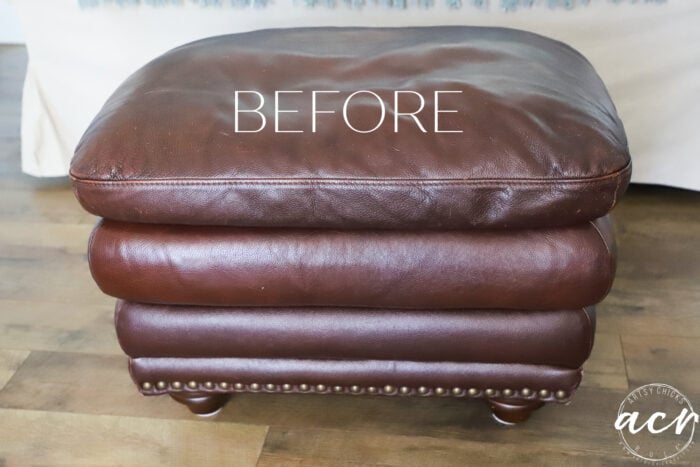
Here it is “before” when I found it at the ReStore…
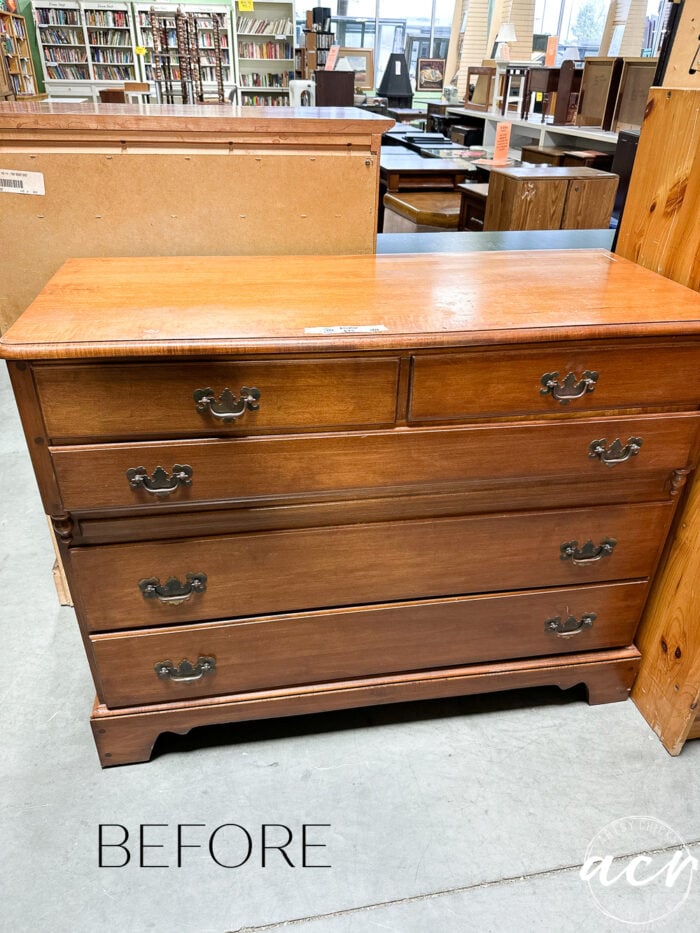
We see these types of dressers all the time, don’t we? I know I do.
However, this one was very well made. Heavy, solid wood, sturdy, and in amazing condition.
A little dated though, right? That’s okay, I had a plan for it.
MATERIALS SOURCE LIST
- Sander (I have 2 other sanders and this sander is my oldest but I almost always reach for it over the others!)
- Pre Stain Wood Conditioner
- White Stain & Finishing Oil
- Driftwood Stain & Finishing Oil
- Wood Filler
- Chocolate Mineral Paint
- Cappuccino Stain & Finishing Oil
- Microfiber Roller
- FrogTape
- Bronze Cup Pulls
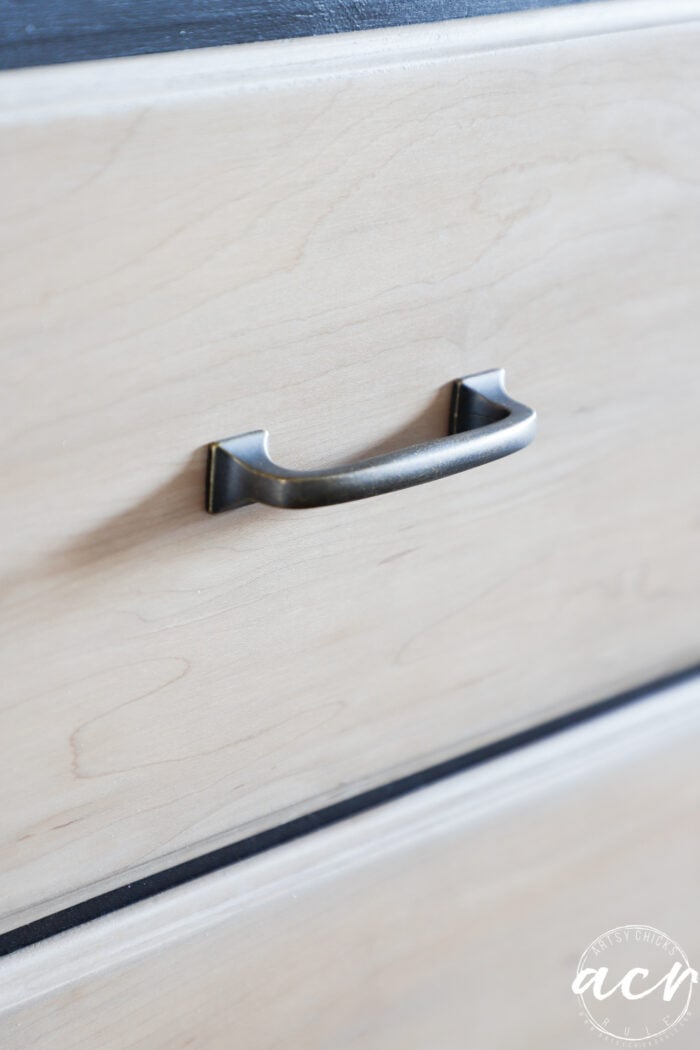
- Bronze Handles
- Wood Feet
- Brackets (for feet)
SAND
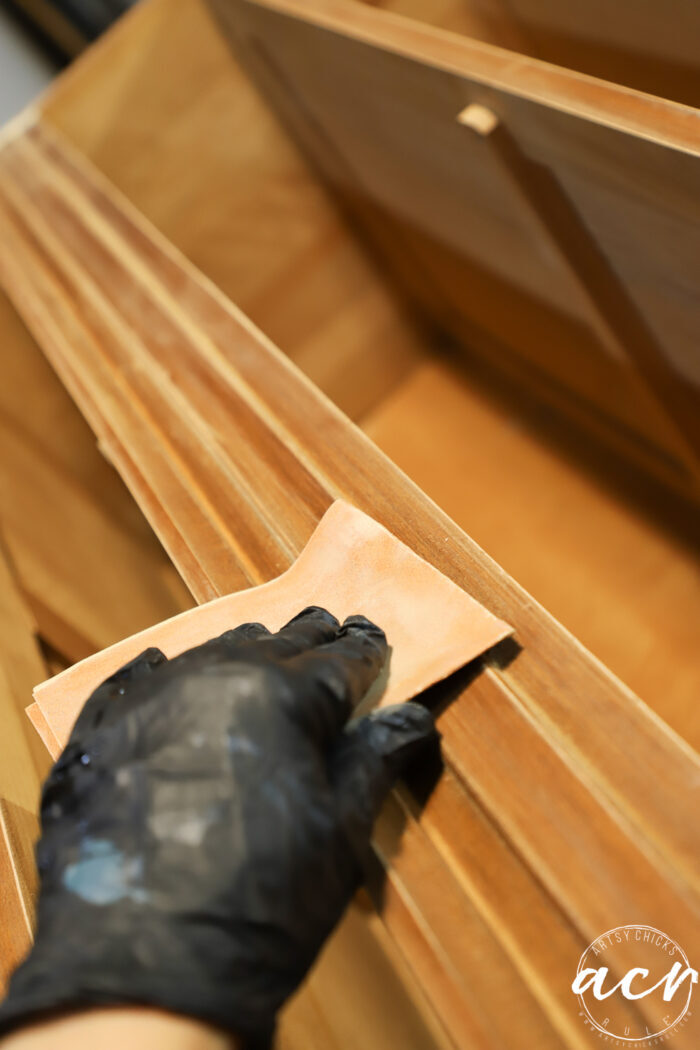
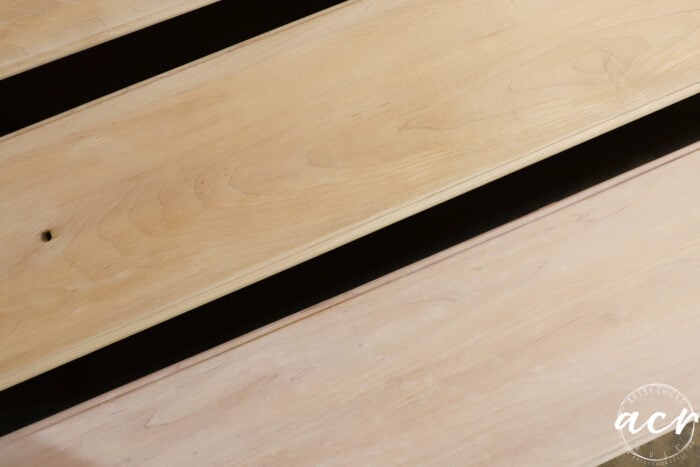
I sanded the drawer fronts with my sander. Then used a folded piece by hand to get in the groove, as shown below.
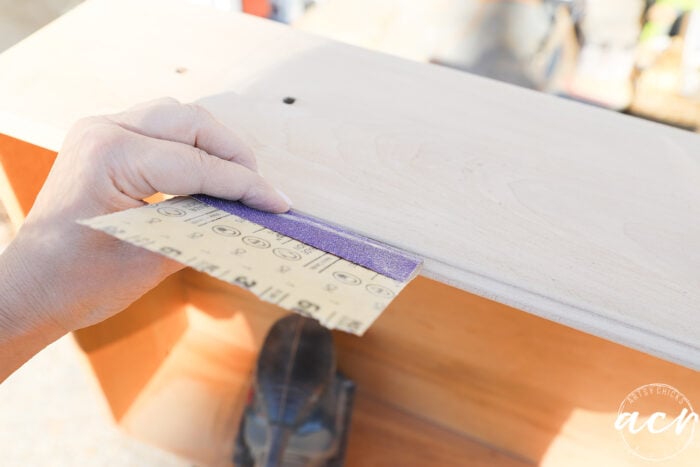
It started to sprinkle as I was finishing up. We moved them inside quickly. (but not quick enough as you’ll see further below)
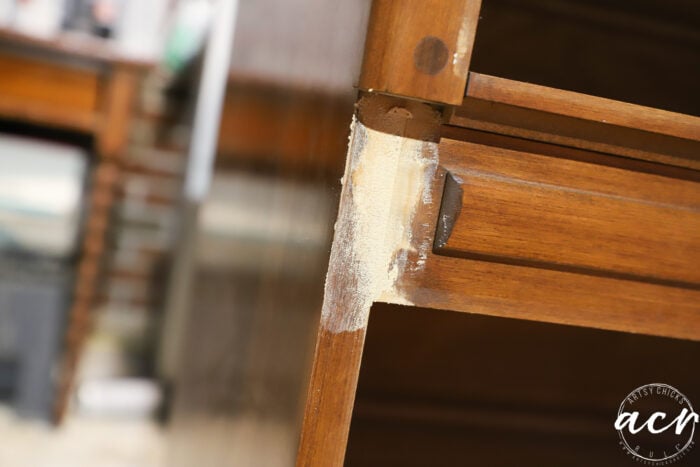
My husband popped off this decorative (dated) piece while I snapped the shot.
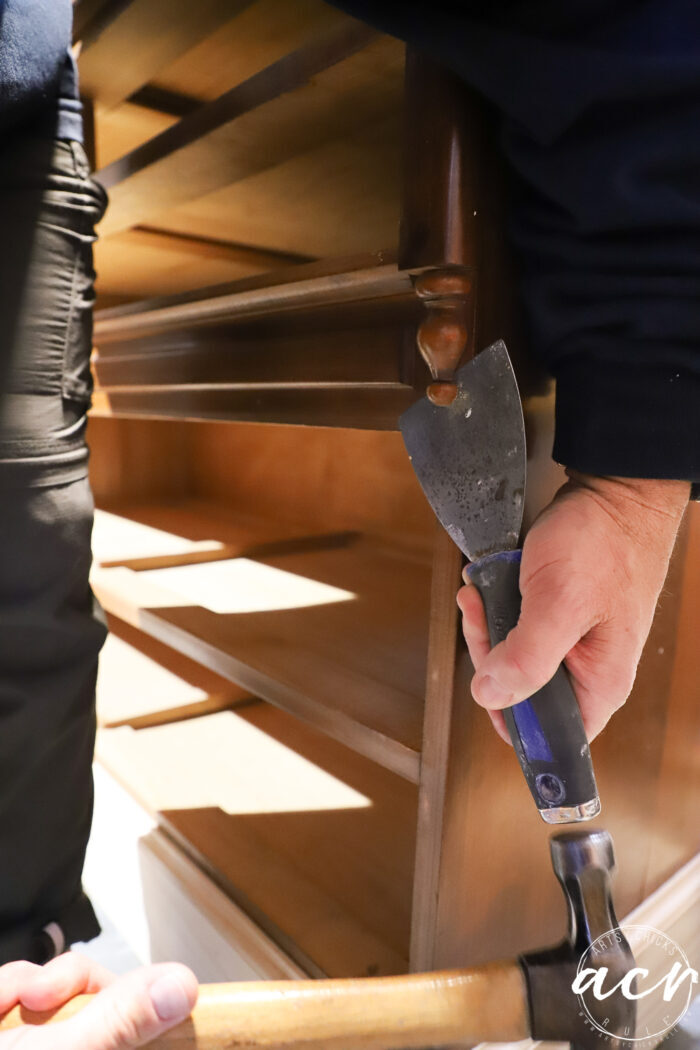
I wanted it to be more masculine and less dated-looking so those had to go.
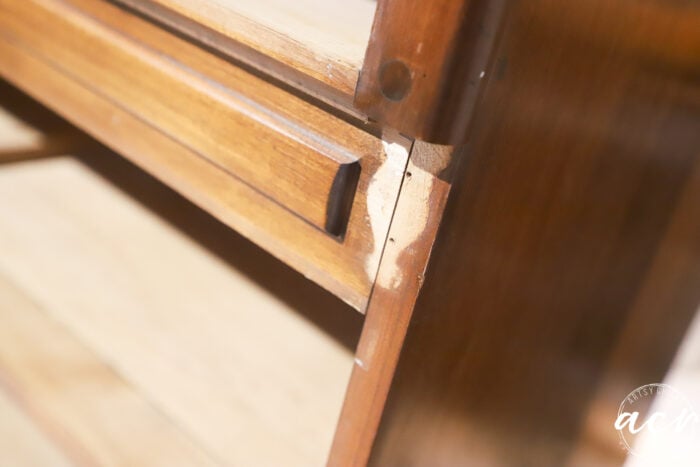
I used wood filler and filled that area.
For the rest of the dresser, I gave it a good cleaning then a light scuff sand.
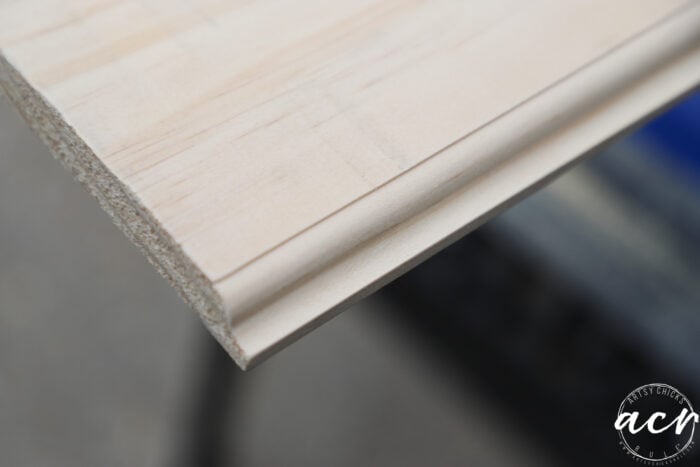
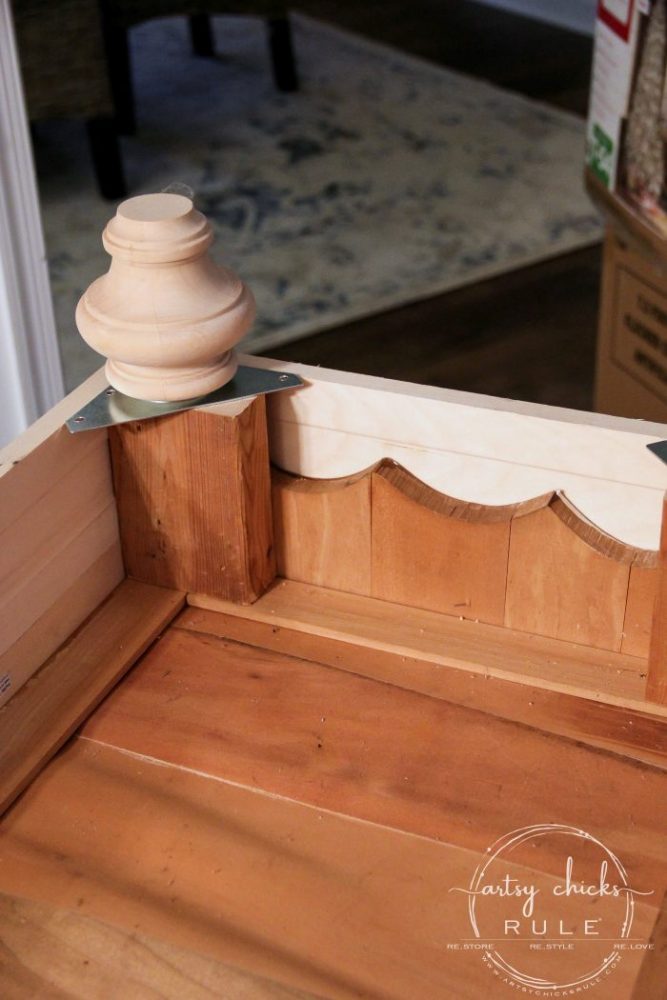
ADD NEW BASE TRIM
My husband made a new bottom piece for the dresser with a 1 x 6. He cut the edge with his router below to make that decorative edge.
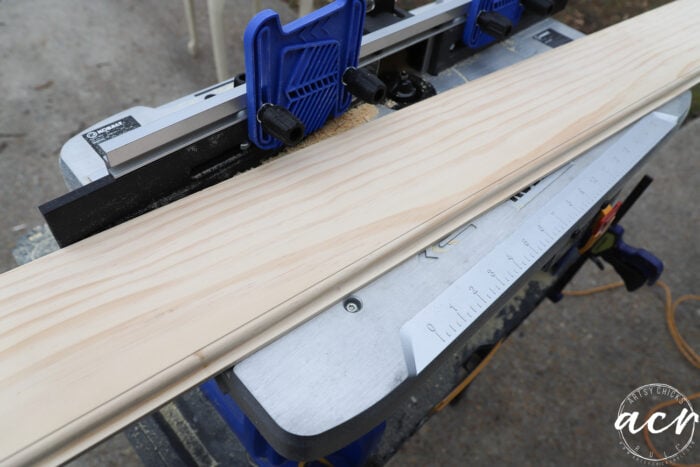
You can see how we attached it by removing the bottom trim pieces and then placing this over the front as you see.
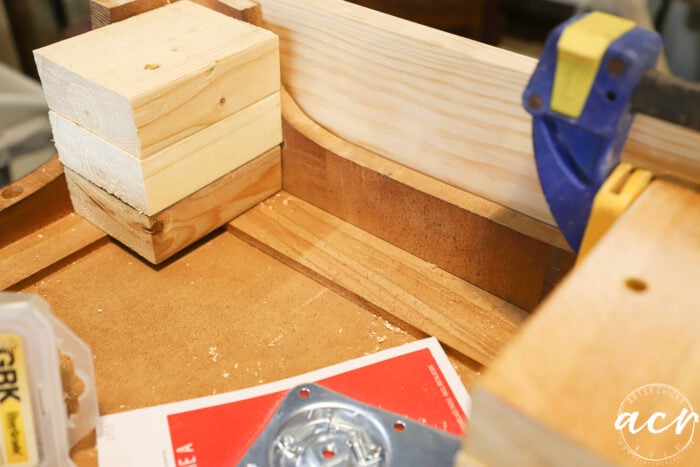
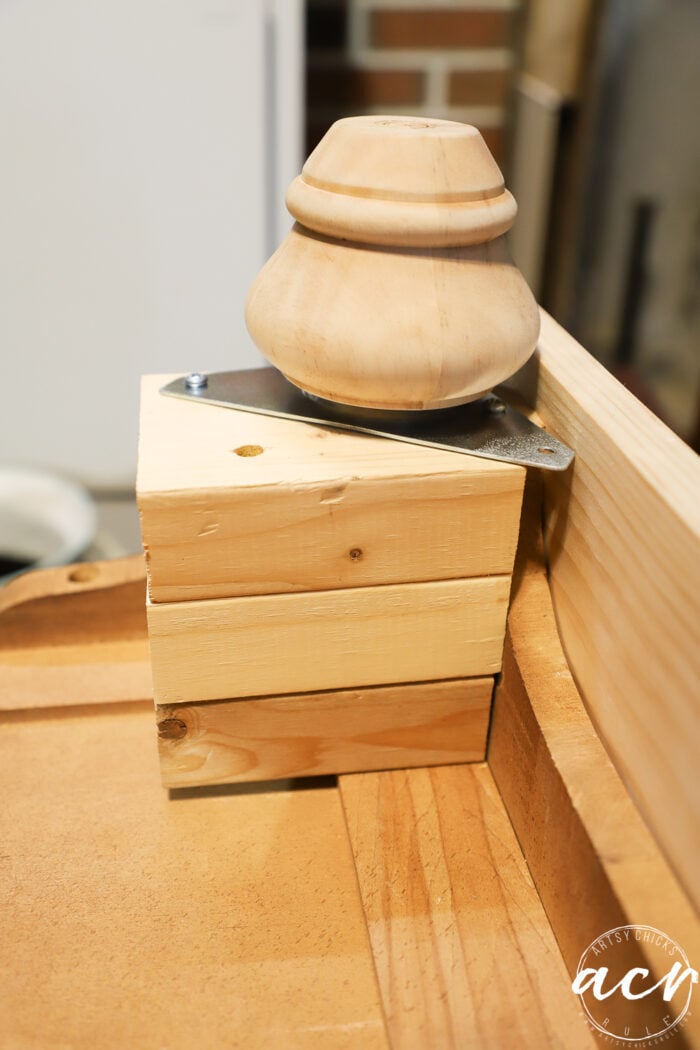
ATTACH FEET
Plus see how we attached the new feet.
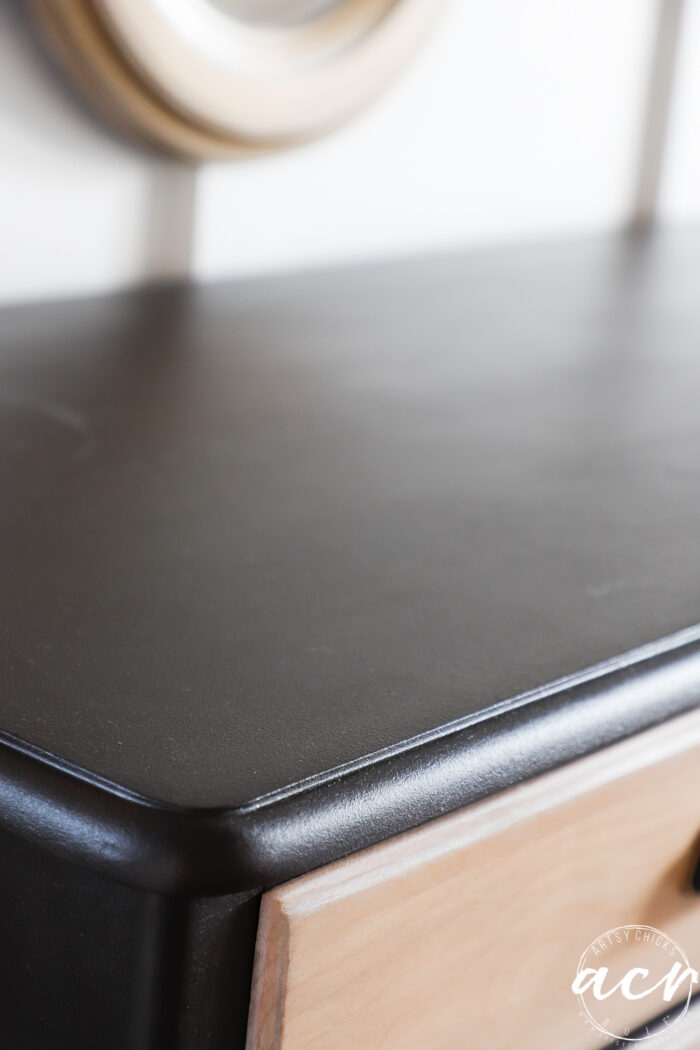
My son wanted it “brown”. I considered doing a gel stain or something similar but then remembered I have different wood with the new base. Plus those decorative pieces we popped off of each side. So I went with brown paint. Fusion has an amazing brown called “Chocolate”. Now, I have never used it before because brown is just not a color I’m that interested in painting my furniture. But I might have to reconsider that!
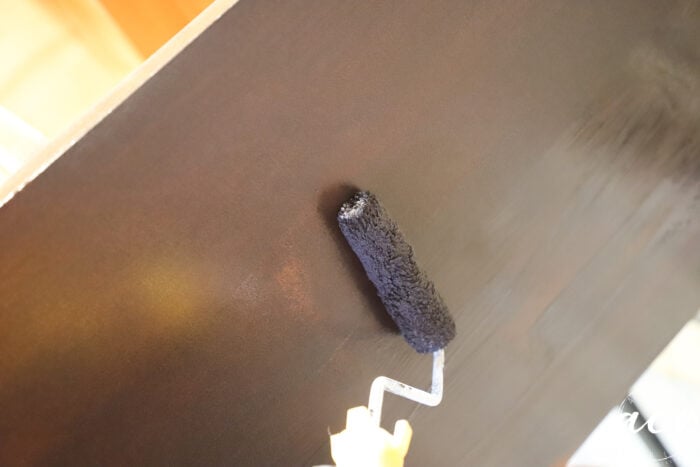
PAINT
The Chocolate paint color is luscious. And even MORE luscious when you layer Cappuccino Stain & Finishing Oil over top. Wow. It’s a stunning look.
But back to painting. I applied it all over with the brush, then rolled it with my microfiber roller.
STAIN
Since it’s water-based, I let it sit for several days before applying the Stain & Finishing Oil.
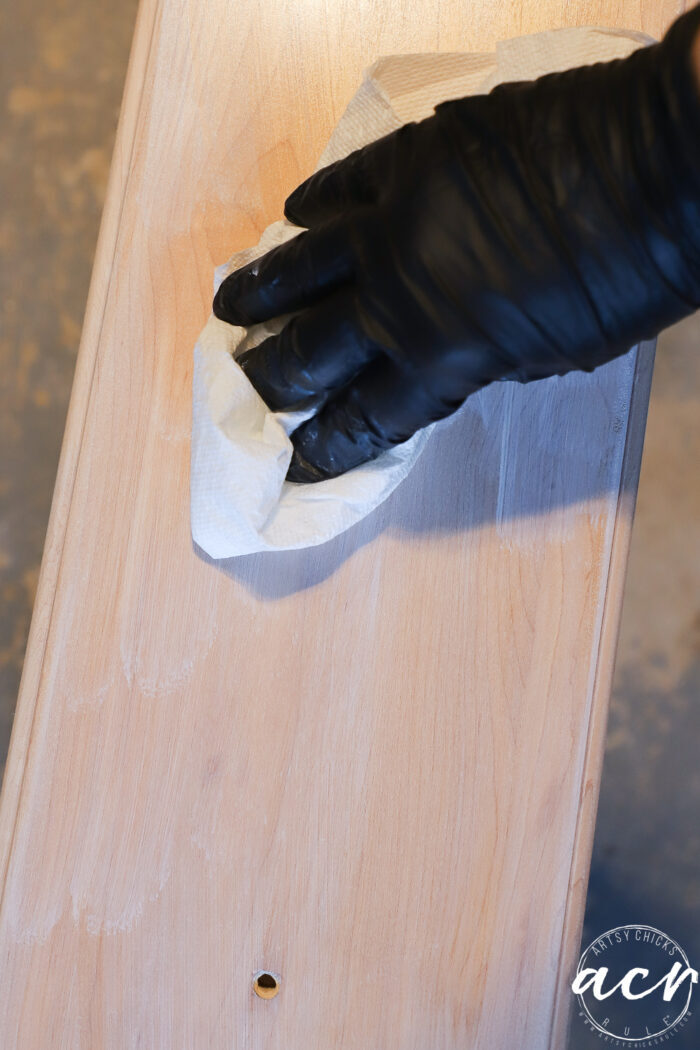
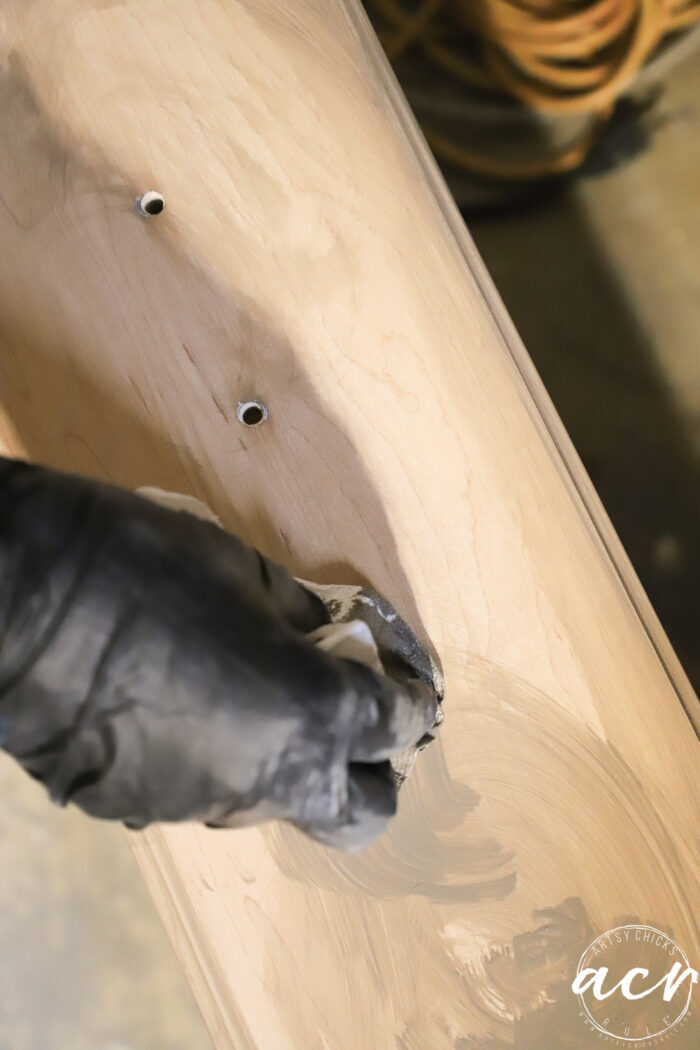
I simply applied it all over, and wiped it back “off”. (not completely off, just the excess like you do with stain)
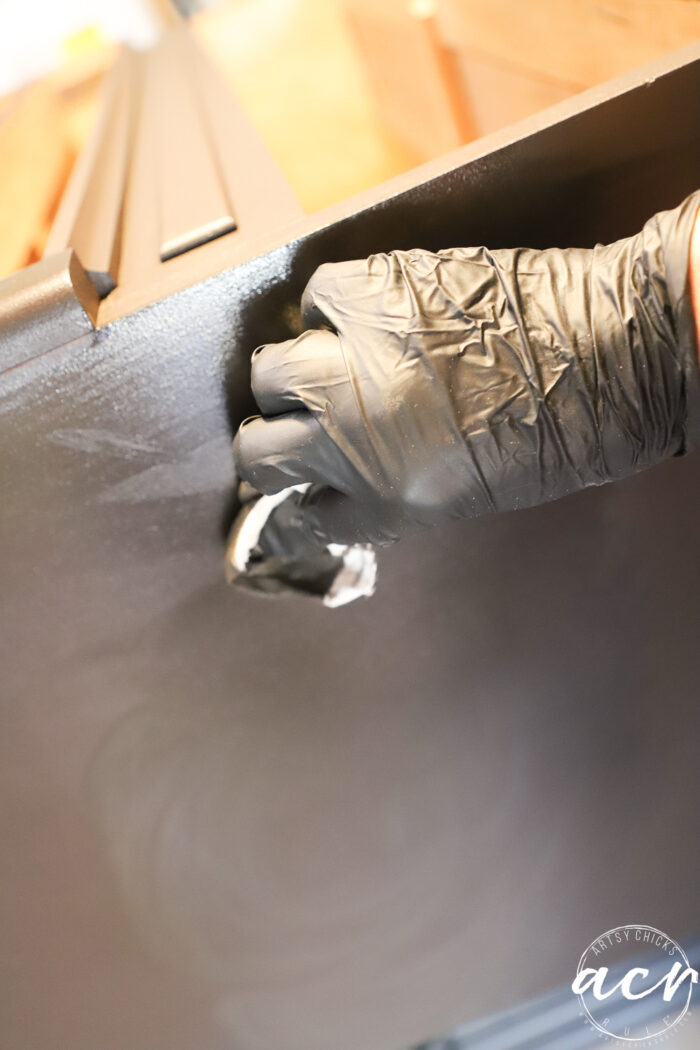
You can see below where I’ve applied it and where I haven’t.

It just adds this layer of depth that I love. Gives it a beautiful richness.
“Bleach Wood” with Stain
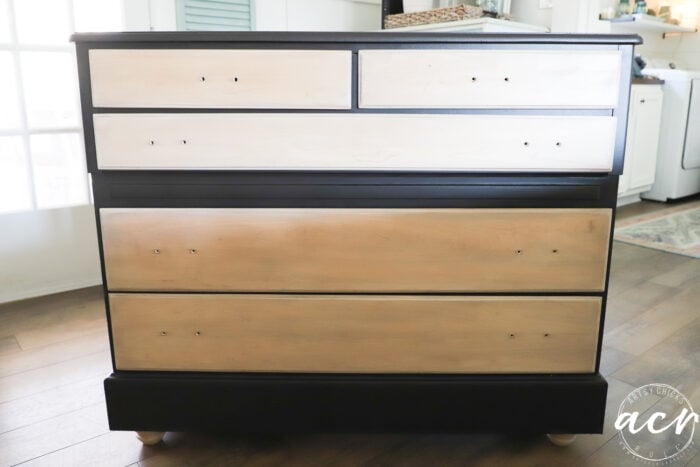
For the drawers, I planned to use the White Stain & Finishing Oil first. Then see how I liked that. I had thought it might be too “white-ish” for this dark-colored dresser and I was right. But I wanted to whiten the orange-y/pink hues in the wood which it worked very well for. I didn’t really think I needed to use pre-stain wood conditioner but…
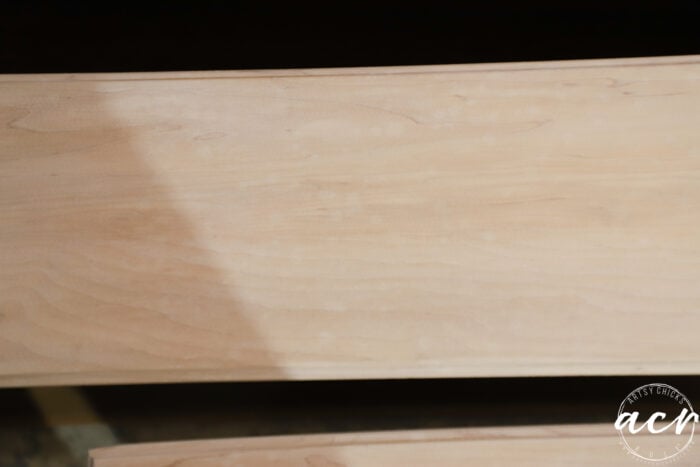
The top drawer is unstained. (see the yellow-y look of it??) The bottom drawer has the white stain on it. (see how it gave it a “bleached” look?? WIN!)
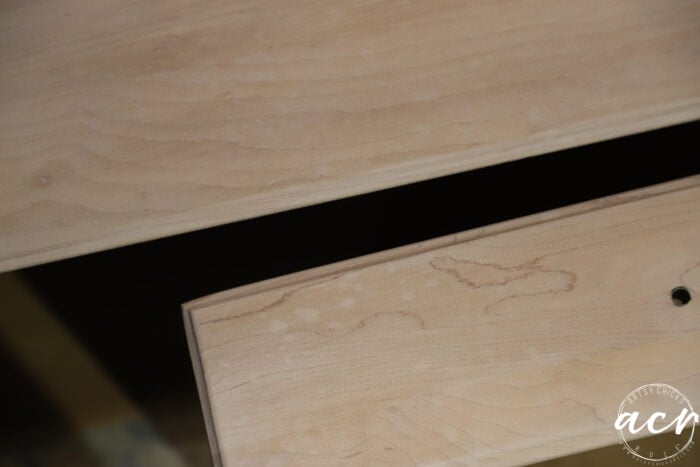
However, can you see the spots in the one I stained?? It was very noticeable in person but hard to see in the photos.
BOO!! The rain left spots that showed up when I applied the stain.
Yuck. See them??
So, back to the drawing board. Well, back to the sander anyway!! Haha!!
My husband offered to resand the fronts for me. He’s a keeper.
So, once that was done, I used the pre-stain wood conditioner and re-applied the white stain. (applying then wiping back)
Since I felt it was just a little too bleached-looking for the brown dresser, I decided to add Driftwood over top of that.
I did let it sit for 24 hours before doing that though so the white stain was good and set first.
I wiped it on, then wiped most of it back off. I only wanted to give it a hint of hue.
What I ended up with was the perfectly bleached wood look that was not stark white. Softer, if that makes sense.
And perfect for the Chocolate-colored dresser.
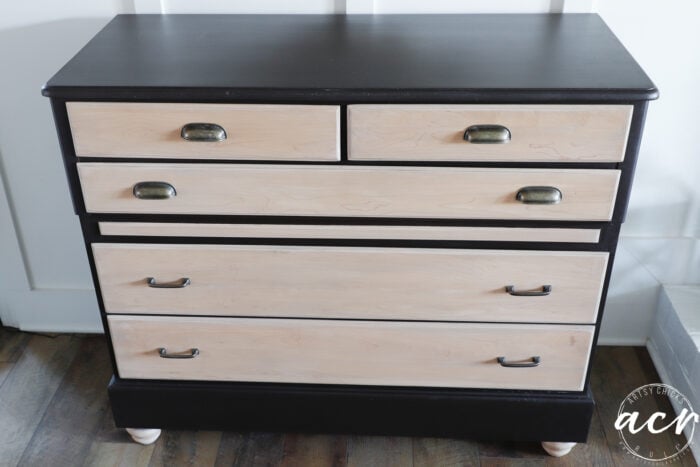
Love how they turned out!! What I didn’t love was…
…the feet! They looked like they were wearing too big of a dresser dress! lol
So we added more wood for them to screw into underneath so they’d show more.
By the way, I stained the feet the same way I stained the drawers.
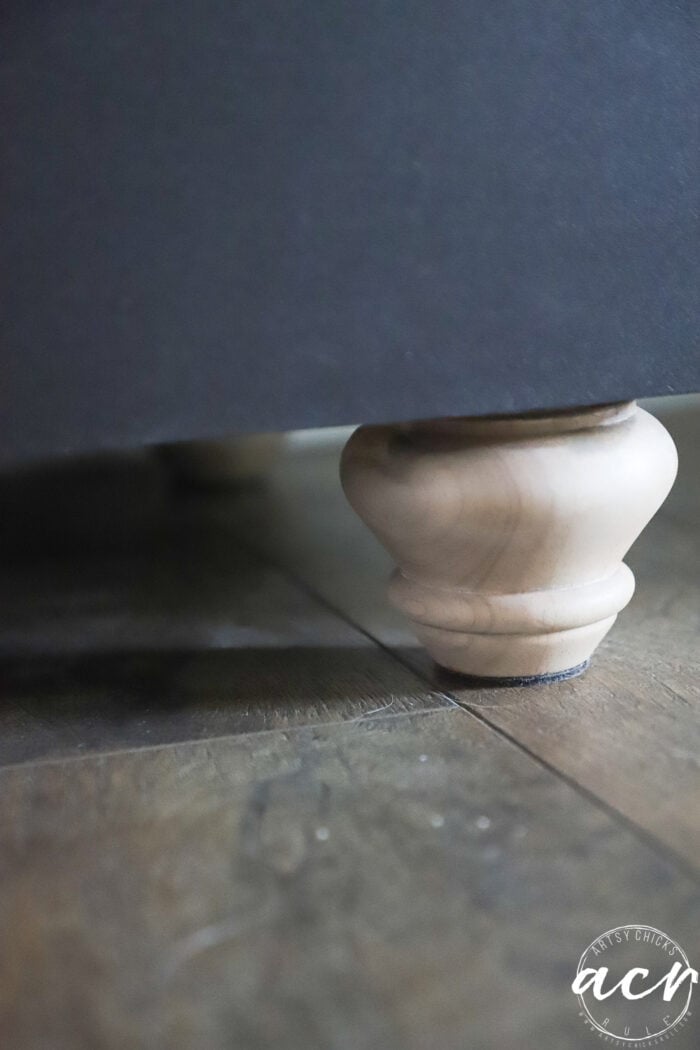
So much better!
But the other thing I didn’t like and my husband was in agreement with, was the wood “bar” between the drawers.
See it?
I SO wish I had sanded that and made it look like the drawers. Darn.
That’s how it goes sometimes though. You don’t know until you see it.
So I did what any crazy furniture painter does. I taped my beautifully finished dresser to prepare it for ruin. haha
No, I mean for paint remover.
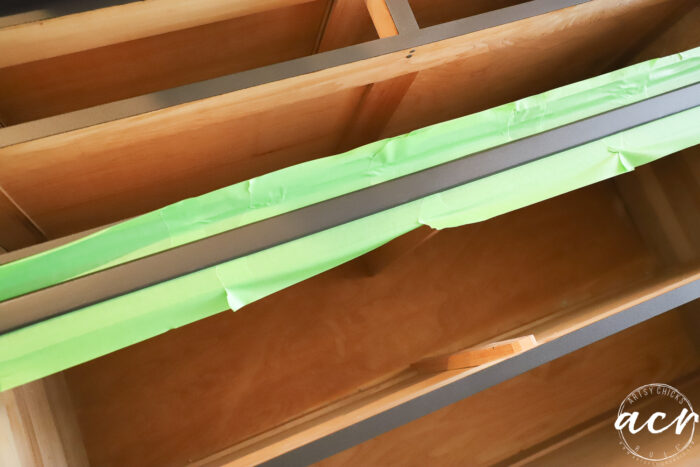
The paint came off well but did remove some of the underneath paint. Shoot.
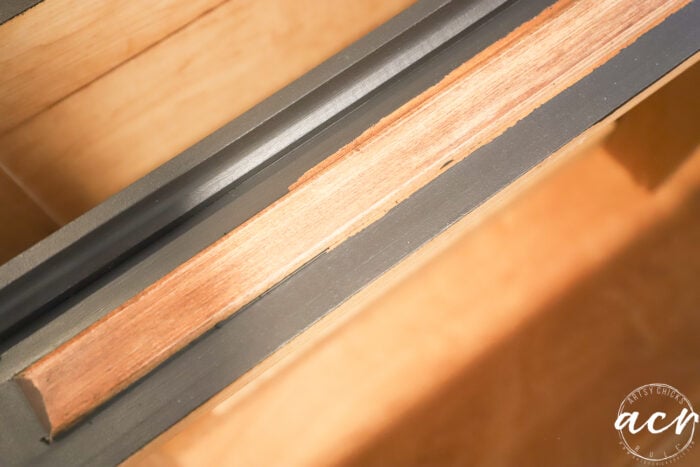
But then I sanded (by hand, whew!) and realized it was pointless to try to not mess up the surrounding area.
Just inevitable.
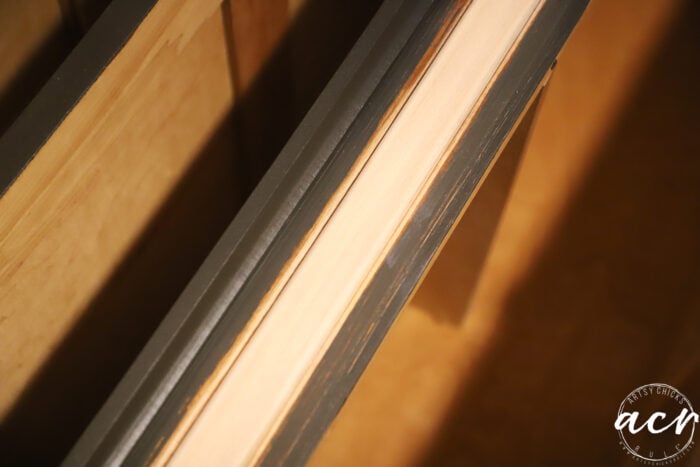
That’s okay, I just stained the wood like I did the drawers and then repainted/stained the surrounding area.
REVEAL
Added these beautiful (and perfectly matching finish…win!) handles and done!
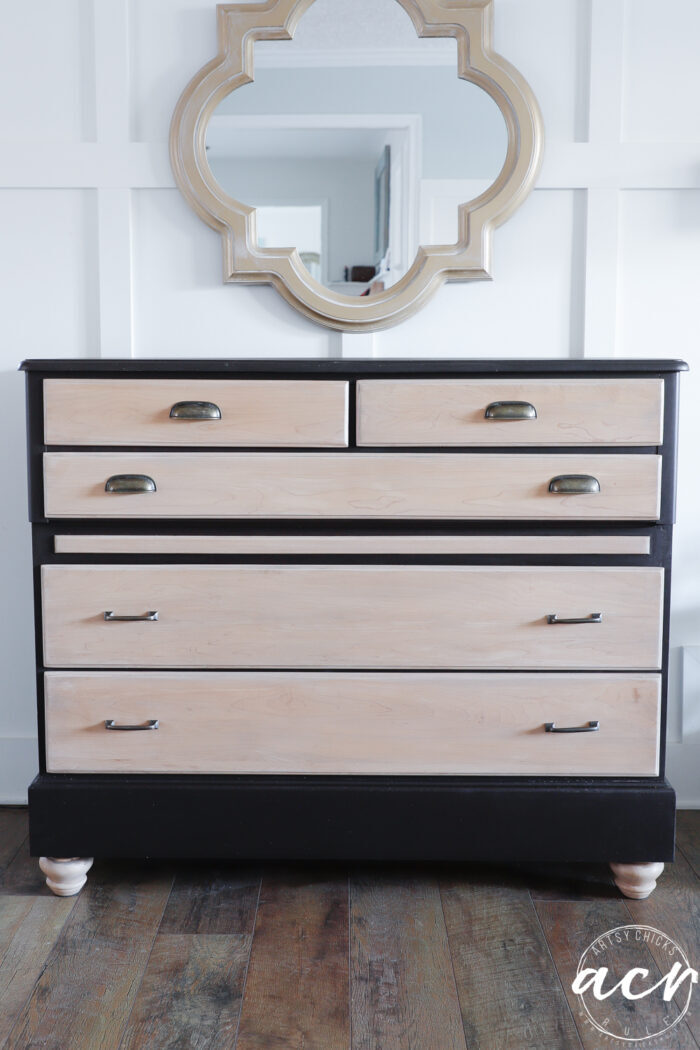
Doesn’t it look a million times better with the centerpiece bleached like the drawers??
And now the feet with the right size dress??? lol (scroll back up and look again)
Wouldn’t that bleach wood look be great on a piece without the paint?
I’m going to have to give it a go on something soon.
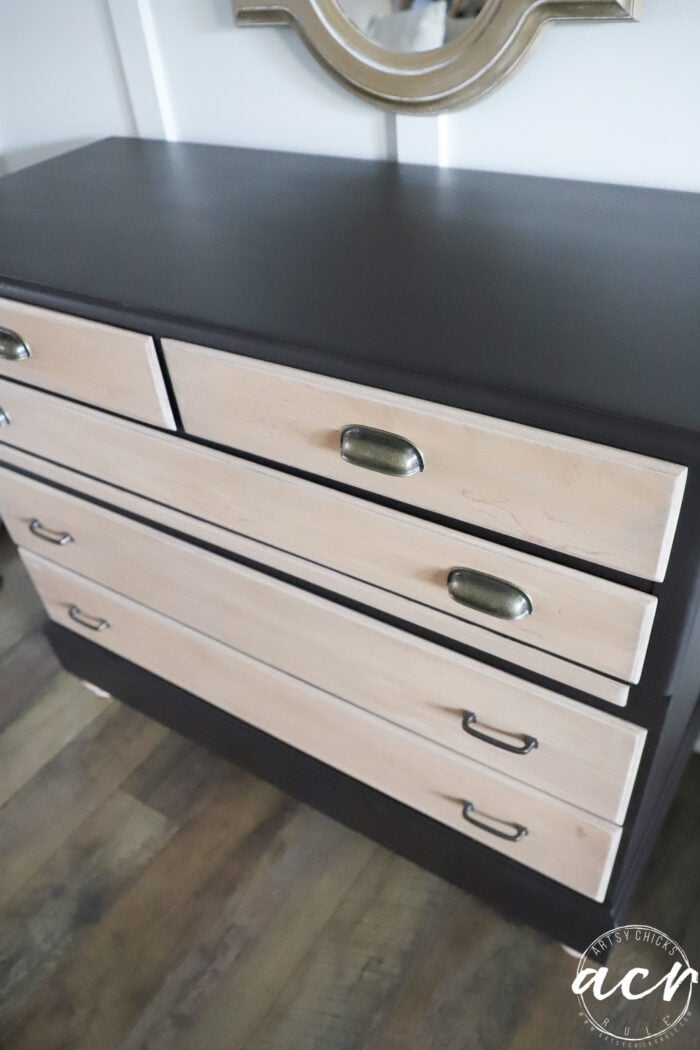
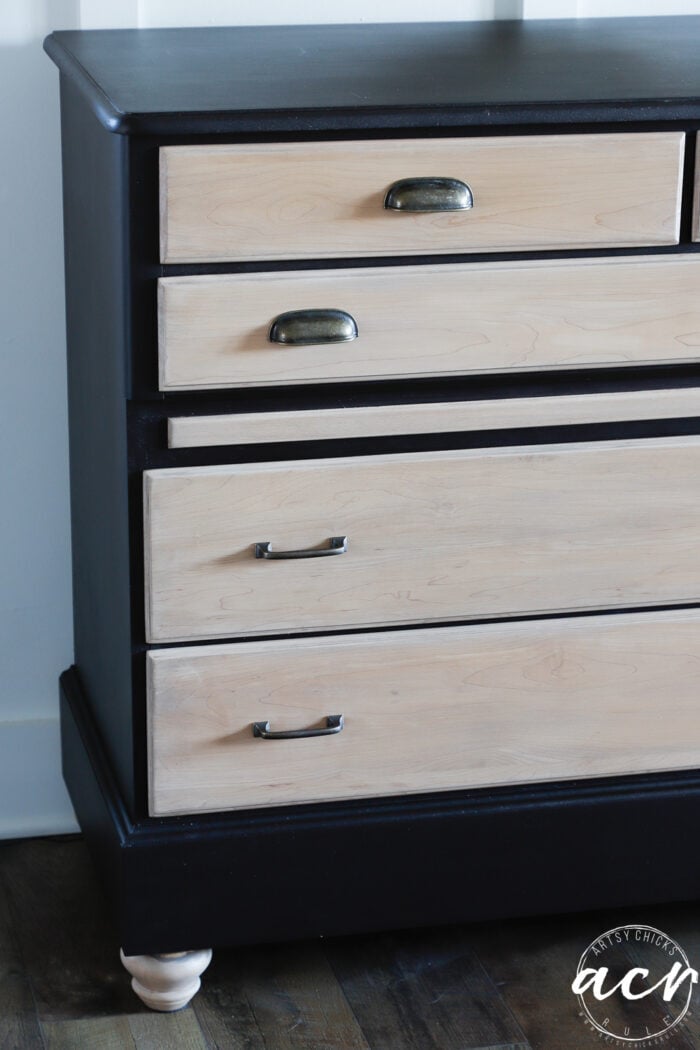
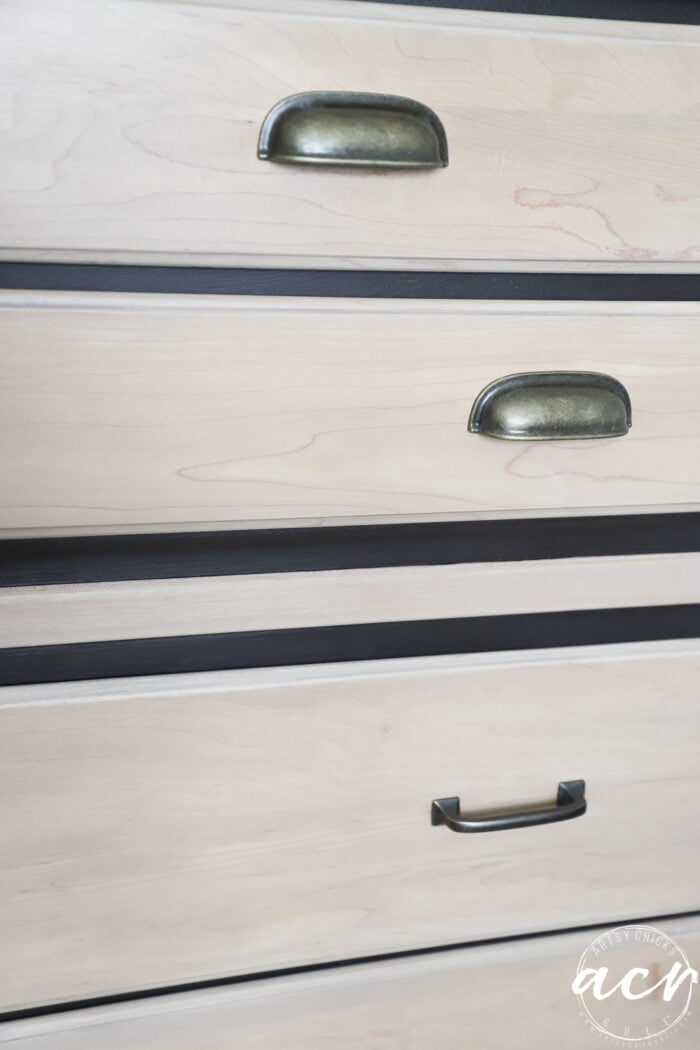
I went with 2 different types of handles to give it some interest.
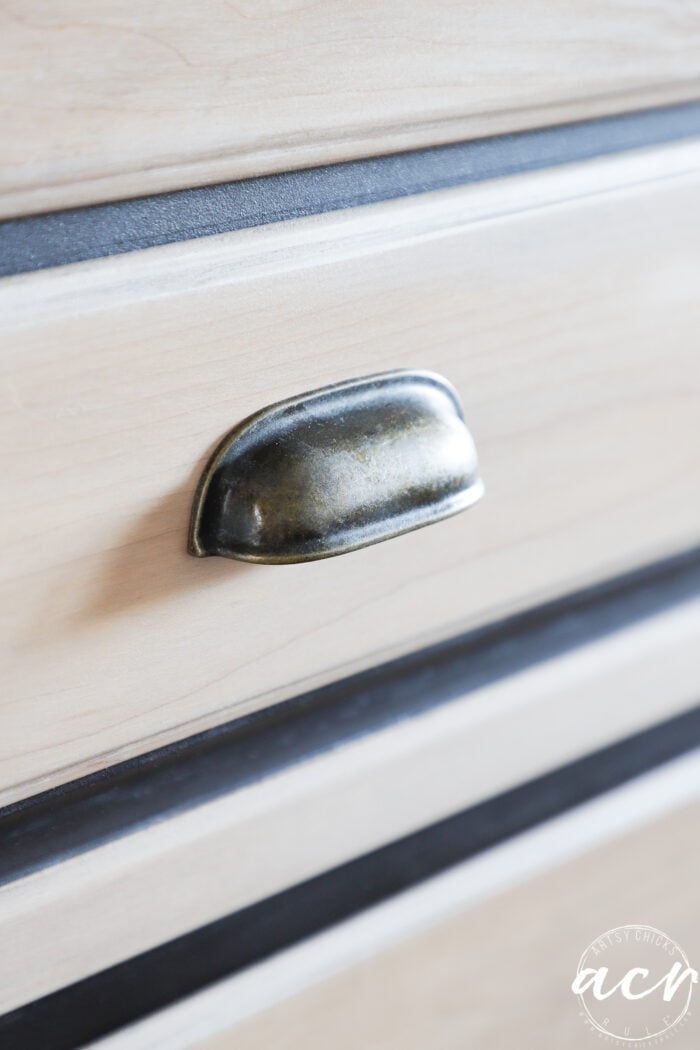
I love the hint of bronze-y gold these have.
And isn’t this pale, blonde, “bleached” wood divine? I love it.
I didn’t do a thing to the inside of the drawers. They were perfect. All of them, just amazing shape.

So glad I took the time (and effort) to go ahead and sand/stain that centerpiece.
Much more modern looking now.
Very happy with it and so is our son. Happy to finally have it finished as is he! ;)
If you like the bleached wood look but haven’t tried it yet, this is an easy way to get the look.
More posts in the “back to basics” series:
- How To Create Faux Verdigris (and video)
- How To Create Faux Patina (and video)
- How To Dry Brush
- 26 Different Types of Chalk Style Paint
- Pros and Cons of Chalk Paint For Furniture
- 5 Top Ways To Seal Chalk Paint
- How To Chalk Paint Furniture & More!
- How To Transfer Images
- How To Import Images Into Silhouette
- How To Restain Wood Without Stripping
- How To Use Gel Stain
- How To Bleach Wood
PIN it to save it!
If you like this makeover, you will probably love this one that we did something similar to!
See it here!
Have a great week! I’ll be back next time with this. Just wait till you see what I did!
UPDATE!! Go check it out now here!
xoxo


")


I love this tow tone Dresser but I ❤️ your floor more..what is it? I am in the middle of building and looking for something like that.
Thanks,Ilene! We love our floors and they span the entire first floor. You can read all about them here. https://www.artsychicksrule.com/affordable-rustic-laminate-flooring/
I love the bleached look and the chocolate! Chocolate anytime is good right?? Great job!
My personal opinion of course, I would make one change. The top drawer pulls look too heavy for the smaller drawers in comparison to the bottom drawer pulls on the larger drawers. I’d switch them to even the “weight” of the pulls to the drawer size.
Thanks!! And you’ve got that right!! ;)
Yes, I totally see what you’re saying but I kinda love it like this! And you are not alone apparently, others thought the same, which is making me question everything! lol Also, with the cup pulls, it’s better that they are on top as you place your fingers underneath of them to open the drawers. Which would be sort of a pain if they were on the bottom drawers. Whereas the open handles on the lower drawers are easy to just slip your hand in from the top to open. Does that make sense?? Plus also, they are actually two different sizes, they won’t fit the other way around. :)
Thanks for your reply!
I totally get your thinking. Plus it’s your project & your opinion is really the only one that counts! That’s for sharing your creative talents.
Yes, but I do love it when you all share your thoughts in the comments! Many times you see something in a way I don’t. We are not all the same and see things the same and that’s what makes life interesting, right?! :) xo
Wow! I know your son must love it.
He does, thanks, Ginny! :)
Hi Nancy! This would look so good with Paisley or Heirloom. For a girls room of course. I thought you said you used Driftwood stain. I have that color and I don’t see it here. Maybe you changed it. I have a piece I want to add feet to. Can you send your husband over? Hahaha. The dresser looks so good.
Hi Cheryl! Oh yes, it really would. Love both of those colors. And yep, I sure did use Driftwood. I used it over the White Stain and Finishing Oil so it didn’t “soak” in. I wanted to only give it a slight hue which it did wonderfully. And haha, I would gladly sub him out, not so sure he would be glad though!! lol! Thank you! xoxo
Looks GREAT! Good for you for keeping on it until you got it right!:) I’ve just gotten into Fusion items- I think I’m scared about the long cure time but everything looks so good with their paint and stains. Will have to be patient- we have a booth for selling furniture we make so I’m always so anxious to get them in there. Love your blog!
Thanks, Barbara! Yay! So happy to hear you have some Fusion products to try! They are great! But I’m not sure what you mean about the long cure time?? It’s really not any different than the other products on the market. Pretty standard, 21-ish days. You can use your items gently after the first couple of days though, just like other name-brand paints, etc. :) Maybe someone told you something different? xo
Love how it all turned out, so much work but always worth it in the end..well sometimes lol..not to pick ..but I think I would have placed the chunkier pulls on bottom and the more slender ones on top to balance it out.?..but that’s just me 🤷🏻♀️
Thanks, Denise!! You are not alone in that thinking! lol But with the cup pulls, it’s better that they are on top as you place your fingers underneath of them to open the drawers. Which would be sort of a pain if they were on the bottom drawers. Whereas the open handles on the lower drawers are easy to just slip your hand in from the top to open. Does that make sense?? Plus also, they are actually two different sizes, they won’t fit the other way around. :)
Yes that does make sense ..lol..thanks for understanding my critique..but that’s how I learn, either way your result as always was beautiful..and I’ve learned a lot from your blog 👍 always waiting on your next project 😃
I love when you all share your ideas and comments. :) We don’t always think the same and it’s nice to have another viewpoint. And many times gets me seeing something in a completely different way! :) xo
Gorgeous! Your children are so fortunate to have such a talented momma!
Aw, thanks so much, Tess! :) xoxo
Great save on a dated piece. On my screen it looks to be more black than chocolate…and that looks good too!!! I am glad you mention your “change of plans & mis-do’s” …it makes it more real to my life!!! It is SO much more fun redoing old unwanted pieces then buying new at the stores….LOVE IT!!! Take care!
Nice work, and good call on that center strip of wood! It looks great! Good thing we can’t see the things we have to do to add feet to the bottom of something, but I always like furniture with feet, I think it’s because I can clean under it easier!
Thanks, Vicki!! Yes, it had to go!! ;) It immediately jumped out at me, so glad I did that too. And yes, it’s certainly not pretty on the underside! But I’m like you though, I love feet and that open area on the bottom. Both aesthetically and for cleaning too! xoxo
Thanks, Addie! Yes, it is a very dark chocolate color, you are correct. And oh yes, I have plenty of those!! lol It is fun, I love to see the transformation. Nothing better than that! xoxo
Nancy, I LOVE how this turned out in the end! I too, thought the center piece just didn’t fit in well and I’m so glad you redid it. Great job, as usual.
Thanks, Caye!! Yes, it was just wrong!! And jumped right out at me immediately!! Glad you agree! :) xo
Wow, that is one gorgeous dresser. Thanks for sharing.
Thank you, Karen! :) xo
Wow I wish I had your ability to envision things the way you do. This is beautiful and so modern now…which is very much back in style. Honestly I thought it looked nice before you redid the bar in the middle and the feet, and then what a difference that made when you made the changes. So nice!
Aw, thanks. I don’t always know immediately. Sometimes it comes slowly to me. And sometimes it’s very slowly! ;) But it gets there in the end. Thank you so much, Debra! xoxo
Oh my gracious, Nancy, that is a thing of beauty now! I ADORE that bleached modern stain.
It is amazing to me that it is the same piece. You both did a FABULOUS job on that dresser!
Love love love it!!
Thanks so very much, Michele!! I’m so loving that wood color on the drawers…now I want to do an entire piece that way! xo
I didn’t think I would like this dresser when you were working on it, but I love it! This is something I would want in my home. I would like it in the entry or the living room more than in the bedroom. One thing I thought about when looking at it was the drawer pulls, the bottom drawers are larger and heaver looking, so I would have put the cup pulls on the bottom drawers. The upper drawer are not as heavy looking, so I would have put the smaller pulls on the upper drawers. I recognize this is a personal choice.
Love that!! Thanks, Kay!! You are right, I think this piece would look great in an entryway, etc. And yep, you and several others think the same! I can see that totally but kind of like it like this. Also, with the cup pulls, it’s better that they are on top as you place your fingers underneath of them to open the drawers. Which would be sort of a pain if they were on the bottom drawers. Whereas the open handles on the lower drawers are easy to just slip your hand in from the top to open. Does that make sense?? Plus also, they are actually two different sizes, they won’t fit the other way around. :)
It always amazes me how such a dated piece can be remade so beautifully !
I’m loving the bleached wood stain. I’m glad to hear you’ll be using it again. :)
Very nice results all around !
Thanks for sharing.
p
Me too! And yes, there’s something about that “natural” wood look that I love. Thanks, p! :)
That dresser is absolutely one of my favorites! Love the blend of finishes. NICE!!!!! You are a superstar!
Oh, so happy to hear that, Ronette!! Thank you so much!! And thank you for the superstar comment, so kind of you!!! xoxo