Update Old Wood For A New Look
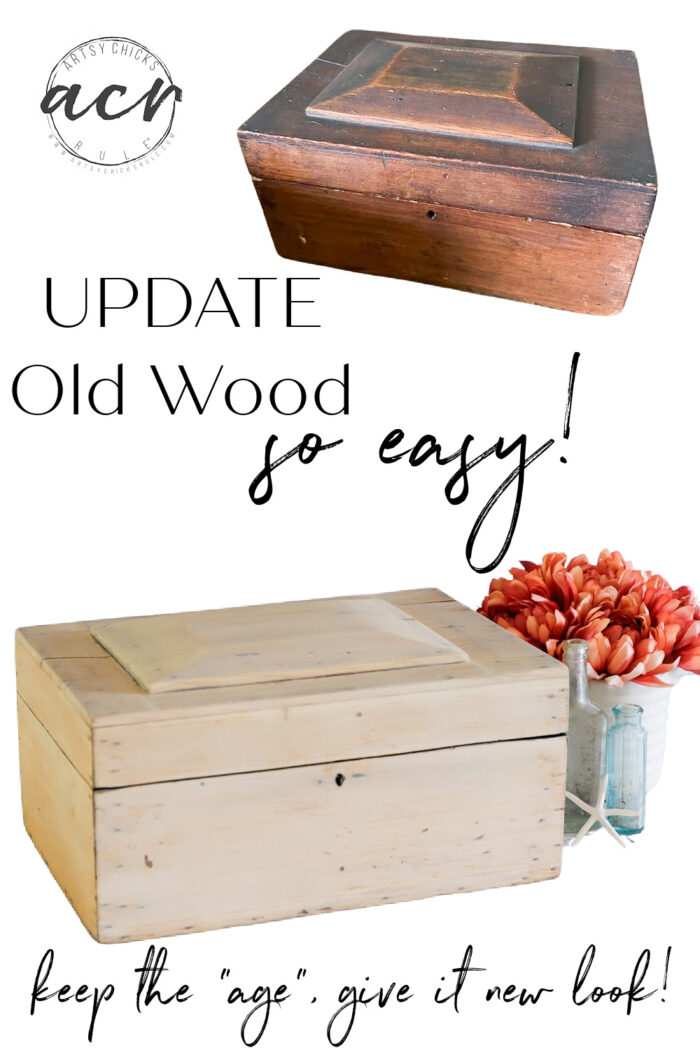
Update old wood for a new look! Or update it for a new “old” look too! Easier than you think!
Hello friends!
I hope you all had a fabulous fall weekend! It sure is feeling like fall finally around here. Downright chilly at times! Looks like we might have a last hurrah of warm weather though, in the next few days. Maybe that will be it for this year?? Who knows around here?!
Today is Trash to Treasure Tuesday and I’m back to share a brand-new find with y’all. My friends are sharing their new treasures too so be sure to scroll all the way down to catch ’em!
Also, have you entered my latest giveaway yet??
If not, hop on over right >>> here to enter to win the tote I made AND a $100 gift card to >>> our shop.
Update Old Wood For A New Look
Here is what I’ll be sharing today.
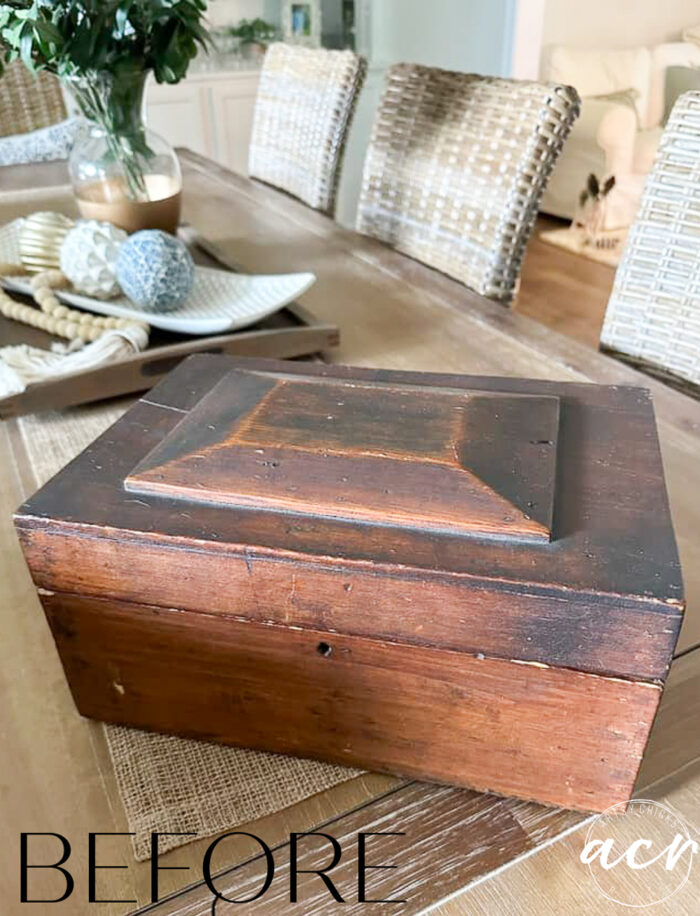
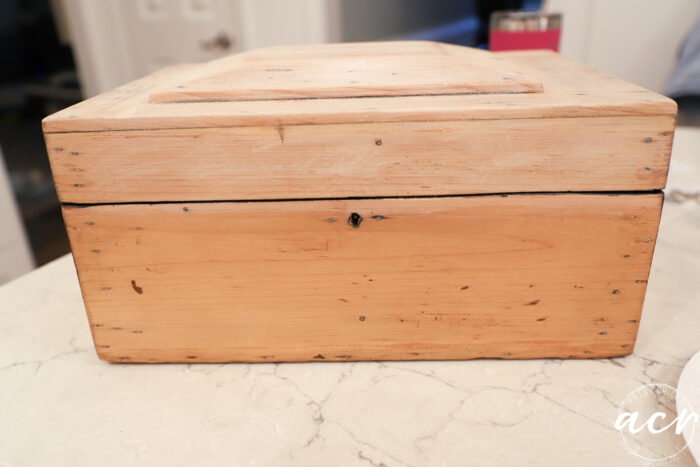
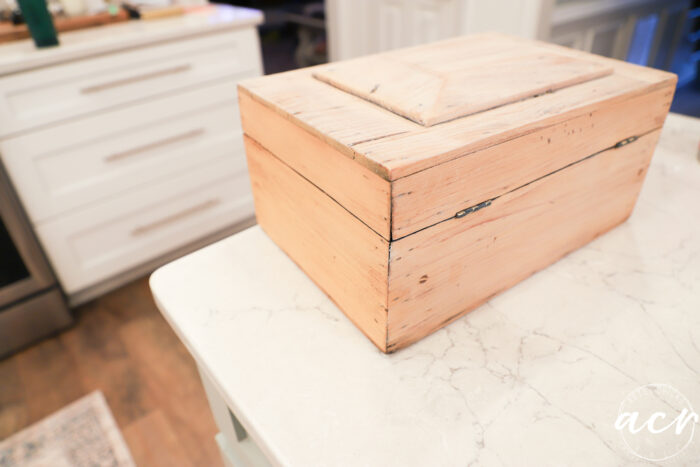
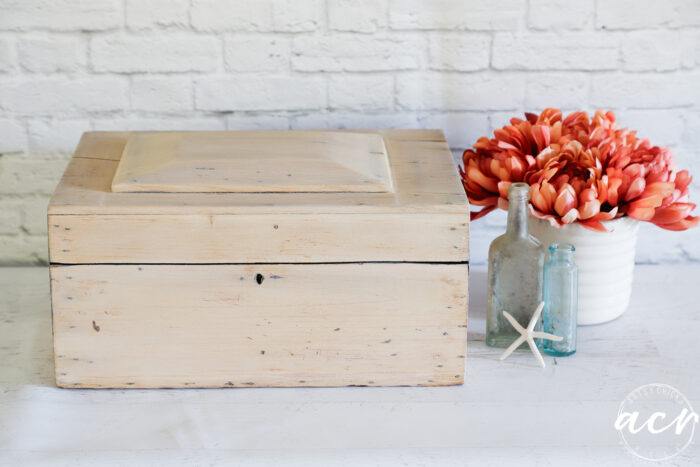
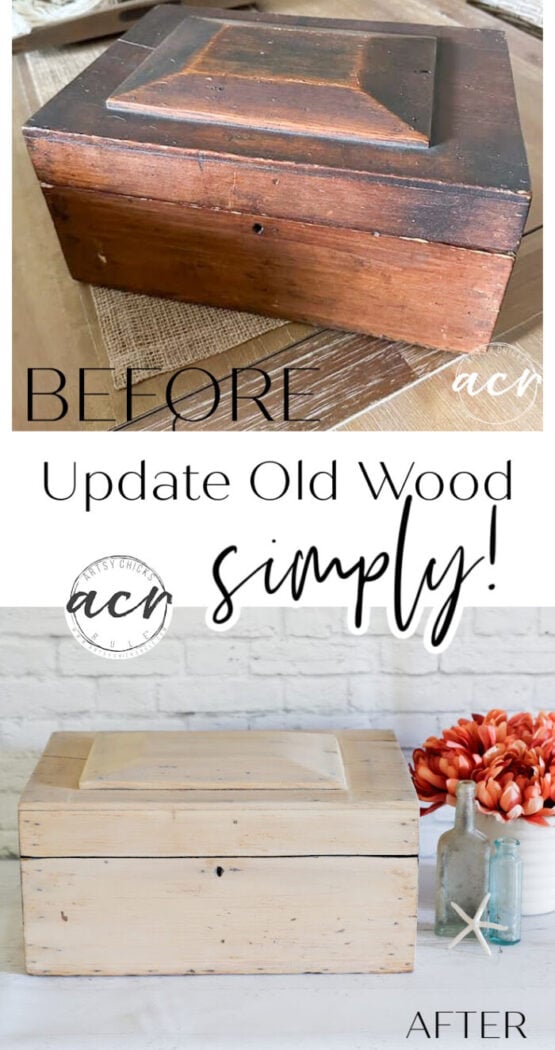
I found this antique wood box for 6.98 (and 50% off of that, so 3.50).
This one is definitely old. Take a look at the keyhole to lock it. Unfortunately, there was no key that came with it. I am sure it is long lost!
By the way, did you spot the cutest little photo bomber in the picture above?? lol (with my son’s sock in front of her…sock thief! haha!)
So…let me tell you before I begin, I forgot to take a photo of the “before” of the inside!! Ugh!!!
It was rough. Way rougher than the exterior. It was oddly half-stained and very beat up. Not sure why!
But darn, I’d have loved to have been able to show you. Whoops.
SAND
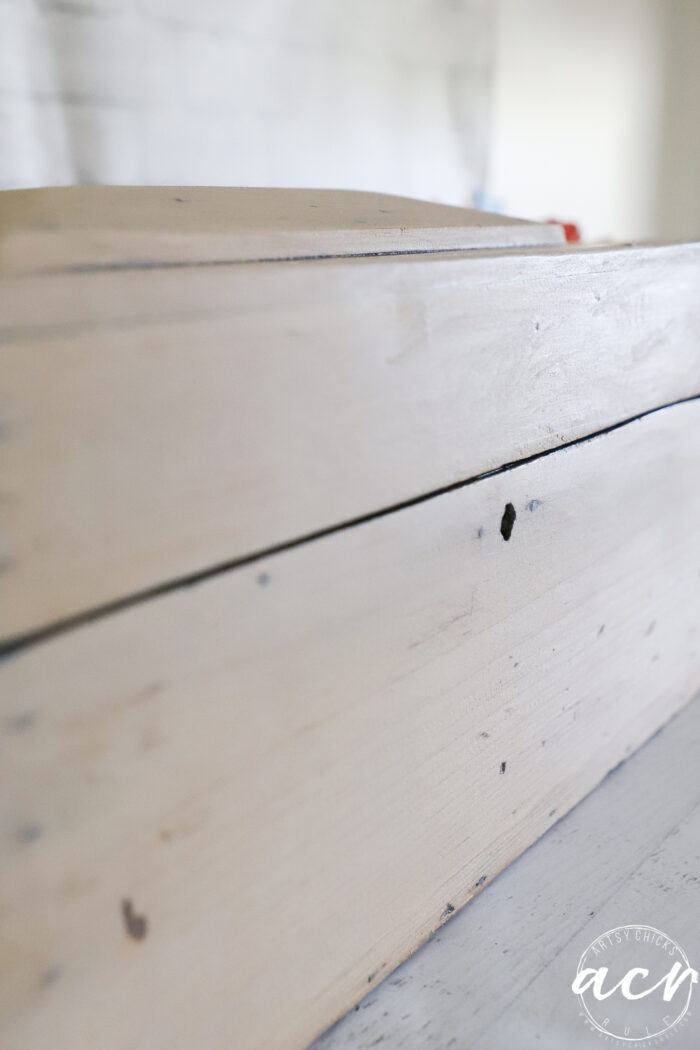
I spent about 15 minutes sanding the exterior of the box and this is what it looked like after that was done. (I started with a 150 grit then finished with a 220)
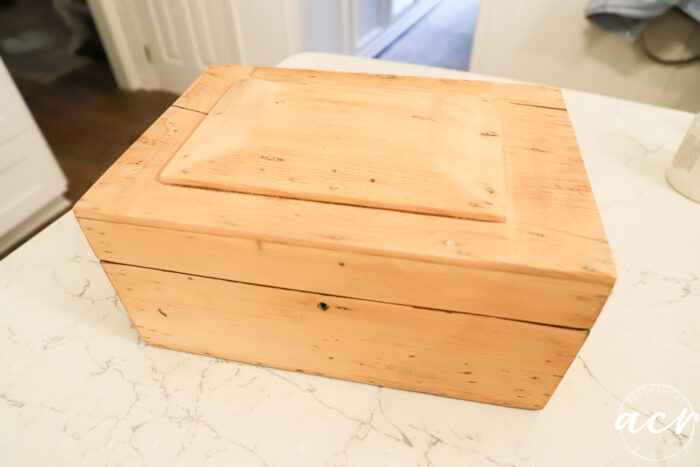
Already better!
Lots and lots of nails showing though that didn’t show up with the stain. I was okay with that though as I decided to embrace the “old” on this one.
If you could’ve seen the interior you’d understand why.
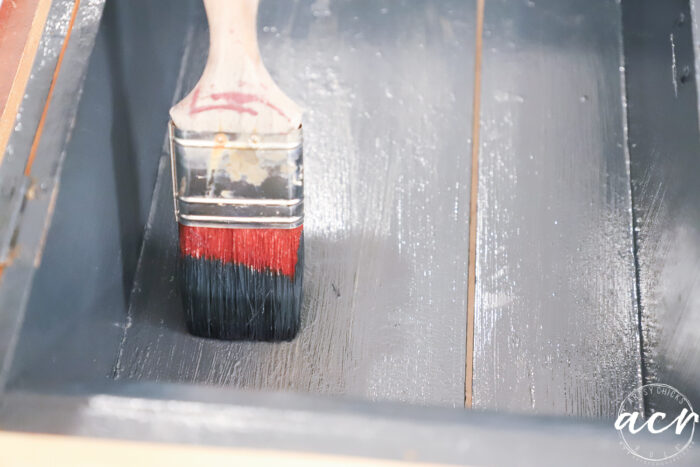
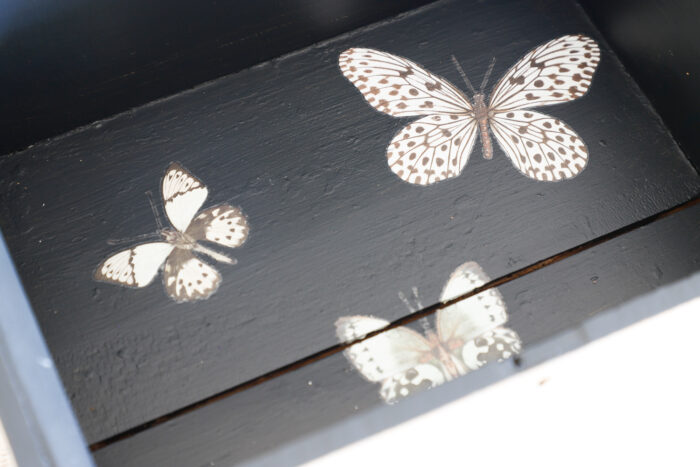
For the inside, I decided to go dark. (for the reasons I stated above) No way I could really sand inside, etc. I considered adding some sort of decorative decoupage or fabric but decided to go for the whole “rustic” look inside and out. I thought it was more fitting for this particular wood box.
PAINT THE INTERIOR
So I mixed up some Ash (dark charcoal color) and Chestler (dark green-toned lovely blue shade) to come up with a very dark navy-ish blue shade.
You can see the two colors below before I mixed them.

And painted the inside.
I also used Chestler on this pretty little table makeover here >>> Easy Way To Glaze Painted Furniture
You can find all the products I used here:
MATERIALS LIST
- Ash Paint
- Chestler Paint
- Fields of Lavender Furniture Wax
- Tough Coat Topcoat in Matte
- Papillon Collection Transfer Set
- Paintbrush
- Casement (white paint I used to tone down the wood)
WHITEWASH THE WOOD
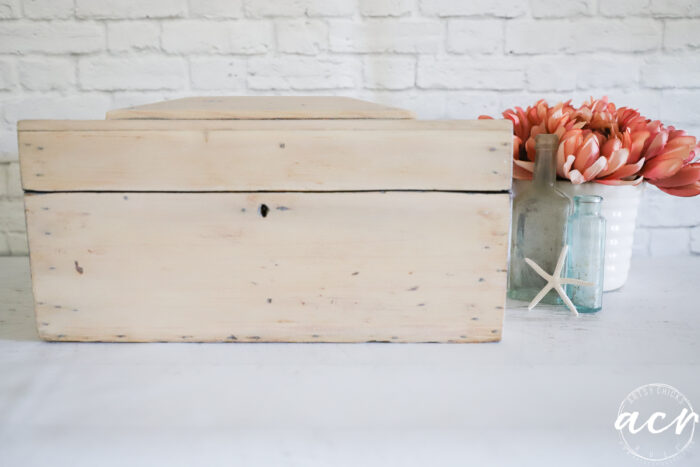
For the outside, I decided to give it a “wash” of white to take away a bit of the orange/yellow tone.

I grabbed a rag and wet it, then dipped it in a mixture of Casement (white) paint and water. (you want enough paint so that you can somewhat see it when you wipe but not enough that it completely covers…you want to see the full woodgrain through it)
You can see what I mean below. The top has been whitewashed, the bottom section has not.
See the difference?
And again here, the entire box has been done except for that one side.
It’s subtle but just enough to update old wood and remove the orange tones for a whole new look.
And keep in mind it’s still wet in these photos. It will naturally look lighter once it’s dry.
APPLY TRANSFERS
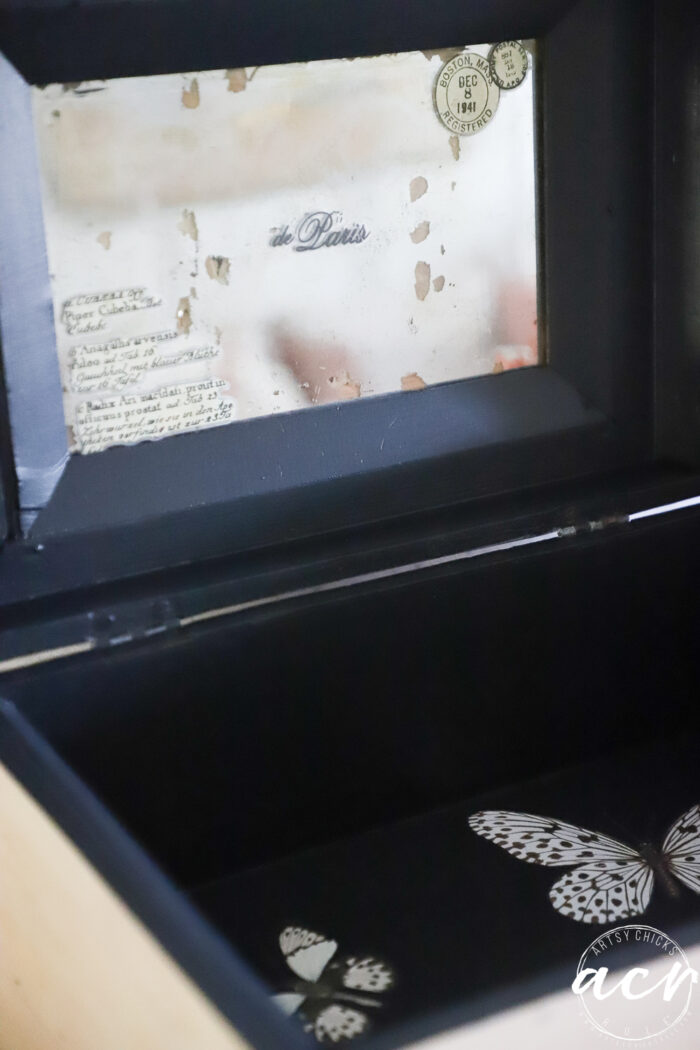
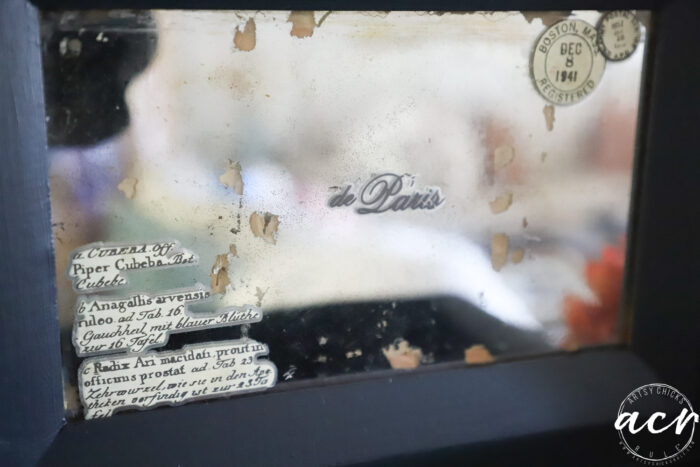
I decided to add a few butterfly transfers to the interior. Also a few on the very aged mirror too.

I also used some of this same transfer on this project here >>> Mini Butterfly Cabinet Makeover
I think the ones on the mirror go perfectly with the state the mirror is in.
SEAL THE INTERIOR
Once I had added the transfers, I sealed it with Tough Coat Topcoat. (all products I used are listed above in the gray box with links to each)
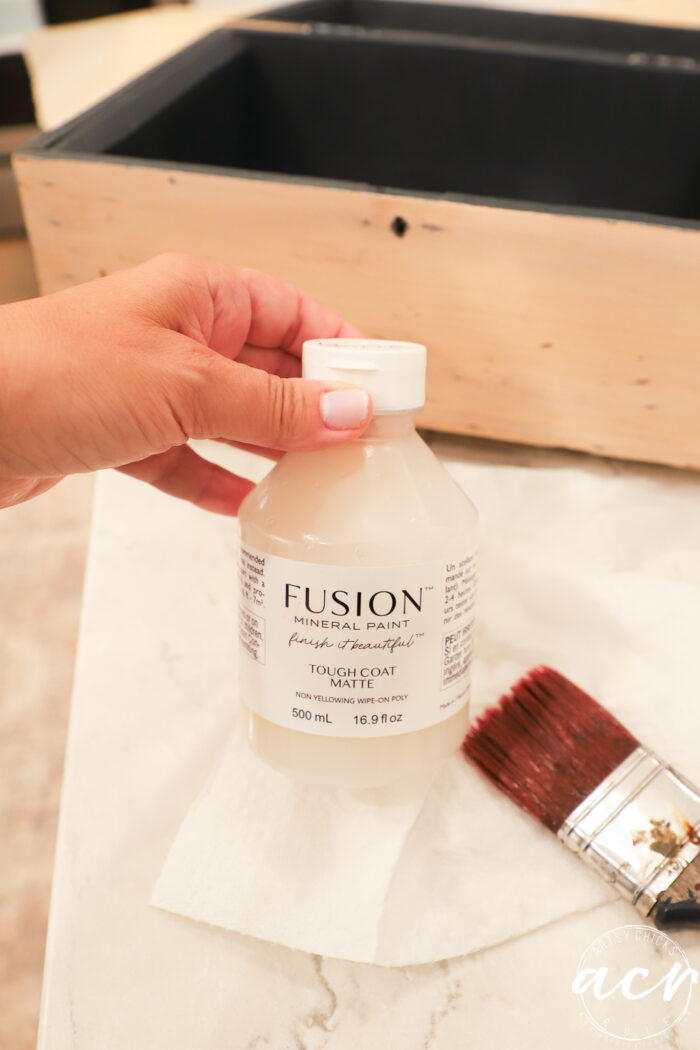
I let that sit overnight and then waxed the exterior of the box in the morning.
WAX TO SEAL THE WOOD
Lastly, I used an old rag and this lovely wax to seal the lightly stained wood.
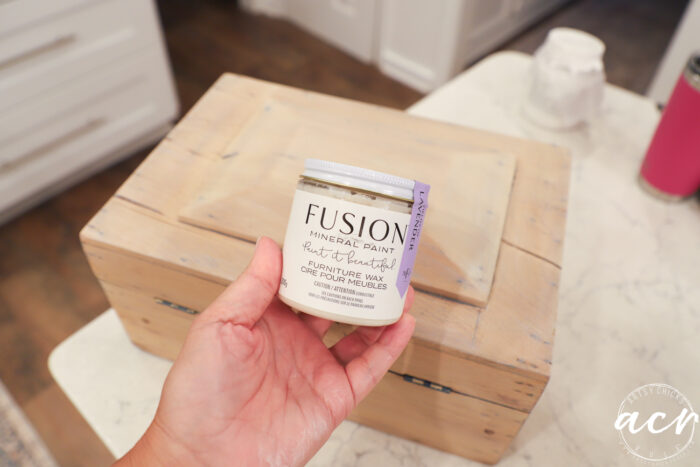
It smells divine while you are using it. Love it.
Plus, just look at that gorgeous luster. So good.
I don’t use wax often anymore but do love it on raw wood! It’s the perfect thing to use when you update old wood like this.
And done!
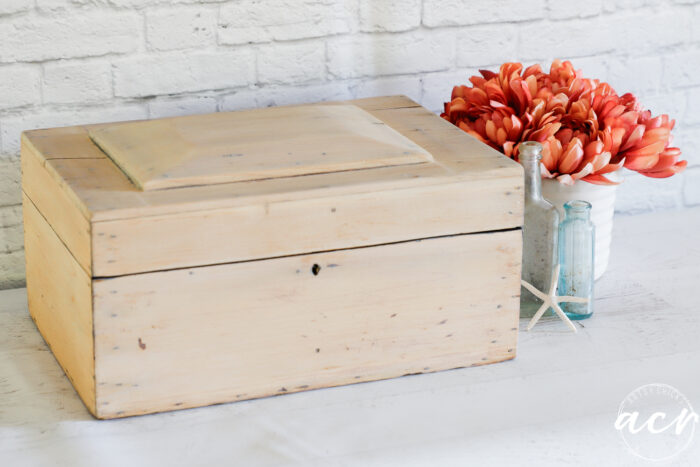
Updated old wood box. With age. Love it!
So I wasn’t necessarily trying to make it look new. I wanted to update it but keep the wear and the charm.
So bumps and marks and nails showing everywhere. Perfect!
Open it up and you get a sweet butterfly surprise.
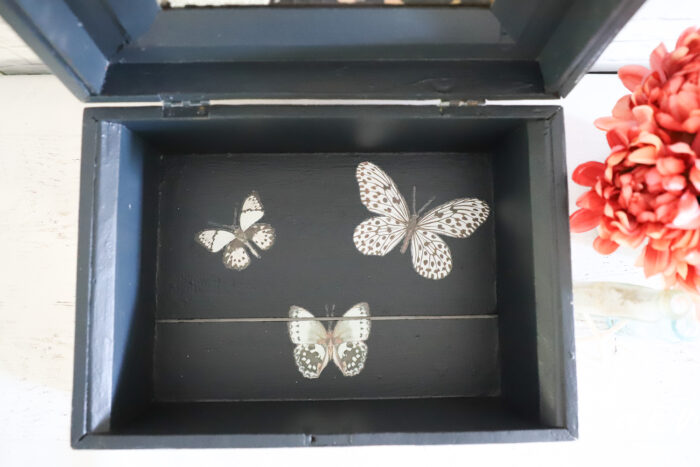
And the old mirror with vintage transfers looks like they’ve always been there.
It’s really a treasure. I love old things.
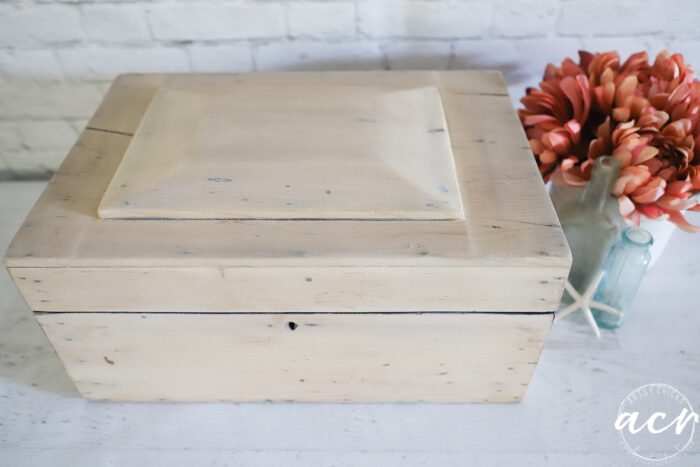
Isn’t it great how well a simple wash of paint tones old, raw wood so well??
Might be a keeper!
Have you updated old wood this way before? I love this process.
I’ve done a few other similar projects you might also like here:
PIN it to save it!
Wait! Don’t go just yet! Hop on over and visit my friends’ makeovers too!

Have a blessed week!
xoxo


I just love washed wood look. You did a funtastic job with the interior the cherry on top, Nancy.
Thanks, Larissa!! :)
I love the new look and especially the ‘surprise’ inside! Beautiful Nancy! XOXO
Thanks, Denise! I always love a little surprise inside! xo
Very beautiful; sanding 15 min; you got a lot done in 15 minutes. The washed look could blend in with a seaside motif❤️
Thanks, Willie! Eh, 15-30 MAX. That finish came off very quickly and easily. (it’s not always that way lol) It was just 4 sides and even the top was done quickly. You are so right, very good for coastal decor! :)
Thank you for your, apparently, tireless endeavors and vibrant inspiration:-)
Aw you are so very welcome!
What a cool box…such a great find, and it is perfect to blend into your decor now! XOXO
Thanks, Christy! Yes, it really does. Maybe I’ll take it to the beach condo! xoxo
So pretty! I also love old things that have a history. I was thinking a small handle on the front of the lid above the keyhole might be a nice touch🙂. I really like the butterfly transfers and what you did on the mirror. Thanks for sharing!
Thanks, Vicki! Me too, so much! And yes, that would’ve looked good too! I actually though about putting one on the top in that center section also. But didn’t obviously! I ended up just keeping it simple since the box felt VERY simple and rustic to me. But then surprise! When you open it up and there’s a little something something special. :) xo
This is the look I love. What a wonderful old box!
Thanks, Suzi!!
It looks fantastic now, Nancy. That little extra “something” inside just makes it really special.
Thanks, Caye! I always love a little something extra inside! xo
I love what you did with this. Love your little photo bomber also lol.
Thanks, Debra! Yes, she’s the best part, isn’t she??! :) xo
OOPS!!!! Can’t agree on this one ;( That box had a beautiful patina!!!! It takes years to get that!!! sorry….
I did LOVE the photo bomber!!!! Adorable!!!
Aw, haha! Thanks for being honest, Addie! :) I understand!! And thank you, she can photo bomb my photos anytime, right?! lol xoxo
I love all you can do. You are very talented. Yes!!! I must be honest…that way when I say, “Love it”…You can know I mean it!!! Usually if I don’t care for something I will not respond….because it usually doesn’t matter, personal opinion. This one tugged at my heart.
Oh! it doesn’t mean I don’t like it if I don’t always respond either…no time/ too tired.
Okay…I am digging myself out of this hole!…I gotta be me…..AD xoxo
Thank you, Addie! And yes, I totally do! I love that you are honest and I appreciate honesty so no worries at all! (and I get the no time/too tired too, haha, trust me! ;) ) Have a great weekend, friend! xoxo
So sweet and I love the dark interior with the transfers! xo
Thanks, Jen!! xo