Mini Butterfly Cabinet Makeover with Decor Transfers
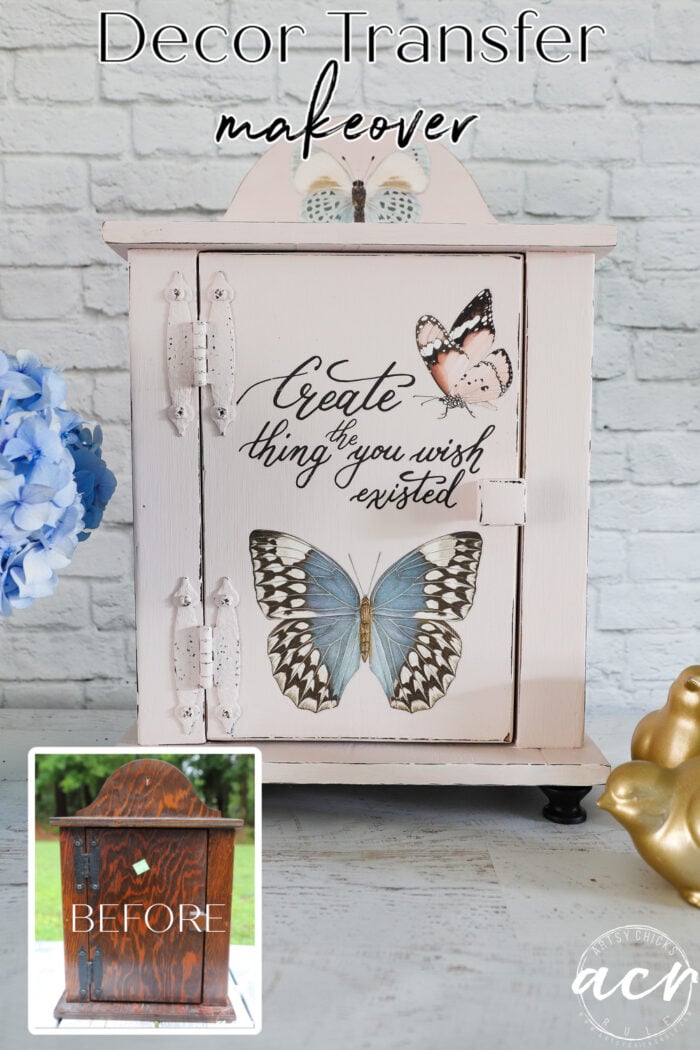
This mini butterfly cabinet is perfect for keeping all kinds of treasures in. So easy with paint and butterfly decor transfers!
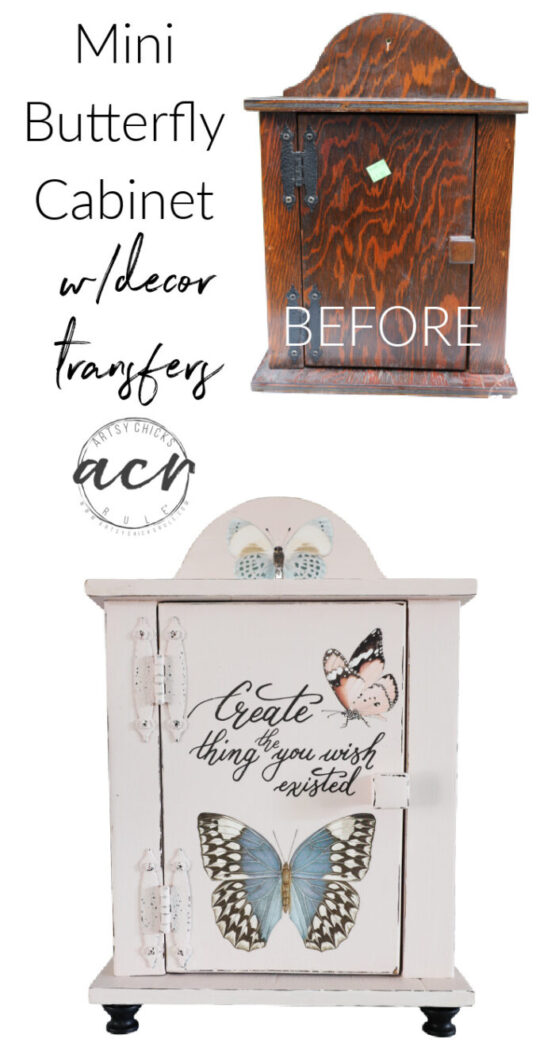
Hello friends! Today I’m sharing a sweet little “cabinet” that I found at a new ReStore I stopped in at last week. I walked past and thought “isn’t that the cutest little thing…but wow they sure tried to make it ugly!” Haha!
But before we get to that, I have to mention today is my and my sweet hubby’s 32 wedding anniversary! Wow, time sure has flown! I created a video of our life together for our 30th and shared it here a couple of years ago and over on my Facebook page. If you are interested in seeing it, click here to hop over to Facebook to watch. :)
Mini Butterfly Cabinet Makeover with Decor Transfers
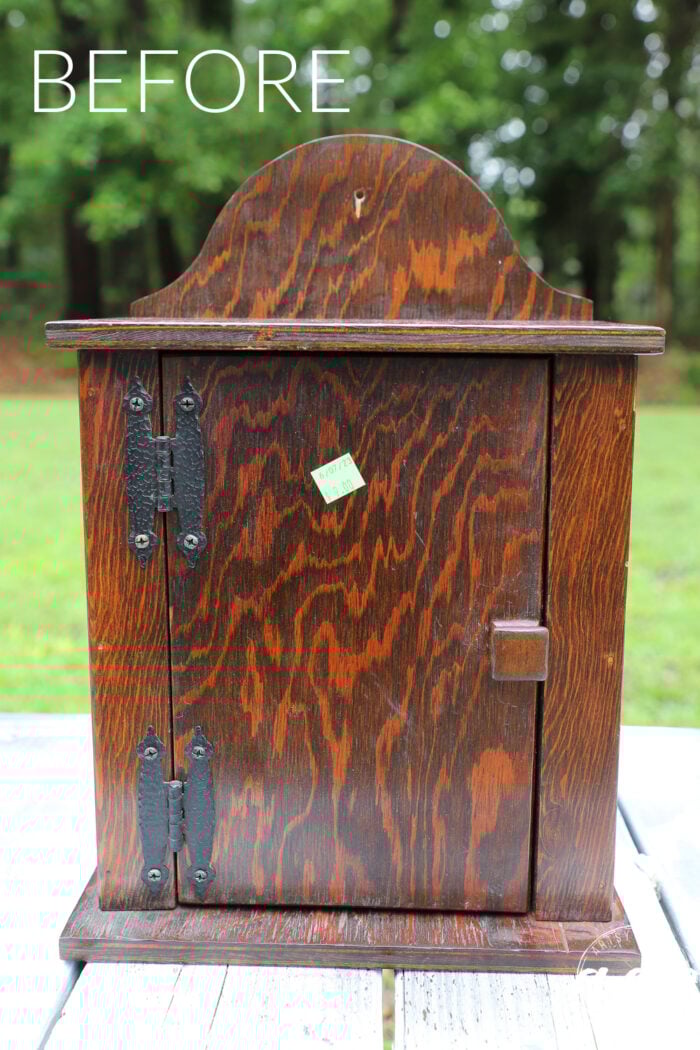
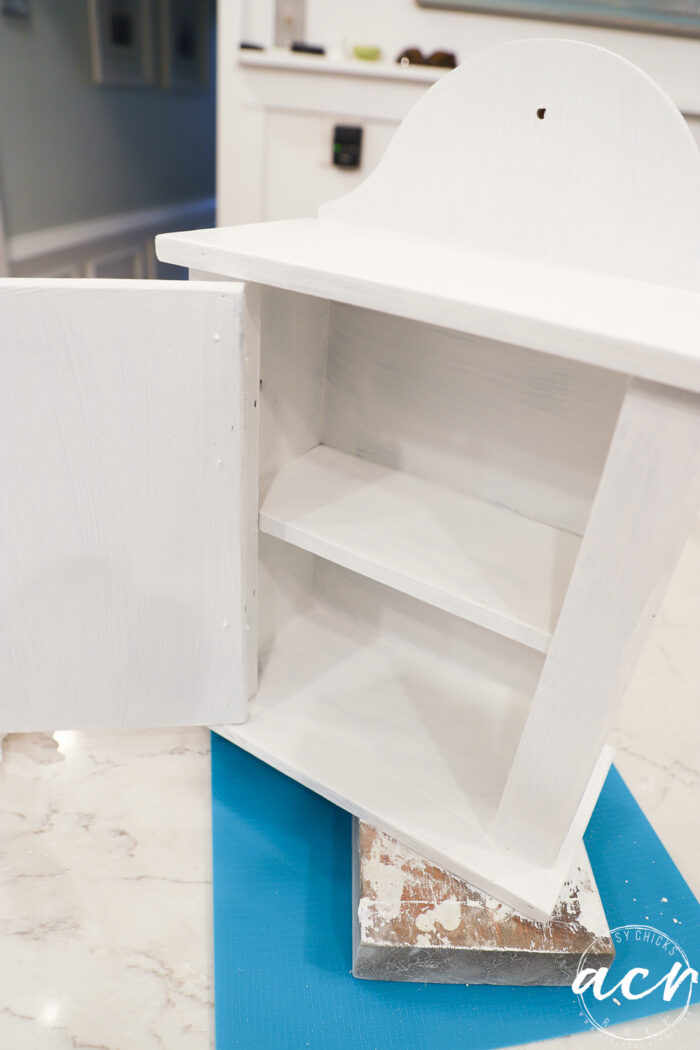
It was $9.
Here’s the inside.
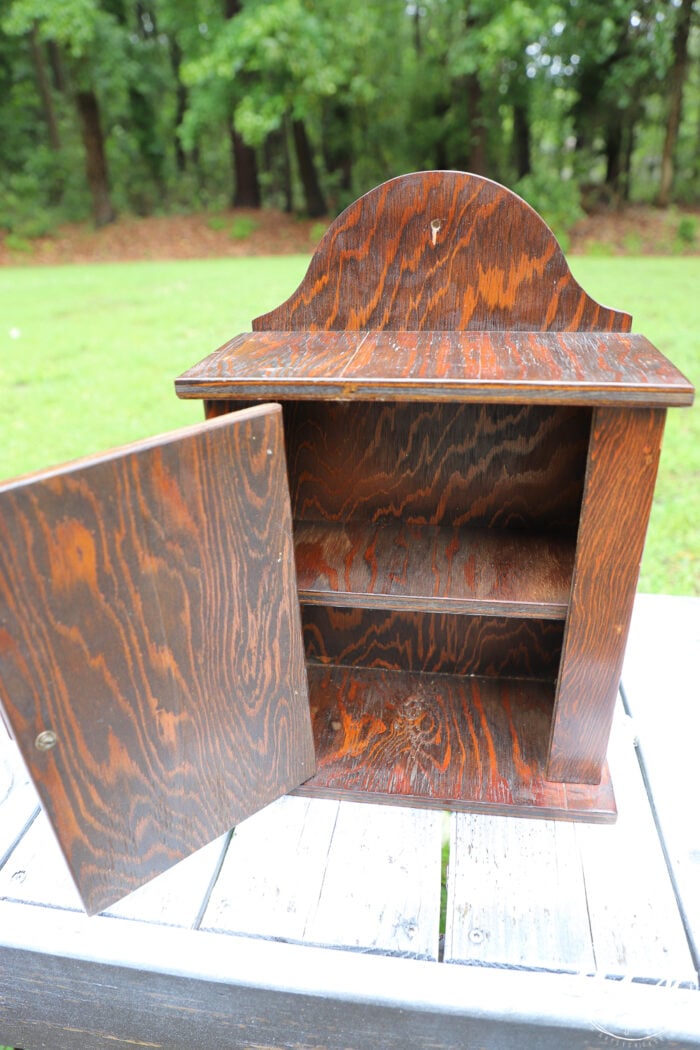
Very basic! I guess it did the job, whatever the job was.
But I am here to doll it up. And doll it up, I did!

By the way, my hydrangea bushes have all gone crazy this year…those are some from one of them! I shared the 4 jars of flowers I put together (all in varying shades of blue/pink/purple from the same bush last night in my Instagram stories, maybe you saw it?!)
Let me begin by saying I just added a bunch of gorgeous brand new decor transfers in the shop! (and restocks on old ones are coming next week) Hop on over and check ’em all out right here.
MATERIALS LIST
- Papillion Collection Transfer
- Rose Water / Picket Fence Paints
- Ash Black Paint
- Champness Paint
- E6000 Glue
- Tough Coat Topcoat
Since the wood had a glossy-ish finish, I lightly sanded it all over. Then I wiped it down well and painted two coats of white, drying well in between coats. (Picket Fence)
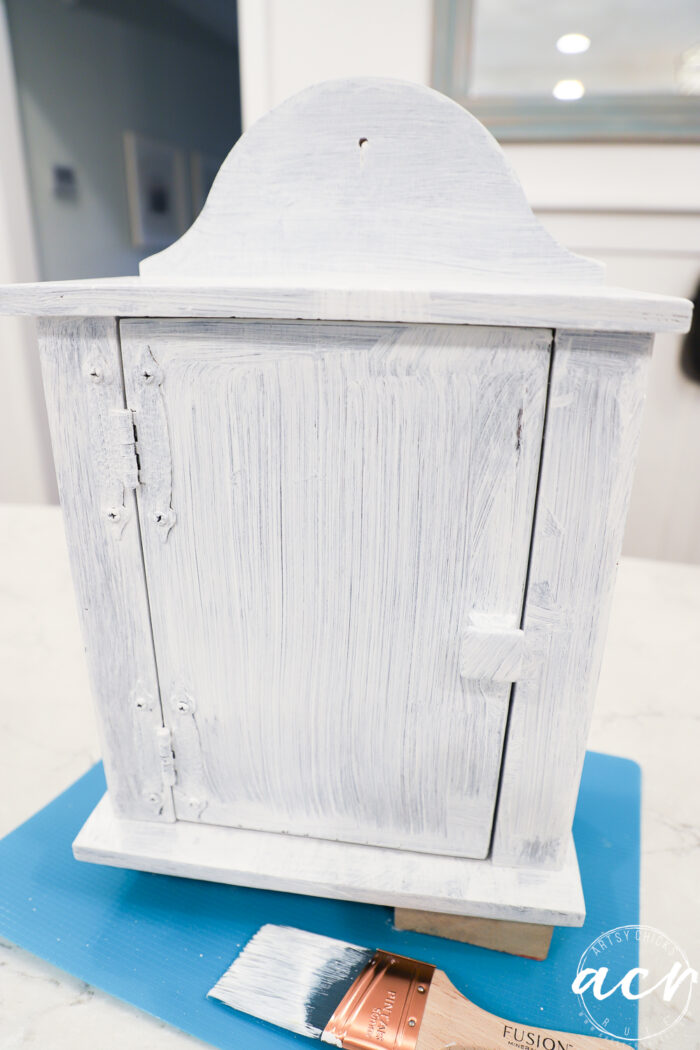
Inside and out. (I also filled in that hole with wood putty. I’m guessing it used to hang on a wall but I’m adding feet so no need for the hole)
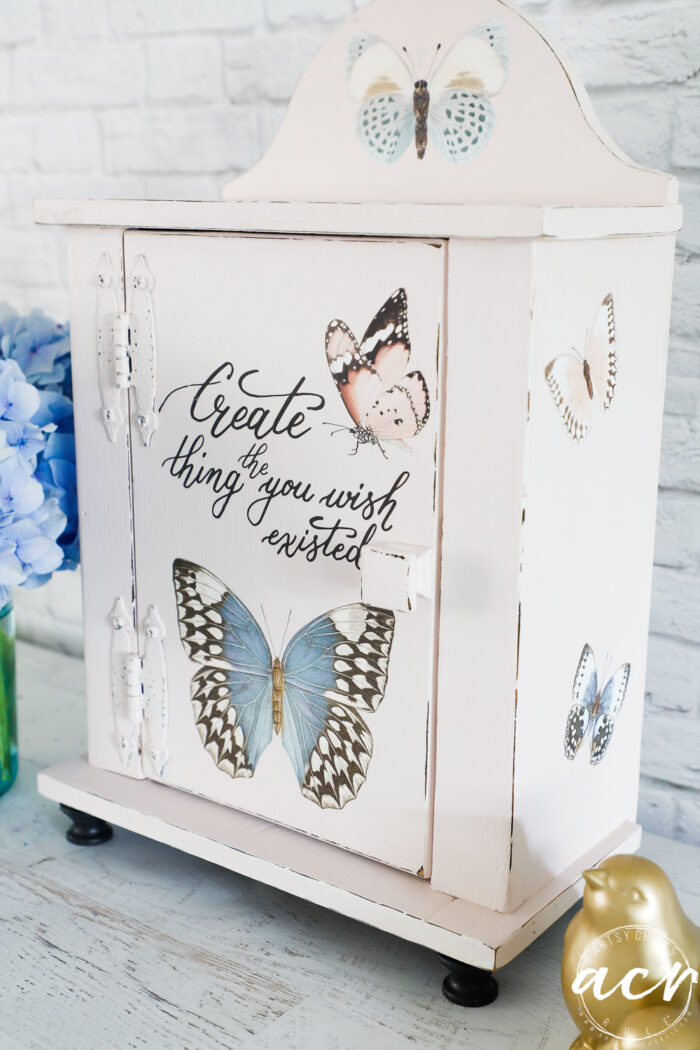
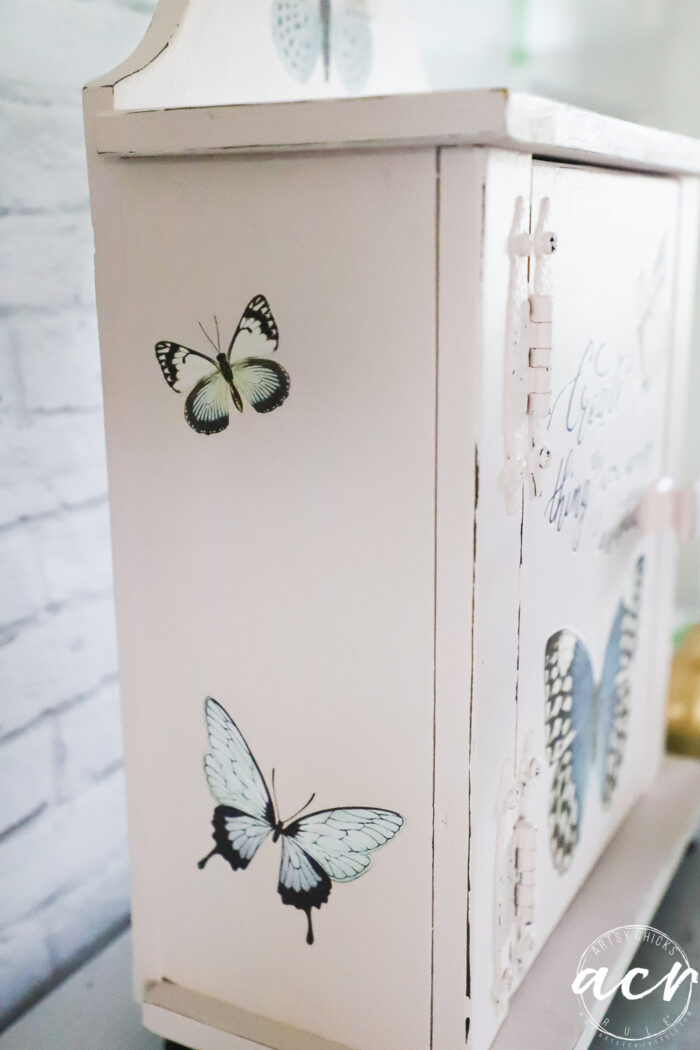
Then I mixed up a bit of Picket Fence and Rose Water. (about 3 parts white to 1 part pink) I wanted a mostly pale pink for this butterfly cabinet.
I painted the outside in the pink mixture and the inside got blue. (Champness …everything is linked above in the gray box marked “Materials List”)
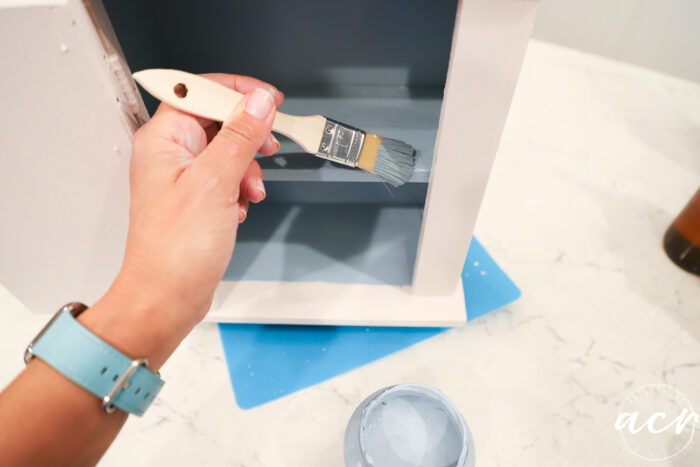
I just love these two colors together! Pink and blue. Obviously! As these are the colors of my theme/brand here on Artsy Chicks Rule.
Always some shade of aqua/pink. :)
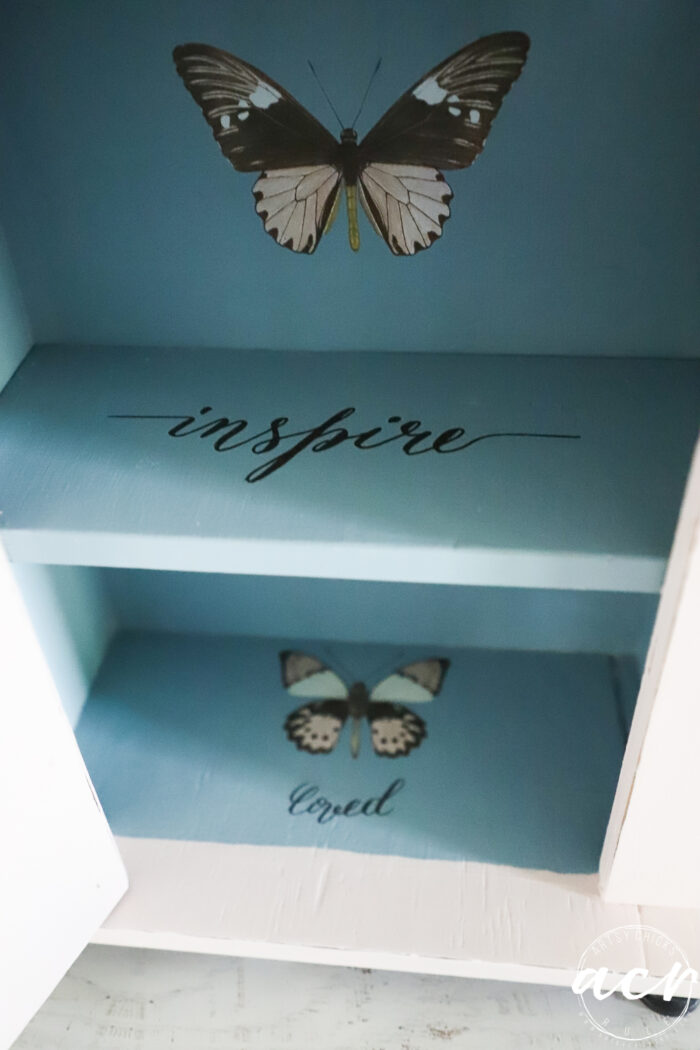
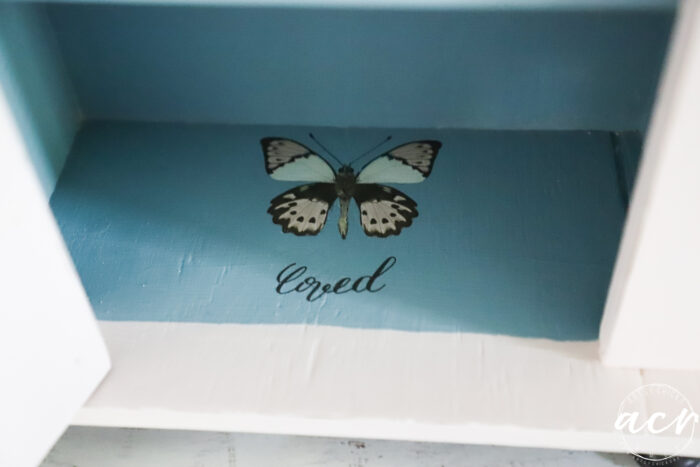
Anyway, I did one coat of the pink and two of the blue. Then I pulled out this new set of decor transfers. (they are in the shop here)
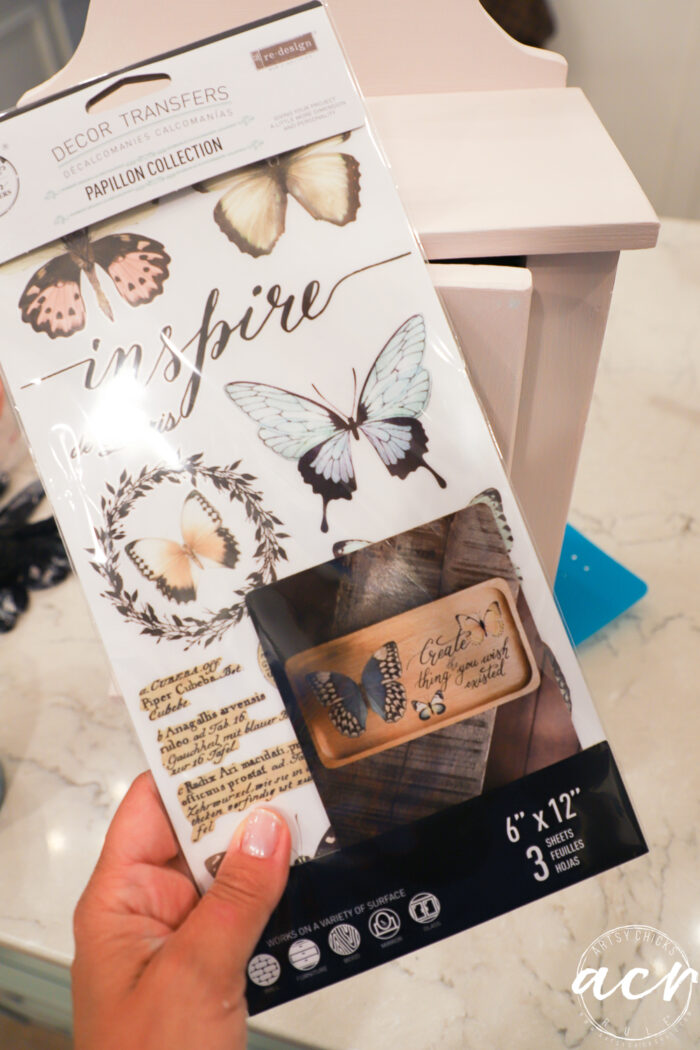
I just love this set!

SO many pretties to choose from.
I started laying things out and creating my design…
On the front, I used this one.

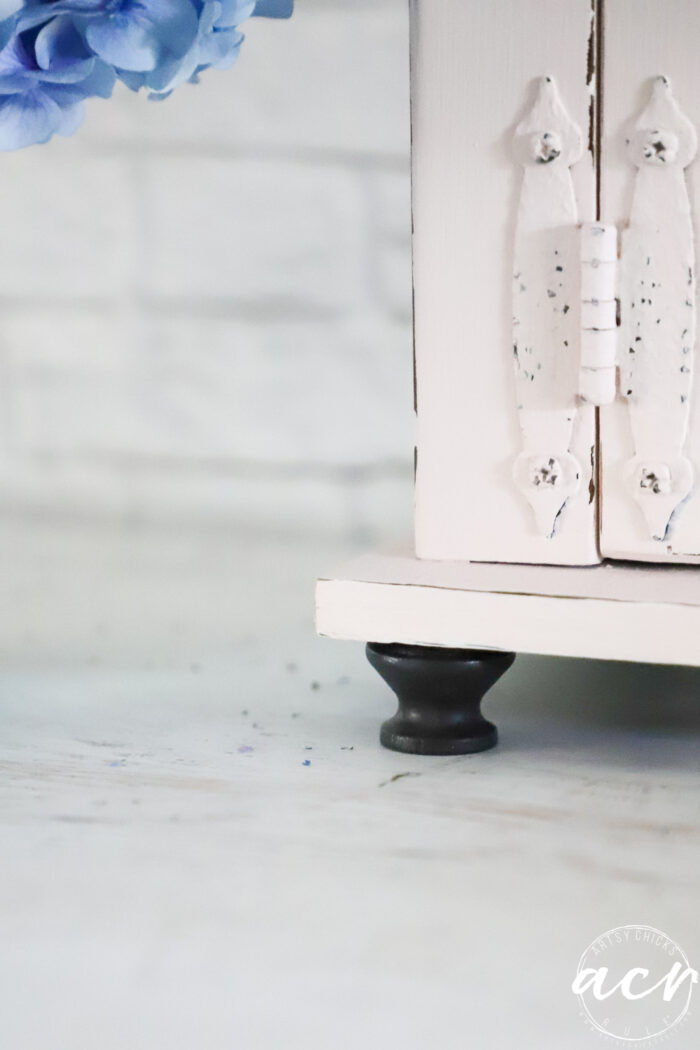
I added more butterflies on the front and sides then found some old wooden knobs in my stash.
I spray painted them gloss black but didn’t love it!
I sanded down the tops of the knobs to apply the glue. Before I applied the glue, however, I set the cabinet on top of the knobs and positioned them where I wanted them to be.
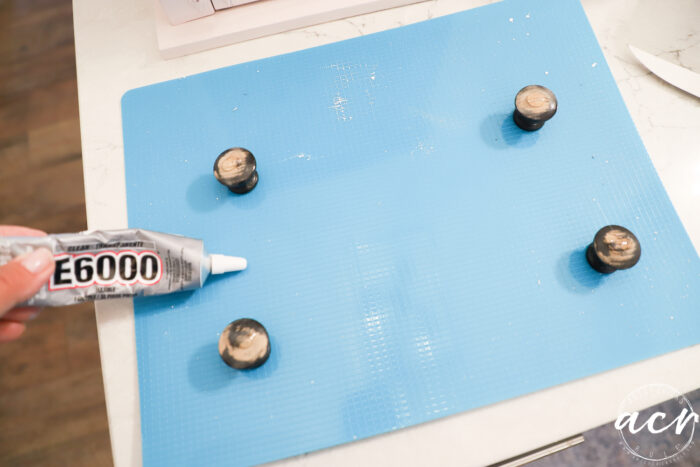
Then I applied the glue and carefully set the cabinet back down on them. I did a final check to make sure all were in the right place before I left it to dry overnight.
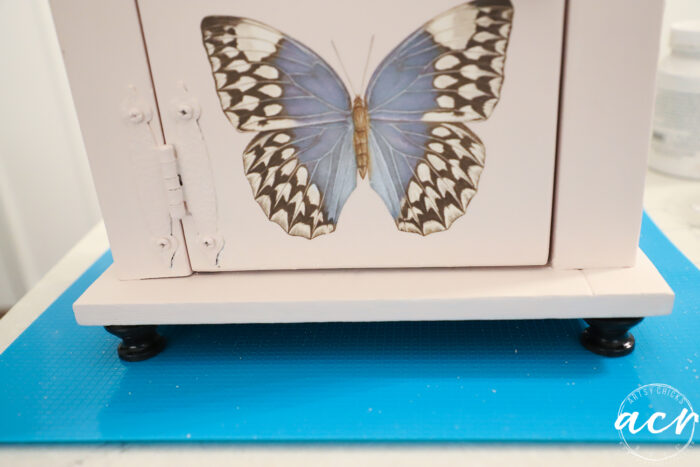
Isn’t it so much cuter with tiny feet?? I think so! It needed those.
Once they were set, I painted over them with my Ash black paint which I like so much better.
It’s such a nice, soft black.
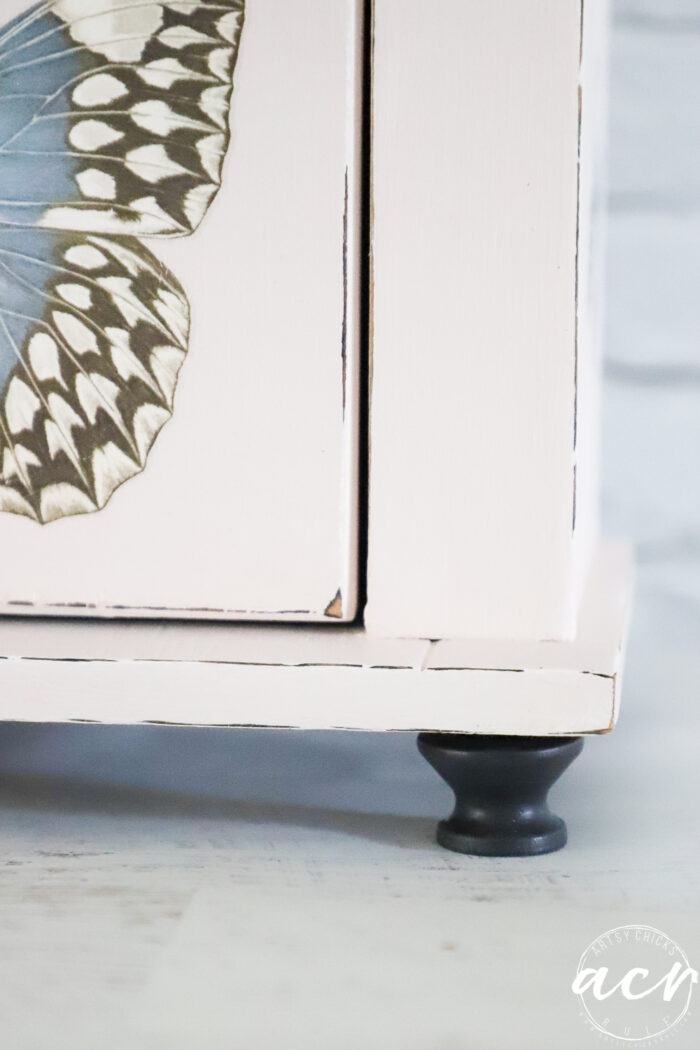
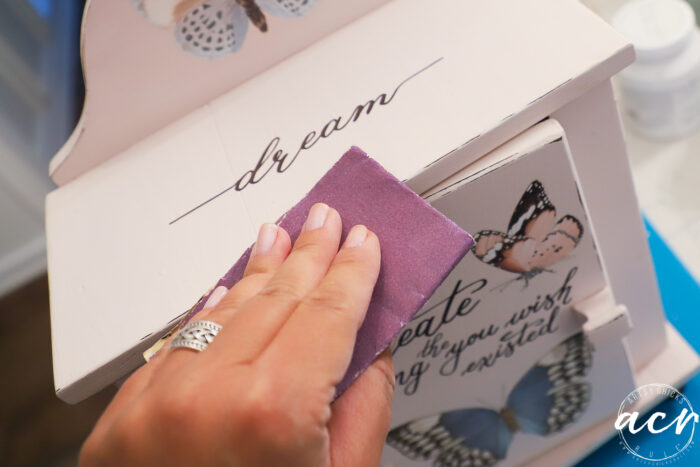
I took some fine grit sandpaper and went over all of the edges to distress. I thought this cabinet should look a little “aged”.
I wiped it down and applied one coat of Tough Coat Topcoat. (see the box above for links to products)
And done! So simple but look how different it looks.
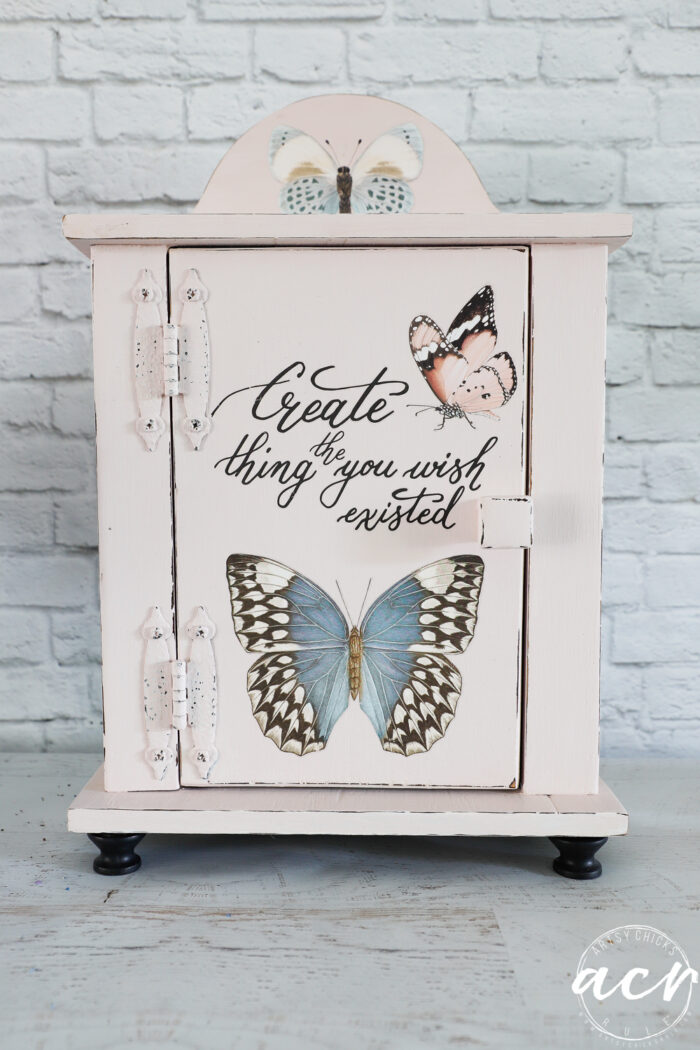
I decided to keep the original hinges and knob and paint them the same as the rest. I didn’t really want them to stand out. I wanted them to blend in so the script and butterflies drew the attention instead.
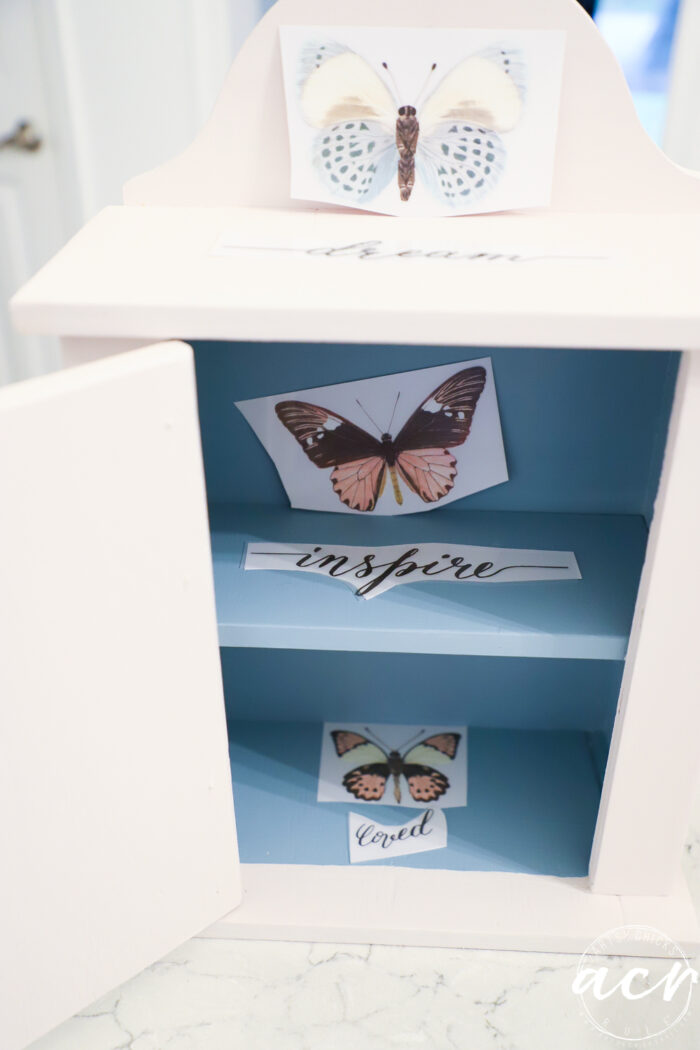
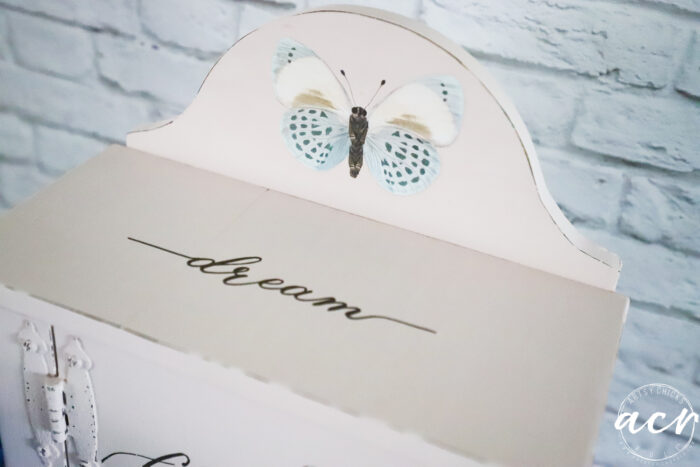
And I just love the inspirational script included in this set.
Isn’t it the sweetest??
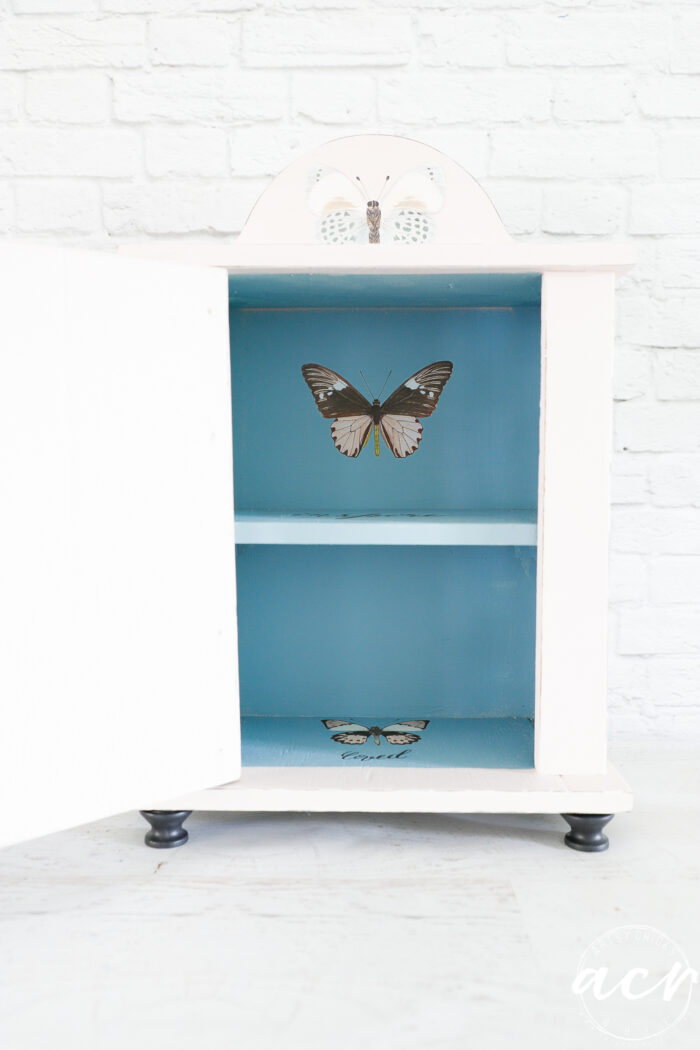
And a fun little pop of color inside with even more surprises.
I decided to leave the inside of the door plain since there was something going on everywhere else. Plus, I really wanted to draw attention to what I put on the inside instead.
Peekaboo.
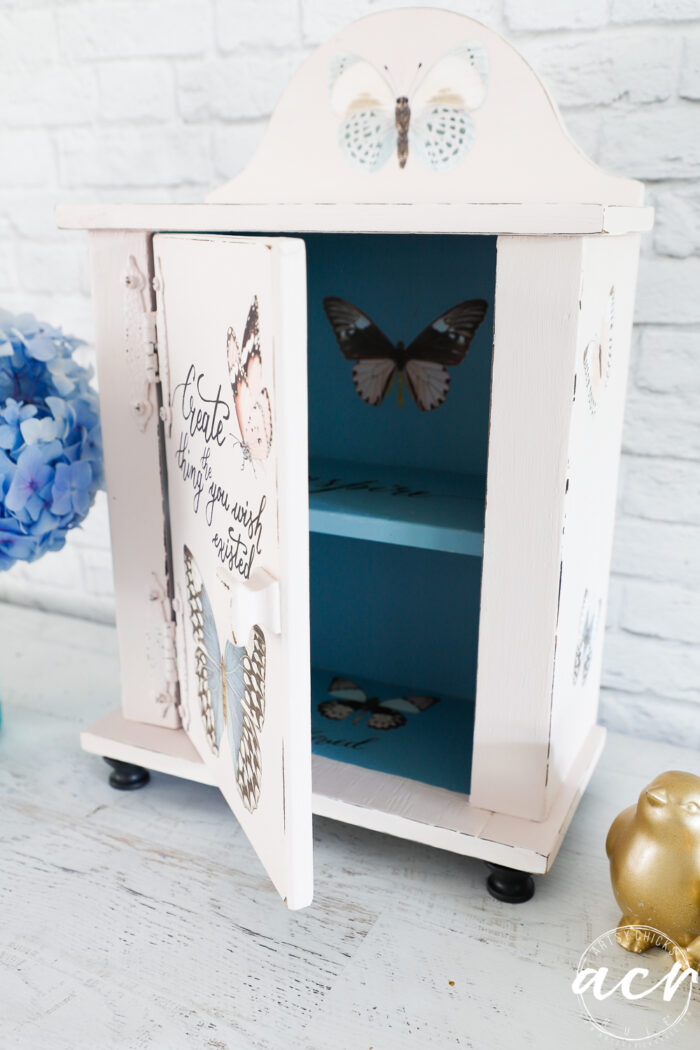
Knob feet are a winner every time.
The sides got butterflies too.
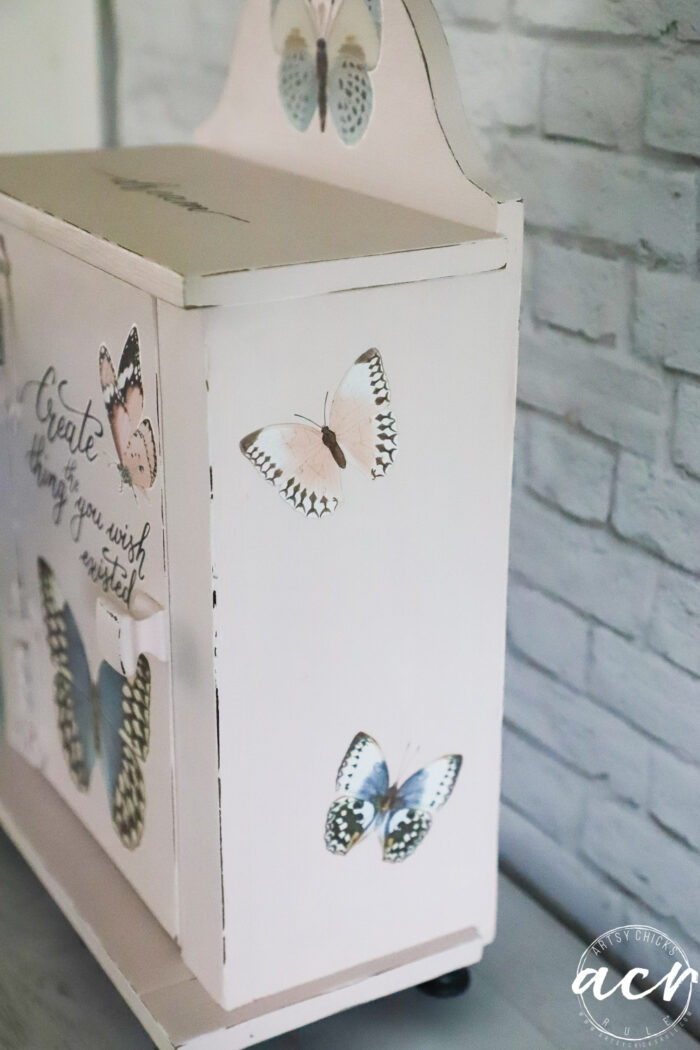
And the top…
Wouldn’t this be so sweet and inspirational for a young girl to have in her room? A fun place to keep all of her treasures in?
I’m glad I didn’t leave this one behind! How fun to change it up with a little paint and these pretty decor transfers.
PIN it to save it!
Have an amazing weekend, friends!
xoxo


")


Beautiful. What a cute little cabinet. Nice item to put in bathroom/powder room.
I’d say that used to be maybe a medicine cabinet that someone had made
Thanks, Colleen! Yes, it would be perfect on the counter in a bathroom. Great idea! xo
I have almost the exact same little cabinet that my grandfather made for my Aunts to put their doll dishes in when they were little girls..born in the early 1900s.
I’ve been trying to figure out what to do with it and this is a great inspiration.
Thanks
Oh wow, that’s awesome. That sounds like exactly what this one could’ve been for! :)
From blah to adorable! Love the feet!! Inspired to put feet on all wood piece I have. Thanks!
Thanks Tess! Yes, the feet always make it! xo
Nancy, I love how this came out. Butterflies are very special to me and this cabinet is so sweet. You are an inspiration to me and I just love your style. Now I have some great ideas for some of my small projects. Thank you.
Thank you Pam and oh yes, I remember. Hugs xoxo
Wow! What a makeover! I have to be honest when I saw the pine box I thought “what the heck”, but I should have known you would pull off the best makeover! This is so cute! Wonderful inspiration piece!
Thanks, Vicki! And haha, love that. It was so much fun to transform…I just love seeing the “afters” even when I’m doing them myself! xo
I didn’t see anything cute about it before, Nancy, but now it’s adorable! The colors are perfect with the transfers and now it really has some personality.
Thanks, Marcie! The “afters” are so much fun. I never tire of it! :)
It’s super-cute! I would love to have it in my house.
Thanks, Lizzy! I’m so happy with this one came out. :)
This is a long way from where it started! Gorgeous! XOXO
It sure is!! Thanks, Christy! xo
This came out so sweet! I love it! Some people in some communities are putting out little lending book boxes where you take one to read and put one in for someone else. For some reason that came to mind with this box. Or putting slits in it and making it an actual butterfly habitat lol. So many uses, it’s adorable. The feet add to much also.
Thank you, Debra! Oh yes, I know those and it does resemble them. And oh, wouldn’t a butterfly house be something? Neat idea! xo
Oh my goodness what a transformation, Nancy! WOW! I cannot even believe it is the same piece. I absolutely love it! And those transfers are gorgeous!!!! Well chosen make-over!!! ♥
Thanks, Michele! The new transfers are all so pretty! :) xo
Just lovely. And the colors of the paint put it all together. You do such nice work.f
Thank you so much, Anne! :) xo
So sweet. I always love what you do. Little late with the comment but I know you’ll read it. Hope you’re having a good summer. Even if I don’t comment I always “tune in” to your post to see what you’re up to.
Thank you, Kathy! Yes, good so far, but going by way too quickly! Hope you are as well. And I’m so glad to hear that. :) xoxo
I love this little cabinet. It could have so many uses.
It really could, couldn’t it, Rose?! Thanks!
The little cabinet turned out so cute! I am a lover of butterflies so it speaks to me. I must have missed the 30th wedding anniversary 2 years ago and when I read that this is your 32nd I thought you must have gotten married when you were 10! You do not look old enough to be married for 32 years! Way to go girl! and Happy Anniversary!
Thanks, Janet! And awww, you are so sweet!! haha!! I did, I did!! I like that math! ;) xo
Great save on the box.
I watched the video!!! So beautiful!!! Wow!! You like a different person with your natural hair color. I hate to be the one to tell you…your husband married a brunette and he has been seeing this blonde!! haha!!! Beautiful couple, beautiful children!!! A life well lived with wishing you many more down the road….hubby is very cute too!!!
Haha!! Addie! Too funny!! Thank you my friend!! xoxo
Love it! What a perfect finish for that little cabinet. It makes me smile. Have a wonderful Sunday- xo Diana
Thanks so much Diana!! xoxo
I just love what you did to this darling cupboard!!! It is such a pleasure to read your posts…a pop of pretty to brighten my day.
Aw, love that so much, thank you, Gabrielle!! xo
It’s just charming as can be! Great job making it look antique. It’s a winner for sure!
Thank you Caye!🥰
Absolutely Beautiful!!! I love it.
Thank you, Sharon! xo
Hi Nancy!! This turned out so pretty and fresh. I love these two colors together. I have this transfer because I love butterflies. Thank you for sharing.
Thank you, Cheryl! I love butterflies too. So much so, that when working on a project I will always reach for them!! But I really do try to change it up with other transfers here and there!! But I do have a lot of projects with them though! xo