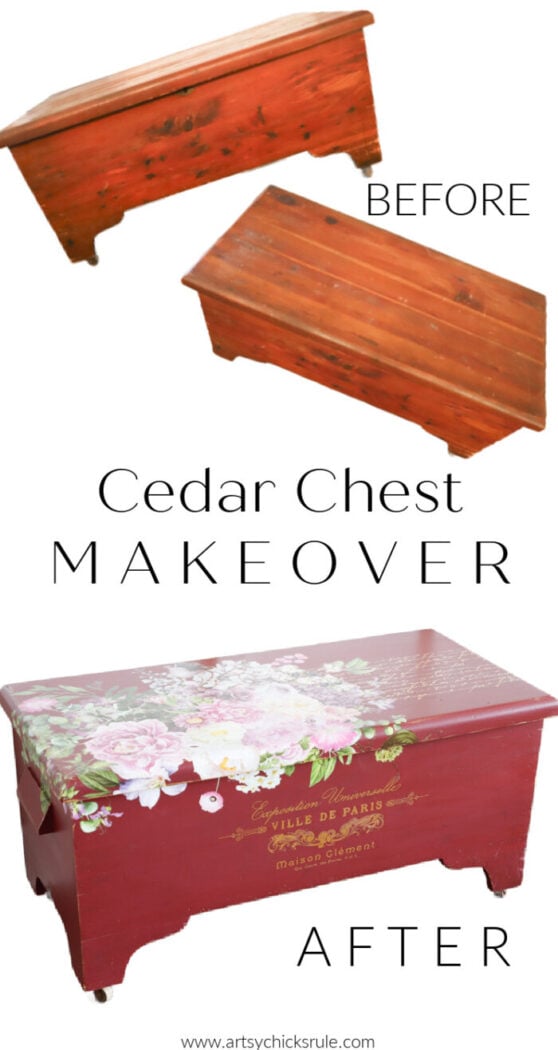
Painted Cedar Chest Makeover
This old painted cedar chest needed a lot of love! It was beat up but now it’s a stunner with new paint and pretty transfers!
Hello and happy Trash to Treasure Transformation Tuesday, friends! The last month of the year and we are so excited to share our brand new makeovers with you. I can not believe it’s almost 2024. That just sounds weird! Where are the flying cars, huh?? haha!
Okay, so today I’m sharing one I’ve had for quite some time. I did change gears on what I thought I’d do to it when I found it though. I considered sanding it down and trying to make it more of a natural-looking wood. But instead…well, read on! ;)
In case you are new around here, my friends and I get together every second Tuesday to share our latest “trash to treasure” makeovers with you. So be sure to scroll all the way to the bottom to see theirs.
Painted Cedar Chest Makeover
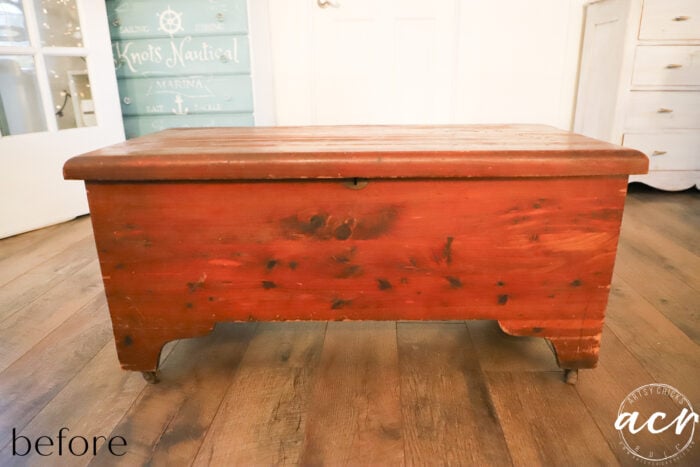
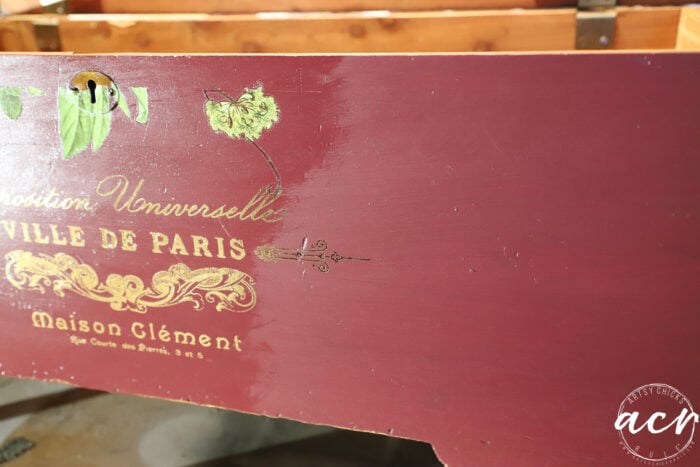
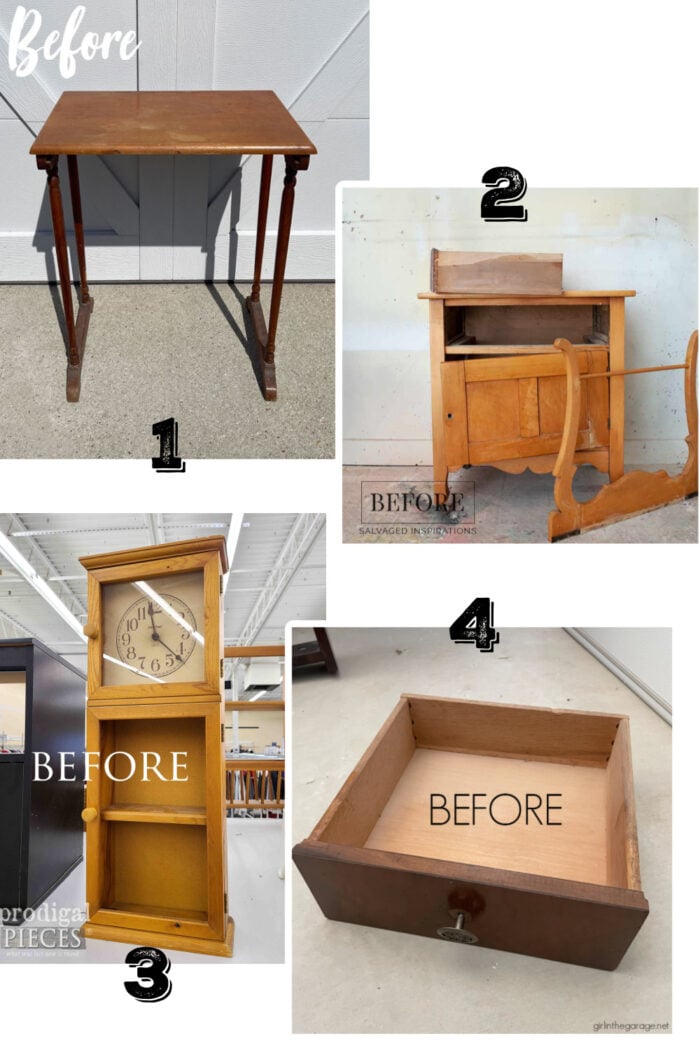
Here is how the little cedar chest looked ‘before’.
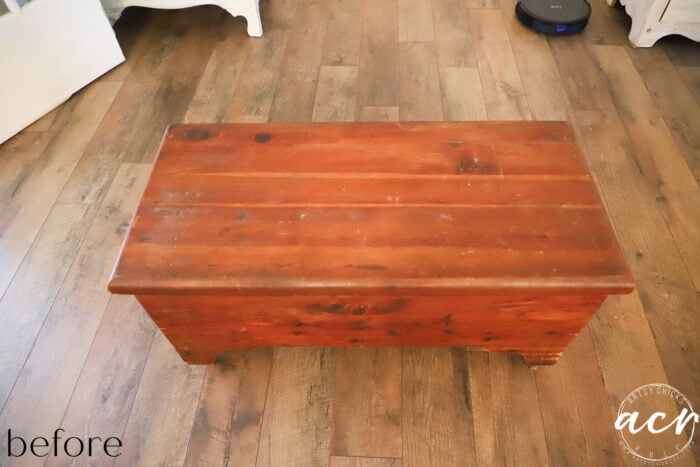
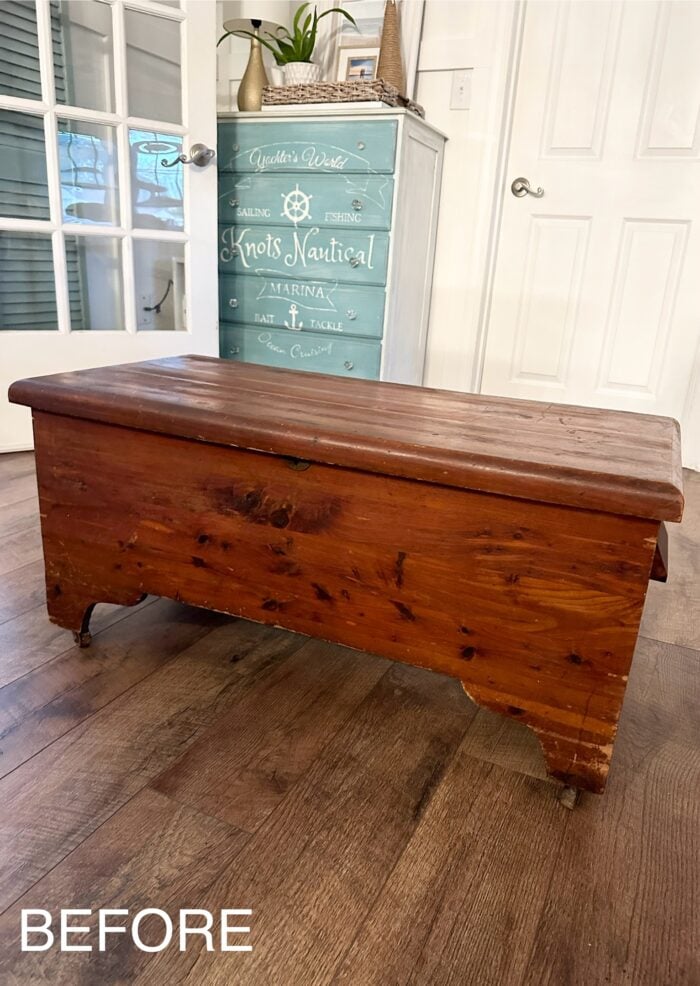
It was pretty beat up.
And it was missing one of the wooden wheels though. Luckily I had some old ones in my stash from other furniture.
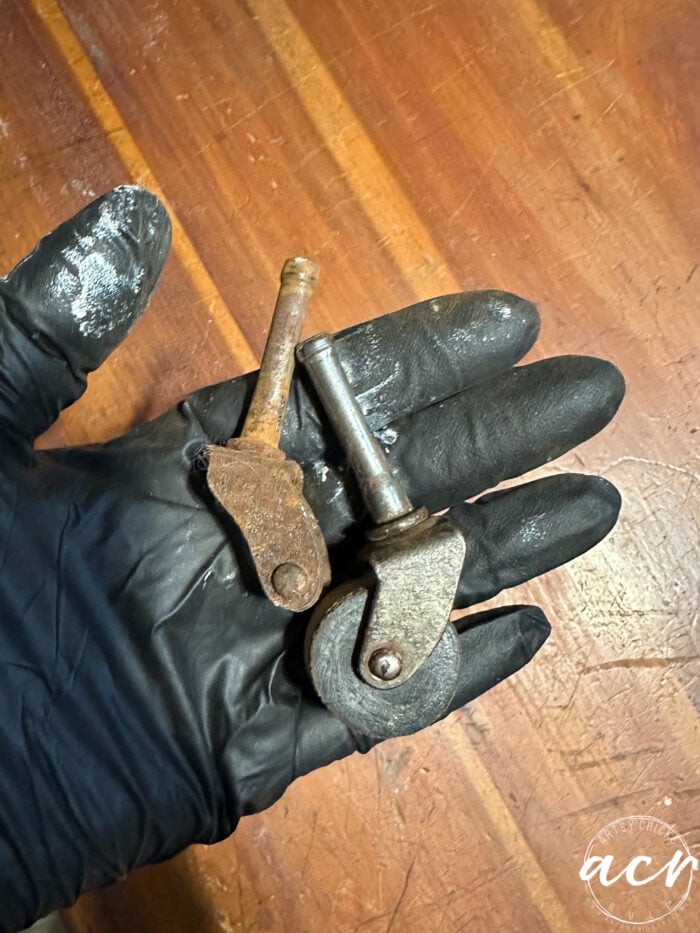
I just popped this one out (the one on the left) and popped this other one in. (on the right)
And fixed!
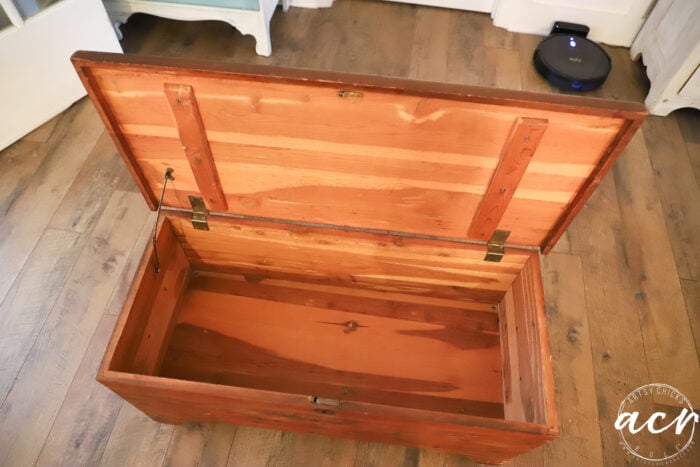
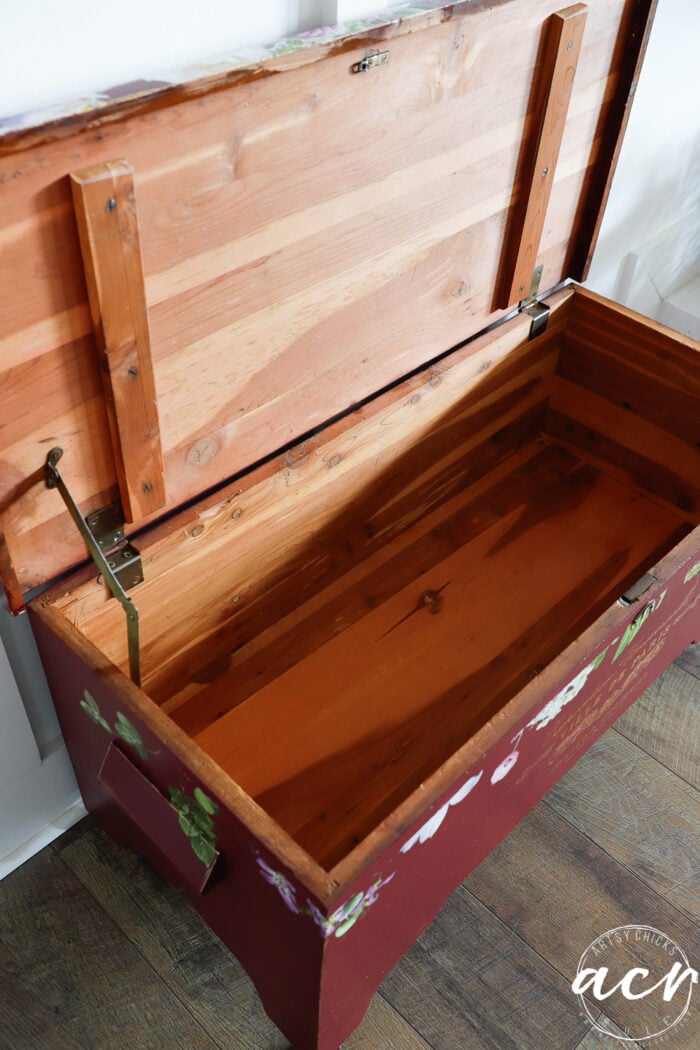
The inside looked great!
MATERIALS LIST FOR PAINTED CEDAR CHEST
- TSP Alternative Cleaner
- Winchester Paint
- Paintbrush
- Perfume Notes Transfer
- Morning Purple Transfer
- Transfer Tool
- Gold Metallic Paint
- Beeswax Finish
Prefer to shop on Etsy? I have an Etsy shop also, here!
CLEAN
I began by cleaning it up well with TSP Alternative Cleaner.
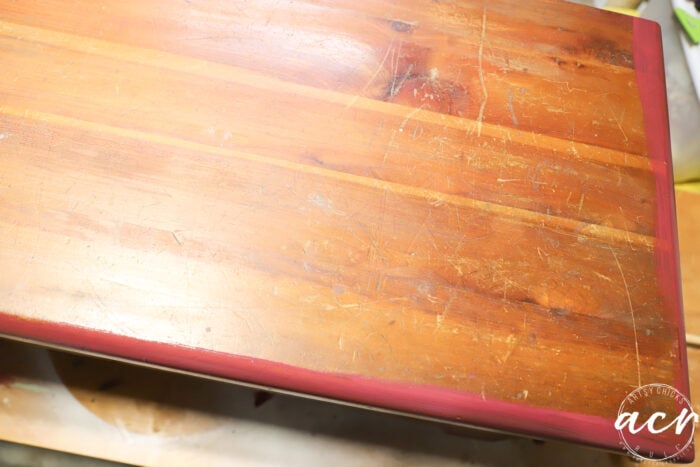
It had lots of scratches and marks but I didn’t bother with sanding it. I figured the transfers that I was planning to use would cover most.
Plus I decided to let that be “character”, which I do sometimes depending on the piece.
Here is what I decided to use.
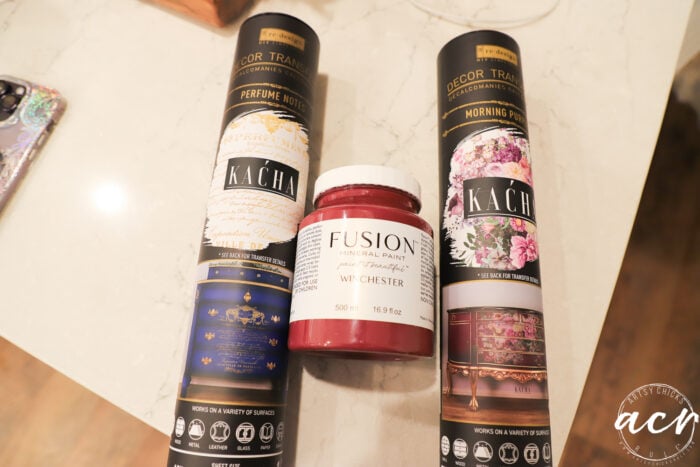
I pulled two different transfers for this one. And this richly colored paint called Winchester. Not quite red and not quite purple…a beautiful, elegant burgundy. (you can find all the products linked above in the pink box)
PAINT
I gave it two coats of paint, drying well in between.
I love this brush! It’s my favorite to use for most things.
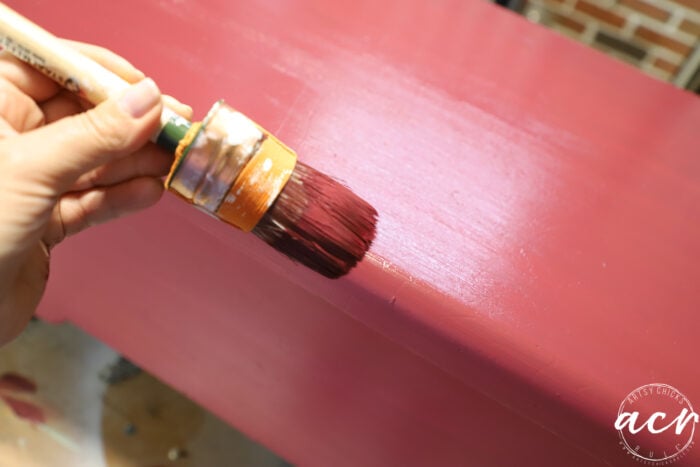
Two coats were perfect.
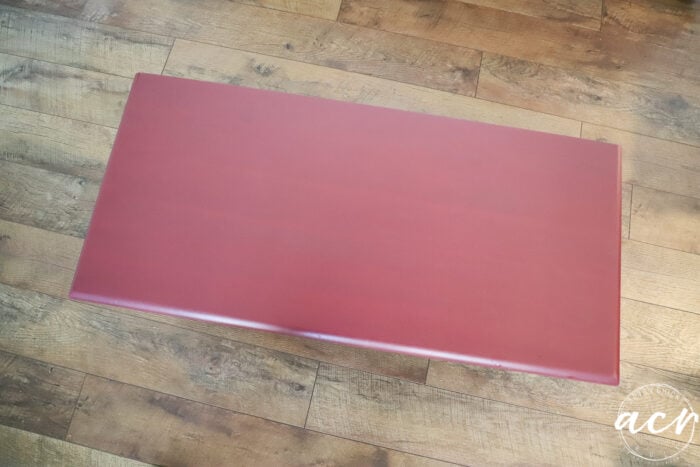
Just the paint hides the multitude of sins that were there. Scratches, gouges, etc. Amazing how paint can do that!
ADD TRANSFERS
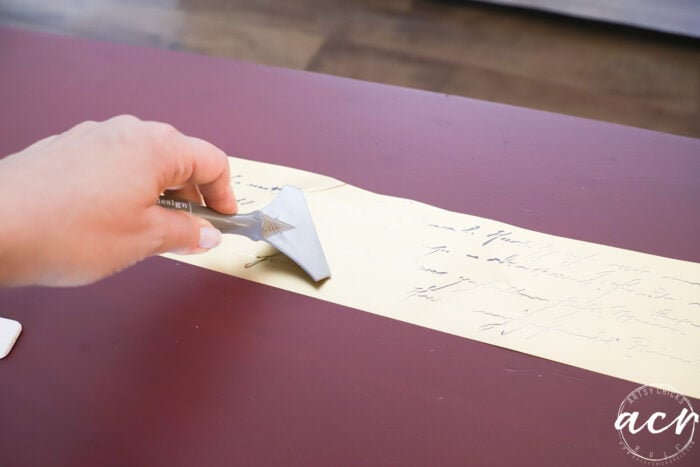
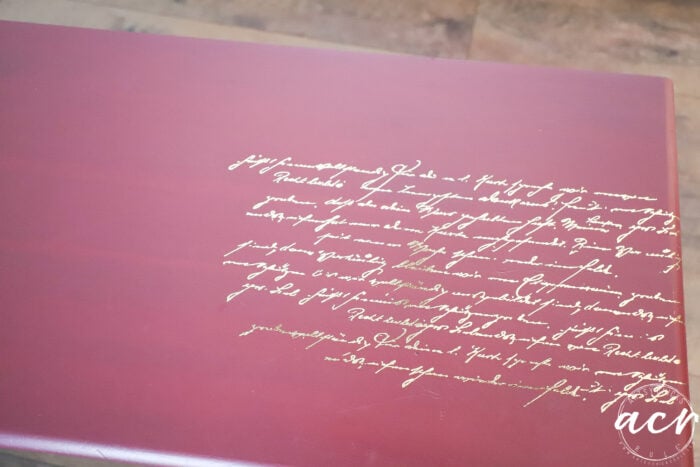
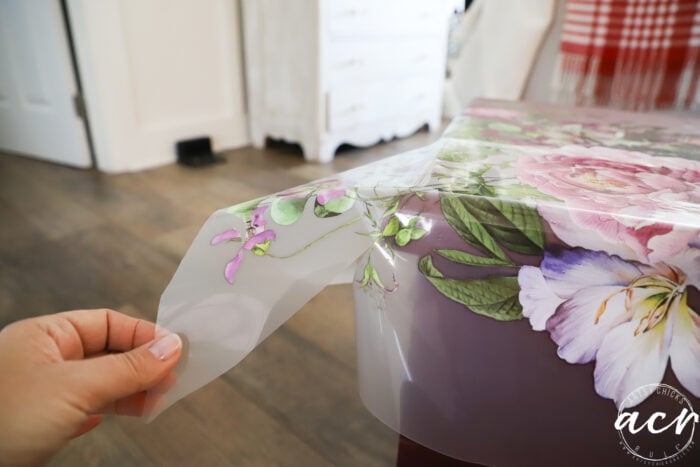
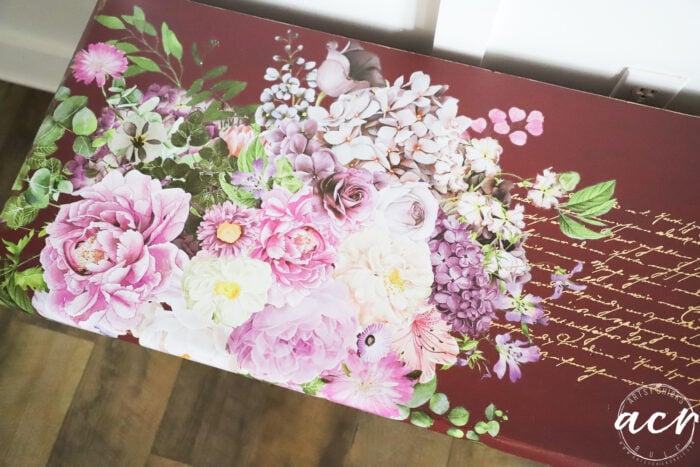
I am using the gorgeous gold transfer here. Just the script part though.
You can use the wood stick to transfer or…
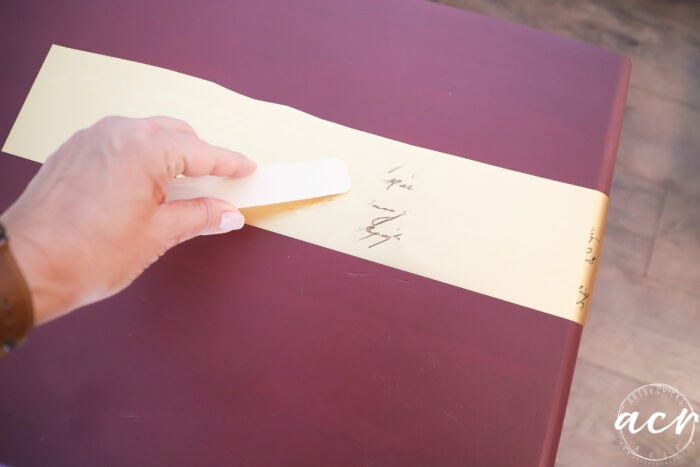
…you can use this tool.
Here is how it looks after the first piece is added.
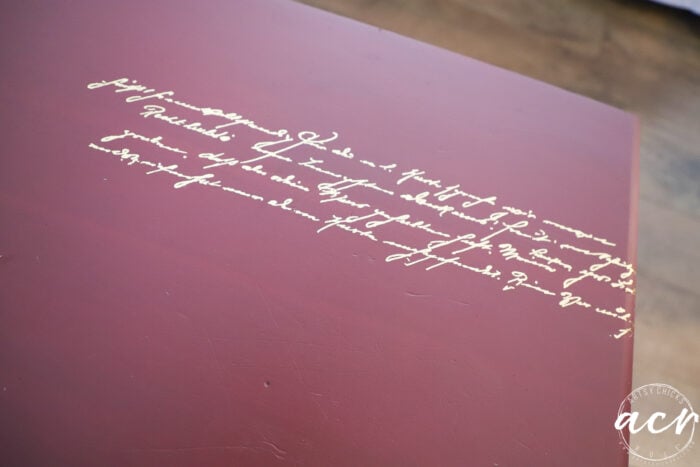
And the second.
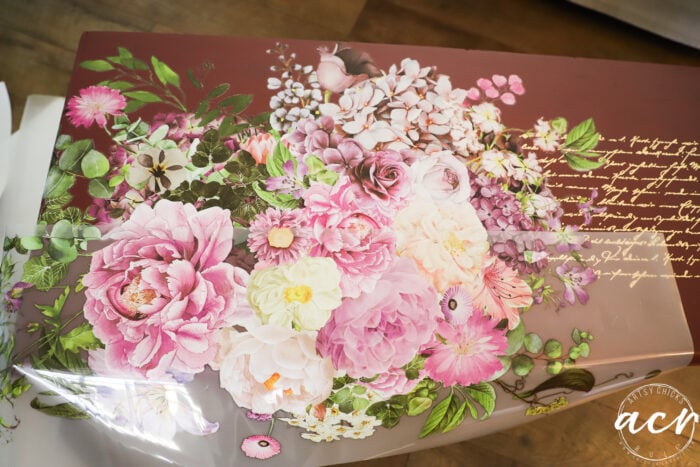
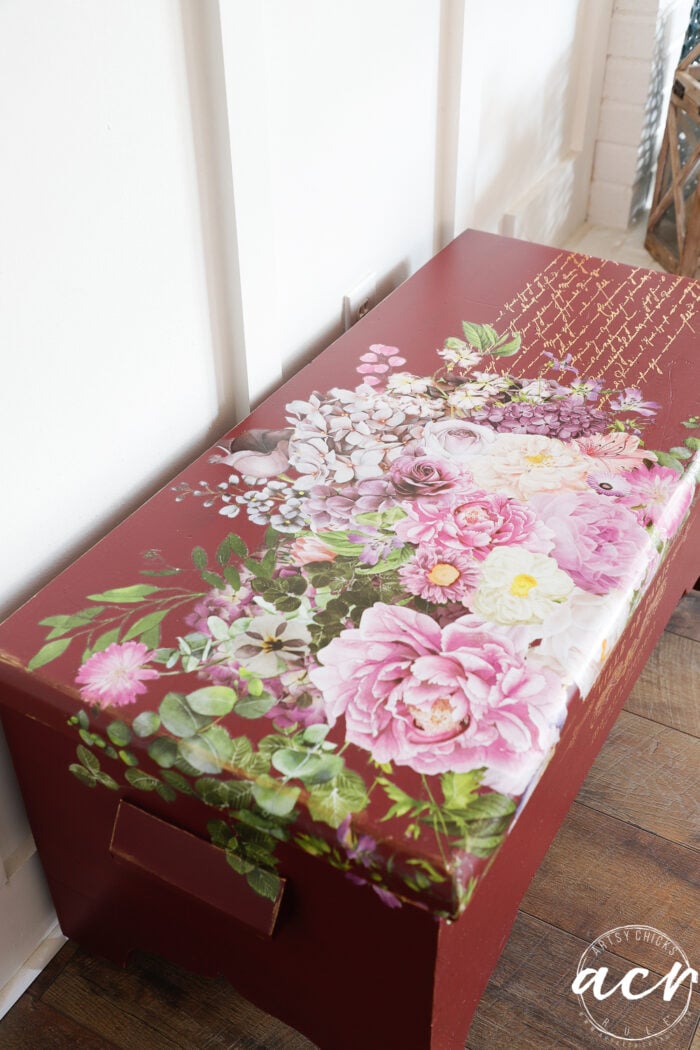
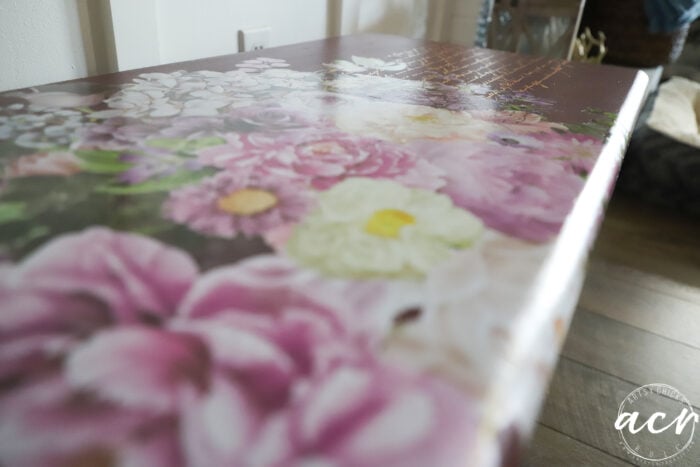
I am doing the floral portion on the left side. Sort of “flowy” as it will go flow over the side and front.
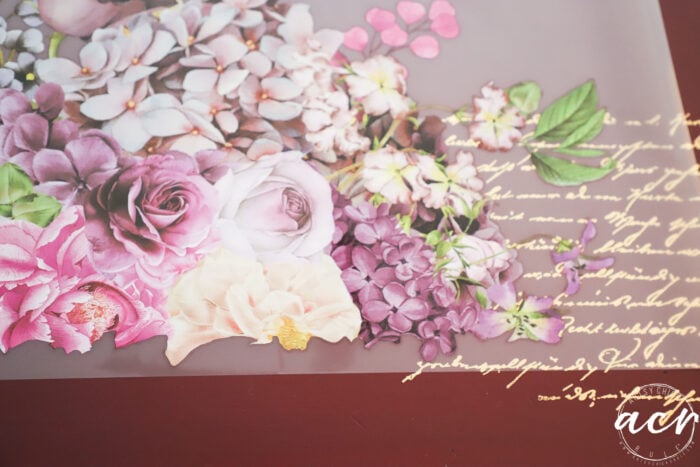
And once that part is done it looks like this.
Now to match up the bottom section.
Which can sometimes be tricky. You can see there on the left that the leaves didn’t quite line up. But I’ll fix that later.
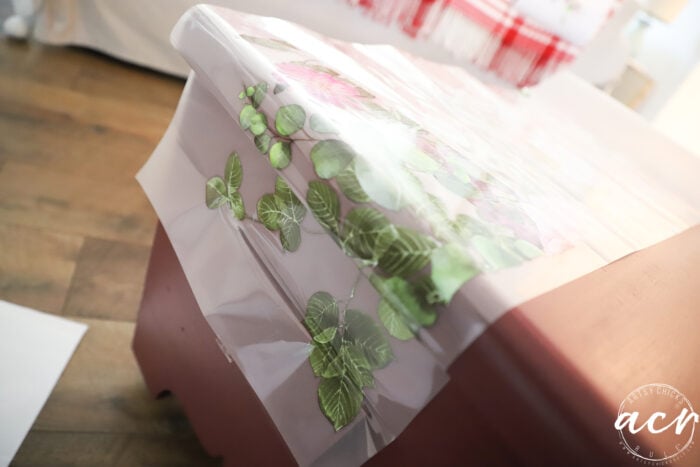
Coming around a corner like so you will want to cut like this. Or even cut a section out and place it later.
Once that was all done. I used another part of the gold transfer below on the front.
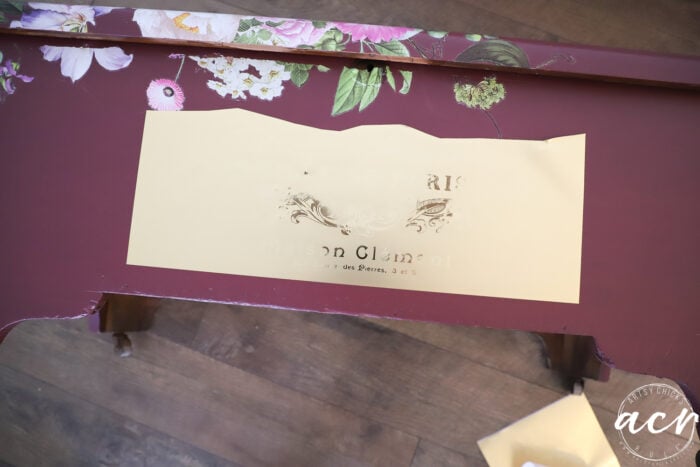
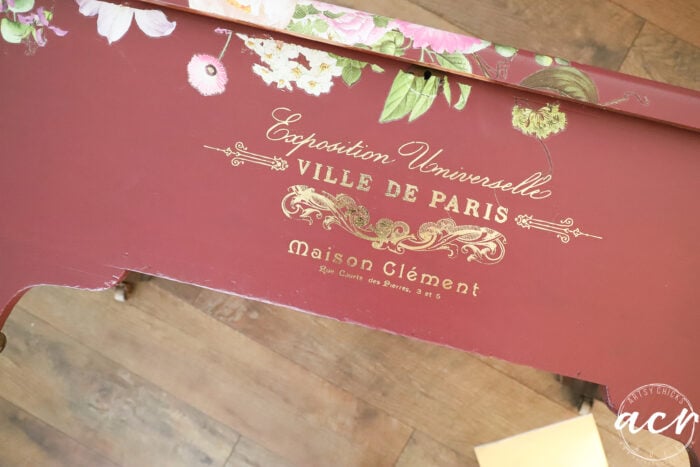
Perfect!
Okay, so let’s fix the where it didn’t line up.
Probably not even a big deal but it bugs me! lol See how the leaves above it have white veining?
I decided to just make this look like a vein too…
Quick and easy!
ADD GOLD ACCENT
I decided to add a bit more gold to this cedar chest.
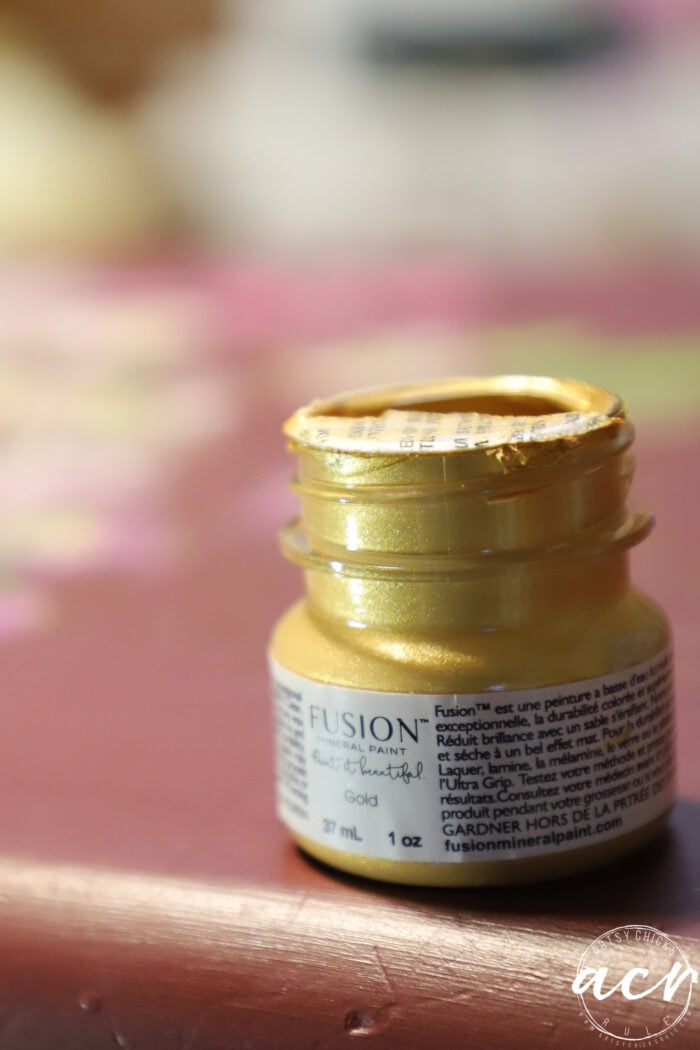
I used my finger to add a touch of gold on every edge. Sort of like distressing but using gold instead of sanding edges.
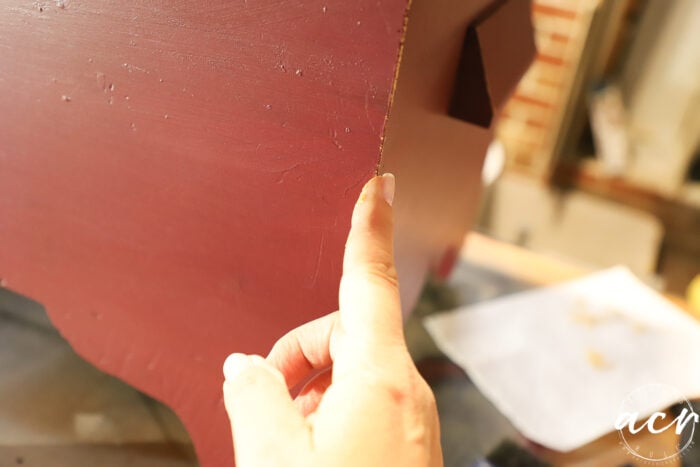
I love that added shimmer!
SEAL WITH WAX
I decided to use wax to seal this one.

I LOVE our Beeswax Finish. It is so lustrous and just a dream to work with. I don’t use wax often but some pieces just call for it.
And it’s perfect for this one!
I mean, just look at the difference the wax makes.
Love it.
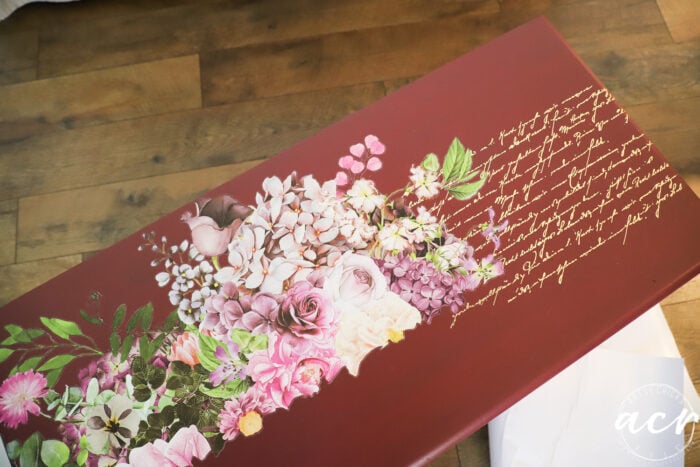
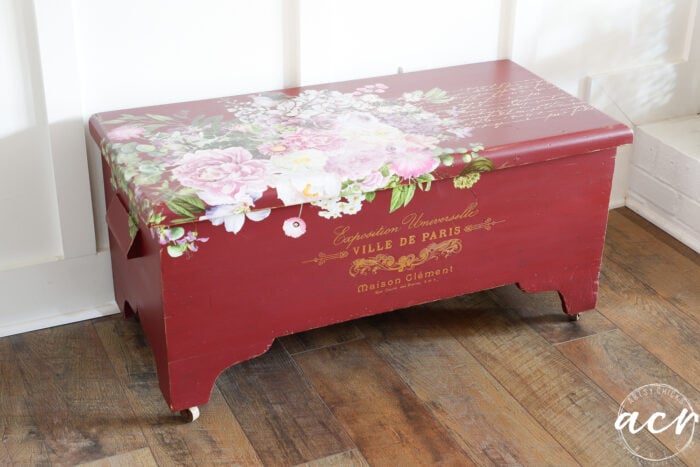
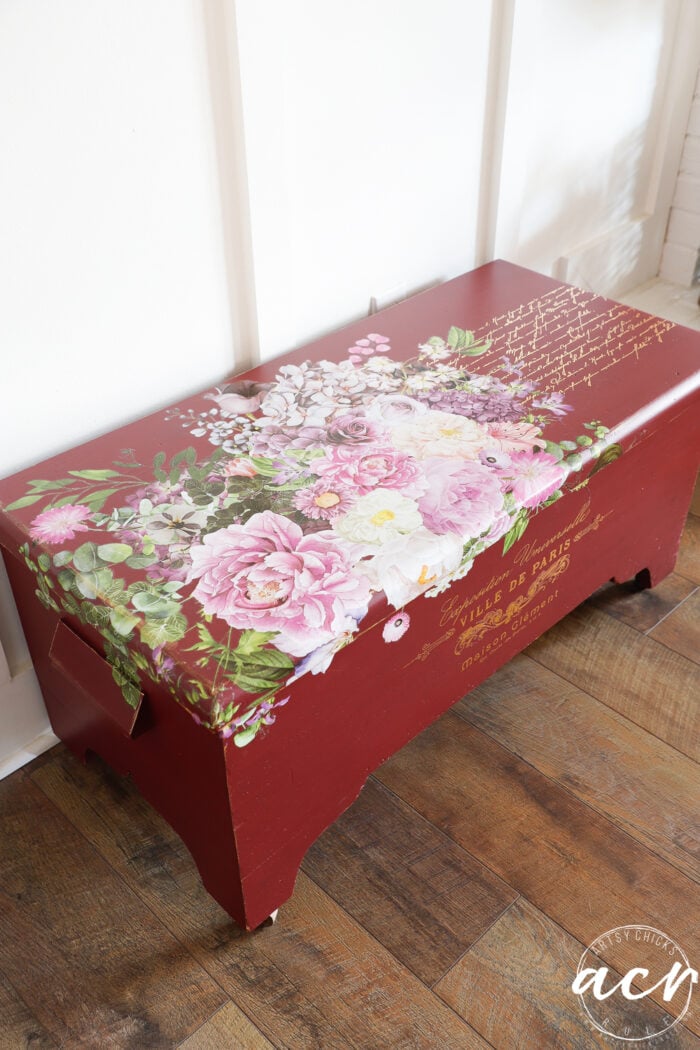
And that’s it, done! So simple really.
But wow, what a brand-new look.
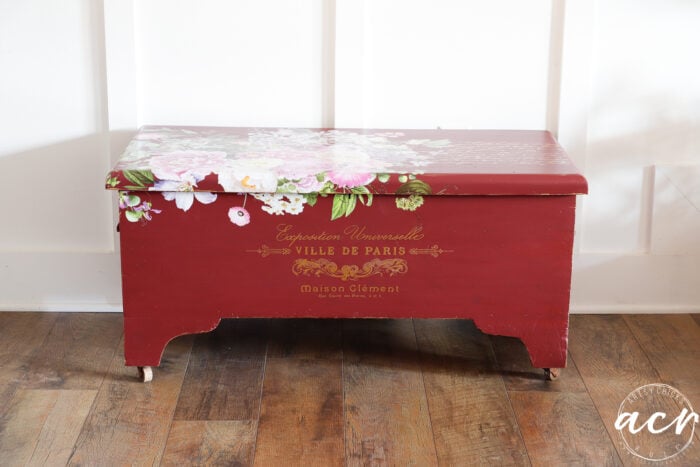
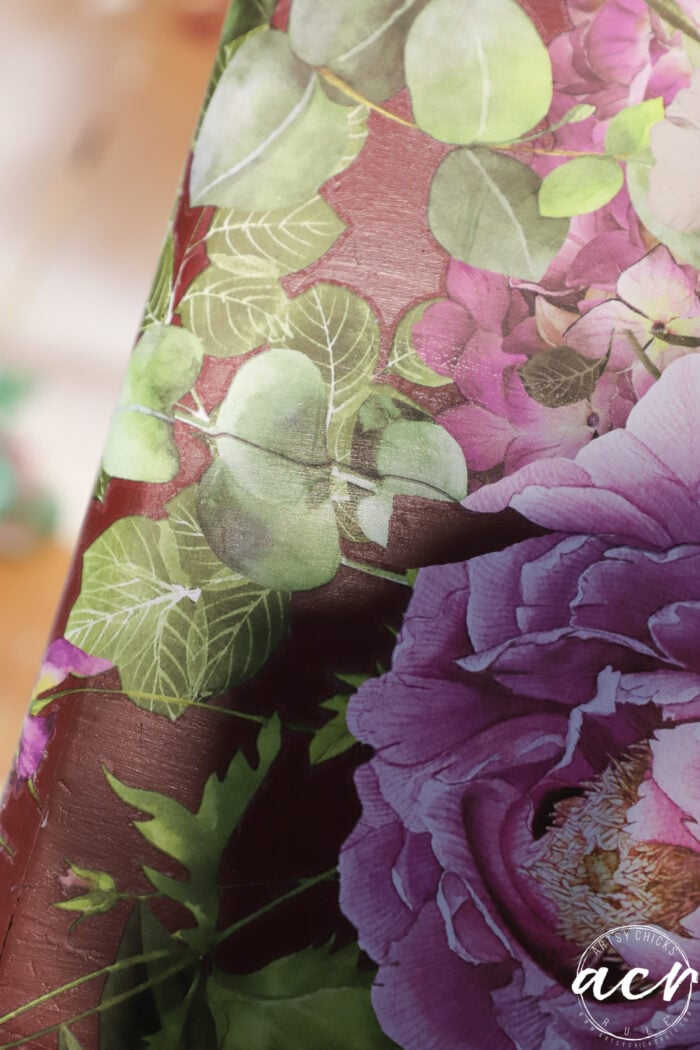
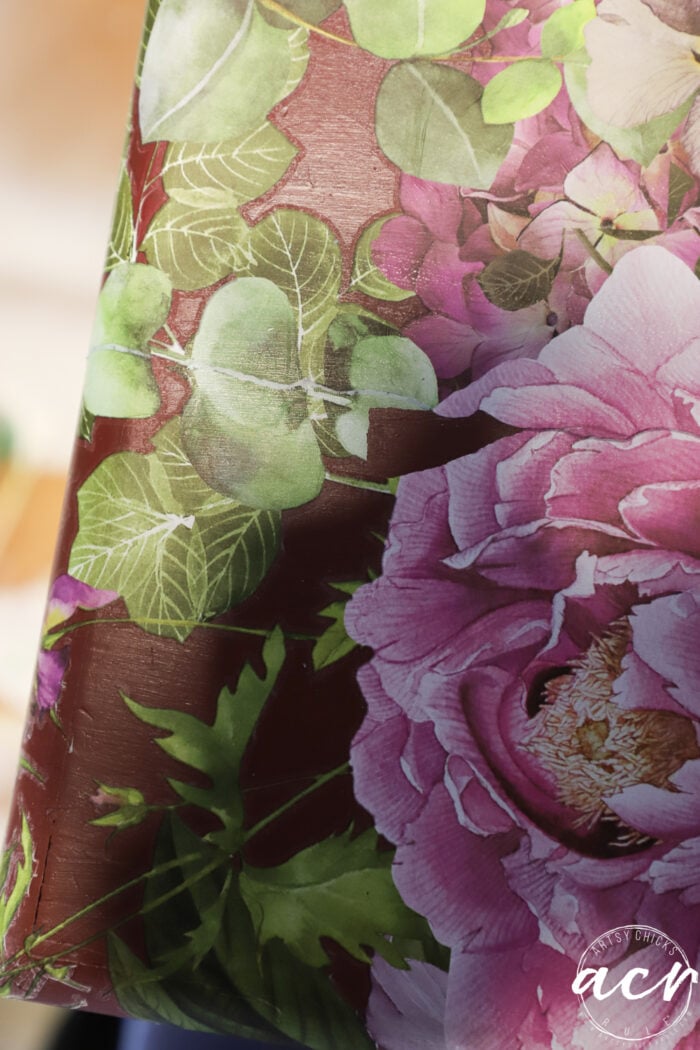
I love how the transfer flows onto the side and front.
And that section of the gold transfer was perfect for the front of the painted cedar chest.
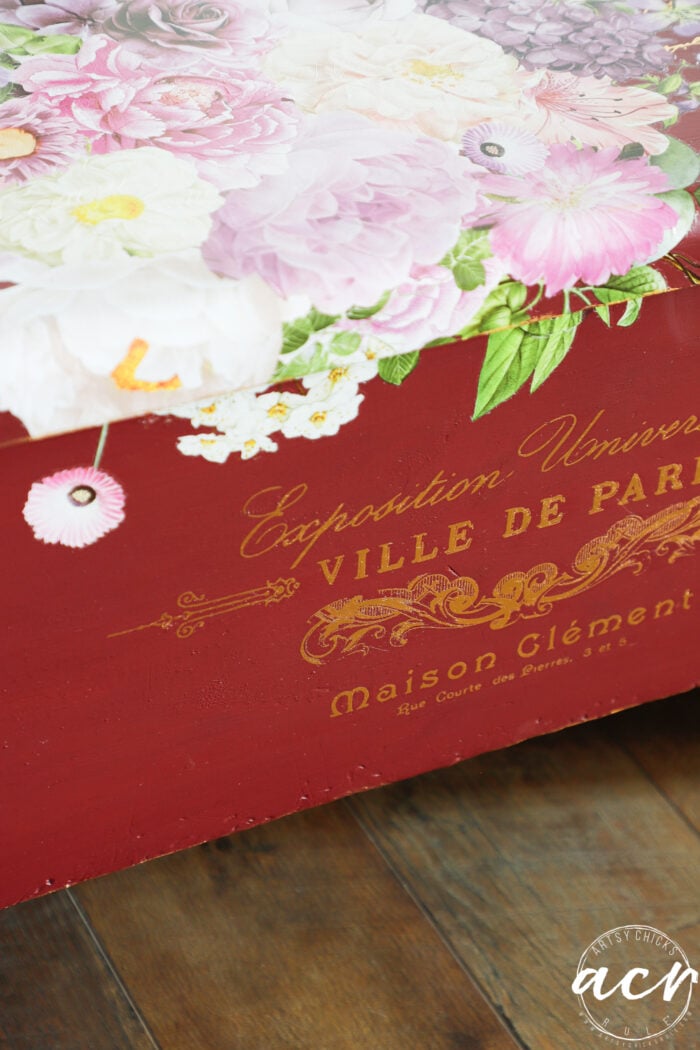
See the hints of gold everywhere?

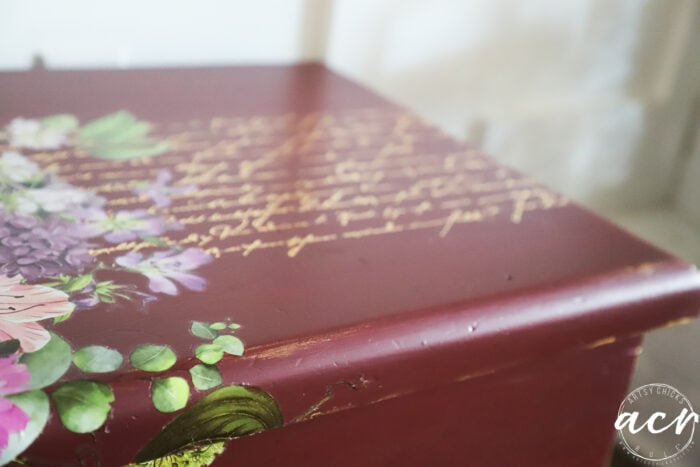
Just gives it a little extra something-something.
That luxurious wax finish, ahhh…
All the inside needed was to be wiped down. In perfect condition.
The back got painted too.
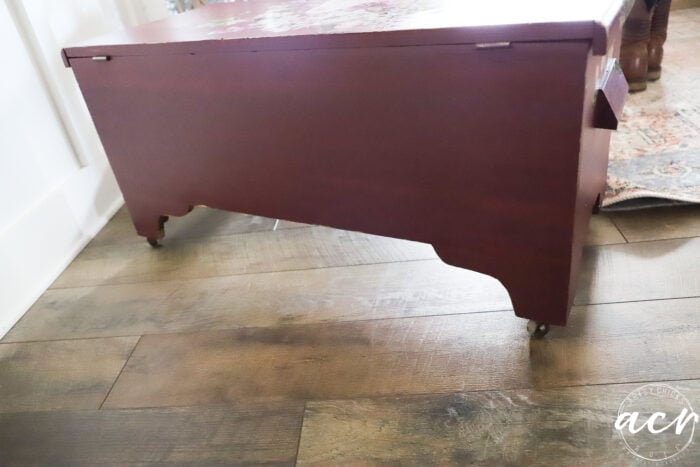
Gorgeous florals, rich color, and beautiful touches of gold!
It’s all ready for its new life and home.
PIN it to save it!
Don’t forget to hop over and visit my friends below!
Want to see more Trash To Treasure makeovers?? Click here to see!
See you back here on Thursday!
xoxo


")


Bravo! It’s just lovely now and I swear I had the twin to this one years ago. Great work, Nancy.
Thank you, Larissa! Oh that’s funny!! :)
I love how the transfer flows over the top as well! Absolutely beautiful Nancy! PINNED! XOXO
Thanks, Denise!! :) xo
You have transformed this Cedar Chest into a Beauty. Love the transfers you chose. Merry Christmas to you and your family!
Thank you, Lorri! Merry Christmas!! xoxo
Stunning!
Thank you, Lori!! xo
Wow! This is gorgeous!!!! Love the gold touches!
Thank you so much, Audra!! I love the gold too!! xo
This is sooo pretty!! Love the transfers and the gold highlights. I love cedar chests. Have one that I painted …white…. LOL. I need to take it up a notch or two lol. I didn’t know you could wax over transfers. That wax looks great. Enjoy the holiday season.
Thank you, Debra! Cedar chests are so fun to makeover really. Just add a pretty, colorful floral transfer. OR a gold script one. Both would be pretty on white! Yes, you can wax over them but you want to make sure you don’t use one with strong solvents as it could damage the transfer. Merry merry!! xoxo
Beauuutiful! Great tips for working with tranfers too!
Thanks so much, Cyndi! xoxo
Gorgeous!! I love to layer the florals and gold too and it works SO good on this piece! XOXO
Thanks, Christy! Yes, layering them looks so good! xoxo
Lovely transformation.
Thank you, Cyndel!! xo
It’s such a beauty, Nancy! I love how the colors all work so well together. xo
Thank you, Jen! xo
This is your best transformation, yet. A perfect way to end the year.
Aw, thank you so much, Robin!! That is so awesome to hear! :) xo