Aqua Dresser Coffee Bar (add dimension with paint!)
A dated dresser turned beauty with paint and a little modification! This aqua dresser is now used as a “coffee bar”.
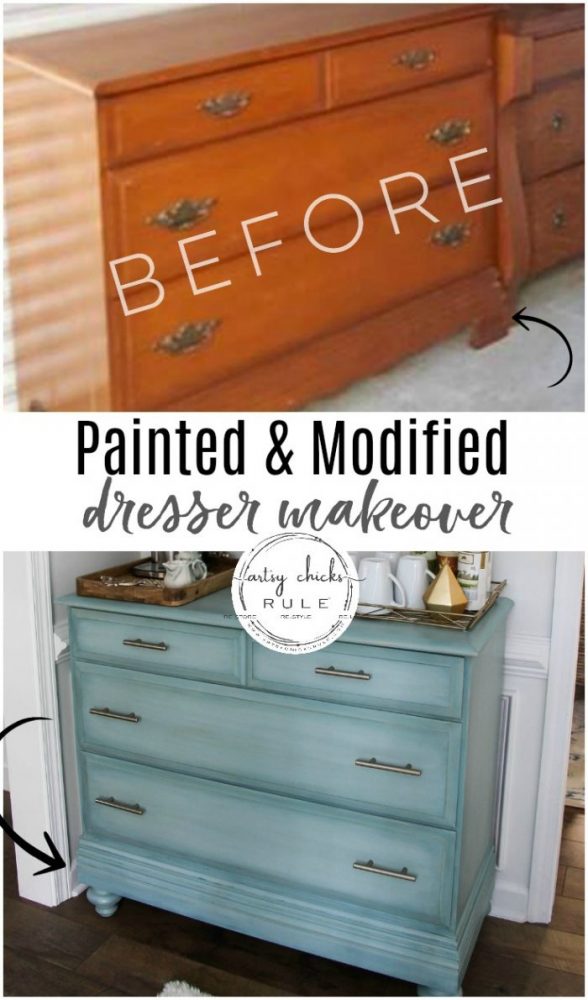
Friends….it’s time! Finally! I’ve been teasing about and working on this little dresser for so long.
Well, it’s done and I could not be happier.
Let’s recap on this little beauty……remember these?
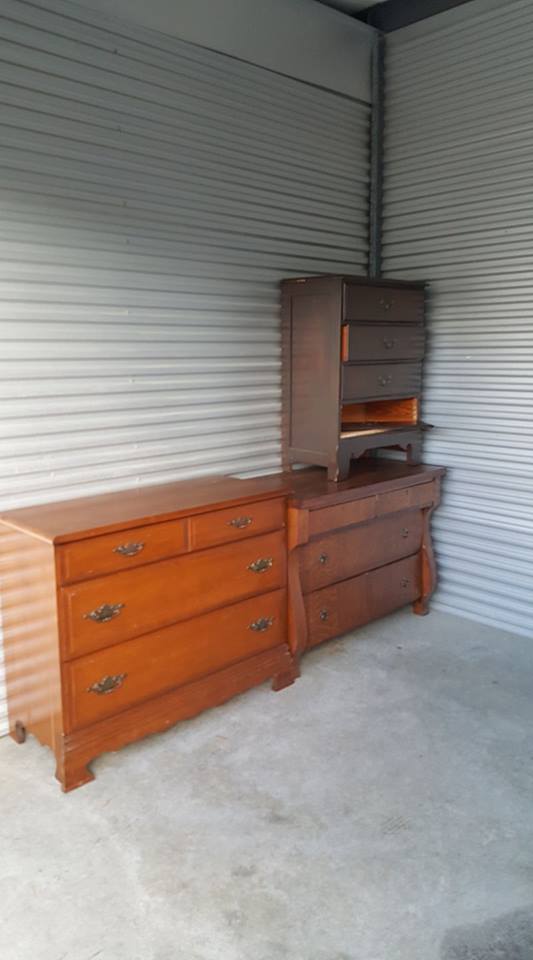
These are 3 dressers that a friend of mine, who was moving out of state, kindly gifted to me.
In our second storage unit which was mostly empty…at the time. lol (not any longer!)
We’re going to build a large shed but our home remodel took a few months longer than planned so that got put on the back burner.
Hopefully soon then bye-bye storage units!
I’ve given 2 of those dressers makeovers so far. The one on the far top right (see it here) and today I’m sharing the one on the left.
Aqua Dresser Turned Coffee Bar
This one…
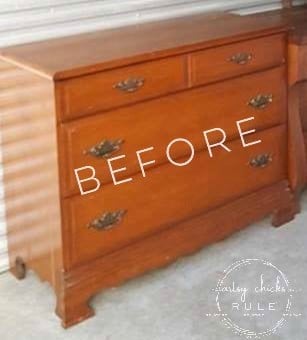
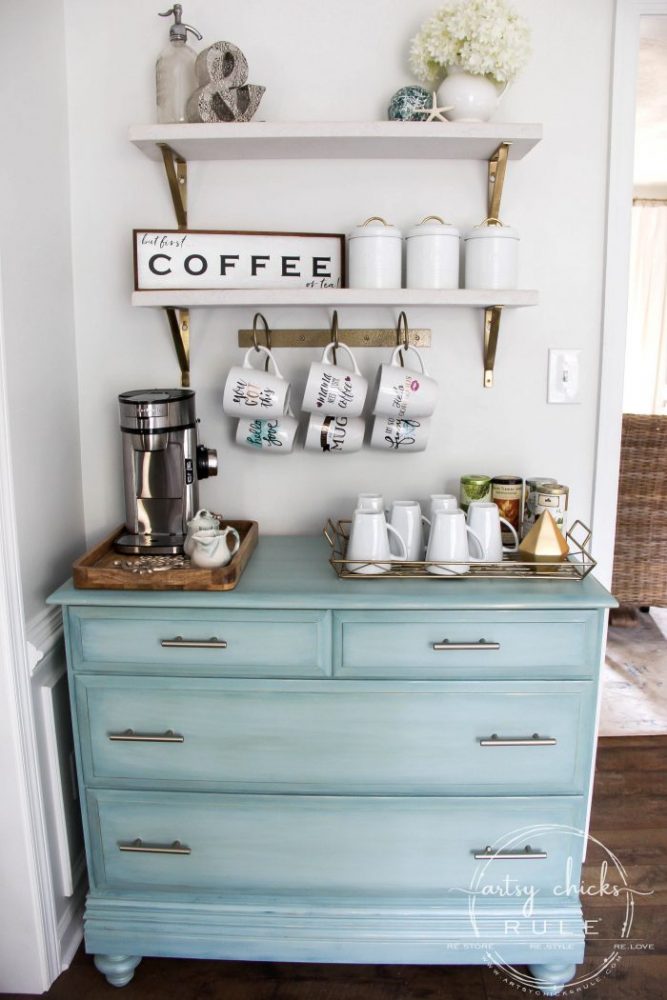
I turned it into an aqua dresser/coffee bar! (and tea, of course)
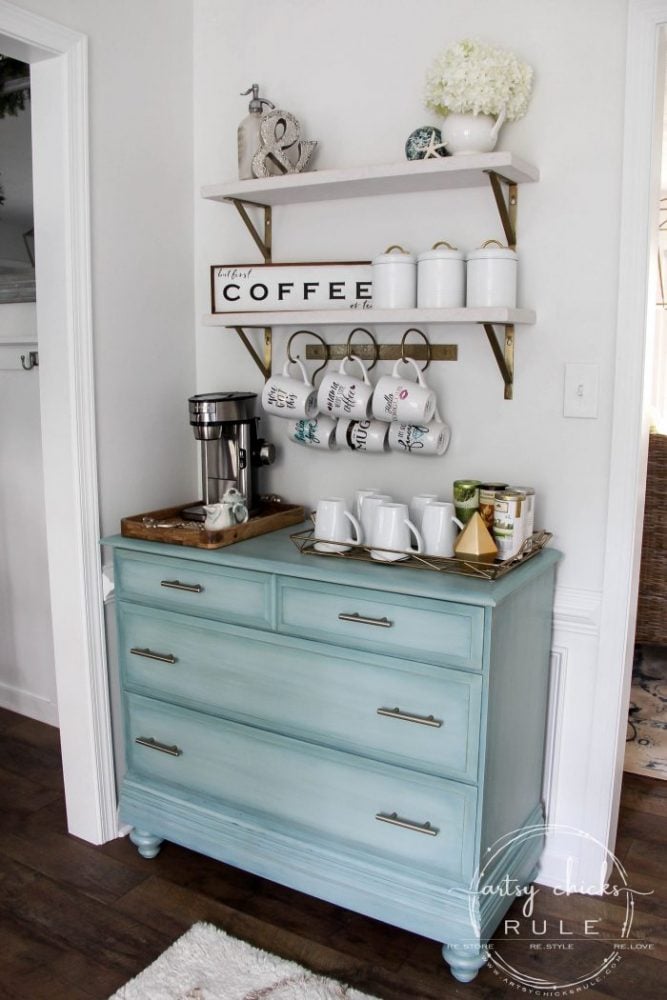
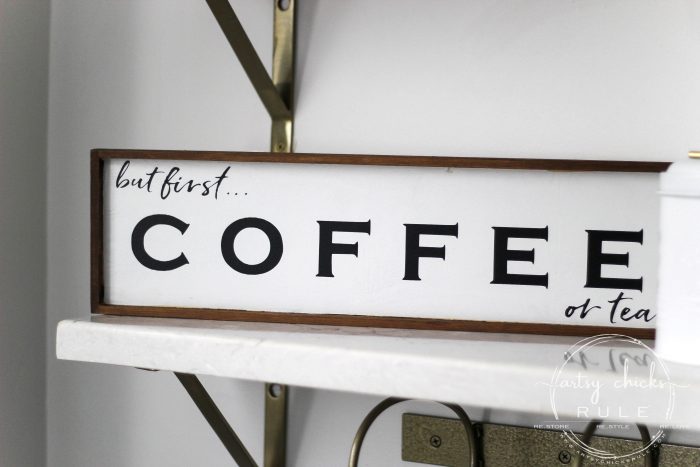
Remember that coffee sign I made awhile back?? You can get all the details, and free printable, here.
I’m really loving how it turned out even though I hadn’t planned to paint it like this originally.
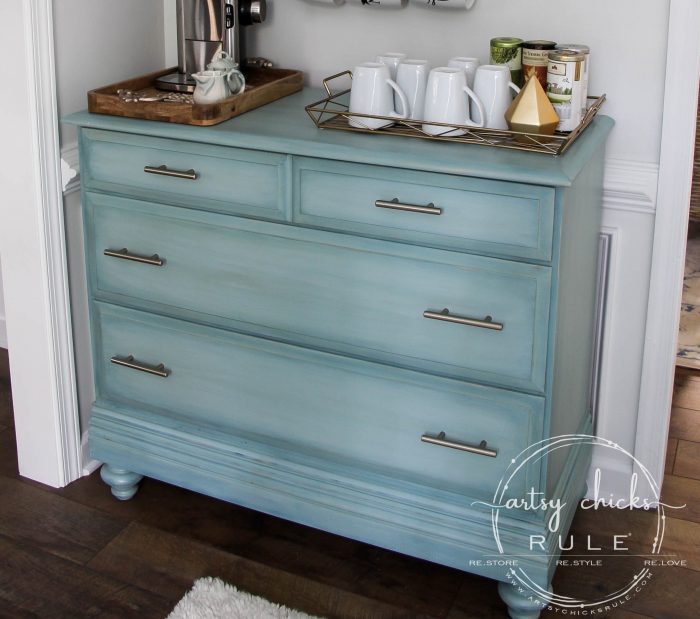
Originally I wanted it to be stained but that didn’t work out because of the modifications we made to it.
The different wood pieces wouldn’t really match. (I had already removed poly and sanded most of the dresser, figures! )
Let’s talk about that now.
If you look closely at the bottom of the dresser in the “before” photo above, you will see the curvature of the bottom of the dresser.
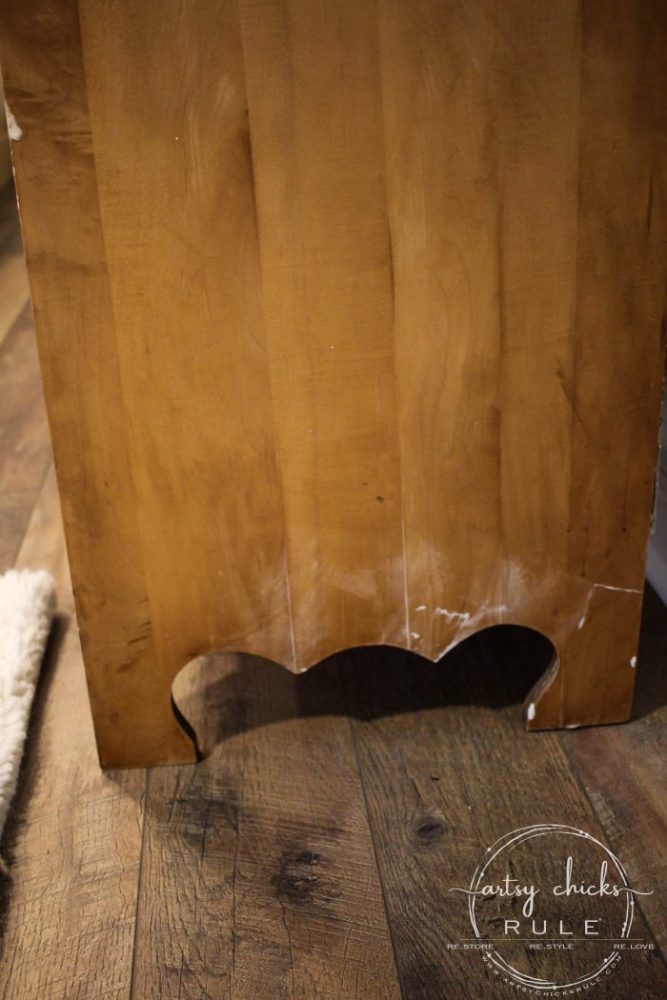
I didn’t want the dresser to look dated so I decided to change it up and modify it a bit.
We pulled off the front trim piece…..
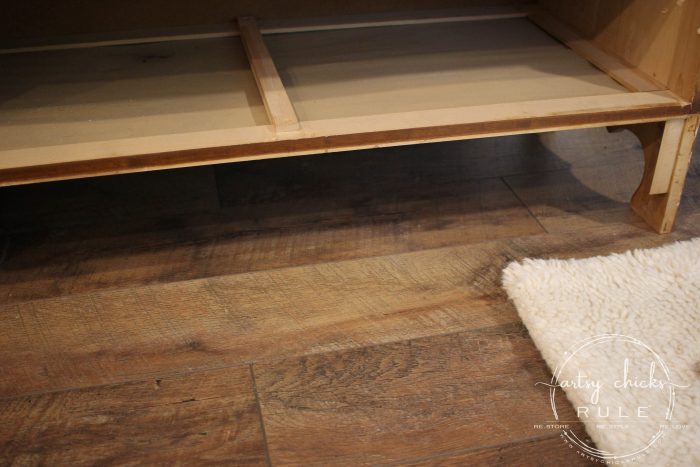
….and covered it up with 2 pieces of trim I chose. (baseboard and decorative trim piece)
I designed and my sweet husband executed the design. Teamwork. :)
This is upside down but it’s the baseboard piece….
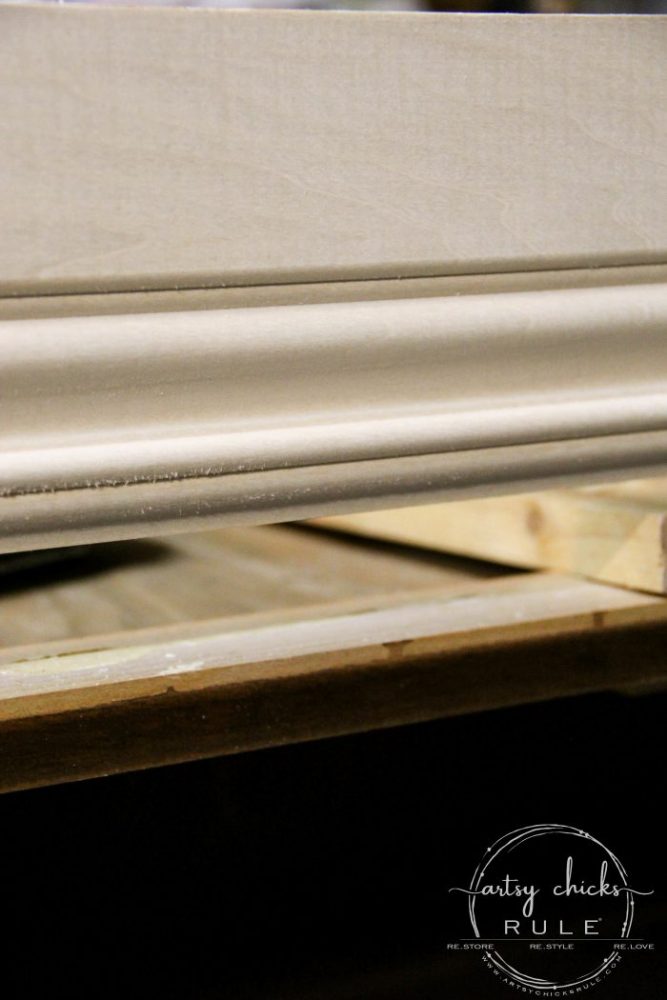
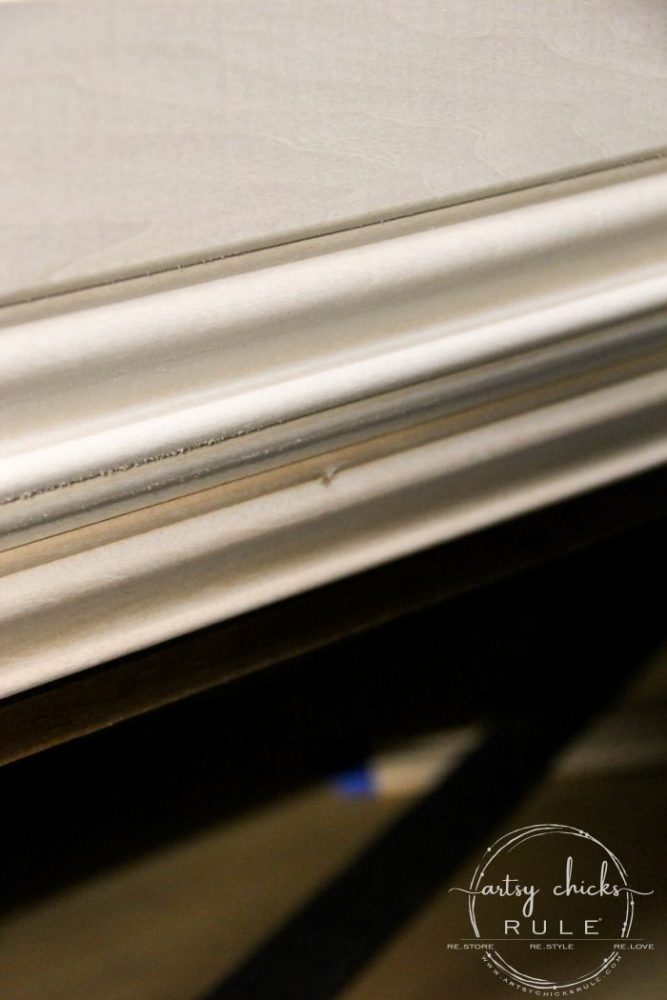
….and above that is the small trim piece closing the gap….
Want to see some of these projects in “live” time? Hop on over and follow along with me on INSTAGRAM. I’m always sharing in my stories as I’m doing projects, finding new furniture, fun finds….just all the day to day behind the scenes.
Which creates the look of one large piece of decorative trim.
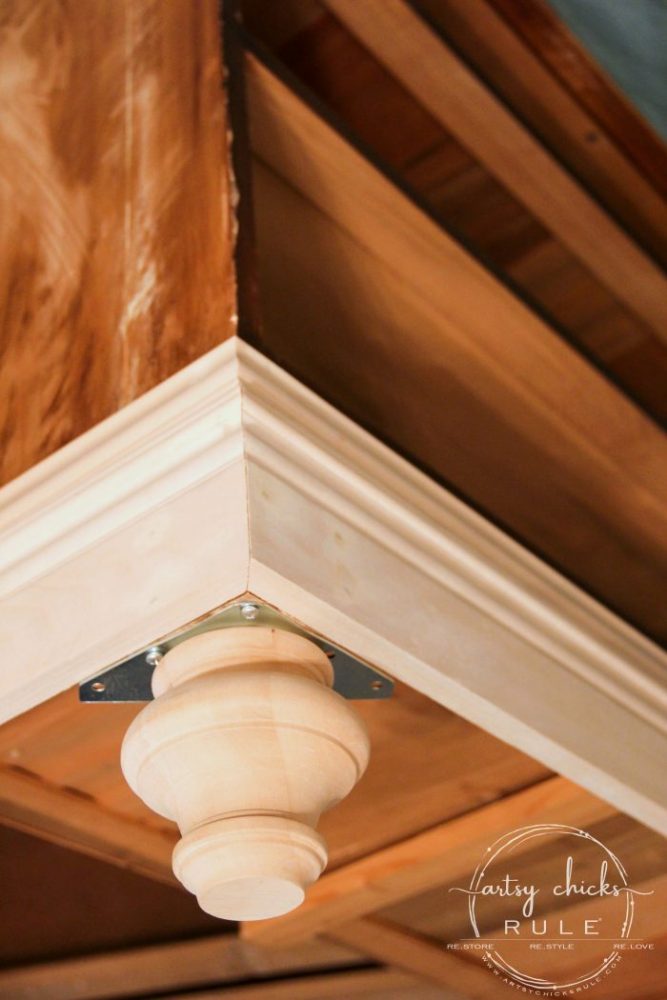
My husband cut and attached the wood support and feet for the aqua dresser.
You can see here where he added a wood support, brackets and the feet.
Also, notice how the new trim covers up the side cutout curves.
We didn’t end up using all the screws/holes for the brackets because it was plenty sturdy with just these.
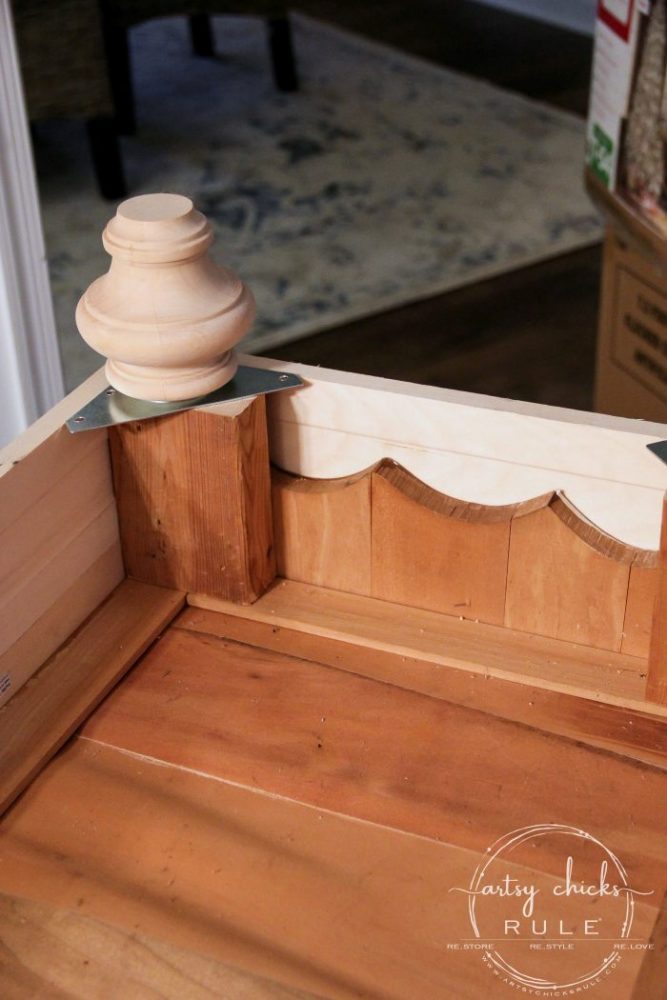
You can visualize it all better in this photo below.
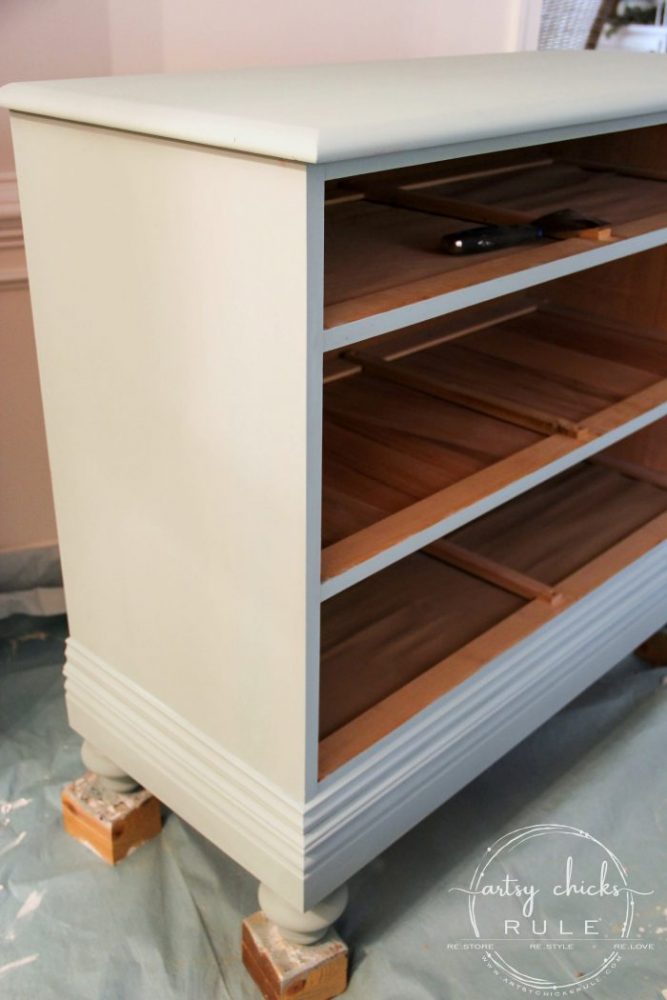
Isn’t that so much better??? It gave the entire dresser a completely new look.
This is the first coat of paint, by the way. And it is definitely an aqua dresser even though it doesn’t look like it.
The photo makes it look sort of white-ish, it’s not.
To get that lovely blue for my aqua dresser, I created the paint out of a blend of what I had on hand. I have no idea on measurements but here’s what I used.
I’ll do my best at what I think I used as a starting point if you are interested in duplicating.
- Snow White – 35%
- Provence AS Chalk Paint – 20%
- Somerset Gold- 5%
- Duck Egg Blue AS Chalk Paint – 40%
I ended up only having to do one coat of this mixture.
Next I made a wash with the Snow White and water. (very wet as you want it to just ever so slightly leave only a hint of “wash”)
I only applied this in the middle area of each drawer. (I used a damp rag, like an old t-shirt material)
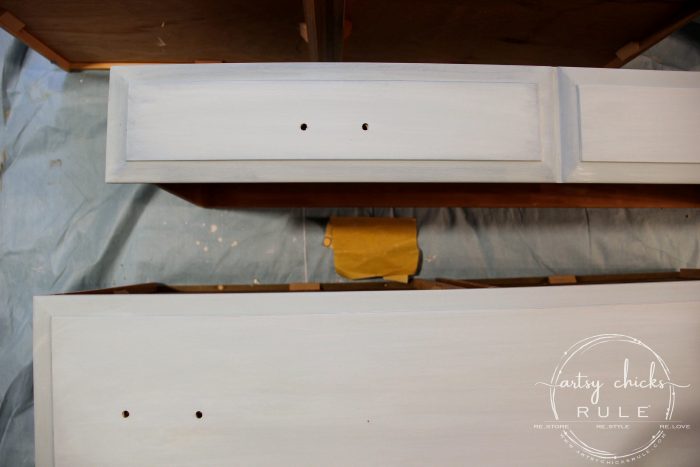
It’s really hard to see in the photos, sorry. But there is a very slight “wash” of white along the middle area.
Next I used Aubusson Blue to darken the outer areas of the dresser.
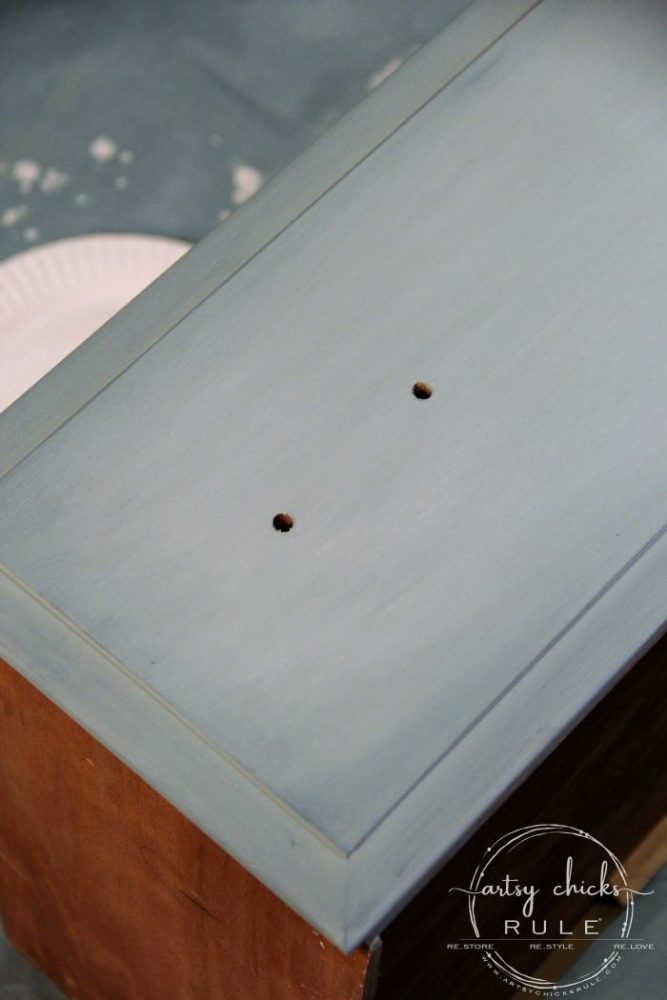
You can see both the white and blue around the perimeter better in these photos.
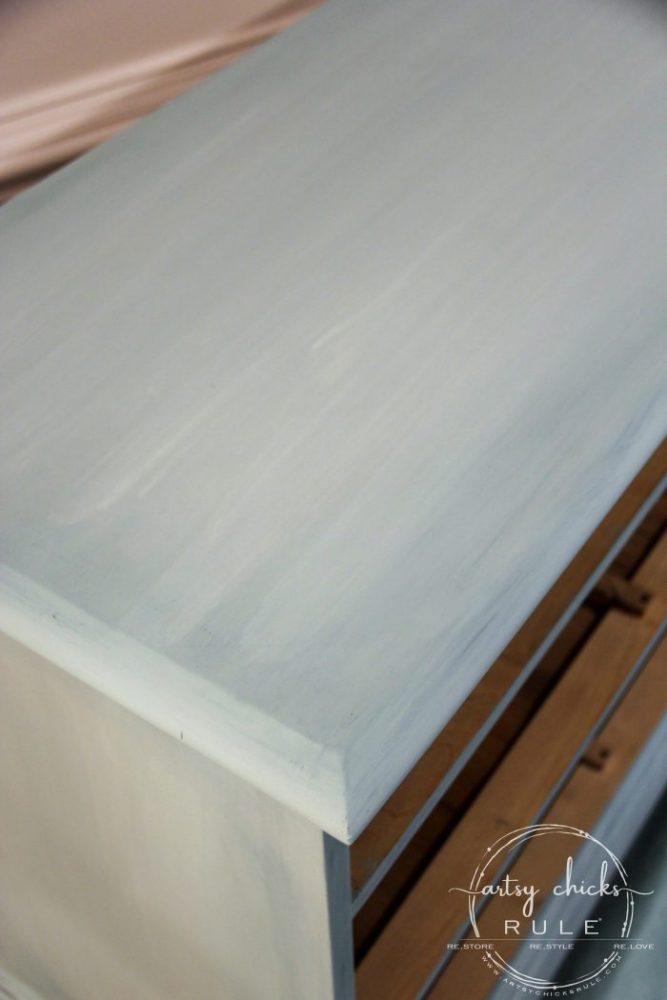
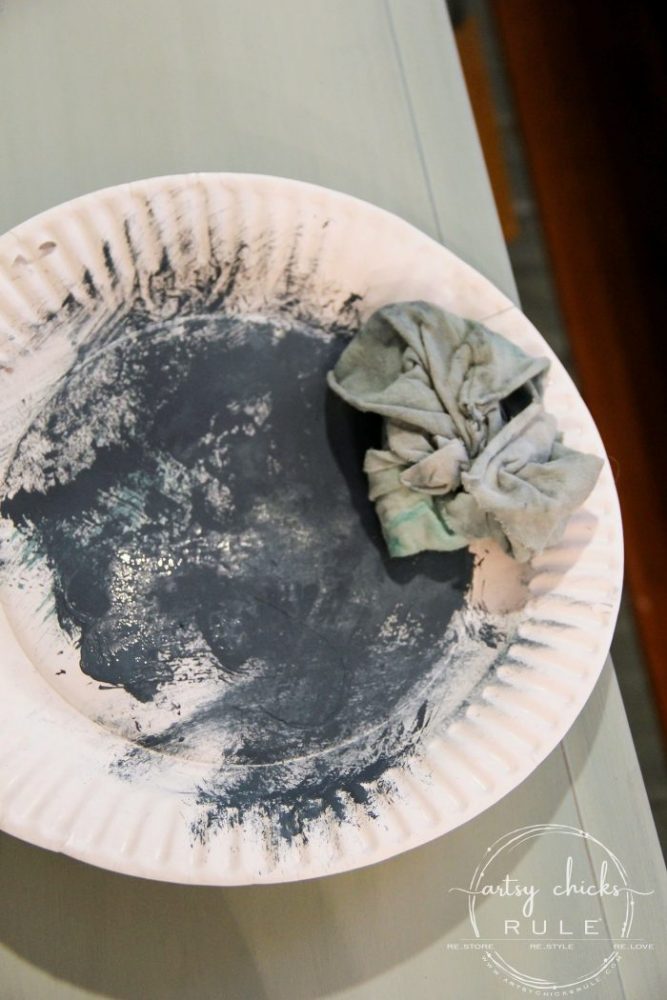
For the darker blue, I used another damp rag and dipped it into paint (undiluted) and wiped most of it away on a paper plate before applying to the dresser.
The key here is a well dampened rag….and to blend. Wipe and blend.
You can see here the dimension is gives.
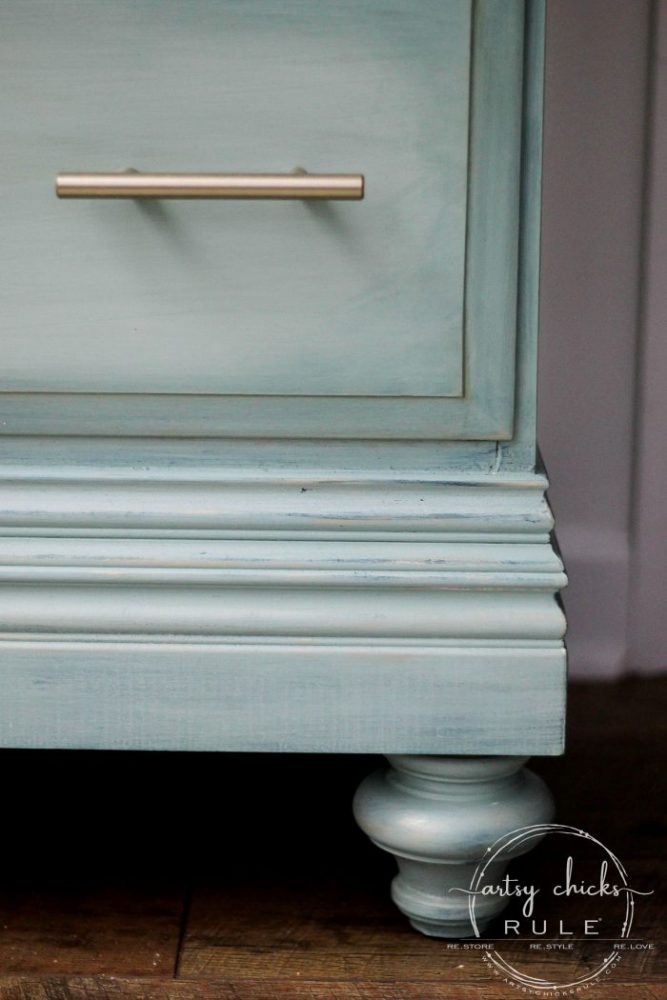
Even the feet got special treatment.
And that’s not all!
I wanted to add a bit of glam to my little aqua dresser.
So I added a bit of gold paint to the edges.
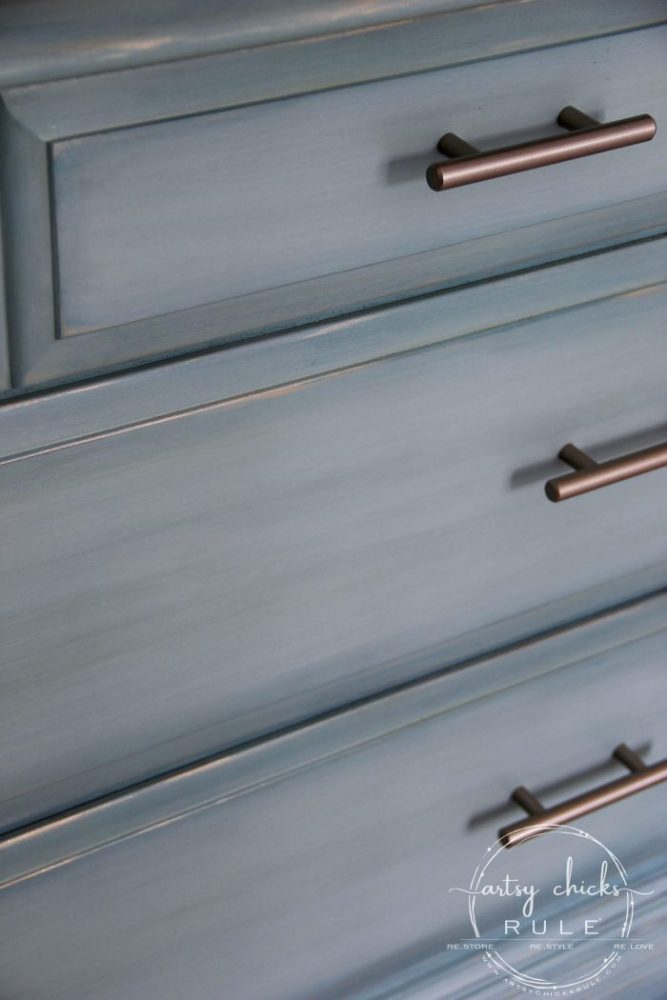
Just as you would distress the edges by taking paint away, I added paint on those same edges instead.
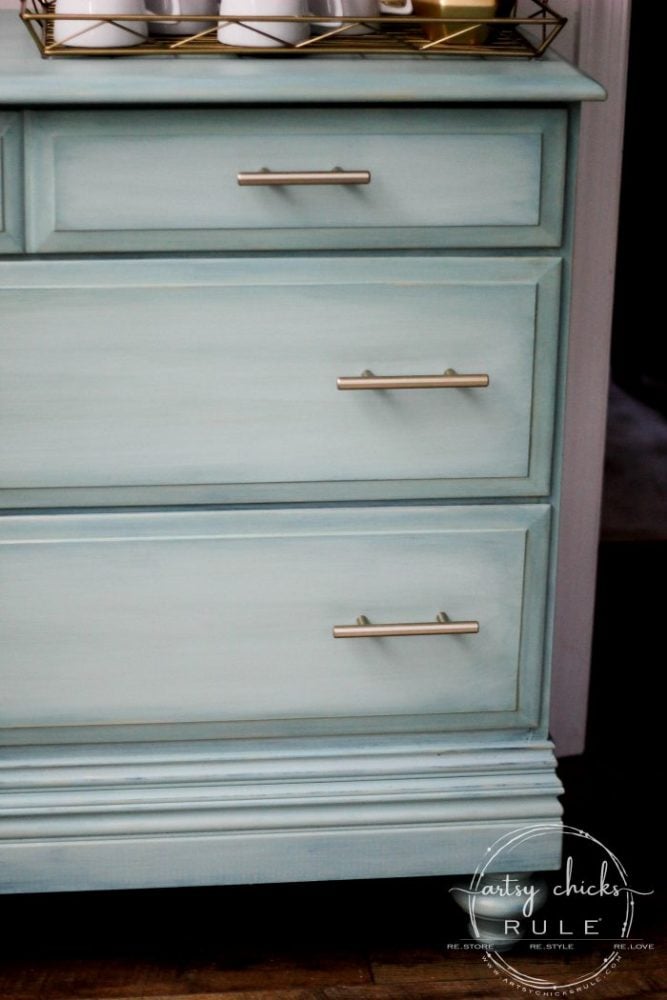
You can see it better here….
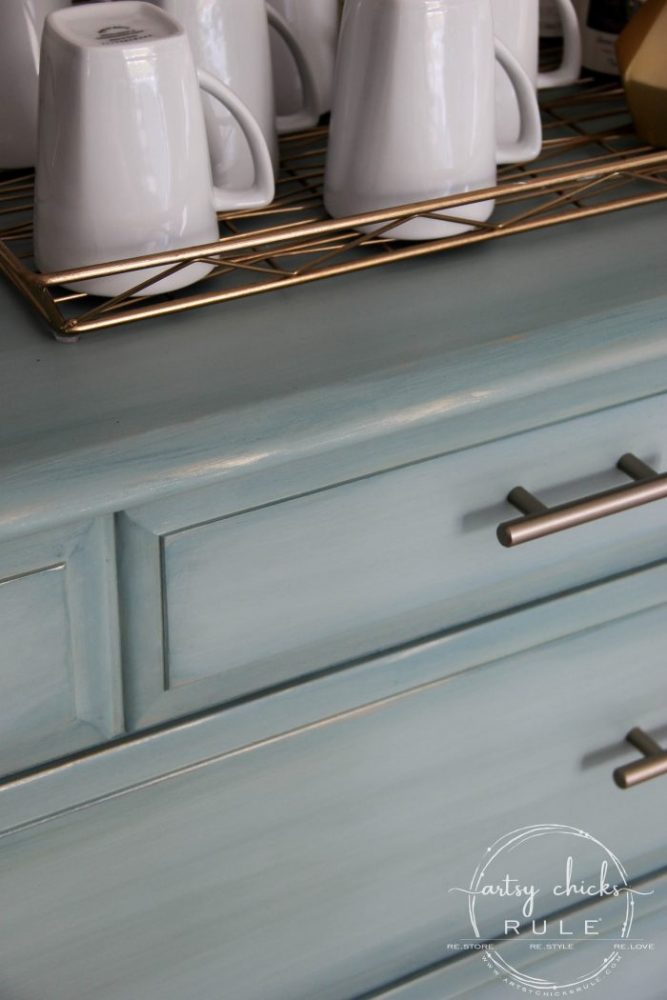
Just a fun little hint when the light hits it right.
The gold paint is just a little jar of gold, metallic paint. It is no longer made but any gold metallic craft paint would work.
And in this photo, you can see the darker blue shading pretty well.
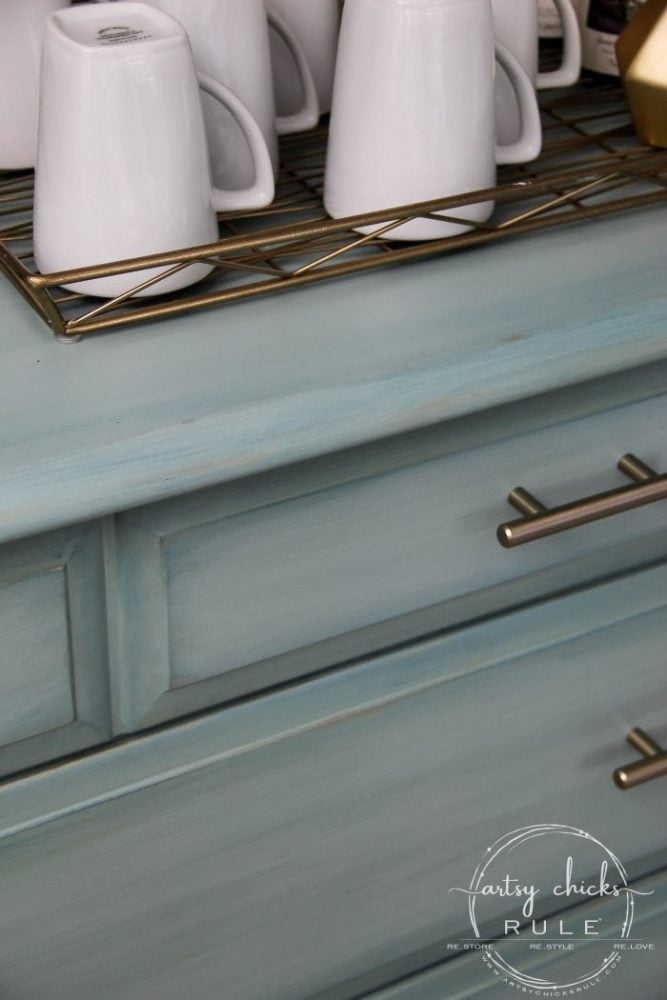
The entire dresser got sealed with high performance top coat, my all-around favorite top coat.
My little pretty got new pulls too.
I used the same ones I have in my kitchen except I painted them so they’d have a hint of gold too.
This is the gold paint I used on the pulls. It’s a beautiful understated gold that I also used on this project.
They look silver in some of the photos but I can assure you, they are gold and look gold in person.
I love how the variations in paint color give the dresser some character and keep it from being just …flat.
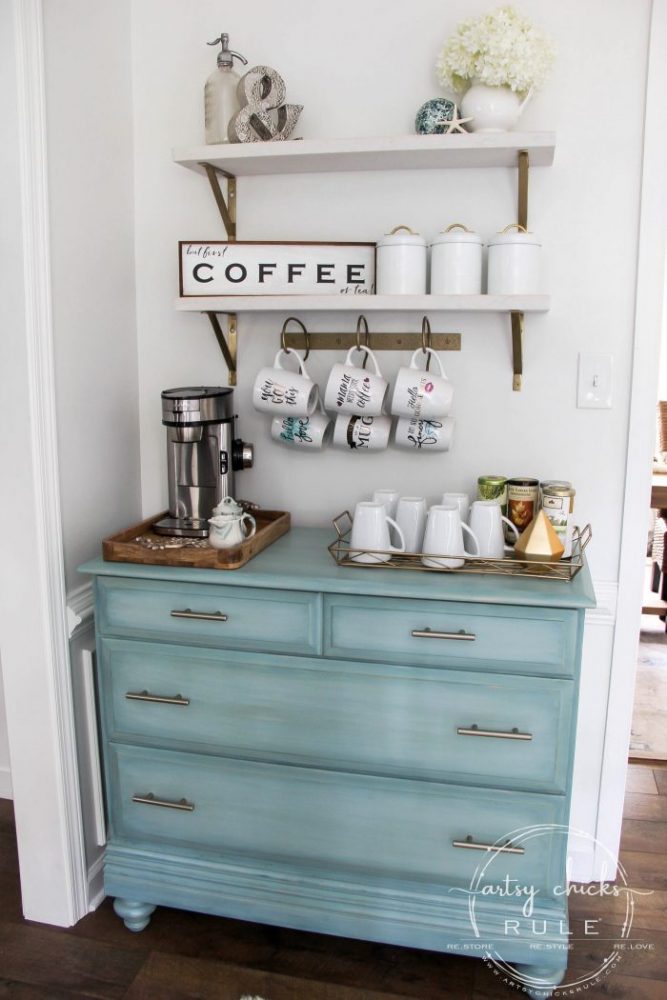
It’s very similar to my favorite secretary desk, just executed a little differently.
Want to know about 26 other chalk style paints?
I’ve got the low down for you right here! >>> 26 Types of Chalk Style Paint For Furniture
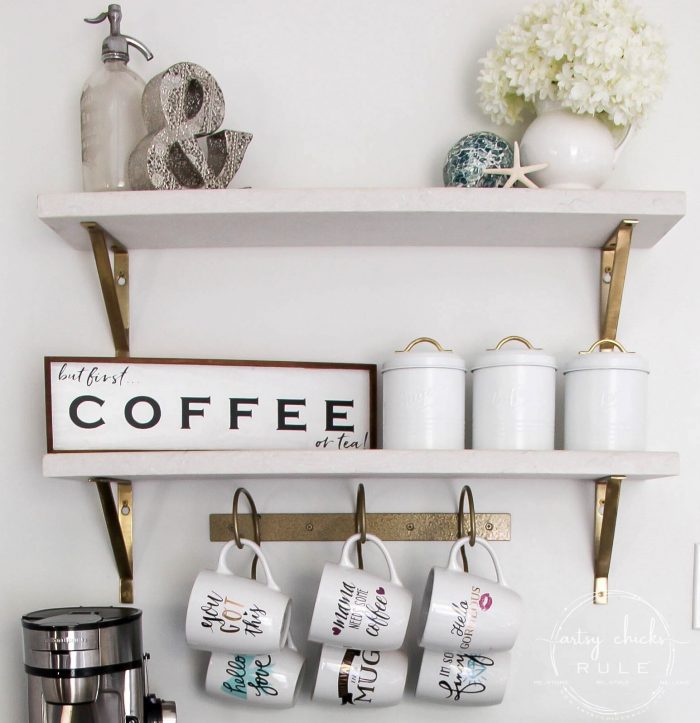
The shelves were leftover quartz from our countertops. I just LOVE them! And love how it ties it into the adjacent kitchen.
I got the pretty gold brackets here.
Do you remember these coffee mugs? I bought the hanger here and used a piece of pallet wood behind it. (And yippee! It was out of stock forever…and it’s back in stock now, I don’t think I’ve ever been able to share the link and I bought it in 2015)
Here’s a photo of it…
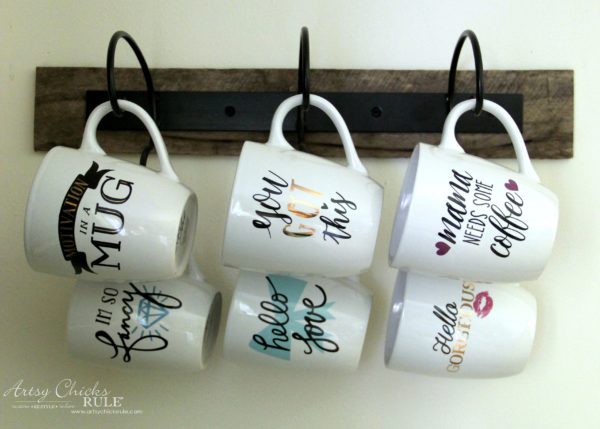
I didn’t think the pallet wood would really go so I simply did not use it when I put this back up.
I did spray the black metal with this hammered spray paint to better go with my new decor though. (love the hammered paint for this use as it looks like it came this way)
And up there on the top shelf in the middle….. I had this starfish platter…
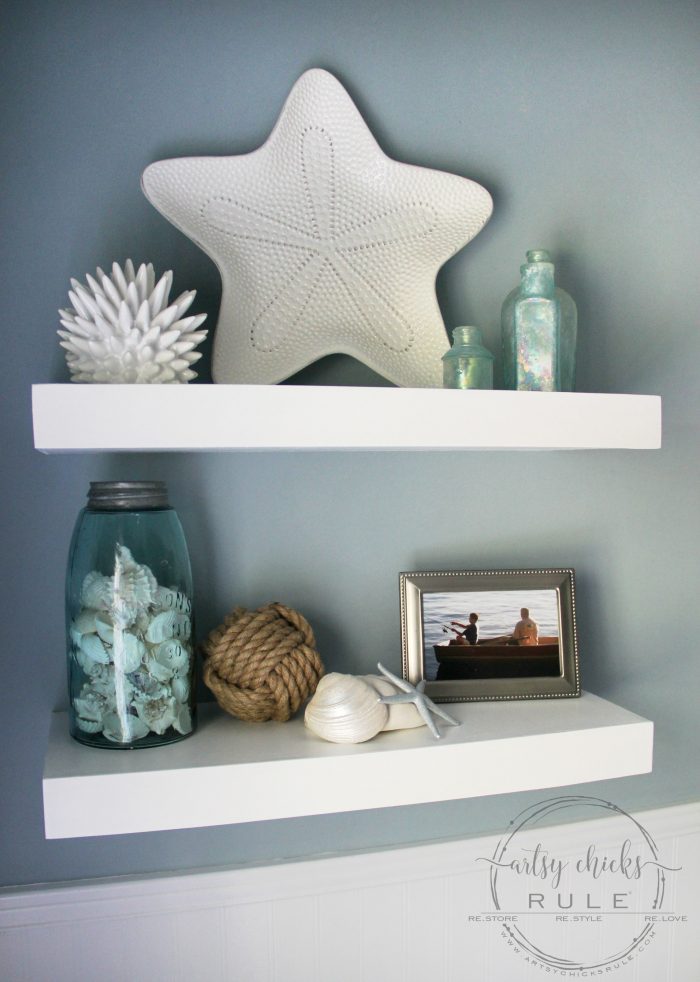
…which I just loved!! I’ve had it for years.
But…dummy me was hammering in a nail to start the screws for the coffee cup hanger and well…I guess I rattled it enough to make it fall… on my head and then it crashed to the floor into a million pieces.
Nice, huh? Did you just visualize all that?? lol
Thankfully it was not too far from my head so that wasn’t so bad…but it really shattered when it hit the floor.
Too bad it didn’t fall to the right of me where there’s carpet. :( I was SO bummed and so sad. I really loved it and it looked great up there.
So I had to rethink what I was going to put up there and that’s what I came up with instead!
I am still working on that so it will most definitely change. But that’s good for now.
Well, for today because that’s coming down and Christmas is going up. hee hee I’ll be sharing all the rooms decorated for the holidays soon.
And these cuties…
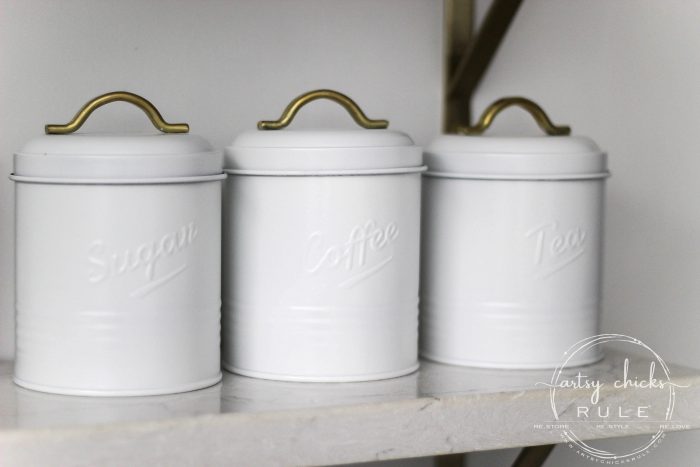
….looked like this when I picked them up at Tuesday Morning, this Monday morning.
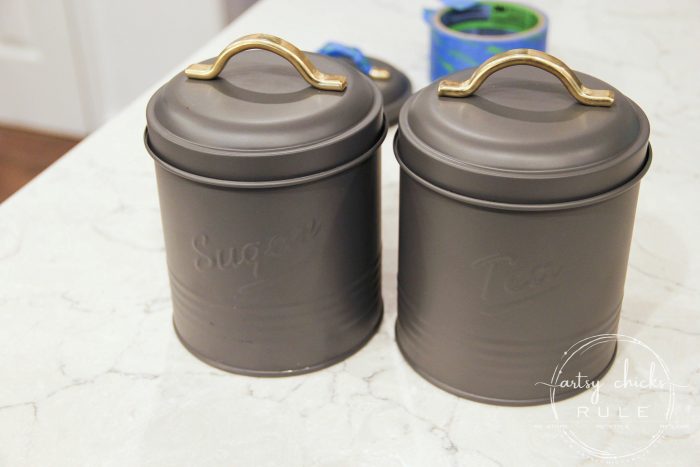
I loved the handles but the gray, not so much, so I sprayed them with white spray paint in a satin finish.
I found the wood tray there too.
I wanted to put something under the coffee maker to protect the paint from splashes and spills.
That is always bound to happen.
The little creamer and sugar set can be found here and here. I picked those up this morning too.
They were cutie patooties and I couldn’t resist them…and they were cheap so they came home with me!
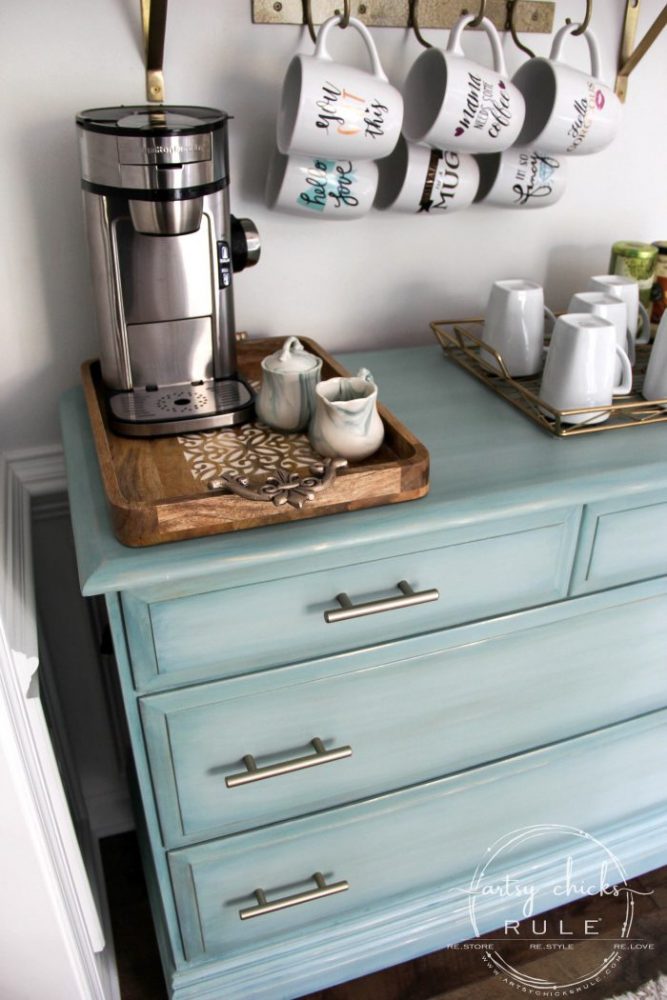
Anyway, I really love the wood tray and the wood is the same as the end tables in my morning room, so that’s a plus.
The coffee maker is new-ish to us. I shared it and a link to it in my Instagram stories a while back.
We LOVE, love it! I previously had the same brand of dual coffee maker and loved it too. (large pot on one side, single on the other)
We never make a big pot of coffee anymore though.
I don’t drink it often and even when we have guests, we’ve found that they would each make their own.
So, we went single…it takes up less space and it’s even better than the other one! So fast and so hot. You can make your one cup in a jiffy.
AND you can make your hot water for tea in a jiffy too! Perfect, love it…and it doesn’t break the bank either! Win!!
You can find it, here.
And the “so fast, so hot” thing has become a joke with my husband and me. haha I texted him the first time I used it and told him how I couldn’t believe how fast it brewed and that it was so darn hot! lol I think I might have said it a few more times after that because he’s always teasing me saying, it’s fast…and hot, every time I make tea, etc. He’s soooo funny.
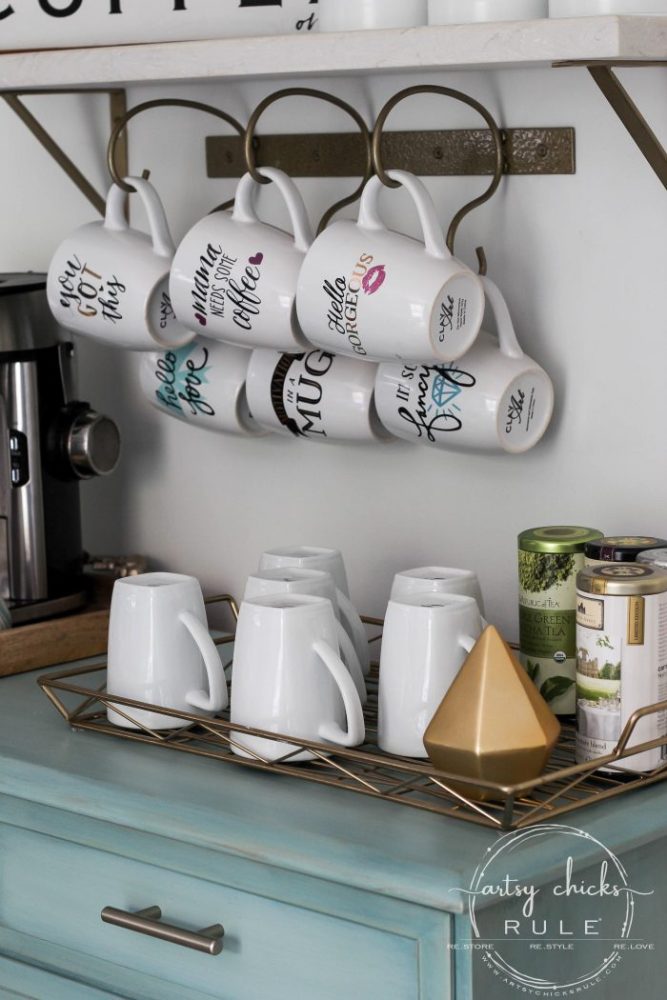
This gold tray was perfect for storing more mugs and teas. (or anything you need for your coffee or tea making)
You can find it here.
The white mugs are from Pottery Barn but I found them at the thrift store some years back. I couldn’t find them on their site but here is a link to a bunch of other white ones they now have.
Want to see how I use the drawers inside my aqua dresser?
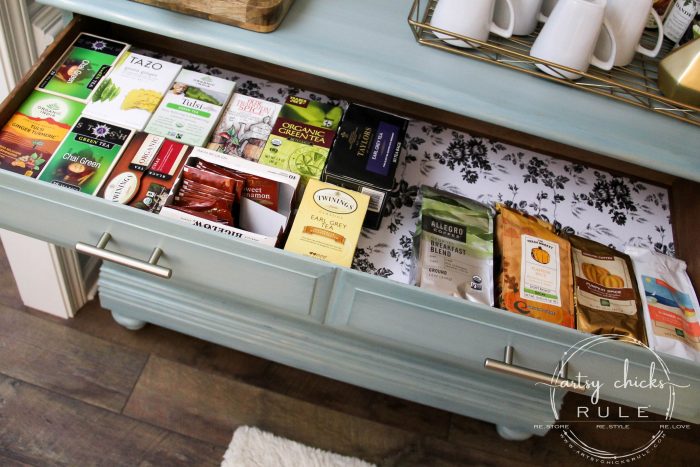
Coffee and tea, of course! ;)
And more…with room to spare. I’m sure I’ll fill it up. haha
The bottom drawer is completely empty right now too!
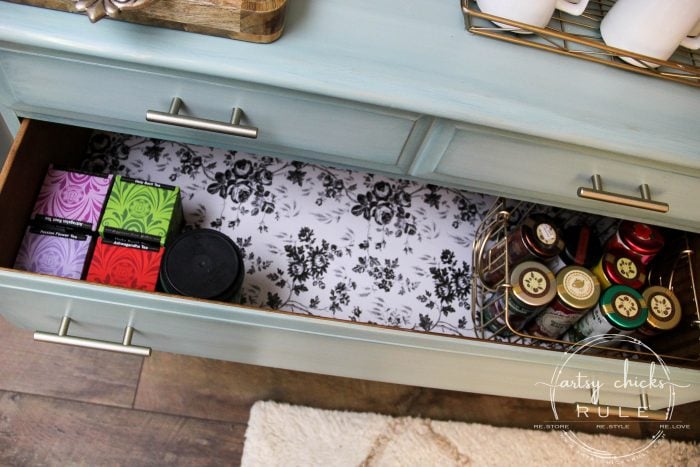
I simply lined them with shelf liners from the Dollar Store. Easy!
I can’t believe how silver the hardware looks in some of the photos. BUT it was dark, raining, and overcast all day here.
Not to mention I didn’t get to take my photos until about 4:30 pm today…which is almost dark anyway! (and yep, every single photo was taken without a single light on in the house…except the inside drawer photos)
So lots of camera settings (crazy slow shutter speeds) and editing magic going on in these photos.
Because I can promise you, it was not anywhere near this light in my house, nor was it sunny like it looks to be in a lot of the photos.
It’s magic I tell you.
Anyway, I am quite sure that is part of the reason they look silver instead of gold.
That and the fact that I used one of the softest, most understated gold spray paints out there.
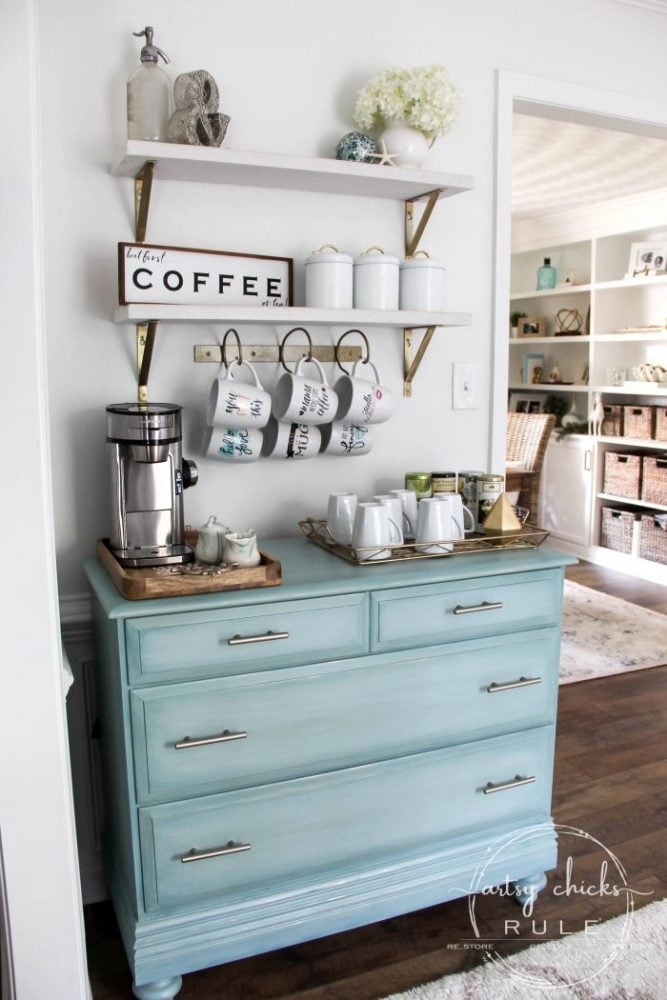
So tell me, what do you think of my aqua dresser??
Do you like the makeover I gave this one?? I’m really happy with it.
Especially since I’m never quite sure (well, not never, but not always) what I’m going to do and IF it’s going to work out.
I was fully prepared to have to repaint this with the base paint if needed.
Thankfully it was not! Yippee!!
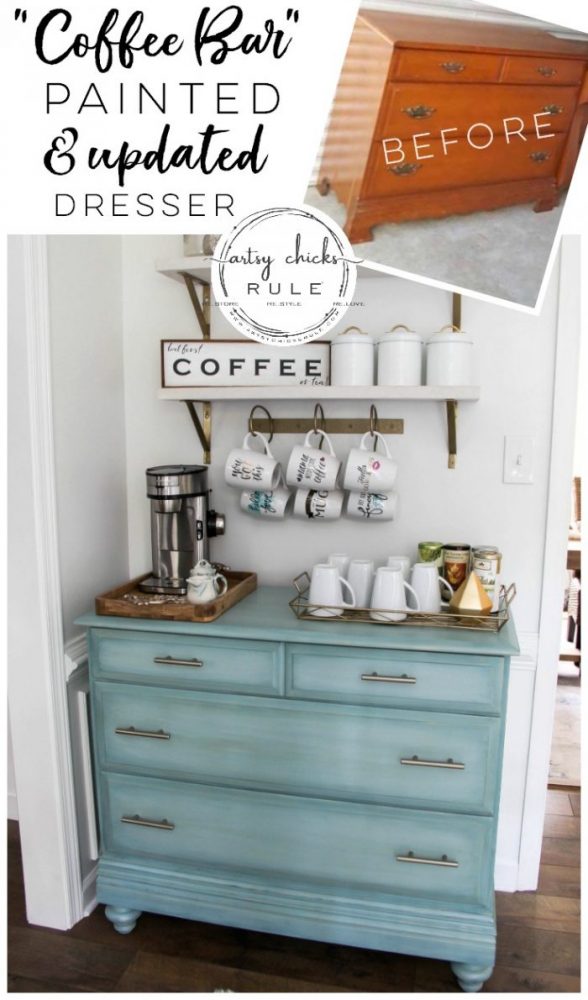
PIN to save it for later!!
I’ll see you guys back here on Thursday with my new coastal dining room all decked out for the holidays! I am even trying to pull together a beautiful table setting on our new table. Hopefully, I’ll be able to!
I put up 3 trees this year. One of them is in the dining room. If you don’t follow along on Instagram, you’ve missed a few little snippets here and there.
I shared it on my account and in my stories too. The trees I shared on my stories are now gone (they only last 24 hours) but you can still catch the photos I posted to my account over there!
Love WHITE painted furniture??
Then you don’t want to miss this post coming next month!
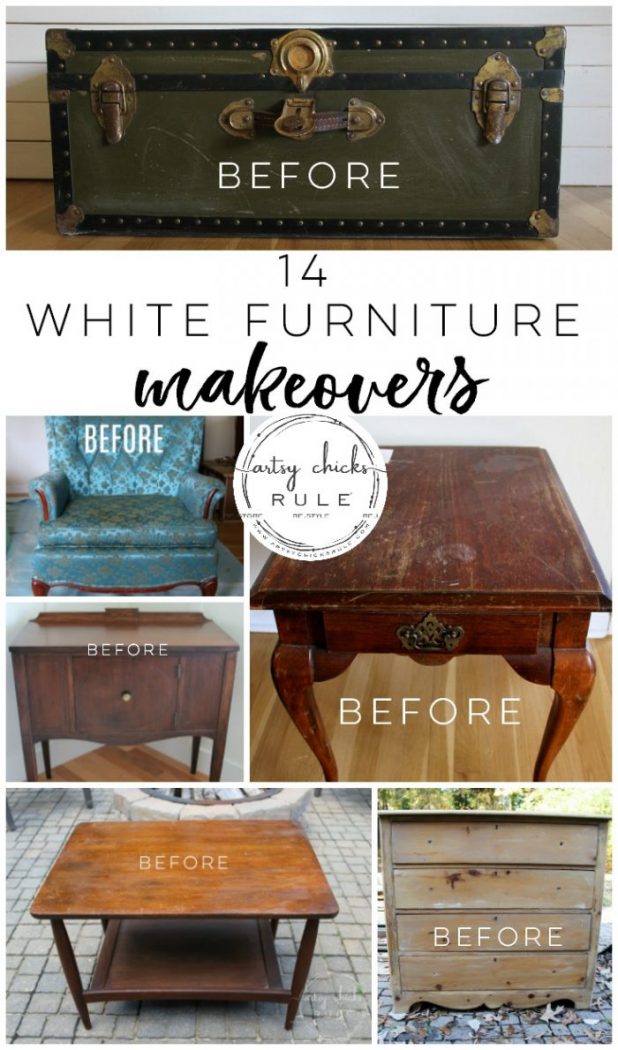
UPDATE!! See it now, here!!
Have a wonderful week, friends!
xoxo




Oh Nancy, this is absolutely gorgeous! Thank you for all the details on how you updated this dresser to your coffee bar! Love the new trim and feet. :) You definitely knocked it out of the park … again! :)
Enjoy the rest of your week!
Thank you Christina! :) It was fun to see this one transform from how it began! Thank you, you as well! xoxo
I absolutely love everything about your coffee/tea bar! You did an amazing job painting the dresser and I really liked me how you trimmed it out to update it and added feet; I’m all about adding feet to furniture, for some reason I don’t like furniture sitting directly on the floor, lol ?. I think maybe its because I think it looks more open and airy that way and I can clean under it easier. Your style is very different from mine, but I really enjoy your projects, and your home is beautiful!
Thank you Vicki! :) I’m with you on that, I love feet too for the same reason!! ;) xoxo
Super cute. I love the idea of using baseboard trim on the bottom.
Thanks Kimberly! :) Yes, it really changed the look of it! xo
Beautiful and fits perfectly in that location! Love it!
Thank you Robyn! :) I’m going to really enjoy this one! xo
Wow you did it again. Love the color, the use of trim to cover the area you didn’t like too much, and the addition of the feet. Love your style too. I’m into “Coastal” too. Your posts give me inspiration every time.
Aw thanks Rita! :) And, yay, I’m so glad to hear that!! xoxo
She is a beauty!!
Thank you!! :) xoxo
LOVE the color!!!!
Thank you, me too Rose!! :) xo
Love everything about the dresser….and the post! Thanks for the great info on how you did the blended colors and all the links to everything. I read the post through and then went back and reread and checked out all the links. It’s so pretty. What a difference the trim and feet make. I learn so much from your blog. Thanks again!
Thank you Susan!! I’m so glad you enjoy the blog. :) And yes, that trim and feet sure did change the whole feel of the dresser! So much fun!! xoxo
Absolutely beautiful. The modifications took it from a Plain Jane dresser to a beauty. By adding the bottom moulding and feet, it also made the front look more defined. The paint texhniques you used added so much depth and dimension. It’s amazing the difference you’ve made in this simple dresser. Astounding work! Thank you for sharing a step by step tutorial so that the brave amongst your followers can attempt to beautify our homes.
Thank you so much Christie! :) You are so right, plain Jane it was and it does have a completely different feel now. And yes, so happy to hear that, as it is my hope, that I may help to inspire others to venture out and create some lovely things in their own homes too! xoxo
What a gorgeous change for this little dresser! I love the additional trim on the bottom to hide the cutouts and those little bun feet! But girl, those soft perfect colors with that hint of gold just take this piece to the top! I love it!
Thank you so much Kaycee! :) I didn’t have a 100% clear vision of what I was doing with this one for so long…and even when I started! lol I’m so glad it turned out. I kinda love it too! :) xoxo
Oh Nancy, this is a stunning, stunning piece! Well done!
Thanks you so much Susan! :) xo
So pretty. Great color combination. Thank you for the inspiration (and for including one non-Christmas project! We don’t all celebrate it.) :)
Thank you Lizzy! Yes, you are so right!! I do try to keep that in mind with my posts/projects around the holidays but didn’t do as many other things this year! :) xo
Hi Nancy, I just came upon your blog and I love you….and it!! You are so thorough on projects and your pictures really do pop on the internet. Such good photography! I am going to do the coffee station dresser and wanted to list what paints I’ll be using that are less expensive than some of the ones you’re using (for those who have to be thrifty). For instance, I’m making my own chalk paint out of Plaster of Paris. The Aubusson Blue (darkest blue paint used) wasn’t listed on your “paints you used list” but I found it later on down the blog:
.Instead of Aubusson Blue chalk paint, I used Valspar Azure Jazz (dark blue)
Instead of Snow White, I used just basic latex white paint
Instead of Provence as Chalk paint, I used Valspar Blue Tango
Instead of Somerset Gold Milk Paint, I used Valspar Canary Honey Paint
Instead of Duck Egg Blue chalk paint, I used Valspar La Fonda Mirage Paint
I will make my own base chalk paint with Plaster of Paris and then add color to each.
I know that it will look different than the exact color of yours but I’m going to try it.
I’ll post how it turns out. Blessings.
I
Hi Elizabeth! Awww…that is so sweet!! :) Thank you for the compliment on my photos and photography too. I have worked hard on that so that means a lot.
AND thank you so much for taking the time to share these colors with everyone. I am all about being thrifty! This is awesome.
Yes, please share it with me once it’s done. I would love to see it!! xoxo
Thanks Nancy. I’m trying to blend as you did on your coffee bar but really can’t seem to get it as smooth as you (even nearly). Do you have a video that would show your blending you did on this table? That would really help out a lot! Just askin’
Hi Elizabeth!! So sorry for the late reply, it’s been kind of crazy with us going out of town twice. I got your pics in my email. I don’t have a video for that unfortunately but that is probably not a bad idea. I will have to work on that. In the meantime, try using a very damp rag when doing this. You want it to blend very well, blend, blend, blend, that is the key. If you notice you get too much dark, take some of the light on a damp rag and blend more. It is a little time consuming but the end result is worth it! :)
Thanks so much for your input!
Hi! Love the colours in this project. I am a beginner, and so have a question as to how to achieve the same coloration in this dresser. Can you specify which color was put on the base coat – and if it is one or two coats. You do mention snow white, (one coat?), and then a wash of snow white on drawer fronts (is this the second coat on the piece – or did you start with two coats?). Then you mention several blues you used – was this a mix of duck egg blue and provence, with a rubbing on the edges of Aubusson Blue?
Thanks in advance!
Hi Kelly!
Per the post, this is approx what I used to create that aqua color. The great thing is, there are lots of wonderful aqua shades out there that would be similar. As a matter of fact, French Eggshell by Fusion Mineral Paint would be very similar to what I created here.
Snow White – 35%
Provence AS Chalk Paint – 20%
Somerset Gold- 5%
Duck Egg Blue AS Chalk Paint – 40%
I did one coat but that always just depends on the paint you are using and what you are painting. That will vary.
Yes, Snow White (or any white will do) is only used as a wash and only in the middle section of each drawer, not the whole drawer. This would technically be the “second” coat since I only used one coat of the base aqua color…but I wouldn’t even call it that as it’s just a wash of white in the middle of each drawer.
For going around the edges of the washed white area, I used a very damp rag with the darker Aubusson Blue, wiping most of the paint off the rag before wiping it onto the drawer fronts. (you don’t want dark streaks of paint, think VERY light-handed and VERY little paint) Going back afterward and wiping to blend ever so slightly. You just want a hint of the darker blue to give dimension.
Your best bet is to get some old scraps of wood and doing this entire process on them first to get a feel for it. That way you have a better feel for how to apply, blend etc, with some trial and error beforehand. (and no, it was only the Aubusson Blue that I used for the darker shade around the whitewashed area)
Hope this helps clarify a little better for you! :)
😮MG… wow., Sooo beautiful! Great Job.. I love the color s. I now want to paint everything with that look! Maybe even try to color streak dye an outfit 🙃
Me too!! I have been wanting to do another but haven’t yet. I need to get on that! An outfit would be fun like that too! :) xo
Hi! It’s been years and I’m still obsessed with this dresser.
I noticed you used a combination of milk paint and chalk paint. Is there anything lost in translation if you only use one or the other? Does a combination of both create something better than the sum of its parts?
Thank you!
Hi Emily! I don’t think it really matters which kind of paint you use, it’s really more about the technique. :) xo
I just finished painting an old beat up but still lovely antique entry way table I found along the road and I AM IN LOVE!!!!!!!!! I followed your instructions to a T, except I used similiar colors from a different brand of chalk paint found at Michael’s Craft store. Its PERFECT!! I can’t stop staring at it. It came out exactly like yours and I couldn’t possibly be happier with It’s boho- farm house feel. It’s exactly what I wanted. I’m so thrilled I’m going to do the same technique on a pedestal dining table gifted to us that I love but don’t care for the color. Thank-you for this blog! It’s inspired me to continue collecting and tranforming furniture that just needs a little love and care.
Oh, I am just beyond thrilled to read this!! Absolutely love it!! So happy you are creating beautiful things…its so much fun isn’t it?! Thank you for the sweet words and for taking the time to tell me!! xoxo