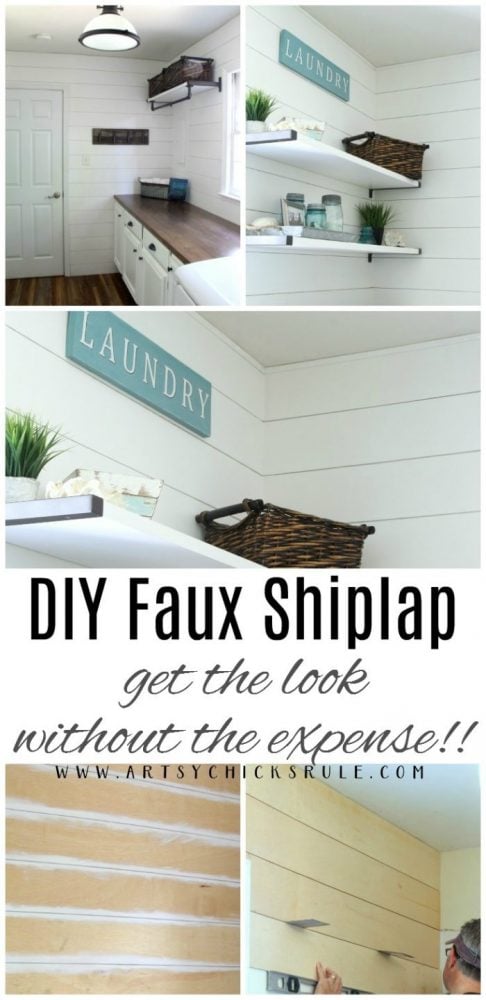
Installing shiplap in your home shouldn’t be exhaustive OR expensive! Learn how we did our DIY faux shiplap, the easy (and inexpensive) way!
Today I’m back with the DIY Faux Shiplap tutorial.
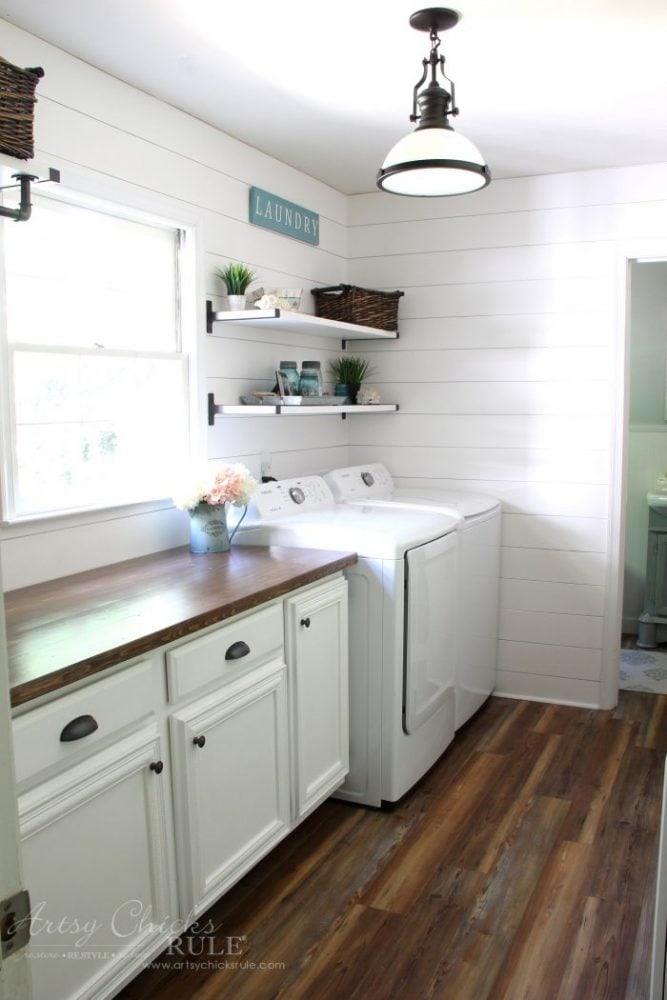
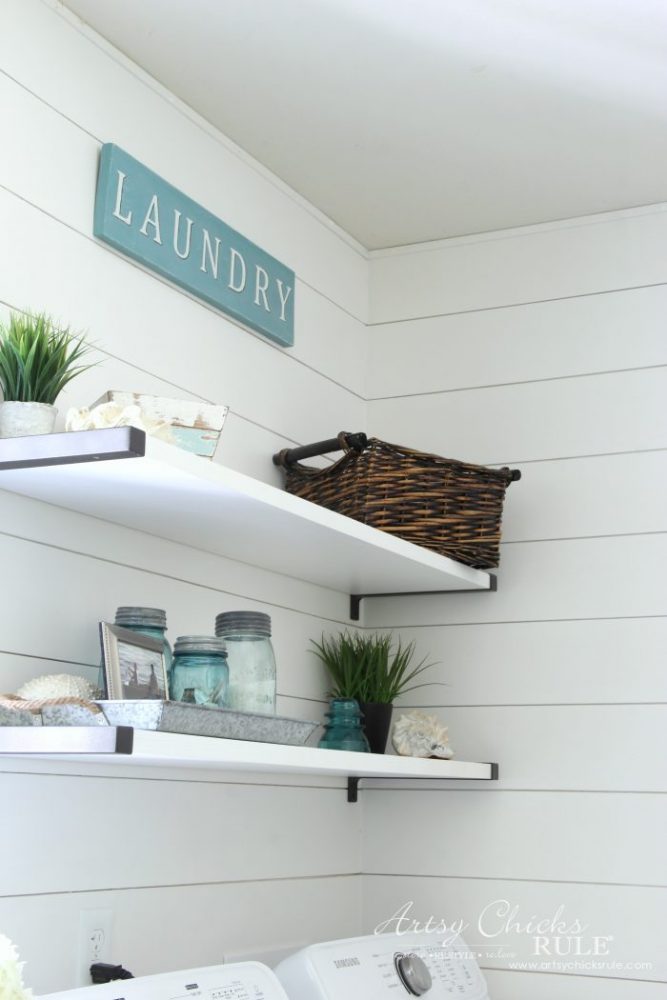
In case you are new here, my husband and I installed DIY faux shiplap in our “Coastal Laundry Makeover“. (<— see more photos and details here)
The DIY faux shiplap is a lot cheaper and pretty easy to install. BUT it doesn’t look cheap. Get that shiplap look for less.
And who can tell the difference once it’s up? (this photo is before finish trim, by the way, see more below) Learn how to do your very own DIY shiplap wall today.
(Want to see even more of my favorite DIY supplies??? Take a look in my very own curated shop, here!)
Okay, let me start out by saying that you can get The Home Depot or Lowe’s to rip these down for you.
That is what we did to get it done quickly.
Unfortunately, the person cutting tried to cut a bunch of boards at one time which left us with different-sized boards, uneven cuts, and really rough edges.
It was such a mess that they ended up giving us 50% off the total cost.
Thankfully we had added in quite a bit extra for the job because we had to sift through the pieces and discard any that were not cut straight or weren’t the right size.
If they had cut one at a time (or even only 2 or 3 at a time) we wouldn’t have run into this problem.
But like I said, the person cutting thought they’d get it done quickly and apparently was trying to cut 5 at a time!
We came back over and saw this and got someone else to cut the rest.
Anyway, just be aware of this if you go this route.
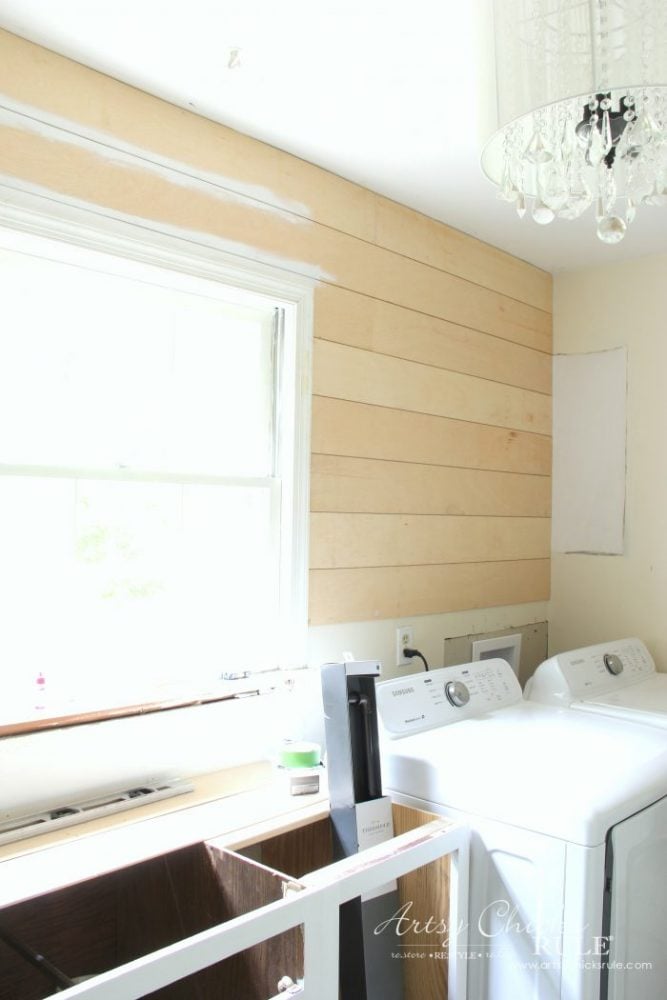
For the size, we decided on 6-inch planks.
I’ve seen where people do larger than this but 6 inches seemed perfect for the scale of our room.
Since the boards were rough cut, we did have to sand the edges before installing.
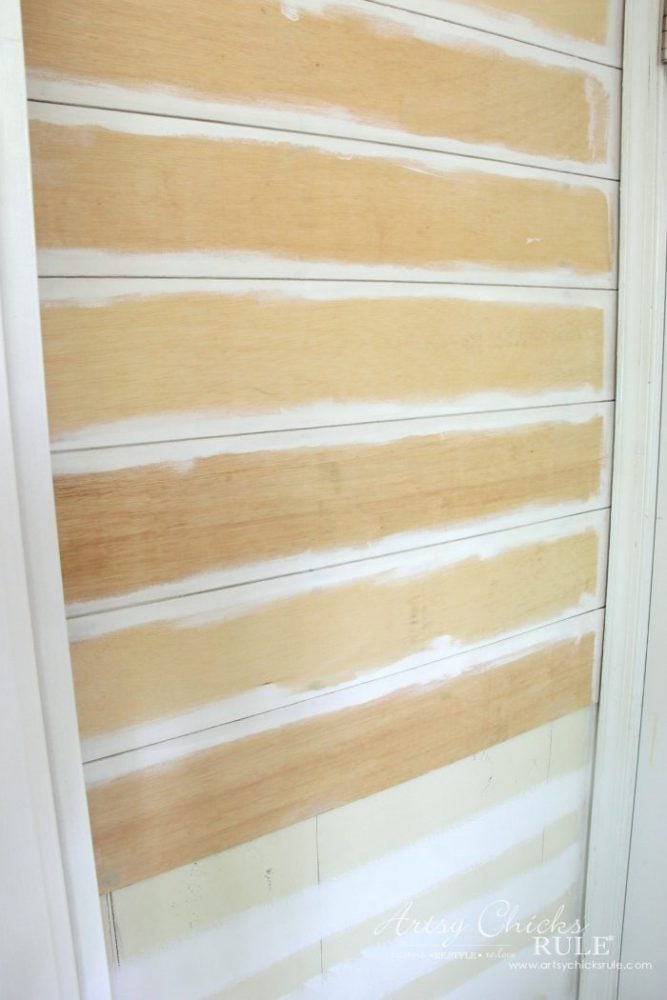
And you may notice that paint line above. I had originally thought since the walls were light to begin with that I wouldn’t need to paint first. That was a mistake.
I should have painted the wall the same color I was painting the shiplap beforehand.
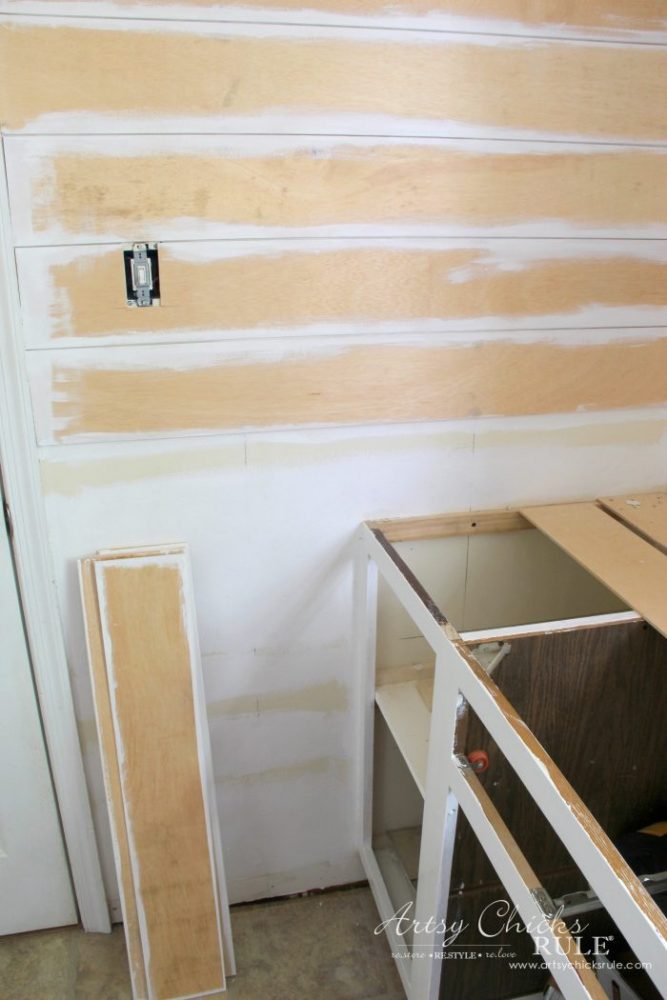
I also should have painted the inside edge seams beforehand as well. We got about halfway through and decided to paint the walls and edges for the entire rest of the job.
I went back and painted the walls everywhere there’d be a gap…..
….and as you can see, the edges of all the boards too. SO much easier!!!
Trust me on this. Take the time to do some priming of the walls with paint beforehand.
It will save you a lot of work.
You might also notice the long penciled lines going down the wall. (hidden partly from my painting)
You’ll want to go around the walls with a stud finder and mark where the studs are.
When nailing the boards up be sure to nail into the studs, whenever possible.
Be sure to follow along over on INSTAGRAM as I am always sharing in my stories what we’re doing…as we are doing! Action shots. ;) Lots of “behind the scenes” in live time.
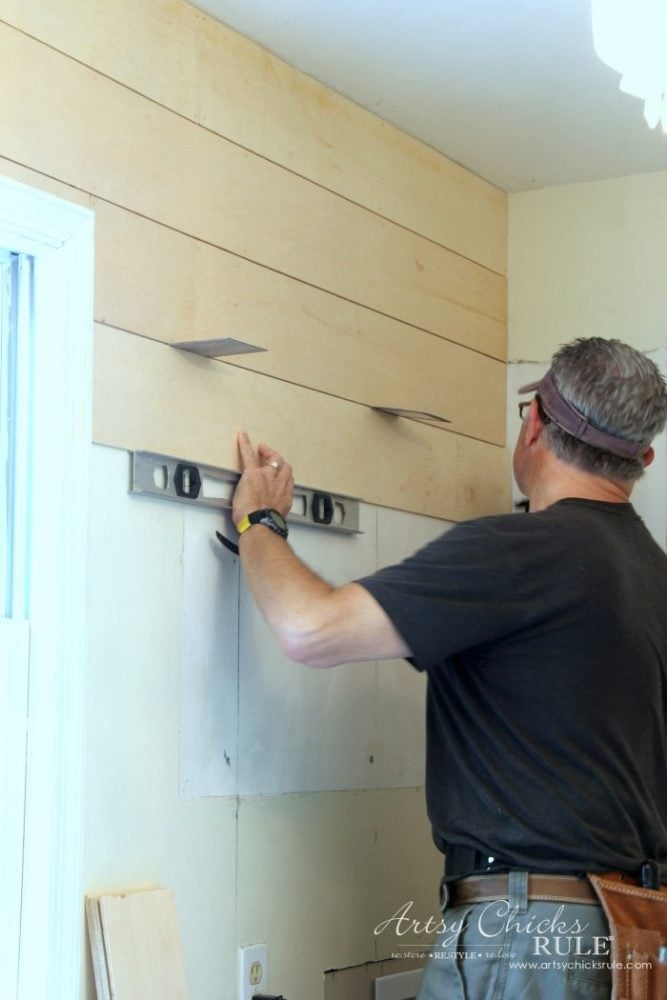
Okay, for the gaps/spacing between pieces.
I’ve seen people use nickels or pennies and even traditional spacers.
But in the end, we used these…..
…and a level of course.
Do you know what those are?
They are flooring samples!! Haha! Yep!
And they were the perfect size for the gap plus they stayed in place pretty well.
Hey, it worked for us!
We used the brad nailer nail gun to nail the shiplap boards into place.
We didn’t use any kind of glue behind them because we felt that was unnecessary.
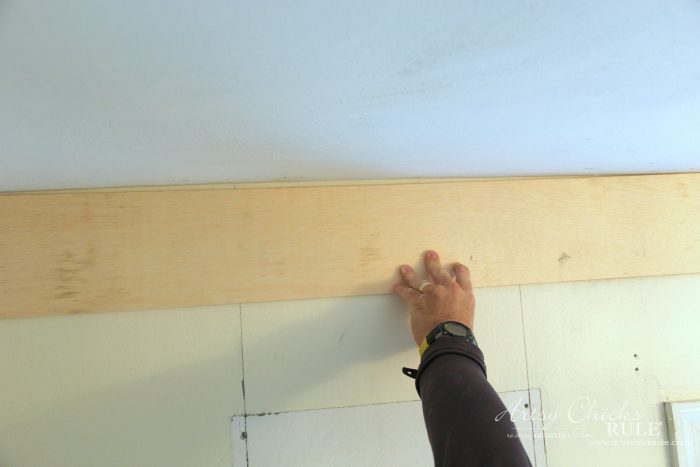
Lovely uneven house.
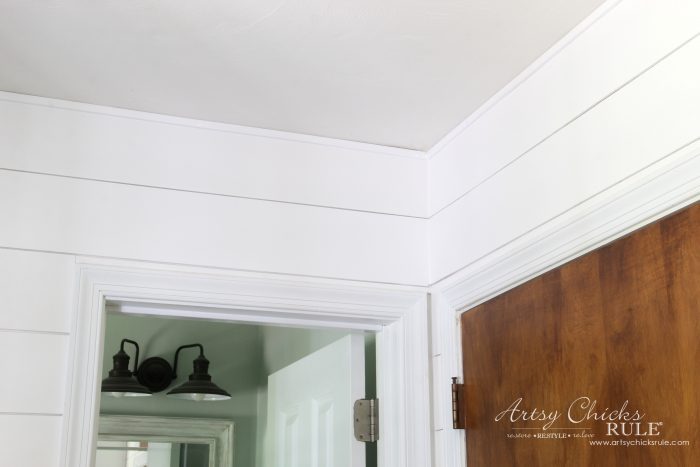
I hadn’t planned to add any extra trim to the top but once we saw how uneven the ceiling was we knew we would have to.
If yours fits tightly to the top I’d say you could skip this next step.
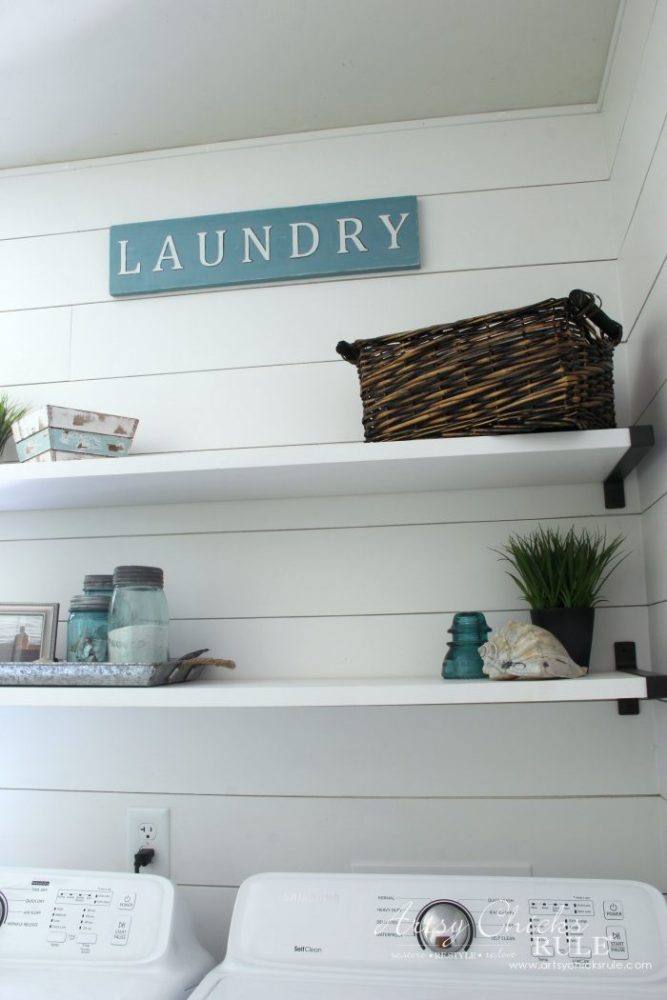
This is the same exact spot you see above all finished.
No more gap!
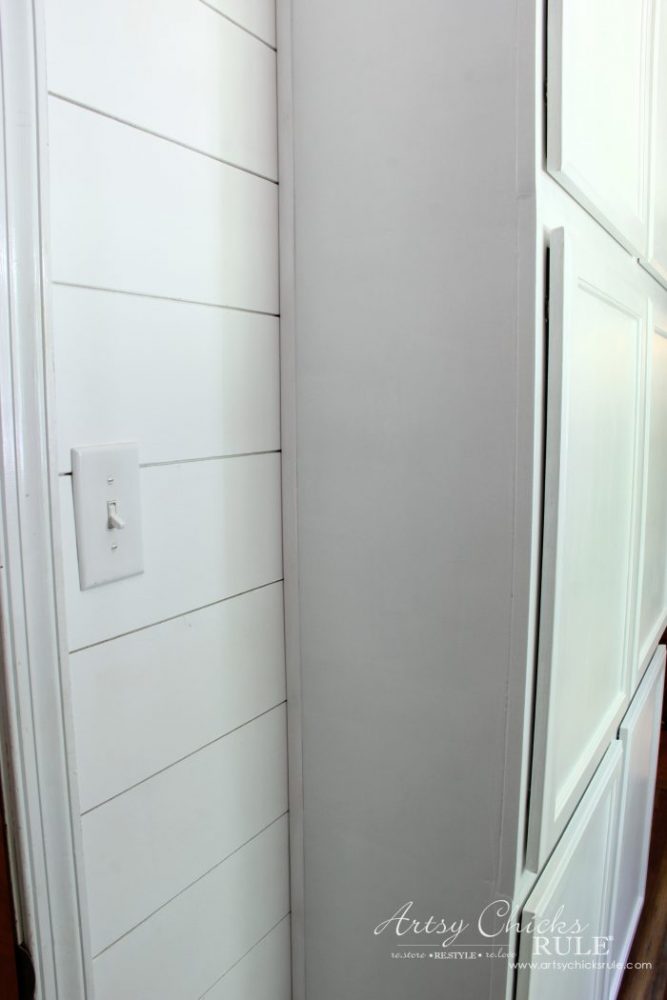
We used the casing all the way around to hide any imperfections and give a finished look.
Much better than the unsightly gaps all around.
Gotta love an older home and its unevenness!!
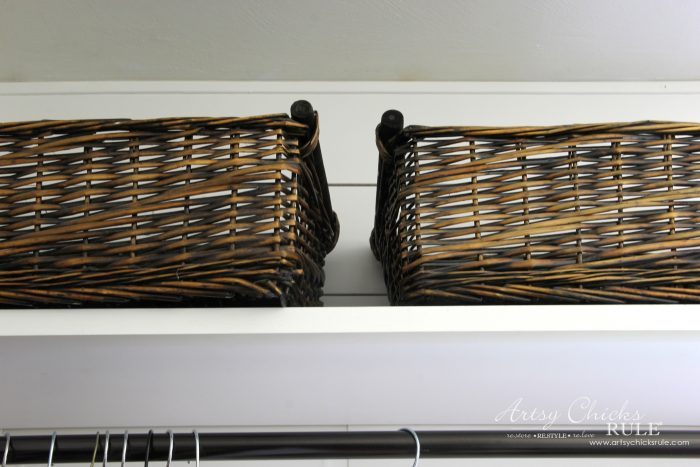
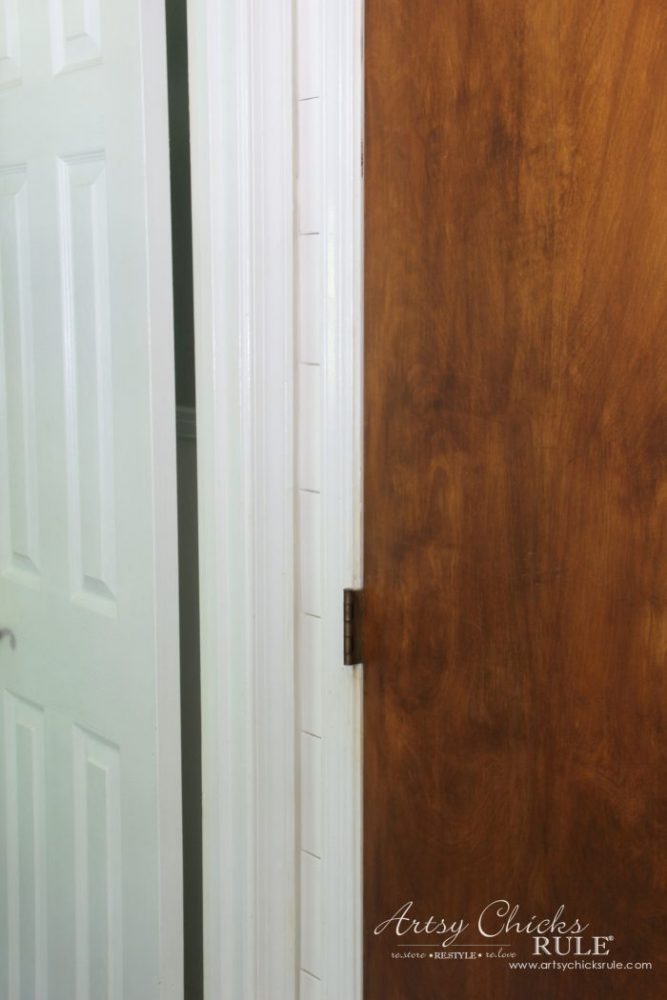
We also went back in and added these little baby DIY faux shiplap pieces in this gap here…..
We didn’t have these or the trim done for the big reveal.
But I’m loving it all completed now.
We also used the casing trim on the sides of the floor-to-ceiling wall cabinets and baseboard where there was a gap.
For reference, the paint color we used on the walls is by Behr and is called Nano White.
And I adore it!
It is THE perfect white, in my opinion, of course.
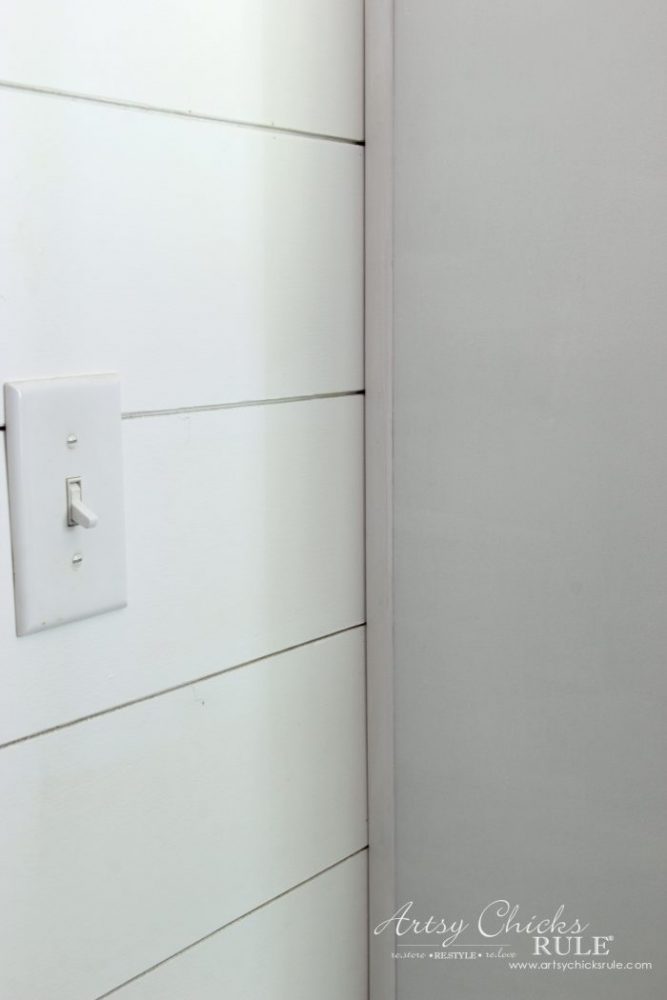
And caulk…..caulk is your very best friend here!
I LOVE seamless and once everything is up, go around and caulk all the ends next to the wall, door trims, corners, etc.
Make it seamless and lovely. I hate caulking but I love how everything looks once I do.
For the brad nail holes, I used regular wood filler.
And that is it!
It truly was not a hard job at all.
BUT it was tedious. I can not tell a lie.
It was a tedious job but so very doable.
Do we want to do it again anytime soon? Nope! But guess what, we are.
We’ll be adding shiplap in the bathroom area of our Master Bath/Closet Makeover. (<<<— Update! See it NOW finished, here!)
Which we are actually getting back to now that the Coastal Laundry Makeover is complete.
I told my sweet hubby that we need to do it like we did that one, in 5 weeks!!!
Hahaha …that didn’t go over too well and I got “the look”. ;)
It was a tad stressful but hey we got it done quickly! Hee hee
Well, we will definitely keep y’all updated here as we go on that project too…so stay tuned for that.
So glad we are finally, for real this time, done with the Coastal Laundry makeover, and am just loving our DIY faux shiplap.
It has made a world of difference in this room. If you haven’t already, hop on over to the Coastal Laundry Reveal so you can see how this room started. (you won’t believe it!!)
Be sure to PIN this DIY Faux Shiplap Tutorial so you can save it for later!
I hope you all have a wonderful weekend! Can’t believe it’s already mid-July, can you?
Nicely done! It’s all beautiful. Thanks for all the helpful and time saving tips. So often I dive into a project and realize I “coulda shoulda” done something earlier or different. It all works out but so nice to keep the momentum rolling and be efficient as possible.
Thank you so much Anne! :) I have to say, out of all the rooms we’ve redone in this house (about all of them ;) ) , this is the one I am most proud of! xo
Your laundry room looks terrific! I’d love to do shiplap in a bedroom. Thank you for the shiplap tutorial and tips! Were the boards all cut to the same length on the long wall above the cabinets? I ask because there are no vertical “seams” visible where the boards meet. Hope I’m making sense,?
Thanks Susan! We staggered the top three with different sizes (seams). The top board was placed from the left side (going right) and went the full length and then the second board down we started on the right (going towards left) and went the full length of the board. And again from the left on the 3rd row down. Then cut smaller pieces to fit each remaining portion of those rows, etc. This way the seams ended up in different spots. Hope that makes sense. On either side of the window we didn’t need to worry about doing that because those were short runs (no seams). As far as seeing them, they fit pretty tightly together though so not really that noticeable. (and probably even harder in photos) I hope this made sense and helps! :)
Thanks Krista! :) I used eggshell to give it a slight sheen. I like it because it tends to reflect light better than flat without being too shiny. (giving more light in the rooms)
Looks awesome! I want to do this for my husband in our laundry room. Actually, there are any issues with not using glue? I’m concerned about warping/bowing between where the boards are nailed in. warping/bowing, then I’ll do without.
Thanks! I think the main thing is to make sure the boards are acclimated before installing. We’ve had absolutely no issues with warping, bowing, etc. :)
I love your room and we are coming along with ours too….could you tell me if your purchased your shelf with the rod, or did you make it? If you made it, could you share how…I just love it, and it’s so practical for hanging clothes on as they come out of the dryer.
Hi Diane! Thanks so much. :) We actually made that shelf and the others you see in the room. Here is the post that tells what we used to make it. Scroll all the way to the bottom for direct links to each item needed for the shelves. :) We love it and have used it a ton!! xo
Thanks Trish! :) Gosh, I honestly can not remember if I repainted them when we did the shiplap….but I’m thinking I did. (and used the same paint, Nano)
Hi Jessica! I see that the link I had for that is no longer valid. I added a new link to something very similar to what we used. If you want it “rustic” you can use regular pine board plywood which is not quite as smooth and has variations, etc. This type of board has a much better finish if you are looking for less of a rustic look. :)
I am wanting to do this in my laundry room. The walls on the left side are really chopped up because of the linen door and then a little recessed space. So I am thinking the back wall and the other side wall that runs the length of the room. I would like your opinion on that and also, we thought the boards were staggered and it looks like they run the length of the room and line up. Is that how you do Shiplap, one wall is to long for one piece.
You can do it either way, really. We didn’t stagger them in that way. We used them long and only had shorter pieces where we had to. And so, the short sides of the room all have the same size. I like the neat, uniform look of that. We are doing the same thing in our bath remodel. (all the same size, not staggered) :)
I’m wondering what you do when your wall is longer than 8 ft. I love the seemless look of the ship lap but how do you work in the seems for a 10 foot wall
We are actually running into that in our beach condo that we are renovating. For us, we have just decided to create the “broken” more rustic look for the longer than 8 feet wall we are putting it on.(pieced together like a wood floor)
Another option for you is applying it vertically instead. If you have 8 foot ceilings or large trim up top and below, you can apply it vertically instead. Hope that helps!
Nancy I have saved your inexpensive ship lap post for sometime. We’re currently working on our house! I want to do ship lap on the ceilings of 3 rooms. My husband proved the board at menards and it was $26 a sheet. Was the cost similar when you did your remodel or has the price really increased? It will cost a fortune to do our ceilings this way. I’m so disappointed! I don’t know what to do now. Any suggestions?
Yes, I believe it was similar in price but still much cheaper than using the pre-made shiplap. You could look for and use a less expensive plywood. (they have some that are 1/8 instead of 1/4, for example, and also different finishes, etc) Other than that, I don’t really have any suggestions, sorry!
LOVE your shiplap walls.
We have been shiplapping our ceilings with 1/4 inch luan plywood. We’ve run into issues with the edges of not only, the full sheets, but our cut strips rippling on the edges. We’ve had to make braces to put against them while we wait for the glue to dry. They are also nailed. How did you avoid the edges of your planks rippling? They look very flat in your pictures.
Hi Tracey! Oh wow, I am not sure why that would be happening. Ours are very flat. We didn’t have that issue at all and we also did this same exact technique in our master bath remodel. I am thinking it’s a different type of plywood maybe? Maybe too much glue (moisture, etc)? All I can offer is maybe use a different type of glue or maybe quite a bit less? I’m so sorry I’m not more help!
I believe we adjusted the outlet box inside by moving it out slightly. If you are not comfortable doing electrical work or don’t know how to do it, then yes I always suggest going with a professional.
hi, how did this thin plywood hold up overtime? I’m wanting to do this for an accent wall right now and someone told my dad that the boards would warp overtime being so thin.
Hi Cassie! It has all held up great. We actually have this in our master bathroom too. (you can see it here) They aren’t as thin as they seem, actually. (1/4 inch) So even in our small bath, showers every day, etc, no issues what so ever! Hope that helps!!
Want to be inspired, learn new skills, discover all the tricks to furniture makeovers, creating new out of the old and more? You'll also receive my FREE ebook "Creating Fabulous Finishes" PLUS access to my private Printables Resource Library, too!
Sign up to get the Weekly Newsletter! Our emails include an unsubscribe link and you may opt-out at any time. Your information will *never* be shared or sold to a 3rd party.


")
")
")


")


Nicely done! It’s all beautiful. Thanks for all the helpful and time saving tips. So often I dive into a project and realize I “coulda shoulda” done something earlier or different. It all works out but so nice to keep the momentum rolling and be efficient as possible.
Thank you Rebecca! :) I totally agree!! So glad this was helpful to you! xo
Stunning! i so love the look of shiplap and your laundry room is spectacular. What a beauty!!
Thank you so much Anne! :) I have to say, out of all the rooms we’ve redone in this house (about all of them ;) ) , this is the one I am most proud of! xo
I love what you did with the laundry room. What a difference you made with the room when comparing it to the before pic.
Thank you Nancy! Crazy it’s the same room, it’s hard for me to believe it myself! ;)
I just love everything about this space! And your bath looks so pretty with the new flooring! XOXO
Thank you Christy! I am loving having new flooring in both rooms! That old stuff needed to go! xo
It looks beautiful, Nancy! My husband saw this post from across the room and commented that he liked your light. :)
Thank you Paula! Aw…that’s so neat! Tell him thanks! :)
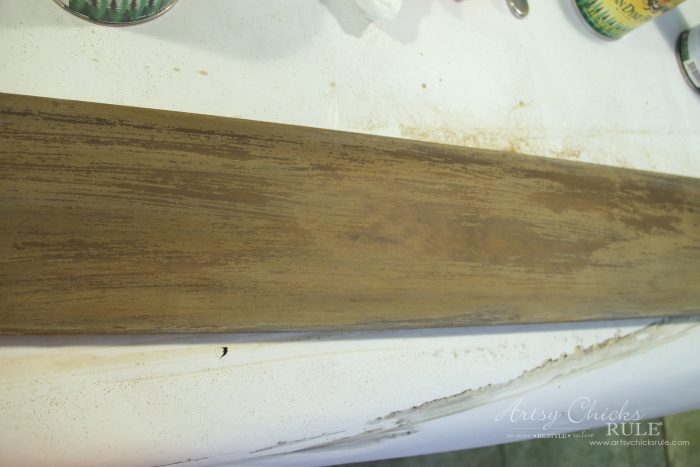
NICE RESULTS…. DID YOU CONSIDER A LIGHT USE OF “DRY BRUSHING” WITH A SLIGHTLY DARKER COLOR (OR HAVE YOU SEEN) TO GIVE IT A MORE “WEATHERED” LOOK?
No, I didn’t but that would look great too!
Your laundry room looks terrific! I’d love to do shiplap in a bedroom. Thank you for the shiplap tutorial and tips! Were the boards all cut to the same length on the long wall above the cabinets? I ask because there are no vertical “seams” visible where the boards meet. Hope I’m making sense,?
Thanks Susan! We staggered the top three with different sizes (seams). The top board was placed from the left side (going right) and went the full length and then the second board down we started on the right (going towards left) and went the full length of the board. And again from the left on the 3rd row down. Then cut smaller pieces to fit each remaining portion of those rows, etc. This way the seams ended up in different spots. Hope that makes sense. On either side of the window we didn’t need to worry about doing that because those were short runs (no seams). As far as seeing them, they fit pretty tightly together though so not really that noticeable. (and probably even harder in photos) I hope this made sense and helps! :)
Yes, it makes perfect sense! That’s kinda how I thought it was done. Really appreciate such a quick and easy to understand reply. Thank you.
Love the finished room! It inspires me to tackle my laundry room. What type of paint did you use: flat, semigloss, eggshell?
Thanks Krista! :) I used eggshell to give it a slight sheen. I like it because it tends to reflect light better than flat without being too shiny. (giving more light in the rooms)
Looks awesome! I want to do this for my husband in our laundry room. Actually, there are any issues with not using glue? I’m concerned about warping/bowing between where the boards are nailed in. warping/bowing, then I’ll do without.
Thanks! I think the main thing is to make sure the boards are acclimated before installing. We’ve had absolutely no issues with warping, bowing, etc. :)
I love your room and we are coming along with ours too….could you tell me if your purchased your shelf with the rod, or did you make it? If you made it, could you share how…I just love it, and it’s so practical for hanging clothes on as they come out of the dryer.
Hi Diane! Thanks so much. :) We actually made that shelf and the others you see in the room. Here is the post that tells what we used to make it. Scroll all the way to the bottom for direct links to each item needed for the shelves. :) We love it and have used it a ton!! xo
Thanks for sharing how you did the faux shiplap! I would love to do this in my home. Also, where did you find that light fixture? Love it!
You are very welcome! It’s so doable! You can find the source to everything in the room in the reveal post, here. :)
Beautifully done… I’m envious! Is the Nano white the same color on your baseboard and door casings?
Thanks Trish! :) Gosh, I honestly can not remember if I repainted them when we did the shiplap….but I’m thinking I did. (and used the same paint, Nano)
Hey Nancy!
Did you use wall paint or furniture paint for the plywood? Has it lasted well?
Hi Jess!
I used wall paint and yes it sure has! :)
Hang a board, then paint the edge. Do this as you go… this way you don’t have to paint the whole wall and it is easier to get between boards.
Looks great!
What kind of wood did you purchase for this?
Hi Jessica! I see that the link I had for that is no longer valid. I added a new link to something very similar to what we used. If you want it “rustic” you can use regular pine board plywood which is not quite as smooth and has variations, etc. This type of board has a much better finish if you are looking for less of a rustic look. :)
I am wanting to do this in my laundry room. The walls on the left side are really chopped up because of the linen door and then a little recessed space. So I am thinking the back wall and the other side wall that runs the length of the room. I would like your opinion on that and also, we thought the boards were staggered and it looks like they run the length of the room and line up. Is that how you do Shiplap, one wall is to long for one piece.
You can do it either way, really. We didn’t stagger them in that way. We used them long and only had shorter pieces where we had to. And so, the short sides of the room all have the same size. I like the neat, uniform look of that. We are doing the same thing in our bath remodel. (all the same size, not staggered) :)
Love the shiplap look, did you have to do anything around door or window, or just butt it up to all casings?
Thanks! No, we just butted it up to the trim and then I caulked for a seamless look. :)
I’m wondering what you do when your wall is longer than 8 ft. I love the seemless look of the ship lap but how do you work in the seems for a 10 foot wall
We are actually running into that in our beach condo that we are renovating. For us, we have just decided to create the “broken” more rustic look for the longer than 8 feet wall we are putting it on.(pieced together like a wood floor)
Another option for you is applying it vertically instead. If you have 8 foot ceilings or large trim up top and below, you can apply it vertically instead. Hope that helps!
Nancy I have saved your inexpensive ship lap post for sometime. We’re currently working on our house! I want to do ship lap on the ceilings of 3 rooms. My husband proved the board at menards and it was $26 a sheet. Was the cost similar when you did your remodel or has the price really increased? It will cost a fortune to do our ceilings this way. I’m so disappointed! I don’t know what to do now. Any suggestions?
Yes, I believe it was similar in price but still much cheaper than using the pre-made shiplap. You could look for and use a less expensive plywood. (they have some that are 1/8 instead of 1/4, for example, and also different finishes, etc) Other than that, I don’t really have any suggestions, sorry!
Hi,
LOVE your shiplap walls.
We have been shiplapping our ceilings with 1/4 inch luan plywood. We’ve run into issues with the edges of not only, the full sheets, but our cut strips rippling on the edges. We’ve had to make braces to put against them while we wait for the glue to dry. They are also nailed. How did you avoid the edges of your planks rippling? They look very flat in your pictures.
Hi Tracey! Oh wow, I am not sure why that would be happening. Ours are very flat. We didn’t have that issue at all and we also did this same exact technique in our master bath remodel. I am thinking it’s a different type of plywood maybe? Maybe too much glue (moisture, etc)? All I can offer is maybe use a different type of glue or maybe quite a bit less? I’m so sorry I’m not more help!
Hi…
What did you do to get your light switch outlet to be even with the wall? Do we have to have an electrician to move it out?
I believe we adjusted the outlet box inside by moving it out slightly. If you are not comfortable doing electrical work or don’t know how to do it, then yes I always suggest going with a professional.
hi, how did this thin plywood hold up overtime? I’m wanting to do this for an accent wall right now and someone told my dad that the boards would warp overtime being so thin.
And advice?
Thanks,
Cassie
Hi Cassie! It has all held up great. We actually have this in our master bathroom too. (you can see it here) They aren’t as thin as they seem, actually. (1/4 inch) So even in our small bath, showers every day, etc, no issues what so ever! Hope that helps!!