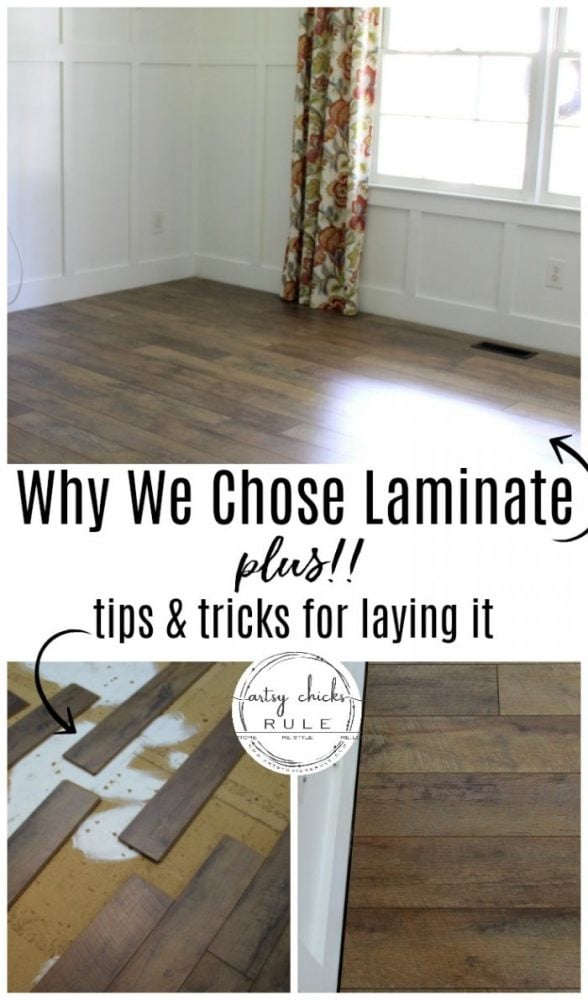
Thrilled to be partnering with Select Surfaces, who generously supplied us with the flooring for this project. Today I’m talking about installing laminate flooring and the reason we chose it!
As you all know, I finally shared our big flooring reveal last week! :) Yippee!!
If you missed it, you can see it >>> here.
So happy to finally be sharing it with y’all. :)
Now that you’ve seen the reveal and all the pretty shots, I’m going to talk a little about why we chose laminate, how to lay it plus a few tips, too.
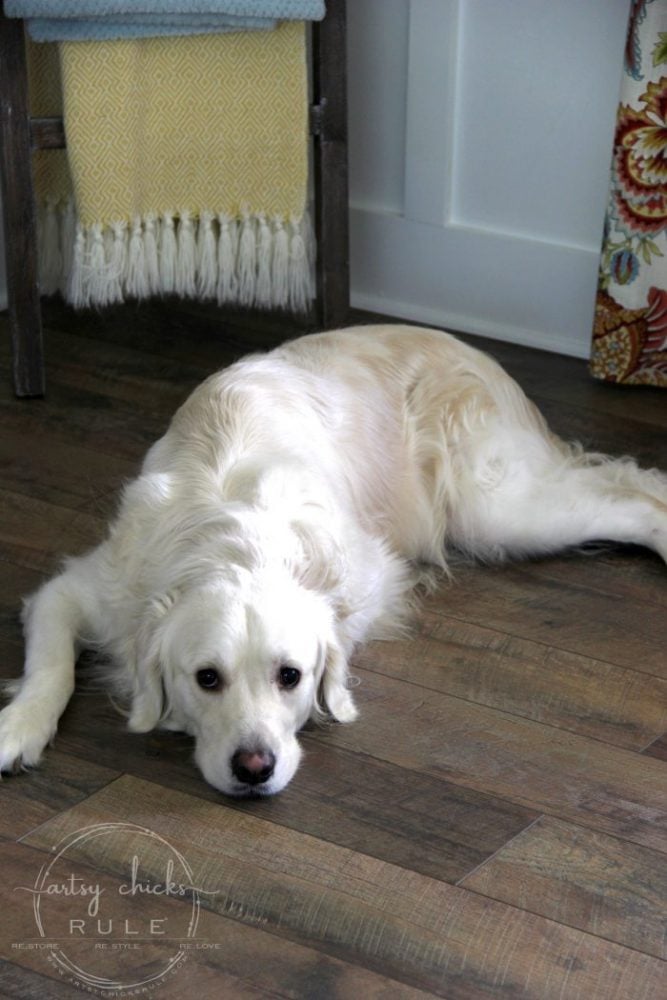
One of the biggest reasons we chose laminate is for it’s durability. With a 65 pound Golden, I didn’t want to have to worry so much about scratches, etc.
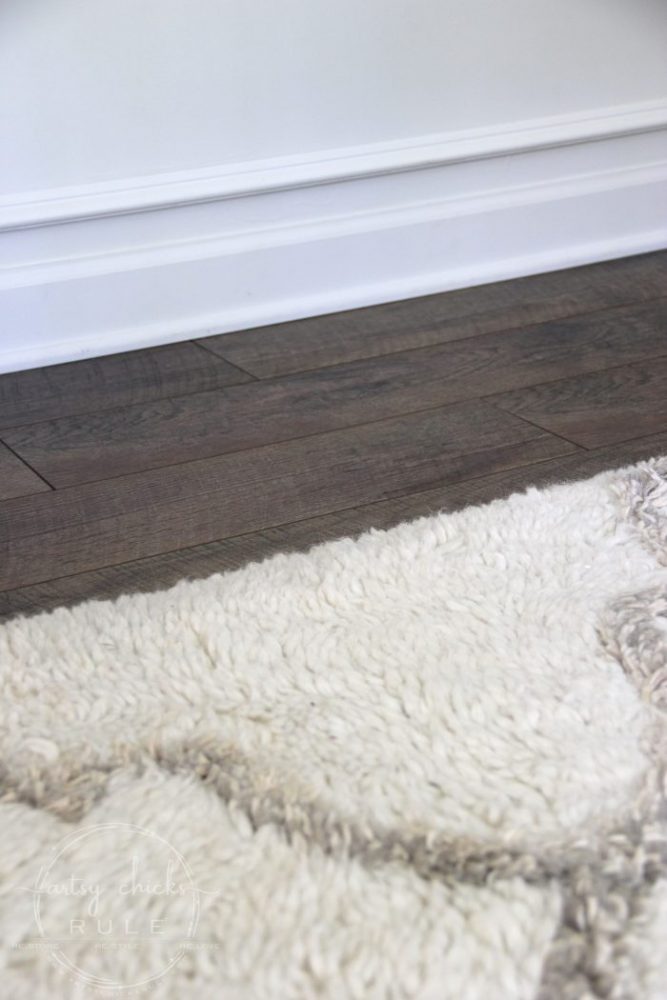
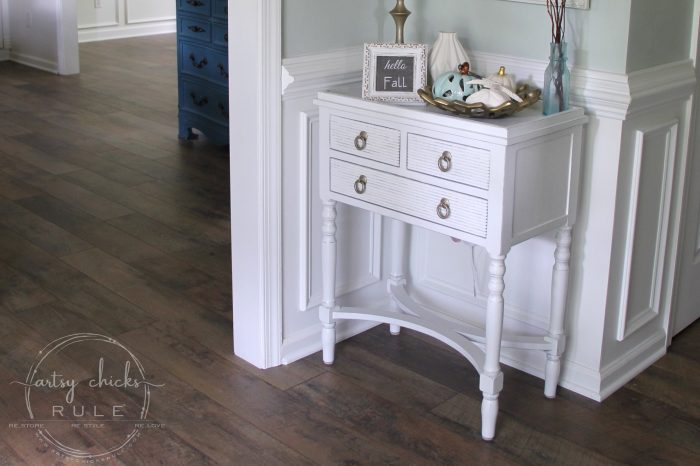
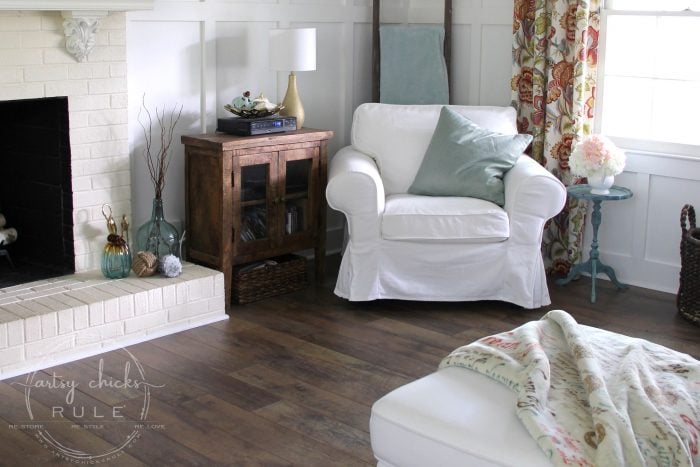
Another is the authentic wood look and appearance it provides.
It’s amazing how realistic it is!
Lastly, installation and upkeep is a breeze. All a win in my book.
Not to mention, it’s also available at Sam’s Club. :)
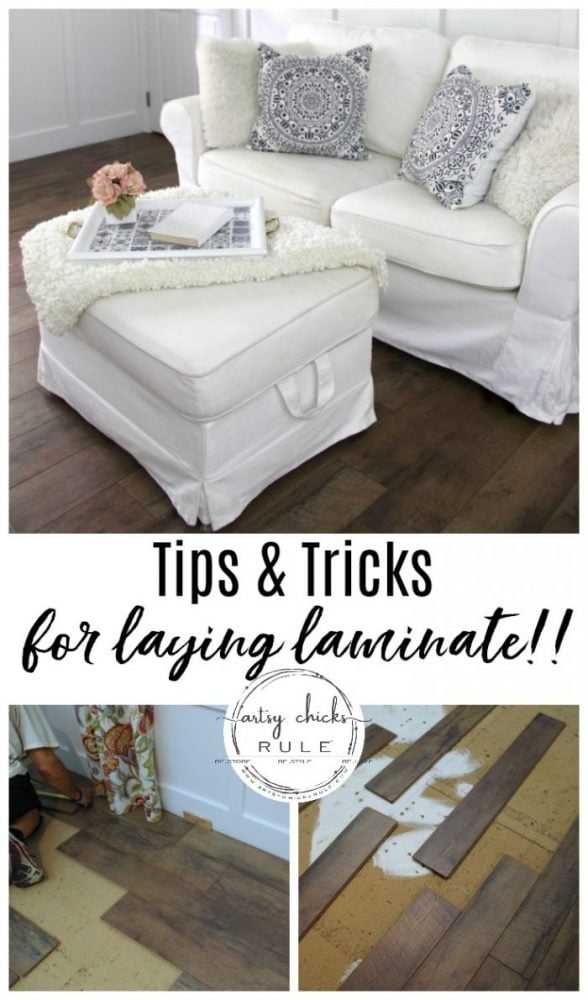
Installing Laminate Flooring
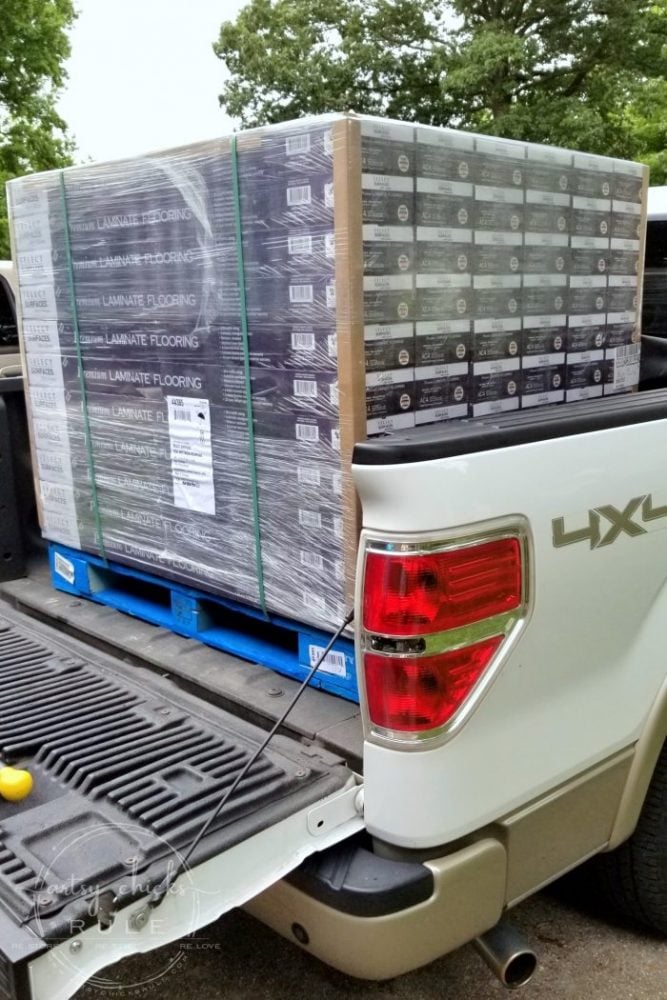
Measure and calculate amount of flooring needed. Be sure to measure your home and add 5% for waste. Also take into account the amount of T-Molds you will need for doorways, etc.
Select Surfaces has a handy calculator that can tell you exactly how many boxes you need.
We replaced the flooring in our entire downstairs so it took quite a lot.
It took us 2 trips but it was worth it.
At less than $2, that makes this floor incredibly affordable.
With a pre-attached foam backer along with the Speedloc™ installation system, it makes for a DIY dream.
Why did we choose laminate?
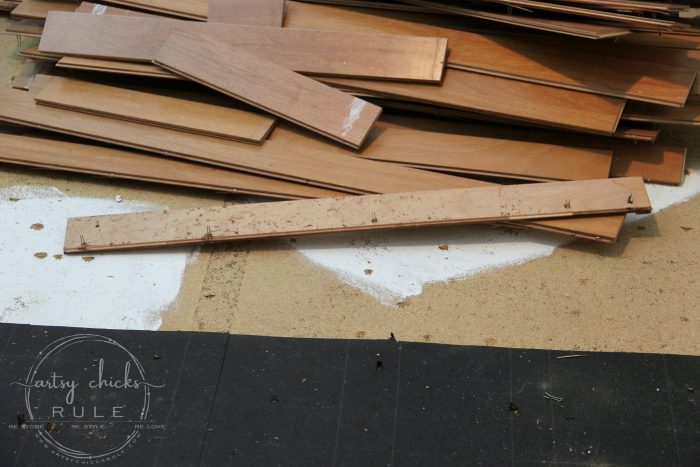
We were thrilled to go with laminate this time around since the flooring we installed about 10 years ago had gotten scratched terribly over the years.
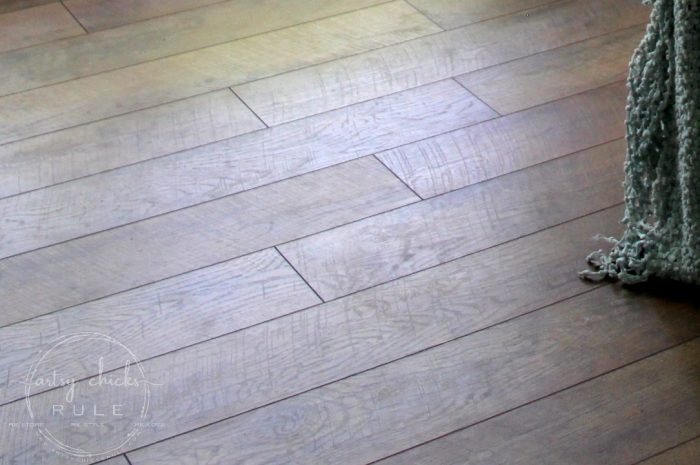
One of the main benefits of laminate is it’s durability.
I was also impressed with how realistic it looks. Wood grain variations and all!
Isn’t that amazing?
You’d be hard pressed to tell this isn’t the real deal.
Let the flooring get acclimated.
Once you’ve picked up your flooring, bring it into the space where you will be installing it so it can get acclimated.
Prep the surface.
We had originally planned to take up the old oak flooring in our dining and study but realized the flooring was completely level once we removed the transition pieces. If we had taken up the solid oak flooring we would have had to lay more plywood to make it even with the adjoining room, etc.
So we decided to leave it in place and installed the laminate directly over top.
We did have to remove all the flooring in the family room though.
When removing old carpeting or flooring, be sure to remove all remnants, nails, etc.
And make sure your floor is level, that is very important.
Once you are ready to lay the flooring, decide which way you will lay it.
We laid ours long ways to create depth and make the rooms feel larger.
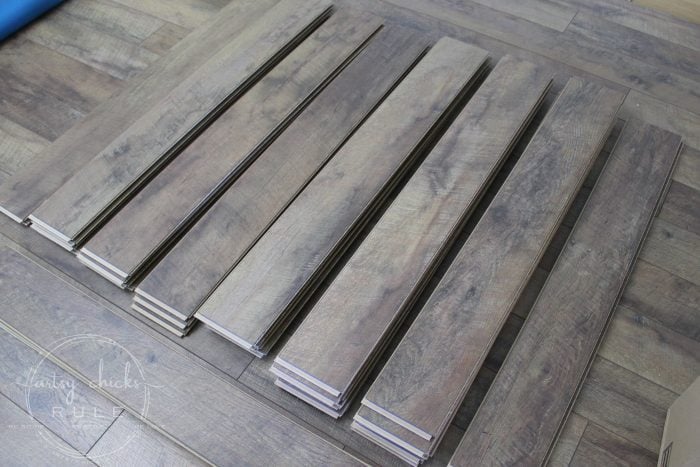
Open several boxes and stack like patterns together. (be sure to mix and match from more boxes than 1 or 2 to accommodate color variations between boxes)
We counted 11 different designs which was great! It really makes for a more realistic floor when there are more wood grain designs in the mix.
Just one of the many things that we love about this laminate flooring.
Similar to above, we kept a rolling supply of the varying designs opening the new boxes and adding as we went along.
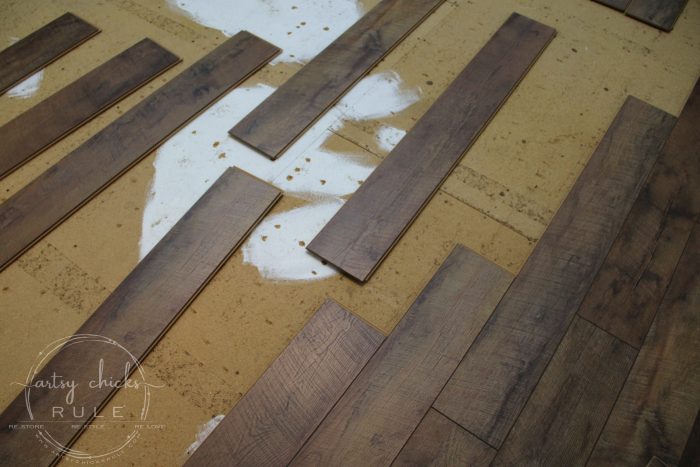
Lay the boards out in advance.
It’s a good idea to lay out pieces ahead of time so you don’t overlap, or overuse, the same pattern too often.
It’s always good to have 2 sets of eyes on this part.
If you work with them too long, they all start looking alike! ;) (not really, but you know how that is)
There were so many designs that my husband and I gave a few of them nicknames to differentiate which ones we were speaking of! haha
Like “Broom Hilda”. (remember her from the Bugs Bunny cartoons and her hair pins flying everywhere? lol)
The grain design looks like a hair pin so it became Broom Hilda. ;) (you can see it in the bottom right corner of the above photo)
We also had “m&m”, “scar”, “blondie”, “c-flip”… anyway, you get the idea.
Sounds crazy but I’m telling ya, when you’re working row to row to row, and one of you are on one side looking at the boards and the other is picking one out. You can say, “grab a Broom Hilda, we haven’t used that one since over there”! haha
Measure and cut.
We decided to cut a bit more and stagger ours since we like that look better. You do have a little more waste doing it this way but it makes the floor look more realistic, in my opinion.
Leave a gap around the perimeter.
You should leave an expansion gap around the perimeter to allow for temperature based expansion and contraction.
We just used a spacer piece of wood as we went along. (as you can see in the photo above this one)
Finish trim.
Once you are done laying all of the pretty flooring….
….you’ll want to finish it off with some quarter round, or similar.
And done!
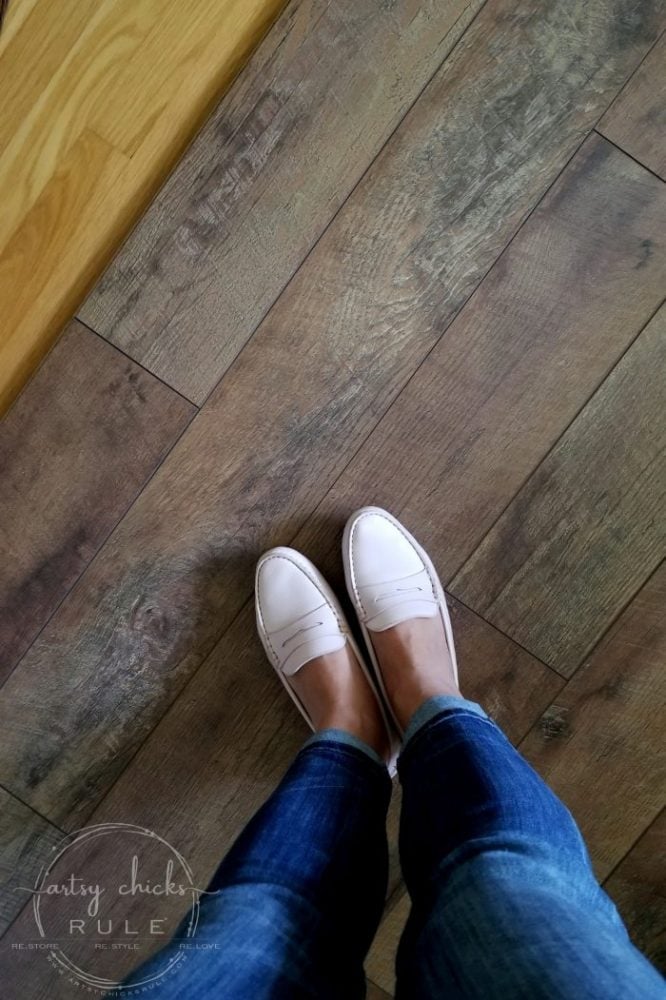
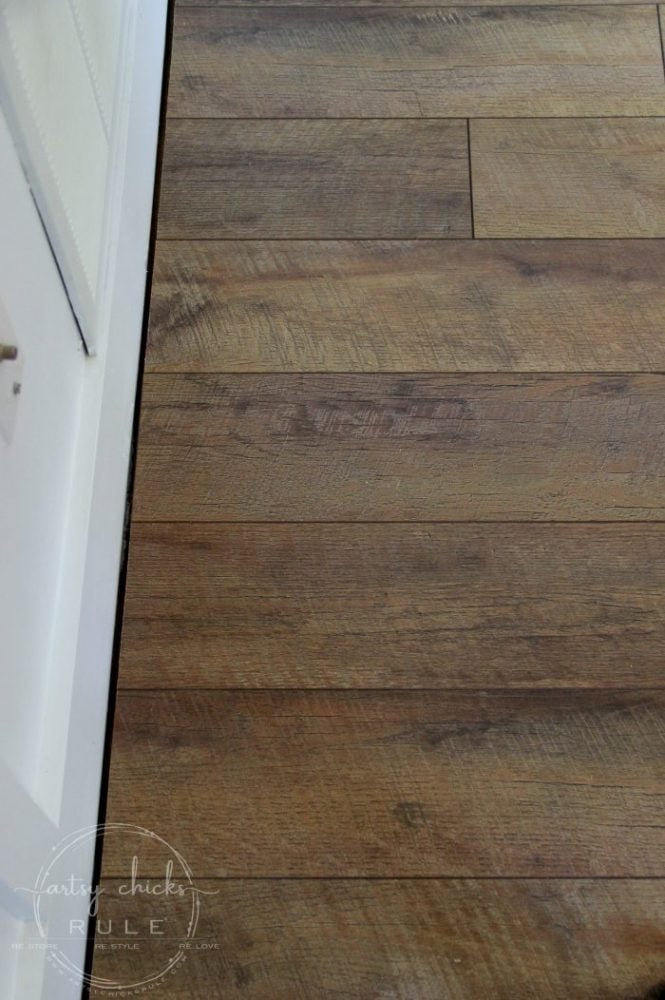
Just as a reminder, we ended up using “Driftwood“.
Perfect name for our house! ;)
Gorgeous warm and cozy “wood” floors to enjoy.
Even Ryder approves. ;)
We are very happy with our choice in using and installing laminate flooring in our home.
Beautiful! My sister just purchased this from Sam’s also. I have been following you for quite a while & was really interested in your floor project. We are just starting the building process & the floors are such a concern for me. We have big rescue dogs 85# In our last home we had white oak installed as we were told it was a harder wood than regular oak…oh the scratches! Please post updates on how these floors are holding up with your dog’s nails! Thank you
Thanks Carol!! I totally get why the floors are a concern. As you see, I’ve been there, scratches and all. ;) I will absolutely keep you updated on the flooring. By the looks of it so far, I think it’s going to do great. My big guy is a playful pup in a 65 pound body. He’s hopping, sliding, running all over this floor all the time. (and keeps up entertained, that’s for sure :) ) xoxo
Several years ago, I pulled up my laminate floor in the basement after a flood. The water got underneath and popped up the flooring. This time I went with luxury vinyl planks and I love it. Laminate must have come a long way in the last few years because yours looks great. It does look real!
Oh no! I bet that was a mess, Lizzy! Vinyl planks are great too but yes, I think these really have come a long way. I’m so impressed with how realistic these are. Our bedrooms are next! ;) We have old laminate we installed (over 10 years ago) and it’s not very realistic at all! lol It’s on the long list! ;) xoxo
Very nice. I love the rustic look of the flooring. It’s amazing that the oak floor scratched so easily and I’m glad that laminate flooring continues to improve to look like real hardwood.
Looks amazing!!! Just got a Sams membership. We have some carpet that needs to be replaced but we will need transition strips. (Will need at least an 8 feet and a 6 feet). Can you get those at Sam’s?
Hey Mindy! Thanks so much! We are beyond thrilled with them!!! Yes, Sam’s should have the T molding kits for you to complete the floor project. :) Good luck and have fun with your new floors! xo
I would love to do this in my house. The tile in the kitchen is what’s mainly holding me back. The thought of removing it is daunting. I also have orangish hard wood that is very scratched. One cohesive flooring that is durable would be great. Thanks to the inspiration! Did you have tile that you removed, or was that vinyl in the kitchen? If it was tile any hints on how to remove it?
Oh, yes, I totally understand! We actually removed ceramic tile in our foyer all the way through our kitchen. It’s not fun but some jobs just aren’t! ;) But it was doable. We really wanted it outta there so it made it easier to do, I guess. Lots of motivation!! We then laid the vinyl tiles. And no, we did not remove the vinyl tiles, we put this right over them. The tiles were still in really good shape and adhered VERY well to the flooring, so no need really.
Hmm, it’s been a lot of years ago that we removed the ceramic tile but I feel like we had to replace some of the underlayment afterwards, before laying the vinyl tiles. A crowbar. No, seriously, it’s just gonna take some work to get that gone. Some come up easier than others though. So, I say go for it! Don’t let that hold you back. Yes, it’s a little work up front but this flooring is a breeze to lay and the rewards when it’s done are so worth it. Good luck with whatever you decide!! xo
May I ask how you got sponsored? I was actually already looking into this flooring, and stumbled across your blog! My husband and I are closing tomorrow on our first home! It’s been a long time coming, as we have rented the past 8 years due to his military career. He is now a veteran, and we are so excited for this next step. Our house, while livable, is going to get a much needed facelift. We have a lot of work ahead of us (the entire 16oo+ sq ft basement needs to be finished, plus updates upstairs). We are hoping to do as much ourselves as possible, and I want to start blogging the process! Any thoughts and tips you have are welcome!
Hi Lydia! Being sponsored as well as having ads on my site are part of the business of having a blog. I began my blog 7 years ago and have worked hard to build it to where it is today. :) We absolutely love this flooring. It has been amazing and is gorgeous AND super affordable!
How exciting to be having a place that you can finally call your own!! Congrats to you both and thank you for your service to this wonderful country of ours! As far as beginning blogging, I do have a page I created for others who may be interested in starting one, you can find it here. It has lots of helpful info! :) Good luck with it and your new home. xoxo
We had this floor mates by our contractor and absolutely love it! However every so often there is a shiny mark on some of the corners I can’t figure what it is from, any ideas? Also what type of mop :cleaner do you use? The web site said water only?
Hmmm, I haven’t had that happen, Gina. I actually use water mixed with some essential oils to clean ours. I don’t use any commercial cleaners on the floor ever. Maybe give the manufacturer a call and see what they say about those corners. Good luck! xo
Hi! I’m really enjoying your page. I’m curious where you got your slipcovered chair and ottoman. They are exactly what I’m wanting for my new home office!
Hi Wendy! So happy to hear that! Both of those and all of our slip-covered furniture is from IKEA. It is the now-discontinued Ektorp series. They have a similar one taking its place though. I can’t remember the name but if you go to their site and search “slipcovered” you should find it! :)
Want to be inspired, learn new skills, discover all the tricks to furniture makeovers, creating new out of the old and more? You'll also receive my FREE ebook "Creating Fabulous Finishes" PLUS access to my private Printables Resource Library, too!
Sign up to get the Weekly Newsletter! Our emails include an unsubscribe link and you may opt-out at any time. Your information will *never* be shared or sold to a 3rd party.


")
")


")
")


Oh my gosh I love it. The color is perfect, especially with your beautiful furniture. Makes me want to run out and do mine lol Hugs!
Oh yay, thanks Bonnie! :) Let me tell you, it has made such a difference in how our house looks and feels! I am in LOVE! :) xoxo
Beautiful! My sister just purchased this from Sam’s also. I have been following you for quite a while & was really interested in your floor project. We are just starting the building process & the floors are such a concern for me. We have big rescue dogs 85# In our last home we had white oak installed as we were told it was a harder wood than regular oak…oh the scratches! Please post updates on how these floors are holding up with your dog’s nails! Thank you
Thanks Carol!! I totally get why the floors are a concern. As you see, I’ve been there, scratches and all. ;) I will absolutely keep you updated on the flooring. By the looks of it so far, I think it’s going to do great. My big guy is a playful pup in a 65 pound body. He’s hopping, sliding, running all over this floor all the time. (and keeps up entertained, that’s for sure :) ) xoxo
Several years ago, I pulled up my laminate floor in the basement after a flood. The water got underneath and popped up the flooring. This time I went with luxury vinyl planks and I love it. Laminate must have come a long way in the last few years because yours looks great. It does look real!
Oh no! I bet that was a mess, Lizzy! Vinyl planks are great too but yes, I think these really have come a long way. I’m so impressed with how realistic these are. Our bedrooms are next! ;) We have old laminate we installed (over 10 years ago) and it’s not very realistic at all! lol It’s on the long list! ;) xoxo
Very nice. I love the rustic look of the flooring. It’s amazing that the oak floor scratched so easily and I’m glad that laminate flooring continues to improve to look like real hardwood.
Thank you Kimberly! And me too, it has come a long way, for sure! Looks so realistic. :) xo
Great tutorial, Nancy… and super helpful tips! Looking forward to more reveals soon!
Thanks Julie! :) And they are coming, little by little! I wish I was ready to do them all NOW! haha Soon! xo
Looks amazing!!! Just got a Sams membership. We have some carpet that needs to be replaced but we will need transition strips. (Will need at least an 8 feet and a 6 feet). Can you get those at Sam’s?
Hey Mindy! Thanks so much! We are beyond thrilled with them!!! Yes, Sam’s should have the T molding kits for you to complete the floor project. :) Good luck and have fun with your new floors! xo
I would love to do this in my house. The tile in the kitchen is what’s mainly holding me back. The thought of removing it is daunting. I also have orangish hard wood that is very scratched. One cohesive flooring that is durable would be great. Thanks to the inspiration! Did you have tile that you removed, or was that vinyl in the kitchen? If it was tile any hints on how to remove it?
Oh, yes, I totally understand! We actually removed ceramic tile in our foyer all the way through our kitchen. It’s not fun but some jobs just aren’t! ;) But it was doable. We really wanted it outta there so it made it easier to do, I guess. Lots of motivation!! We then laid the vinyl tiles. And no, we did not remove the vinyl tiles, we put this right over them. The tiles were still in really good shape and adhered VERY well to the flooring, so no need really.
Hmm, it’s been a lot of years ago that we removed the ceramic tile but I feel like we had to replace some of the underlayment afterwards, before laying the vinyl tiles. A crowbar. No, seriously, it’s just gonna take some work to get that gone. Some come up easier than others though. So, I say go for it! Don’t let that hold you back. Yes, it’s a little work up front but this flooring is a breeze to lay and the rewards when it’s done are so worth it. Good luck with whatever you decide!! xo
Good to hear this..
May I ask how you got sponsored? I was actually already looking into this flooring, and stumbled across your blog! My husband and I are closing tomorrow on our first home! It’s been a long time coming, as we have rented the past 8 years due to his military career. He is now a veteran, and we are so excited for this next step. Our house, while livable, is going to get a much needed facelift. We have a lot of work ahead of us (the entire 16oo+ sq ft basement needs to be finished, plus updates upstairs). We are hoping to do as much ourselves as possible, and I want to start blogging the process! Any thoughts and tips you have are welcome!
Hi Lydia! Being sponsored as well as having ads on my site are part of the business of having a blog. I began my blog 7 years ago and have worked hard to build it to where it is today. :) We absolutely love this flooring. It has been amazing and is gorgeous AND super affordable!
How exciting to be having a place that you can finally call your own!! Congrats to you both and thank you for your service to this wonderful country of ours! As far as beginning blogging, I do have a page I created for others who may be interested in starting one, you can find it here. It has lots of helpful info! :) Good luck with it and your new home. xoxo
We had this floor mates by our contractor and absolutely love it! However every so often there is a shiny mark on some of the corners I can’t figure what it is from, any ideas? Also what type of mop :cleaner do you use? The web site said water only?
Hmmm, I haven’t had that happen, Gina. I actually use water mixed with some essential oils to clean ours. I don’t use any commercial cleaners on the floor ever. Maybe give the manufacturer a call and see what they say about those corners. Good luck! xo
Hi! I’m really enjoying your page. I’m curious where you got your slipcovered chair and ottoman. They are exactly what I’m wanting for my new home office!
Hi Wendy! So happy to hear that! Both of those and all of our slip-covered furniture is from IKEA. It is the now-discontinued Ektorp series. They have a similar one taking its place though. I can’t remember the name but if you go to their site and search “slipcovered” you should find it! :)