How to hang peel and stick wallpaper plus tips and reasons why you should!
Hello friends! I’m back today sharing our downstairs guest bath.
I mentioned on Tuesday that I had also finished wallpapering this room too. If you missed that post, it’s the one where I painted our foyer ceiling darker. You can see it here.
And all of these changes I am planning in our home is in this post here. (<<< you can also see all the other wallpaper choices I was considering for this guest bath…and yes, one of the ones I showed is one I picked!)
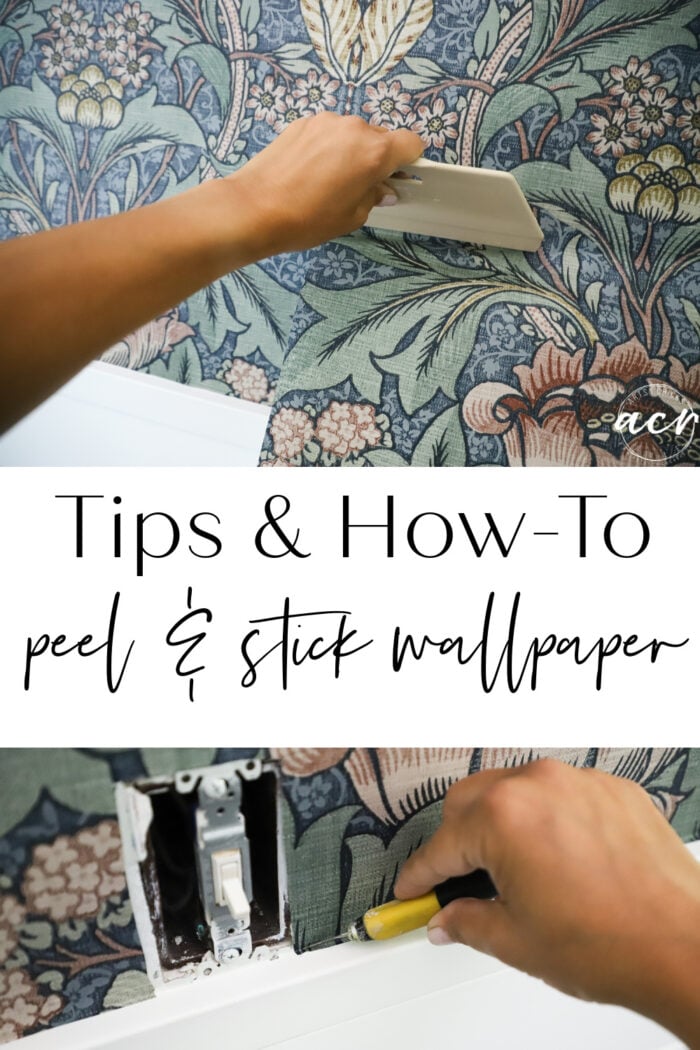
I’m going to share a few tips on hanging peel and stick wallpaper, plus basically how to hang peel and stick wallpaper too. It’s pretty basic but there are a few things to keep in mind. I’ll share a few tips too.
How To Hang Peel and Stick Wallpaper (and more importantly…why I chose it! And why you might want to too.)
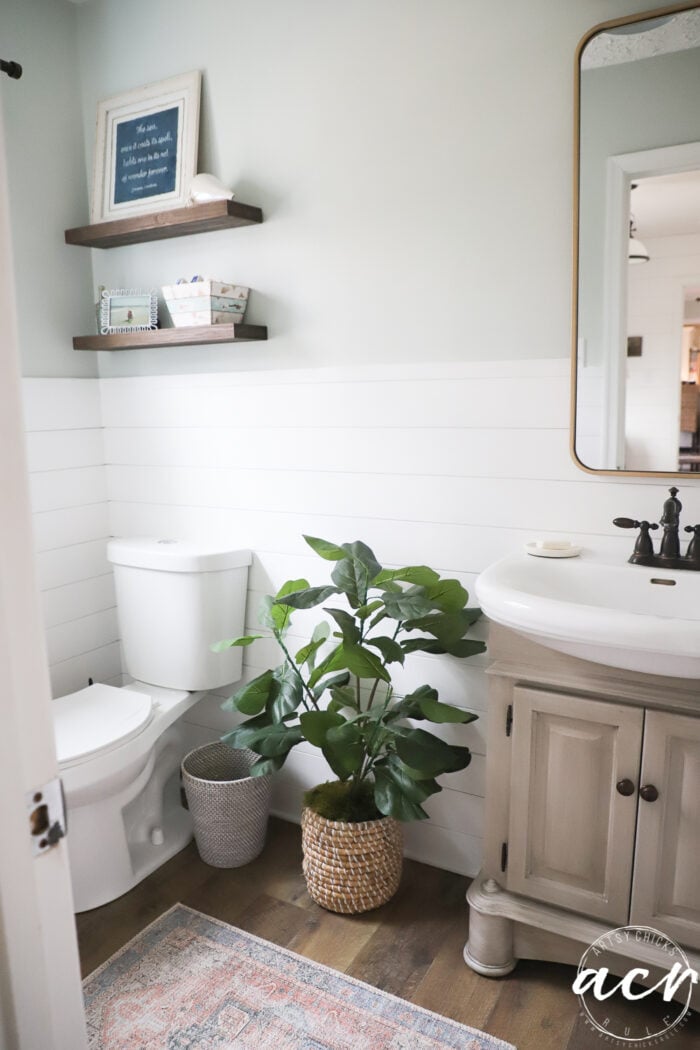
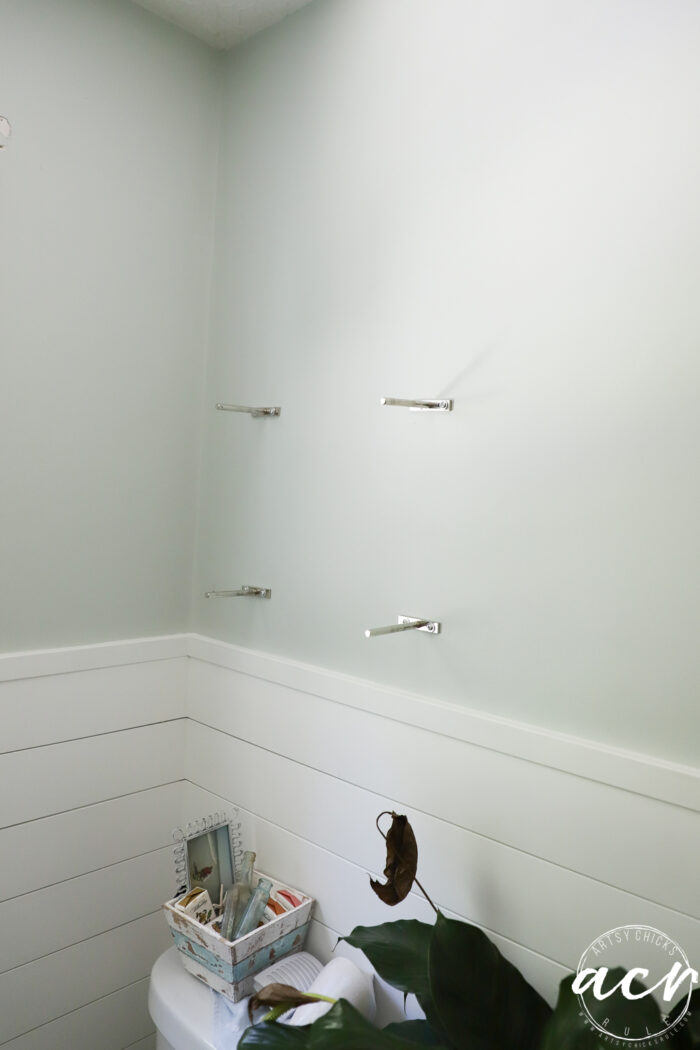
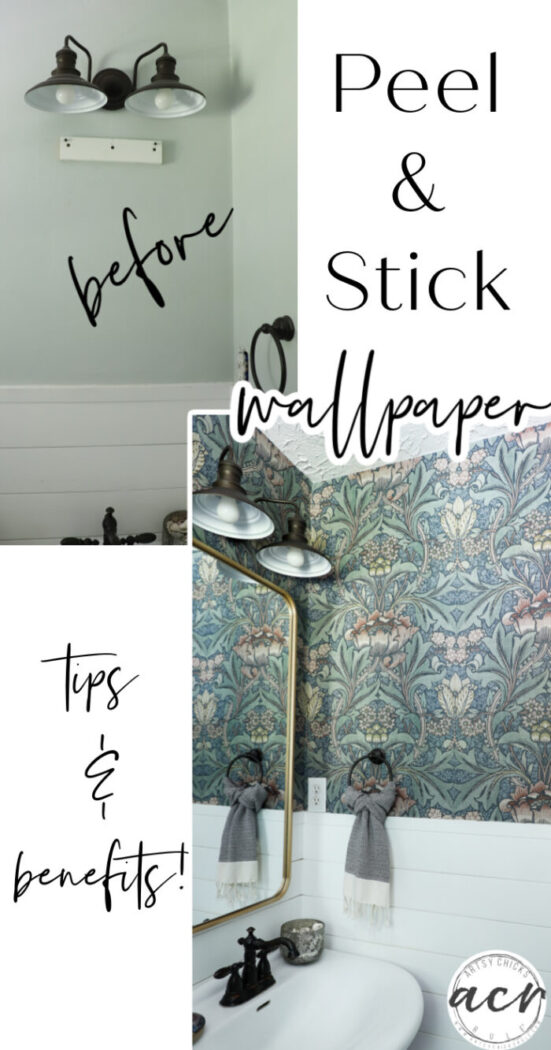
Here is our bathroom “before”. (well, after I gave it 3 different makeovers since moving in years ago!)
I love (love, love!) the Sea Salt paint and the light, bright airy feel of it. I love how “spa-like” it is. BUT I am ready for a change.
I want something a little more, oh, I don’t know, elegant, snazzy?? Different. Just different.
And you know what?? Peel and stick wallpaper fits that bill! No painting…and no real wallpaper mess to deal with.
You know what that means?? No real wallpaper to remove once I’m ready for another change!! Ha!! And bonus, I’ll just peel this right back off and my pretty Sea Salt walls will still be under here to shine again when I’m ready.
That’s the first reason why you should consider peel and stick wallpaper.
It’s fun and it adds style, change and more. Then you can take it right back off easily when you are ready for another change…or just want to go back to what you had before. Love that!
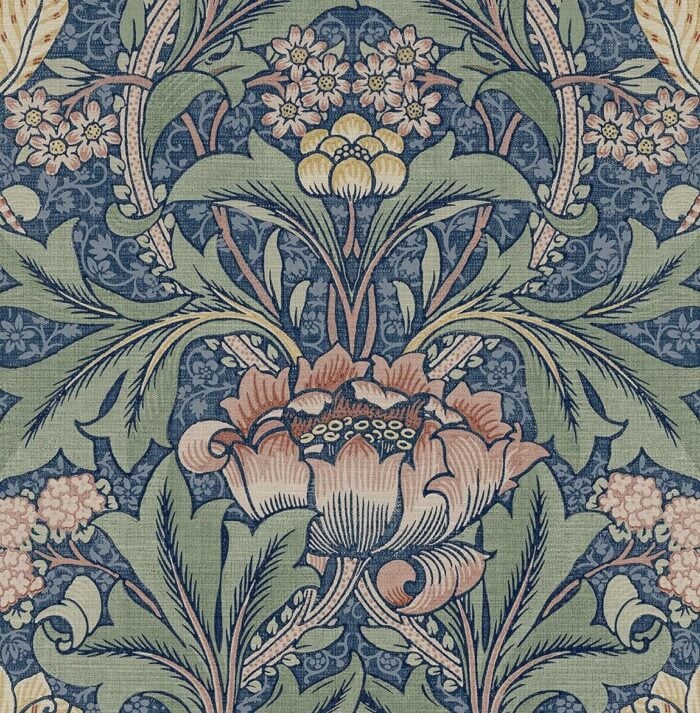
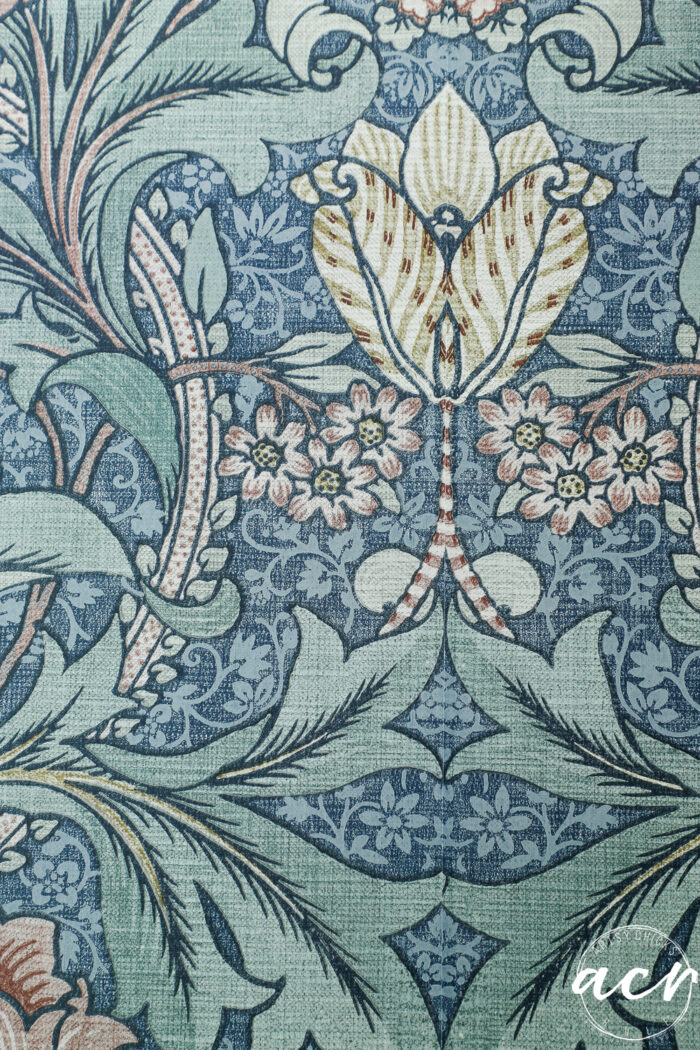
Here’s the one I chose…
I liked the colors and I liked the design. You can find it >>>here.
Remove everything from the walls
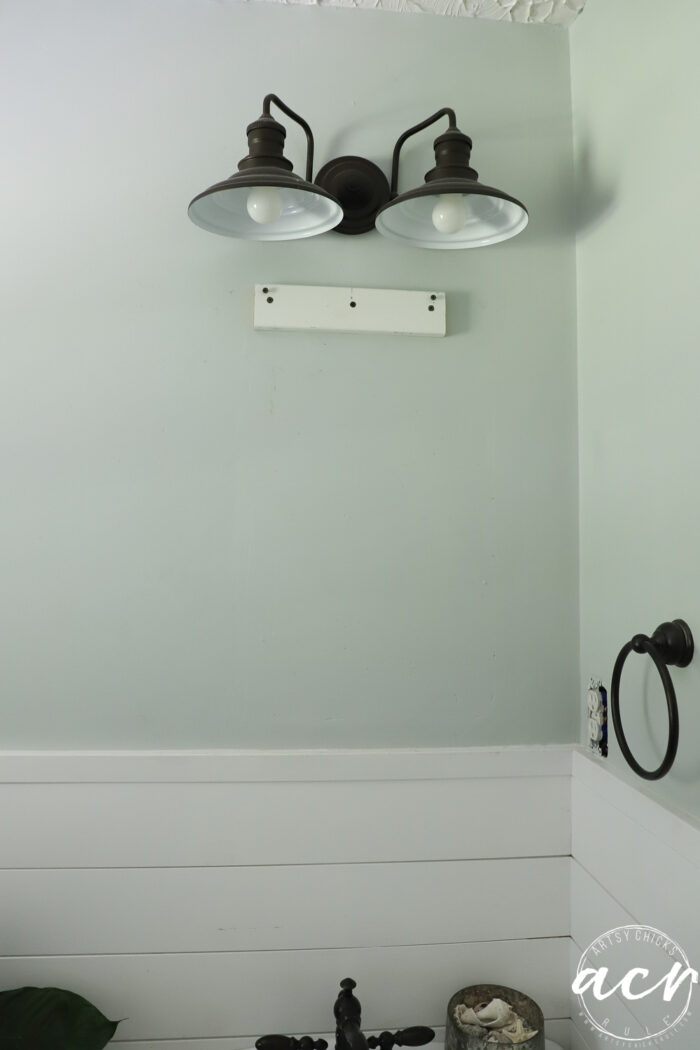
I took the mirror down and I actually loosened up the light fixture so it was away from the wall. (I turned off the circuit breaker too)
Don’t forget light switch plates, etc.
I also ended up taking these brackets for the floating shelves off too. I had thought I’d work around them.
Trust me when I say, take it all off!! It will make your job SO much easier.
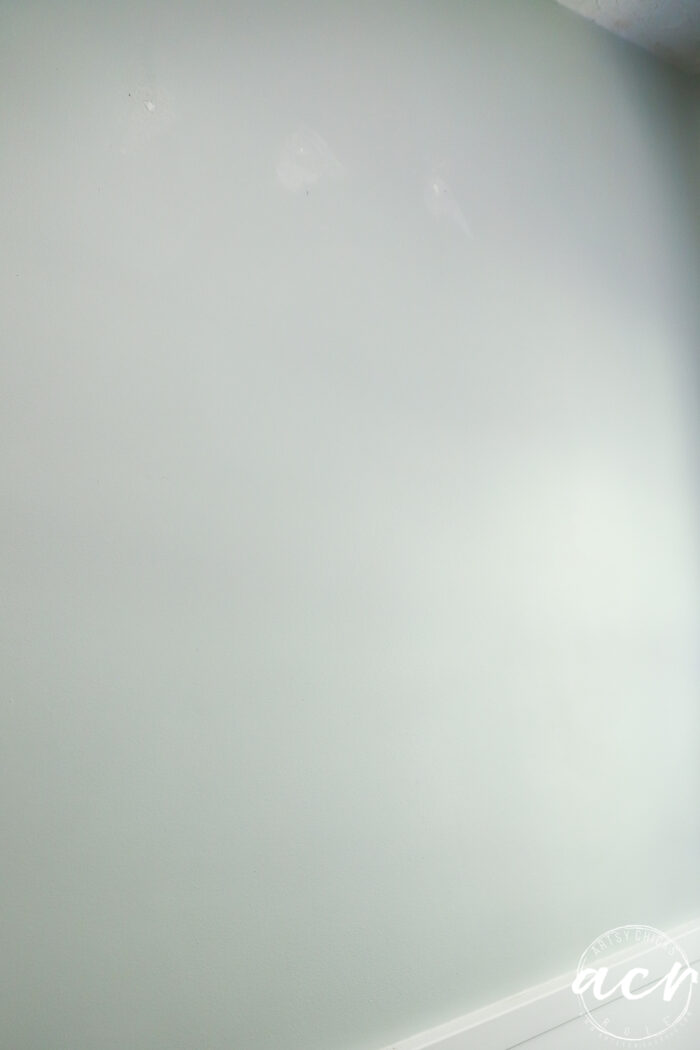
Clean the walls
I filled the holes for the canvas print I had on this wall…
I knew I wouldn’t be hanging it back up here so I filled them.
I’m thinking I will leave it blank for now.
I also wiped the walls down with alcohol and an old tshirt before beginning.
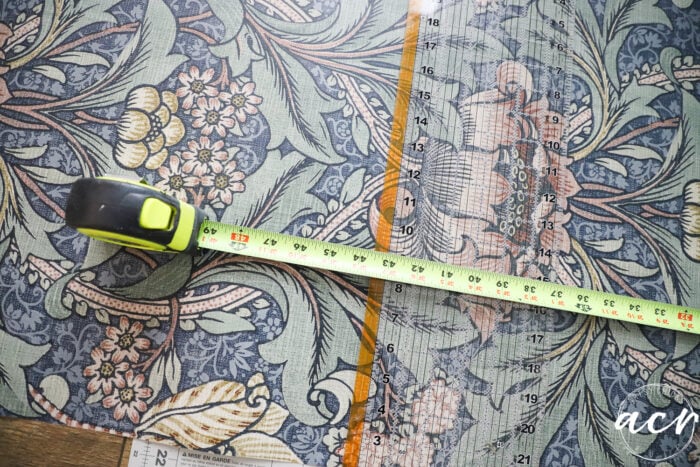
Cutting and hanging
For the first piece, I measured the wall leaving adding an inch or two overlap.
I used my cutting mat for every cut. You can find it here.
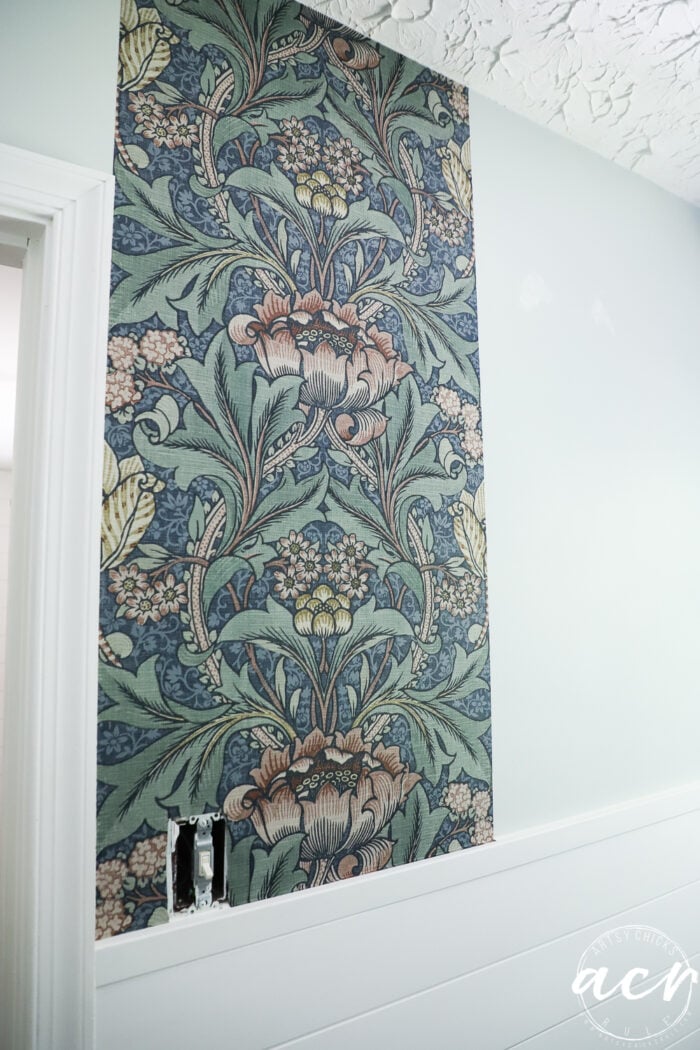
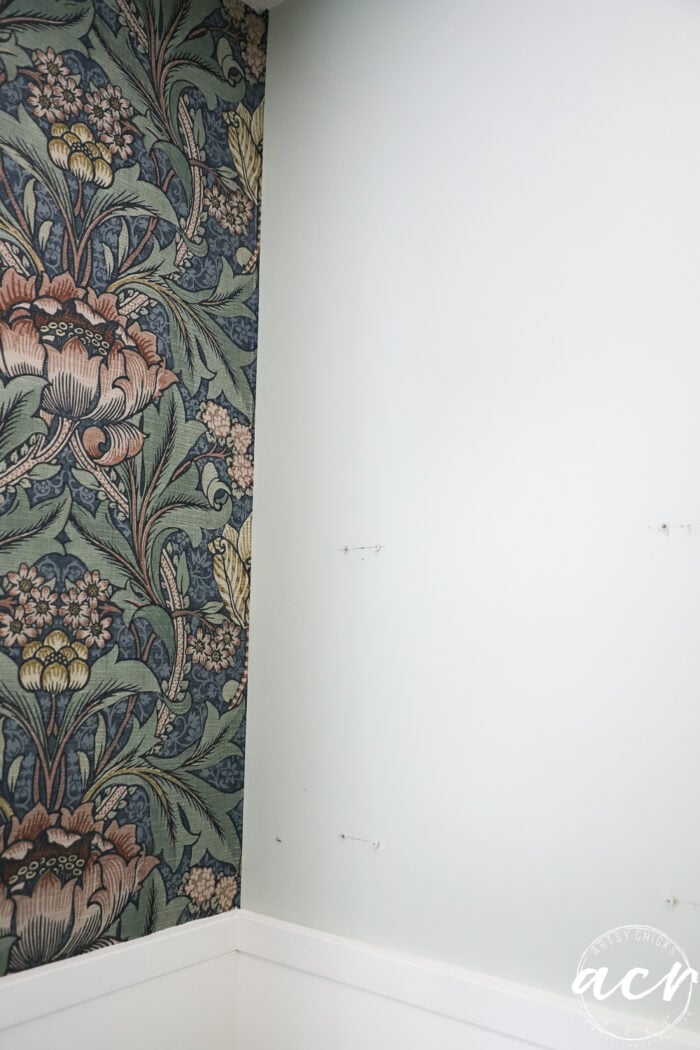
I hung it to the right of the bathroom door to begin. (so that I would end in the “far” corner on the other side of the door)
You’ll want to end in a place less conspicuous in case your pattern does not match up at the end. Which it most likely will not.
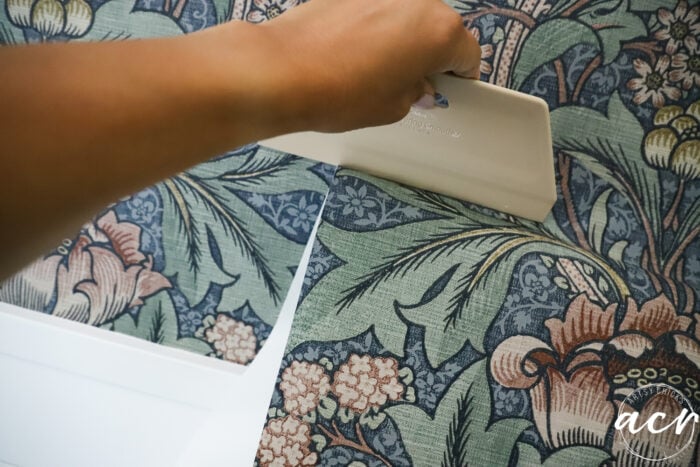
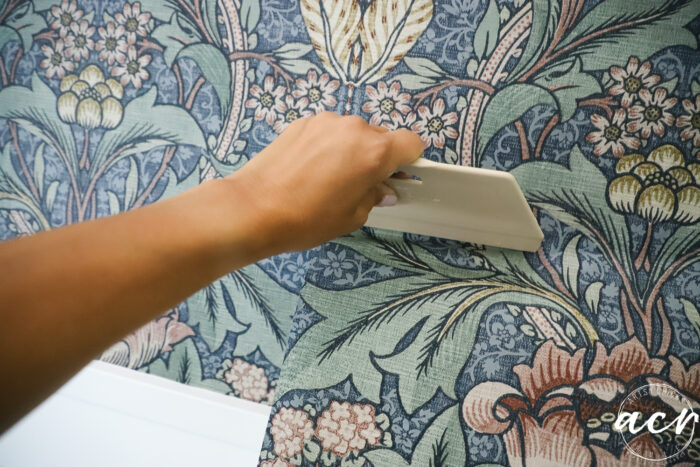
I used my wallpaper smoothing tool to scrape the paper, remove air, etc.
Edited to add: This paper is quite sticky so as I applied the paper, beginning at the top, I would only remove/roll down about 4 inches of the backing paper to begin. Once I had it aligned where I wanted it to be, I simply unrolled more of the backing paper as I moved down the wall. In no way would I recommend removing the entire backing paper all at once. Remove/roll it down as you go.
Trimming
I cut the bottom with an X-Acto knife.
This just makes applying it so easy. Just cut an inch or two longer than you need (don’t forget to match your pattern and then measure from there…then add the extra inch or two!)
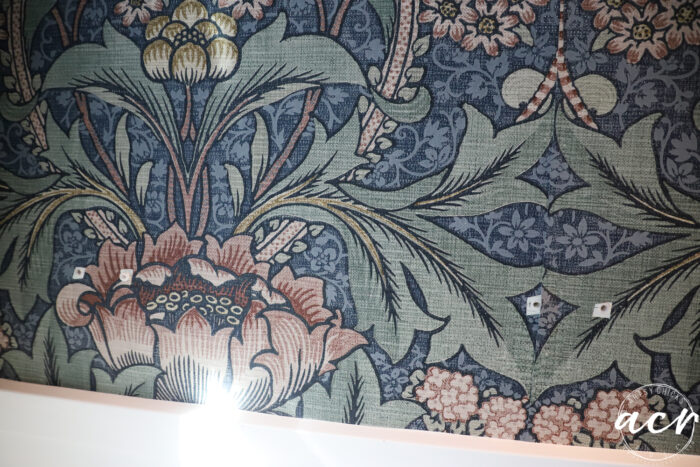
When adding the next sheet, be sure to match the pattern and overlap the seams a bit. Approx. 1/16 of an inch.
The reason for overlapping is to account for slight temperature changes which could create shrinkage, etc., so as not to have gaps.
Here’s a seam, right down the middle of the yellow flower. Very hard to see!
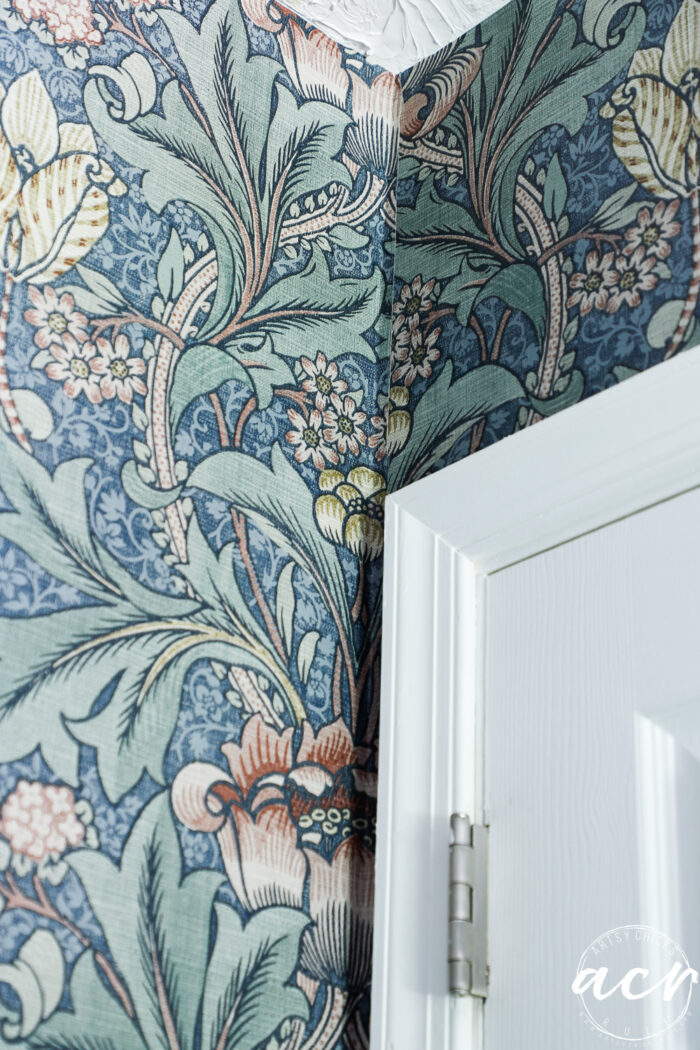
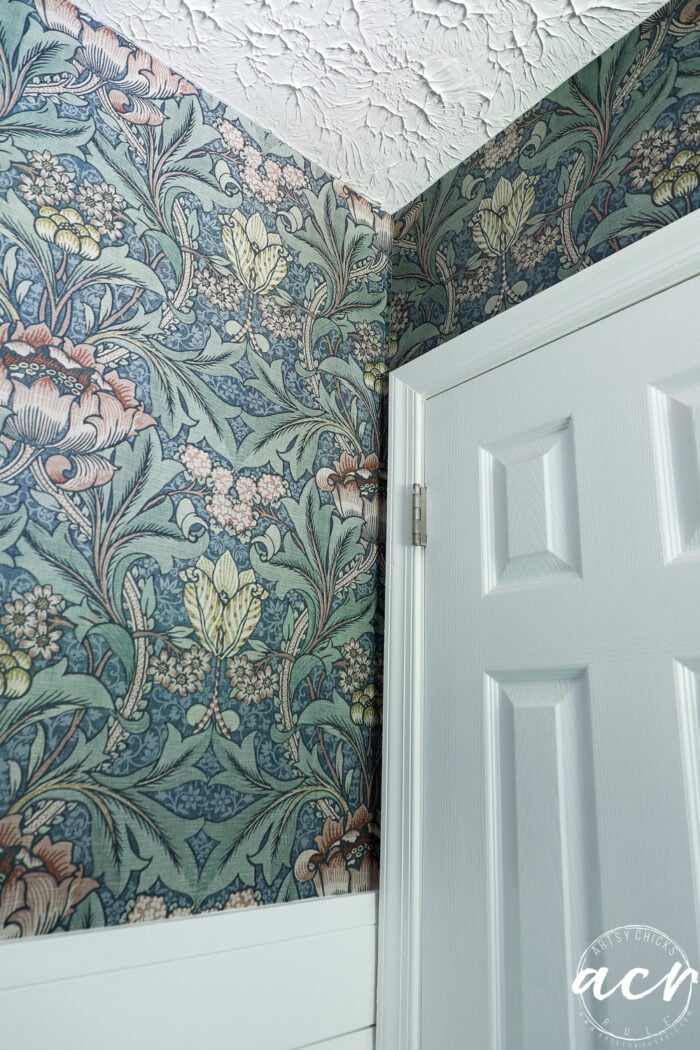
Corners
When doing corners, I overlapped the corner by about 1/2-1 inch. It’s so much easier to overlap it onto the next wall than trying to get a nice straight seam in the middle of the corner. This way you can start again with a new panel on the next wall right next to that small overlap.
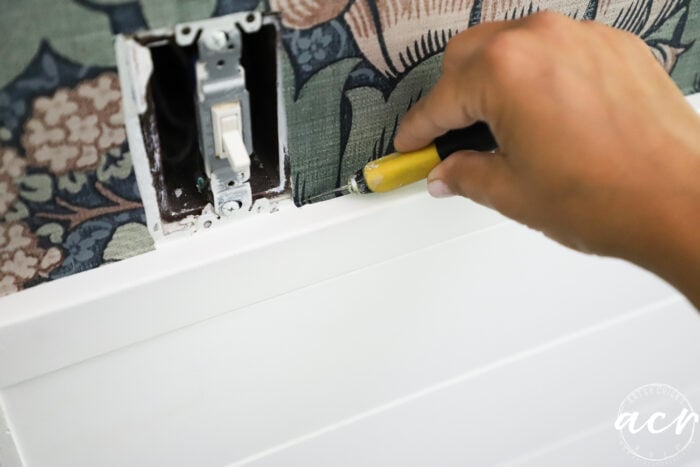
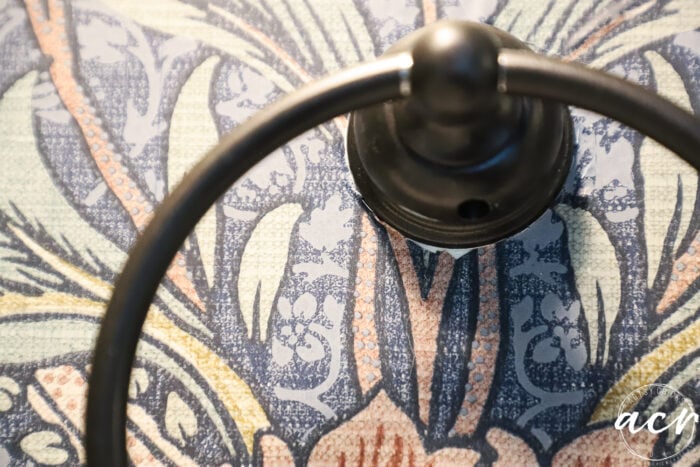
Be sure to cut around your holes for easier finding when you put things back up. PLUS you want your paper smooth around them, so don’t try to just simply paper over the top of them.
Issues that may come up
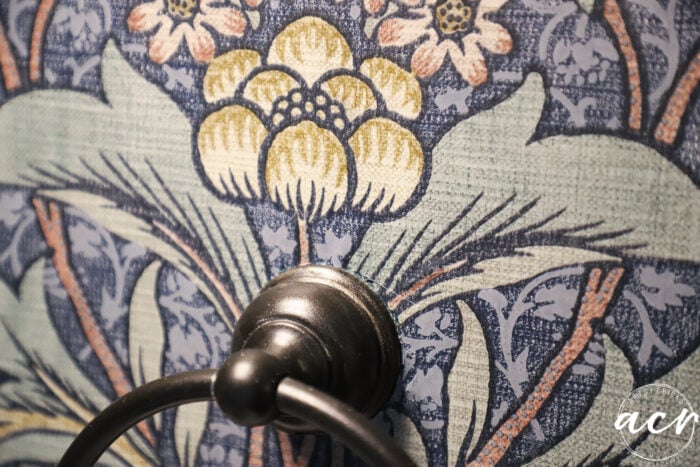
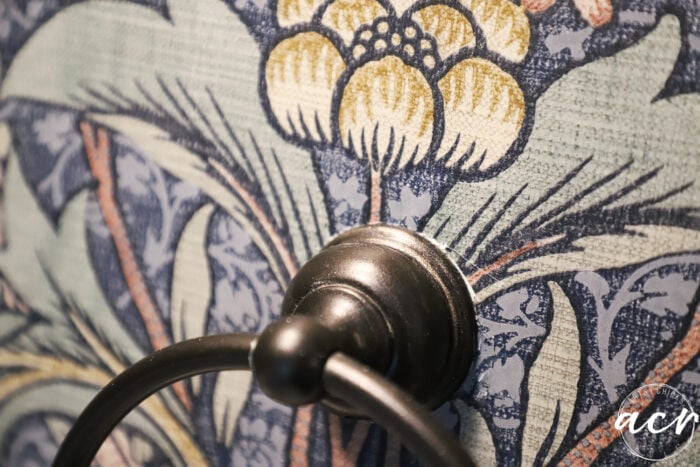
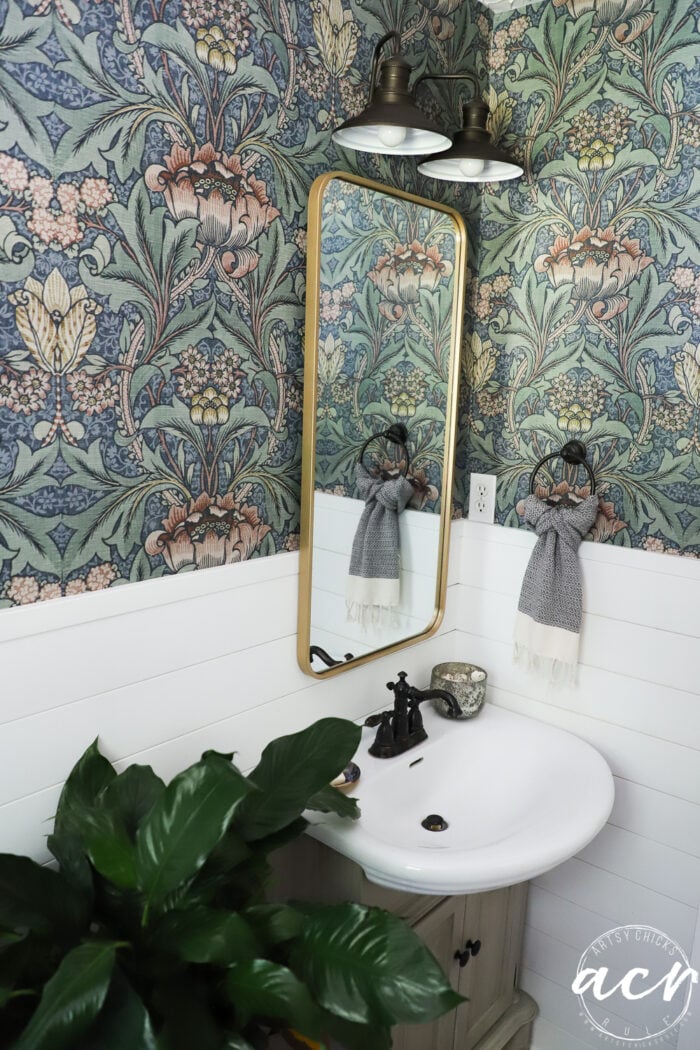
This was the only thing I could not remove. And do you want to know why?? Because I glued it with E6000 glue to the wall. Haha!
It was soooo wobbly and I could not get it tight so I said to heck with that a few years back and just glued it. And now that sucker is not going anywhere!! lol
So, I was going to have to work around it.
Not fun but I made it work.
And by made it work, I mean that I tried to cut around the round part (didn’t work) and so next I tried to cut a small section and pull the ring through (didn’t work). Then I actually ended up ripping the paper…oops. But happy surprise, it worked!!
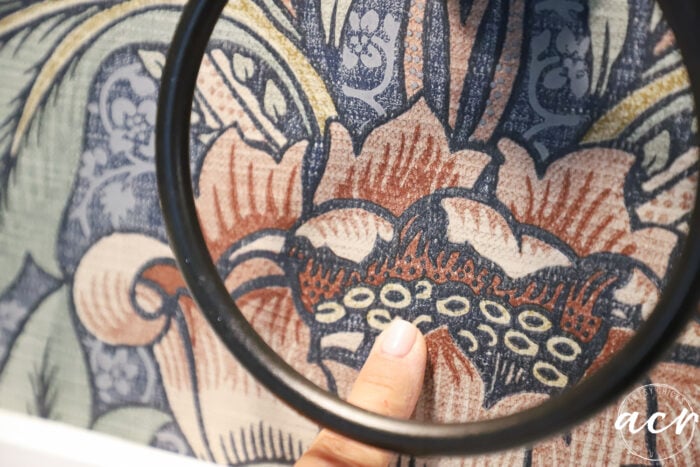
I’m pointing to the jagged ripped paper put back together under the ring…you can NOT even tell. It came together perfectly.
BUT…
I had some yucky cuts around the attached portion.
See the white where it’s not quite seamless?
And this one. Boo.
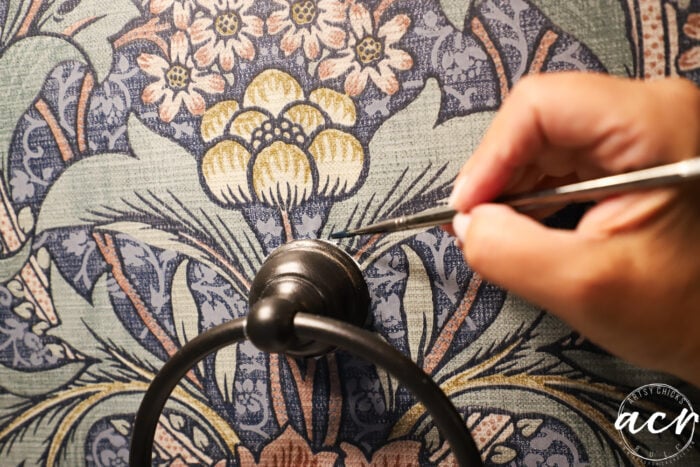
So I pulled out some blue paint and a small paintbrush and touched it up that way.
It worked great!
Finishing up
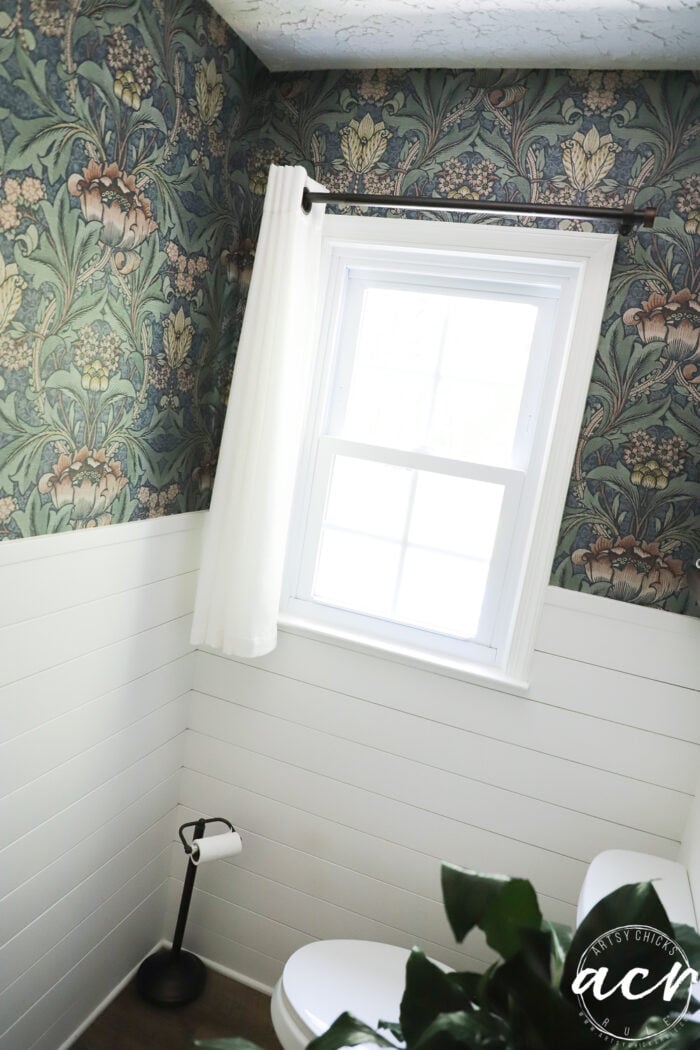
For the final piece, I ended up in this corner as I mentioned above.
And no, it does not match the pattern but it’s okay. It’s really not noticeable in this corner. See?
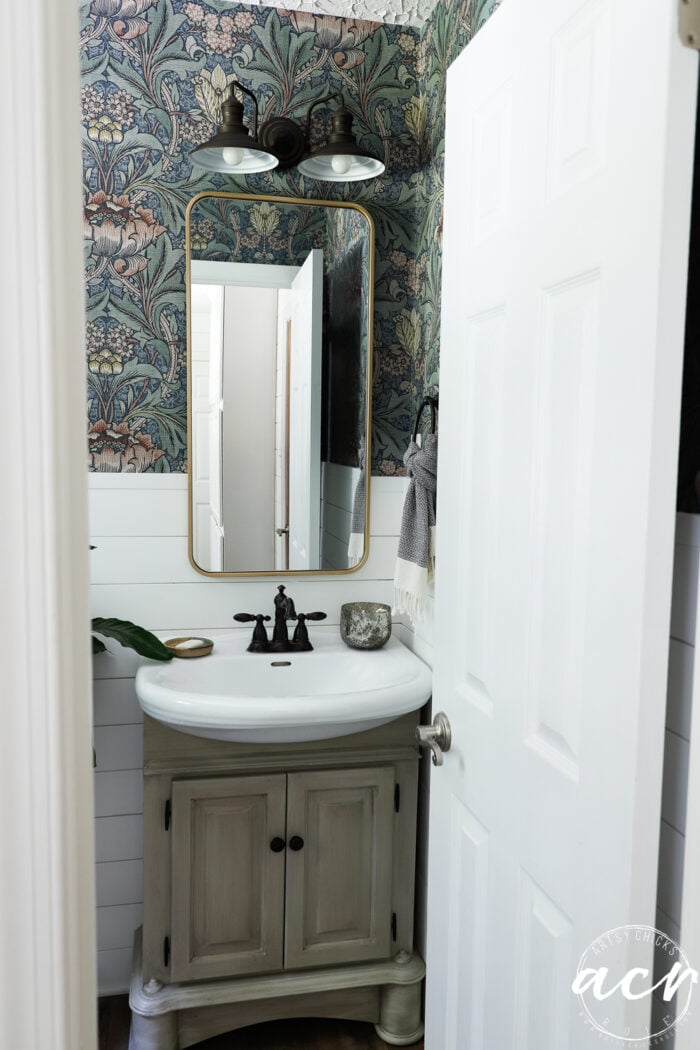
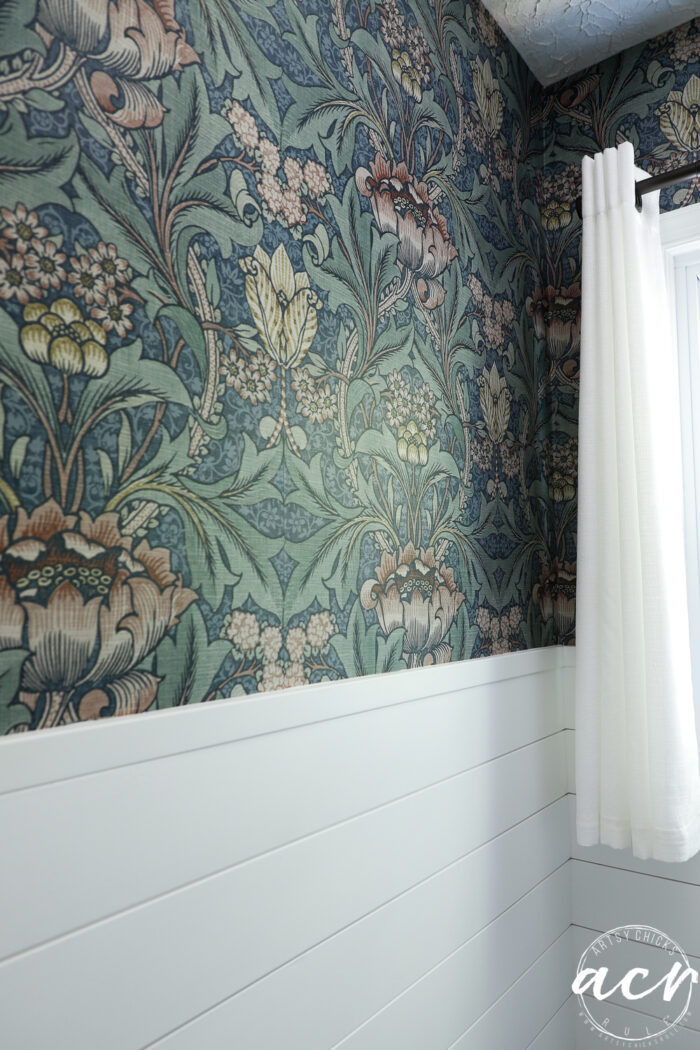
And that’s it, done!!
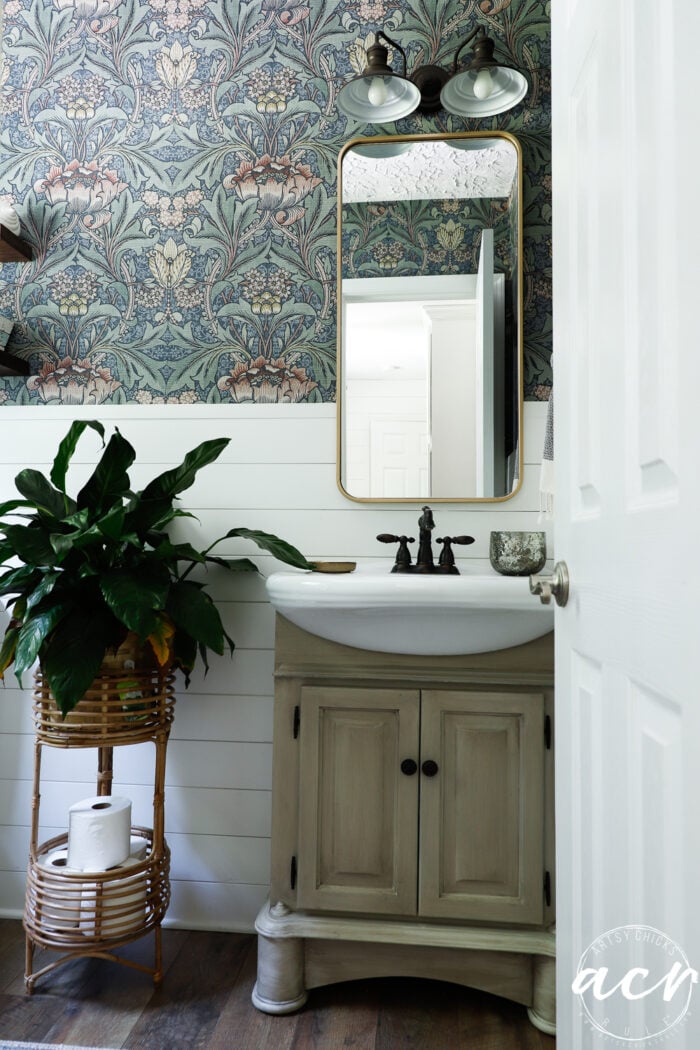
Welcome to the Jungle room as my sweet husband called it!! haha!!
I love it! It’s so fun and different.
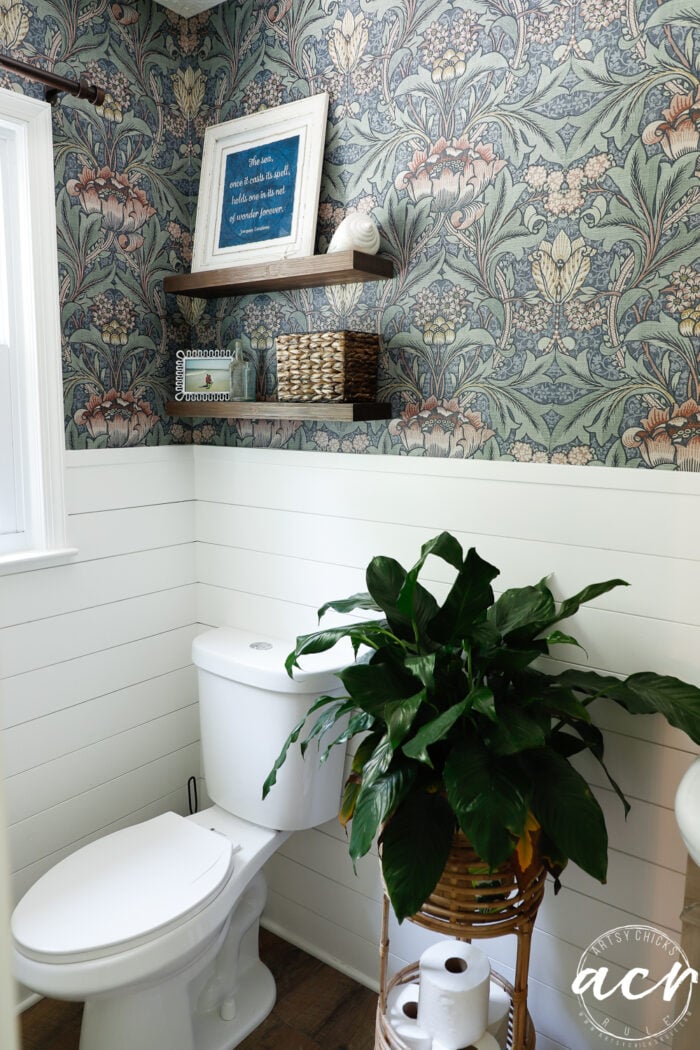
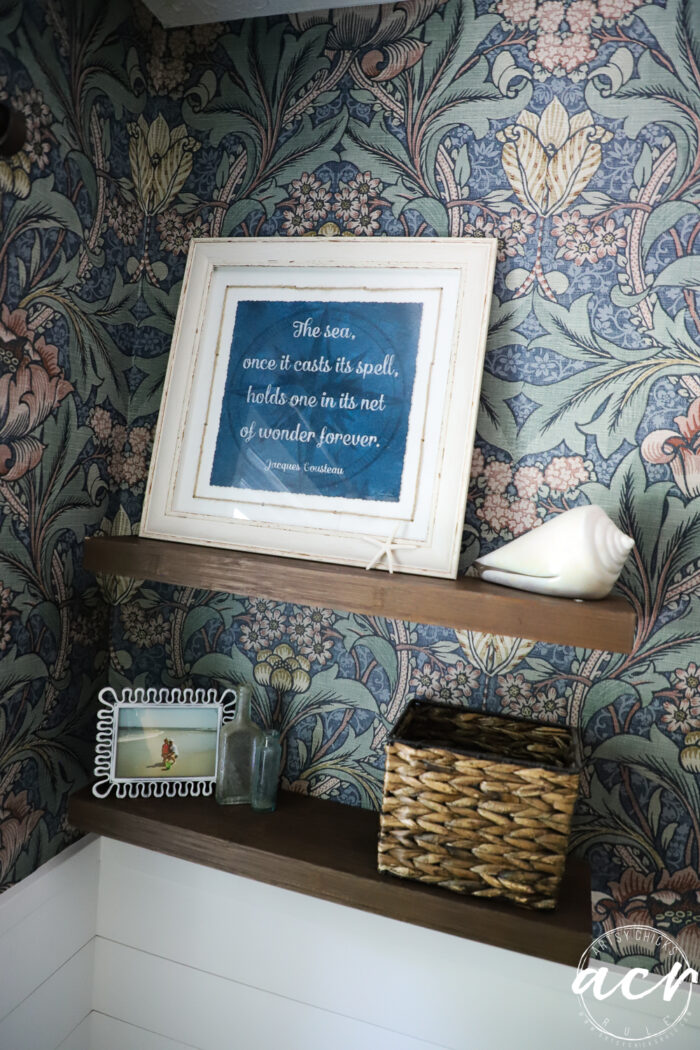
I’m probably going to change the decor on the shelves since that’s what I had up there before. (except that small basket, it’s new-thrifted)
I’ll update this post if I do!
I’m going to keep this wall empty for the time being, or maybe forever. A lot is going on with this paper so I don’t think anything needs to be here.
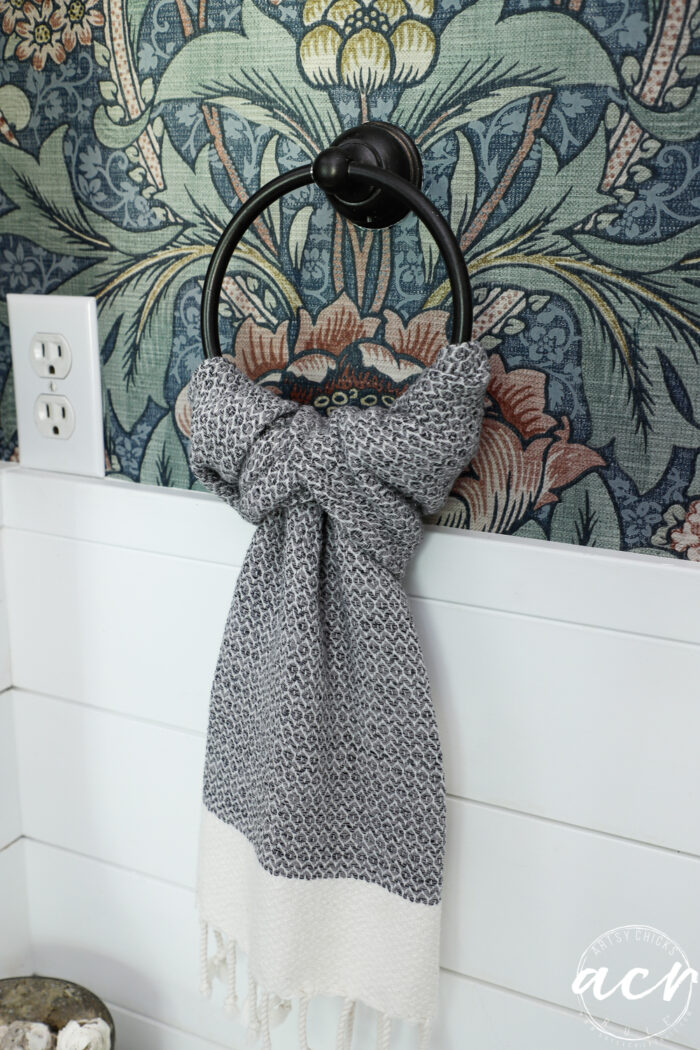
I just love these long tea towels.
You can find some similar towels here. And some different colored ones here.
And for a video on how I hang this, check out my reel over on Facebook.
I’m thrilled with the new look. And even more thrilled knowing that if I decided I didn’t love it anymore, I could simply peel it right back off!
What do you think? Do you like my choice?? I kind of have a feeling this is going to be a “love it” or “hate it” project!! ;)
Either way, do you think you’d give peel-and-stick wallpaper a try??
Wow, stunning, love it. I will definitely put up peel and stick wallpaper. I like to change things up every few years. This is over the top beautiful. Oh, and the dark ceilings you painted, brilliant idea. Big impact!!
Thank you, Carol! And you sound like you are my kindred spirit then! ;) You know I love to change things up! Peel and stick is definitely the way to go. xo
Yep, this one comes both ways! I actually found it as regular wallpaper at first. Then found the peel and stick version, thankfully! And I bet the guest room is just beautiful. xo
I was a little hesitant about the business & colors of the print BUT… WOW 🤩 it’s actually a soft, refresh that compliments your bathroom & YES! Adds the glamour you were looking for! Love it!!
Well I love it. I think your choice is gorgeous and it makes the room (even if just a guest bath, haha) quite sophisticated. Peel and stick – who knew? Your painting over your miscuts – never in a zillion years would anyone ever know. Um, unless they read your blog and then they’d be able to tell you that you are genius.
Sophisticated…yes, that’s the word I feel for it! Perfect. Peel and stick, the only way to go…or the only way I’ll go!! ;) And yes, haha, that is true! Have a wonderful weekend, friend! xo
I used the same paper in grey in my half bath on one wall and it looks as beautiful as yours! Mine was done with paste, though. I wish I had tried peel and stick! So much easier!
Oh nice!! Yes, I’ve seen that it comes in varying colors and that it also comes in regular wallpaper variety, not peel and stick, too. I for sure wanted peel and stick because I know me!! ;) If you ever have another room you want to do, give peel and stick a try! Have a great weekend, Maureen. xo
Thanks, Ellen! It’s a longer towel so works well for this. I put the two ends together and pull the looped end into the ring, then pull the two ends through the loop. Oh, gosh, that’s hard to describe. I might have to do an Instagram post/story to show it. (If I do that I may be able to save it to the post too) Stay tuned! xo
Thanks, Joanne! I’m going to do a video of my doing it on Instagram. I’ll try to share the video to the post here. (easier than me trying to describe) :)
I love your wallpaper! I recently wallpapered my powder bath too and I love it. The pattern I chose is similar in feel to yours and in the small space it makes such a great impact. I hope you love yours too for at least a few years. I’m like you in that I like changing things up every so often. If my husband had his way everything would stay the same forever, but luckily he’s willing to let me do what I want. Thank you for sharing.
It’s absolutely beautiful! The colors and pattern make such a statement! What do you think about changing the curtain to a darker color and perhaps painting the window trim a color to match the paper? Just a thought…
Nice job, Nancy! I’m seriously going to look into using peel and stick! So much less messy than using wall paper. One of the reviews I read on the Amazon site did say to overlap each piece. She said she used 1/4″ because hers separated a little and then revealed the wall color beneath–something I would not have considered.
Now your bathroom looks lovely! Good job.
Have a great weekend.
I love your wallpaper choice! Have been admiring that paper for awhile and now you have made me want it more! Anxious to hear how well the peel and stick works in a bathroom. Could you update us if there are issues?
One thing when hanging wallpaper, use a plumb bob and chalk line for your first piece, this makes sure it is straight (as most houses have issues) and helps with matching the paper all the way around!
Really pretty paper and you did an amazing job. Wallpaper (even peel & stick) intimidates me so bad lol. Have to add I did love your bathroom the way it was also. Loved the soft coastal vibe but this is beautiful too.
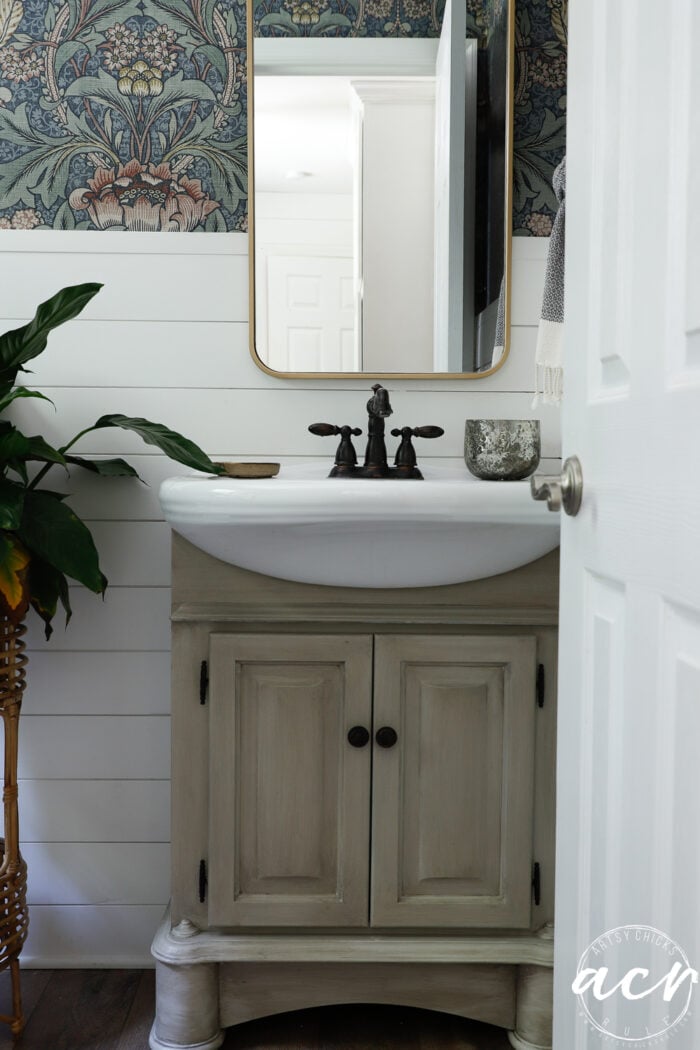
Asking about the vanity. Is that the original color or did you refinish it? I’d like to lighten up a dark wood vanity. That look would be perfect. What would you suggest?
Hi Robin, no, it was originally Cherry stained wood finish. This post here will show you what it looked like when we put it in and the different colors I made it over the years. And the most recent makeover when I made it this color here.
It really depends on the look you are going for. Painted? Stained? You could sand it and refinish it lighter if you want to keep the wood grain. OR paint it a lighter color. Lots of options there! Take a look at the posts I shared here to see if they help with that. :)
Nancy, at what point do you remove the backing paper from the wallpaper. Seems like you would have your hands full trying to hold wallpaper piece and remove the backing and keep the wallpaper from grabbing onto everything close. ???
Oh yes, I start at the top, matching the design, and only unroll just a few inches of the backing at first. Then after I have it lined up and attached at the top, I will roll down more of the backing as I move down the wall doing this until I get to the bottom. Sorry I forgot that step! I will edit the post to include it! :)
Well, that is unknown to me at this time however, I think it will be fine. It is supposed to be able to removed without any residue left behind. We shall see! :)
I love the wallpaper😍 ..it looks really nice with yr white board on the bottom. You don’t have to tell us about yr boo boos..we would have never known. lol. I have to say that I don’t think yr long towels match with any of yr colours. I would get another towel that goes with yr wallpaper..but hey that’s me.. Might try peel and stick wallpaper… I swore never to do wallpaper again after my last house that had wallpaper in almost every room… not good🤪
Hi Lorri!! Thanks!! I will probably get a few more now that I’ve changed things up in there. Yes, you should! Same in this house and I wasn’t either but peel and stick is the way to go!
Wow! I had no idea there was such a thing as peel-and-stick wallpaper! I, too, was traumatized by ripping out old wallpaper. It took off the surface of our walls when we removed it, so we had to re-“mud” the entire bathroom. It was awful.
Your pattern reminds me less of a jungle and more of “Where the Wild Things Are.” Love it!
Yes, isn’t it great? The only way I think I’d ever do wallpaper at this point. And yes, it’s just awful isn’t it? Ugh!
Love how you described the paper, perfect! xo
I have been longing to hang paper in the laundry closet, and your instructions and tips are most helpful! Had not considered peel & stick wallpaper, so may be an EXCELLENT option for me. Many thanks.
Love this wallpaper! I am a huge fan of all things William Morris and this is very reminiscent of his style. I would love this in my dining room. Thank you for sharing your technique.
I thought the last update was lovely but now, wow! I used peel and stick paper in my kitchen and everyone thinks it’s actually tile when they first see it. Sometimes I forget, too 😂 So much easier than pasting up wallpaper and so much easier to remove. I would caution anyone who’s considering it that it is VERY sticky, like contact paper, best to peel back small areas at a time. But when you can get a look like that gorgeous powder room, it’s worth the effort.
Yay, thanks, Marcie! And oh, that’s so cool. Love that! You’ve got that right, so so much easier. And oh yes, someone else asked about that in the comments here and I mentioned that I would edit the post to add how I did that part…and forgot! Thanks for reminding me!! It is very sticky for sure. Defnitely worth the effort! xo
I LOVE the wallpaper in the powder room. I have been wanting to try peel and stick walllpaper in my powder room because it’s small enough for my first project. I still am unsure I can do it though. I really love the way it completely transforms a room . The pattern you chose is right up my alley! Great job, it looks awesome!
Love this!! You did an excellent job, as always! Where might I find those long tea towels? I like the way you have it hung! I get so tired of picking up towels off the counter cuz “some people “ 😉 won’t hand them up.
Want to be inspired, learn new skills, discover all the tricks to furniture makeovers, creating new out of the old and more? You'll also receive my FREE ebook "Creating Fabulous Finishes" PLUS access to my private Printables Resource Library, too!
Sign up to get the Weekly Newsletter! Our emails include an unsubscribe link and you may opt-out at any time. Your information will *never* be shared or sold to a 3rd party.


")


")

Wow, stunning, love it. I will definitely put up peel and stick wallpaper. I like to change things up every few years. This is over the top beautiful. Oh, and the dark ceilings you painted, brilliant idea. Big impact!!
Thank you, Carol! And you sound like you are my kindred spirit then! ;) You know I love to change things up! Peel and stick is definitely the way to go. xo
Didn’t know it came in peal and stick I put this same wallpaper in my guest room! My favorite room!
Yep, this one comes both ways! I actually found it as regular wallpaper at first. Then found the peel and stick version, thankfully! And I bet the guest room is just beautiful. xo
I was a little hesitant about the business & colors of the print BUT… WOW 🤩 it’s actually a soft, refresh that compliments your bathroom & YES! Adds the glamour you were looking for! Love it!!
Aw, thanks Hope! I’m so thrilled so many love it like I do!! xo
I think it looks great!
Thanks, Carla! xo
Well I love it. I think your choice is gorgeous and it makes the room (even if just a guest bath, haha) quite sophisticated. Peel and stick – who knew? Your painting over your miscuts – never in a zillion years would anyone ever know. Um, unless they read your blog and then they’d be able to tell you that you are genius.
Sophisticated…yes, that’s the word I feel for it! Perfect. Peel and stick, the only way to go…or the only way I’ll go!! ;) And yes, haha, that is true! Have a wonderful weekend, friend! xo
Great improvement! Looks beautiful. The paper was a great choice!
Thank you, Amy!! xo
I used the same paper in grey in my half bath on one wall and it looks as beautiful as yours! Mine was done with paste, though. I wish I had tried peel and stick! So much easier!
Oh nice!! Yes, I’ve seen that it comes in varying colors and that it also comes in regular wallpaper variety, not peel and stick, too. I for sure wanted peel and stick because I know me!! ;) If you ever have another room you want to do, give peel and stick a try! Have a great weekend, Maureen. xo
Gorgeous! Would love to know how you tied the hand towel. Love it!!!
Thanks, Ellen! It’s a longer towel so works well for this. I put the two ends together and pull the looped end into the ring, then pull the two ends through the loop. Oh, gosh, that’s hard to describe. I might have to do an Instagram post/story to show it. (If I do that I may be able to save it to the post too) Stay tuned! xo
Hi Nancy, that would great. I’m sure it’s easier than it sounds!!! LOL
Would love to see this too!!
Hi Cindy! I have posted the video over on Facebook and Instagram. I hope it’s helpful to you! :) xo
Ellen, I have created a video to show how to do it two ways. It’s over on Instagram and on my Facebook page. Hope it is helpful! :)
I love it! It just adds something extra to the room. And I’d also like to know how you tied that towel!
Thanks, Joanne! I’m going to do a video of my doing it on Instagram. I’ll try to share the video to the post here. (easier than me trying to describe) :)
Hi Joanne! I have created a video to show how to do it two ways. It’s over on Instagram and on my Facebook page. Hope it is helpful! :)
Hi Nancy, that would great. I’m sure it’s easier than it sounds!!! LOL
I love your wallpaper! I recently wallpapered my powder bath too and I love it. The pattern I chose is similar in feel to yours and in the small space it makes such a great impact. I hope you love yours too for at least a few years. I’m like you in that I like changing things up every so often. If my husband had his way everything would stay the same forever, but luckily he’s willing to let me do what I want. Thank you for sharing.
Yes absolutely lovely!! I’m for sure going to do this in my small bathroom! Definitely need to see you tie that towel! Thanks for all you do!
Thank you, Nancy !:)
It’s absolutely beautiful! The colors and pattern make such a statement! What do you think about changing the curtain to a darker color and perhaps painting the window trim a color to match the paper? Just a thought…
Nice job, Nancy! I’m seriously going to look into using peel and stick! So much less messy than using wall paper. One of the reviews I read on the Amazon site did say to overlap each piece. She said she used 1/4″ because hers separated a little and then revealed the wall color beneath–something I would not have considered.
Now your bathroom looks lovely! Good job.
Have a great weekend.
I love your wallpaper choice! Have been admiring that paper for awhile and now you have made me want it more! Anxious to hear how well the peel and stick works in a bathroom. Could you update us if there are issues?
One thing when hanging wallpaper, use a plumb bob and chalk line for your first piece, this makes sure it is straight (as most houses have issues) and helps with matching the paper all the way around!
Really pretty paper and you did an amazing job. Wallpaper (even peel & stick) intimidates me so bad lol. Have to add I did love your bathroom the way it was also. Loved the soft coastal vibe but this is beautiful too.
Asking about the vanity. Is that the original color or did you refinish it? I’d like to lighten up a dark wood vanity. That look would be perfect. What would you suggest?
Hi Robin, no, it was originally Cherry stained wood finish. This post here will show you what it looked like when we put it in and the different colors I made it over the years. And the most recent makeover when I made it this color here.
It really depends on the look you are going for. Painted? Stained? You could sand it and refinish it lighter if you want to keep the wood grain. OR paint it a lighter color. Lots of options there! Take a look at the posts I shared here to see if they help with that. :)
These posts are very helpful! Can’t wait to get started. Thanks!
I’m so glad to hear that, Robin! xo
Nancy, at what point do you remove the backing paper from the wallpaper. Seems like you would have your hands full trying to hold wallpaper piece and remove the backing and keep the wallpaper from grabbing onto everything close. ???
Oh yes, I start at the top, matching the design, and only unroll just a few inches of the backing at first. Then after I have it lined up and attached at the top, I will roll down more of the backing as I move down the wall doing this until I get to the bottom. Sorry I forgot that step! I will edit the post to include it! :)
And when you peel it off there is no residual adhesive on the wall? Does it all stay with the paper?
Well, that is unknown to me at this time however, I think it will be fine. It is supposed to be able to removed without any residue left behind. We shall see! :)
I adore wall paper; nothing changes a room as much.
You did a terrific job selecting and hanging it.
Thank you, Sharon!! I am so, so glad I went with this one. I was considering several. And you are so right, nothing changes it so much as this! xo
I love the wallpaper😍 ..it looks really nice with yr white board on the bottom. You don’t have to tell us about yr boo boos..we would have never known. lol. I have to say that I don’t think yr long towels match with any of yr colours. I would get another towel that goes with yr wallpaper..but hey that’s me.. Might try peel and stick wallpaper… I swore never to do wallpaper again after my last house that had wallpaper in almost every room… not good🤪
Hi Lorri!! Thanks!! I will probably get a few more now that I’ve changed things up in there. Yes, you should! Same in this house and I wasn’t either but peel and stick is the way to go!
Love!!!
Thanks, Heather!
Beautiful colors and print! Also very timeless, I’d never take it down!
Thank you, Debbie! I very well might not, love it! xo
Wow! I had no idea there was such a thing as peel-and-stick wallpaper! I, too, was traumatized by ripping out old wallpaper. It took off the surface of our walls when we removed it, so we had to re-“mud” the entire bathroom. It was awful.
Your pattern reminds me less of a jungle and more of “Where the Wild Things Are.” Love it!
Yes, isn’t it great? The only way I think I’d ever do wallpaper at this point. And yes, it’s just awful isn’t it? Ugh!
Love how you described the paper, perfect! xo
I have been longing to hang paper in the laundry closet, and your instructions and tips are most helpful! Had not considered peel & stick wallpaper, so may be an EXCELLENT option for me. Many thanks.
Yes, definitely!! So glad this is helpful to you, Paulette! Have fun updating your laundry! xo
Love this wallpaper! I am a huge fan of all things William Morris and this is very reminiscent of his style. I would love this in my dining room. Thank you for sharing your technique.
Thanks, Melissa! And oh yes, I so agree with you, it really does. This would be beautiful in a dining room. xo
Great job. I love it!
Thank you, Ruth! :)
I thought the last update was lovely but now, wow! I used peel and stick paper in my kitchen and everyone thinks it’s actually tile when they first see it. Sometimes I forget, too 😂 So much easier than pasting up wallpaper and so much easier to remove. I would caution anyone who’s considering it that it is VERY sticky, like contact paper, best to peel back small areas at a time. But when you can get a look like that gorgeous powder room, it’s worth the effort.
Yay, thanks, Marcie! And oh, that’s so cool. Love that! You’ve got that right, so so much easier. And oh yes, someone else asked about that in the comments here and I mentioned that I would edit the post to add how I did that part…and forgot! Thanks for reminding me!! It is very sticky for sure. Defnitely worth the effort! xo
I LOVE the wallpaper in the powder room. I have been wanting to try peel and stick walllpaper in my powder room because it’s small enough for my first project. I still am unsure I can do it though. I really love the way it completely transforms a room . The pattern you chose is right up my alley! Great job, it looks awesome!
Thanks, Michele! And yes to that!! That is exactly one of the reasons I did ours. I think you can do it! xo
Love this!! You did an excellent job, as always! Where might I find those long tea towels? I like the way you have it hung! I get so tired of picking up towels off the counter cuz “some people “ 😉 won’t hand them up.
Thank you, Sheri! Here’s a set that is similar. And yes, I know all about that too!! lol