DIY Tiled Table Top (so easy to do!)
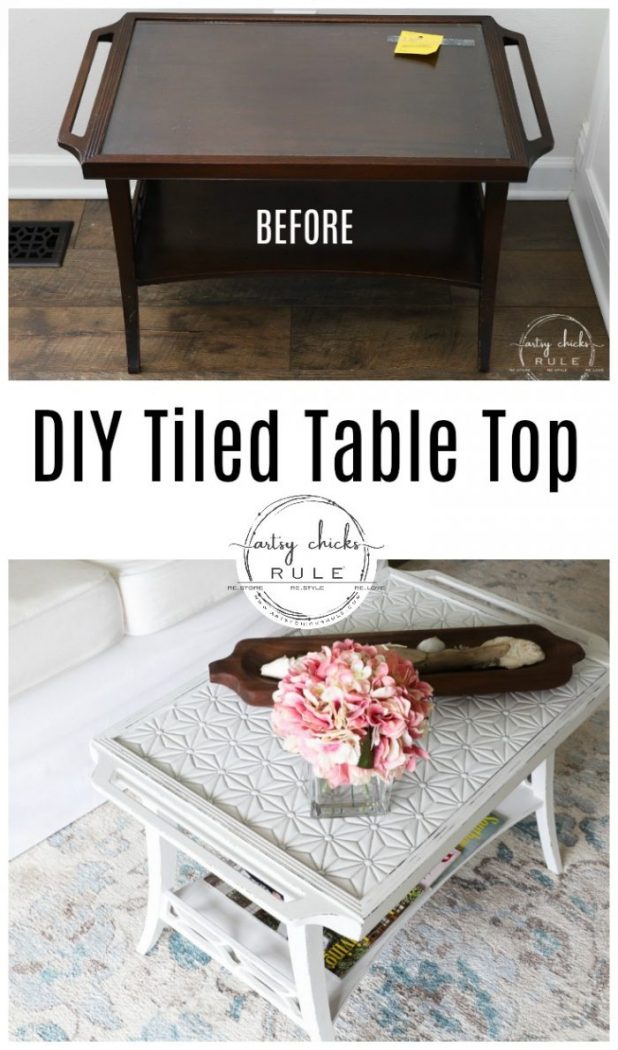
This DIY tiled table top was a welcome and refreshing change to this dated thrift store find!
Hello beautiful friends!
I am finally sharing this little table with you guys. I’ve only been promising it for several posts now.
But it is done!
Yippee!
And I love it.
But I did have a few bumps in the road. What’s new?! lol
It’s all part of the creative process, right?? Yep.
Before we begin, I can’t let this day go by without wishing our beautiful, and so loved, Ryder, a big ole happy birthday!
He is 3 years old today.
How in the world has the time gone so fast?!
I don’t know but we love him to pieces. He has been such a blessing to us.

This boy loves his toys!!
It’s like living with a toddler again. Toys are everywhere. haha
But that’s okay! I am so thankful for him.
He brings so much joy to our lives.
Okay…back to the project!
Remember that thrift store haul I had last month?
This one…
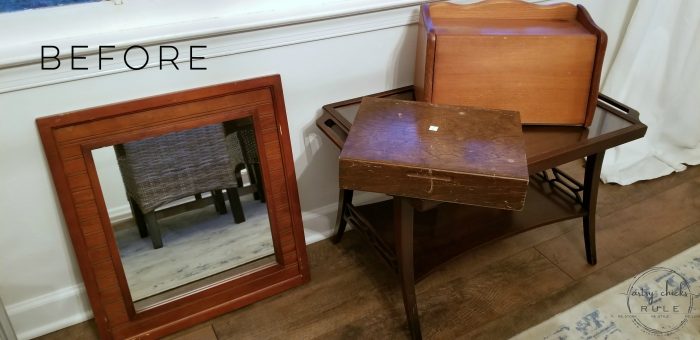
It’s a small haul so it didn’t take me too long to get through ’em!
If you missed any of the makeovers, you can see them all here:
And today, I am sharing the last one.
DIY Tiled Table Top
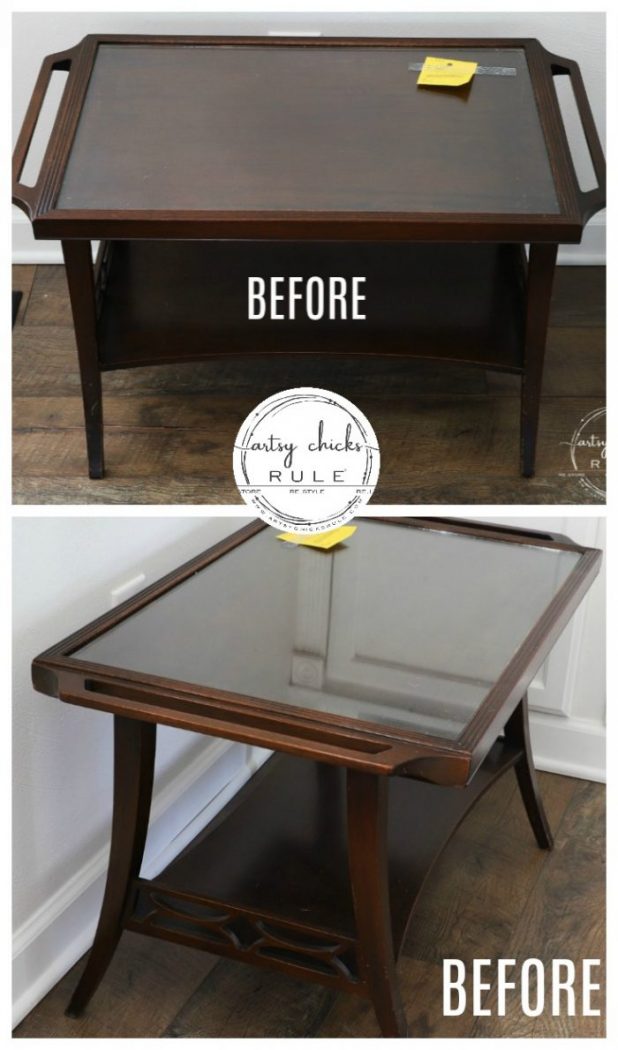
I picked this one up for $14.99.
What a steal, right?
But it had the type of wood that is notorious for “bleeding” through the paint but I really wanted to paint it white.
So I began by cleaning it up, then spraying it with Shellac before I did anything else.
Shellac works great to stop the “bleed thru” on these old pieces.
MATERIALS LIST
- Shellac Spray
- Shellac Liquid
- White Chalk Style Paint
- Tile Cutter
- Glue
- Grout
- Annie Sloan Clear Wax
- Sealer Top Coat
- Tile (this is the one I used – 3 sheets)
Then I gave it a coat of white paint….but after it sat for a day I noticed a couple of tiny spots of “bleed-thru”.
Both of them were in the crevices, like this…
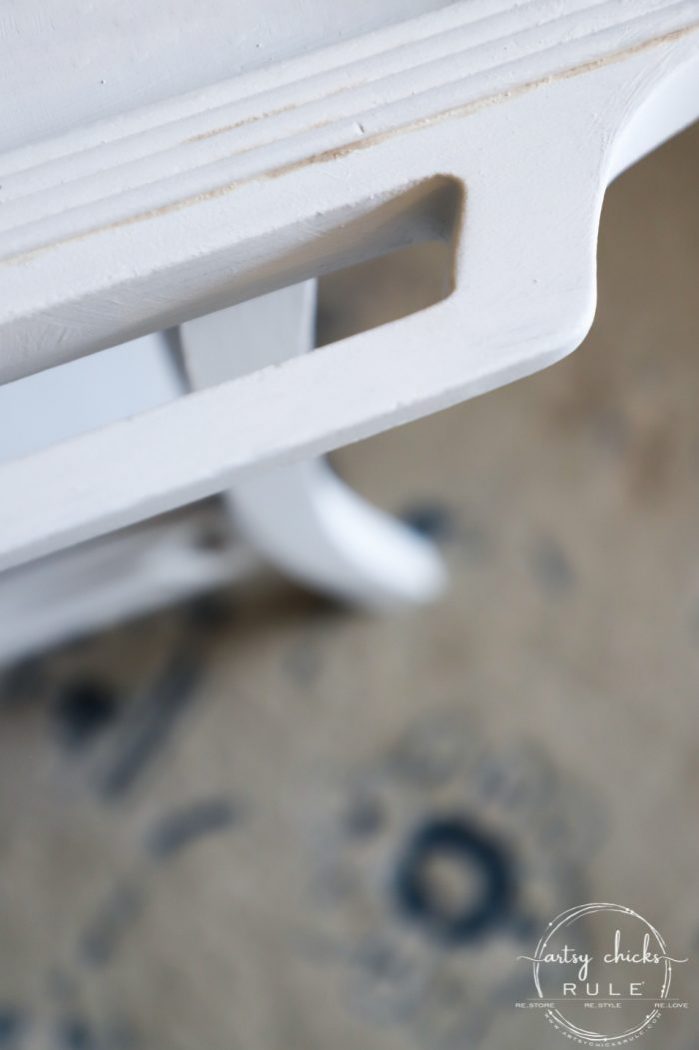
I’m guessing the spray just didn’t get down into those crevices well enough.
So I just went back over those areas with liquid Shellac.
Are you new to chalk painting?? This post might be helpful to you >>> “How To Chalk Paint Furniture & More (tips & tricks I’ve learned!)“
Then I gave it another coat of white. All good now!
I lightly sanded it to distress and gave it all one coat of topcoat.
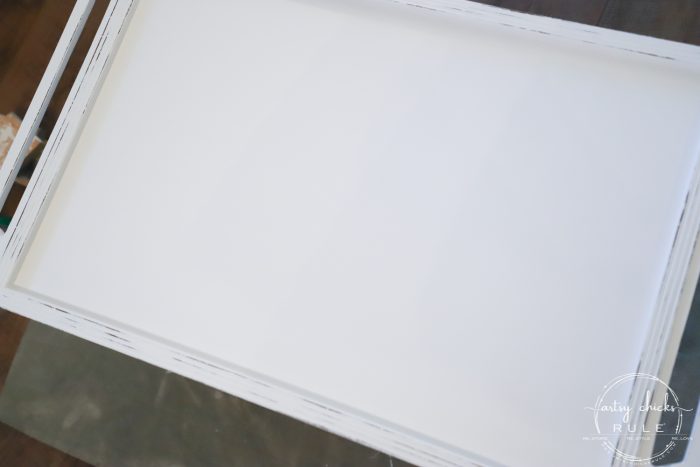
I had originally planned to use a stencil, in a medium blue, on the top of the table for a sort of tile-like look.
Then replace the glass piece back over top.
But…..
If you follow along on Instagram, you might have seen this in my stories the day I was working on the top.
Want to see some of these projects in “live” time? Hop on over and follow along with me on INSTAGRAM. I’m always sharing in my stories as I’m doing projects, finding new furniture, fun finds….just all the day to day behind the scenes.
Me, changing directions?? Nooo! haha You know the right answer there.
Anyway, that was not working for me but I still wanted it to look like tile.
So I thought, why not just add some real tile?? Duh!
I mean, look at that top. It was made for tile the way it’s inset like that.
And I found this gorgeous and fun Moroccan-style tile…
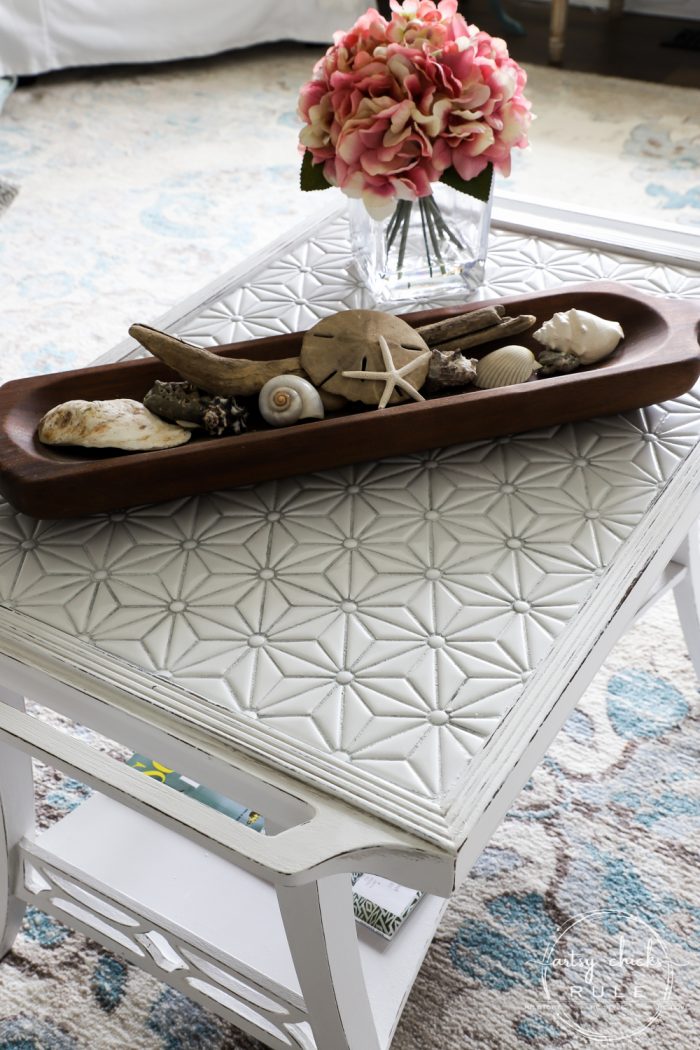
Here’s how I did the DIY tiled table top…
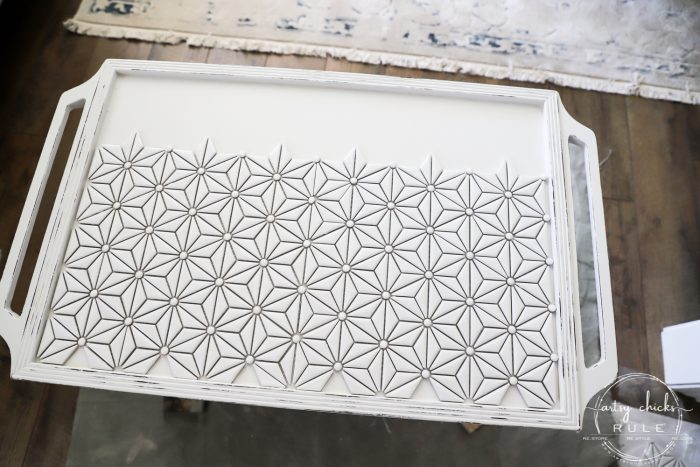
It ended up working out almost perfectly, 2 side by side.
Then I cut another piece to fit above that…. (I used a cutter like this)
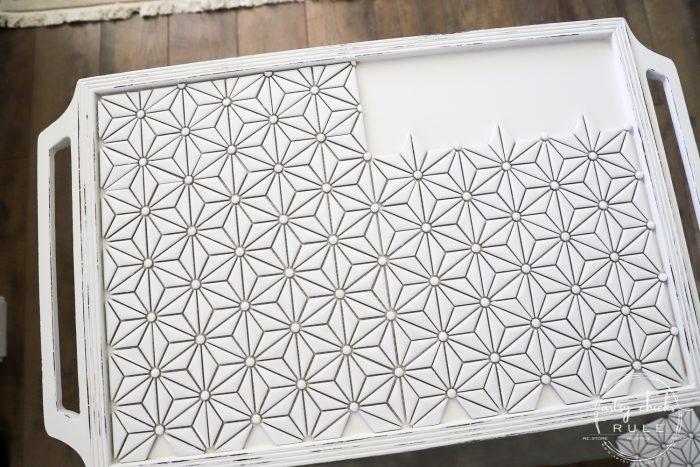
And used the other half of that one piece for this side…. (so 3 in total)
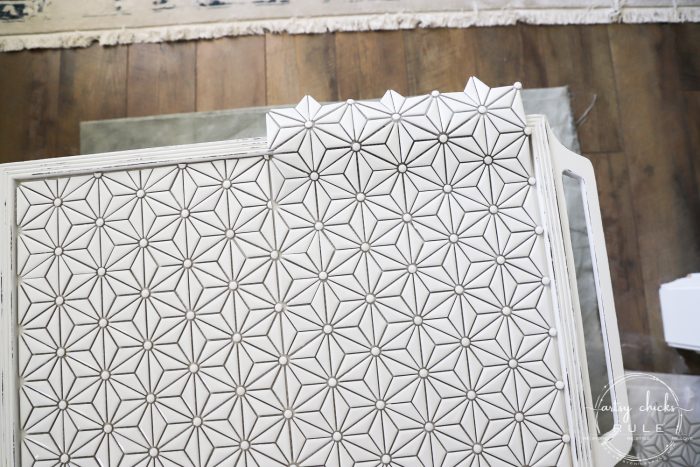
I left this one long so you could see where and how I’d have to cut it.
You can see in the photo below where I had to cut the tiles.
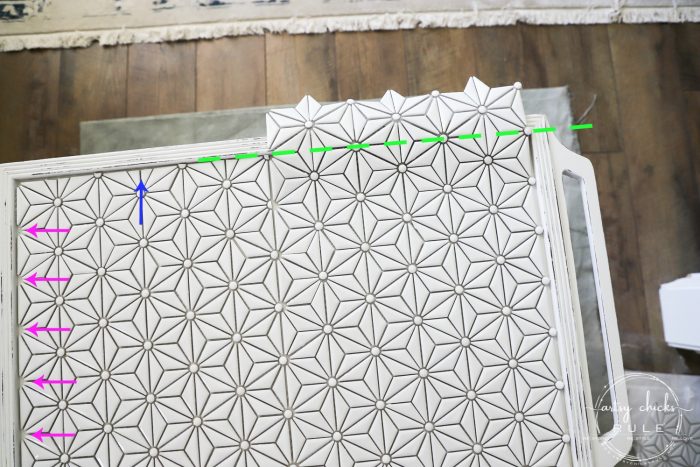
Green line – this is where I cut the tile piece and each set of “triangles” and circles to fit.
Blue arrow – the “triangle” and circle pieces I cut to fit.
Pink arrows – I used the half circles here I cut from the other side. (see below)
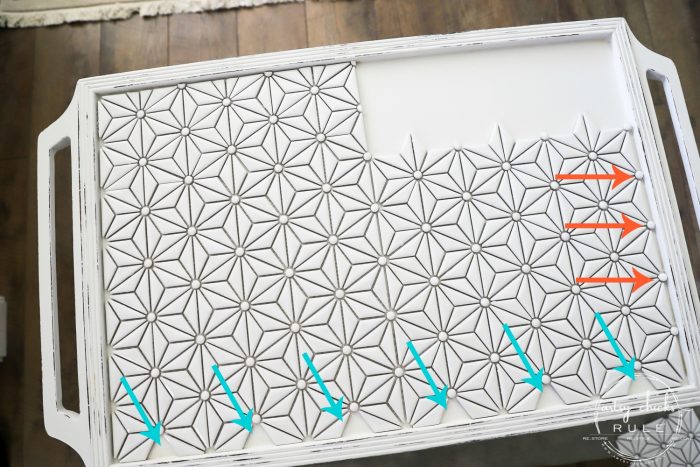
Orange arrows – I had to cut all the round ones in half on this side.
Aqua arrows – I had to add triangle pieces here. I used the ones I cut from the top pieces. (see above)
I hope that makes sense!
It was actually really simple to do.
Once I had it all laid out and cut, I glued the tiles down to the wood. I don’t use mortar or any of that on these types of projects.
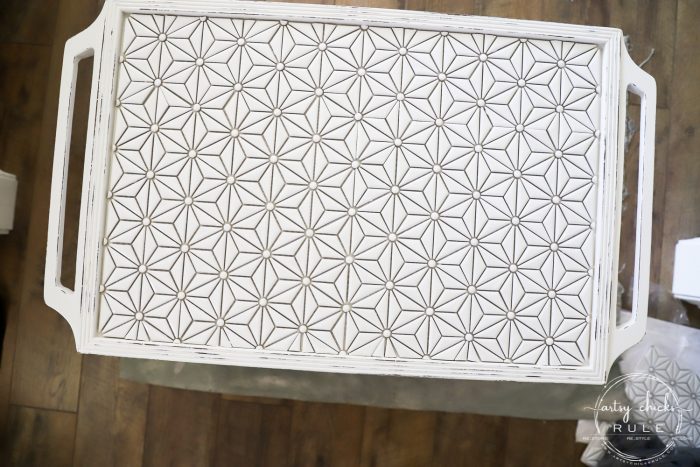
I kind of liked the look it had with the darker lines as it made the design pattern stand out.
So I thought a gray grout would be nice…..
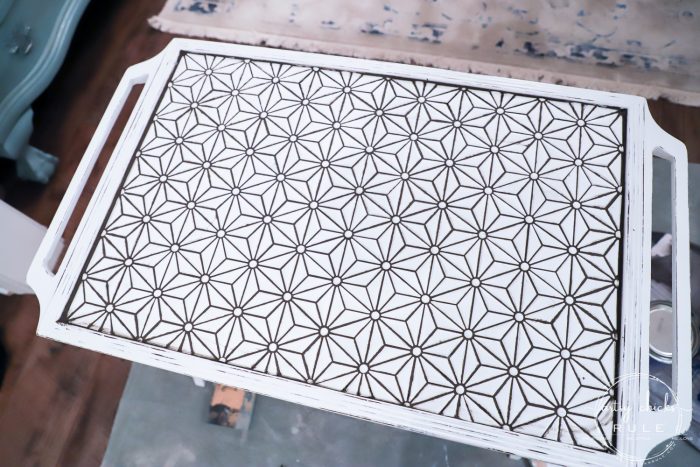
But that was a big fat no, too! Ugh.
Way too dark.
So instead of trying to redo it (which would have been a big ole pain), I just let it dry and gave it a wash the next day with some white chalk paint.
And here’s what I ended up with…
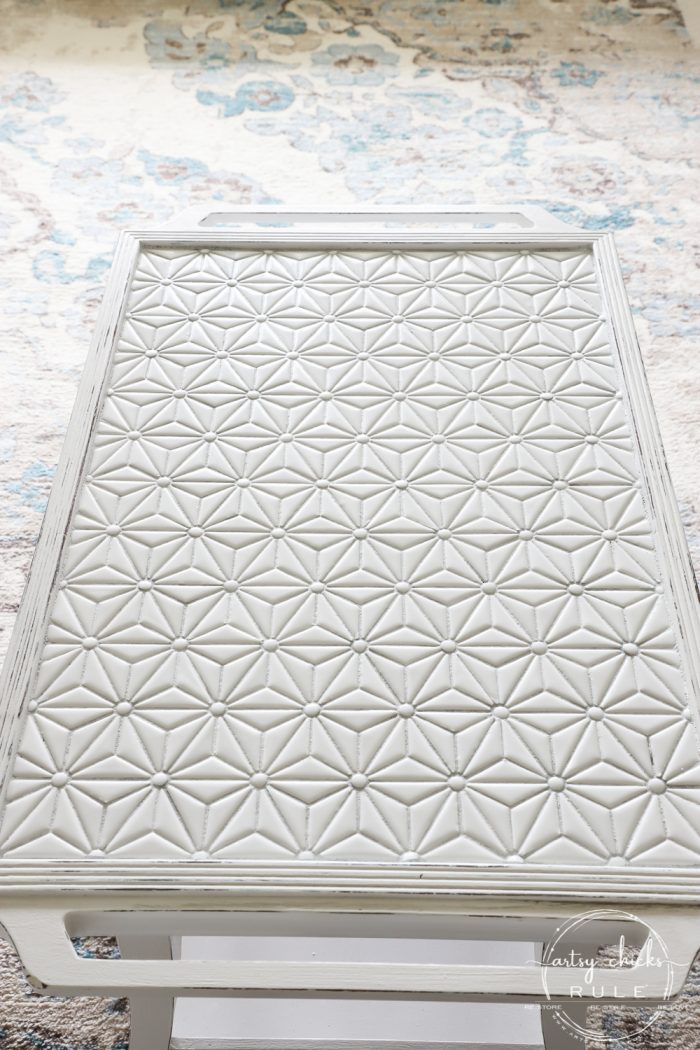
Not exactly the look I was after as it ended up whiter than planned. (the grout)
I was hoping it would only whiten it up a little…but it whitened it up a lot! Oh well.
I wasn’t gonna mess with it anymore! lol
I rubbed some clear wax over the top to seal the white that I had just applied and one more coat of poly on the base.
And done!
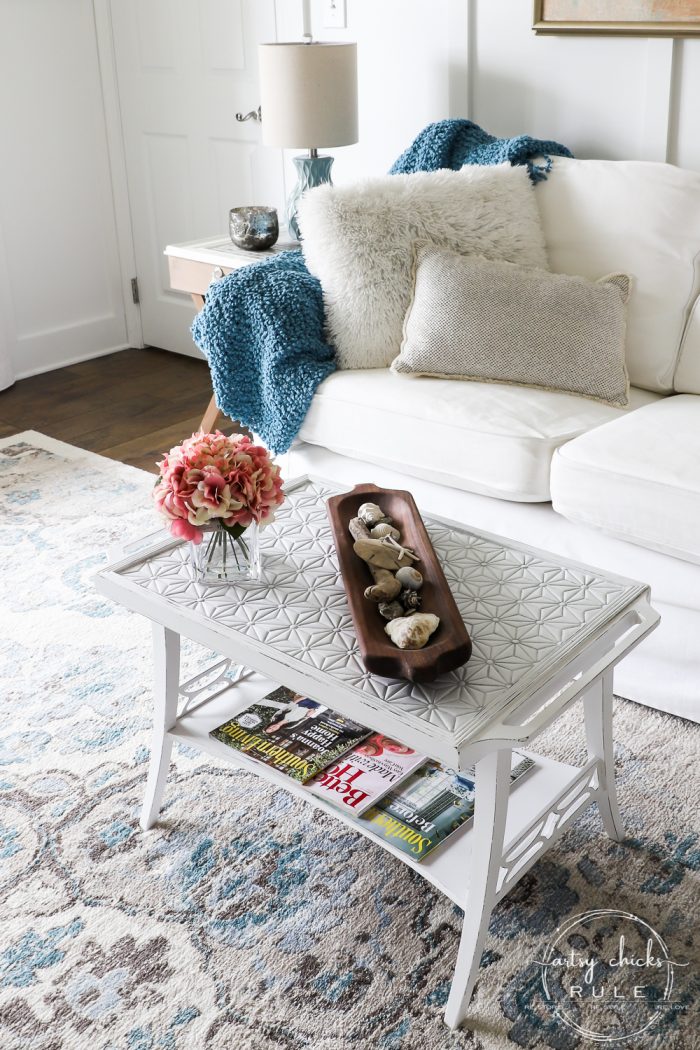
Looks really cute in here but it’s not staying. :)
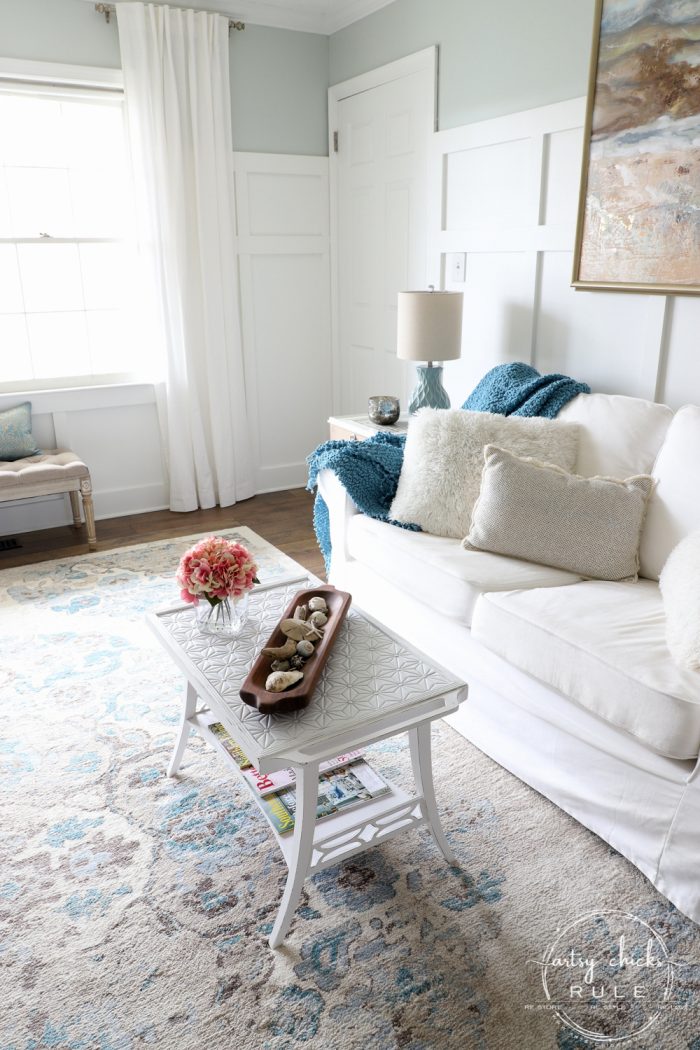
I have tiled top side tables that I did a while back and they don’t really go with the new coffee table.
You can read all about them, here. (see one of them back there?)
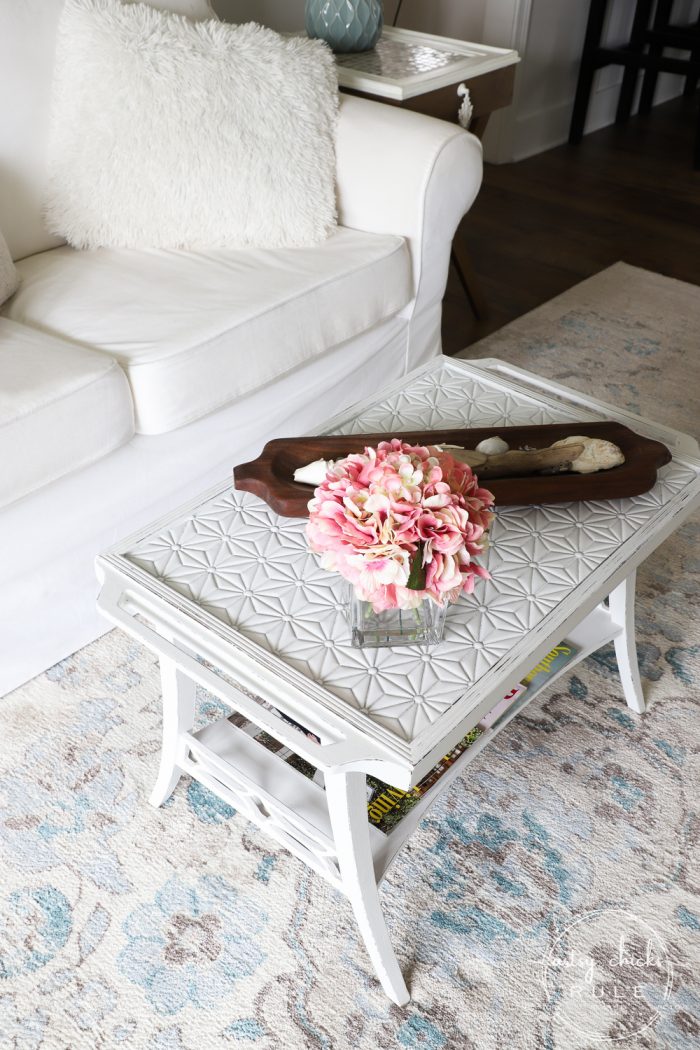
But I can tell you that I’m hankering to use this tile again.
Maybe on new (old!) side tables! Hmm….that might be a thing. Stay tuned.
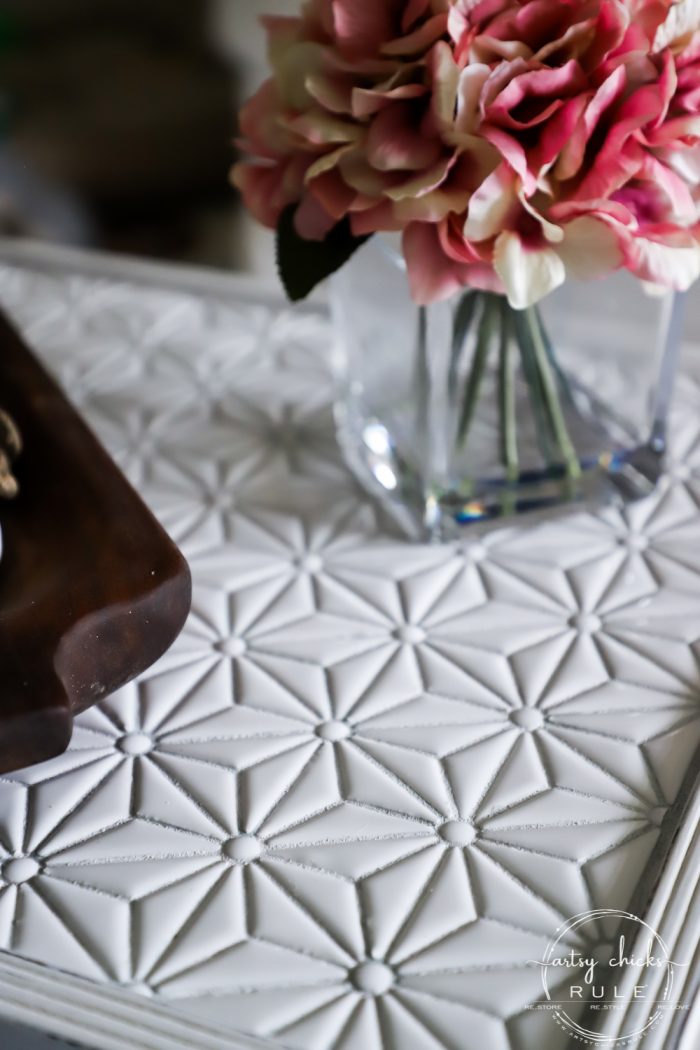

I love the design pattern on the sides and think it’s going great with the whimsical feel of the DIY tiled table top.
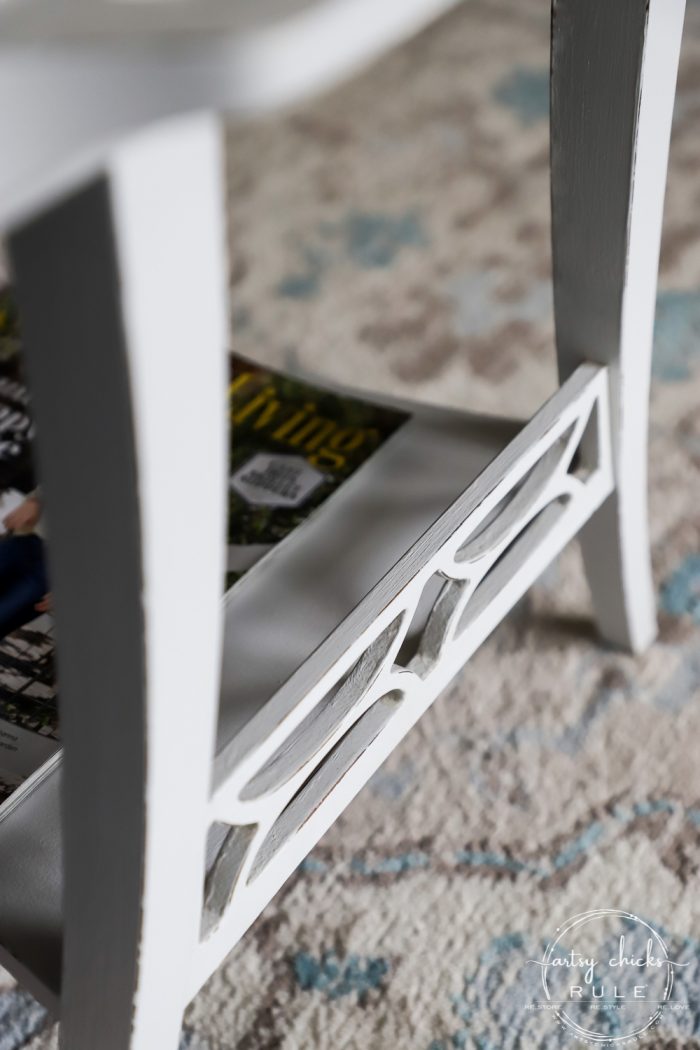
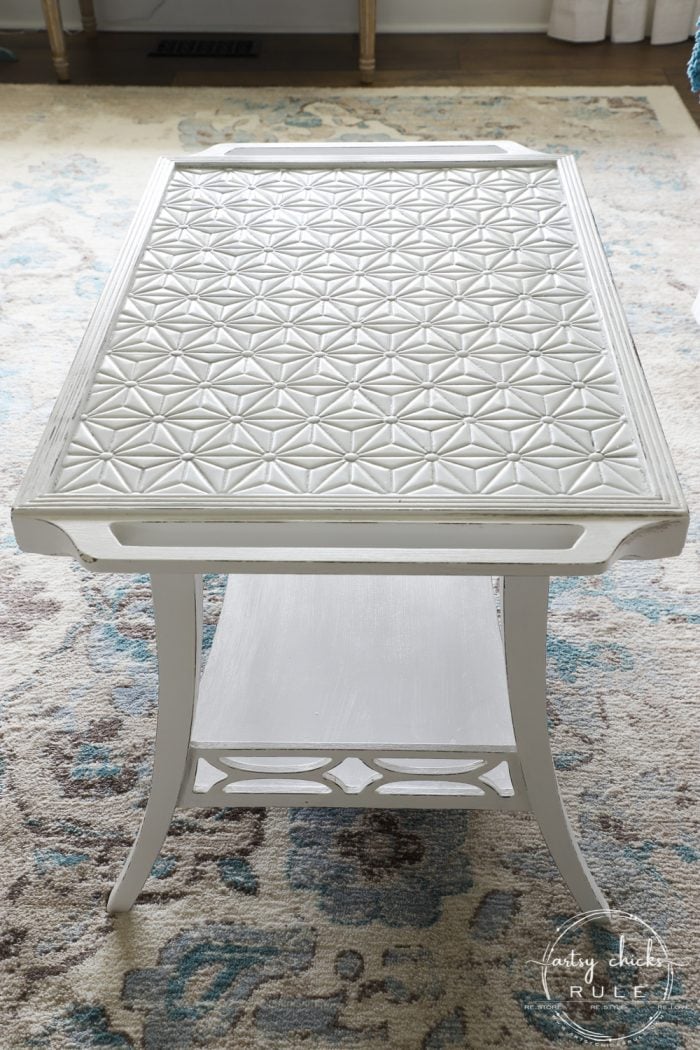
Isn’t that tile so pretty?? I just love it!
If you are interested in the rug, or any other item you see in my home, you can “Shop Our Home” >>> here.
It’s a page dedicated to all the things I’ve used here in our home.
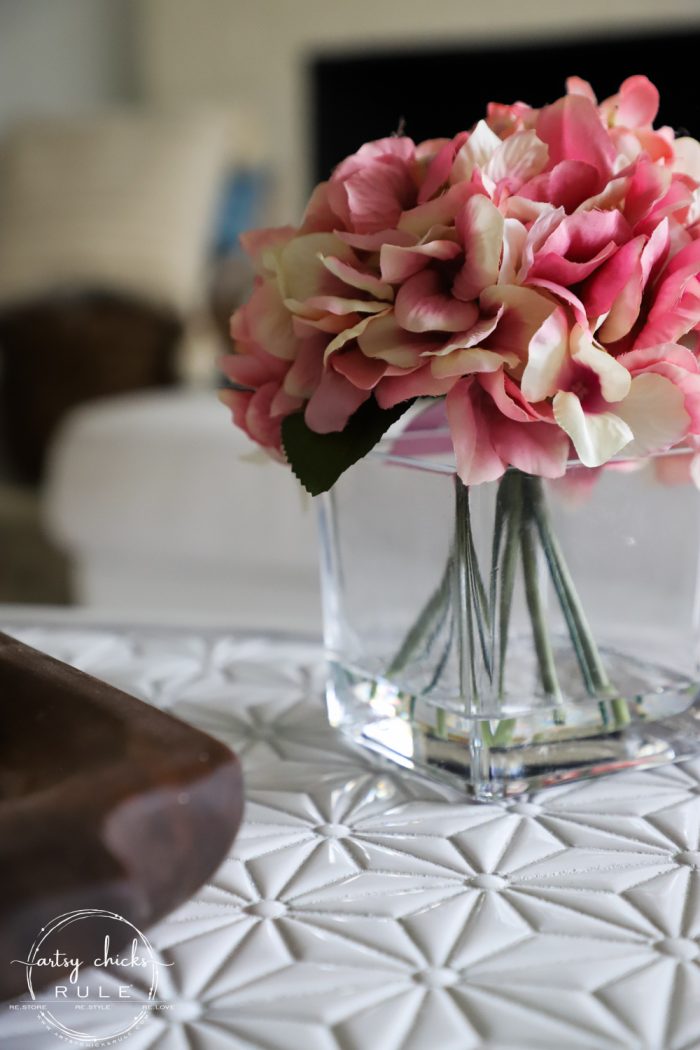
I’m so glad I changed directions on this one.
It’s all part of that creative process. Sometimes you just have to!
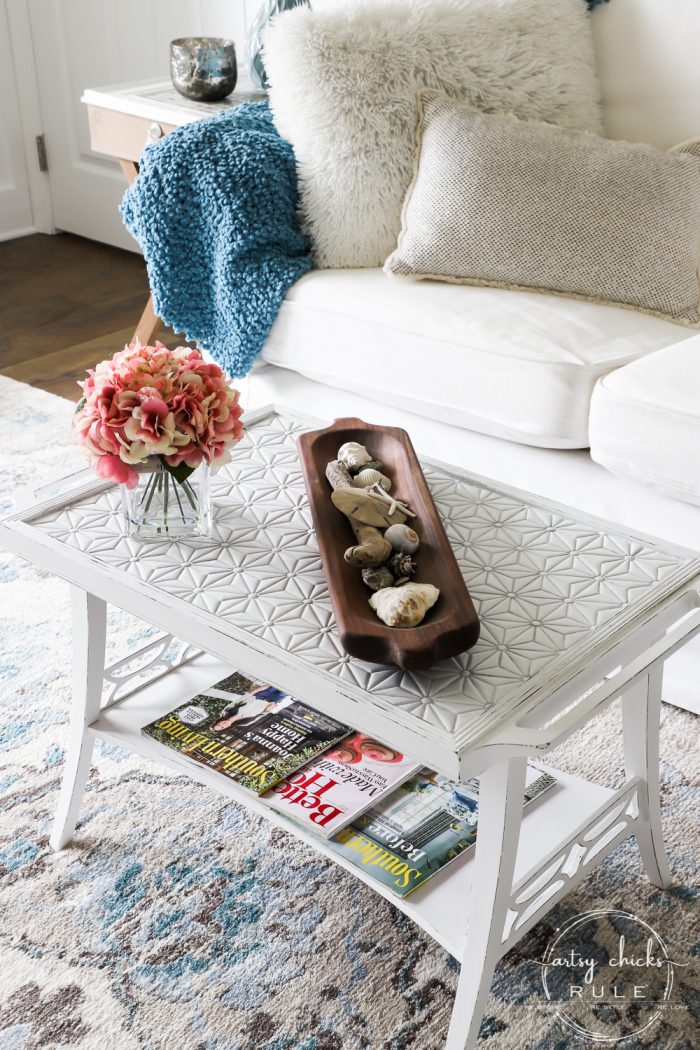
Sweet little table.
I paid $14.99 for it and $7.98 for 3 sheets of tile, so not including paint, etc, the table cost me $39 ish dollars.
Not too bad!
Hope you enjoyed the DIY tiled table top project today.
It took a little longer than expected but I think it was worth it!
I think you might be seeing even more tile goodness around here soon.
PIN it to save it!
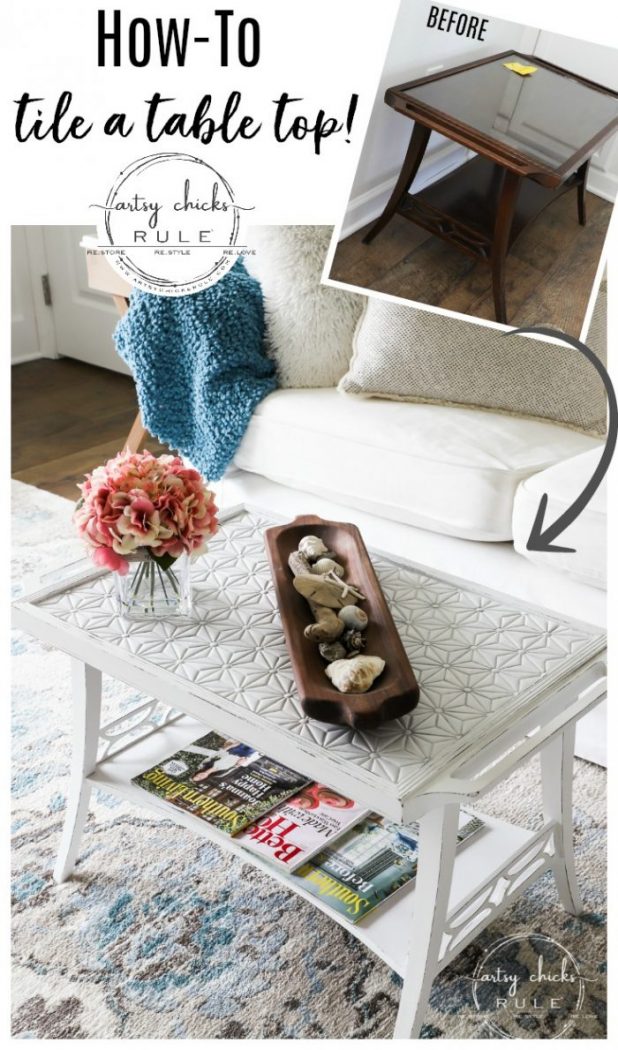
Want to see even more tiled projects here on the blog??
- Thrifty Print Turned Tiled Coastal Tray
- Old Frame Turned Tiled Tray
- DIY Criss Cross Tiled End Tables
- DIY Blue and White Tiled Tray Makeover (one of my favorites!)
- DIY Tiled Backsplash
- Coastal Inspired Tiled Kitchen Backsplash
Be sure to stop back in to see what I do with this old thrift store find!
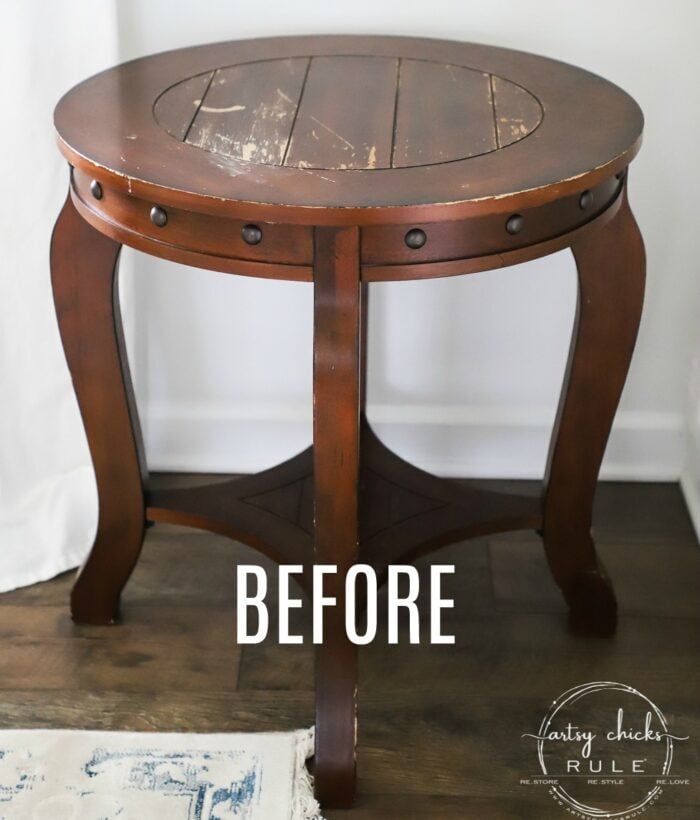
UPDATE!!! See it now, here!
Hope you have a blessed weekend! See you right back here next week with more!
xoxo





I love this, especially the tile you used.
Thanks, Rose! I am really loving that tile too! I want to use it on something else now. :) xo
Love the table! The tile really adds to the beauty.
Thanks, Sally! :) I think so too! xoxo
I love it, I think it turned out beautiful and it does suit your room.
Thank you, Darlene! :) xo
Hi Nancy, this piece is wonderful – one of my favorites.
Sheila
Aw, thanks so much Sheila! :) xo
HAPPY BIRTHDAY CUTE RYDER!!!!
Thanks Tracey! :)
I love the use of tile. Great make over! I also like your rug, can you tell me where you bought it?
A Big Happy Birthday to Ryder!
Hi Susan! Thank you! I have a direct link to the rug (Amazon) in the post. It is highlighted in blue but I went back in and made the text larger as it was probably easily missed. :) xo
Sorry, that should say, a direct link to my shoppable page with all the things in my home. The rug is on there with a direct link. :)
Who knew tile could transform a table so much. I agree…the white between the tiles looks much better, not so stark.
I know, right?! Such a difference. I just love it! And now I’m wanting to do more with that tile. Thank you, Kimberly!! And yes to the lighter color grout!! ;) xoxo
Very cool!
Thanks Cyndy! :)
Really pretty…you make such great pieces and love to see that you re-use old furniture-very inspiring!!
Thank you so much Lesley! :) I love transforming these old pieces! xoxo
Why do u say you used 2 side by side when it looks like you used 3? By the way that turned out gorgeous!! So what do I plan to use the glass for?
Oh! I’m sorry for the confusion, I just meant that the 2 tile sheets (they come in sheets) fit perfectly side by side without have to cut up a sheet that way too. Then I used one more for the top section, basically cut in half. :) So 3 in total. And I don’t know about the glass. But you know I’m holding onto it for something!! ;) xoxo
There’s that auto correct again!! Lol
Haha!! I knew what you meant. ;)
Very beautiful! You’re so creative and I enjoy your weekly email!!
Aw, thank you so much Nanette! :) So happy to hear that!! xoxo
Oh my!! I love it Nancy!!
Thank you so much Aunt Jo! :) xoxo
The tray is a “one of a kind” piece of art! Part of being creative means being able to jump back on track when we get derailed!! (sometimes I feel like I fell off the train altogether!) I love the new ideas that you share and such good detailed instructions. Thanks for all the inspiration! XOXO
Thanks Cecilia!! And oh my yes, you are so very right! Haha, yes, I feel like that a lot!! ;) But I get right back on…and most times that train then goes in a totally different direction! Hope you have a wonderful weekend!! xoxo
Really, really love the tile choice. A bit mod/retro, but not so much that you’d get tired of it!. I think the whitened grout is definitely NOT too much. Just enough pattern to enhance the structure of the table itself. Well done.
Thanks Robin! :) xo
Umm gorgeous!!! I love this so much!! I think it looks fantastic as is and might not have looked as good with the shiny tile, so it was meant to be! I’m also thinking your rug might work in our master…hmmm….will check that out!! Looking forward to our play date lol! XOXO
Thanks, Christy! The rug is great, can’t go wrong with it! Price is right too! ;) Me too! xoxo
Another great make over. Love the tile.
Thank you, Debbie! :) xo
Nancy this table turned out so pretty and that tile is GORGEOUS! xo
Thanks, Jen! :) xoxo
What a nifty looking coffee / tea table.
Like your end tables as well
Thanks so much Colleen! :) xo
Quite a transformation! SO pretty!
Thanks so much, Cristina! :) xo
Beautiful!!! – can you tell me where you purchased that tile from ?!
Thanks, Michelle! Lowes! :)
First of all, happy birthday to baby Ryder!! ❤️ May he and his family and enjoy many many many years yet ahead.
Once before, I think you did a segment on painting bathroom floor tiles, which I am anxious to try myself. Would it have been possible to maybe paint certain tiles on this to bring in added color and then seal it? Just curious. Although, I do love white! Looks wonderful!
Thanks, Dawn! :)
And yes,I did do a tutorial on painting our bathroom tiles. (turned out great and still love it!) I sure could’ve done that too! Wouldn’t that have been fun?? Might’ve make the pattern stand out even more! xo
So sorry, Nancy, I should have proofread my comment!
That is hard to believe it is even the same table, Nancy! It looks great.
Awl and Ryder when a young pup – so so so so cute. ♥♥♥
I know, isn’t it crazy how paint changes things?? And isn’t he?? Can’t believe how the time has flown! xo
I love it! Now I want to look for a table with an inset top so I can try this!
Yes, do! I’ve done this a few times now. I just love how tile completely changes the look! Thank you, Karen! xo
I LOVE the table (a steal!) The tile is PERFECT! This is one of my favorites of yours. Nice job.
Thank you, Jeanne! I love playing with tile and furniture! :) xo