Kitchen Tile Backsplash (Do-It-Yourself)
This tile backsplash post is a bit overdue. I’ve been meaning to get it done for awhile now.
I haven’t most likely because I wasn’t blogging when I did this project so don’t have much in the way of “tutorial” type photos.
I will do my best to try to walk you through the tile backsplash installation a bit instead. I will say it was easy, easy, easy.
Really, it was.
I started this project on a Sunday evening and finished the following evening by 6pm.
I know, I remember vividly. It was my Dad’s birthday the following day and we had to be out of the house by 6 to go to dinner.
We made it but not without a little stress on my end. ;)
I was determined to finish before I left. And I did. There are two sides to the back splash.
The one you see here and another on the other side of the sink. You’ll see it all in the upcoming kitchen reveal. :)
Here is the tile backsplash ……
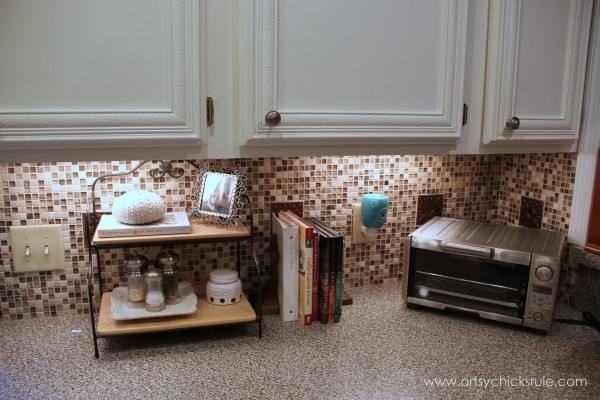
And yes, those are indeed my Chalk Painted cabinets…and the laminate counter top we put in 9 years ago that we are replacing with wood. I think.
That is the plan anyway…but it is ever evolving around here. I just know I’m more than ready to get my farmhouse sink IN!
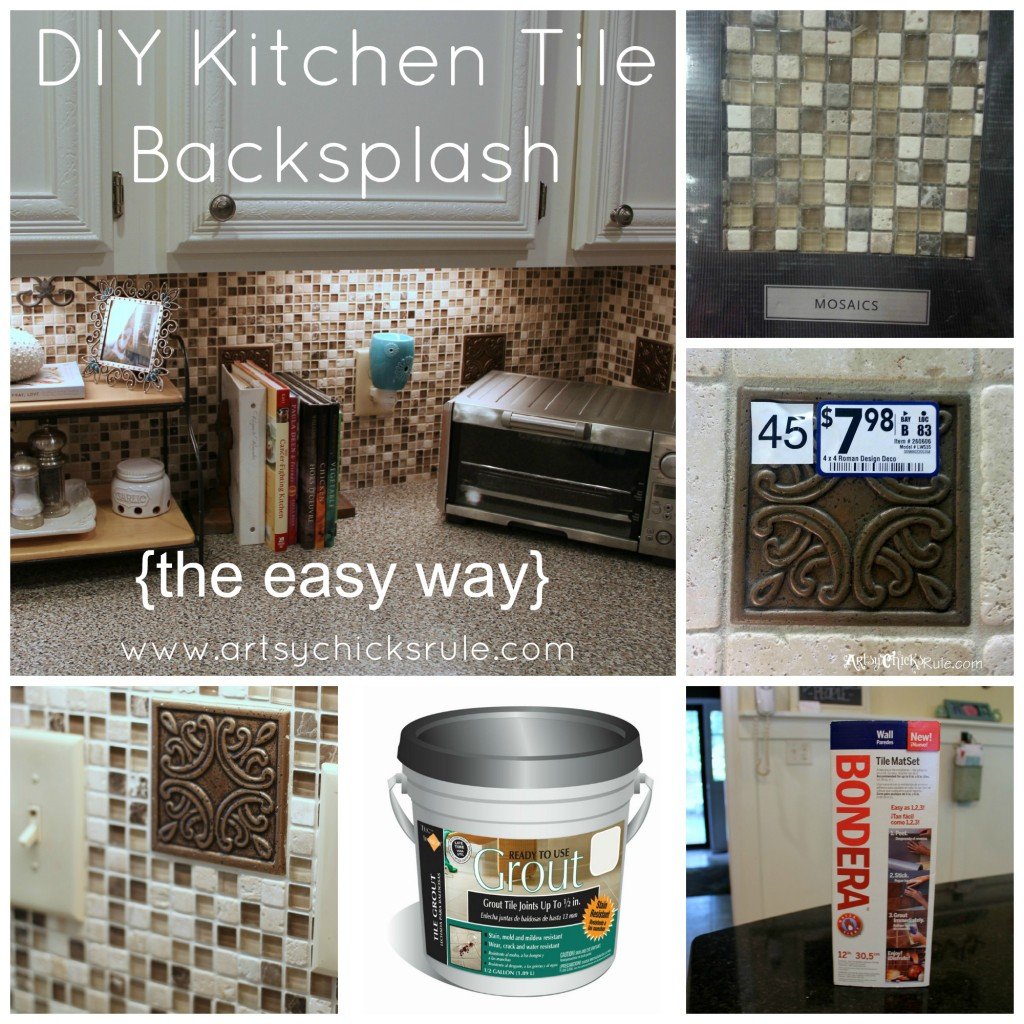
So let’s start with the actual tile I used.
I got it at Lowe’s and it used to come packaged like this….
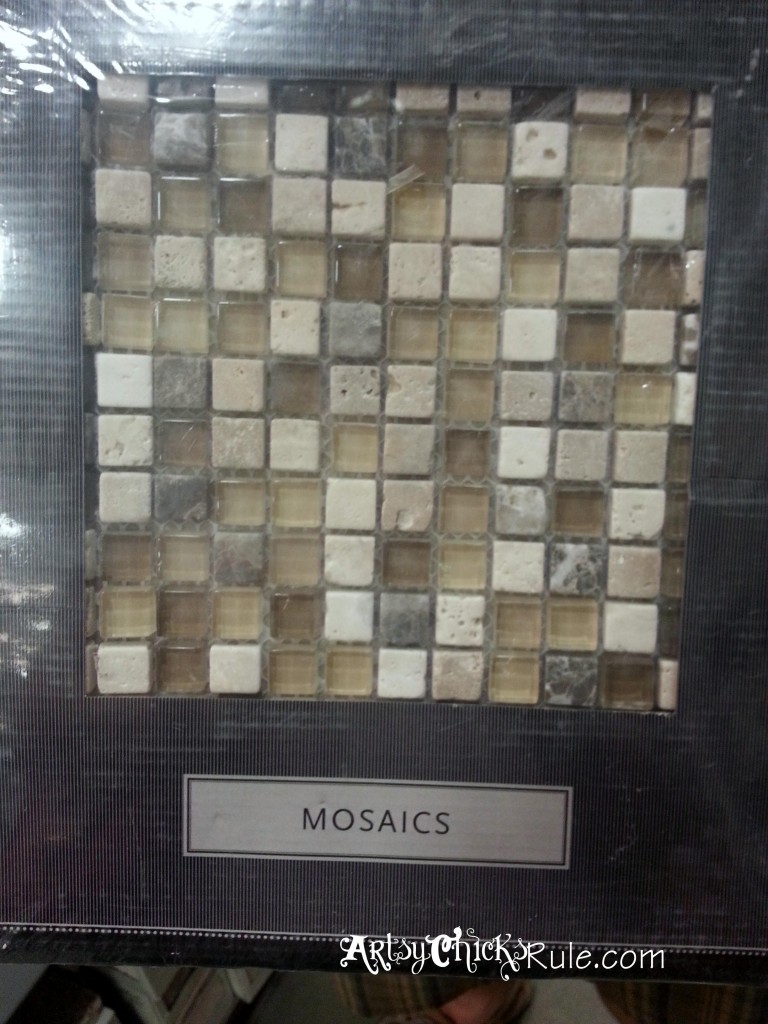
But it seems to be packaged like this now….(without the box). Either way, it’s the same product.
Product info in the photo.
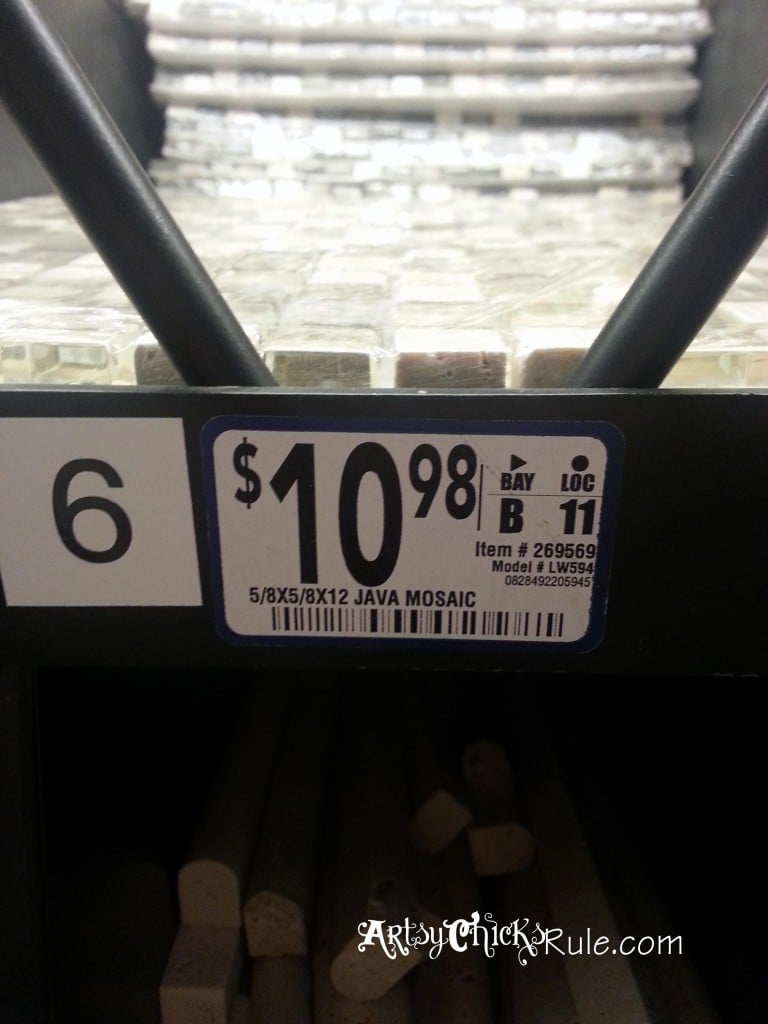
And as you can see from the first picture, I chose to add bronze colored medallions…also from Lowe’s.
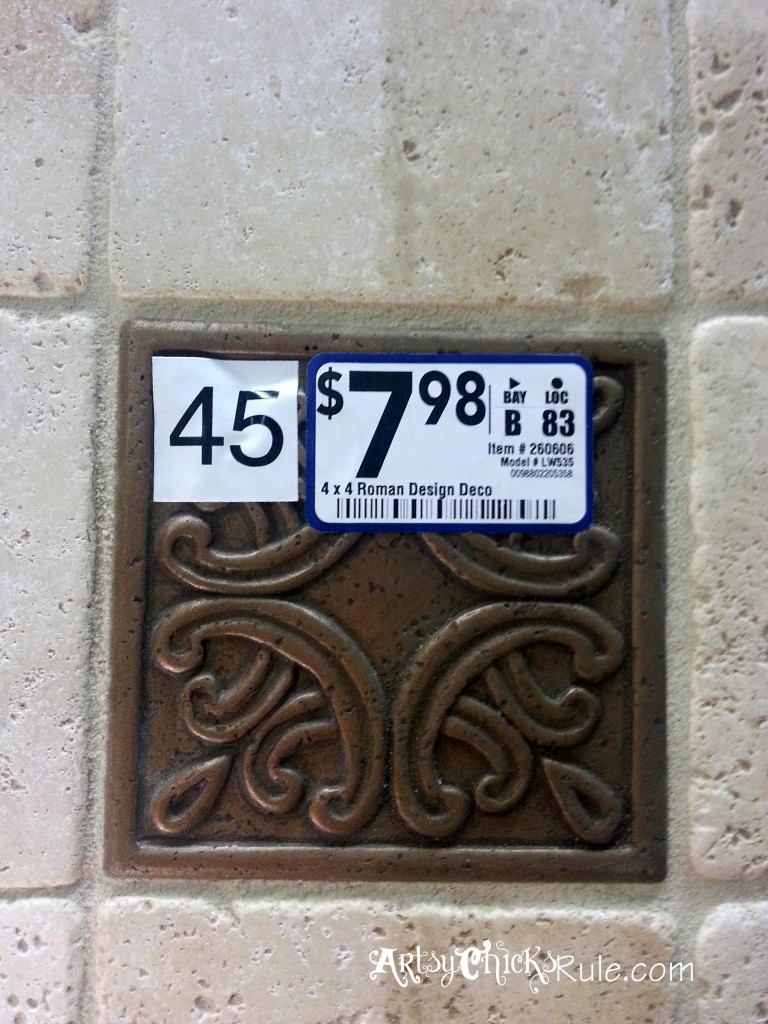
Here is a sample of the finished tile with grout at Lowe’s.
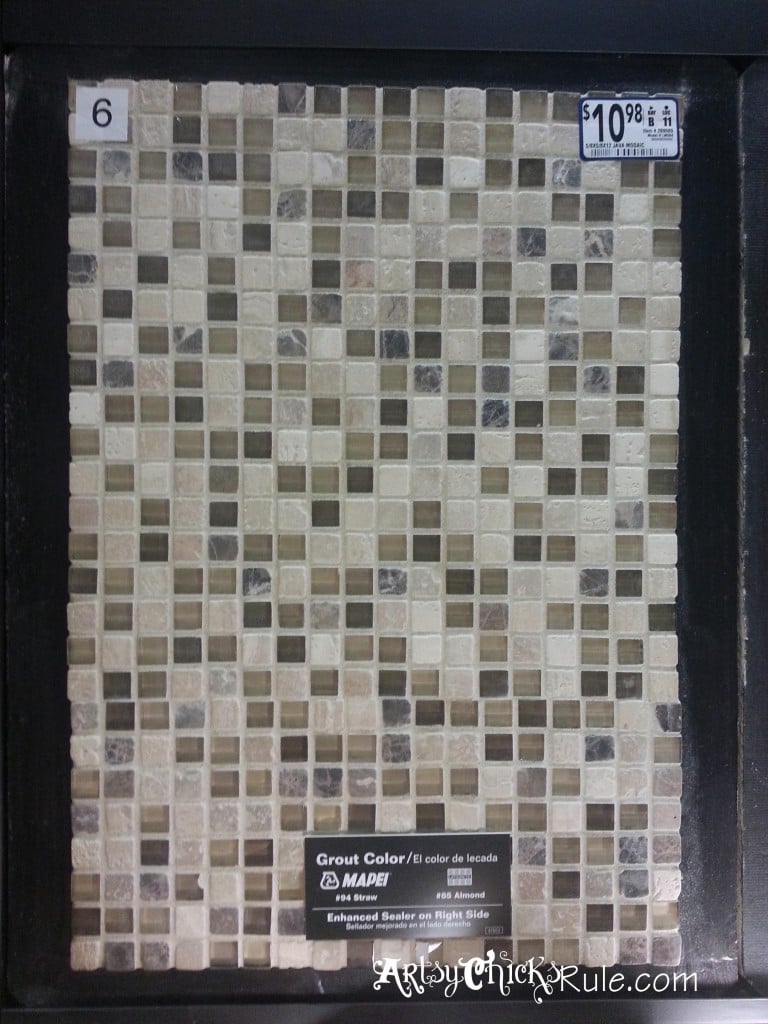
I’m fairly certain this is the grout I used (please forgive me, I don’t have any left so I’m counting on memory!)
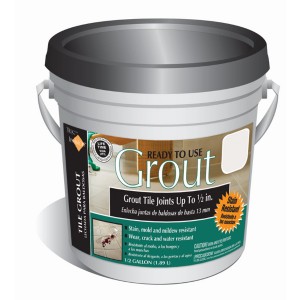
I have no clue what color, but it was pale.
Probably beige, sand or almond in shade. It really made the job easy (I remember that!) because it was ready to use.
No mixing.
Now as I’ve already warned you, I don’t have photos of the actual process but I’m telling you….it was simple, really.
I mean, don’t get me wrong, it was work, it was just very do-able work!
And this is the magic.
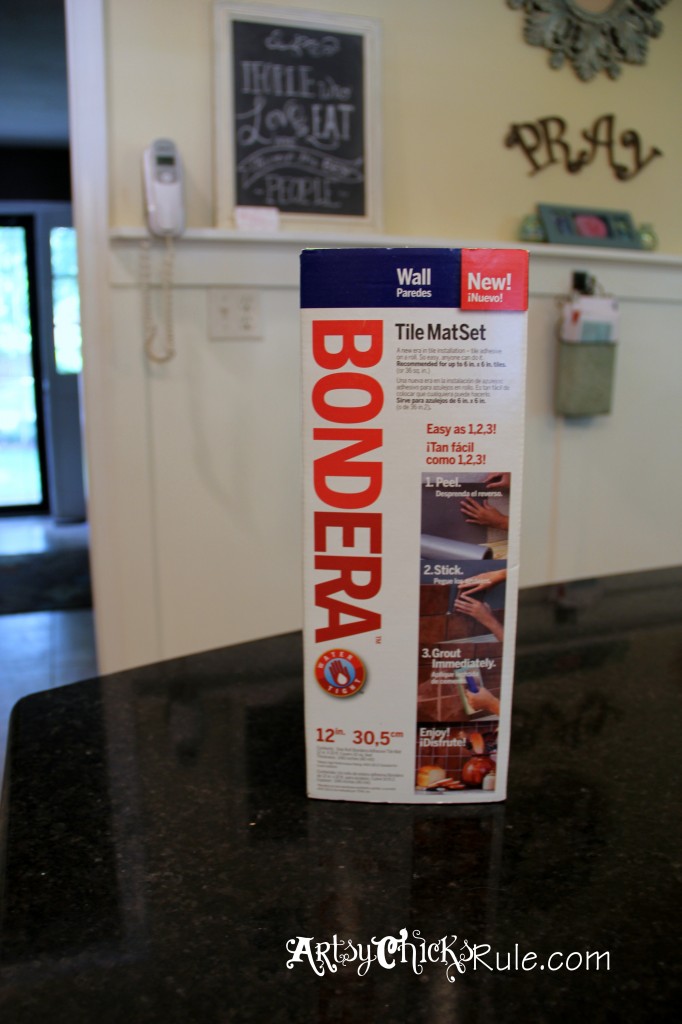
Well, it’s not really magic but it IS sticky. Like super, crazy, ridiculously sticky.
As it should be.
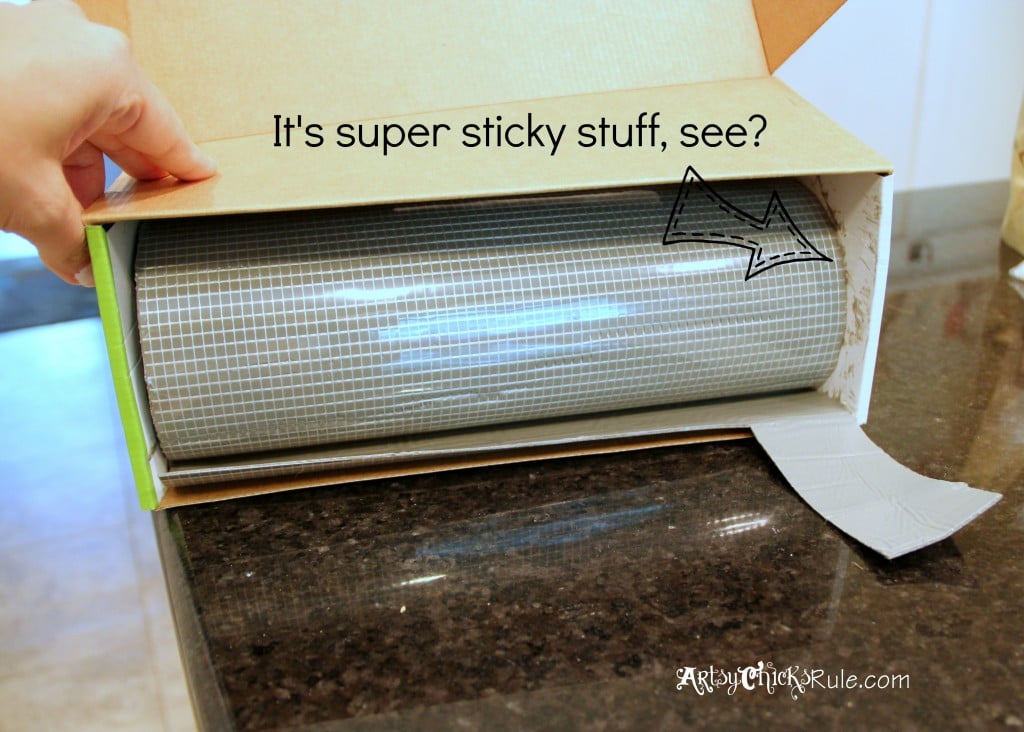
See? I couldn’t even pull it out of the box because it was stuck! But it’s been there for 2 years like that so it didn’t want to budge.
Read the directions on the box.
Cut to fit.
Peel backing.
Apply to wall…that’s the gist anyway.
You get the idea.
Easy.
We’ve used regular mortar and grout to tile a bathroom floor and honestly I did not want to mess with all that again.
So the helpful guy at my local Lowe’s showed me this product and I thought I’d give it a try.
And the tile I chose was really easy to work with too since it came in sheets with no large tiles to cut to fit.
The Process:
I cut and measured every single piece the night before. (of the Bondera and the tile sheets) Then I laid them out along the entire counter where they went.
The next morning I started applying.
Now did I mention how incredibly sticky that Bondera stuff is?? Yes, I did, but listen, this is important. ;)
You know that thin little film that is usually attached to the backs of the tiles?
Look, you can see the edge of it on the corner of the large piece of tile below….see it to the left there?
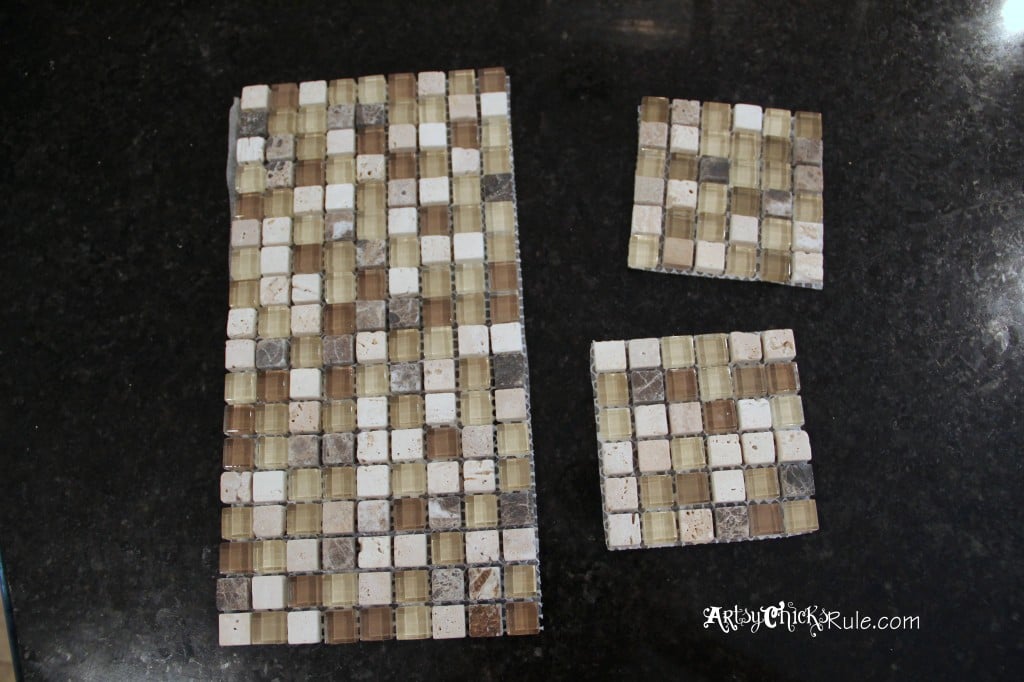
Well, don’t put your Bondera on the wall, then remove the plastic film so the sticky is exposed….and then position your tile sheet over it WITHOUT removing the thin film from the back of the tile sheet. Do not do that!!
You know why? Because then you have a really pretty wall of white film instead of tile.
Ask me how I know. Oops.
And because it is pretty much impossible to remove the Bondera to start again…. I probably wasted over an hour fixing that little snafu alone.
At least.
Anyway, you can see in that picture above the squares I cut out for the medallions to fit.
Pretty easy because it’s all squares!
Just count and cut.
In my kitchen I did not have an area at the top of the tile that needed to be finished off pretty.
All was hidden under cabinets. But if you do, you can use the long, thin tile strips, or even wood, for a finished look.
Here is a picture of how I worked around the trim of the window…..
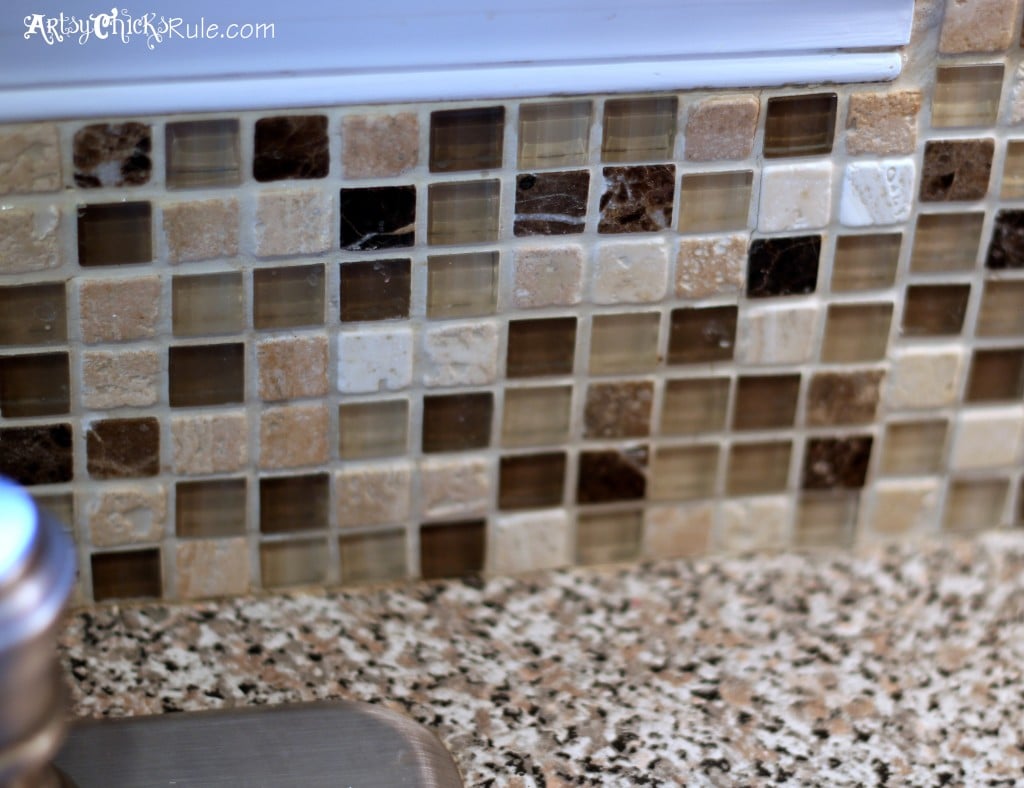
Yes, I know there is a bit of a gap at the corner with a bunch of grout. But trust me, no one notices.
I surely was not going to try to cut a tiny piece of tile to fit there for such a small piece. ;)
As it goes up the wall it evens out since that bottom trim is angled…..as you can see in this photo.
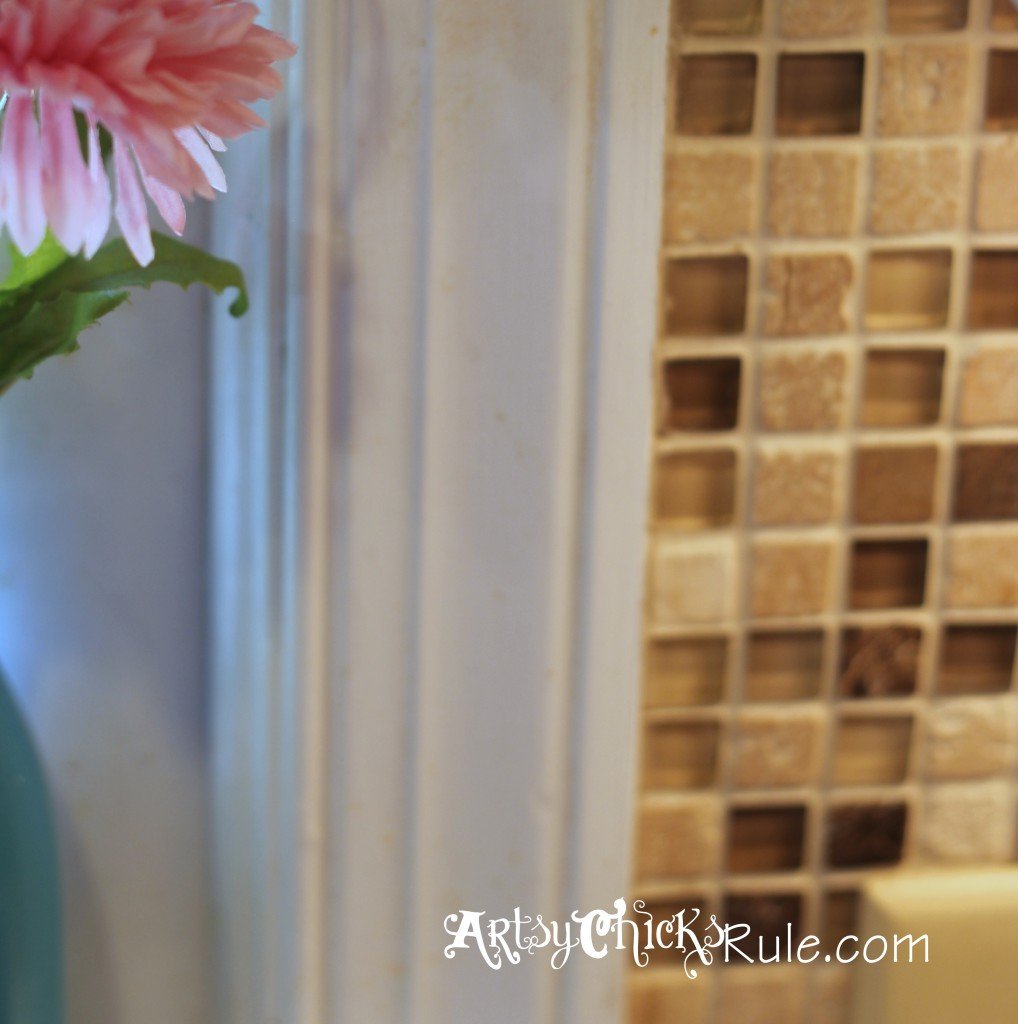
This is the top edge of the tile…..just under the cabinet. There is a slight space because we have under cabinet lighting.
The top edge of the tile cannot really be seen.
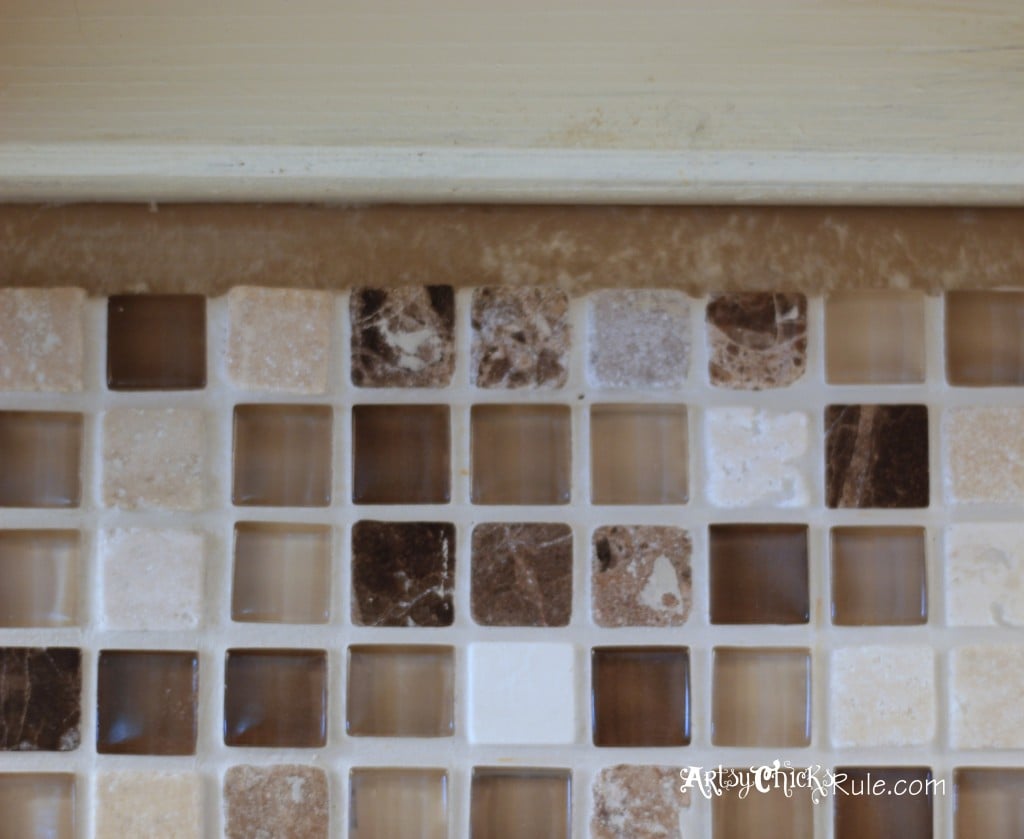
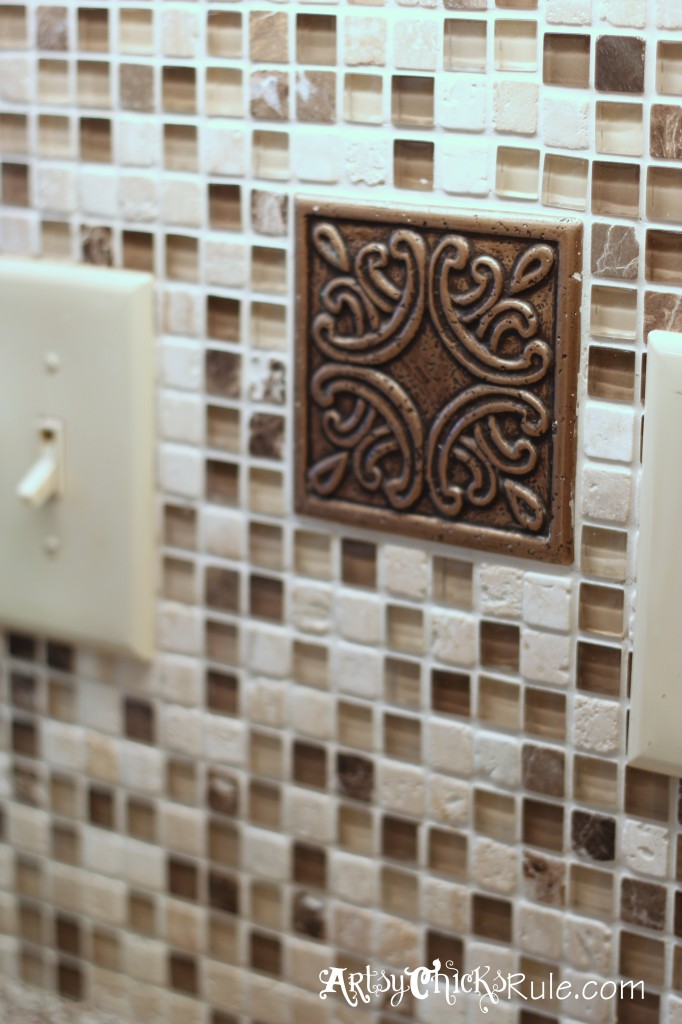
A close up of the medallion and tile…..
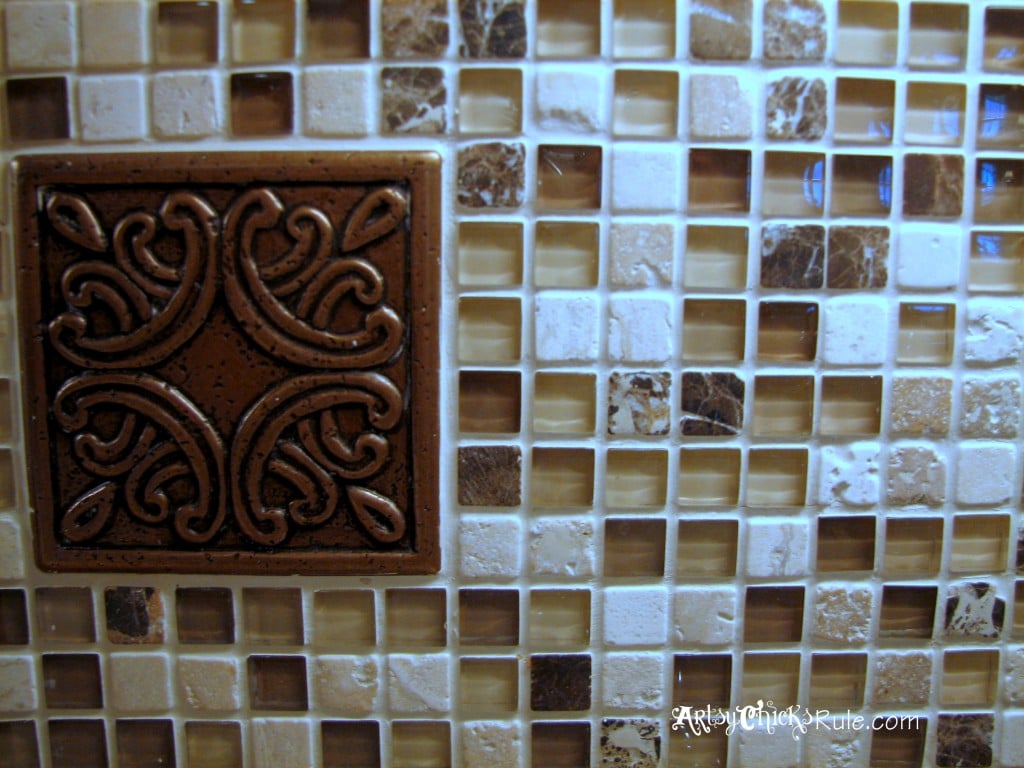
Another….and you can see where I had a little “oopsie” right above the right side of the medallion.
Remember, the Bondera is super sticky stuff so be sure of where you are putting your tiles because they won’t really want to move after.
I’m not worried about it because it’s not really noticeable, mainly because of the style of this particular tile.
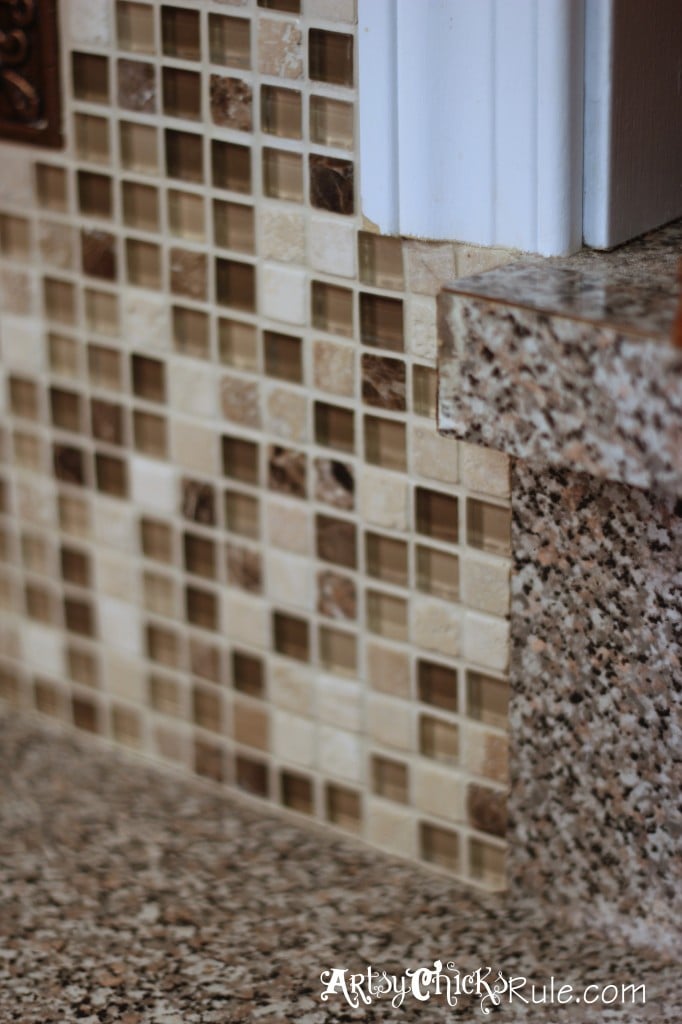
And this is the edge where the tile ends and the bar top begins.
Once you have it all up and stuck to the Bondera you apply the grout. (I think it says you have to apply the grout within 8 hours or something…again, please read the box :) )
After lots of wiping and cleaning the sponge out and wiping some more, you are done!
So there you have it.
PIN this tile backsplash for later!!
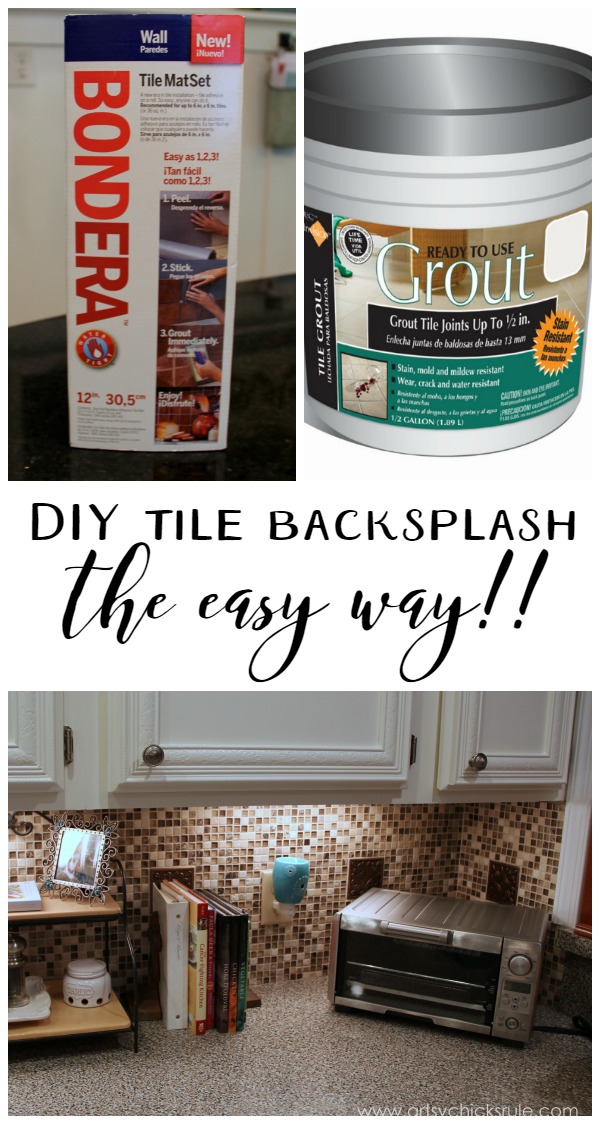
Change the look of your kitchen (or bath) in less than a day (or two) with a new tile backsplash.
What do you think? Is this is a project you would try to tackle? I think anyone can!
EDITED to add, I’ve since re-tiled this space. See it and all the details, here, “Coastal Inspired Tile Backsplash“.





looks fabulous!
Thanks Anne! :)
I loved tiled backsplashes…I eventually want to tile the splash in the new kitchen, but I know I’ll have to wait awhile and make SURE it’s what I want because it’s such a commitment! I know me, and I’d no more than get something put up and I’ll wish I’d done something different. And I know my husband would choke me to death if I ever suggested changing it down the road. Choke. To. Death.
Yours looks awesome, and I’ve looked at that same tile before! And I love that you did it yourself without any Manly McManlykins around. :)
-andi
Hi Andi!
I so get that, trust me! I’m in a constant state of change around here. ;) But I still love the tile so we are good there…for now anyway. And thanks so much, yep, this was an easy one to complete all by my little ole self! He went to work…and came home to a gorgeous new tiled backsplash. Most days he comes home to half painted walls, furniture or stuff moved all round. ;)
Nancy
Thank you, Nancy, for posting this! It really does look gorgeous and you did a fantastic job! I can’t wait to tile my back splash and I may use this very same tile…. I’m still stuck between using this and white subway tile. Can I use the Bondera on that as well?
Thanks!
Hey Karen! I hope it helps with your project. I sure wish I had taken pictures during to share here. I think either tile will look great. The white subway tiles are so nice and clean looking. I do love the multi of this one though. I would imagine the Bondera would work well with those as well. I would double check with the guys at Lowe’s though. I’ve only done this tile job with it so far although I do have some ideas stirring around in my head. ;) I’d love to see it when it’s done whichever tile you choose!
Nancy
I work at Home Depot as a Flooring Specialist, which includes tile floors, backsplash, bath, etc. I am assuming Bondera is similar to SimpleMat at THD. You can use it to install most any tile, as long as it is NOT in a wet area (shower, outdoors, pool, etc.). It is also NOT made for floors! It is great for tile surround mirrors too! Many DIYers love it because you can grout it the same day! When I teach a tiling class, it usually sells itself! Nancy, your backsplash looks amazing!
Hi Gina,
Yes, I think it is similar to that. THD used to carry Bondera (them or Lowe’s, or both, I don’t remember which I purchased it at now).
I loved the ease of using it! :)
And thank you for the nice compliment!
Nancy
Can you put this Bondera over a coat of paint on the wall? Or will it pull the paint off? I painted over vinyl covered sheetrock (using primer). I’m just wondering if this will pull the paint off and fall off. Thanks so much.
Hi Terry,
I put it over painted drywall so I imagine it should work fine! It didn’t pull the paint off of mine. It stuck very well. (very! ;) ) Nancy
Looks amazing & what oops?! If someone is looking that closely they have issues. We’re thinking the faux stone and I will certainly remember (write down) to check out the Bondera.
Aww thanks so much Ellen! :) Oh, I love faux stone look. Make sure you send a pic when it’s finished! :) Nancy
Your back splash looks beautiful Nancy! I can’t believe you got it done that fast! I never heard of that Bondera stuff but I may have to check it out, I am using marble subway tiles for my back splash in the kitchen this bondera stuff sounds so much faster and easier then the traditional route. I LOVE your cabinets that molding is gorgeous on them :)
Thank you Dria! I did, but I’m like that!!lol ;) Hyper and determined! Thank you! Those cabinets are circa 1978 and originally a very dark stain (in a very dark kitchen) and flat fronted. I had the idea to dress them up with some pretty trim from Lowe’s…and hubby cut and glued them to the fronts of the cabinets. 9 years and still looking good! :) Nancy
Nancy, this is so beautiful and extremely timely…I am giving thought to removing wall paper and putting up tile or something. I have looked at Weathered Stone, which is actually like a paper that you cut to size (large tile size…small tile size, squares, rectangles, whatever,) then, stick up and grout. Not sure which way I will go, but you sure gave me some food for thought. I am impressed with your outcome. Tell me, tho….was that medallion tile $7.97 EACH? Yikes!
Hi Teri,
Oh those tiles sound like something we used on our floors. Tiles that you peel and stick and then grout. Either way I’m sure it will look fabulous! And yes, that is the price on the medallions probably because they are decorative pieces. I did this project 2 years ago and don’t remember the exact price I paid…this picture was taken just recently so they may have increased in price since then! ;) Nancy
Hi! Great job – you should be so proud of yourself! I stay away from complicated tile stuff myself- I did my backsplash in faux tile – using a few textures and taping out the grout lines and troweling on the texture. Came out great – toughest part was the taping!
Linda
Hi Linda! Thanks so much! :) Ohh yours sounds interesting! And yes, it’s always the prep work that gets ya! ;) Nancy
Wonderful tips Dria, and I bet this would work really well for mosaics on tabletops!
This looks absolutely stunning! I can’t believe how quickly you finished it either, maybe you need to take on a kitchen redo challenge on HGTV star :)
~Katie @ Upcycled Treasures
Thanks so much Katie! :) Aww so sweet!! Can you imagine??!! That would be so fun AND nerve wracking at the same time!lol
Beautiful finished backsplash! Item been trying to decide what to do with my plain white walls. Thank you for the easy steps to follow.
Hi Janet, Thanks so much! And you are welcome, I am so glad it was helpful! :) Nancy
Nancy, your backsplash looks so beautifu! I so want to tackle this in my kitchen but I’ve been dragging my feet because I’m worried about pulling out the little 3-in piece of granite that’s there now. I seriously probably just going for it on a weekly basis but at this point I think I’ll wait until for my 3 girls go Ja k to school at the end of Aug.
Cheers!
Hi Therese :) Oh yes, I would be a bit nervous too but I bet you can remove that and put the tile up without too much problem! And I’m with ya on waiting until school starts! ;)
Awesome job Nancy!! Your backsplash looks fantastic and I agree with Ellen, there’s no oops at all. The medallions were a great touch. Goes to show that with some creativity and the latest DIY stuff at the store we can turn our homes into what we imagined they’d look like. Keep up the superb work :)
Thanks so much Jeff! :) I totally agree with you…anyone can do this! And thank you for the sweet words on my “oops”! ;) Nancy
Looks great! And sounds easy, but I have one question: Are you saying that one should remove the mesh backing from the tile? I love the idea of using something like Bondera instead of thinset, but if it means placing tiles one by one, it doesn’t seem worth it. So, I guess I’m a little unclear about the process at that point. Any clarification is much appreciated!
Hi Jeremy,
I’m so sorry! No, don’t remove the mesh backing. No way would I place all those tiny tiles one by one! ;) What I was referring to was the thin film that is on the back of the mesh. It sticks (statically, if I remember right!) and I placed the tile without removing it on one piece and the only thing that stuck to the Bondera was that thin film! Hope that makes sense …sorry about the confusion. Nancy
Thanks so much! I’m gonna tackle my backsplash soon. Just trying to get geared up for it.
Oops You Have Already Answered My Question, Lol. So ThankYou. I Hope Mine Looks As Goods As Yours!
Great job, Nancy! I really love the medallions.
Thanks Denyse!!
I’ve never tried Bondera, but anything that keeps me from having to use mastik is a really good thing. Fabulous tile job, my motto when tiling is, if grout can fill it, then it’s not a mistake :-)
‘
Aw thanks! :) It was super easy to use and I think you should give it a try if you have a tile job you need to do!
Great job! We used Bondera for our shower and absolutely loved it! Now we’re thinking about using tile for our kitchen countertop. Goodbye laminate!
Hi Marty! I had read you can use it in showers too…that’s good to know!! We still have a master bath that needs a complete renovation!! (it keeps getting pushed to the bottom of the list!) And we are doing a fully tiled shower (replacement). Glad to hear it went well in that application too!
It’s so pretty, Nancy! I would LOVE to do this to ours, but our current (ugly) backsplash has such thick grout that I’m afraid of the removal process. :-/ After seeing how gorgeous yours is, though, I may just have to attempt it. Hope you’re having a great week!
~Abby =)
Love this look! The meathead who re-did the kitchen before I bought my house used the matching laminate on the counters and the backsplash. It is very easy to keep clean but UGLY! (Faux granite looks like faux!) I had just been reading about the Bondera product. I know how to lay tile but was not excited about the prospect of tiling over the laminate. Looks like the Bondera will stick to both the wall and tile making the job much easier.
What was on your wall before you added the tile? Thanks-Lori
Lori,
Painted drywall. Has held up wonderfully. Hope that helps. nancy
it looks wonderful Nancy! I have been tiling for years but not for the past 8 at least…so I have never heard of Bondera! What a helpful product! I think it should really take the “scare” out of tiling for sure! Love the new backsplash!
Nancy,
I love the backsplash what a great job! I love your blog and love following you in Instagram too just wanted you to know I have added you on the sidebar of my blog so I can get here every day lol!
Have a great day!
Sandra
The Adored Home
Great tile job you did there, Nancy! I love the tiles you chose.
Bondera works great for almost any tiling project. It repels water, it’s mold resistant and it’s eco-friendly. Anyone can use Bondera because it is very easy to use. As long as it’s used on kitchen walls, backsplashes and countertops; bathroom walls and countertops; tub and shower surrounds; and other horizontal or vertical interior spaces it will work great.
Also, Bondera can be applied to any clean, flat, smooth and stable surface including drywall, plywood (horizontal applications only), cement board, existing tile, metal, laminate, Corian and Formica.
Here is the company’s website http://www.bonderatilematset.com/index.html and their Facebook Page https://www.facebook.com/BonderaTileMatSet.
Thanks so much Christine :) I loved using it and have been very happy with it. Nancy
Great job…thanks for sharing!
Thank you :)
Beautiful! So you put the Bondera on the wall and leave the film on the back of the tiles? Attach the non-sticky back of the tiles to the stick Bondera? Thank you for posting this!
Hi, thank you. :) No, the film that is on the back of the tiles needs to be removed. (it comes off easily…the rest of the “mesh” on the back of the tiles stay) Hope that makes sense. Nancy
Nancy,
Question for you: How is the Bondera Holding up? Still sticking to the walls? Just curious as to how it help up after installation? Also, any issues in the wet area around the sink? It seems a great idea, was just wondering how it held up so far?
Hi Mike,
It has held up fantastically actually. I have had no problems with it anywhere (sink or otherwise). It has been over 2 years since installation. I am pretty sure this product can be used in shower stalls (or they have a different Bondera product for that but I’m fairly certain I’ve seen it) as well so water should not be problem for it.
HI,
Great job. I am wanting to tackle my backsplash also and actually picked out some sheets at home depot I liked. Using that product sounds so easy. My question is did you have to cut around outlets. If so, how? Also did your outlets go back on easily or did you have to use an extender?
Thank you
Hi Toni,
Thanks..this product was super easy to use. :) As far as the outlets go, I just cut enough tile out so that the outlet (inside part) was open and the cover plate still covered the tile. I did not have to use an extender of any sort, I just adjusted the outlet out a bit to accommodate the space. The Bondera is not thick and the tiles were not very thick either so there really wasn’t that much of an adjustment.
Hope that helps
Nancy
Help!! lol You didn’t have to cut any of the tiles? How did you get it all to fit so perfectly. I’m a little burnt out, french fried and tired. I’ll keep reading. I’m perplexed about the wall outlets and any area around window sills.
You didn’t have to cut one tile LOL. Oh boy.
I didn’t really have to cut any. It looks as if I did nip the corner off of the 2 tiny pieces on either side of the window sill(I did this project 2 and 1/2 years ago now and wasn’t blogging then). But for the rest of that area I just filled it in with the grout instead of trying to cut those tiny pieces. (probably not the best idea but it wasn’t a large space as seen in a picture above). The rest of the area was square so no need to cut any tiles.
To cut out for the medallions I just cut the mesh (that held the little tiles together) in between the tiles to fit. Wall outlets were the same, cutting the mesh in between the tiles to fit. (you can see in one of the pictures above what I’m talking about..those are the pieces I cut out for the medallions to fit in) It truly was pretty simple. :)
Larger tiles would have been a bit tougher I think.
Hope that helps some! :)
Nancy
Nancy, this is awesome! So glad to read your tips. Thank you!
You are welcome Kelly!
Nancy
Finally got around to completing my remodel job after reading your post. It was so inspiring, and the adhesive was not nearly as intimidating as mortar. — http:// wishiniwasstampin.blogspot.com
Hi Kelly,
OH that’s great!! And I totally agree!! We have another tile job to do in our master bath and I may do it this same way!
Nancy
And I so wish I had been blogging then …or had taken pictures during the process! A picture is always worth a thousand words!! :) I may do this again in our Master Bath renovation and will most definitely take pictures of the entire process then!
Nancy
Oh Nancy, you have no idea what Pinterest and all the great bloggers like yourself who support us women, with your ‘go for it’ attitude. Not to mention the money saved. lol Thank you for sharing so freely. I <3 ya's all.
I'm a bit over the hill, 64 and did a lot of DIY stuff but, without the internet, blogs, etc. Wow, it's opened up a whole new world for me. I'm still in the race LOL!!!
Rosemary,
Oh I know!! Giving us all kinds of ideas! ;) (I know my husband is thrilled by that fact!ha)
Yes, we’ve done it all here in the last 10 years of living in this house. I am not sure I could pay someone to do it now!! I’m jaded. ;) Too much money saved to give someone my money to do what I know we can do ourselves.
And no way are you over the hill!! :)
Hope you have a fabulous week!
Nancy
Ok, maybe just a small speed bump. LOL You girls make me so proud to be a women. As Yoda said, ‘Do or No Do, there is no ‘try’. You keep rockin and keep doin. Going to check out Lowe’s and Home Depot tomorrow. :D
My spousal unit is used to this now. This is my last house, not a fixer but, you know we ‘doing types’ have to put our mark on any place we move into. This is my 7th house in 3 different states. The longest fixer was a 16 year commitment. When I got it jusssst right. My husbands company went belly up and we’ve moved from NJ to NC. Oh well, new projects such as the tile and Bondera.
You have a great week, too. And all you Artsy Chicks, you DO rule.
Oh isn’t that how it always goes?!! We say we’ll finally finish up here and move. (which we most likely will once my youngest is done with high school(2 more years)…to a ONE story! ;) )
And yes, there are always projects that can be done! ;)
Have a great weekend! (almost!)
Nancy
How beautiful! I love that Bonera product.
hmmmmmm…. Maybe I can try this, to…
Thanks so much Debbie!! The Bondera certainly made it much, much easier! :)
Nancy
We just got done installing backsplash ourselves and I couldn’t convice the hubs that we didn’t need edging….He won out – http://sheekgeek.org/2014/adamsheekgeek/back-splash-edging-tips
Hi Jessica,
We had it originally but took it down when I put the tile back splash up! I thought it would give a cleaner look with the tile…and maybe look a bit more like granite. ;)
Nancy
I agree :). I showed these pictures to my husband to prove it CAN look good without it!
Boys!!!! ;)
Nancy I JUST finished mine today!!! Seriously, like an hour ago! I googled finishing backsplash from the wall to the countertop (which I think I’m just going to use a thin line of caulk behind the stove) and your blog came up. I’m a first time visitor, and I must say, I absolutely LOVE your blog!! We have a LOT in common! ☺️ I saw you mentioned you MAY do wood countertops?? A few weeks ago my husband and I put in wood countertops and just went right on top of our laminate with poplar wood. It’s a sturdier wood like oak, so it’s a little more expensive. The only reason we went with that one is because originally we planned on pulling it up, but realized we didn’t need to until after the fact! You can see them here on Instagram http://instagram.com/p/yD5BA7OPFb/
Once I’m finished remodeling the kitchen, (I’m also using chalk paint on my cabinets as well), I’ll do a post on the whole transformation. I just set up my blog this week!
Hi Amber!
That’s so great.:) And thank you!!!
Oh, they look great. We have not decided if we will continue with the wood. We may leave what is there for now instead. (so many projects, so little time!;) )
Good luck with your cabinets and new blog! That is exciting. :)
I am getting ready to paint my laundry cabinets again for the 4th time! I think.
Nancy