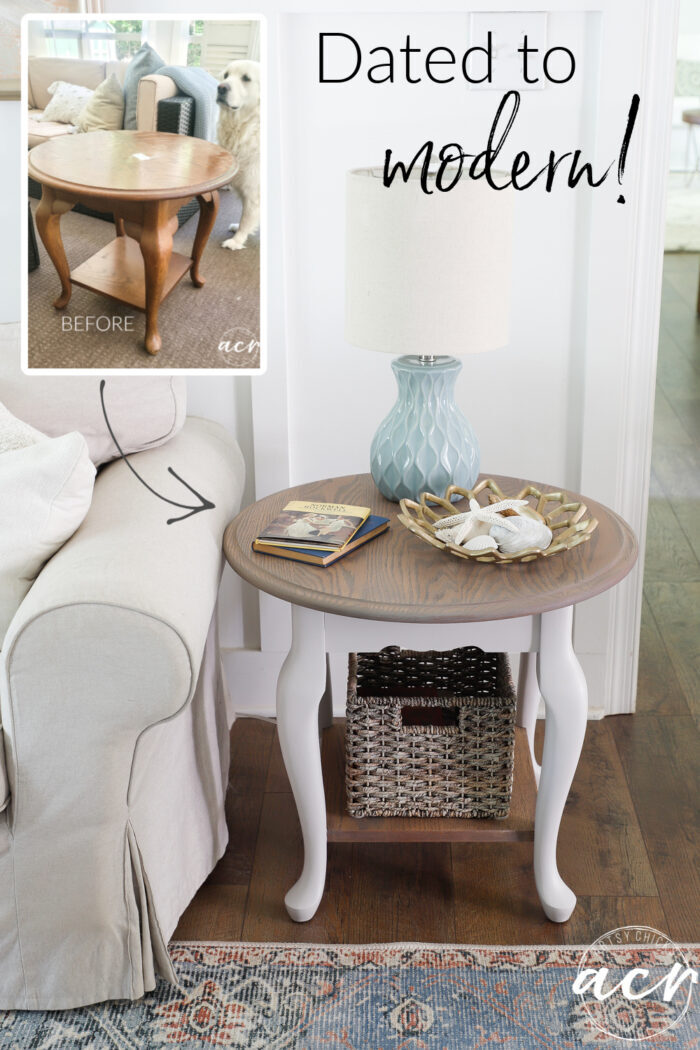
Updated End Table (dated to modern!)
This updated end table went from dated to modern, made simple with the right products!
Hello, my sweet friends!
Today is Trash to Treasure Tuesday and I am so excited to share my latest makeover with you and my friends. Don’t forget, they are sharing theirs too so be sure to scroll all the way down to catch their fun makeovers too.
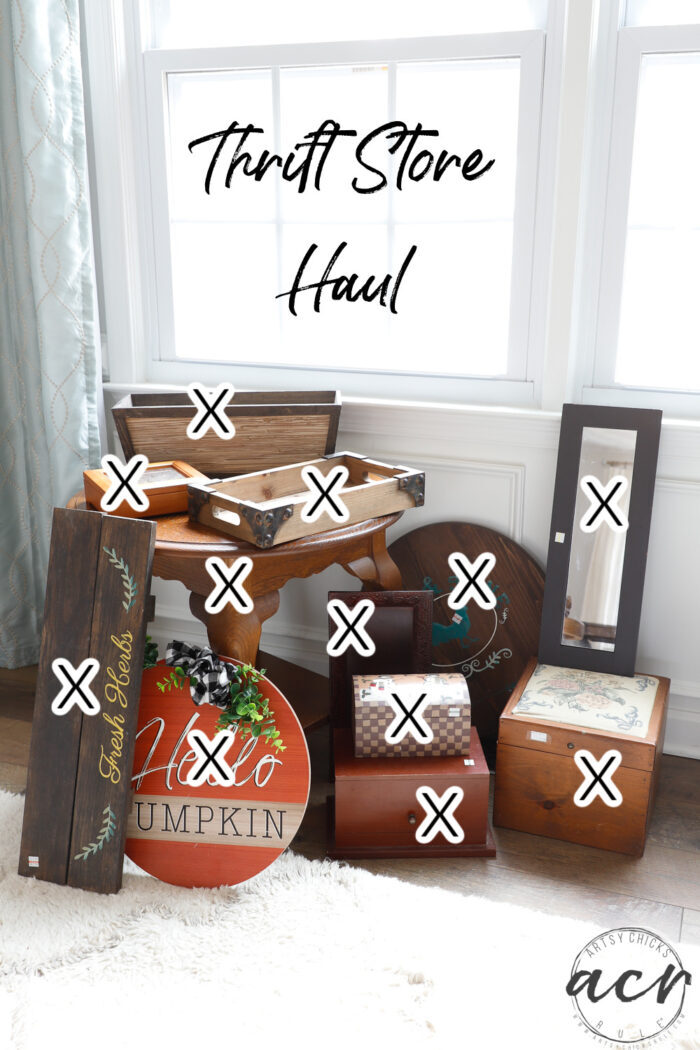
Today I’m sharing the last one from my recent haul…
Done!
Now onto my next one here…
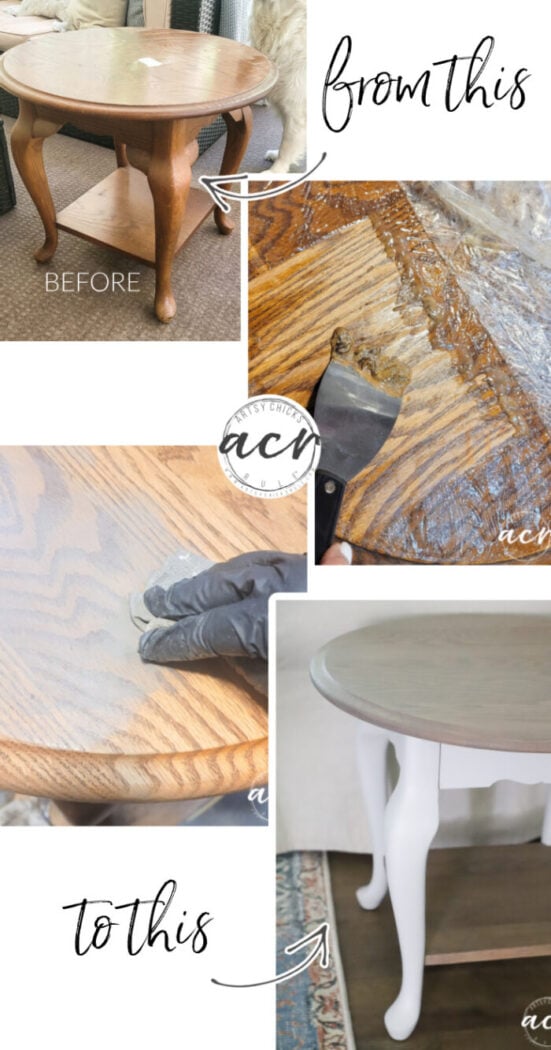
Updated End Table
But today, it’s all about this $8 beauty…
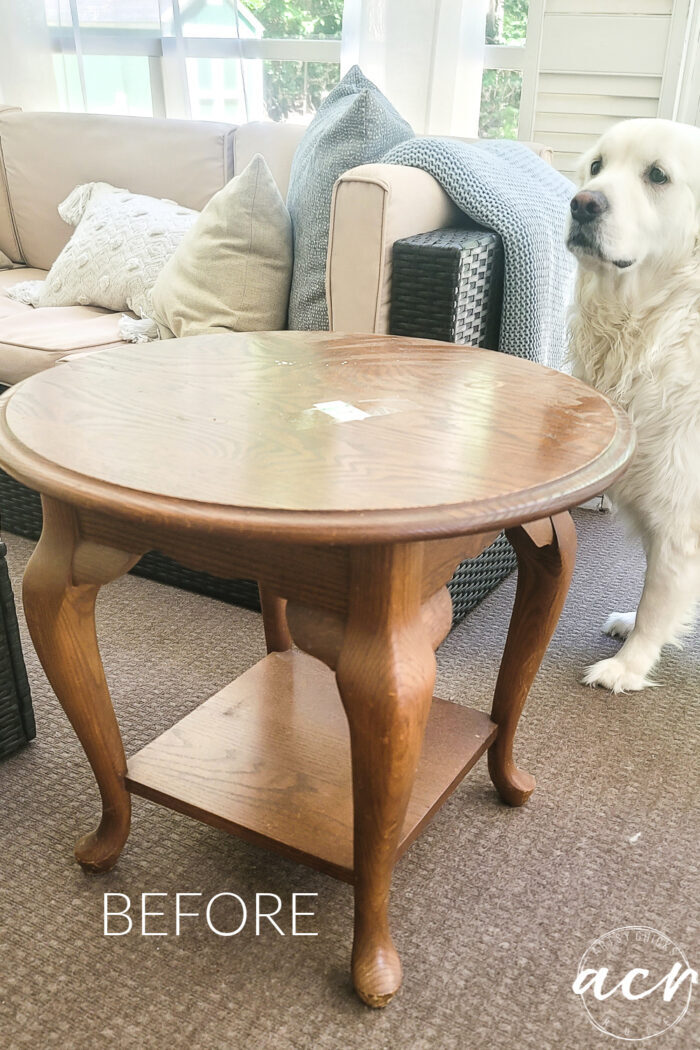
Dated, orange…time for a brand new look.
MATERIALS SOURCE LIST
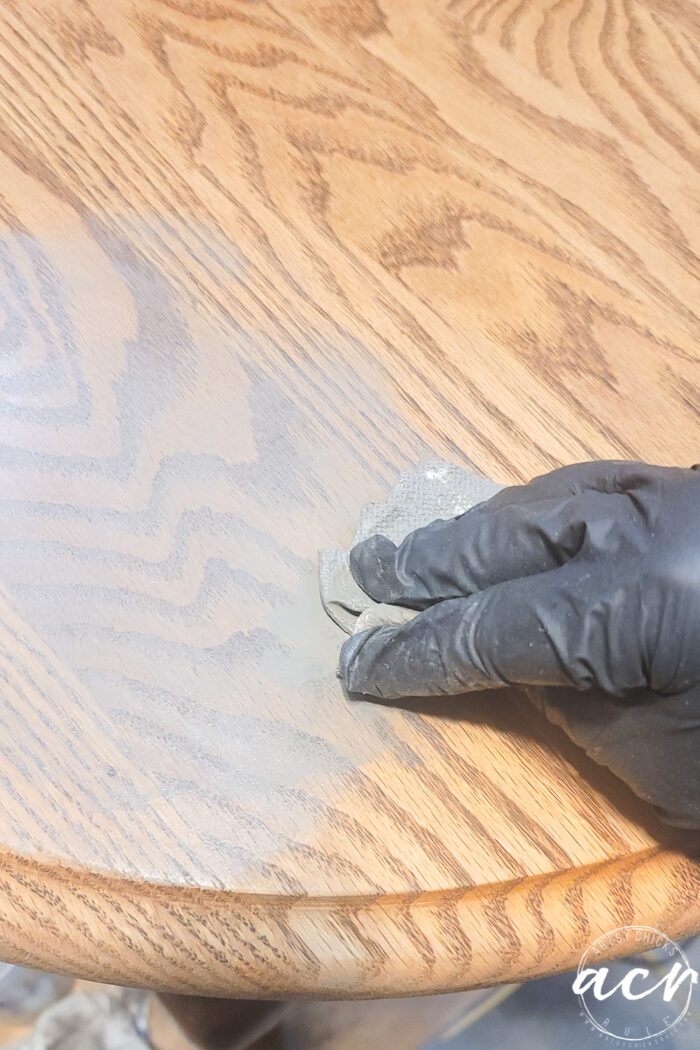
I pulled this from my stash to give it a try.
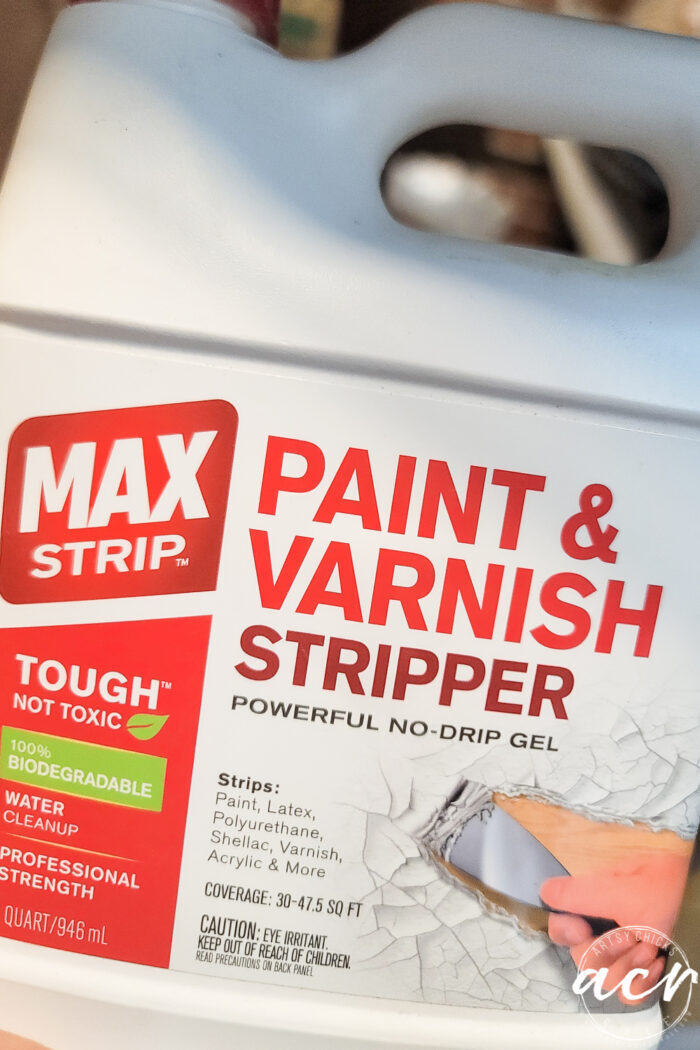
I liked that it was biodegradable AND water cleanup. Yes!
I brushed it on and covered it with plastic wrap then let it sit for an hour or so.
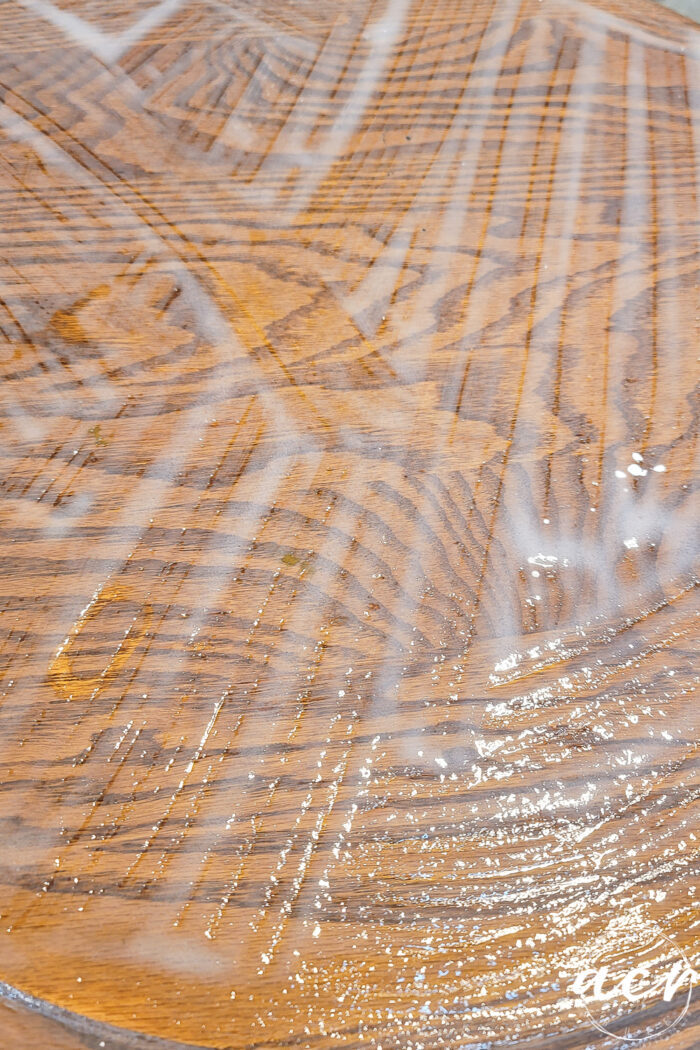
I came back to check and it was working great.
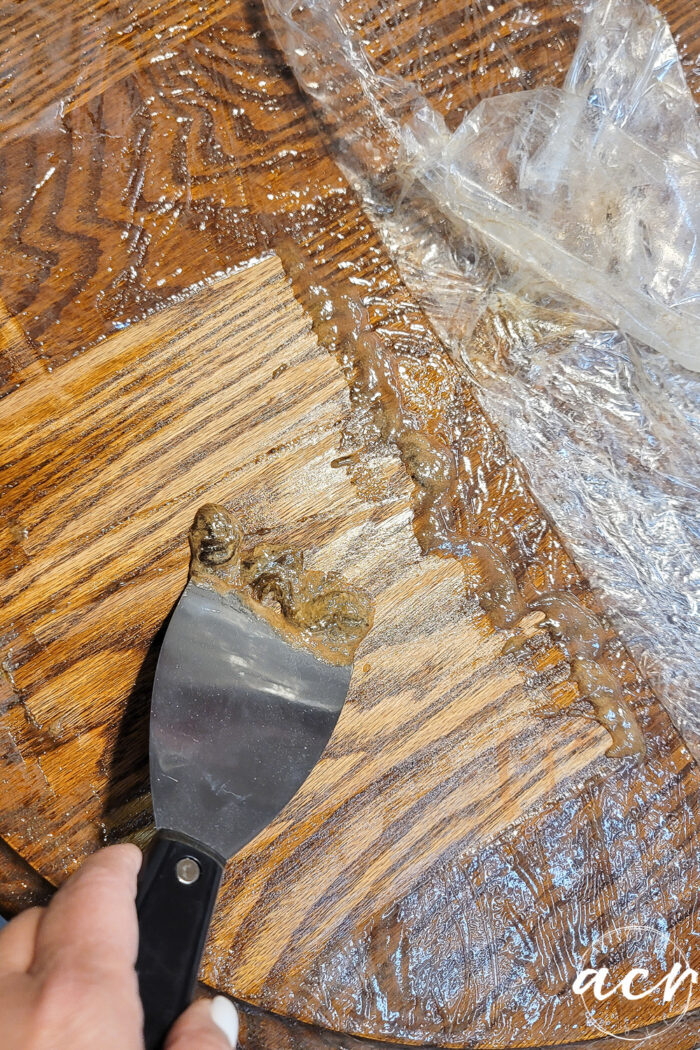
I scraped off all of the finish and got most of the stain out. Awesome.
AND the very best part…I cleaned up the residue with water! That was a major win.
So much easier (and much fewer chemicals) than cleaning up with mineral spirits, etc.
I’ll try it out on something painted next and report back.
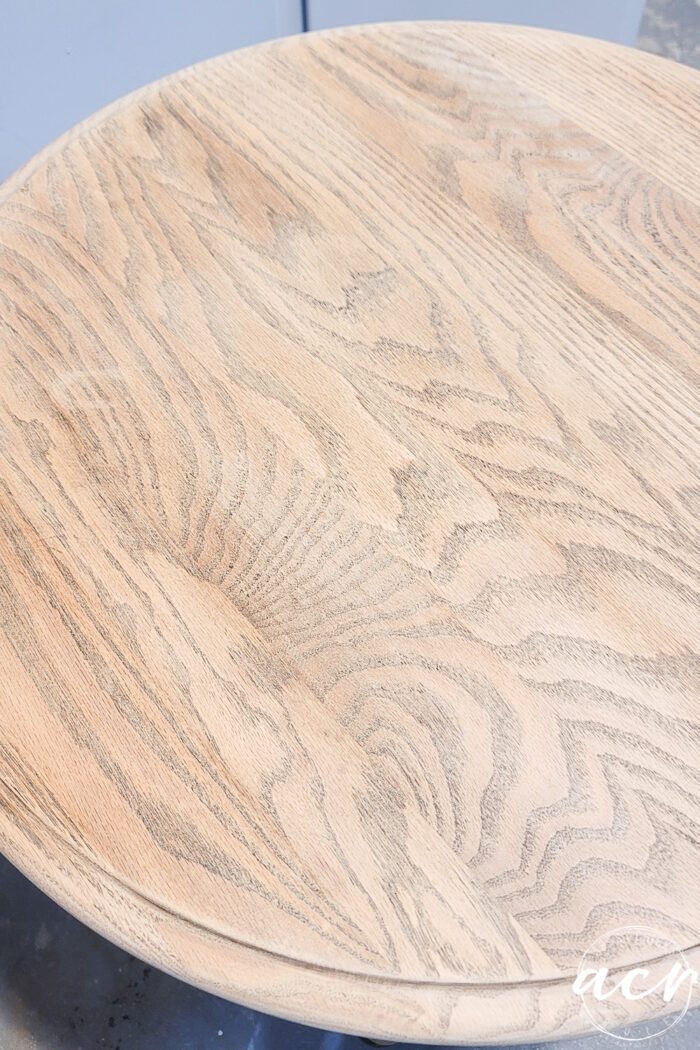
I then sanded the top and bottom shelf.
 \
\
Removing that finish sure saved me a ton of time sanding.
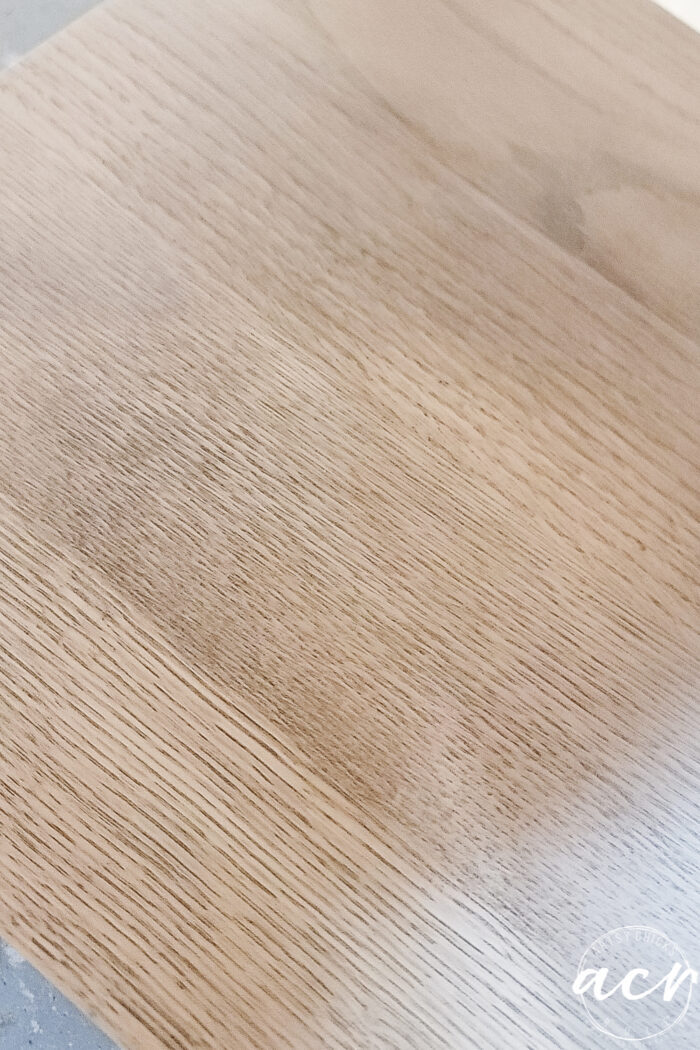
I cleaned up all the dust from sanding and then used my fave, Driftwood Stain & Finishing oil to give it a brand new color and look.
I applied only one coat and let it dry.
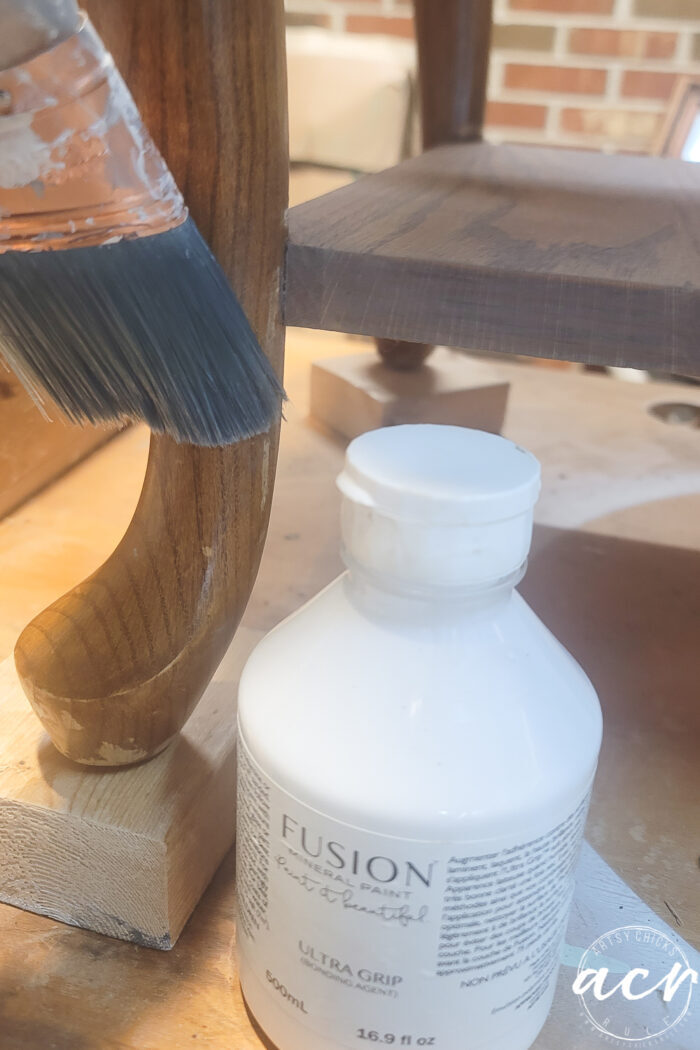
Once it was dry, I cleaned up the legs and the rest of the wood with a TSP alternative. Then I applied Ultra Grip and let it sit for the rest of the afternoon.
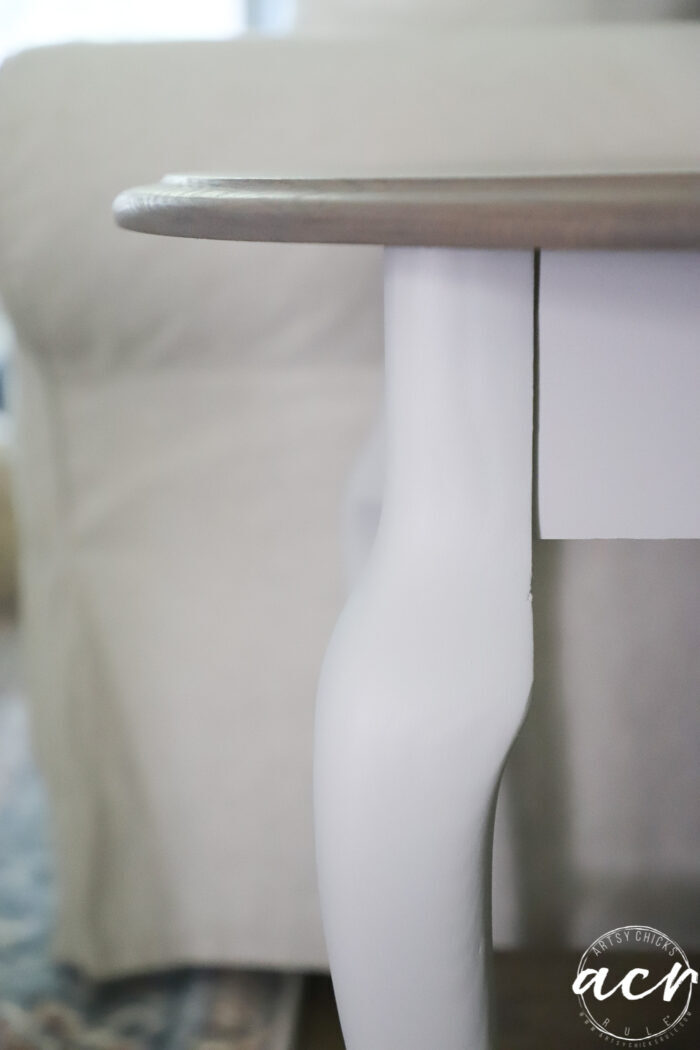
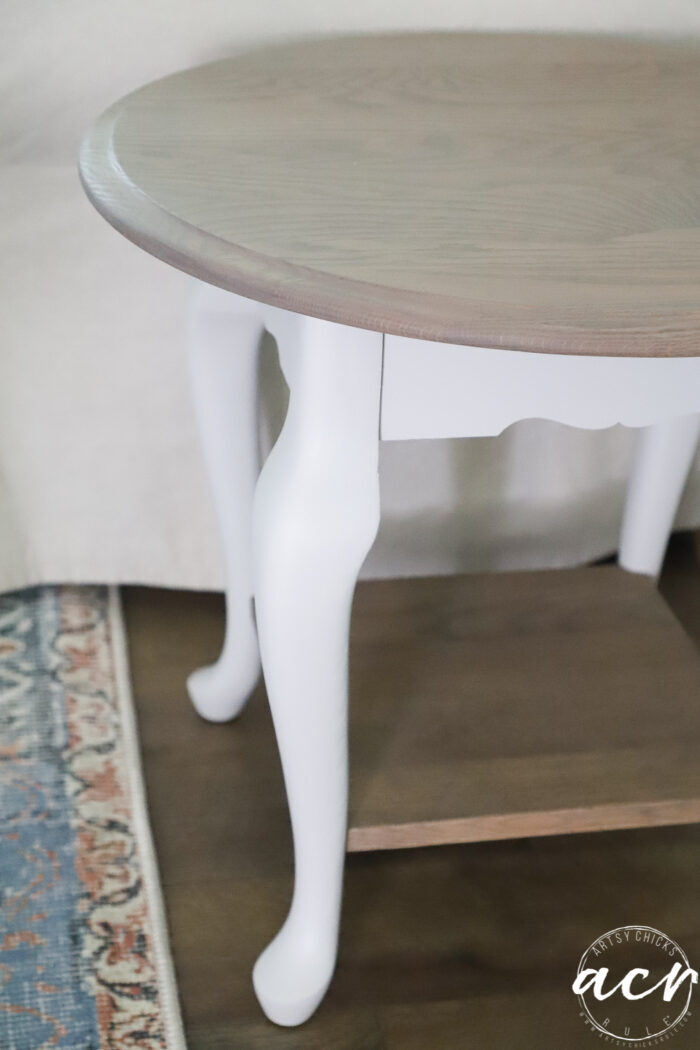
I followed that by taping up the bottom shelf around the legs and painting it in a pretty warm-toned white.
I didn’t want it bright white so this was the perfect color.
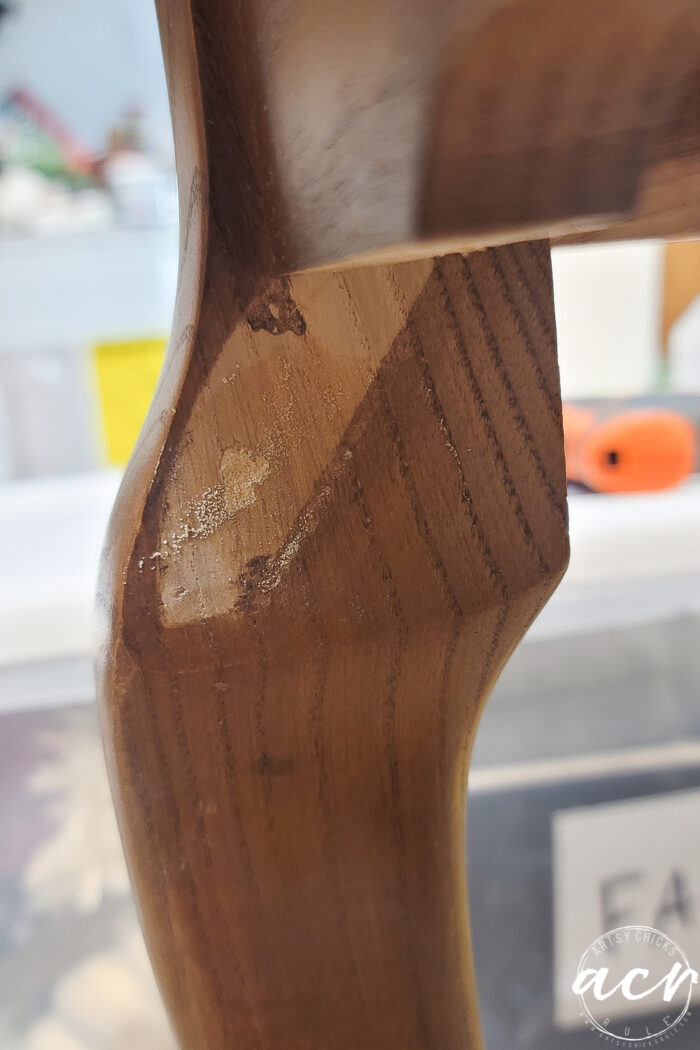
Oh! But as I was cleaning those legs, I realized that it was missing a piece of wood trim. Bummer. (scroll up to the “before” picture to see the pieces that I’m talking about)
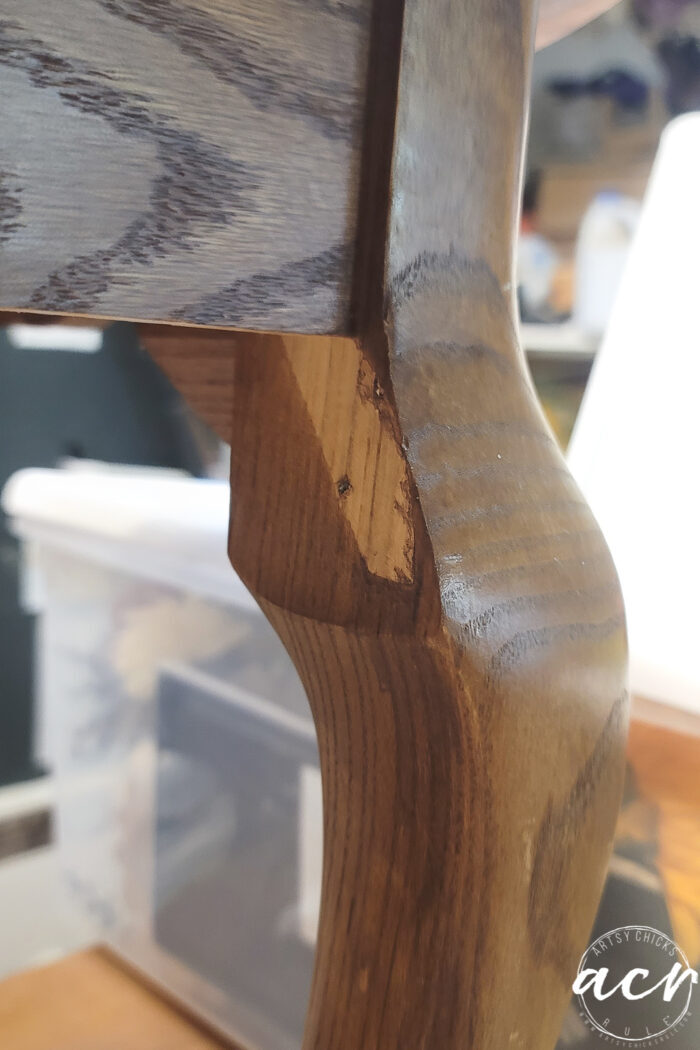
I hadn’t noticed that when I bought it. Oh well, I just decided to remove them all since they weren’t really structurally needed.
And I actually think it looks more modern, less dated, with those gone. So win-win!
I filled the holes leftover with wood putty and sanded them to paint.
I plan to give the entire thing (top and bottom shelf included) a coat or two of Matte Tough Coat. I want to let it cure a bit before applying that though.
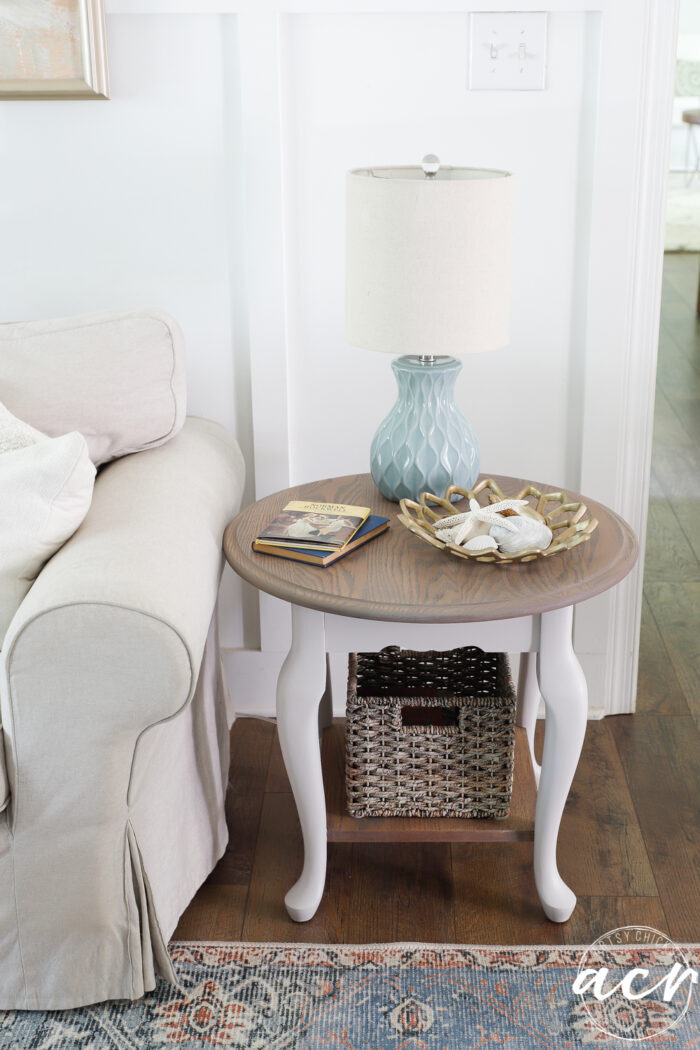
In the meantime, here is the updated end table with its brand new look.
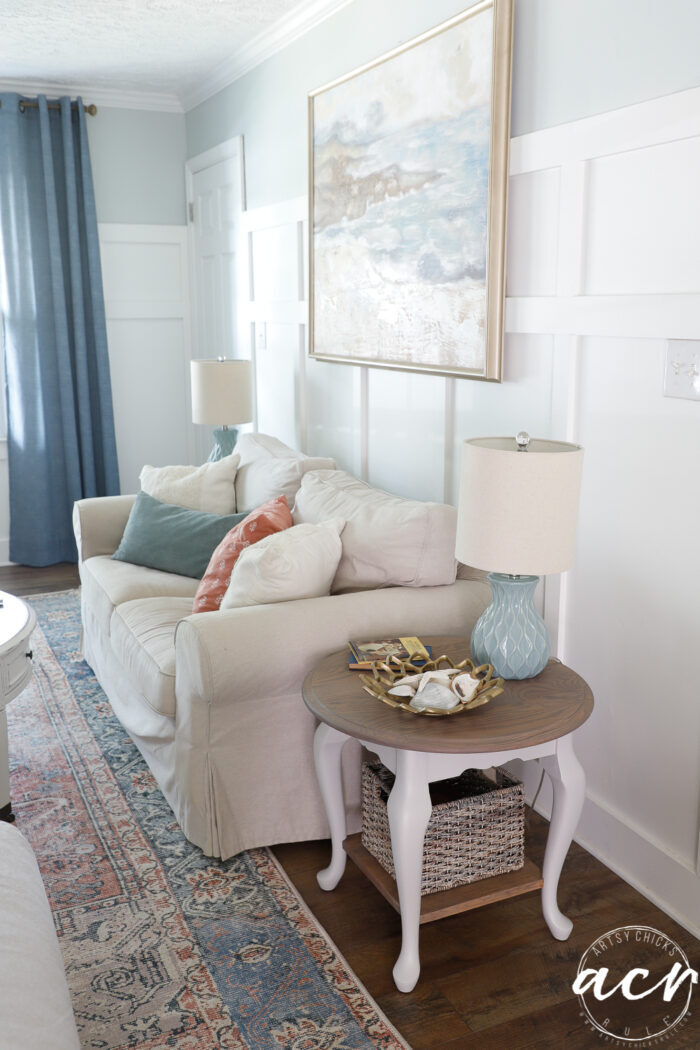
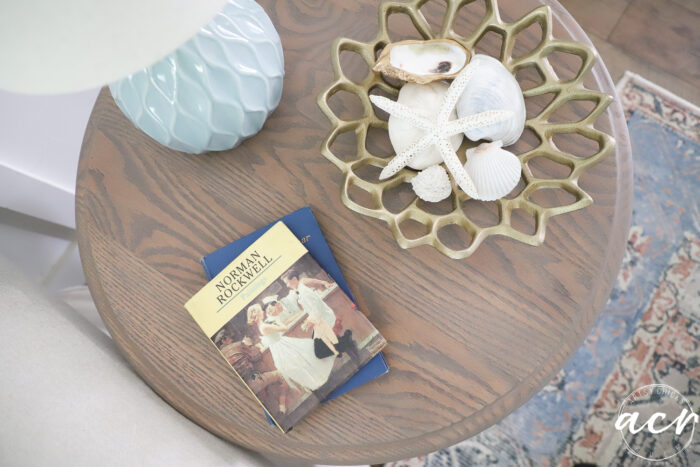
I love the new color the Driftwood stain gave it. It’s a great neutral color.
It’s a favorite of mine. I’ve used it on many pieces now, as a stain and even over paint.
- Driftwood Nightstand Makeover
- Faux Weathered Driftwood Tabletop
- Painted Aqua Console with Stain
- Driftwood Stain Dresser
With the right products, this is a fun and simple makeover!
Have you tried the Driftwood Stain yet? You can find it right here in my shop.
PIN it to save it!
Don’t forget to hop on over and visit my friends below!
Be sure to come back by to see how this one turned out!

UPDATE!! See it now, here!
I hope you have a wonderful week!
xoxo


")


")


You’ve done this dated beauty justice, Nancy. I just adore the finish!
Thank you Larissa!!
I love this little table now! So happy and fresh!!
Thank you, Christina!! Happy weekend!! xoxo
Beautiful ❤️🤗 driftwood is always a wonderful vibe 👍. As long as you don’t move the table all the time.. removing the little blocks won’t matter. But they did add a little endurance stability to the legs.
Now I want to stain everything driftwood😁. 🤔 would a urethane gloss add anything to the look, or ruin it? I found out recently that some model craft people add Pledge floor treatment to their models instead of clear coat. 🤷♂️ But not everyone wants things shiney and with glitter 🙄😁lol. Great job 💐
Thanks, Willie! Yes, true! It feels very sturdy so hopefully it will be okay. :) And yes, Driftwood stain is addicting for sure!! lol Love it! I think a gloss coat could look beautiful, it’s all in what you like I think. Who doesn’t like glitter?! Give me all the sparkle. Ha!! Have a wonderful weekend!
Ooh, clean and bright, Nancy. Love when a minor problem adds to the finished project, too!
Thanks so much, Marcie! Yes to that! xo
I love it Nancy and the grain showing through is fabulous! XOXO
Thank you, Denise! xo
Refreshing Nancy. It gives a nice coastal vibe. I like that you didn’t distress anything-and any time you can get rid of the orange tones is a big win.
Thanks, Niki!! Yes, it really does! And yep, I love a nice clean look sometimes. :) Have a great weekend! xo
Such a nice refreshed finish. You are right – the driftwood stain is a nice soft neutral.
Very nice !
Thank you p! :)
I love it! It reminds me of a piece you might find in a coastal cottage ❤️ Great stain 🌴
Thank you Jen! :)
Oooooh – wow. A solid hardwood table of outstanding beauty for $8 and elbow grease.
That is just awesome. It looks great. Whoo hoo- that’s a big win!
Thanks so much, Michele! Can’t beat 8 EVER! Especially with the price of things these days, right?! Happy weekend to you, friend! xo
SO much better and it looks great with your floors!! XOXO
Thanks, I think so too! :) xo
Such a sweet new look for that dated table! Another beautiful makeover, Nancy! xo
Thanks so much, Jen! xo
LOVE it!!! This one came out great…well they all do!!! It does look better with those wood pieces removed…win~win!!!! I love to see things escape the landfills!!!
Have good weekend….(already again!) xx
Thanks so much, Addie! :) And yes, you and me both!!! Have a wonderful weekend, again, again!! lol xo
Lovely, and such a difference! Would you mind explaining how you scraped the finish off the top where the flat surface curves down to the outer inch or so, and the rounded edge? Also, would you explain how you sanded that area? I’ve never quite understood how to work around this area without damaging the pretty curves. Thank you!
I ended up not removing that because the wood was different there, so it got painted instead. Sanding areas like that you just have to be very careful with the sander and do some by hand. I know they have a sander that is made to do these types of areas (with grooves, etc) but I haven’t tried it yet. I might have to! :)