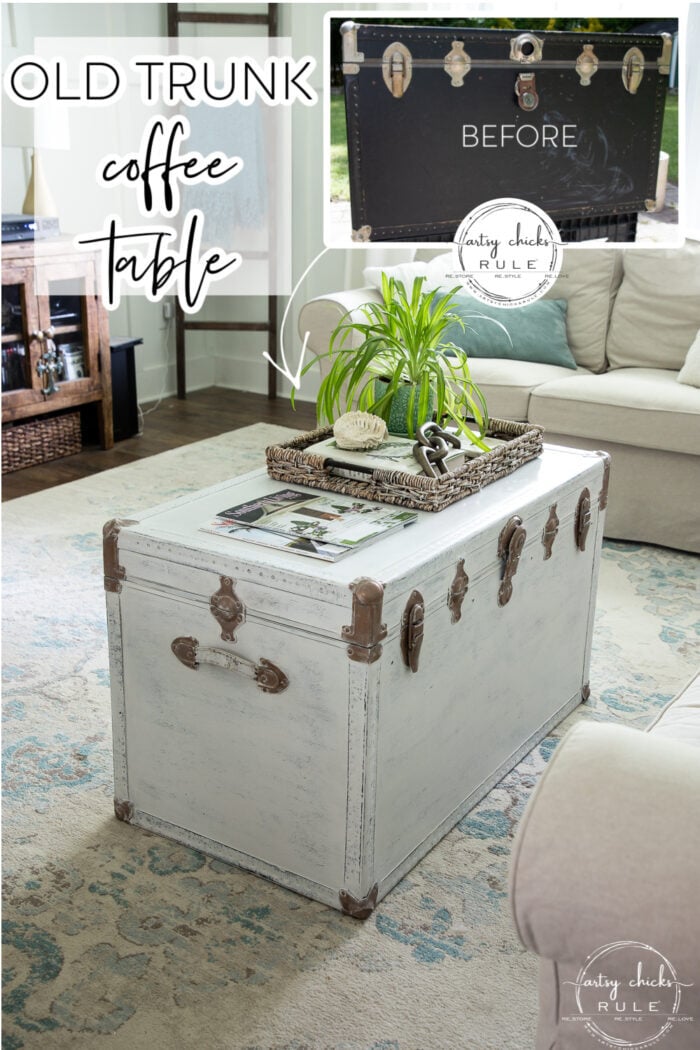
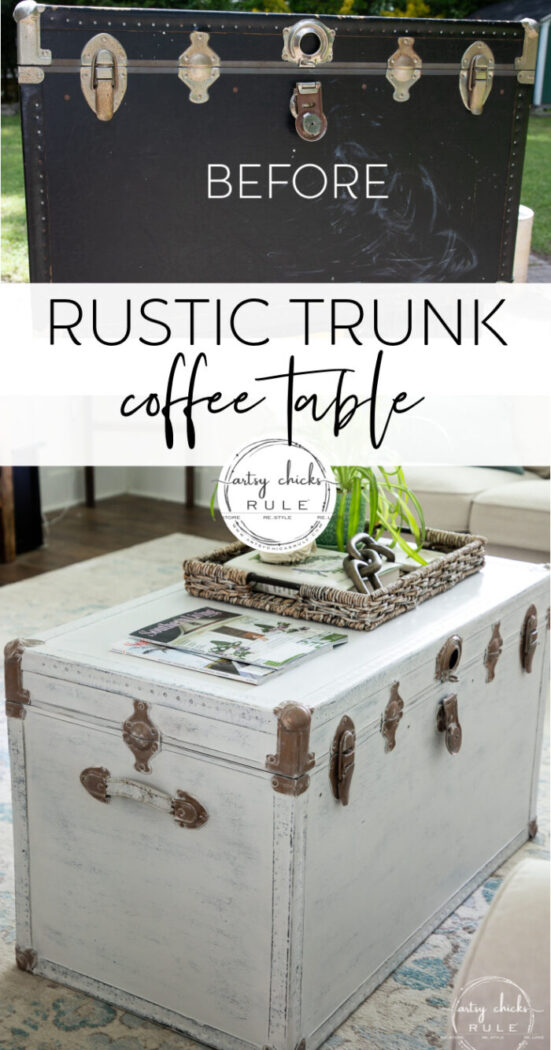
Rustic Trunk Coffee Table (easy DIY)
This old thrifted trunk turned rustic trunk coffee table was such a simple makeover! Now ready for a brand new life!
Hello friends!
I hope you had a blessed Mother’s Day weekend. I had a very nice one spent with family. And the weather was just beautiful too! I’m so loving the warmer weather and lots of glorious sunshine. My favorite time of year…spring and summer.
Ryder is enjoying it too. And seeing Frank. Remember I mentioned him in last week’s post? Well Frank came by yesterday and I got a picture of him and shared him in my >>> Instagram stories. Hop on over to see before it’s gone!
And now… it’s Trash to Treasure Transformation Tuesday. Yippee! That’s a mouthful, huh? lol
I can’t wait to share my makeover today. Be sure to scroll all the way to the bottom so you won’t miss what my friends are sharing today too.
Today I’m sharing this trunk I found sometime back. I’ve had it for a while and figured it was time to give it a much-deserved makeover.
I’ve done a couple of trunk makeovers before this one. You can see them here…
Rustic Trunk Coffee Table
This ended up being a VERY simple makeover. I had originally thought I’d put a furniture transfer on it OR some graphics of some sort.
I even considered a compass rose right in the middle of the top. (which would have been really cool too)
But in the end, I decided to keep it simple and clean. I was liking it without all the other fuss.
Here is how this one began…

Just your basic, beat-up aged trunk. I think I paid $5 for it.
The black papery finish was worn and coming off on several of the edges. You can see it in the photo above.
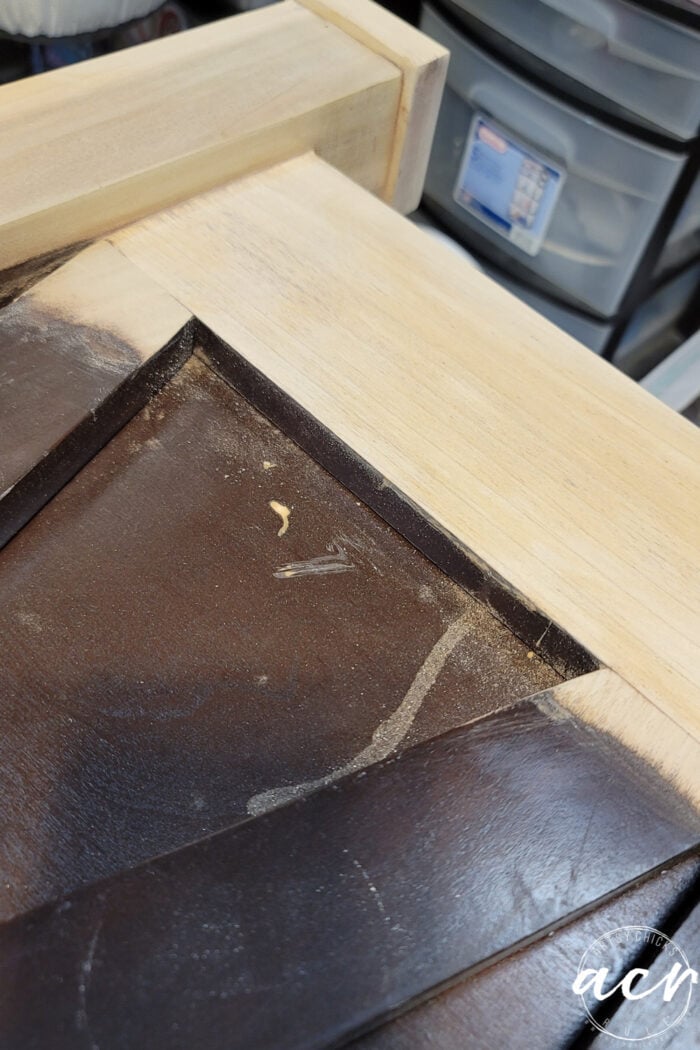
I lightly sanded the entire trunk, including those areas to smooth them before I began.
MATERIALS LIST
Then I applied a coat of primer. (since it was so dark and I was going white and to help with adhesion, etc)
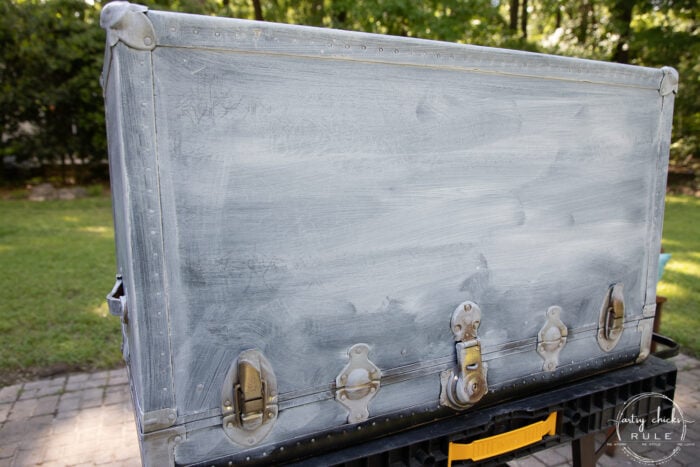
I didn’t worry whether I got it on the metal pieces or not.
Once that was dry, I went over that with two coats of white chalk-style paint. (all linked above)
New to chalk paint? You can check out this post here >>> How To Chalk Paint Furniture (tips and more)
Then I spilled my paint trying to swat at the “no see-ums” trying to bite me all over! haha

That’s always fun, not. Oops!!
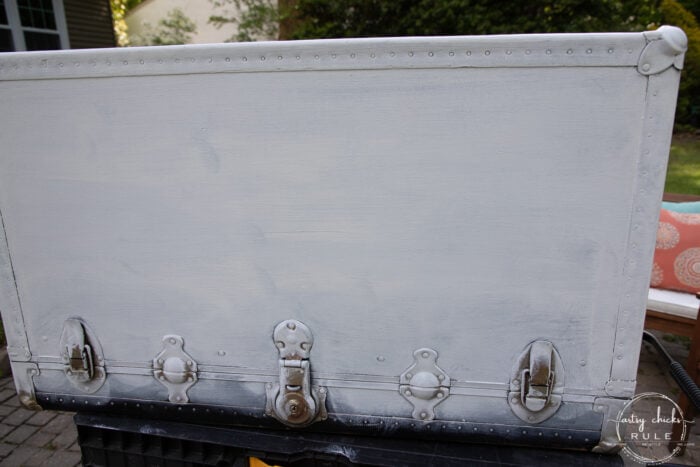
Once that was cleaned up, I turned the trunk over and painted the top.
Then brought it in the garage away from those pesky things. (and the pollen which was terrible this past weekend)
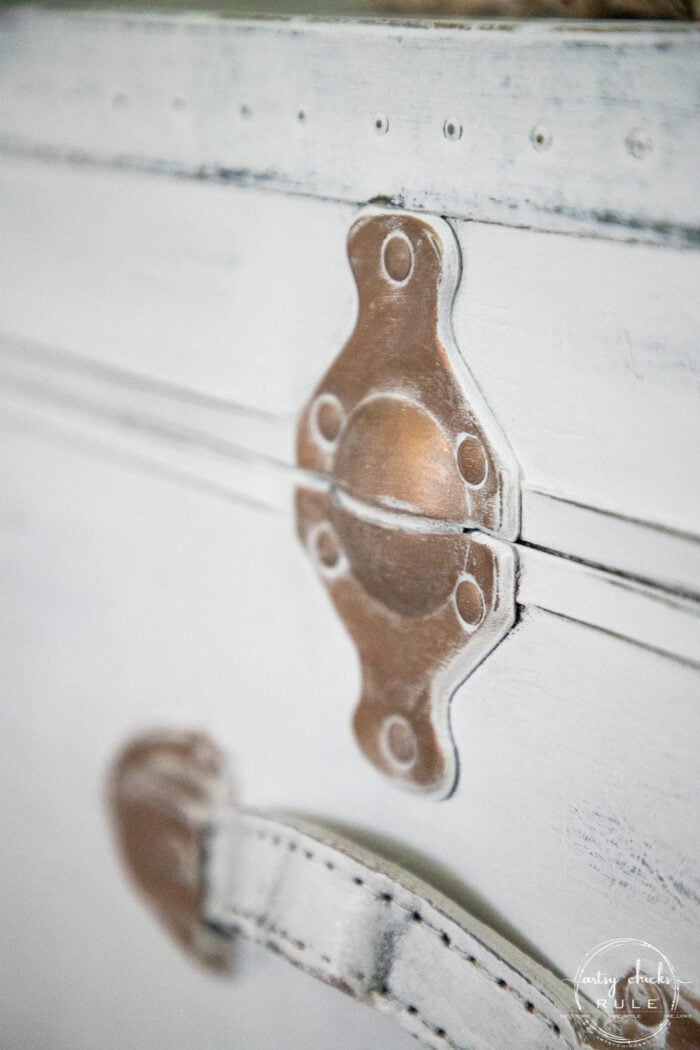
I decided to pull out one of my Gilder’s Paste that I hadn’t really used yet….this bronze shade.
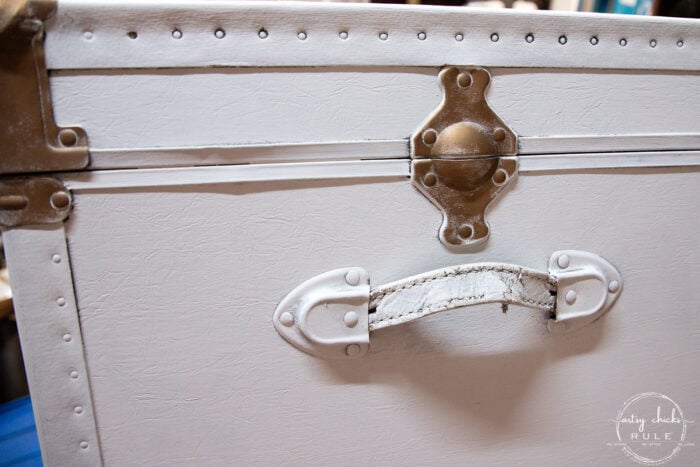
I thought it would be perfect for the metal on the trunk. I love the shade of it.
Want to see some of these projects in “live” time? Hop on over and follow along with me on INSTAGRAM. I’m always sharing in my stories as I’m doing projects, finding new furniture, fun finds….just all the day to day behind the scenes.
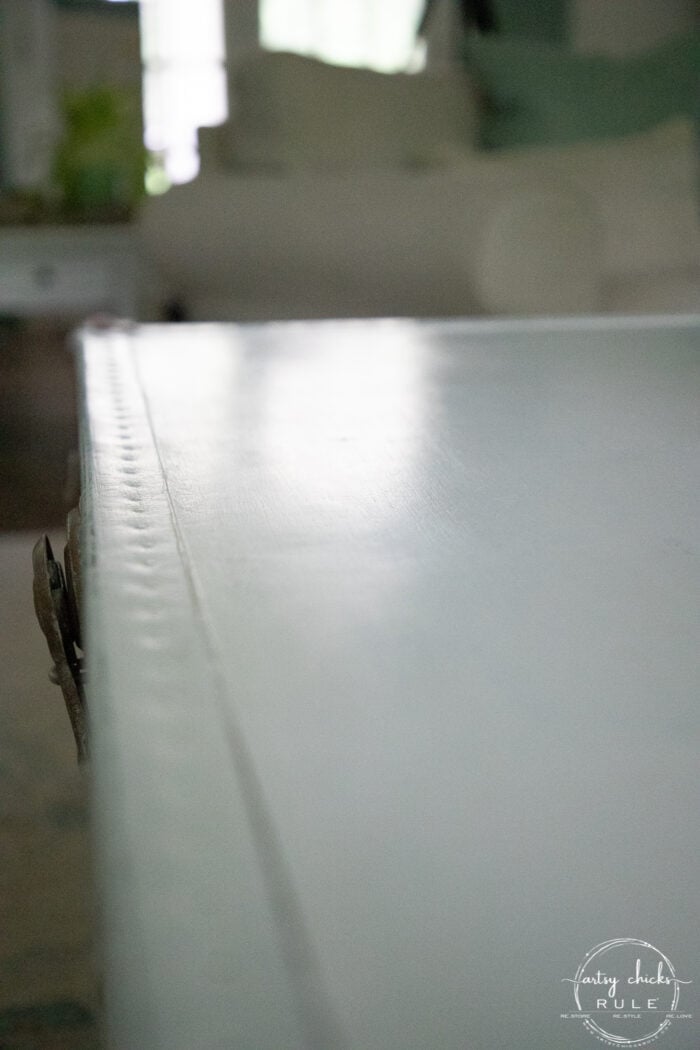
And to go along with that rustic bronze look I gave the metal, I decided to sand the edges to distress.
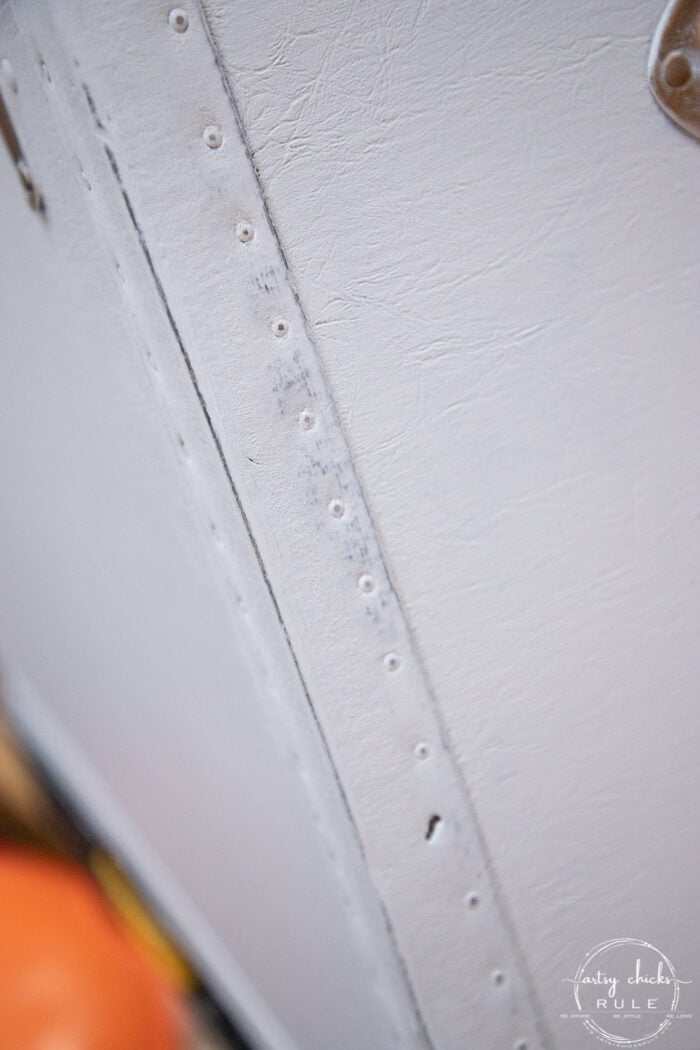
I was liking that so much, I decided to sand it all. So the whole trunk got distressing to give it a completely rustic look.
Once that was done, I wiped it down to remove the dust and then applied clear wax all over to seal it up. I don’t use wax a lot anymore, but this is one of those times that I just love using it.
Want more ideas for sealing chalk paint? Check out this post here >>> The 5 Top Ways To Seal Chalk Paint
And look at that luster and sheen…
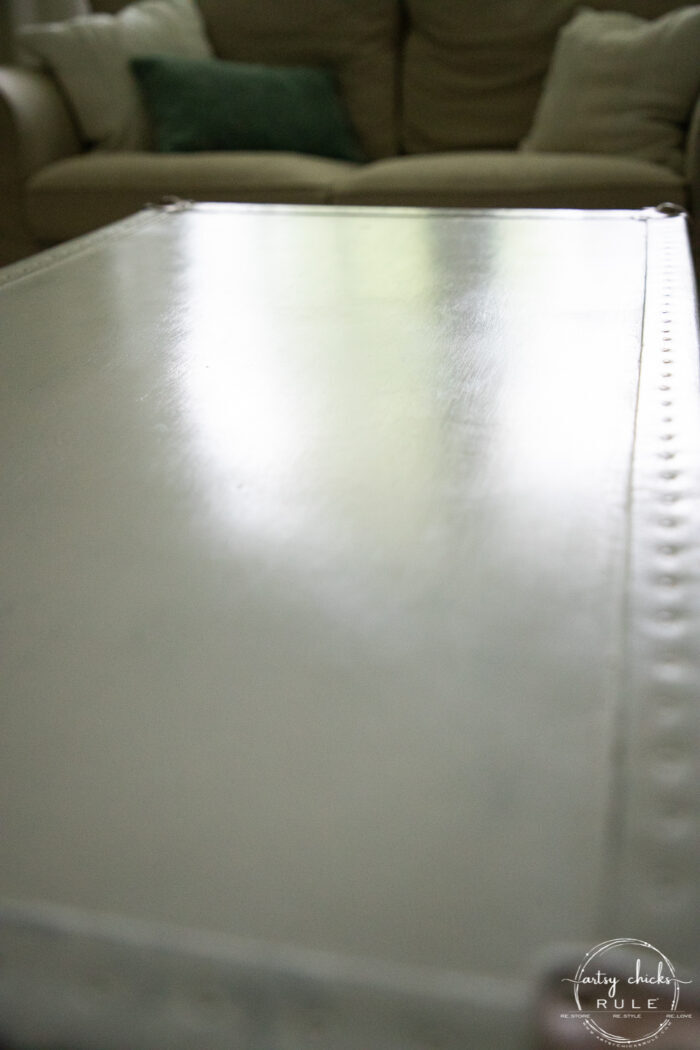
So good…
Perfect for this trunk.
Curious about chalk paint?? I wrote an entire post devoted to all the pros and cons of using it, here >>> “Pros and Cons of Chalk Paint For Furniture“
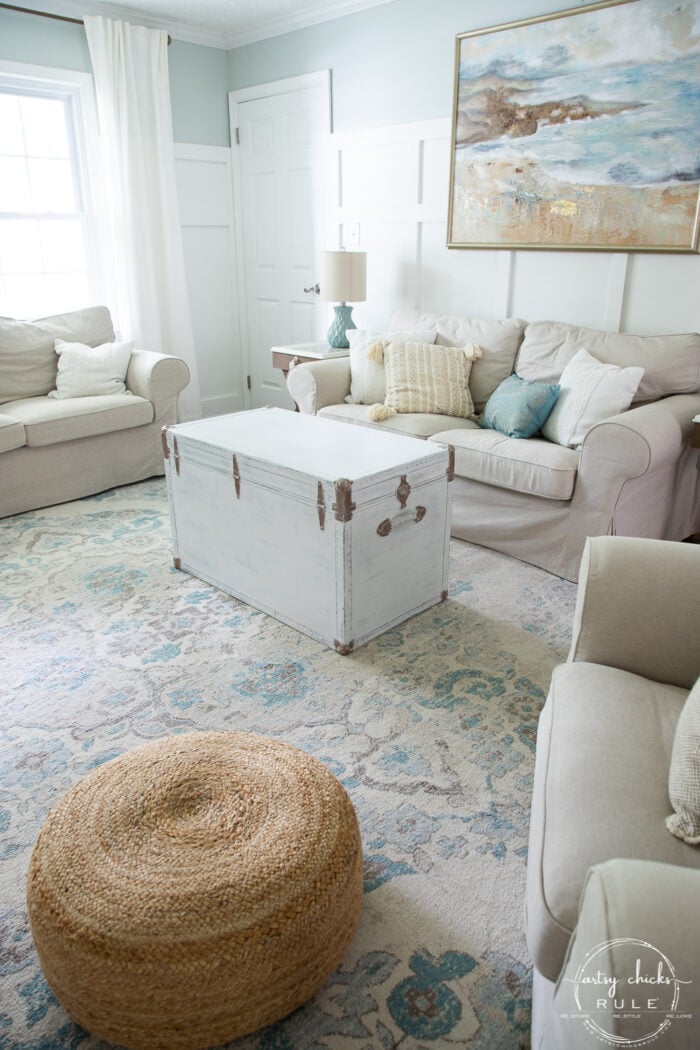
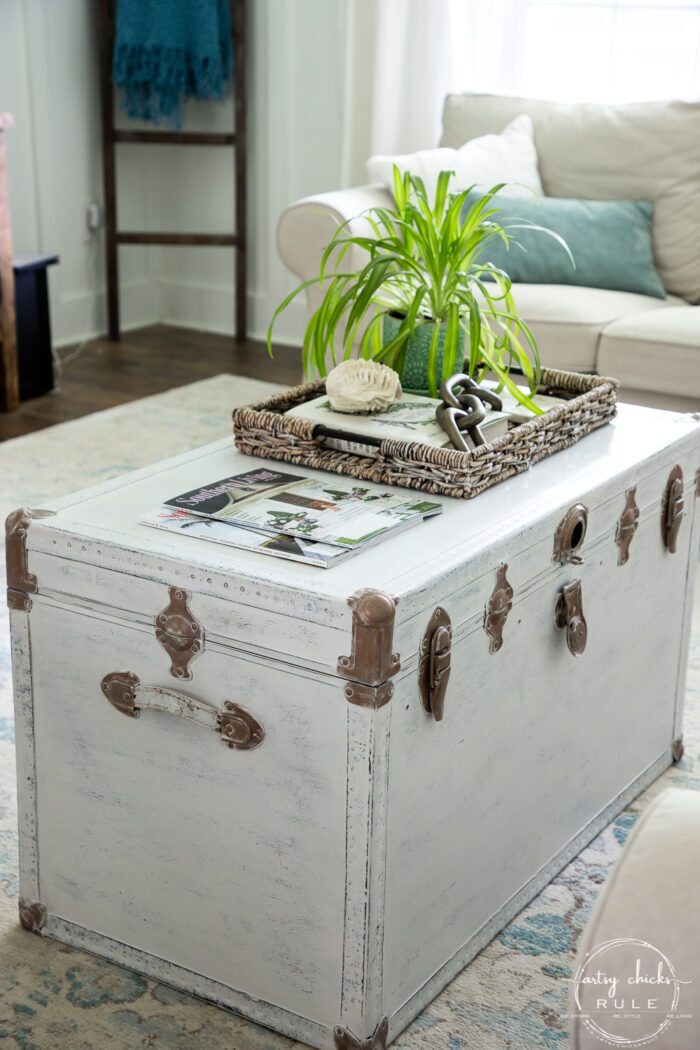
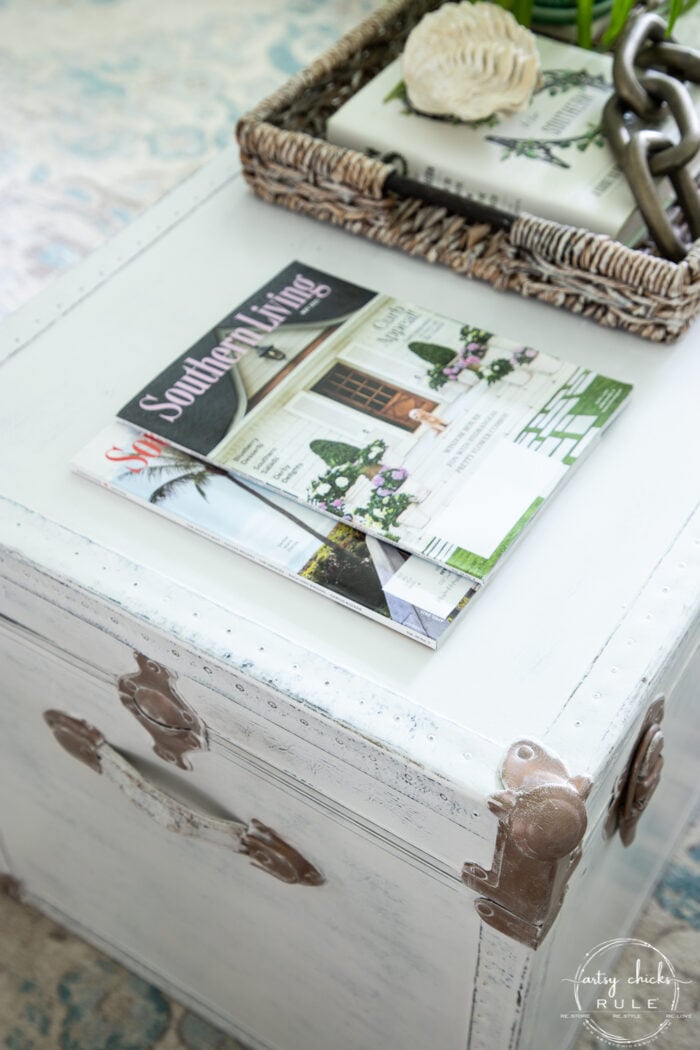
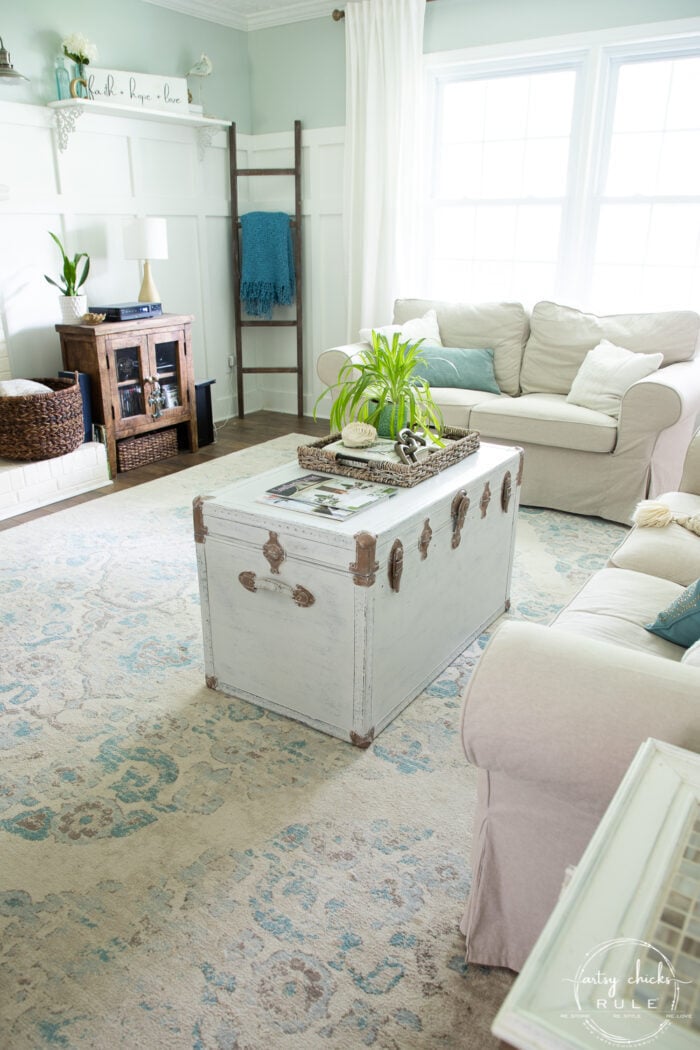
And here it is all finished…
See the black coming through a bit on the sides?
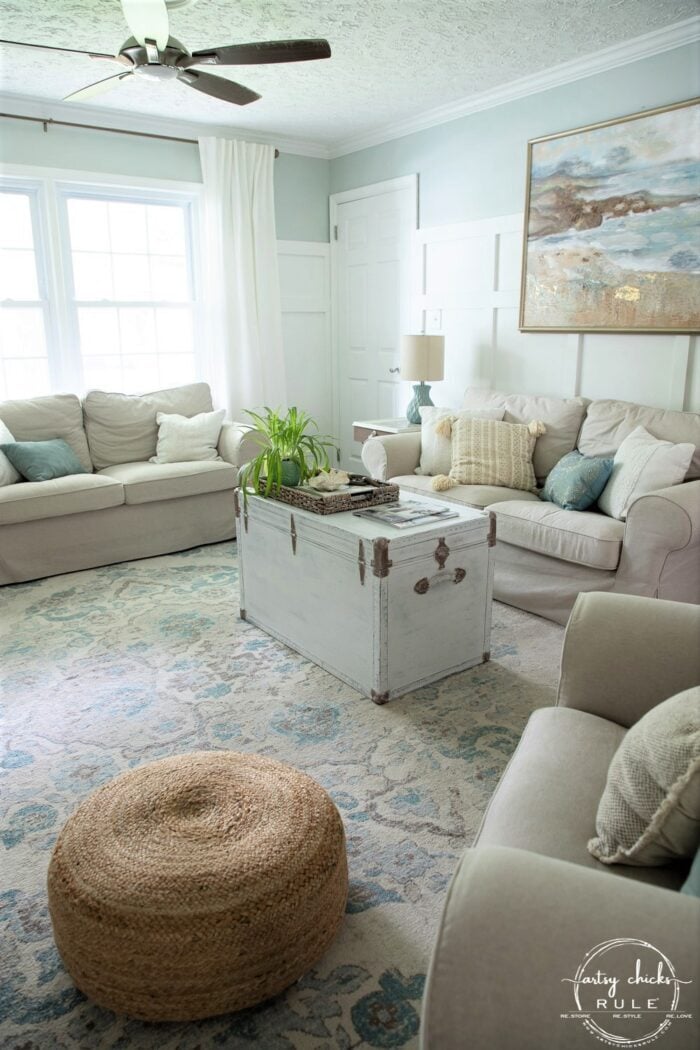
Oh, and that’s a little pouf I found at Home Goods recently.
We’d been wanting something there as everyone who sits in that chair wishes they had something to put their feet on.
And I aim to please, haha.
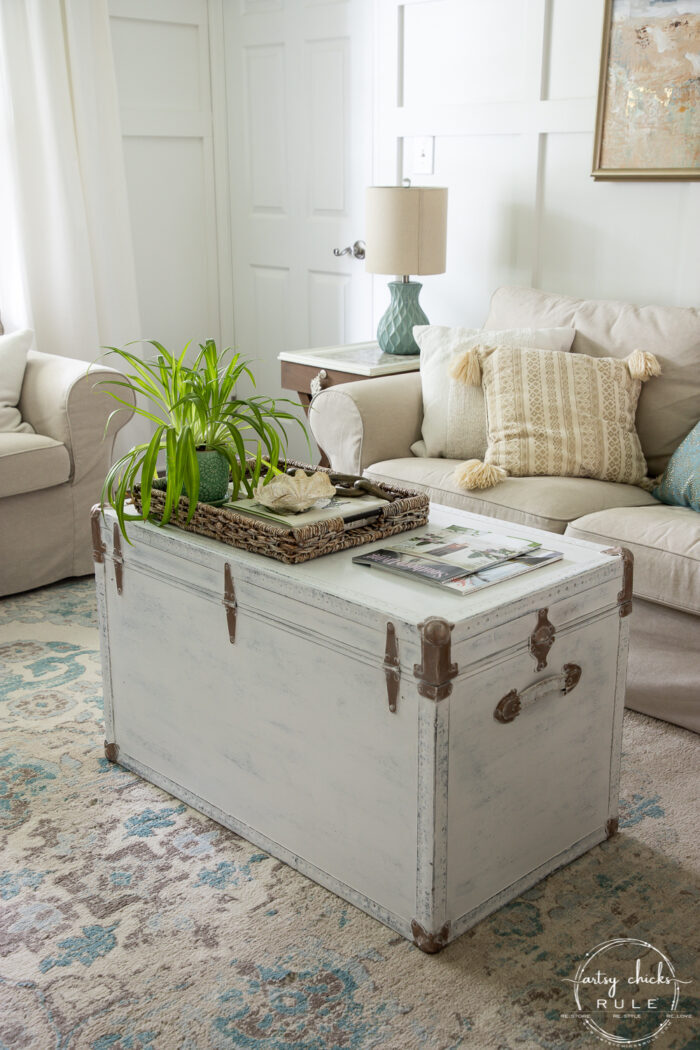

I painted and waxed the leather handles too.
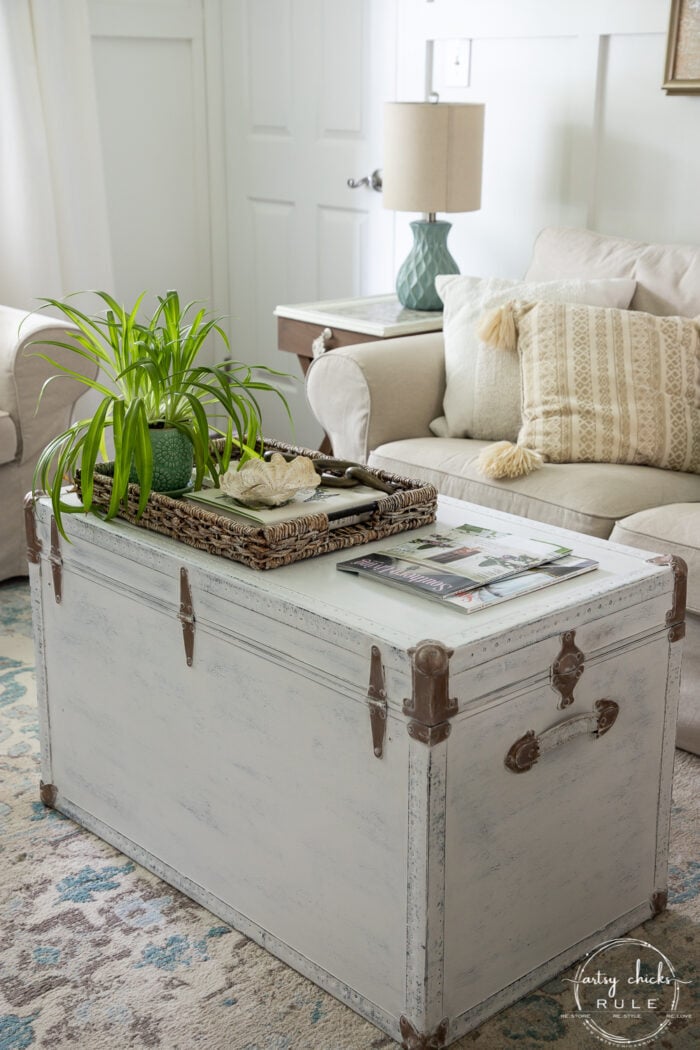
Isn’t that bronze color so pretty?
It’s really the perfect shade for a trunk like this.
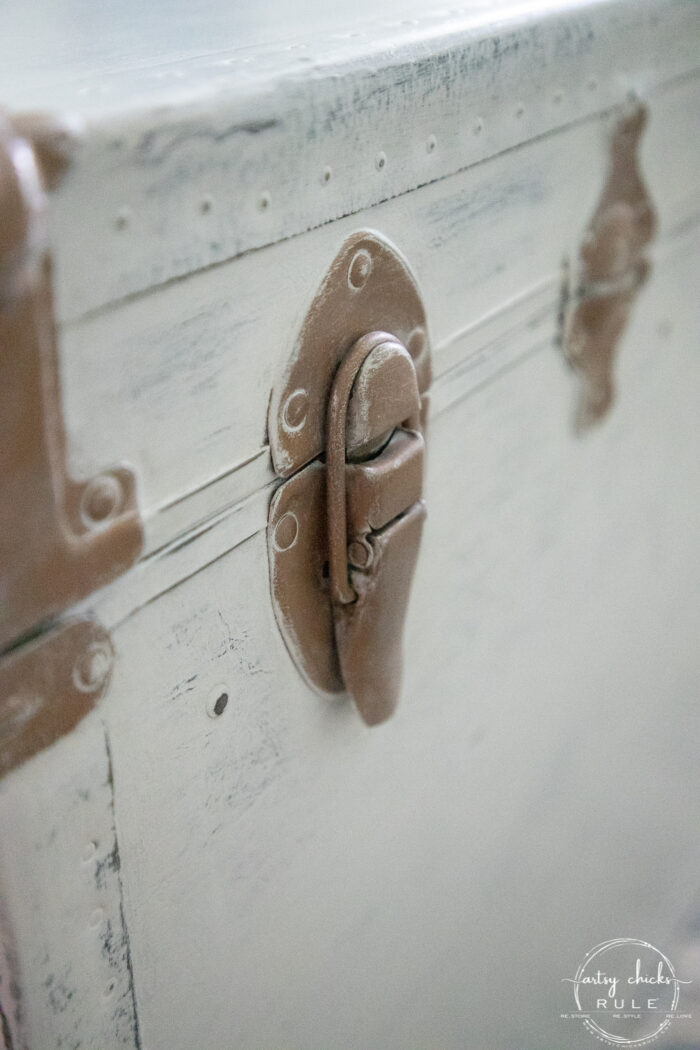
By the way, I just rub the Gilder’s Paste on with my finger.
I didn’t try to get it in all the crevices, etc, because I wanted that aged look.
I sanded and distressed the top too. It’s hard to tell, but it also looks like the sides.
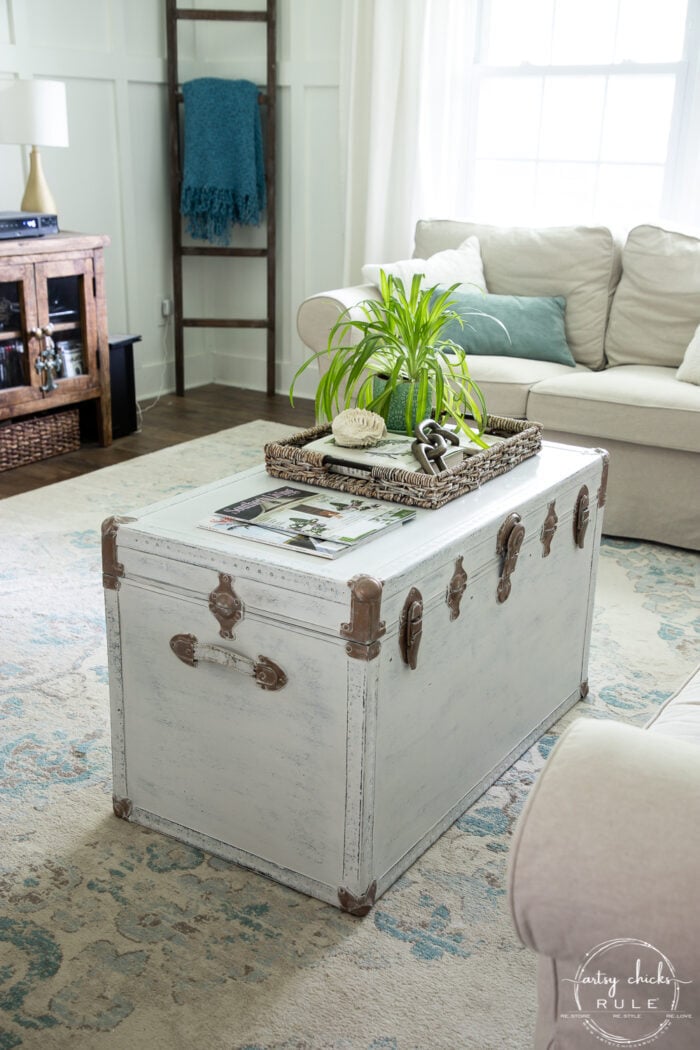
Perfect to use as a coffee table…and wonderful for storage.
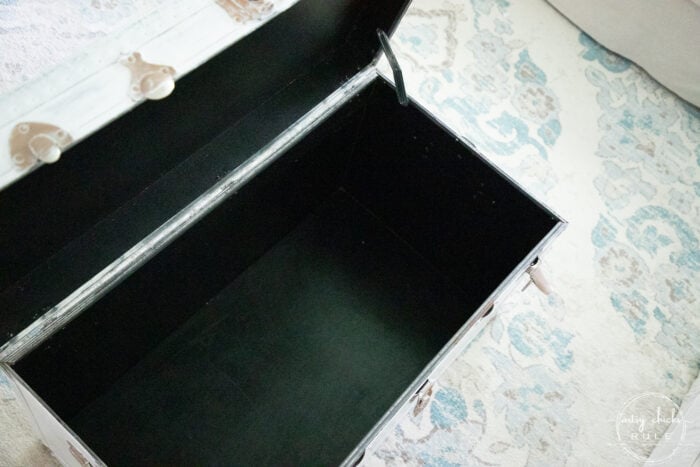
The inside was in great shape so didn’t do a thing to it except wipe it down.
You can store throws or extra pillows, etc, inside.
Looks great in here!
But I really love my round coffee table so it’s not staying.
Have you ever made over a trunk? They are great fun to do. And the sky is the limit.
You can stencil on top or add a graphic or even a pretty floral furniture transfer.
So many possibilities!
PIN it to save it!
But wait, don’t go yet!
Hop on over and see what my friends have in store for you today. (links to each are below)
Want to see more of our Trash To Treasure posts? Click here.
………………………………………………………………………………………………………………………..
I hope you enjoyed today’s rustic trunk coffee table makeover.
Trunks are so much fun to play around with. I bet you have one already or can find one at a thrift store today!
I see them quite often. Go get one if for nothing else, but to paint and make it beautiful.
They are great for storage and when they look pretty too, well, win!
Have a wonderful week friends, I’ll see you right back here later this week!
UPDATE! See what I did to this here!
xoxo


")

")


Wow! Not only is the trunk beautiful redone, but your he is amazing as well. Bravo, Nancy!
Thank you so much, Larissa!!! xo
Looks amazing as a coffee table Nancy, and I love how the wax gave it a gorgeous sheen! It’s been turned into a treasure! XOXO
Me too!! Thanks, Denise!! xo
Trunk turned out great! I’d use it in a bedroom for hiding blankets and extra linens. Hummm, maybe I should go shopping for a trunk! Frank is getting big! Thank goodness you the paint you soiled was chalk paint, and I hope it washed out good. I hate when that happens but my hubby hates it more😳
Yes!! That is a great use for it! And yes, it washed right up, thank goodness! lol Clumsy me!! Funny you say that, before I could get it up, hubby walked around (I was in the house getting cleaning supplies to clean it up) and I heard him say, through the open window, “what the heck”….hahahaha!!! I had to run out and say, I got this! hee hee
I love, love this trunk. The distressed white along with the bronze guilders paste really makes the trunk pop! This has given me inspiration to paint and distress my grandmother’s old trunk! She signed her name on the inside, but the rest of the inside needs work as well. Nancy, thank you so much for all of the inspiration you have given me. Now I need to pick up the brush and get to work!!! Have a wonderful and productive week.
Aw, thanks Sue!! I am actually quite happy with how it turned out! :) I never know!! lol And oh, how special is that. I have a small table that my dad made while he was in high school and I made him sign it on the underside when it was given to me. I am excited for you to work on that treasure that means so much. :) xoxo
It looks so fresh and updated in white and is the perfect height for a coffee table! Bummer about the spilled paint…that happens to me more than I’d like to admit lol! XOXO
Thanks, Christy!! It turned out better than I’d hoped!! haha And spills…a day in the life!! lol xoxo
What a great coffee table. The wax was definitely the way to go. I’m surprised that Ryder wasn’t “lurking” around. What a great treasure for trash to treasure day. See you on Thursday.
Thanks, Kathy!! I know, he’s elusive some days!! haha (most likely still laying around in my office as I’m photographing downstairs) xo
So pretty. I love it!
Thanks, Lizzy!! xo
Great Job! So pretty.
Thank you, Rebecca! xo
Nancy- that is so perfect in that room! It is made for it! Good job. Love those easy ones.
Aw, thanks so much, Michele! xo
Nancy, this trunk coffee table looks amazing! I’ve been hunting for couches lately though, so I’d love to know where you got your set! xo
Thanks, Jen! It’s IKEA …their old Ektorp. I bought new covers (from white to tan) just before they discontinued (thank goodness!). xo
Love how this turned out! Did you clean the paint off the hardware before using the gilding paste?
Nope! That is the great thing about the Gilder’s Paste….goes right over and covers too. :) xo
I have questions about the tray you recently did and have a trunk I would like to do the same. Can you email me so I can email pictures of the trunk and you can tell me if I could use your same method?
Hi Dara! Just pop me an email with photos and your questions. I’ll help if I can! :) nancy (at) artsychicksrule (dot) com
Beautiful! How tall is it? I have a similar trunk i was considering using as a coffee table but trying to decide if it’s too tall:)
Thank you! I don’t know, sorry, I no longer have it. If I had to guess, 2+ feet?