We’ll have to see what else I can come up with.
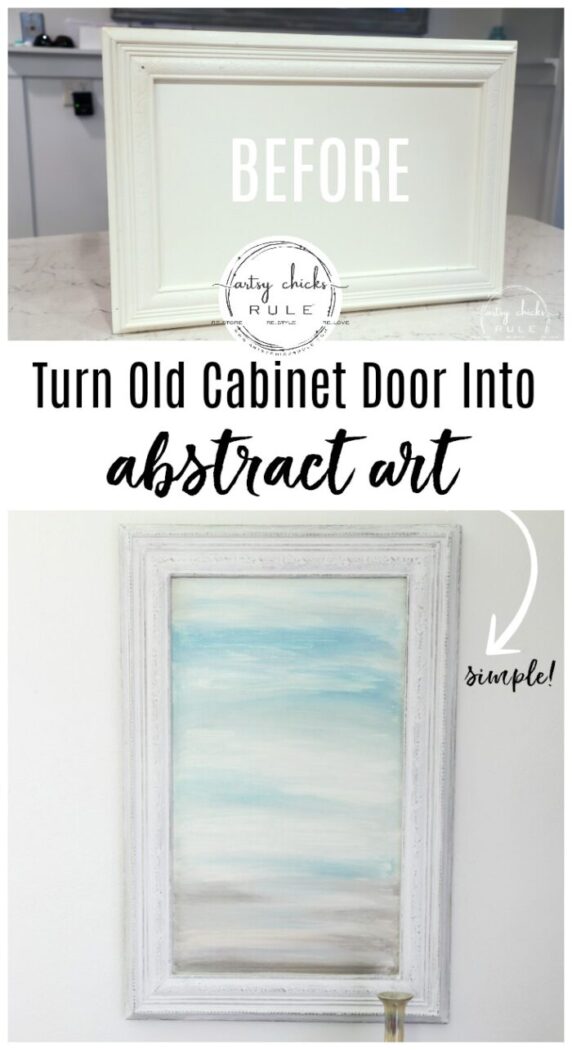
But today it’s all about DIY abstract art.
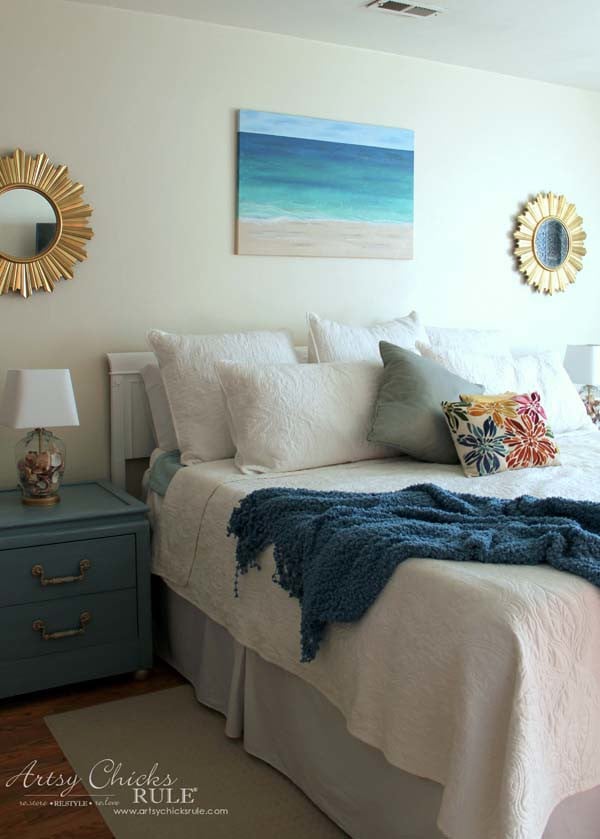
I’ve done something similar to this DIY abstract art awhile back, here…
This painting that I created for our bedroom from a photo I took of the beach while in Florida.
It was pretty simple to do! And I added some cool texture with a “texture and depth adding” product too. You can read all about that project here >>> DIY Beach Painting
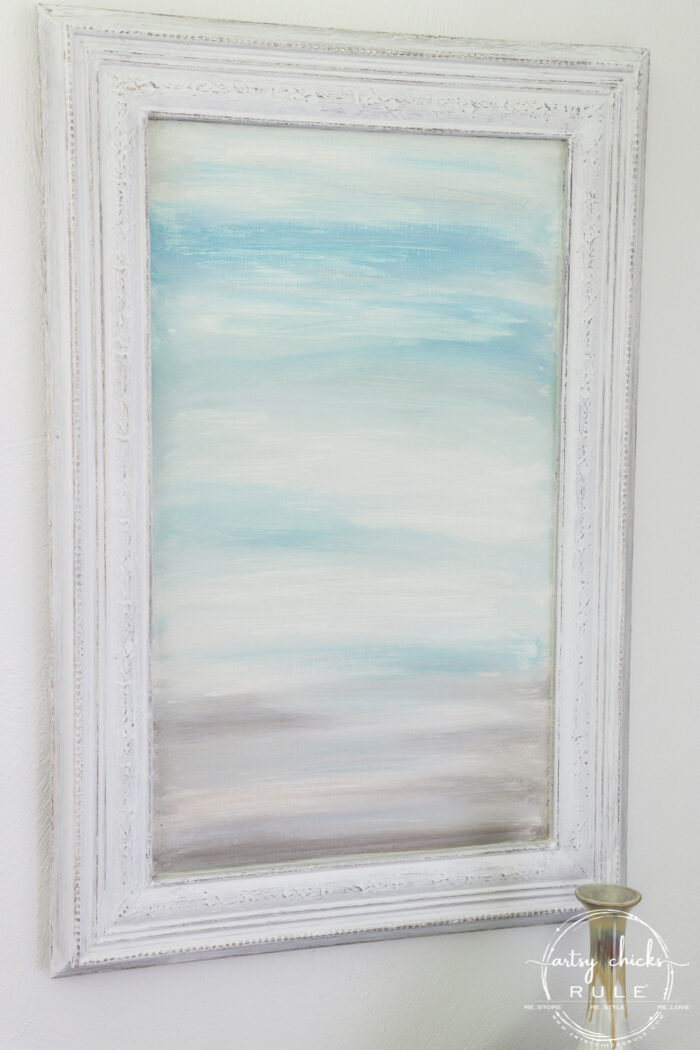
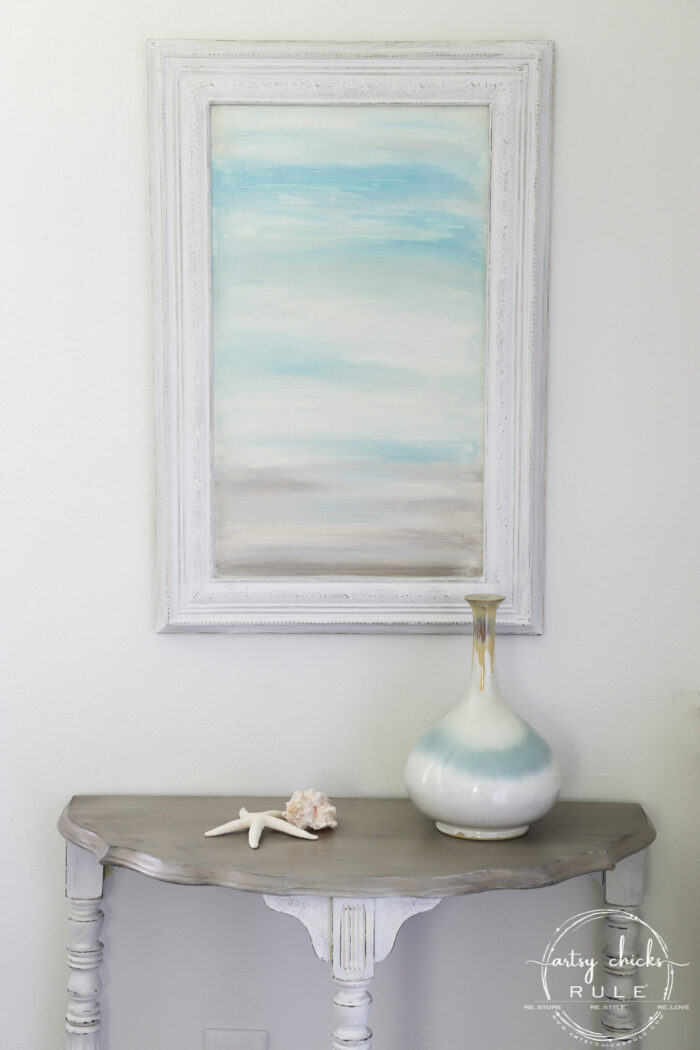
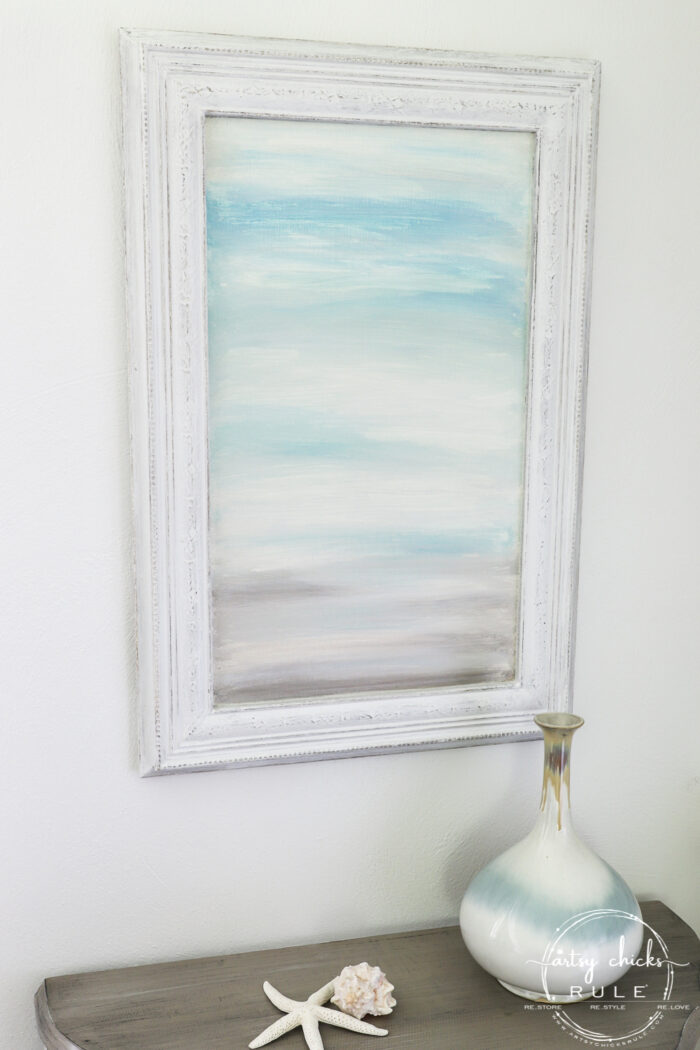
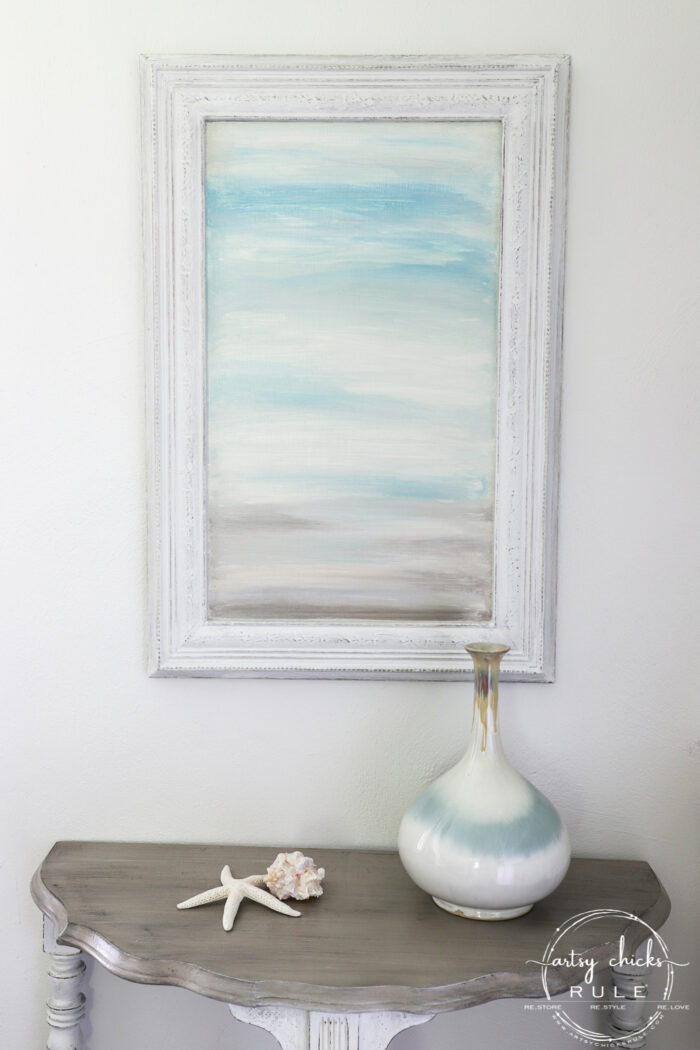
DIY Abstract Art
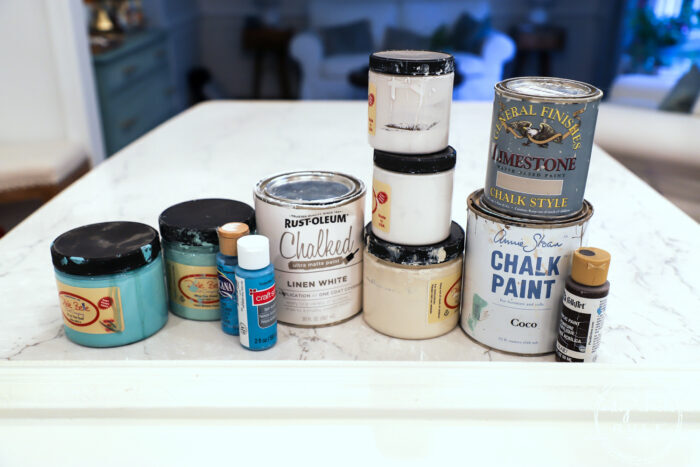
For this one, I used some of these paints.
No fun “texture adding” product on this one, just a range of “beachy” colored paints.
I basically went out to my garage and pulled colors that I thought I’d need for a beach scene and that is what I came back with.
I didn’t end up using them all though. Almost.
I used all of the Dixie Belle paints pictured, the brown and blue craft paint. And a touch of the Coco chalk paint because the brown craft paint was not the right shade after all.
Because let me tell y’all…I am not a professional. ;)
I am not an artist in this way at all. I’ve always loved art and have taken a class or two in my adult years, but I am in no way a “painting” artist like this.
Learning watercolor is on my list! If only I had the time. Sigh…I would SO love to learn to paint all the pretties.
One day!
But none of that ever stopped me from trying anyway. Abstract art??
Never done it but darn it doesn’t look hard at all, right???
I will tell you, as it is with most things, it’s a little harder than it looks.
But not in a “too hard, you can’t do it” kind of hard. Because you can do it.
In a, “I just thought I’d throw some paint on there, swish it around, blend it a little and it’d be a masterpiece” kind of way!
Ha! It didn’t quite go like that…wait, it kind of did. It just didn’t turn out as I saw it in my brain turning out.
Dang, if only. lol
No, I wouldn’t call it a “masterpiece”. But what I would call it is accomplished.
I did something I’ve never done before and it didn’t turn out awful. I’m pretty happy with the look of it.
I’m quite sure I’d win no prizes for it but I did take an old door and repurpose it into my own little masterpiece.
So I get a few kudos for that. Saving one more thing from the landfill, right?!
Before I show you the “how-to” photos, let me warn you that this type of painting is hard to stop and photograph.
It’s a brush and go and brush more, and add this color and brush and so on.
You don’t want the paints drying before you can blend well enough. Or maybe there is a trick I don’t know about!
But I think this will be one I’ll have to do over and video the process.
So I apologize for the lack of better photos of this project.
Want to see some of these projects in “live” time? Hop on over and follow along with me on INSTAGRAM. I’m always sharing in my stories as I’m doing projects, finding new furniture, fun finds….just all the day to day behind the scenes.
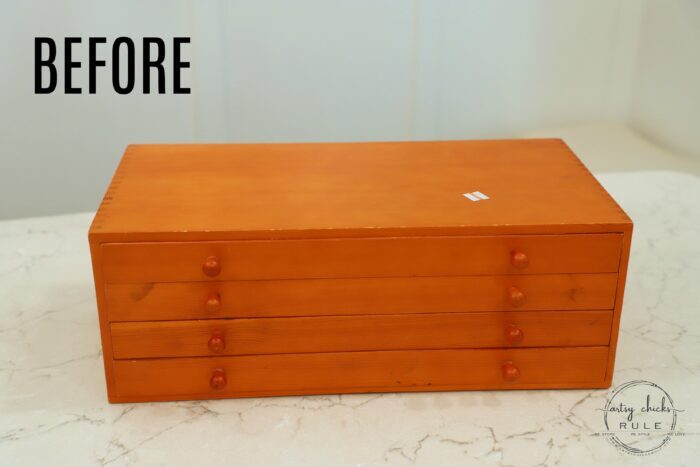
Here’s the door “before”.
I filled in the hole where the knob was and cleaned it up well before painting.
I loved the idea of using one of these old doors for this since it basically had a “frame” around it already.
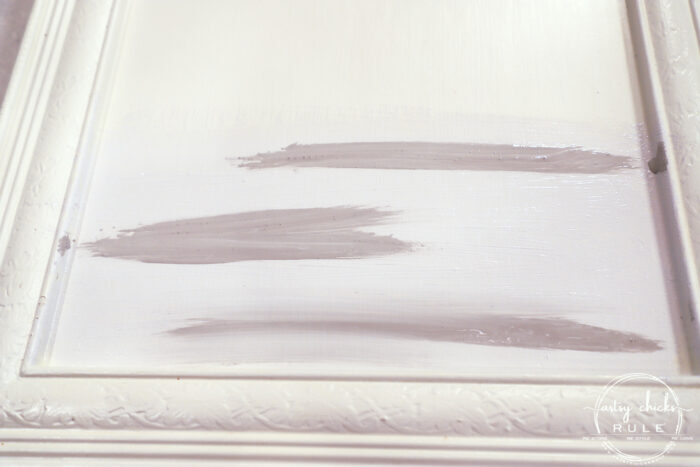
I began with the dark brown at the bottom. (which I later decided was all wrong…too dark, wrong shade, but it was too late)
Be sure to use a different chip brush for each color.
I think something that would’ve helped it all blend better is if I had painted the whole thing with a coat of white or beige, wettish, paint beforehand.
It was drying up before I could do much with it so I began to wet the bristles of the chip brushes as I went. Learning as I go on this DIY abstract art.
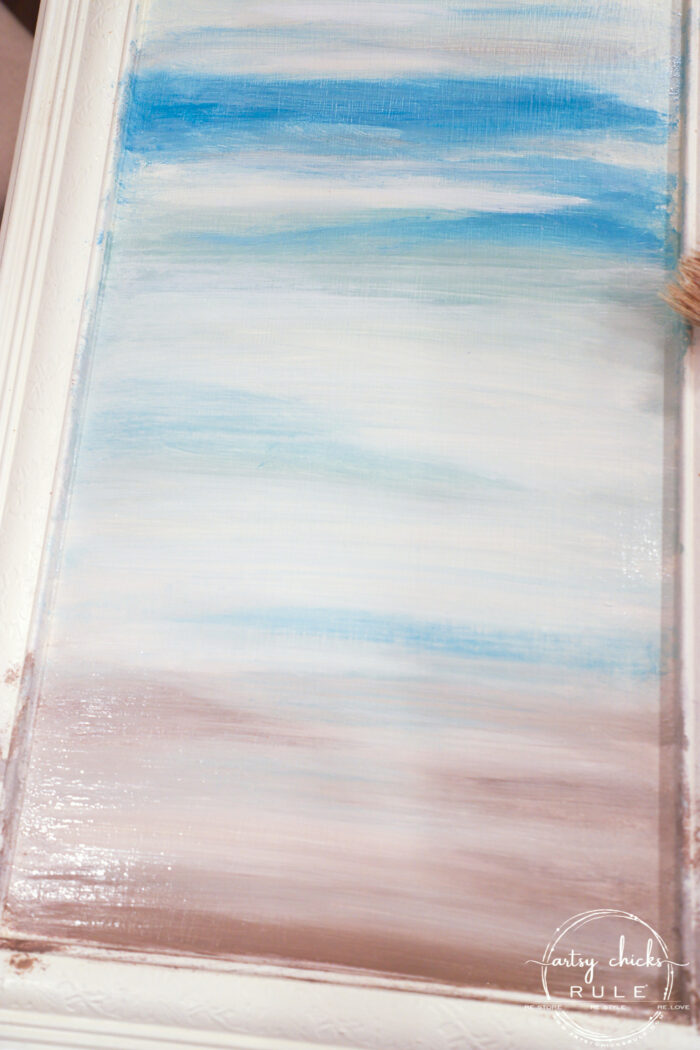
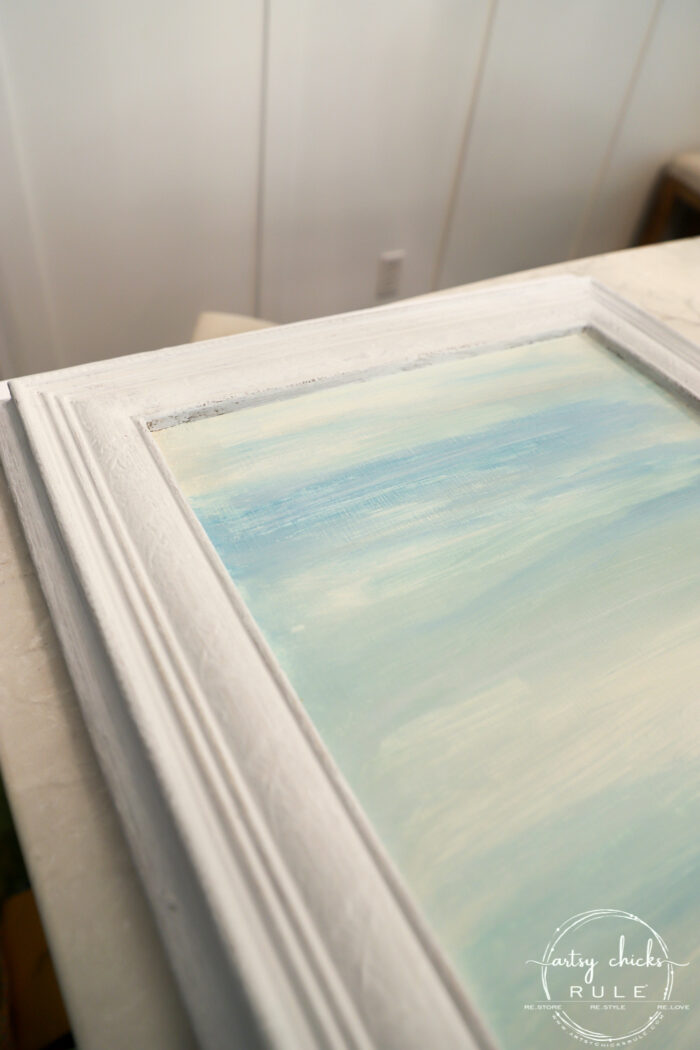
As you can see above, I was painting in the “sand”.
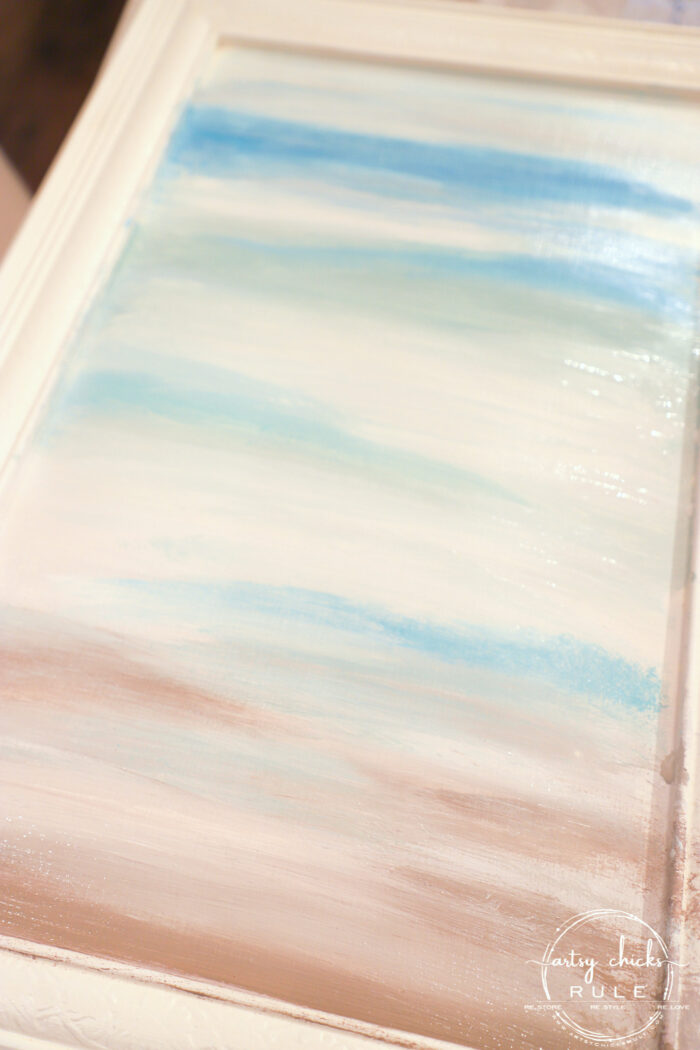
I added blues, whites, and creams above that.
Blending, blending, blending as I went.
I added some darker blue by the sand and up in the “sky”.
As you can see above, I began adding cream and even some of the Coco to soften that dark brown at the bottom.
But it was not looking good to me at all. I almost threw in the towel! haha
Now, I’m showing you all this but it’s not pretty….yet.
It was harsh.
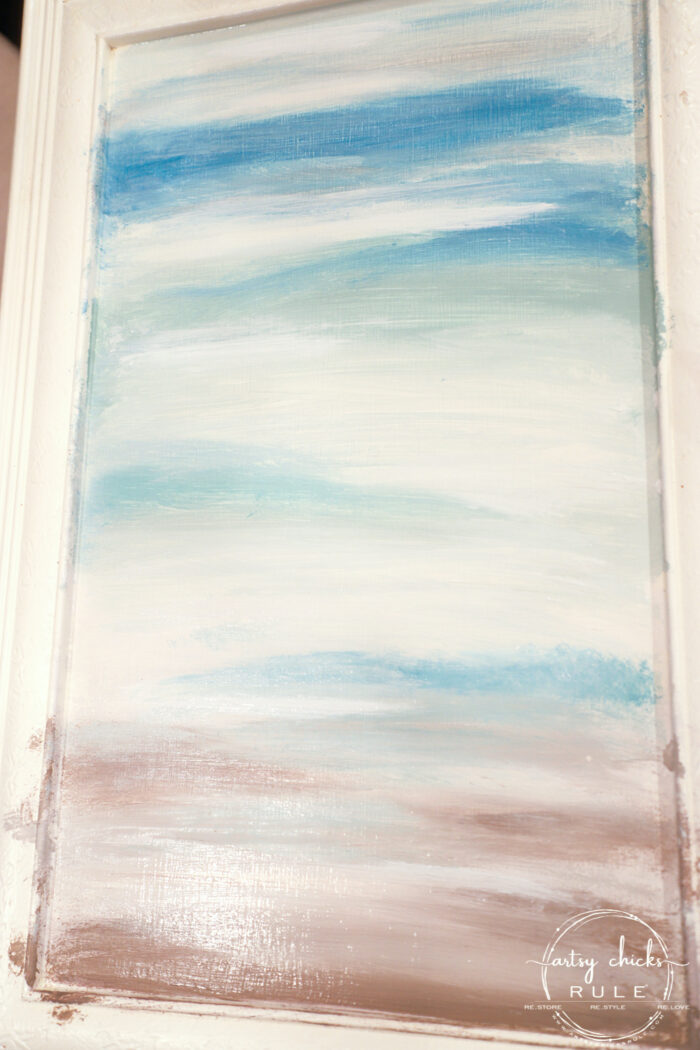
So I got some of the Fluff and a wet chip brush and went over the entire thing, just blending and softening the colors.
Not a lot of paint, just enough to cover slightly. Almost like a whitewash over the whole thing.
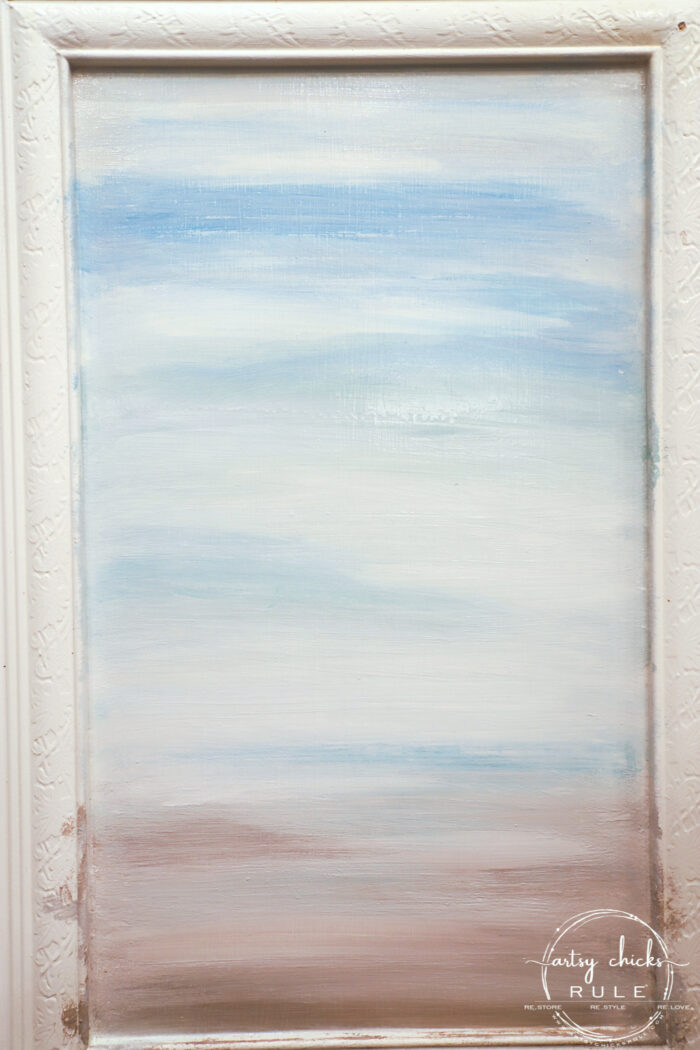
A little better.
And even better still.
I just kept going over it with the white to blend and soften.
The thing about this kind of painting is, you can’t really mess up. Need more blue?
Add more blue. Need more brown? Add more brown.
Too bright/dark? Add a whitewash to soften it up.
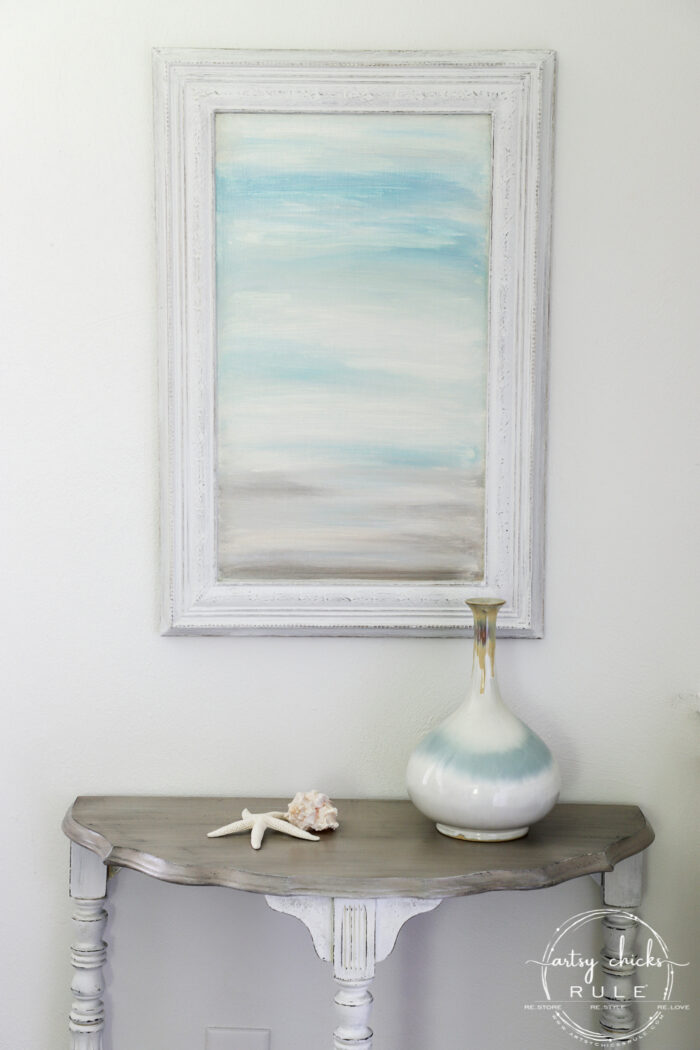
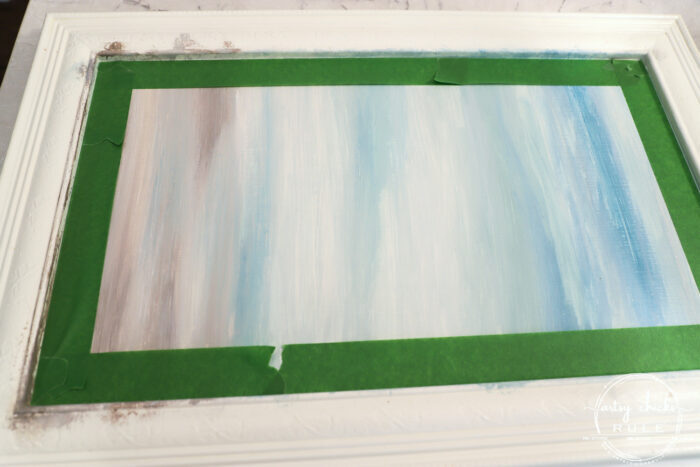
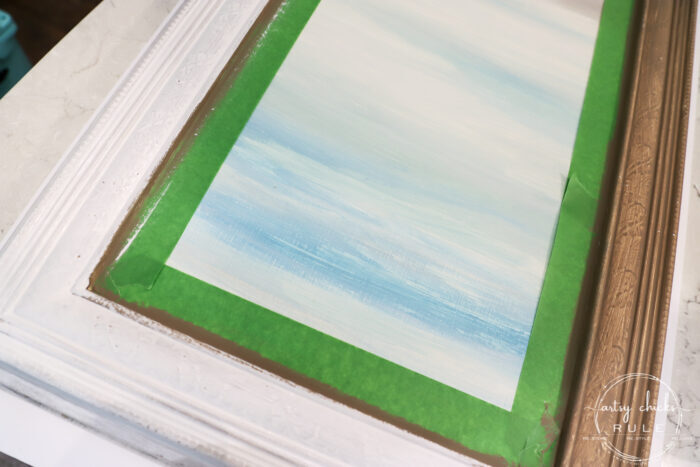
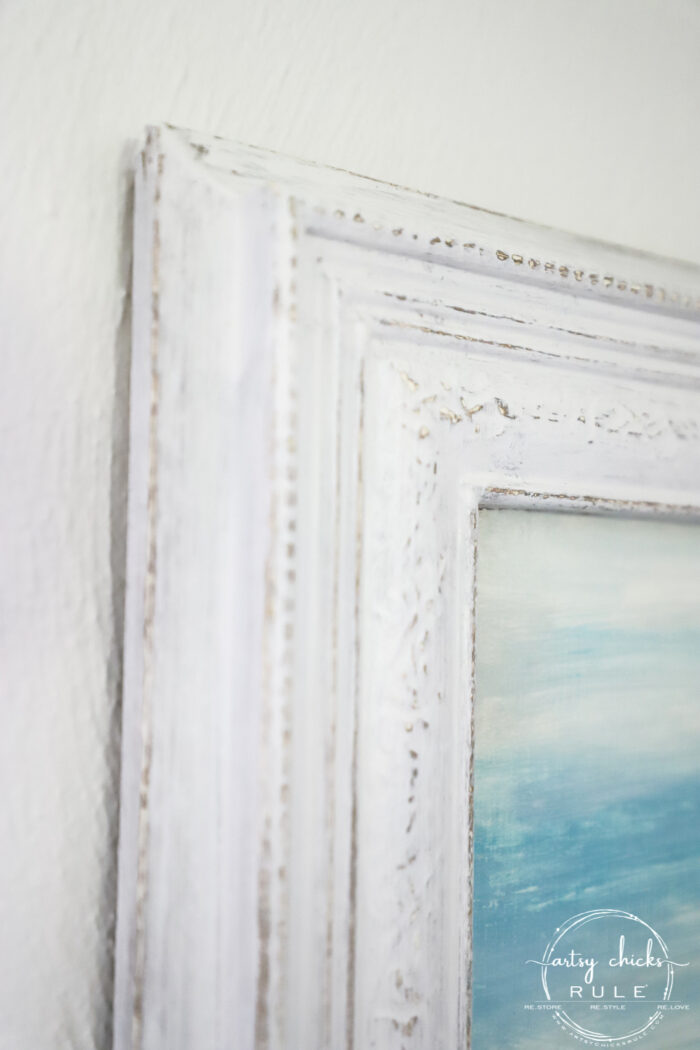
Next, I painted the frame.
I taped up my abstract painting (after it was very good and dry, of course!).
I painted the Coco underneath so I could sand to reveal a little of that if I ended up deciding to do that.
I was thinking bright white but wasn’t positive so figured I’d have that under there just in case.
A little of the Linen White over that.
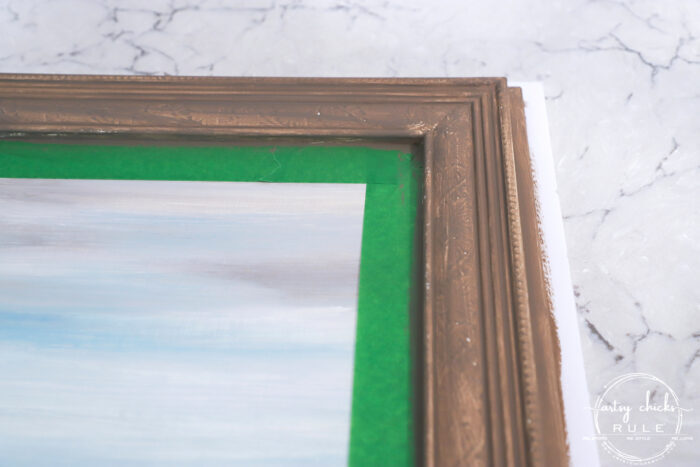
And nope, I wasn’t feeling the plain white with all the pretty detail on the “frame”.
So I gave it a light sanding to reveal the brown underneath for a more relaxed, coastal feel.
The whole thing then got one coat of sealer. (satin, linked above in the gray box)
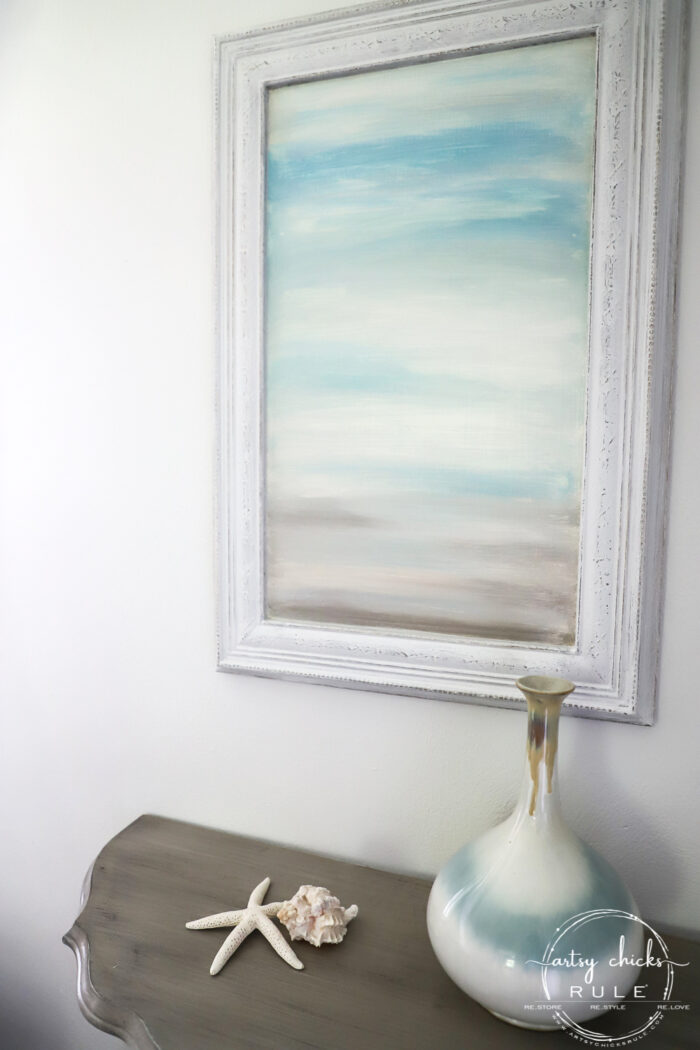
I love how the vase (and table) colors really match my new DIY abstract art so well.
I have to tell you, my husband was not so sure about this project….at all. haha
I think he was really questioning my artistic and creative abilities on this one!!
(maybe you are too! ;) )
But once it was done, he said, oh, okay, that ended up looking pretty good.
Well, gee, thanks, honey! hee hee
I think I’ll save it for the beach house. (and that table too) :)
What do you think?
Would you give this a go??
You don’t have to use an old cabinet door. Anything flat would work.
Or even on canvas from the craft store.
This DIY abstract art really was “simple”. Simple in that I think you just have to keep going. Past the point that you want to throw in the towel.
I think it only took me about 15 or 20 minutes to finish painting this. Really!
So just keep working it, working through it, blending, etc., and I think you will find you have created something beautiful for yourself. :)
Hi Nancy! You’re pretty sassy and that appeals to me as I am too!!! I love to play around with stuff and see what comes of it. I collect all sorts of “junk” to see what can be made from it! I am not particularly good at what I do but I just love doing what I do! And, strangely enough, I just happen to have some old doors and windows with which to play! Thanks for the inspiration – I think you’re awesome!
Aw, haha, that’s awesome, Lorraine! But yes, isn’t that so much fun?? Thank you so much, I hope you have fun playing with your old doors and windows! xoxo
I like your little painting. I think it’s the white frame that isn’t working. Something a little darker to bring contrast. The white gets lost on your wall. But you’re right… kudos for thinking of it!
Love LOVE Love this idea and going to try it. I have a few cabinet doors, and I’ve done a few different things, but never thought of this!! Thanks!
ps: you did a GREAT paint job!
OOOHHHH!!! I love this painting….has a nice relaxed “feeling” to it…Am definitely going to give it a try. Thanks for sharing. Oh yes, I just absolutely love the table and vase.
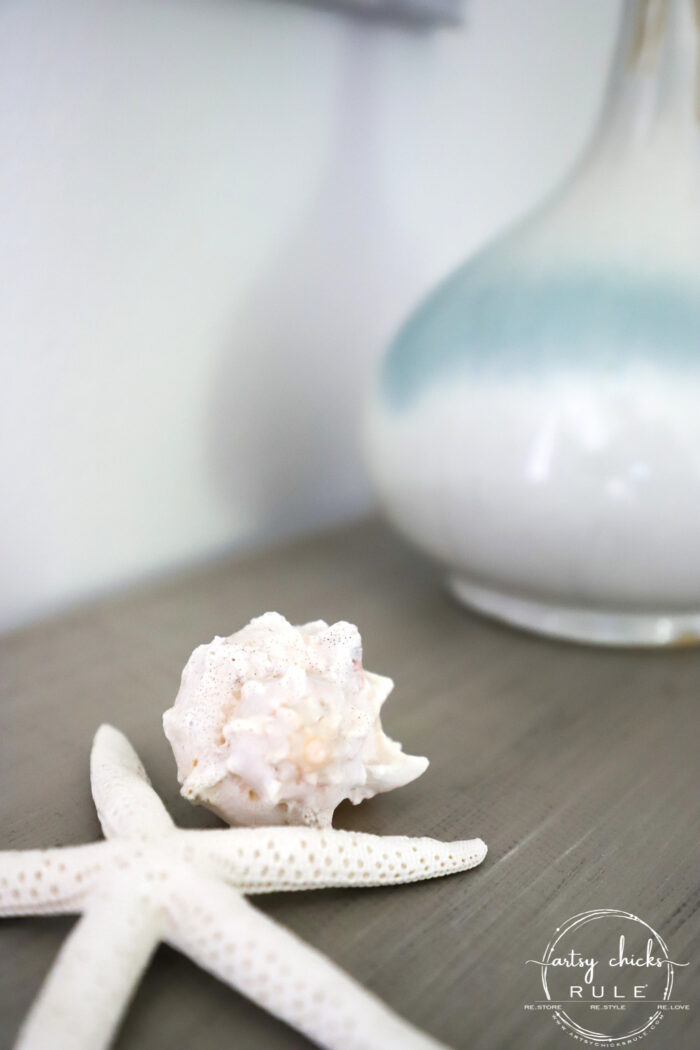
I think if you added a starfish or some seashells to the sand part it would really give it that ocean feel………..just my opinion……It really does look good though……..
Thank you so much, Kathy! That was actually a cabinet door off of our old kitchen. (we have since completely renovated the kitchen with new cabinets, etc) When we moved into our home, we updated the existing kitchen cabinets by adding that pretty wood trim to the plain, flat fronted cabinet doors and painting them. It worked nicely for many years but we finally had to tear out and give our home the new kitchen it deserved! ;) But I have quite a few more doors to play with still! xo
Look for paint extender at a craft store to help keep your paint more blend-able. You could also try to spray a little water on the surface that you’re painting to help keep the paint from drying so fast.
I think you did a really good job for first time out. Keep up the good work. I enjoy seeing your ideas turn into great home accessories. .
Oh yes!! I have actually used an extender for latex paint years ago on furniture and totally did not even think about that! Love it! Thanks so much for that reminder and thank you also for the kind words! :) I have so much fun making over these old items. xoxo
I love this! You did a beautiful job and inspiring me to try this! I just found a slatted wooden tray that this might do well on. Just paint over if it doesn’t work! Hobby Lobby has fine misters that are good to help with thick paint.
Nice work!
It is beautiful! You did a wonderful job I believe and the colors are calming and so pretty. I have an old cabinet door that I may try the same thing. It will take a little bravery on my part, but you have given me hope. Great job!
Want to be inspired, learn new skills, discover all the tricks to furniture makeovers, creating new out of the old and more? You'll also receive my FREE ebook "Creating Fabulous Finishes" PLUS access to my private Printables Resource Library, too!
Sign up to get the Weekly Newsletter! Our emails include an unsubscribe link and you may opt-out at any time. Your information will *never* be shared or sold to a 3rd party.


")


")
")
")
")

")

Hi Nancy! You’re pretty sassy and that appeals to me as I am too!!! I love to play around with stuff and see what comes of it. I collect all sorts of “junk” to see what can be made from it! I am not particularly good at what I do but I just love doing what I do! And, strangely enough, I just happen to have some old doors and windows with which to play! Thanks for the inspiration – I think you’re awesome!
Aw, haha, that’s awesome, Lorraine! But yes, isn’t that so much fun?? Thank you so much, I hope you have fun playing with your old doors and windows! xoxo
I like your little painting. I think it’s the white frame that isn’t working. Something a little darker to bring contrast. The white gets lost on your wall. But you’re right… kudos for thinking of it!
Thank you, Carolyn! Yes, I can see that too! :) xoxo
Love LOVE Love this idea and going to try it. I have a few cabinet doors, and I’ve done a few different things, but never thought of this!! Thanks!
ps: you did a GREAT paint job!
Yay!! Have fun with that!! And thank you so much, Lisa! :) xoxo
OOOHHHH!!! I love this painting….has a nice relaxed “feeling” to it…Am definitely going to give it a try. Thanks for sharing. Oh yes, I just absolutely love the table and vase.
Oh yay, I hope you do Tersia! So much fun! :) And thank you so much! xoxo
It really does look like a framed painting, Nancy!
Thanks, Marcie!! And yes, doesn’t it??! Built-in frame, perfect! xoxo
I think if you added a starfish or some seashells to the sand part it would really give it that ocean feel………..just my opinion……It really does look good though……..
Oh, now that’s a fun and creative idea! Love it, thank you!! :)
So clever! I think you did a great job with your painting! Where did you find a cabinet door that has such pretty, detailed trim around it?
Thank you so much, Kathy! That was actually a cabinet door off of our old kitchen. (we have since completely renovated the kitchen with new cabinets, etc) When we moved into our home, we updated the existing kitchen cabinets by adding that pretty wood trim to the plain, flat fronted cabinet doors and painting them. It worked nicely for many years but we finally had to tear out and give our home the new kitchen it deserved! ;) But I have quite a few more doors to play with still! xo
This looks great! I would never have thought to use a cabinet door as an art canvas! XOXO
Thank you Christy! I know, me either! And then I did!! lol xoxo
I have a couple doors to do something with!
Yay!! Have fun Rose! :) xo
Very nice, you always think outside the box I love it.
Aw, thanks so much, Christina! :) xo
Look for paint extender at a craft store to help keep your paint more blend-able. You could also try to spray a little water on the surface that you’re painting to help keep the paint from drying so fast.
I think you did a really good job for first time out. Keep up the good work. I enjoy seeing your ideas turn into great home accessories. .
Oh yes!! I have actually used an extender for latex paint years ago on furniture and totally did not even think about that! Love it! Thanks so much for that reminder and thank you also for the kind words! :) I have so much fun making over these old items. xoxo
Hi there,
I AM a painter. Let me just say, you did really good. Yes, you could sell it. I like the fact that you knew to “soften” the painting. Don’t apologize.
I paint on whatever I can get my hands on. Right now I’m using old piece of boards to paint some of those popular churhces on.
Wow, thank you SO much, Rebecca! That makes me so happy! :) And oh, how fun!! I love that! xoxo
Beautiful painting. It’s something I would buy.
Aw, really?? That’s so awesome, thank you, Barbara!! :) xoxo
I love this! You did a beautiful job and inspiring me to try this! I just found a slatted wooden tray that this might do well on. Just paint over if it doesn’t work! Hobby Lobby has fine misters that are good to help with thick paint.
Nice work!
Thank you, Tess! And yay! I am so thrilled you were inspired by this! And oh my, yes, I didn’t even think of using a mister! Great idea, thank you! xo
Nancy, it sounds like you were enjoying the ride with this project! Love the colors!
Yes! It’s so much fun to venture out sometimes! :) Thank you! xoxo
It is beautiful! You did a wonderful job I believe and the colors are calming and so pretty. I have an old cabinet door that I may try the same thing. It will take a little bravery on my part, but you have given me hope. Great job!
Thank you, Char! Yes, do! That would look so pretty on there. Be brave! You can do it!! :) xoxo