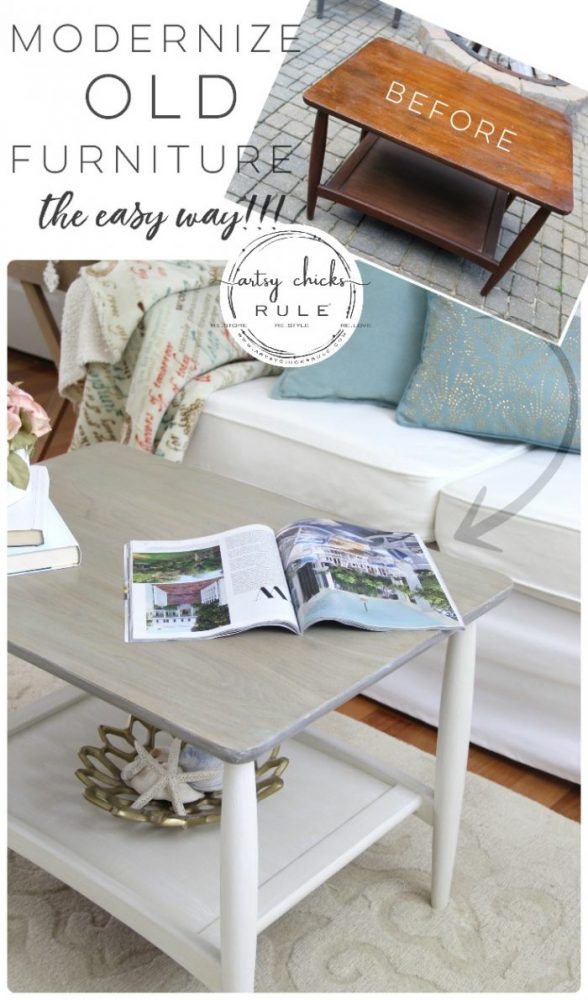
How To Modernize Old Furniture With Chalk Paint
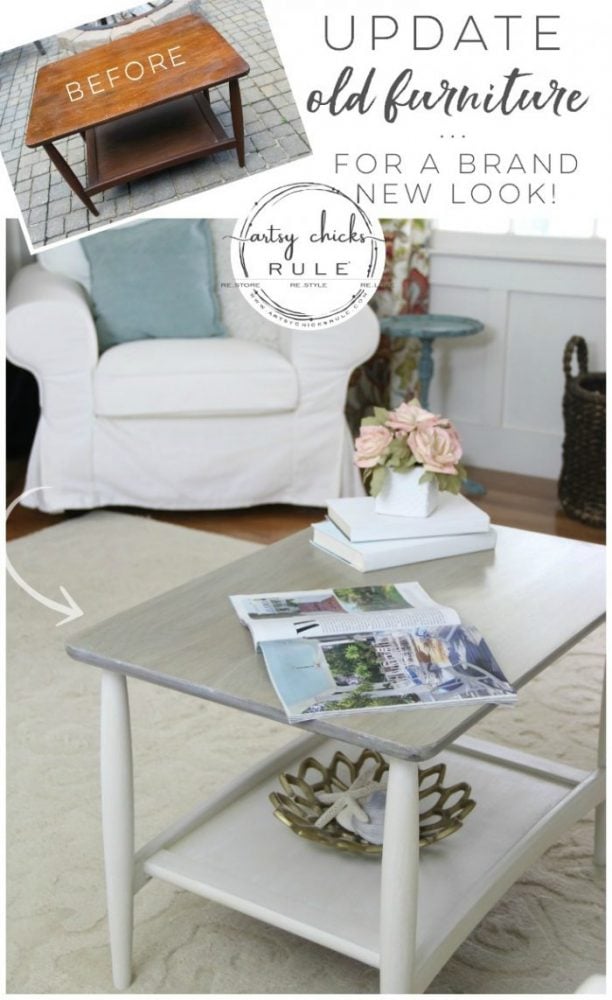
There are many ways to decorate your home on a budget! I’m sharing a $15 thrift store table and a simple tutorial on how to modernize old furniture with chalk paint today.
You don’t have to spend a fortune to decorate or furnish your home.
This blog is a testament to that!
I’ve bought (and sold…and used in my own home) many pieces of used furniture over the years.
Not only used furniture but even home decor items, too.
Today is Trash to Treasure Transformation Tuesday and I’m sharing this $15 thrift store table makeover with you.
(don’t forget to scroll all the way to the bottom to see what my friends are sharing today too!)
And “how to modernize old furniture with chalk paint”.
Or any paint but chalk paint tends to be easier with a little less prep when painting old furniture.
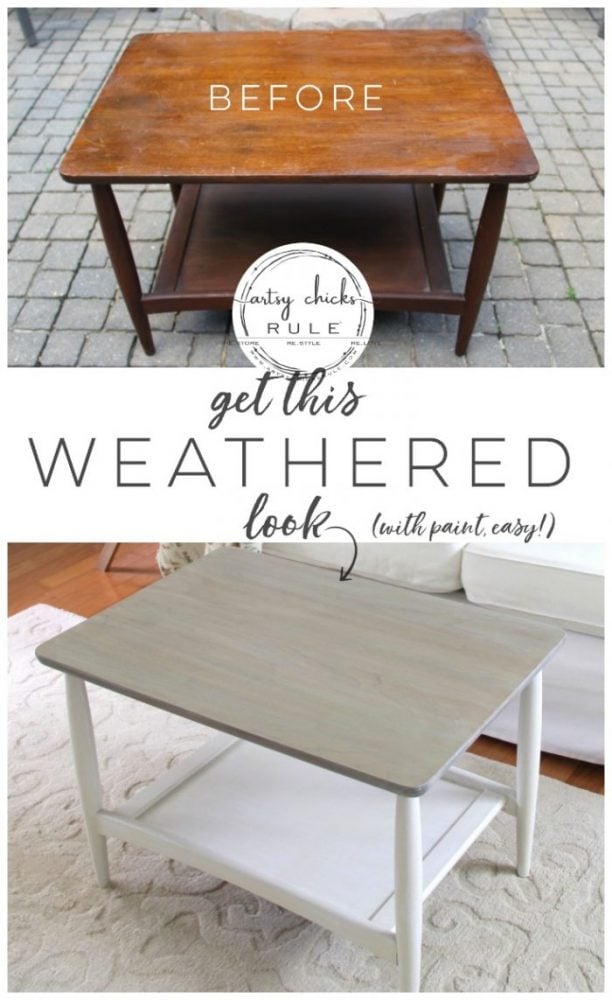
Here’s how my fab find started out:
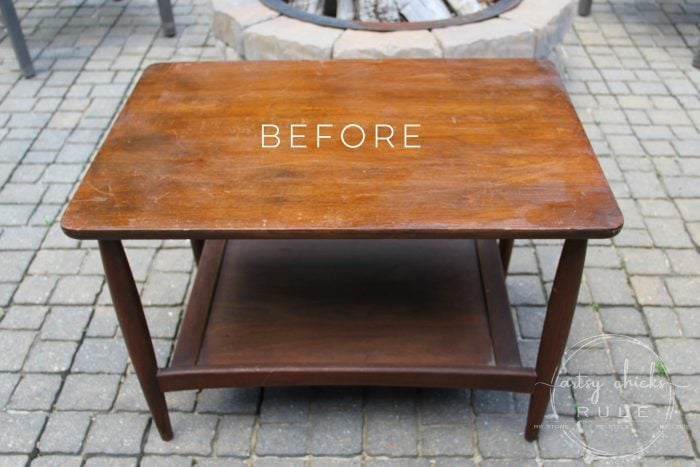
Not terrible but a little beat up…..and old.
BUT, with a very nice form, I think. Don’t you?
I decided to keep it pretty simple to show how you can take something like this and give it a completely new, updated, modern look.
I started the project by removing the finish on the top with my fave remover, Citristrip.
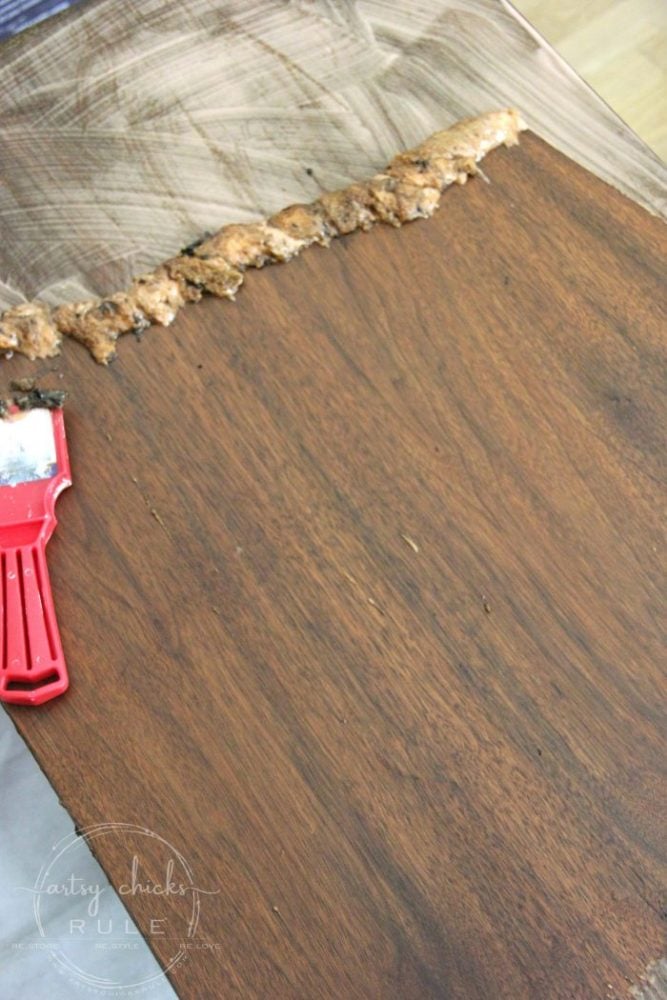
I mean, just look at that!
I love this stuff.
It takes the gunk and old finish right on off.
If you like the way it looks once doing that, you can clean it well (I usually give it a wipe with mineral spirits) and give it a coat of poly.
It sure is pretty enough to do that which just makes this makeover even easier!
But, I don’t want to do that with this one.
I’m going to give it a beachy, weathered vibe instead.
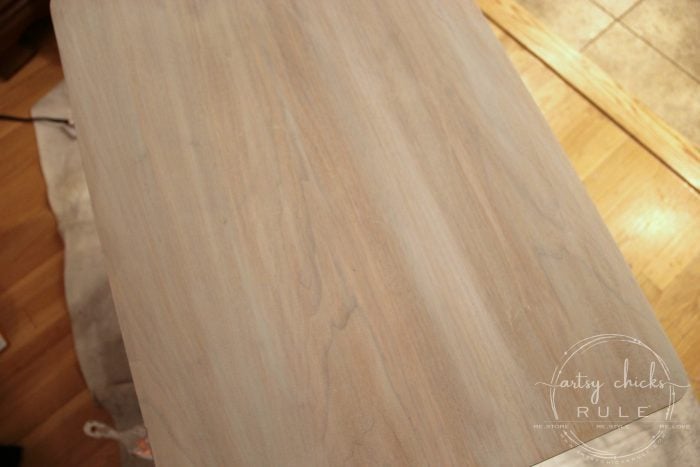
So I had to sand it a little to get the stain layer off.
Not my favorite thing to do but it didn’t take very long since that top thick finish was removed.
Here is what I ended up with:
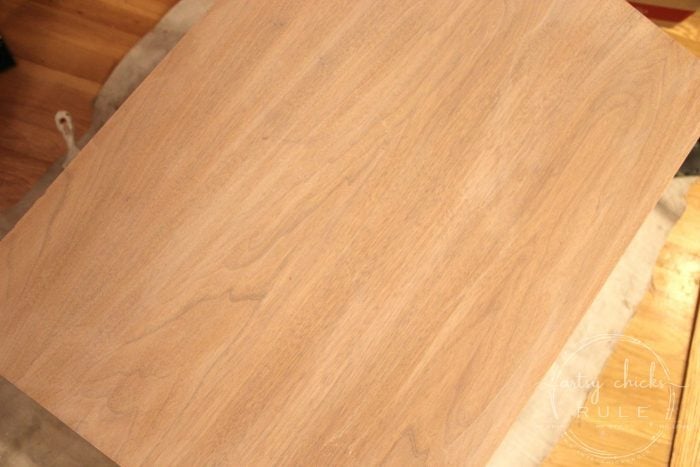
Lovely pink wood! haha
It actually is pretty but I want a bit more of a gray, weathered look so it might be a little challenging since it’s so red.
I did seal the entire bottom half with Shellac though. This wood tends to “bleed” right on through your paint but Shellac works wonders!
I usually use a spray but this is the Shellac I used this time.
I started out by taking a wet cloth and wiping on this glaze.
I honestly don’t think it would have mattered if I used this or a white colored chalk paint. (I thought it would apply differently than it did)
For this, you want to make sure you use a fairly damp cloth so the paint does not go on too thickly.
I actually had two cloths, one for paint, and one that was just damp and clean to wipe back over the paint that I just wiped on. (you can also use paper towels for this)
You just need to work it in, in long strokes, with the grain of the wood, until you get it looking like you want. I will be doing another video tutorial on this very soon.
Keep an eye out for it!
It still looked too “red” so I used this blue chalk style paint to counter act that. (you can see that effect further down)
I originally thought I’d paint the base white but with that “little too warm” top, it didn’t look right.
As you can see here…. (the white bottom shelf….too white)
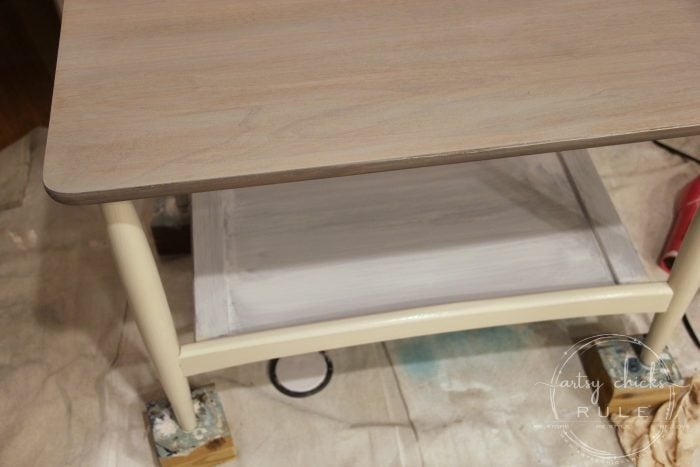
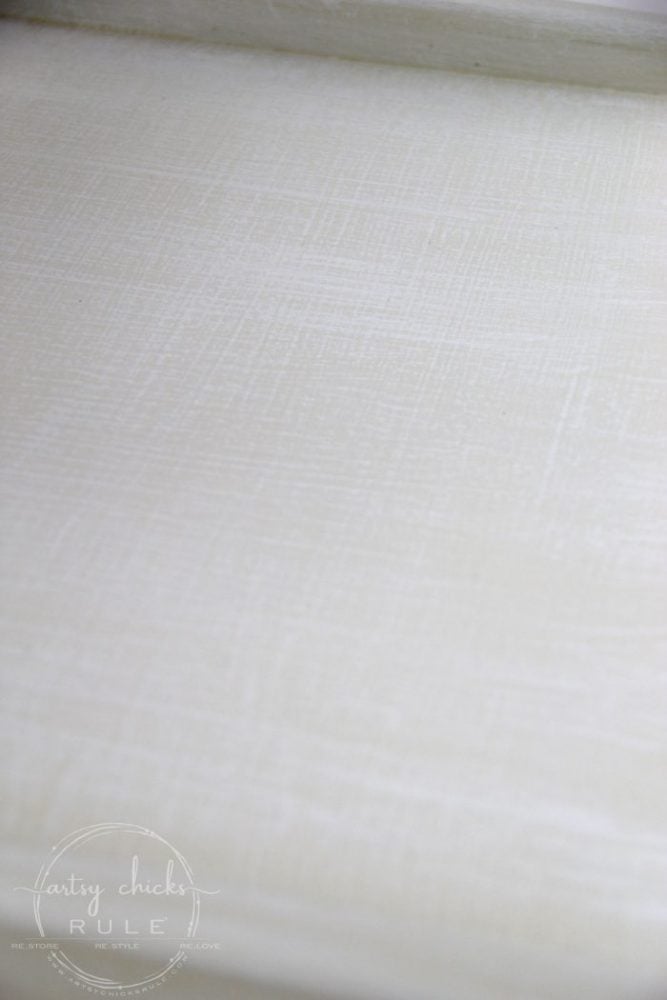
Instead I used this chalk style paint, which is a nice cream shade. It went on like a dream!
But how much better does that look? Much, right?
Want to know about 26 other chalk style paints?
I’ve got the low down for you right here! >>> 26 Types of Chalk Style Paint For Furniture
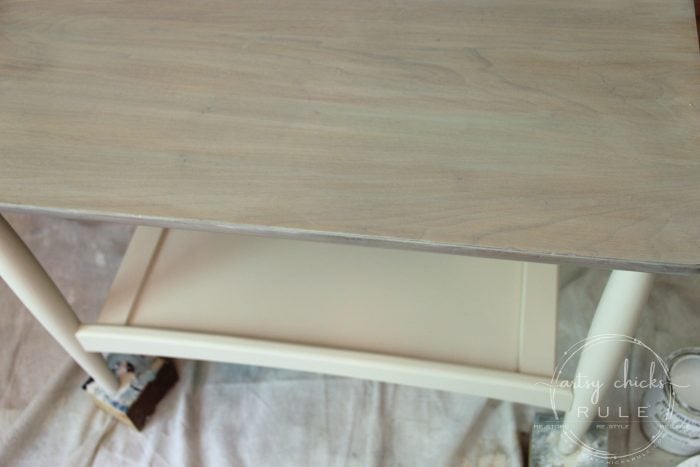
Here you can see the top with the blue added.
You can see how it really “cooled” things off.
Much better.
But now that I had the top a little less “red” and warm, I decided to add some white back into the bottom.
I gave the entire base some dry brushing with this white chalk style paint so as to not cover up all the creamy color.
You can see my video tutorial on “how to dry brush” here.
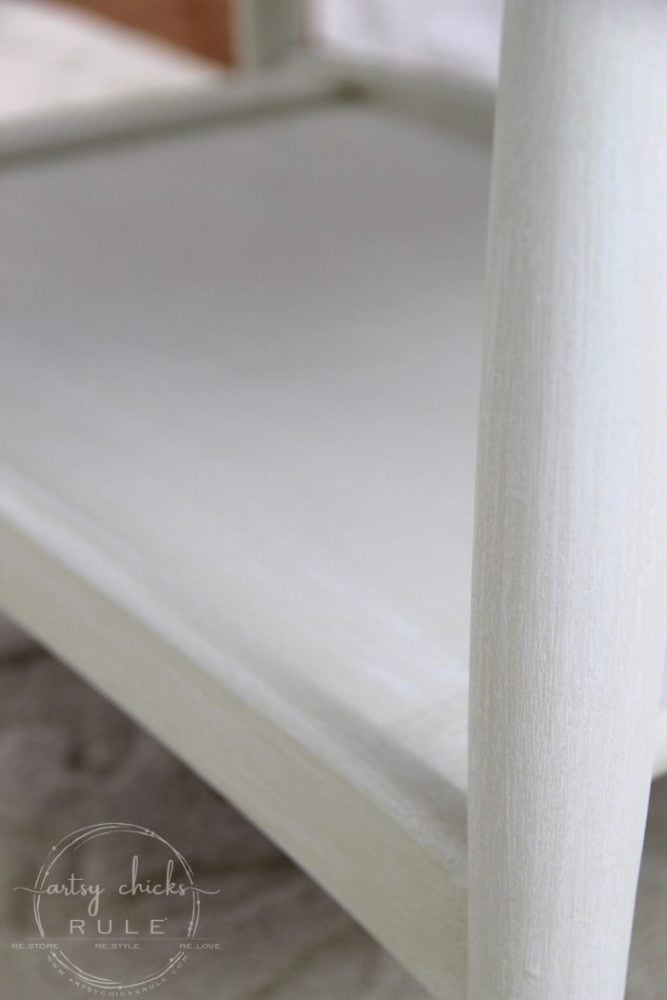
This way you can still see some warmth but the white really brightened it up nicely.
I applied the dry brush in opposite directions to give the bottom shelf this look.
The top got two coats of my fave sealer and the bottom got one coat.
And done!
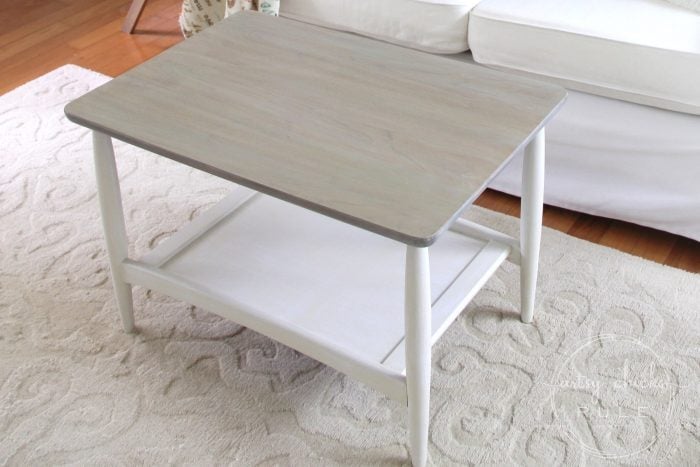
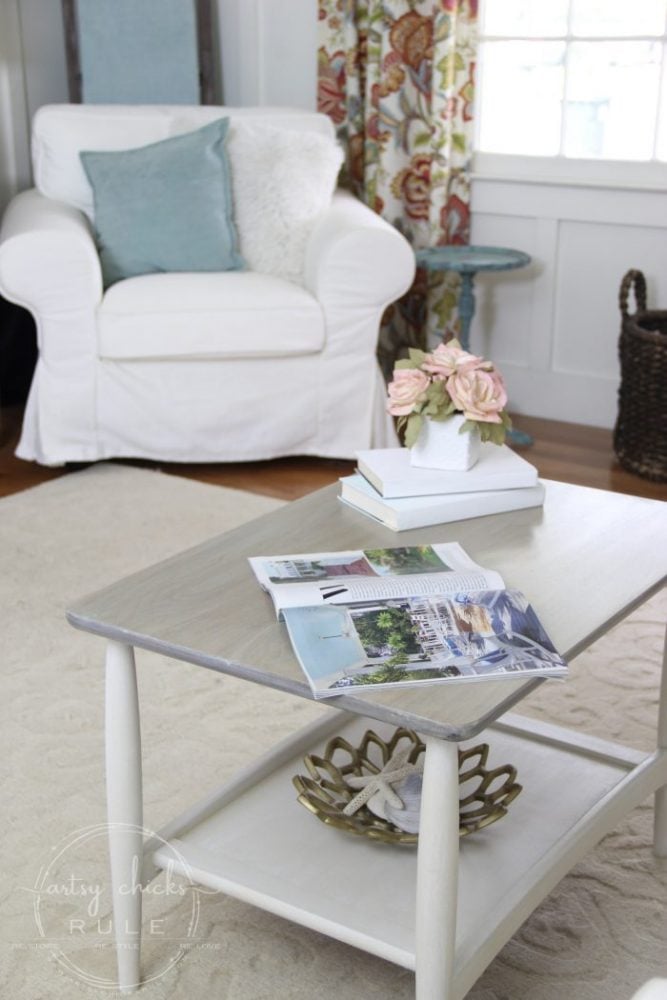
A fun “new” modern piece for anyone to love! For $15 and a little work (fun, not work, I call it fun ).
You really can not beat that!
You can modernize old furniture with chalk paint…or any kind of paint really, and it’s fun too! Promise!
And who would ever think you could get a nice weathered, white washed looking top out of that tabletop?
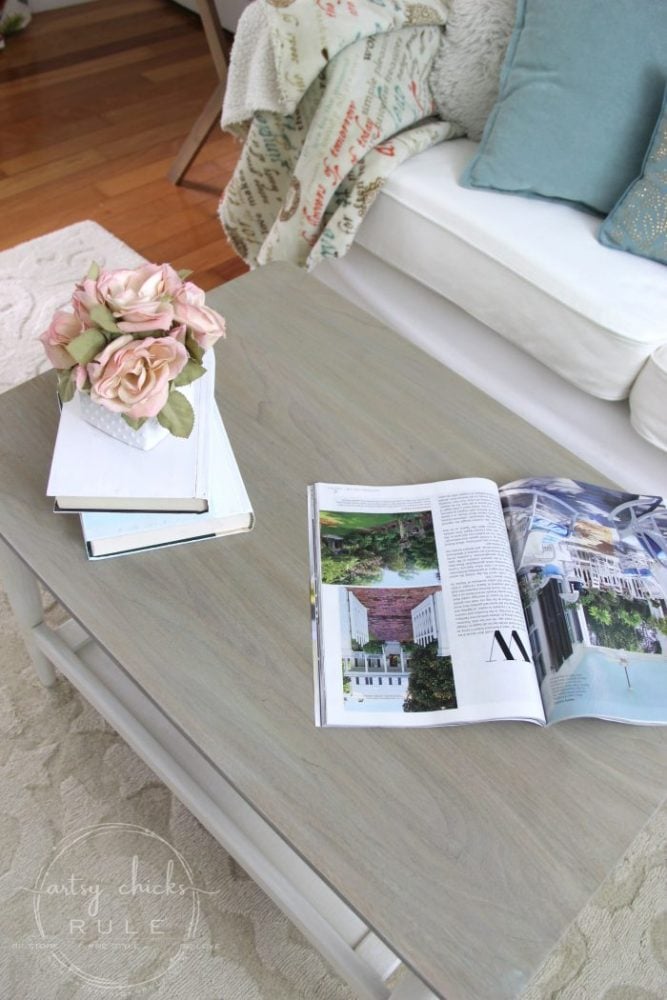
You can see the grain of the wood even better than before…
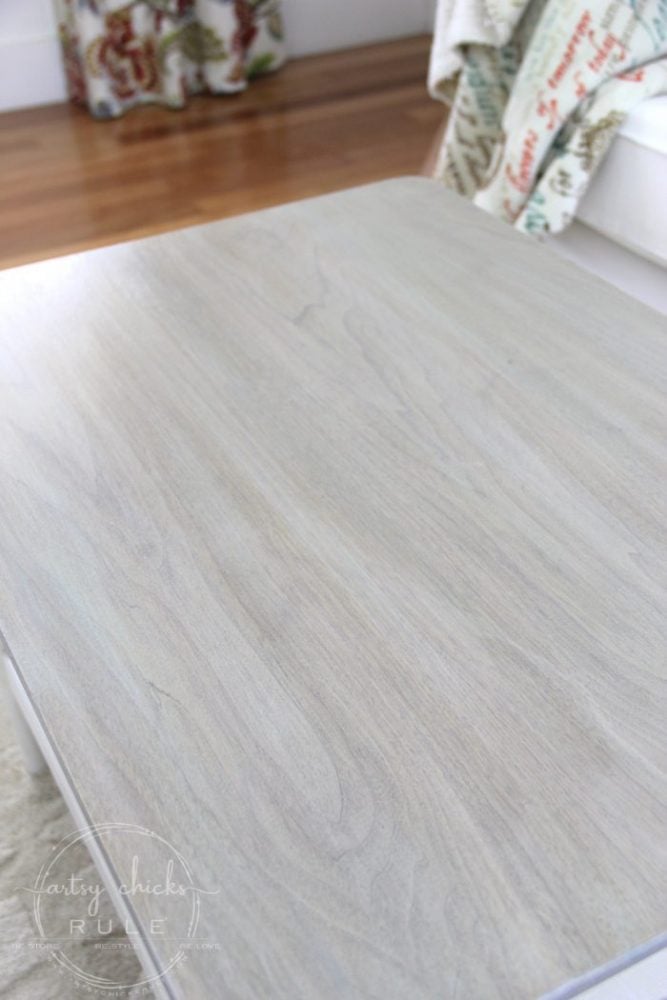
What a difference a little paint makes…always.
I just love paint.
It’s magic.
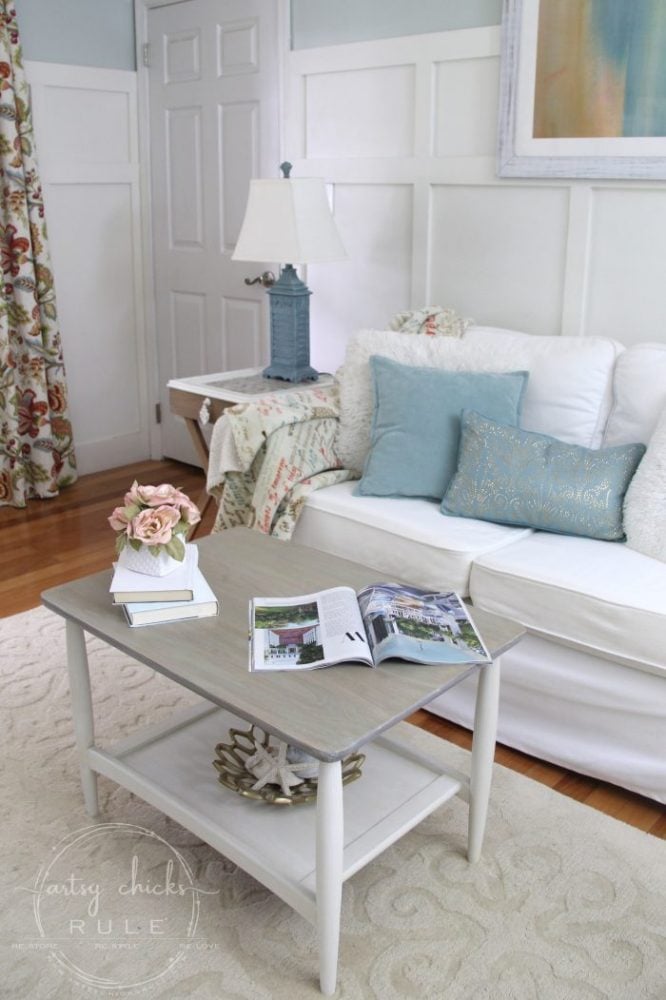
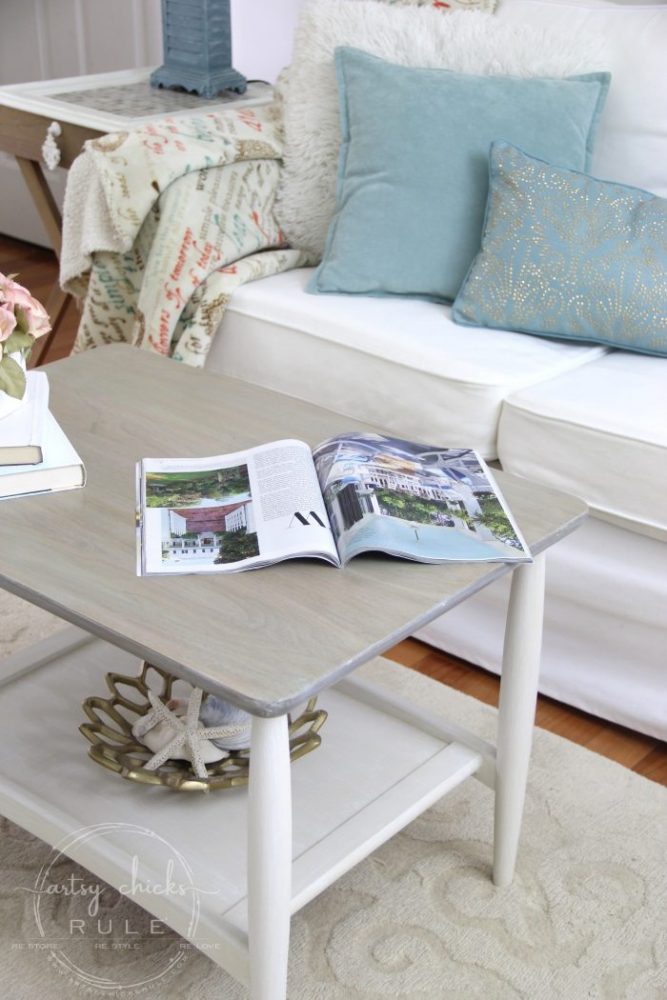
Loving that pretty new finish on the top.
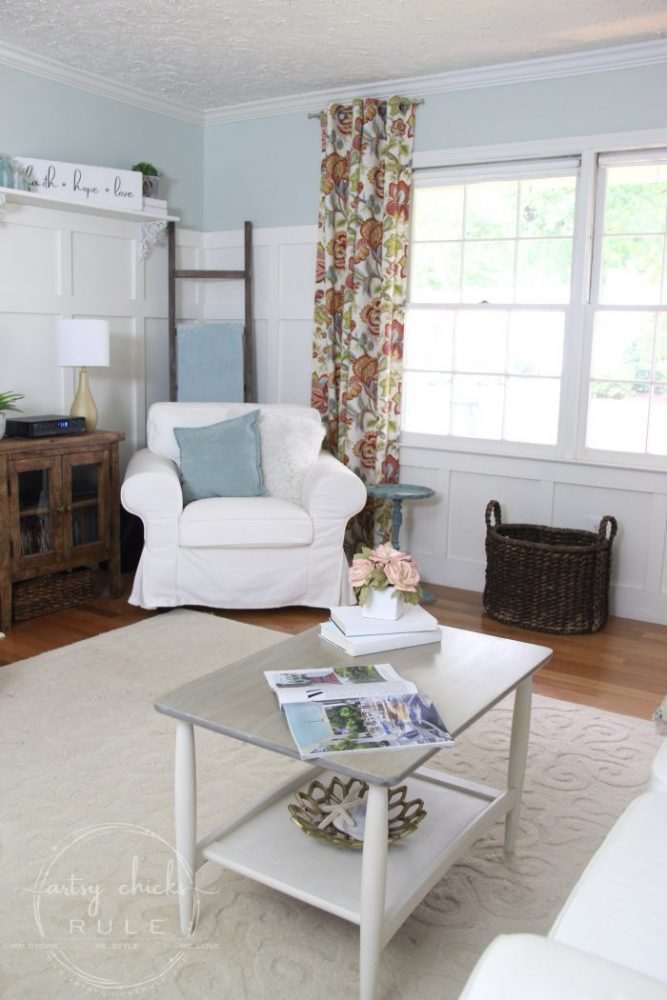
Goes perfectly for a coastal or farmhouse theme.
The blue paint really toned down the red nicely without really looking “blue”.
Which would have been totally okay with me, don’t ya know?!
You guys would not believe how dark it was today when I had to take these photos.
It was one of those really overcast days where it almost looks like nighttime inside.
You know the ones.
So I had to really work my camera….and bring out my lighting kit…to get these shots.
But it sure does look like it was a pretty, sunny day, doesn’t it? lol
Natural lighting is so much better but oh well, what can ya do?!
Edited to add this post I wrote about the Pros & Cons of using Chalk Paint for Furniture, see it >>> here.

So what ya gonna do next time you hit up the thrift store?
Or drive by a garage sale and see that old, dated, beat-up furniture with good bones?
You’re going to stop and throw it in the back, right?
Right!
PIN this post to save it for when you do!
Now hop on over and see my lovely friends and their beautiful trash to treasure makeovers too! (links are below the photo collage!)
See you later to share what I did with this!
UPDATE! See it now, here!!
xoxo

")


")

")

What a save! Refreshed and so beautiful now, Nancy. Love your tips too!
Thanks Larissa!! Very different looking, for sure! :) xo
Hi! Love this makeover. I have a question – did you dry brush the blue on to the top? Thanks!
Hi Kathy! Thank you! No, I didn’t, I actually did it the same way I did the white. I need to edit that! Sorry! Once the white was on and dry, I just went back in and added a little blue here and there. In the same way I did the white. (with the damp rag, etc) I will do a video soon on this. :) xo
Thanks Nancy – I look forward to seeing the video!!
LOVE everything about this! You know I love that weathered white-washed look and this looks amazing in this finish! And yep, looks like a bright, sunny day outside, but I know it wasn’t lol! XOXO
Thanks Christy! Yes, it would also look great in your house! :) And yes, it was SO gloomy yesterday!! haha xo
I LOVE it! It’s so beautiful now compared to before. Great job!
Thanks Robyn! :) It sure is a different table now, for sure! I figured I’d sell this one….but I may keep it. It’s fun for a change! ;) xo
Beautiful finish on the table, Nancy. I love the shape of it, too.
Thanks Marcie! I’m loving the design of this one and may end up keeping it for a nice little change up! :) xo
It looks great!
Thank you Rose! :) xo
Such a fantastic makeover, Nancy! I didn’t even think there was any real wood on the table from the Before photo. You classed it up and gave it a new (better) life! xo
Thanks Jen! Yes, that old finish really hid the pretty wood grain. :) xo
Love the table. Going to try this this summer. Also love your drapes. Where did you get them?
Thanks Claudia! :) The drapes were made by me, you can find all the details on the fabric and how I made them, here. xo
What a difference! Very pretty. Thank you for all the info.
The end result of painting furniture is like the 8th wonder of the world, isn’ t it? I am amazed every single time at the before and after of painted furniture.
Thanks Di! :) And oh my, yes, it really is! I am just like you. xo
Excellent job on the table! It matches your beautiful home decor perfectly..btw.. I love your drapery
Thanks Jamala! :) I think so too, and why I think I’m going to go ahead and keep this one! ;) xo (the drapes are no-sew curtain panels, you can see them here…so easy to make!)
pure genius
Ha, thanks! :) xo
Lovely as always, Nancy! The coastal vibe is perfect, and you are the QUEEN of dry-brushing! Amazing effects you create!
Thanks Julie! :) xoxo
This is a great transformation! I love finding pieces at a second-hand store and reinventing them. Could you please apprise me of the brushes you used? I sometimes end up with brush strokes. Thank you!
Thank you Debra! :) I use mostly Purdy brushes. (and chip brushes for the “dry brushing” or any effects like that) xo
Hi Nansy… love this little table. What color are your walls in this room? Both the blue and white please. Thank you
Hi Amy! Thanks! The blue Seasalt by Sherwin Williams and the white is called Extra White also by Sherwin Williams :)
It definitely looks so much classier.
Thank you, I think so too, Rose! :) xo
Good save!!! Very coastal refresh. Love your do-overs!!! Keep up the good work!!!
Thanks, Addie! So happy you enjoy my makeovers! xoxo
Hello Nancy. Thank you for all of the wonderful tutorials.
Are your slip cover pieces Pottery Barn or IKEA? I’m in the market but just found out IKEA discontinued the set I wanted. 😢
Thank you,
Trish
Hi Trish! They and the furniture are from IKEA. (Ektorp…which is being discontinued)