Learn how to apply furniture & decor transfers to fabric! It’s SIMPLE!! And fun!!!!
Hey there and happy Thursday, friends!
I’m back today to talk all about how to apply furniture and decor transfers to fabric. Because why not?!
I have some plans to do more of this but for now, let’s get to it.
Today it’s not about that though, it’s all about how to apply decor transfers to fabric.
I love decor/furniture transfers on furniture, you know, the regular kind. I even love them on smalls like trays, wood boxes, and more.
But what I hadn’t tried yet was putting them on fabric.
So I did a little research and got to it.
How To Apply Furniture & Decor Transfers To Fabric
From what I gather, putting a transfer directly on fabric that has not been treated in some way is a no-go.
You’ll need to add some kind of medium first. Something like Mod-Podge, our Decoupage & Transfer Gel, or paint, etc.
That will give it something to grip onto. The furniture transfers are SUPER sticky but you’ll still need it to have something to grip onto.
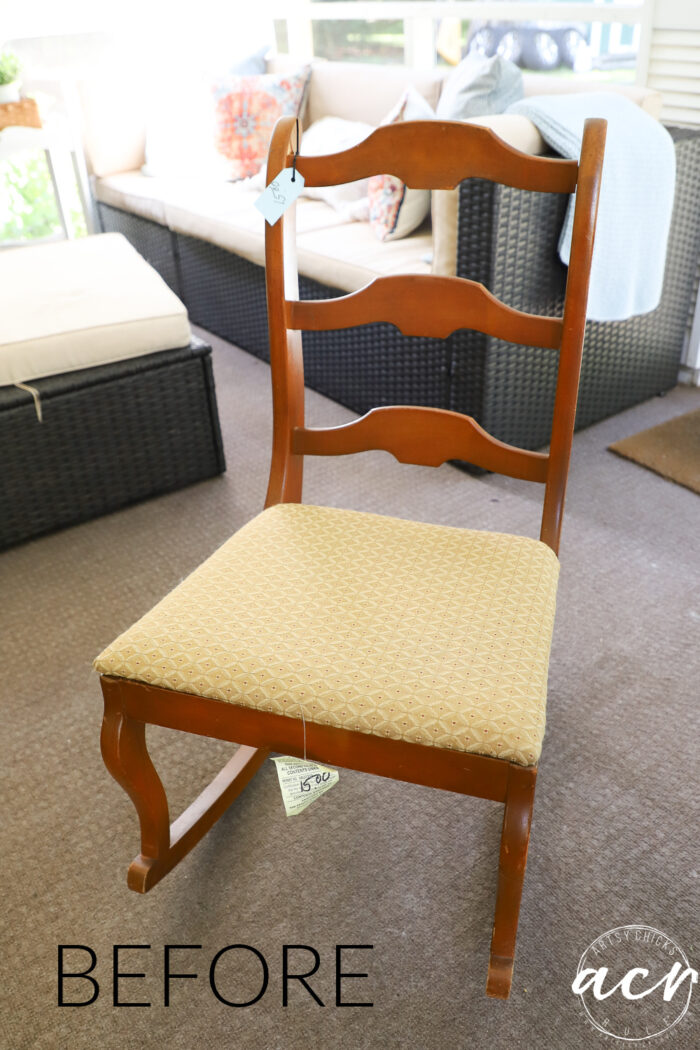
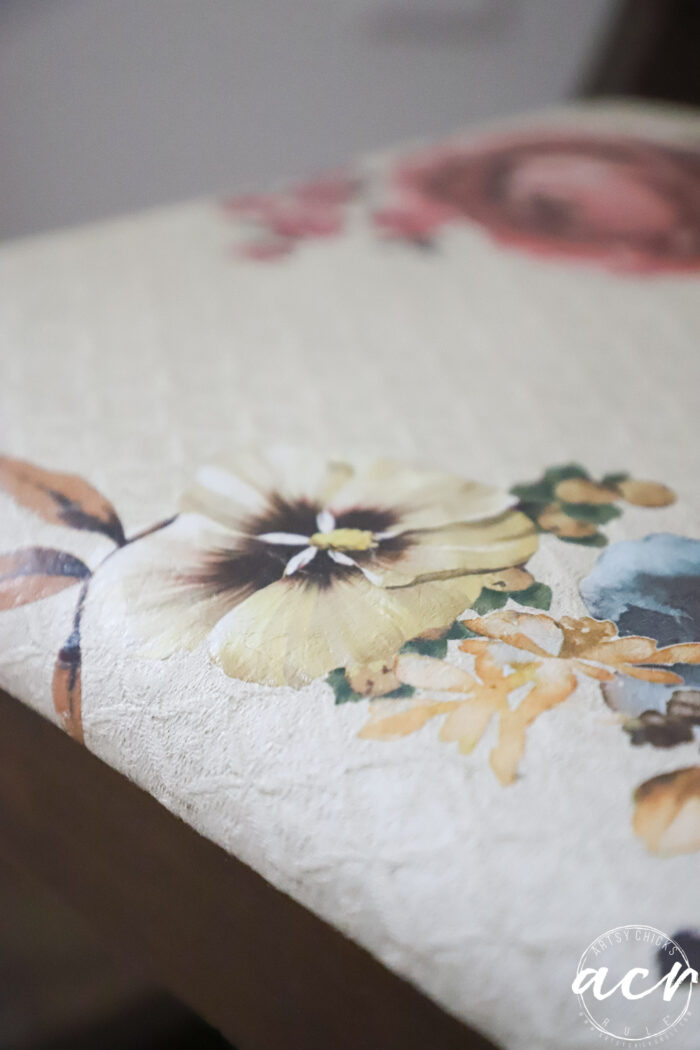
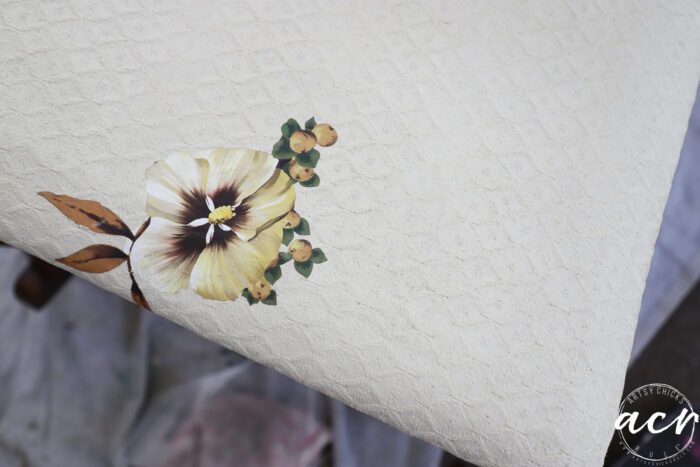
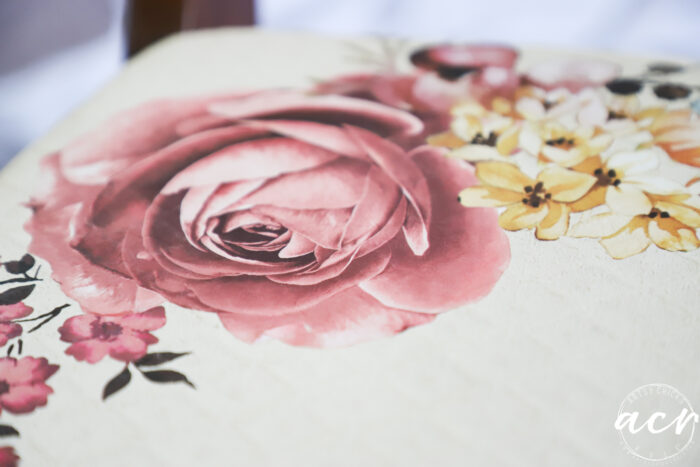
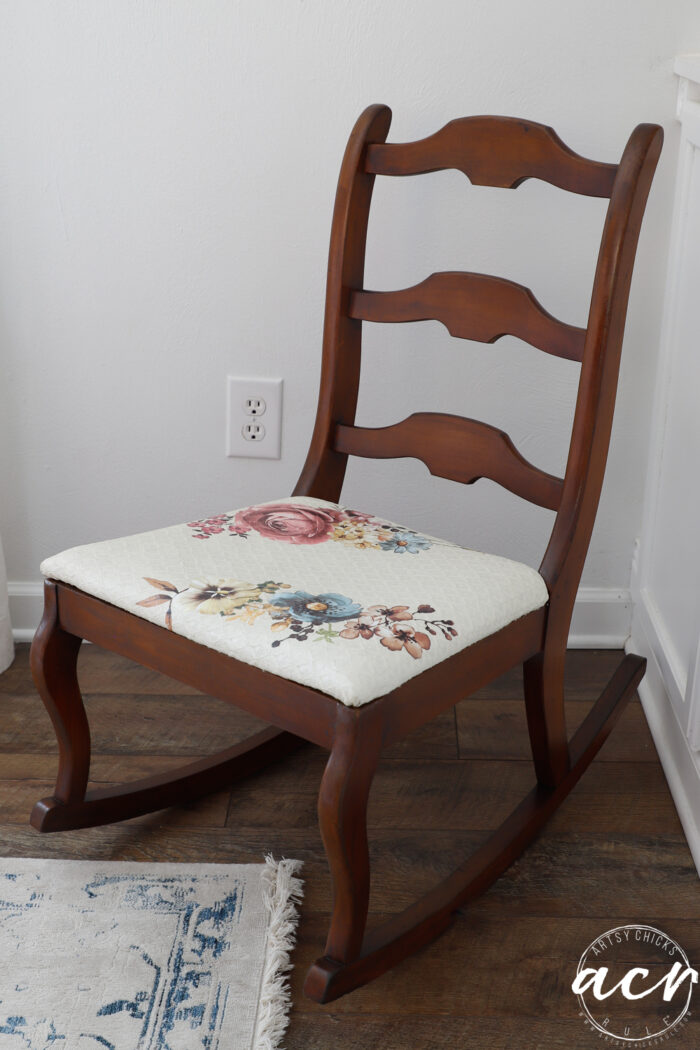
Now, I painted the fabric on this rocker so we were good to go. I was a little concerned because the fabric had a design/texture to it. I wasn’t sure how well that would work with a furniture transfer. But these furniture transfers are SO thin that it did not matter one bit. Meaning, it completely and easily conformed to the bumps and lumps of the design.
MATERIALS LIST
Painted Fabric
Furniture & Decor Transfer of your choice (I used this one)
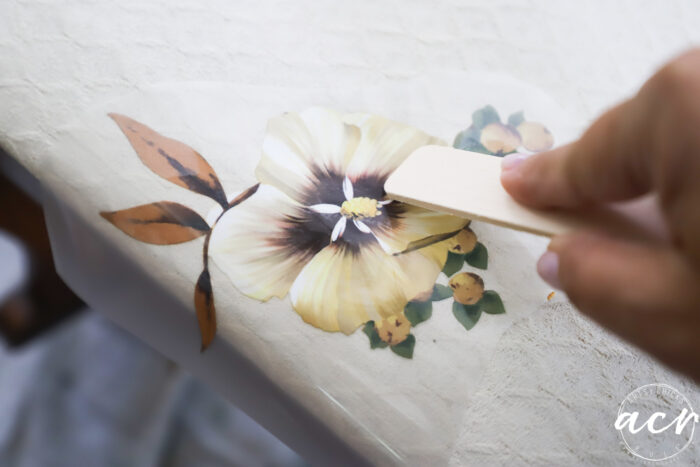
So once your fabric project is fully dry (FULLY, you don’t want any moisture at all) you will apply the furniture transfer just as you would to a piece of wood furniture, etc.
You’ll just want to be sure you rub it very well to make sure it is adhering to all sections of the fabric. Like, for example, mine with the “hills and valleys” of the fabric. haha!
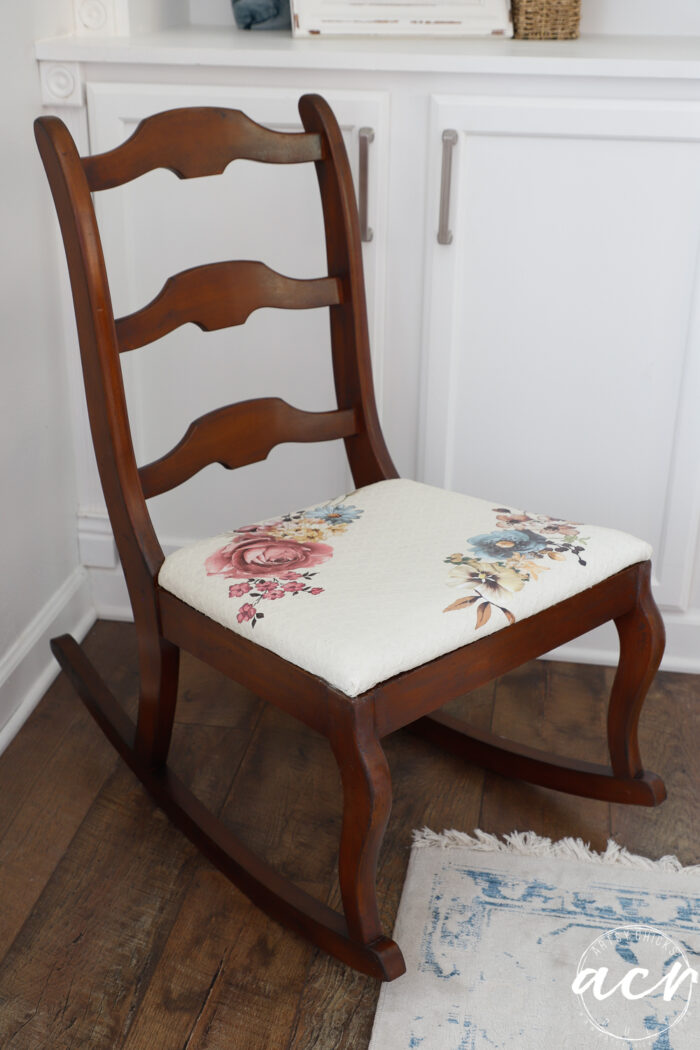
I was thrilled once I did the first piece! I mean, just look at that. How pretty!
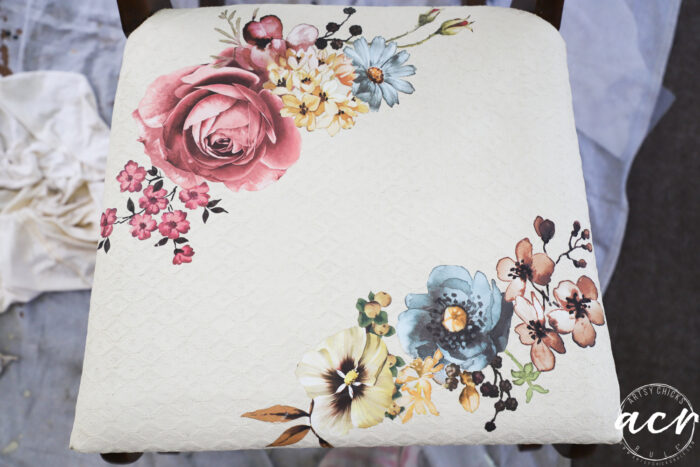
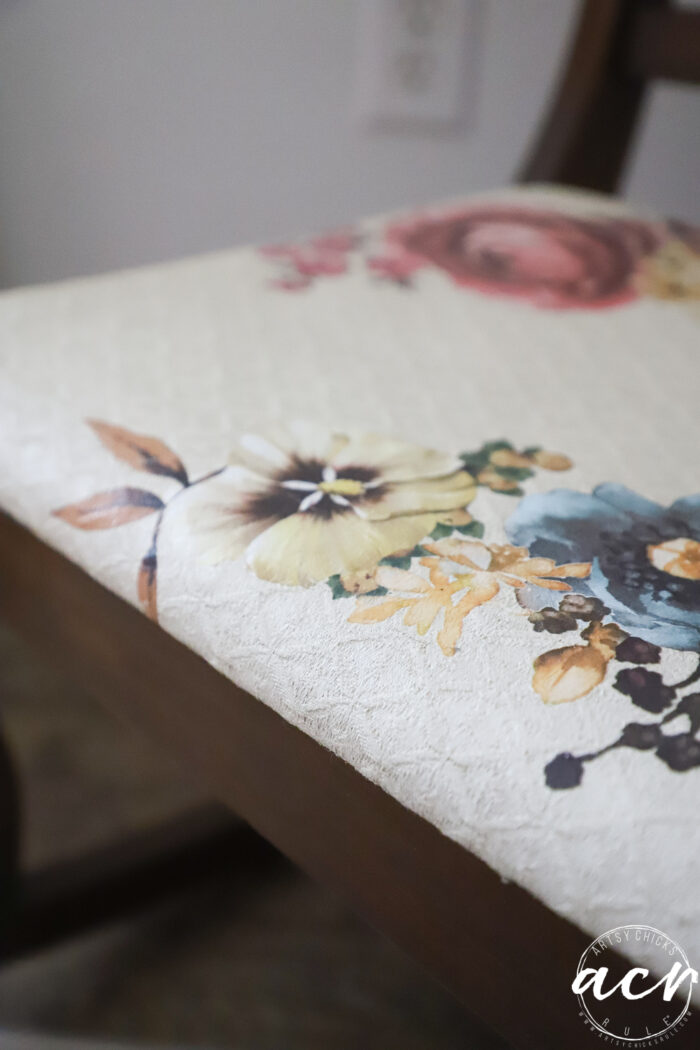
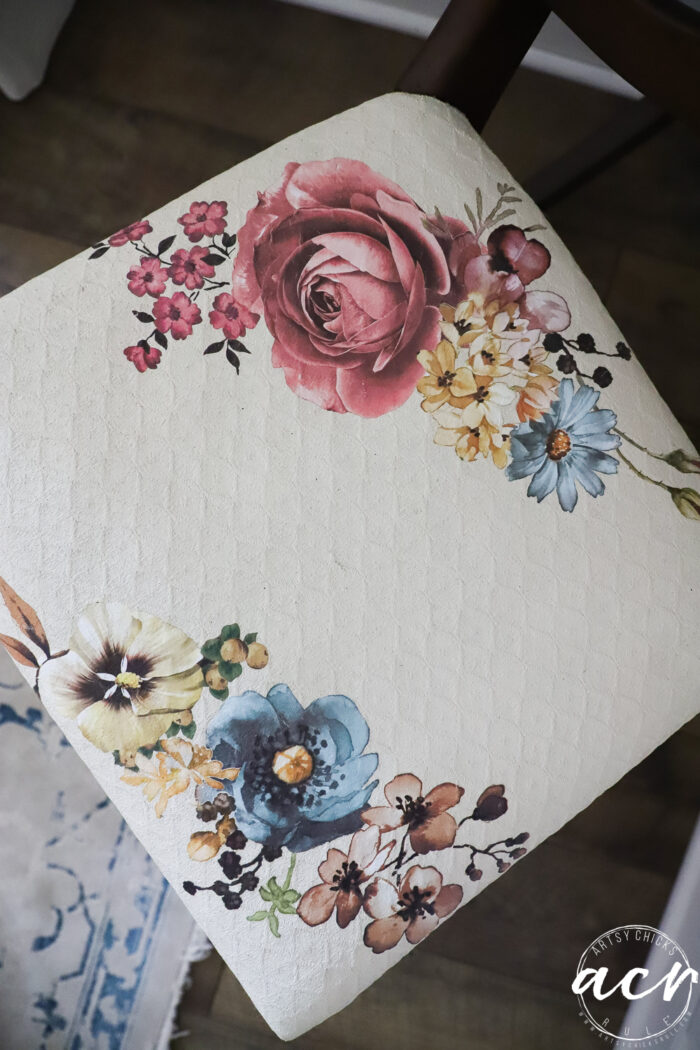
I ended up adding more on the bottom right and this other section on the top left.
I sort of liked the look of it draping each corner.
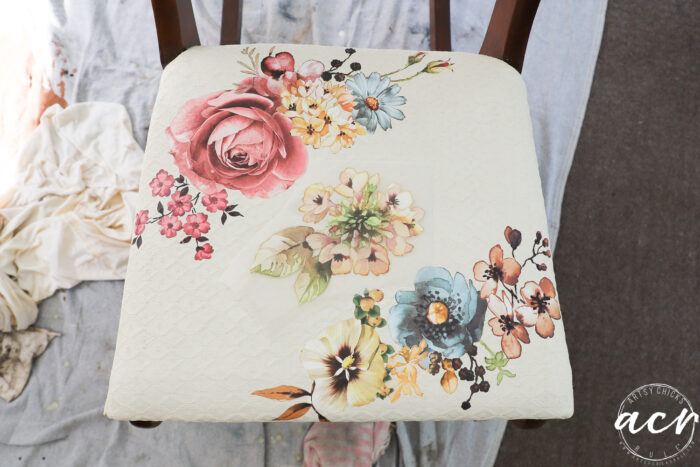
I considered doing more in the middle…
…but decided against it.
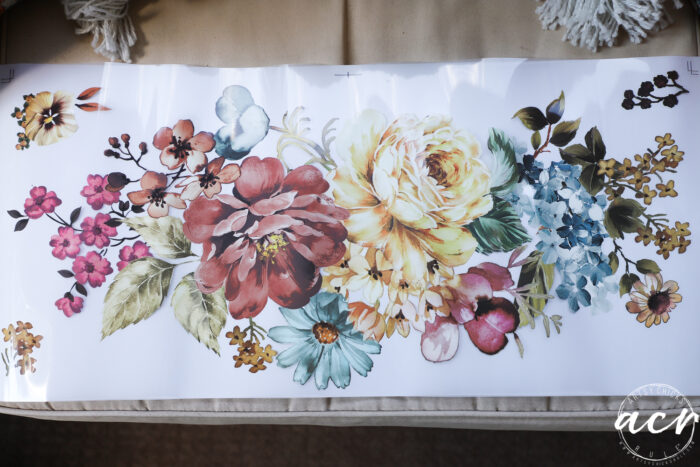
Look at this big lovely piece that’s also a part of this set. I already know exactly what I’m going to use this one on! I just need to get busy on that project. Soon!
So, once you have transferred your furniture transfer onto the fabric. You will then need to rub it very well to make sure it is adhered well in all areas. Plus doing this really gets it into the fabric and becomes “one with the fabric” in a way.
Applying Topcoat Sealer To Our Decor Transfer On Fabric
Finally, you can “seal” this with wax OR poly, like our Tough Coat Topcoat. I decided to use the Tough Coat for extra protection. I am also sharing another project of applying a decor transfer to fabric but using wax as a seal coat to see how that does too. Keep scrolling, it’s further down!
I ironed it to get the wrinkles out before I began.
As I mentioned above, the transfers don’t really like to stick to fabric by themselves. So I’m not going to test that! lol
It’s best to have it painted or use some sort of medium that will give it something to “stick” to. Now, the decor transfers are super, duper sticky but still, let’s give it something to hold onto for longevity.
I painted the first project and used a poly topcoat. This time I’m using Decoupage and Transfer Gel (sort of like Mod Podge, which will also work) and wax to seal this time. So just different all the way around.
I used some wax paper inside the cloth bag so the transfer gel wouldn’t bleed into the other side.
Then I simply applied one coat over the entire piece. (this one side only)
I let it dry completely.
Again, just like with the paint, you do not want any moisture at all or your transfers will not adhere properly.
I pulled out this pretty floral transfer.
I still had a few pieces left from these two projects I used it on previously:
I figured I’d go ahead and use up what I had left. So I laid all the pieces out to see how I’d arrange them.
I LOVE this furniture transfer. Unfortunately, I do not believe it is being restocked so I will not be able to get any more of this one. I think I have about TWO left and that’s it! So if you love it too, you better snag it below!
Now, once you’ve transferred it, you’ll want to rub it to make sure it’s stuck well everywhere.
You want it to really get it down into the fabric just like on the chair cushion.
I used my fingers, you can also rub over it with a soft cloth like an old t-shirt, etc.
This is the wax I decided to use. I love our Beeswax but didn’t want to use the Beeswax on this particular one. (sorry the photo is blurry, I didn’t catch that in the camera when I took it)
This wax smells amazing! It has Lavender essential oil in it and it is a joy to use. First time using it!
I simply rubbed it in and all over the entire side shown with a soft cloth. (old t-shirt)
And that’s it!
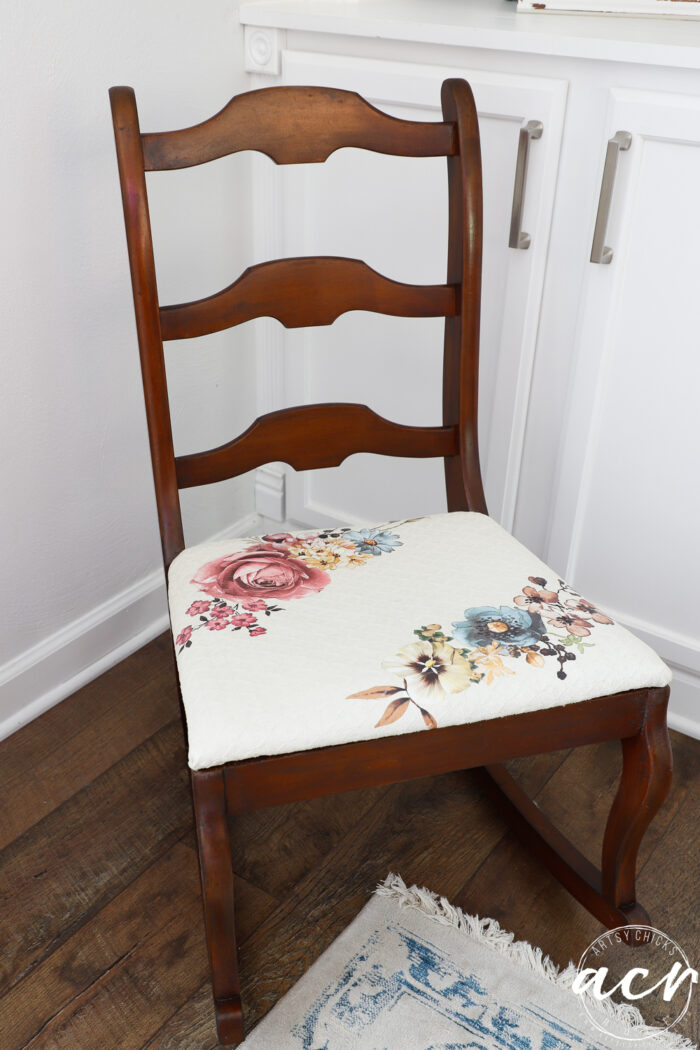
It turned out wonderfully. I’m so impressed. How fun to use these furniture and decor transfers in a completely new way.
And this transfer…ahhh…so pretty! Love all the soft pinks and blues with the touches of gold.
I can see all kinds of projects with fabric like this! Fun, fun!!
PIN it to save it!
I hope this has inspired you to give furniture and decor transfers a try! (if you haven’t already) AND to maybe try them in a completely new way…on fabric!
First and foremost, so happy for Ryder’s results! Great news!!
The chair came out so pretty and I love the bag also. The chair has the same fabric that is on my camper window valences which I painted white. I was nervous doing it but they came out great. I used DB’s Easy spray wax since they won’t be handled at all. Never knew you could put these transfers on fabric. Good to know, so many things you could make using them.
That transfer really is beautiful, Nancy. I’ve seen people use transfers on jackets and boots, never thought about trying it on a tote bag. My only concern is how to wash it. I use my totes a lot and they can get pretty dirty.
Thanks, Marcie! Oh fun, on a jacket would be interesting! Boots too!! Yes, that is a valid concern. I would say spot washing would be fine. I have no idea if it would hold up in the washer but I’d lean towards no. It is very soft and flexible though which is good. And the only side that would probably get dirty would be the unfinished side mostly likely. Might be interesting to go ahead and wax both sides so they would have a sort of “repellent” that could be easily wiped.
Thanks, Paulette! Not in my experience! The transfers are tissue paper thin so they don’t really add any feel at all. The wax adds protection but not stiffness. It’s still soft and flexible. Washing, well, I’d probably only do spot washing on these. :)
Hi Nancy! I love it!! I don’t have this transfer☹️but I do have some different ones and I have a canvas bag. I’m definitely going to try this. I’m am so happy to hear about Ryder!! I’m sure a weight was lifted off your shoulders. Our dogs are our family!! Thank you for sharing!
Want to be inspired, learn new skills, discover all the tricks to furniture makeovers, creating new out of the old and more? You'll also receive my FREE ebook "Creating Fabulous Finishes" PLUS access to my private Printables Resource Library, too!
Sign up to get the Weekly Newsletter! Our emails include an unsubscribe link and you may opt-out at any time. Your information will *never* be shared or sold to a 3rd party.


")
")


Thank The Lord that Ryder is doing well! I’m so happy to hear that! I just love him!❤️ oh, and thank you for the transfer post!
Yes, indeed!! 🥰 You are very welcome, thank you Nancy!! xo
Lovely new use for transfers. Thanks for the great how-to
And thanks for sharing the great news about Ryder! I’m sure you and your family are much relieved.
You are so welcome, Gayle!! And yes, we are so very much relieved!! 🥰
WOW – I am just so surprised that fabric can be painted and transfers attached! That is truly a game changer! Looks amazing.
SO SO glad to know Ryder is on recovery and (hopefully) all is well. Sure is a sweetheart. Give him pets for me. ♥
I know, so fun! Lots of things you can do. And thank you, Michele! I sure will! :) xoxo
First and foremost, so happy for Ryder’s results! Great news!!
The chair came out so pretty and I love the bag also. The chair has the same fabric that is on my camper window valences which I painted white. I was nervous doing it but they came out great. I used DB’s Easy spray wax since they won’t be handled at all. Never knew you could put these transfers on fabric. Good to know, so many things you could make using them.
Thank you, Debra!! Me too!! Whew!!
Oh that’s so funny it’s the same as you have! Awesome you painted them, love that. xo
That transfer really is beautiful, Nancy. I’ve seen people use transfers on jackets and boots, never thought about trying it on a tote bag. My only concern is how to wash it. I use my totes a lot and they can get pretty dirty.
Thanks, Marcie! Oh fun, on a jacket would be interesting! Boots too!! Yes, that is a valid concern. I would say spot washing would be fine. I have no idea if it would hold up in the washer but I’d lean towards no. It is very soft and flexible though which is good. And the only side that would probably get dirty would be the unfinished side mostly likely. Might be interesting to go ahead and wax both sides so they would have a sort of “repellent” that could be easily wiped.
Congrats Ryder!!
My concern using transfers on fabric?? Does it make the fabric stiff? And as above, how to wash? Thanks!
Thanks, Paulette! Not in my experience! The transfers are tissue paper thin so they don’t really add any feel at all. The wax adds protection but not stiffness. It’s still soft and flexible. Washing, well, I’d probably only do spot washing on these. :)
Yay for Ryder! Bill, has been worried!!! That tote came out so pretty.
Can you believe it is Friday ALREADY!!!…does anyone else feel this way!!!
Thanks, Addie!! Tell Bill he doesn’t have to worry anymore! :)
And yes, every single week!! haha!!
Hi Nancy! I love it!! I don’t have this transfer☹️but I do have some different ones and I have a canvas bag. I’m definitely going to try this. I’m am so happy to hear about Ryder!! I’m sure a weight was lifted off your shoulders. Our dogs are our family!! Thank you for sharing!
Hi Cheryl! Thanks!!
Yes, do try it!!
And thank you, it’s a huge weight off for sure. :) xoxo
So very happy to hear the good news about Ryder! Our furry friends are truly family.
Thank you,Sheila, so relieved!! They really are!! xoxo