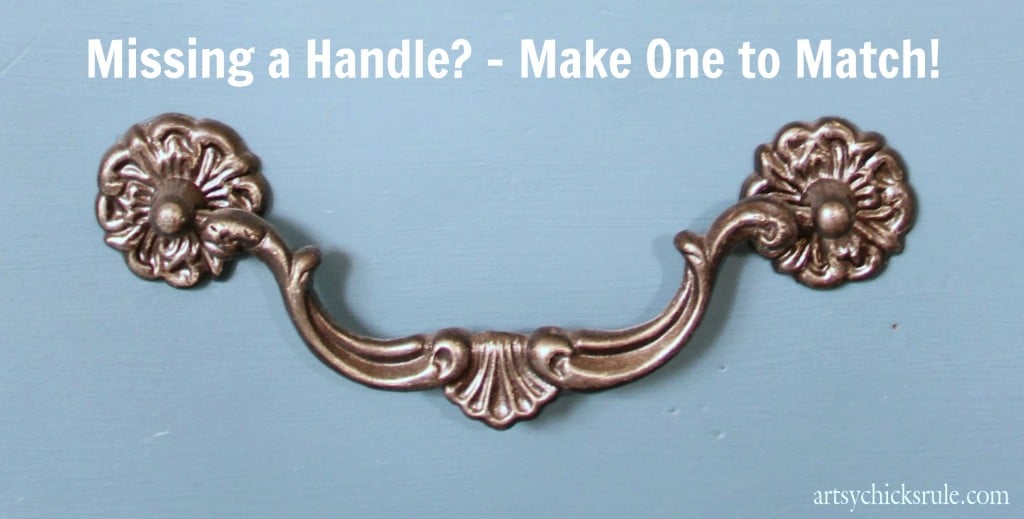
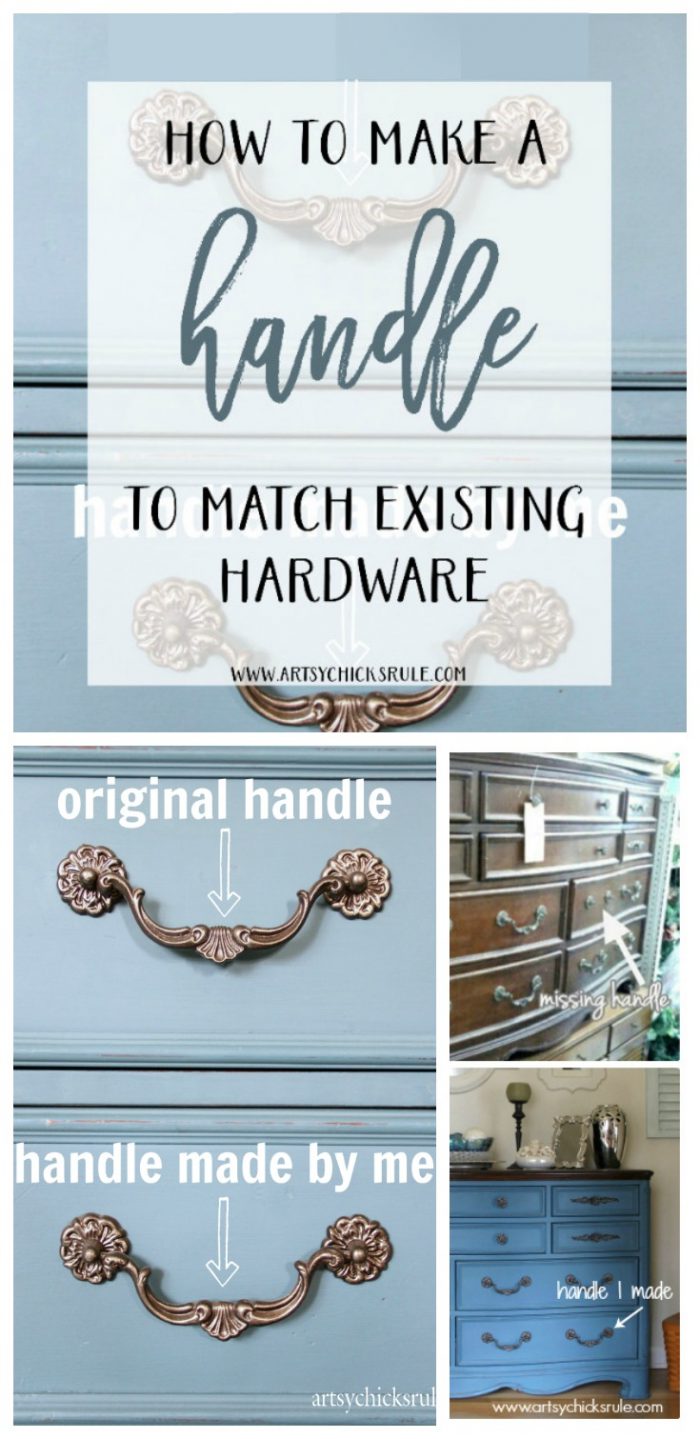
Ever wondered what to do if you have missing hardware?? Here’s a fix!
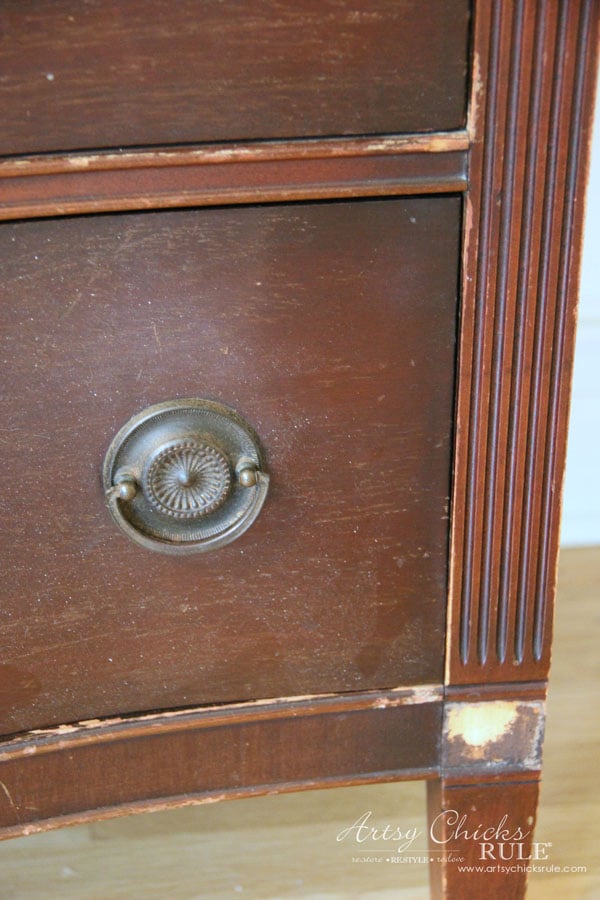
I bought this great dresser a while back. I loved the curviness of it….the details….so very pretty.
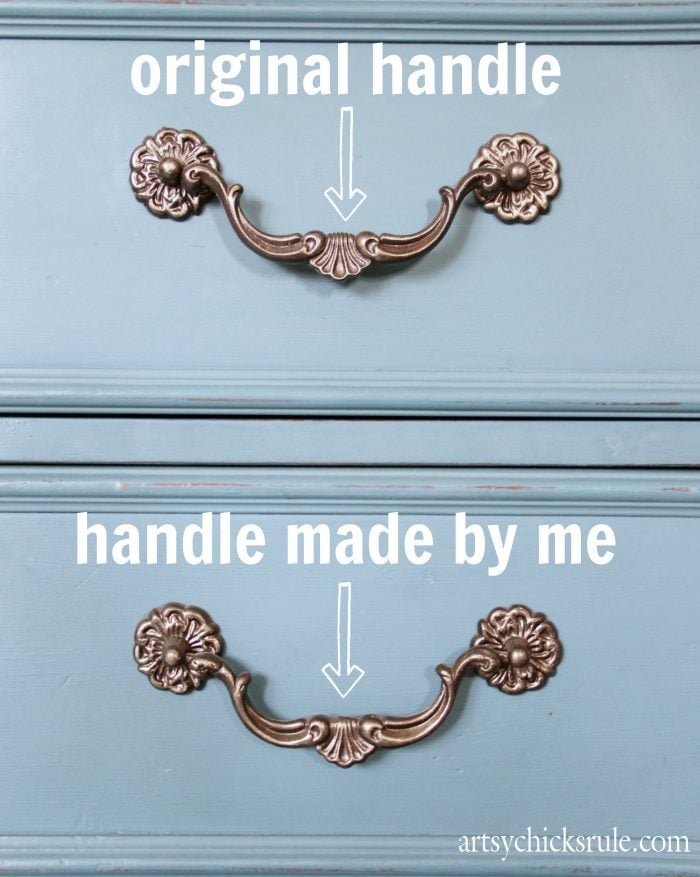
But it was missing hardware, a handle.
Not too big of a deal but replacing hardware can get pricey….and trying to match it was not gonna happen.
So….I bought it anyway. I loved it and decided it needed to come home with me.
I’d figure out what to do about the handles later. Here’s a hint. ;)
Okay, that’s a little more than a hint. But let’s continue…
Typically, I don’t buy pieces that have missing hardware unless:
I really, really like it and the price is right.
I’m planning on changing out the hardware anyway, which sometimes I do.
I get distracted and don’t notice. Has been known to happen.
Once home I went through my stash of knobs and pulls hoping to find a way to make it work.
(change out just a couple, move them around, etc)
Nope.
Actually, I liked the hardware that was on there and didn’t really want to switch any out.
So……I did what any other crafty, creative girl would do. –>I decided I’d make one to match!
Surely somehow I can mold one of the others and make one.
Somehow, right?
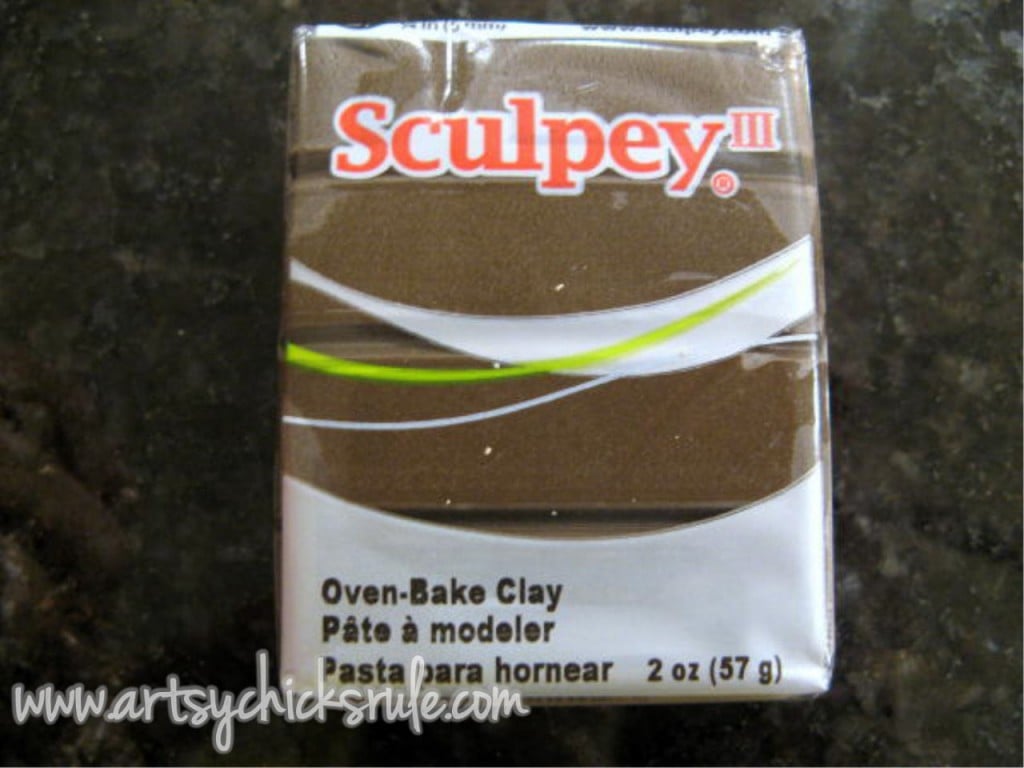
So off to the craft store I went and I found this…… Sculpey Clay .
.
Ok, I must give credit to the store manager who knows me as I am a regular AND he was also my cell phone rep before he came to this store.
Things you didn’t need to know, I know, but just funny to me.
So I told him what I was trying to do and asked which product would be best.
We worked through it a bit and agreed on what I should use and how I should do it.
Thanks so much, Mr. Mobile Phone Rep turned Craft Store Manager friend!
Here’s how I did it…..
First I made a mold of one of the handles using the clay.
I then baked it in the oven to harden it. I used an old tile I had lying around to bake it on (as shown above).
After the mold cooled I squished more clay down into it well. (Be sure to sprinkle the mold with some powder so you can get it back out. I figured that out the hard way. I used a small paintbrush to get the powder down into the crevices well.)
Next, I cut two small pieces of wire to put in the ends. (to hopefully add some strength & stability) I just put it in the ends where it would hook but I’m sure if you bent it to shape you could put it through the whole handle. After I did that I took a sharp knife and shaved off the excess clay. (try to do this as even as you can. I ended up making two because the first one was kinda bumpy and I didn’t like it)
Slowly and gently I pulled the soft clay out of the mold. I laid it out onto the tile, and using the real handle as a guide, made sure it was the same shape as the original. (it’s soft and can get a bit out of shape so just hold the real handle over the top to be sure it’s right before you bake it)
After it cooled, I took some fine sandpaper and rubbed away any rough edges.
Voila! New matching handle!
Pictured below, on the left, is the clay mold I made. The finished “new” handle I made from the mold is far right with the real handle in the middle.
Note: Another option for this would be a resin type of material. That’s a bit pricier alternative, however.
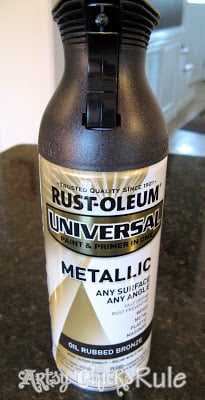
I sanded the edges to smooth them and then sprayed it, along with the rest of the hardware, with Oil Rubbed Bronze spray paint.
(LOVE this stuff…you can see all the things I’ve painted with it (–>transformed) in this post –>here.)
I decided to add just a touch of gold antiquing to the edges of each piece after spraying.
To see the complete re-do of this dresser–> look here.
Here is the finished handle up close and personal.
How about that??
Now I am not certain how well this will hold up over time but I know for my purposes it is perfect.
This dresser is in my study and the handle will not be pulled on often.
Or ever really.
So my suggestion is that this be used for those pieces that won’t get much use.
I suspect it is more for looks and not as sturdy as a regular metal handle.
This is a great fix for those pieces that have lovely old antique hardware and no matches can be found, etc.
Or as in my case, furniture with hardware you like (and only one missing).
Love it? PIN it to save it!
What do you think? Would you ever guess it’s a “fake”?
Think this is something you might try the next time you have missing hardware?
UPDATE: Want to see how I made this missing molding (flourish) for another dresser? Click, here.
Thank you Judi! I am sorta resourceful like that! ;) I just had to share this little workaround with everyone! Thanks for the follow! Hope you have a fantastic week! xo Nancy
I was looking through the comments to see if anyone had a suggestion for something strong enough that you COULD pull on and then I remembered I already know — plumbers putty hard as steel epoxy –comes in a tube –you cut off a piece – has hardener in center so you have to knead it together until it is uniform color then QUICKLY press into mold (it gets hot and sets up in 3 minutes) but the result it truly like steel –sometimes even harder than steel. And another idea would be bondo, but the hard as steel would be MY pick :-)
Nancy… I bow down! This is one of the smartest ideas I have seen in ages! Who would have thought? Love how the dresser turned out and the color is just so gorgeous, too!
What a fantastic fix for a missing handle! I was checking out a chest in my garage two days ago so I could get it ready for painting and discovered that it is missing one part of a drop handle. I think the husband got rid of it accidentally when he cleaned out the garage a few weeks ago. Anyway, your project will be the perfect solution for me to replace the missing parts. Thanks so much! Sue
Hi Ani,
Oh, this was very simple really. I just dipped my finger in and wiped lightly onto a paper towel…then I rubbed lightly over the edges of the handles. Very light hand with a tiny bit of product works well! Hope this helps. :)
Nancy
WOW!!! I was just browsing through your blog and I’m really impressed with your talent and creativity!!! This is just genius… I’d love to hear how they’re holding up! Since its in your own home, do y’all just try not to use that one? I’m seriously in awe!!!! Yay you!!!
Thanks so much Pia! :) Yes, it is a dresser I have in my study. It’s not opened and closed often…at all. So yes, mostly for looks. I do open the drawer on occasion but am mindful of it. I honestly can’t say how it would hold up to daily opening and closing but for my purposes it has worked perfectly!
Thanks so much for stopping by!
Nancy
Hmm it appears like your blog ate my first comment (it was super long)
so I guess I’ll just sum it up what I had written and say, I’m thoroughly enjoying your blog.
I as well am an aspiring blog writer but I’m still new to the whole thing. Do you have any suggestions for inexperienced blog writers? I’d genuinely appreciate it.
This is exactly how you’d replace a missing piece on an antique frame. I bought a frame from a yard sale and the lady was a frame repairer. She said she gets a bit of sculpey, makes an impression to make a mold, then repeats the process in reverse, then glues it on/in. It wouldn’t really hold up well for a dresser with kids or daily use, but for decorative pieces, it’s the PERFECT solution.
Oh yes, I am sure you can use it for quite a lot! I also use wood filler for smaller areas of repair work. (that aren’t as intricate as a frame, etc would be!) You are correct, the handle I made is mostly for decorative purposes! I do use it but I am gentle when doing so (and yes, not likely kid friendly! ;) )
thank you!!
Hope you have a wonderful weekend!
Nancy
Can’t wait to try this on a piece that I broke the hardware while taking it off to refinish! Been searching flea markets and antique stores for two years for a replacement so that the piece would look balanced. Thanks for the great idea!
Awesome!!!!! I am very impressed! I could not believe you could actually make one to match, but you did it!! And I will definately try it when I need to do the same!!
Thanks Laura! :)
Yes, that’s how my crazy brain works!! Although, sometimes what’s in my brain and what actually transpires doesn’t always work out as well as this one!! lol
Nancy
Thanks Heather! Yep, it surprised me that it worked so well. But I am kind of stubborn and determined like that! ;)
Hope you have a great weekend!
Nancy
Love it. Can’t tell tell the difference between the original and the sculpey one. :) Love the color of the dresser.
Do you know how I can fix a dresser leg that has piece missing? Is there some way I can make a mold and fill it in?
Thank you.
Thanks Peggie! Oh yes, that dresser is actually my favorite piece of furniture in my home. The color is gorgeous (and also a favorite!)
It’s hard to say without seeing a photo of the leg. I have filled in big chunks of missing pieces with wood filler and “molding” them to the shape they need to be. Is the entire leg missing or just part of it. Is it sturdy and just cosmetic? If you’d like to send me a photo of it I would be able to help a bit more. You can send it to my email (linked at the top of the page).
Nancy
Aw thanks Sharon! Determination is right!! Just ask my husband how determined I can be!! ;) (stubborn might be a better word? lol)
Hope you have a great weekend!
xo
Nancy
Good idea for those missing pieces of hardware that don’t get much use. For those pieces that will be pulled on, I was thinking that metal clay might work, but only because after seeing your post, my mind turned to something I’d seen recently at the craft store.
OMG! You are a genius! I have two matching armoires – French Regency – and there has been a circle drop ornament missing from the handle since I bought them 40 years ago!! At one time I checked into having a new brass piece made, but it was using the lost wax process and was just prohibitively expensive. I’m starting a new board on Pinterest for me called “Best Ideas Ever!!” and you are the first post!. Thanks.
Hey there! I saw this a while back and knew I had a piece of hardware on my dresser that needed replaced. I decided to give it a go. I won’t lie. I’ve never used baking clay, ever. It took me a couple of times to get it right.
However, when I finally got it…it looks identical! I am just amazed and thankful to you for me not having to go buy all new hardware for our bedroom! Thanks so much!
Thanks so much for all these great ideas here. I need to try spray painting my frames with the Rustoleum. I had used the Rustoleum brown hammered finish on my metal patio furniture and it was amazing how expensive they looked after spray painting them. I can understand how you got on a role painting so many things. It’s addicting! I live in a nice rental but there were these shabby looking metal pipes for hand rails at the entry steps and the stairway to the property. With my landlady’s permission, I spray painted them with the same hammered finish and now the whole entry has a totally new feel to it. Funny how simple things like that can give you a different attitude about a property or a piece of furniture.
Hi Janet!
Oh yes, you can spray it all!! ;) It really is addicting..but honestly so much of it is!
I agree…it is truly amazing how a little paint can completely transform something!
Nancy
No, not for daily use. I mentioned in the post I don’t use this dresser as a “dresser” so it doesn’t get opened and closed much. It’s a great solution for those pieces with old, unique or antique hardware that you can no longer find. AND pieces that won’t be handled much. I do open the drawer but am just mindful that it is a decorative piece only. :)
Nancy
At the danger of exposing myself as an old male nerd, let me mention a stronger version. Steel wire along the body of the handle, with a second piece next to that in the center portion. (one is for compression the other for tension forces, kinda like a beam). Then use an epoxy and metal powder epoxy called “JB Weld”, from the hardware store or auto supply. this makes a much stronger assembly.
I tried to use Sculpy for a somewhat structural connector for a tripod. It broke almost immediatly. I was not impressed. Don’t try this at home, but I swear you could chew the darn stuff. ;-)
I welcome any and all ideas…or improvements on this! I did it almost 3 years ago now so I may even do it a little differently, with a little more research, if I were doing now.
I must say though, it’s been over 3 years since I did it and it’s holding up great! But like I mentioned in the post, it’s not a drawer I open often, mostly decorative.
Handles used often I would not recommended this for. I like your idea and will keep it in mind next go round though!
Thanks !
Nancy
to make a functional handle, I wonder if you could find thinner plain handle, then place it in the molde and press the clay around it? The metal handle would provide the internal strength, and the clay would hide it and provide the decoration.
Sheer genius!!! THANK YOU! THANK YOU! THANK YOU! My husband Jamie and I are always running into problems with missing hardware in our endeavors to re-sell vintage furniture. Your idea is godsend! I am so happy to have found your blog. I can already tell that I will be up late tonight reading it. LOL! — Kristi
Aw thanks! My mind just works weird!! ;) I somehow come up with a workaround for just about anything.
(sometimes it works…and sometimes it doesn’t!lol)
Nancy
Great Job!
I might be a little concerned about spray painting Sculpey though! I recently read that it breaks down the polymer over time. The article said that acrylic paint is the only one to use…Best of luck!
-D
Thanks Daniel! :)
Oh I have not heard that about the spray. Good to know for future reference.
Well, so far so good, still looks like day one! It’s been over 2 years now since I made this one!
I still have the mold I made so if for some reason I’d need to, I’d be able to recreate it!
Nancy
You can melt soldering wire down in one of those tiny cast iron skillets and pour that into your mold to get a silver handle. I got that idea from an old “Make Toy Soldiers” set for boys that I had (see http://en.wikipedia.org/wiki/Tin_soldier ). See http://en.wikipedia.org/wiki/Solder for background information to make the best decisions on the metal and then Google that or go to a hardware store or plumbers supply shop. Of course do not use lead.
I have these handles and knobs that I took off a 60’s provincial style chest of drawers I bought at a thrift store for $35 So I just added cabinets to my laundry room and I decided I could use them on my upper cabinets and they look lovely Great job making your own replacements
Hi! Found you via Hometalk.
I just bought antique pulls and WILL (don’t try to talk me out of it!) make more handles. I was wondering if you actually had the photos to which you refer, but aren’t there? The tile, the wire, things like that.
I’m heading to MIchael’s after work. :)
Hi Christine! :)
OH fun! No, unfortunately I didn’t take those. I was pretty new to blogging and had no idea how popular that post would be! I need to do another, with more details and photos, on another handle.
Keep in mind that I wouldn’t make these for handles I needed to use on a daily basis. The wire does give strength to them but I can’t say if they’d hold up to daily use. :)
xo
Nancy
I have an old dresser set in this style and it has been missing the handle for more than 20 yrs. Neat Idea and I will try to match using this method. Can you please tell me the color you used on the dresser? That is very pretty as well. Thanks for the ideas and keep on decorating on a budget!!!
Hi Christine,
Oh yes, do! What a great fix for an old dresser. Just keep in mind this is more of a “looks only..or mostly” type of fix. I can’t say how well the handle will hold up to daily use.
The color is Annie Sloan’s Aubusson Blue, a favorite of mine.
Would love to see your handle when you finish if you’d like to share!
xo
Nancy
Hi Amelia,
Oh yes, absolutely you can share. I only ask that you not list the full tutorial on your page, just the link and please send them here for the tutorial. :)
Thanks so much for asking!
Nancy
Great! Thank you. That was what I was planning on doing. This is such a neat idea, I love your blog! I am only just starting mine (I am looking into new camera’s and such, I am currently working on older material that I wanted to get out before though!)
Feel free to take a look around!
Thank you Liz!! :)
And thanks so much for sharing the link with me! The middle section is identical!! I may have to get one! (not sure about the size, will have to measure but wow!)
Thanks again!!
xo
Nancy
Re: the ” dilemna v. dilemma” dilemna, did you go to Catholic school? Most folks in a certain age category taught by nuns spell it the right way, DILEMNA. The French word for dilemna is dilemne. I actually googled this once because someone corrected my spelling (the nerve). No one spells it correctly anymore, only about 5%.
LOVE the Aubusson blue! Gorgeous makeover, inspiring.
No I didn’t attend a Catholic School. I was raised in public schools on the East Coast (Virginia), elementary in the early-mid 70’s. Something certainly had to have changed since then. (or possibly a regional thing?) Thanks for that info though, it makes me feel a little less crazy! ;) (since no one seems to remember this spelling — dilemna)
Thank you! I love the Aubusson too. :)
Nancy
This is pretty genius! I’m planning on making over an old dresser. It’s really, really plain so I was thinking of putting some decorative appliqués on it, but then I saw how expensive they are and nixed the idea. But with this technique I’d only need to buy one appliqué and then make the rest myself. Yay!
One question on yours though, how did you get the handle to go through the little handle holders? It seems like you’d have to bend it to get it into the little holes?
Thanks Jenise! And oh yes, that is a great solution! :)
I inserted the handle I made into the openings on either side while they were not all the way screwed in. Then once it was in place, I tightened the screws on the backside. :)
Nancy
This post is older so maybe by now you can say how it’s holding up. I dabble a little bit with Sculpey (key word is “little.”). I help my daughter from time to time make “needed” fairy garden supplies (furniture, toys, and dishes, etc.) and have learned more than I ever set out to, so I thought I’d share a tidbit in the event that you find yourself making another similar project (or maybe something else).
I think that rather than the wire, which is probably something I’d have done when I first started working with the stuff, you could have actually pushed a couple screws into the back before baking and used nuts to secure them. I’ve used all types of attaching mechanisms before and after baking. If you’ve already baked your original projects you can use back and bond (even over the top of paint and finish).
That’s a great idea for future projects! I don’t think it would have worked on this one just because of the way it needed to hang freely and fit into the outer pieces. BUT it’s a great tip for other pieces!
Thank you for sharing it!! :)
Nancy
For $1000 you can buy a 3D Systems Cube 3D printer and for $400 a 3D Scanner. Scan the object in and print it out in plastic at home. There are cheaper printers on the market. Or send the scan in to 3D Systems and they can print it in metal.
For $500 you can buy a 3D scanner that connects to the iPhone 6. These might be integrated in future models – TBD.
You can also search the web for scan/print services / prototyping.
Being young technology, prices will start high. .But, in a few years you should be able to replace that handle with a nice solid metal one that was 3D printed for not too much money. You could even add your initials.
Great tip and you are so right about that in the future. It’s amazing what they can do. That is a bit out of my price range right now for one handle though! ;)
Thank you for all the info!!
Nancy
If you do this with not-so-precious metal clay (like bronze – since it’s cheaper), you may get a handle that holds up well to ware and tear. I have a dresser that is missing decorative handles like these and I have been considering it. Funny how you think you’re the only one to think up such crazy ideas until you meet a fellow artist doing the same thing! Good to see that great minds think alike!
Like minded!! ;) What a great idea that is! I actually just made another wood decorative piece that was missing from a dresser. This works wonderfully for that! But, what you suggest for the handle would be great!
I recently purchased a buffet so similar to this piece….and, it was missing THE SAME HANDLE. I have scoured thrift stores and GOOGLE trying to find one to replace it. NOW I know I’ll just create a replacement. THANK YOU!!!
Hi Kathleen, and yay! That’s great. :) And yes, this is a great solution to so many things, even missing decorative molding (like on this dresser). Also, I don’t know if you saw it, but one of my readers above in the comments shared an ebay listing for an almost identical handle to to this. SO…if your handle is in fact the same, this one might work for you…here is the link. Good luck! :) xo
Great idea! I hope it is holding up well!
I wonder if you mix fiberglass fibers (for mixing in concrete)with Sculpy if that would give it more strength?
Yes!! I held up for years! I have since replaced it because a reader here shared a link to the exact handles that she found on ebay. I was thrilled to find a matching one! :) (and yes, I bet that would help strengthen it!)
Want to be inspired, learn new skills, discover all the tricks to furniture makeovers, creating new out of the old and more? You'll also receive my FREE ebook "Creating Fabulous Finishes" PLUS access to my private Printables Resource Library, too!
Sign up to get the Weekly Newsletter! Our emails include an unsubscribe link and you may opt-out at any time. Your information will *never* be shared or sold to a 3rd party.

 ]
]
")
")

")
")

")
")
")


OMG! I am SOOooooo impressed! What a FANTASTIC job you made of this project. You should be really proud of yourself.
I only just found your blog, and have already set up to follow by email, as you seem like my kind a girl friend!
Judi in the UK
Thank you Judi! I am sorta resourceful like that! ;) I just had to share this little workaround with everyone!
Thanks for the follow!
Hope you have a fantastic week!
xo
Nancy
I was looking through the comments to see if anyone had a suggestion for something strong enough that you COULD pull on and then I remembered I already know — plumbers putty hard as steel epoxy –comes in a tube –you cut off a piece – has hardener in center so you have to knead it together until it is uniform color then QUICKLY press into mold (it gets hot and sets up in 3 minutes) but the result it truly like steel –sometimes even harder than steel. And another idea would be bondo, but the hard as steel would be MY pick :-)
Oh cool, I don’t know that product but I’ll have to check it out! Thanks for telling us about it!
Nancy… I bow down! This is one of the smartest ideas I have seen in ages! Who would have thought? Love how the dresser turned out and the color is just so gorgeous, too!
Take care,
Trish
LOL Thanks Trish! :) So sweet!!
Thanks so much for the kind words. This turned out to be one of my very favorite pieces in my home.
xo
Nancy
What a fantastic fix for a missing handle! I was checking out a chest in my garage two days ago so I could get it ready for painting and discovered that it is missing one part of a drop handle. I think the husband got rid of it accidentally when he cleaned out the garage a few weeks ago. Anyway, your project will be the perfect solution for me to replace the missing parts. Thanks so much! Sue
Oh so sorry that happened! I know that is a sinking feeling. But hopefully this will be a good fix for you!
Hope you have a great day!
Nancy
Can you describe the last step of the gold antiquing? Is it as simple as a dry brush of gold paint? It looks so pretty!! Thanks!
Hi Ani,
Oh, this was very simple really. I just dipped my finger in and wiped lightly onto a paper towel…then I rubbed lightly over the edges of the handles. Very light hand with a tiny bit of product works well! Hope this helps. :)
Nancy
WOW!!! I was just browsing through your blog and I’m really impressed with your talent and creativity!!! This is just genius… I’d love to hear how they’re holding up! Since its in your own home, do y’all just try not to use that one? I’m seriously in awe!!!! Yay you!!!
Thanks so much Pia! :) Yes, it is a dresser I have in my study. It’s not opened and closed often…at all. So yes, mostly for looks. I do open the drawer on occasion but am mindful of it. I honestly can’t say how it would hold up to daily opening and closing but for my purposes it has worked perfectly!
Thanks so much for stopping by!
Nancy
Hmm it appears like your blog ate my first comment (it was super long)
so I guess I’ll just sum it up what I had written and say, I’m thoroughly enjoying your blog.
I as well am an aspiring blog writer but I’m still new to the whole thing. Do you have any suggestions for inexperienced blog writers? I’d genuinely appreciate it.
GENIUS!! I have an antique plaster frame that is missing a piece. I wonder if this would work for it…Hmmmmm
This is exactly how you’d replace a missing piece on an antique frame. I bought a frame from a yard sale and the lady was a frame repairer. She said she gets a bit of sculpey, makes an impression to make a mold, then repeats the process in reverse, then glues it on/in. It wouldn’t really hold up well for a dresser with kids or daily use, but for decorative pieces, it’s the PERFECT solution.
Oh yes, I am sure you can use it for quite a lot! I also use wood filler for smaller areas of repair work. (that aren’t as intricate as a frame, etc would be!) You are correct, the handle I made is mostly for decorative purposes! I do use it but I am gentle when doing so (and yes, not likely kid friendly! ;) )
thank you!!
Hope you have a wonderful weekend!
Nancy
YOU ARE A GENIUS !!! Fantastic job !!!
Wow ! :)
Ha, Thanks so much!! :) My mind always finds a work around…even if they don’t always work!! ;) This one just did!
Nancy
Can’t wait to try this on a piece that I broke the hardware while taking it off to refinish! Been searching flea markets and antique stores for two years for a replacement so that the piece would look balanced. Thanks for the great idea!
Awesome!!!!! I am very impressed! I could not believe you could actually make one to match, but you did it!! And I will definately try it when I need to do the same!!
Thanks Laura! :)
Yes, that’s how my crazy brain works!! Although, sometimes what’s in my brain and what actually transpires doesn’t always work out as well as this one!! lol
Nancy
I’m a bit late to this party, but WOW that handle is incredible! You did an amazing job. The dresser is beautiful!
Hi Cheryl!
Never too late! ;) Thanks so much!! It was a fun little “experiment” lol…and it worked, so all the better!! ;)
Nancy
ARRRR Can’t get it to Pin. I want you on my team. Maybe I want your phone turned hardware man too.
Oh my goodness Nancy this is AWESOME!!!!! What a fabulous idea! Kudos to you gurl!
Thanks Beth!! lol….sometimes things that come through this brain of mine work…and sometimes they don’t!! ;) This one did surprisingly!
xo
Nancy
Wow. That is crazy. What an interesting idea…one that I would NEVER have come up with. Thanks for sharing that!
Thanks Heather! Yep, it surprised me that it worked so well. But I am kind of stubborn and determined like that! ;)
Hope you have a great weekend!
Nancy
Love it. Can’t tell tell the difference between the original and the sculpey one. :) Love the color of the dresser.
Do you know how I can fix a dresser leg that has piece missing? Is there some way I can make a mold and fill it in?
Thank you.
Thanks Peggie! Oh yes, that dresser is actually my favorite piece of furniture in my home. The color is gorgeous (and also a favorite!)
It’s hard to say without seeing a photo of the leg. I have filled in big chunks of missing pieces with wood filler and “molding” them to the shape they need to be. Is the entire leg missing or just part of it. Is it sturdy and just cosmetic? If you’d like to send me a photo of it I would be able to help a bit more. You can send it to my email (linked at the top of the page).
Nancy
Incredible! I am SO impressed with your ingenuity and determination!!
Aw thanks Sharon! Determination is right!! Just ask my husband how determined I can be!! ;) (stubborn might be a better word? lol)
Hope you have a great weekend!
xo
Nancy
Genius! Thank you.
Thanks Katie!! :) And you are so welcome!
Nancy
Good idea for those missing pieces of hardware that don’t get much use. For those pieces that will be pulled on, I was thinking that metal clay might work, but only because after seeing your post, my mind turned to something I’d seen recently at the craft store.
Thanks Paulette!
Oh metal clay could work too. I didn’t realize they had that at the craft store. (I’ve seen it for jewelry making)
Nancy
I would have just replaced the hardware, but you are so incredibly talented and resourceful! This idea is genius! Love your blog!
Hi Lisa,
Thank you so much!! :)
Nancy
This is an amazing idea and the best part is how identical the new handle looks compared to original- you da bomb!! Lol
Aww thanks Claire!! :)
Nancy
OMG! You are a genius! I have two matching armoires – French Regency – and there has been a circle drop ornament missing from the handle since I bought them 40 years ago!! At one time I checked into having a new brass piece made, but it was using the lost wax process and was just prohibitively expensive. I’m starting a new board on Pinterest for me called “Best Ideas Ever!!” and you are the first post!. Thanks.
Oh, lol! I’m so happy you have a solution now!! :) Yes, do try this!
Nancy
Hey there! I saw this a while back and knew I had a piece of hardware on my dresser that needed replaced. I decided to give it a go. I won’t lie. I’ve never used baking clay, ever. It took me a couple of times to get it right.
However, when I finally got it…it looks identical! I am just amazed and thankful to you for me not having to go buy all new hardware for our bedroom! Thanks so much!
Oh yay, that is so great to hear Sonja!! So glad it worked for you. Thanks so much for letting me know! :)
Nancy
Wow, so so awesome! Great idea! Even though this is a little older of a post, I’d love it if you’d share it on Worthwhile Wednesdays http://thecraftiestallie.blogspot.com/2014/07/worthwhile-wednesdays-25.html
~Allie
Thanks Allie!! :)
Nancy
Thanks so much for all these great ideas here. I need to try spray painting my frames with the Rustoleum. I had used the Rustoleum brown hammered finish on my metal patio furniture and it was amazing how expensive they looked after spray painting them. I can understand how you got on a role painting so many things. It’s addicting! I live in a nice rental but there were these shabby looking metal pipes for hand rails at the entry steps and the stairway to the property. With my landlady’s permission, I spray painted them with the same hammered finish and now the whole entry has a totally new feel to it. Funny how simple things like that can give you a different attitude about a property or a piece of furniture.
Hi Janet!
Oh yes, you can spray it all!! ;) It really is addicting..but honestly so much of it is!
I agree…it is truly amazing how a little paint can completely transform something!
Nancy
Is it strong enough ?
No, not for daily use. I mentioned in the post I don’t use this dresser as a “dresser” so it doesn’t get opened and closed much. It’s a great solution for those pieces with old, unique or antique hardware that you can no longer find. AND pieces that won’t be handled much. I do open the drawer but am just mindful that it is a decorative piece only. :)
Nancy
At the danger of exposing myself as an old male nerd, let me mention a stronger version. Steel wire along the body of the handle, with a second piece next to that in the center portion. (one is for compression the other for tension forces, kinda like a beam). Then use an epoxy and metal powder epoxy called “JB Weld”, from the hardware store or auto supply. this makes a much stronger assembly.
I tried to use Sculpy for a somewhat structural connector for a tripod. It broke almost immediatly. I was not impressed. Don’t try this at home, but I swear you could chew the darn stuff. ;-)
Hey Gary!!
I welcome any and all ideas…or improvements on this! I did it almost 3 years ago now so I may even do it a little differently, with a little more research, if I were doing now.
I must say though, it’s been over 3 years since I did it and it’s holding up great! But like I mentioned in the post, it’s not a drawer I open often, mostly decorative.
Handles used often I would not recommended this for. I like your idea and will keep it in mind next go round though!
Thanks !
Nancy
to make a functional handle, I wonder if you could find thinner plain handle, then place it in the molde and press the clay around it? The metal handle would provide the internal strength, and the clay would hide it and provide the decoration.
Hi Scott!
That’s a great idea! :) Will have to give it a try!
Nancy
Sheer genius!!! THANK YOU! THANK YOU! THANK YOU! My husband Jamie and I are always running into problems with missing hardware in our endeavors to re-sell vintage furniture. Your idea is godsend! I am so happy to have found your blog. I can already tell that I will be up late tonight reading it. LOL! — Kristi
Aw thanks! My mind just works weird!! ;) I somehow come up with a workaround for just about anything.
(sometimes it works…and sometimes it doesn’t!lol)
Nancy
I love this. You are a true artist!
Aw thanks Pat!! :)
Nancy
Great Job!
I might be a little concerned about spray painting Sculpey though! I recently read that it breaks down the polymer over time. The article said that acrylic paint is the only one to use…Best of luck!
-D
Thanks Daniel! :)
Oh I have not heard that about the spray. Good to know for future reference.
Well, so far so good, still looks like day one! It’s been over 2 years now since I made this one!
I still have the mold I made so if for some reason I’d need to, I’d be able to recreate it!
Nancy
You can melt soldering wire down in one of those tiny cast iron skillets and pour that into your mold to get a silver handle. I got that idea from an old “Make Toy Soldiers” set for boys that I had (see http://en.wikipedia.org/wiki/Tin_soldier ). See http://en.wikipedia.org/wiki/Solder for background information to make the best decisions on the metal and then Google that or go to a hardware store or plumbers supply shop. Of course do not use lead.
Hi,
That is a great idea! I may have to try that out. I’ll be sure to post about it if I do! :)
Thanks for the tip!
Nancy
I have these handles and knobs that I took off a 60’s provincial style chest of drawers I bought at a thrift store for $35 So I just added cabinets to my laundry room and I decided I could use them on my upper cabinets and they look lovely Great job making your own replacements
Oh that’s a great idea Sharon! :) I bet it is really lovely!
Nancy
What a good idea. But now I’m wondering if there is a harder medium out there to put in the mold.
Thanks Sue! And yes, there are but for my purposes (and ease!) this worked great! :)
(you can use resin, which is pretty hard)
Nancy
This is so impressive! I would have never thought of making a replica jangle using clay. So nice! Thank you for sharing.
Thanks! :)
Nancy
Holy crap…. that is AMAZING! What a phenomenal idea! I’ll share this post everywhere! Your brilliant.
Nancy
Thanks Nancy! :)
I have crazy ideas…sometimes they work, sometimes they don’t! ;)
Nancy
Wow! I am super impressed. Your are my new DIY super hero of the day! That’s awesome:) thanks so much for sharing:)
oh my goodness this is GENIUS! I would have never thought of making a handle! I absolutely love how it turned out! Beautiful work!
Thanks Betsy! It is still going strong! :)
xo
Nancy
Hi! Found you via Hometalk.
I just bought antique pulls and WILL (don’t try to talk me out of it!) make more handles. I was wondering if you actually had the photos to which you refer, but aren’t there? The tile, the wire, things like that.
I’m heading to MIchael’s after work. :)
Thanks for your time and work!
Christine
Hi Christine! :)
OH fun! No, unfortunately I didn’t take those. I was pretty new to blogging and had no idea how popular that post would be! I need to do another, with more details and photos, on another handle.
Keep in mind that I wouldn’t make these for handles I needed to use on a daily basis. The wire does give strength to them but I can’t say if they’d hold up to daily use. :)
xo
Nancy
I have an old dresser set in this style and it has been missing the handle for more than 20 yrs. Neat Idea and I will try to match using this method. Can you please tell me the color you used on the dresser? That is very pretty as well. Thanks for the ideas and keep on decorating on a budget!!!
Hi Christine,
Oh yes, do! What a great fix for an old dresser. Just keep in mind this is more of a “looks only..or mostly” type of fix. I can’t say how well the handle will hold up to daily use.
The color is Annie Sloan’s Aubusson Blue, a favorite of mine.
Would love to see your handle when you finish if you’d like to share!
xo
Nancy
Hello!
I love this. Would you mind if i mentioned this in a blog post about revamping a dresser that I made? I would put a link directing them here.
Ameli
Hi Amelia,
Oh yes, absolutely you can share. I only ask that you not list the full tutorial on your page, just the link and please send them here for the tutorial. :)
Thanks so much for asking!
Nancy
Great! Thank you. That was what I was planning on doing. This is such a neat idea, I love your blog! I am only just starting mine (I am looking into new camera’s and such, I am currently working on older material that I wanted to get out before though!)
Feel free to take a look around!
Thanks Amelia!! And I sure will! :)
Nancy
Amazing! very smart dear :)
Thank you! :)
Nancy
Hi! First of all, let me just say that this is an amazing idea. I was browsing for antique hardware on pinterest and your site popped up. I hope your handle is holding up well! While searching I did come across this listing on ebay: http://www.ebay.com/itm/5-5-Bail-Dresser-Drawer-Pulls-Kitchen-Handle-Antique-Bronze-Vintage-Look-140-mm-/251987455669?hash=item3aab9f6eb5 It looked so much like yours that I thought I’d share it! Just in case you needed a more sturdy one. Best of luck! Love your ideas!
Thank you Liz!! :)
And thanks so much for sharing the link with me! The middle section is identical!! I may have to get one! (not sure about the size, will have to measure but wow!)
Thanks again!!
xo
Nancy
Re: the ” dilemna v. dilemma” dilemna, did you go to Catholic school? Most folks in a certain age category taught by nuns spell it the right way, DILEMNA. The French word for dilemna is dilemne. I actually googled this once because someone corrected my spelling (the nerve). No one spells it correctly anymore, only about 5%.
LOVE the Aubusson blue! Gorgeous makeover, inspiring.
Hi Paulette,
No I didn’t attend a Catholic School. I was raised in public schools on the East Coast (Virginia), elementary in the early-mid 70’s. Something certainly had to have changed since then. (or possibly a regional thing?) Thanks for that info though, it makes me feel a little less crazy! ;) (since no one seems to remember this spelling — dilemna)
Thank you! I love the Aubusson too. :)
Nancy
This is pretty genius! I’m planning on making over an old dresser. It’s really, really plain so I was thinking of putting some decorative appliqués on it, but then I saw how expensive they are and nixed the idea. But with this technique I’d only need to buy one appliqué and then make the rest myself. Yay!
One question on yours though, how did you get the handle to go through the little handle holders? It seems like you’d have to bend it to get it into the little holes?
Thanks Jenise! And oh yes, that is a great solution! :)
I inserted the handle I made into the openings on either side while they were not all the way screwed in. Then once it was in place, I tightened the screws on the backside. :)
Nancy
Beautifully done!! And , no I would have never guessed
Thanks so much Julie! :)
Nancy
This post is older so maybe by now you can say how it’s holding up. I dabble a little bit with Sculpey (key word is “little.”). I help my daughter from time to time make “needed” fairy garden supplies (furniture, toys, and dishes, etc.) and have learned more than I ever set out to, so I thought I’d share a tidbit in the event that you find yourself making another similar project (or maybe something else).
I think that rather than the wire, which is probably something I’d have done when I first started working with the stuff, you could have actually pushed a couple screws into the back before baking and used nuts to secure them. I’ve used all types of attaching mechanisms before and after baking. If you’ve already baked your original projects you can use back and bond (even over the top of paint and finish).
That’s a great idea for future projects! I don’t think it would have worked on this one just because of the way it needed to hang freely and fit into the outer pieces. BUT it’s a great tip for other pieces!
Thank you for sharing it!! :)
Nancy
For $1000 you can buy a 3D Systems Cube 3D printer and for $400 a 3D Scanner. Scan the object in and print it out in plastic at home. There are cheaper printers on the market. Or send the scan in to 3D Systems and they can print it in metal.
For $500 you can buy a 3D scanner that connects to the iPhone 6. These might be integrated in future models – TBD.
You can also search the web for scan/print services / prototyping.
Being young technology, prices will start high. .But, in a few years you should be able to replace that handle with a nice solid metal one that was 3D printed for not too much money. You could even add your initials.
Great tip and you are so right about that in the future. It’s amazing what they can do. That is a bit out of my price range right now for one handle though! ;)
Thank you for all the info!!
Nancy
You rock!!!
Aw thanks!
Nancy
You are a genius! great job!
Hi Lisa!
I don’t know about that, but thank you!! ;)
Nancy
Wow, yes, great idea! Love it! :)
If you do this with not-so-precious metal clay (like bronze – since it’s cheaper), you may get a handle that holds up well to ware and tear. I have a dresser that is missing decorative handles like these and I have been considering it. Funny how you think you’re the only one to think up such crazy ideas until you meet a fellow artist doing the same thing! Good to see that great minds think alike!
Like minded!! ;) What a great idea that is! I actually just made another wood decorative piece that was missing from a dresser. This works wonderfully for that! But, what you suggest for the handle would be great!
You are so talented and clever. So happy to have come across your website.
Aw thanks Regina! :)
I recently purchased a buffet so similar to this piece….and, it was missing THE SAME HANDLE. I have scoured thrift stores and GOOGLE trying to find one to replace it. NOW I know I’ll just create a replacement. THANK YOU!!!
Hi Kathleen, and yay! That’s great. :) And yes, this is a great solution to so many things, even missing decorative molding (like on this dresser). Also, I don’t know if you saw it, but one of my readers above in the comments shared an ebay listing for an almost identical handle to to this. SO…if your handle is in fact the same, this one might work for you…here is the link. Good luck! :) xo
WOW!!! That is AMAZING!!!! You are talented….Good job!!!….who knew this was possible???
Thanks so much!! :) xo
Great idea! I hope it is holding up well!
I wonder if you mix fiberglass fibers (for mixing in concrete)with Sculpy if that would give it more strength?
Yes!! I held up for years! I have since replaced it because a reader here shared a link to the exact handles that she found on ebay. I was thrilled to find a matching one! :) (and yes, I bet that would help strengthen it!)