Ever wonder how to make missing molding? It’s so much easier than you think to repair and replace moldings (and even hardware) on old furniture pieces.
I love finding old furniture and making it beautiful again.
It’s truly one of my favorite things to do. Sadly, some pieces are in not great shape when found.
Some have wonky drawers (lots of times!) and some have missing veneer, missing hardware….and even missing wood flourishes and molding.
I will sometimes pass up a piece if it’s missing too much or if too much work will be involved in fixing it….unless I’ve fallen in love with it as I did with this one…
I didn’t let that stop me, I just made one to match! See it >>> here.
Those are just a couple of examples of what I mean. As I type this, I have two dressers in my storage shed that need some love.
The drawers are very wonky on both of them. They are gorgeous old dressers though and obviously, I couldn’t pass them up!
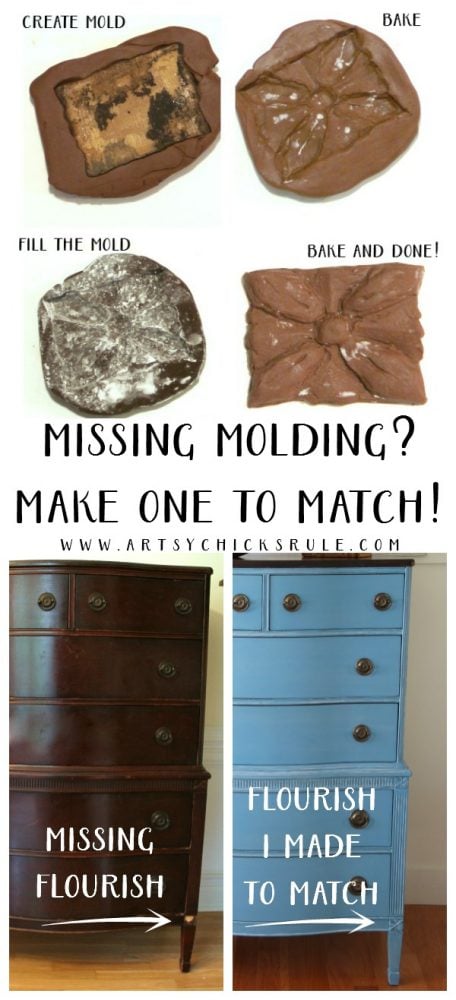
Today I’m going to share how to make missing molding.
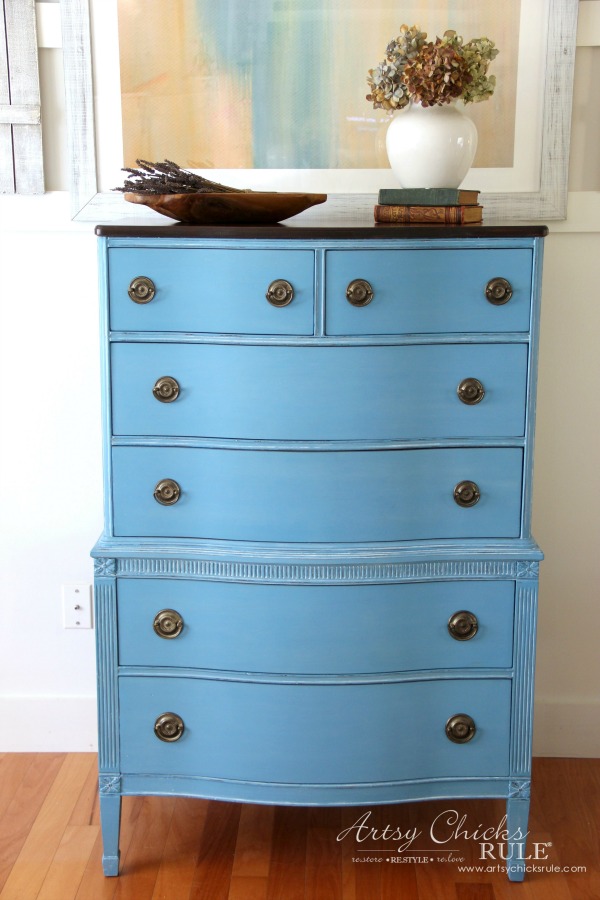
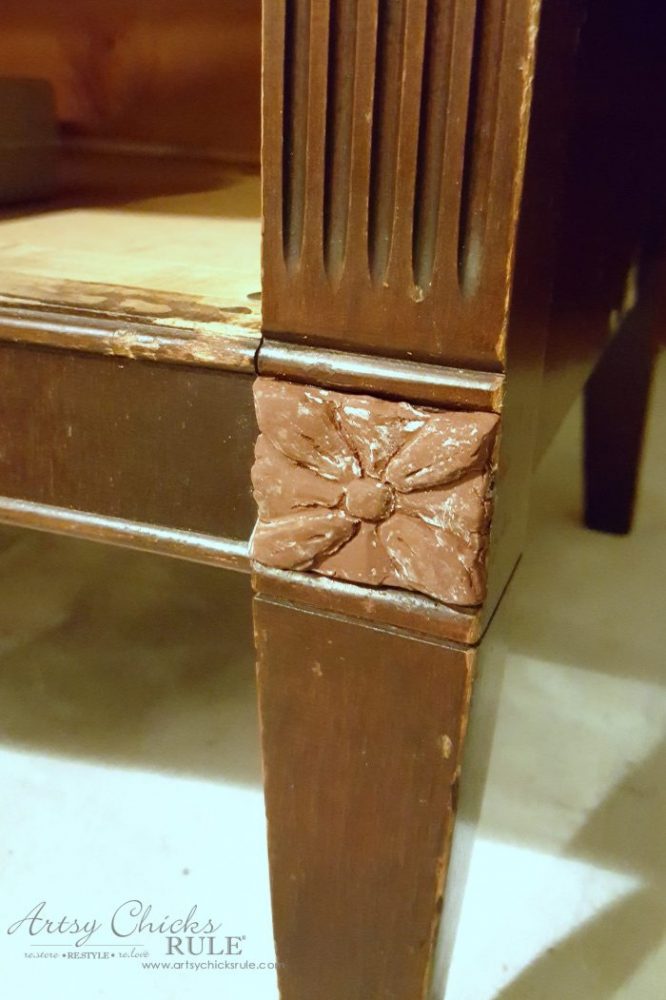
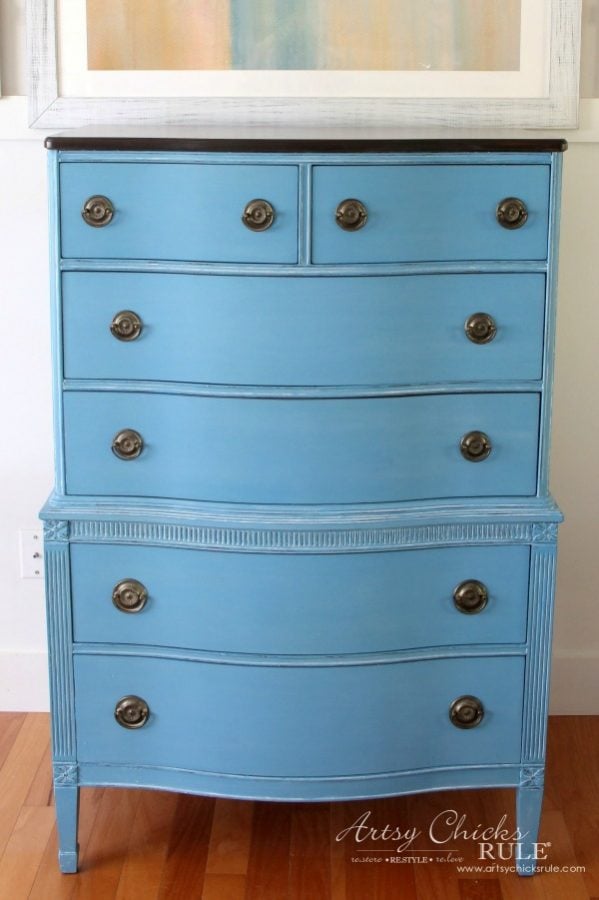
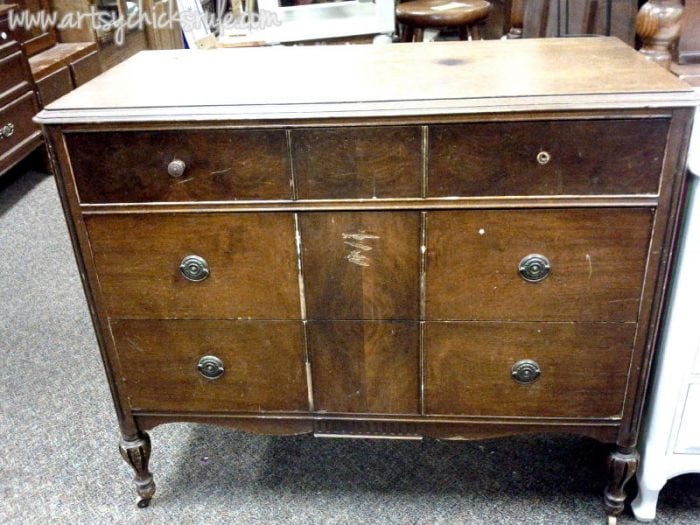
Remember this pretty chest I recently gave a makeover to?
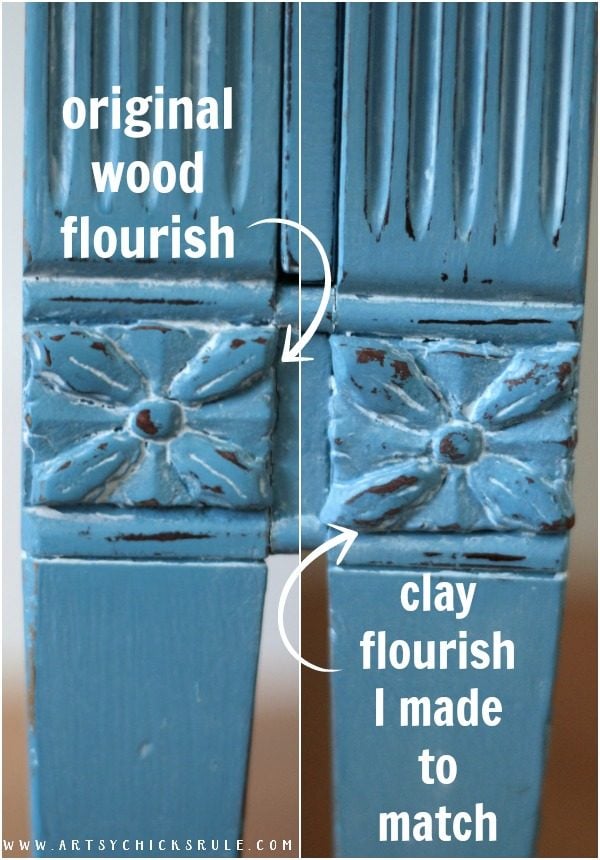
You might also remember that it was missing a little piece of molding, a flourish here…
I showed you guys in that post how I made a piece to match…
….well now I’m back with all the details.
It’s easier than you think to make missing molding.
It’s easy peasy. Really.
Here’s how to make missing molding…
I used the same clay to make this mold as the handle in the dresser I linked at the beginning of this post. You can find it here >>>Clay
First, warm up the clay in your hands by kneading it for a minute or two.
Then roll it into a ball and spread it out to the size you need.
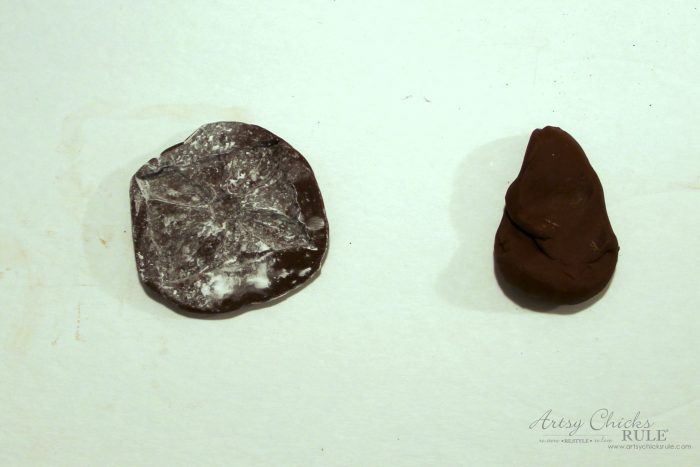
Rub some corn starch or powder over the piece that you are making a mold from so it won’t stick.
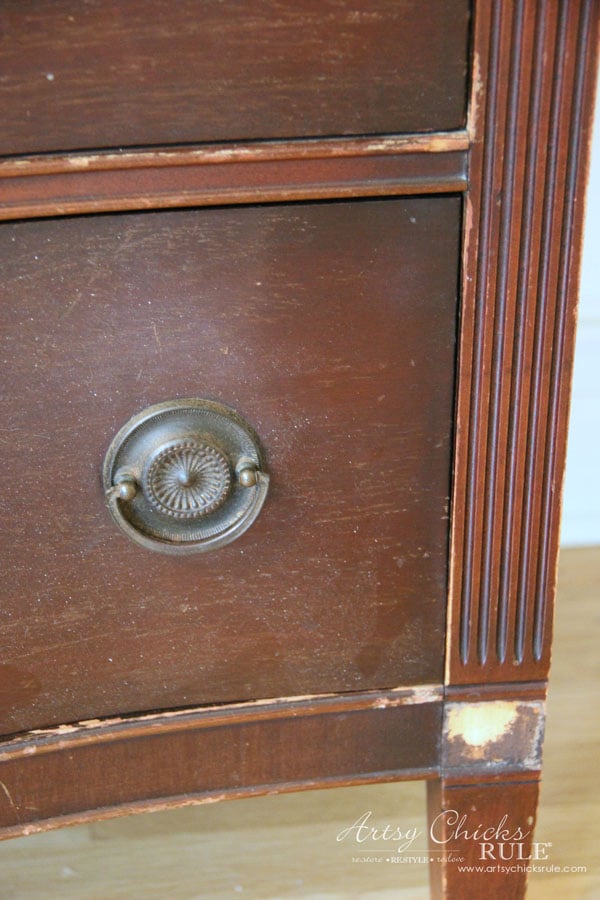
In my case, I removed one of the other flourishes to make the mold.
Press firmly, and evenly, down into the clay.
Gently remove the wood flourish from the clay.
Next, lay the clay mold you made onto a pan and bake it as specified on the package.
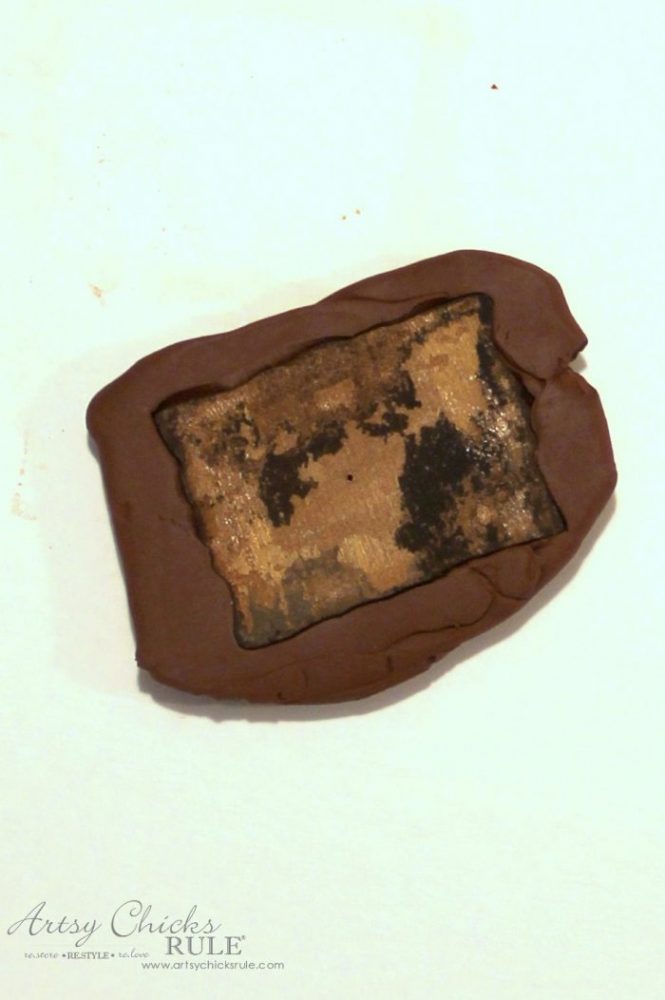
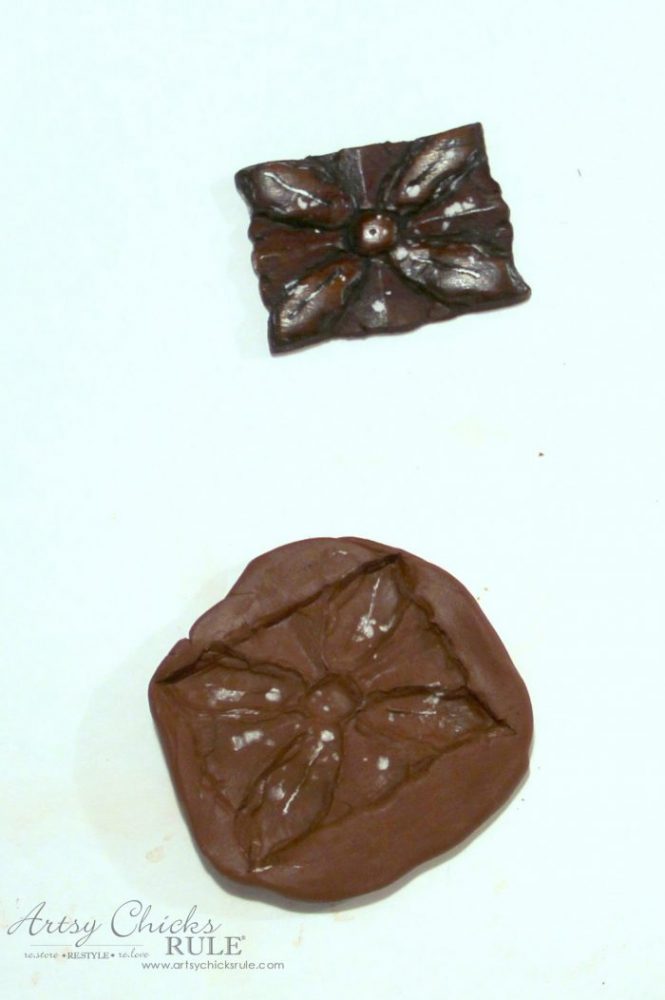
Once it has been baked, and cooled, take another piece of clay and firmly press it into the mold you have just created. (also, dust it with a bit more corn starch or powder so your clay will remove easily)
Very carefully remove it from the mold. If you mess it up or didn’t get it all correctly, just smoosh it up and start again.
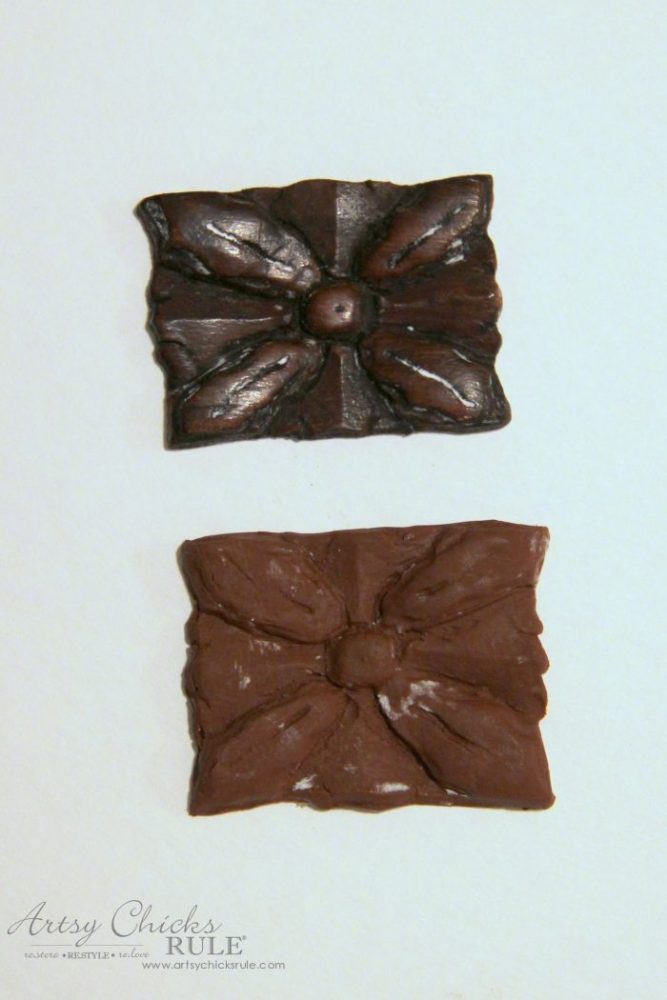
If you are happy with it, now is the time to fix any small imperfections.
Such as, removing any straggling pieces from the outside or anything else that doesn’t look right.
Once it’s baked it will be harder to fix.
Bake this piece like you did the mold.
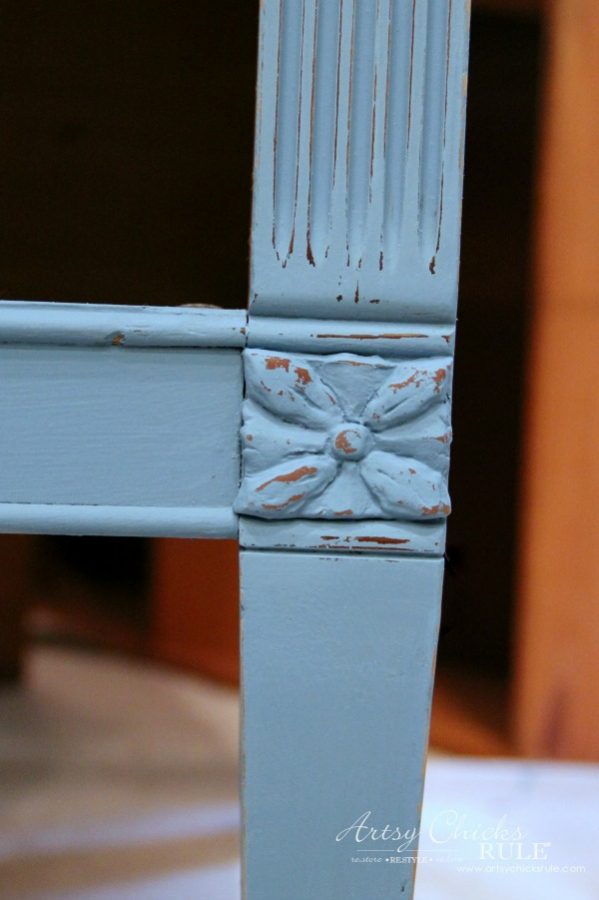
Once it’s done and cooled you can apply it to your furniture piece.
I glued mine in place as you see below…
Isn’t that the coolest?
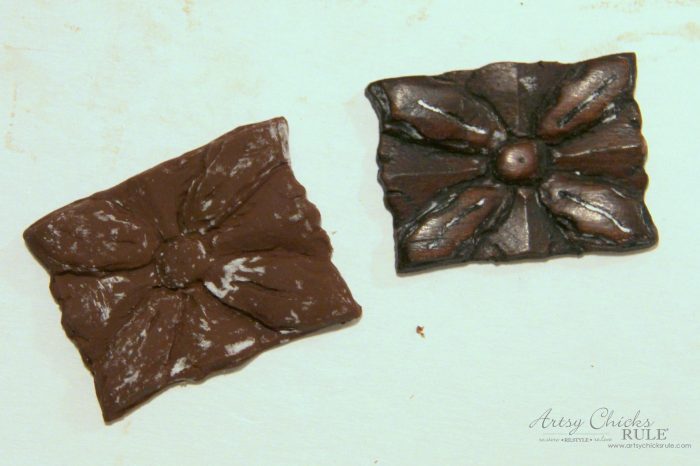
I used brown clay because I knew I’d be lightly distressing and wanted “brown” to show through.
If for some reason I didn’t have brown clay, however, I could have given it a coat or two of brown paint before painting it blue.
Nothing stopping me! ;)
So, yep, that is pretty much it.
I told you, easy peasy and I wasn’t kidding one bit.
See the brown “wood” showing through the paint below?
Who would even know that was not the “original”?
Not a soul! Unless you tell them….which of course you will want to, right?!
You are fabulous and innovative and you fixed this furniture in an amazing way.
Why not tell all?!
So, let’s review, what do you do when you come across a fabulous furniture piece that’s missing molding??
Or hey, how about one that’s even missing a handle?
You bring it home with you because you’ve got this!
PIN this for later so you can make missing molding too.
I’ve got some fun makeovers coming up. I went thrift store shopping for the first time in a long while last week.
I didn’t find too much furniture….in the 11 stores I visited! But I did find one special little piece plus some small decor items I’m excited about.
Can’t wait to get started on them and share them with you all.
In the meantime, you might also like this little goodie of a makeover…. (it also had some molding issues but I decided to do something completely opposite of what I showed you here in this post)
Hi Nancy, I have a dresser very similar to the blue dresser you refurbished here. However, I’m missing some of the small half-round molding that is around the drawers. Do you know where I can purchase or find that same molding to make repairs? Thank you so much for your help.
Hi Paul, actually you should be able to use this same method with that trim/molding. I don’t know of anywhere you could purchase it so I would try making a mold of what you have and creating it like I did in this post. :)
You are so amazing the way that you create new pieces of molding or handles for furniture that needs a little love. The blue chest turned out beautiful!
Aw thanks Bonnie! But it is really a simple little procedure. ;) Anyone can do it, I am sure of this. Thank you, I ended up keeping that beauty and it now resides in my master bedroom. :) xo
Isn’t it the coolest way to replace missing trim! I tried this a few years ago on a sewing cabinet and I literally was doing the happy dance when I was finished. Smart choosing a clay color that once distressed, will look like the original wood. Pinning to share ☺
Thaaaank you!!! This is just what I was looking for! I’m just doing a project for a client and one of the molding was damaged. This is so simple! I don’t know why I didn’t think of that :D
This is so amazing. Thanks so much. My husband and I refinished my grandmother’s treadle sewing machine cabinet that had sewing me missing molding. It wasn’t intricate, though. So glad to learn this trick. My imagination is taking wing!
Love your idea to make a missing piece with the clay and I am going to try this. Question, though. When you bake the mould, does it shrink up at all during the baking process?
Thanks for letting me know. I ordered some Sculpty clay today and am interested to try it. It will be a first for me. I see many projects in my future. ♥
Nancy, I have no idea how I missed this! SOOO creative! I adore that the clay is brown… brilliant! This piece truly sings now!! Thank you for all the details!
Perfect match! Nancy, what is your favorite glue that holds the best? I want to repair the lip of a jug using this clay, and don’t want it to pop off. Thanks!
Im glad you finally “escaped” to do some thrifting. Ill bet it felt great to get back to the “hunt”. Love the tips. You are so full of details that help us a lot. We’ll leave the fear of missing molding behind now. “Wonky”, what a cute word. I’m going to steal it and add it to my vocabulary! 🤣I can’t wait for the surprises. See you on Thursday.
Aw, thanks Addie! :) I had a missing handle and couldn’t find a match, didn’t want to replace them all so I came up with it! That was way back in the beginning of my blog and one of the very first posts I wrote and shared. So a missing handle I made first…then these flourishes with the same exact technique! xo
Hi Nancy! I know I’m late to this page, and I love all your makeovers! However, the link to the clay you used is no longer to the product on amazon; is there a way you can let us know what the clay is called and how to find it? Thank you!
Want to be inspired, learn new skills, discover all the tricks to furniture makeovers, creating new out of the old and more? You'll also receive my FREE ebook "Creating Fabulous Finishes" PLUS access to my private Printables Resource Library, too!
Sign up to get the Weekly Newsletter! Our emails include an unsubscribe link and you may opt-out at any time. Your information will *never* be shared or sold to a 3rd party.
")
")


")


")

Amazing! You’ve made this process look so easy. No one would ever know that this piece didn’t have all of its original mouldings.
Thanks! It really is Paula! :)
Hi Nancy, I have a dresser very similar to the blue dresser you refurbished here. However, I’m missing some of the small half-round molding that is around the drawers. Do you know where I can purchase or find that same molding to make repairs? Thank you so much for your help.
Hi Paul, actually you should be able to use this same method with that trim/molding. I don’t know of anywhere you could purchase it so I would try making a mold of what you have and creating it like I did in this post. :)
I’ll give it a try. Thank you.
You are so amazing the way that you create new pieces of molding or handles for furniture that needs a little love. The blue chest turned out beautiful!
Aw thanks Bonnie! But it is really a simple little procedure. ;) Anyone can do it, I am sure of this. Thank you, I ended up keeping that beauty and it now resides in my master bedroom. :) xo
SO very clever!! You would never know that piece was clay! XOXO
Thanks! I try!! ;) xo
Isn’t it the coolest way to replace missing trim! I tried this a few years ago on a sewing cabinet and I literally was doing the happy dance when I was finished. Smart choosing a clay color that once distressed, will look like the original wood. Pinning to share ☺
OH it really is. SOO easy and no one would ever know! Thanks for sharing Marie!! Happy weekend to you!! xoxo
You do such amazing work. I always enjoy seeing it. Wish you lived by me!
Aw thanks so much Rose!! :) That would be fun!! xo
Thaaaank you!!! This is just what I was looking for! I’m just doing a project for a client and one of the molding was damaged. This is so simple! I don’t know why I didn’t think of that :D
You are so welcome!! And it really is! My brain just works like that!! ;) xoxo
This is so amazing. Thanks so much. My husband and I refinished my grandmother’s treadle sewing machine cabinet that had sewing me missing molding. It wasn’t intricate, though. So glad to learn this trick. My imagination is taking wing!
Thanks! :) And oh yes, get to molding! Make the whole again! :) xo
You are so talented I just love all your makeovers, and the use of clay for missing pieces, very clever.
Aw thanks Sue! :) Hope you have a wonderful New Year! xo
what is the clay called ?
It’s Sculpey clay and I have it directly linked in the blog post here. :)
Love your idea to make a missing piece with the clay and I am going to try this. Question, though. When you bake the mould, does it shrink up at all during the baking process?
Thanks!
Hi Hannah,
If it does, it’s minimal. I haven’t had any problems with that. :)
Thanks for letting me know. I ordered some Sculpty clay today and am interested to try it. It will be a first for me. I see many projects in my future. ♥
Good luck and have fun! :)
Nancy, I have no idea how I missed this! SOOO creative! I adore that the clay is brown… brilliant! This piece truly sings now!! Thank you for all the details!
You are very welcome!! It’s super easy to do this too! xo
Perfect match! Nancy, what is your favorite glue that holds the best? I want to repair the lip of a jug using this clay, and don’t want it to pop off. Thanks!
E6000!! It holds amazingly well.
Im glad you finally “escaped” to do some thrifting. Ill bet it felt great to get back to the “hunt”. Love the tips. You are so full of details that help us a lot. We’ll leave the fear of missing molding behind now. “Wonky”, what a cute word. I’m going to steal it and add it to my vocabulary! 🤣I can’t wait for the surprises. See you on Thursday.
Yes, absolutely! And wonky…hee hee, steal away!! Gotta have some fun, right? I can’t wait to share, Kathy! xoxo
AMAZING!!!! You are the Master Crafter!!! How did you figure that out?
Good job!!!!
Aw, thanks Addie! :) I had a missing handle and couldn’t find a match, didn’t want to replace them all so I came up with it! That was way back in the beginning of my blog and one of the very first posts I wrote and shared. So a missing handle I made first…then these flourishes with the same exact technique! xo
You are such an artist! And a dedicated one! I admire how you seek to restore the beauty in things.
Aw, thanks so much, Rose! I might be a little determined and stubborn too! ;) xoxo
This tutorial was exactly what I needed. The color and moldings are beautiful. Thank you!
Awesome!! Happy to hear that, Lizzy. xo
Hi Nancy! I know I’m late to this page, and I love all your makeovers! However, the link to the clay you used is no longer to the product on amazon; is there a way you can let us know what the clay is called and how to find it? Thank you!
Hi Alethea! Yes! You can find it right here. I will also update the page. :)