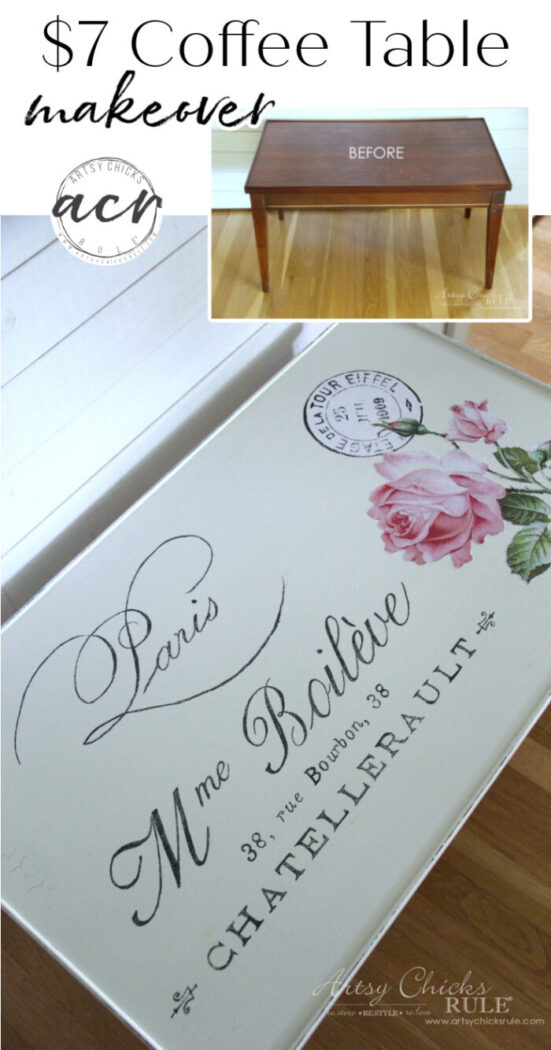
French Graphic Decoupage Coffee Table Makeover
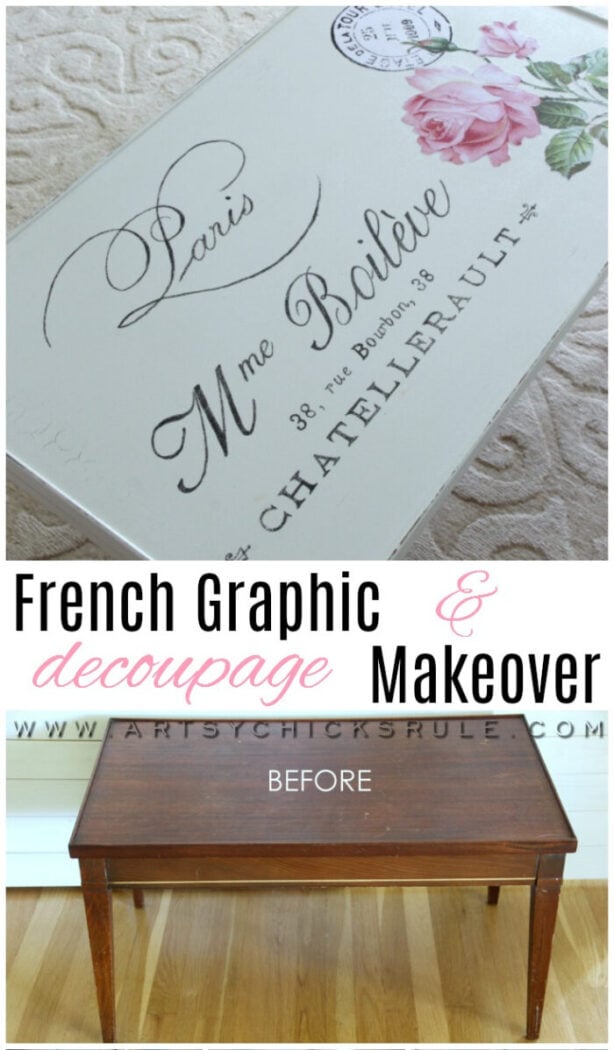
With a mixture of hand-painted graphics, using an easy transfer method and decoupage, you can create this thrifty and chic French graphic decoupage coffee table for your home.
POST UPDATED: 2-22-24
Hello dear friends! It’s Trash to Treasure Transformation Tuesday and we are back with another round of goodies for you.
I’m sharing this decoupage coffee table with a French graphic, so fun! I found it at the ReStore, I think I paid around $7 for it.
French Graphic Decoupage Coffee Table Makeover
Here is what it looked like when I found it.

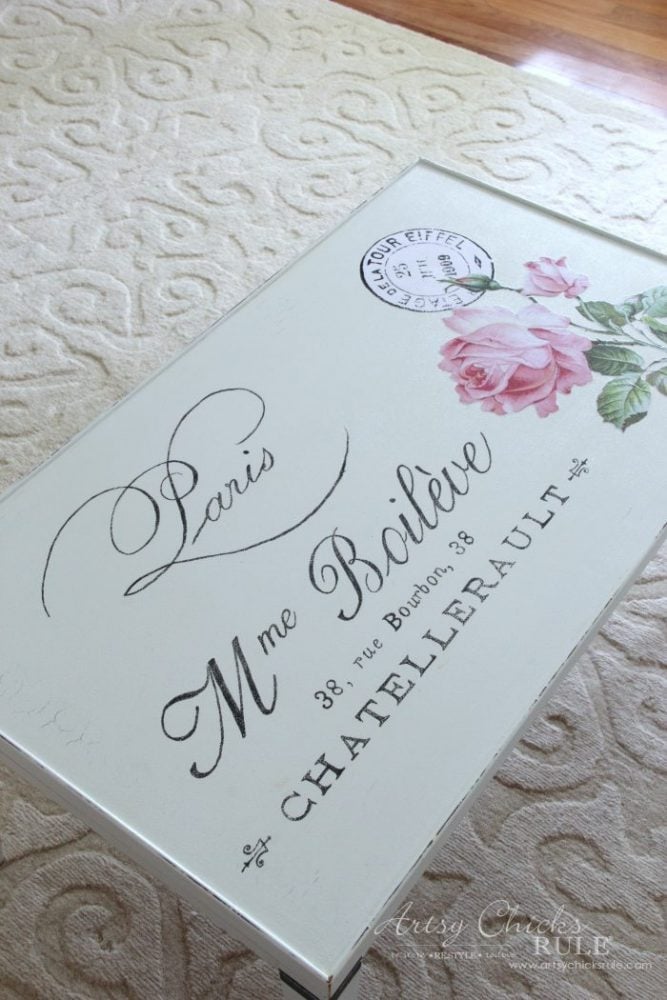
…and what it looks like now.
It had scratches pretty much everywhere, legs and all. If something is in pretty good shape wood-wise, I will usually pass it by. Unless I want to “bleach” or stain the wood. Otherwise, I typically don’t want to paint perfectly gorgeous wood.
This one had seen some years of good use though!
MATERIALS SOURCE LIST
- White Chalk Style Paint (or Picket Fence)
- Shellac Spray
- this graphic
- x-acto knife
- decoupage medium
- black or dark gray paint
- script liner brushes
- sandpaper
- Topcoat
Since it was that lovely reddish wood, (that loves to “bleed” just like this other little table I did previously) I decided to give the whole thing a spray with Shellac before beginning.
That usually helps keep the red from coming through the lighter paint colors. You can use that Shellac spray or this BIN Shellac Based Primer.
And since I was planning to use white paint on this one, it was a must!
It’s a good thing I did, you’ll see why below.
I have been wanting to use this graphic from The Graphics Fairy for a while. I almost used it on this old trunk, actually, but decided to go with something else.
Decoupage Coffee Table Tutorial
Next, I started the project by printing the lettering portion out using blockposters (.) com.
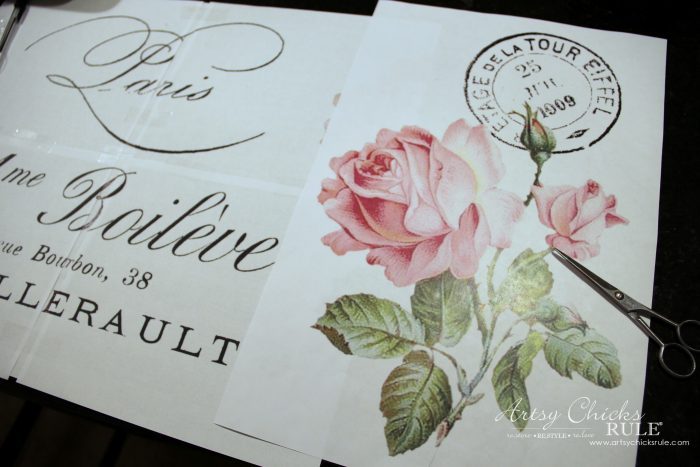
The flower part got printed out at Office Max because I wanted it to be good quality. (better than my little ole printer here)
UPDATE: I have since bought a laser printer so could print this at home. Might need to find something pretty to do this with now that I do! I can’t believe I haven’t tried something like this since getting it. lol
After the table was dry from the Shellac spray, I gave it 3 coats of white paint.
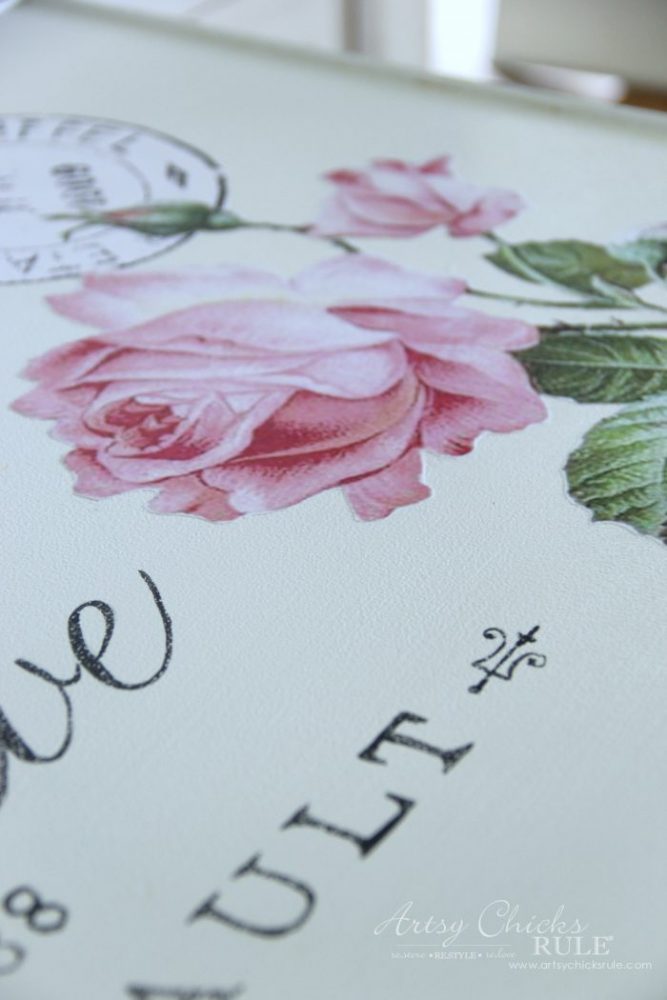
I cut it out using those small scissors and an X-Acto knife for the interior white areas.
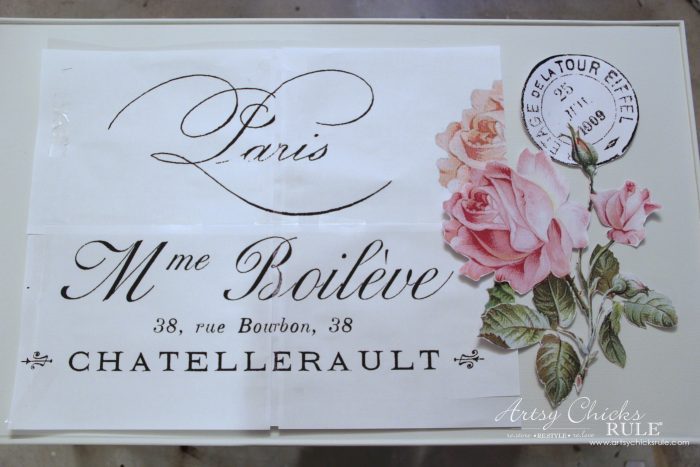
I decided to go ahead and get the layout how I wanted it and apply the flower portion decoupage first. Then simply brushed the decoupage glue onto the back of the paper and laid it carefully on the table.
You’ll then want to make sure there are no air bubbles, etc. It was a little bit of a bear because of those squiggly thin areas (stems) but all went well.
After that, I took the brush dampened it with some water, and went over the entire top of the decoupaged section with it.
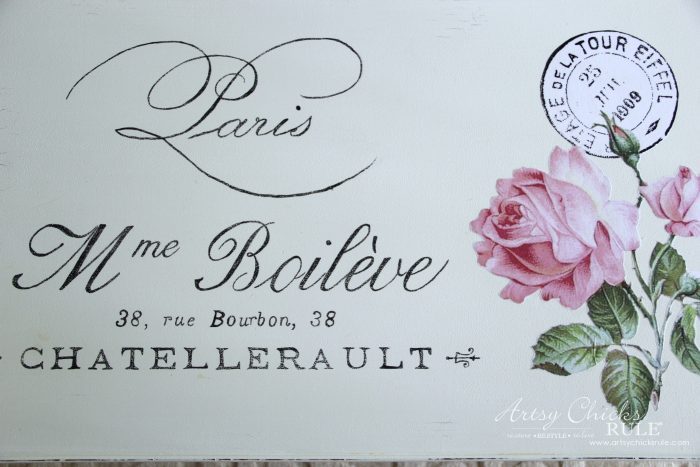
Next, I transferred the wording by shading the backside of the lettered paper (as described in this “Transfer Methods” post) and made sure it was aligned properly with the table. (measure!)
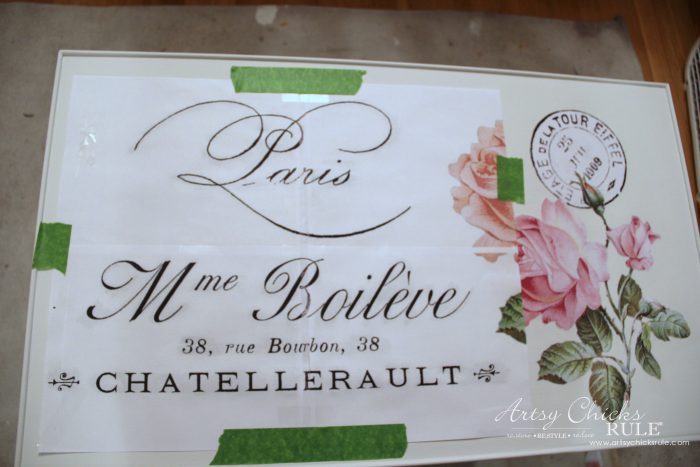
If you clicked over to the link for the graphic, you might notice that I cut out the top portion (extra text) of the graphic. I needed it to be more rectangular than square, so I left that portion off.
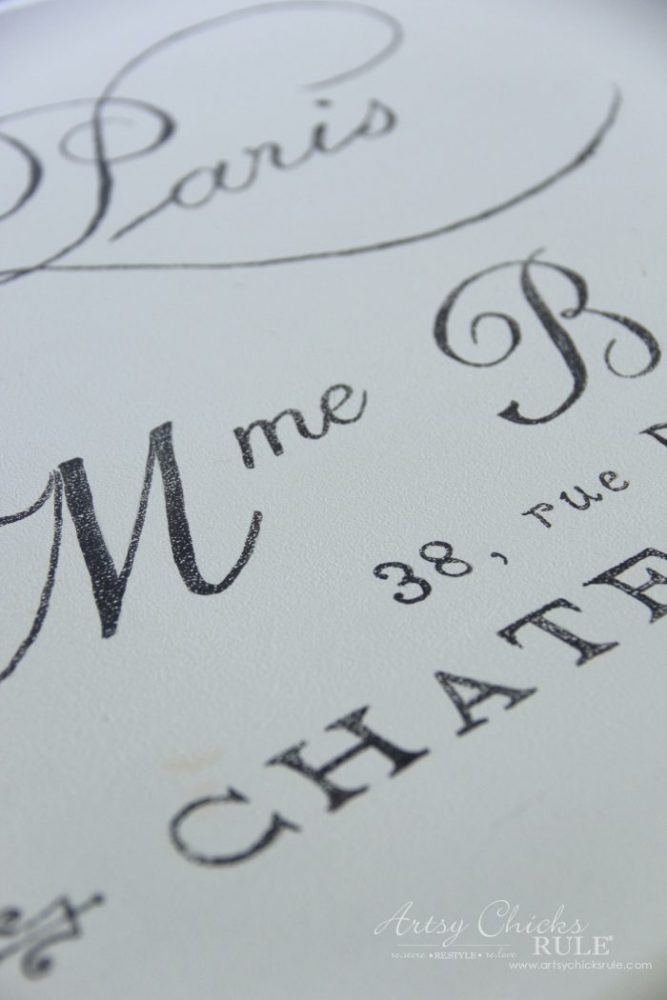
Once that was taped in place, I simply traced the letters and then hand-painted them using black paint and a series of script liner brushes.
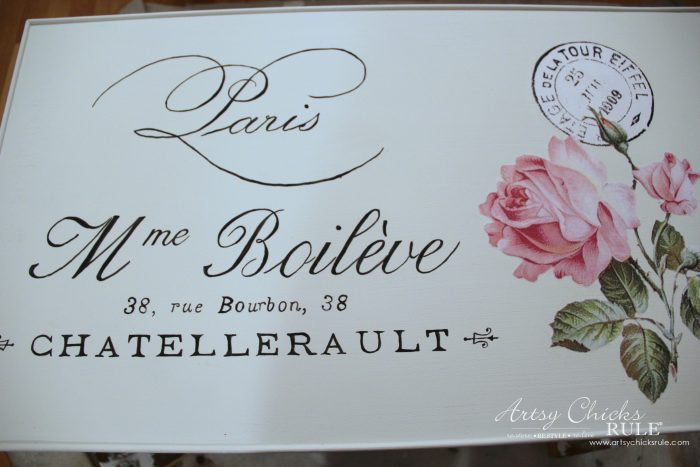
And to soften it up and give it a touch of “wear”, I gave the lettering and the table edge a tiny bit of sanding.
I finished up by giving it 2 coats of topcoat sealer.
I also painted these areas on each leg with the same black color. As you can see, they got a bit of sanding too. Remember when I said I’d show you why the Shellac was a good idea earlier?
Well, just take a look at the corner there where I gave it a bit of sanding….see the orange-y/red coming through?
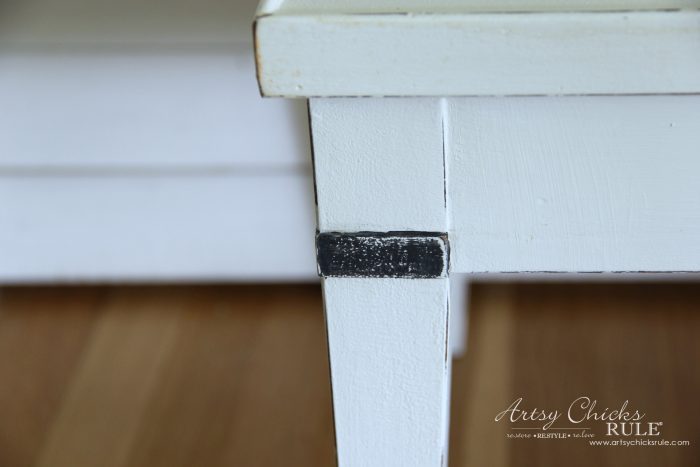
It would’ve looked like in more places had I not prepped it and given it a spray of Shellac before I started painting.
I learned that lesson long ago!
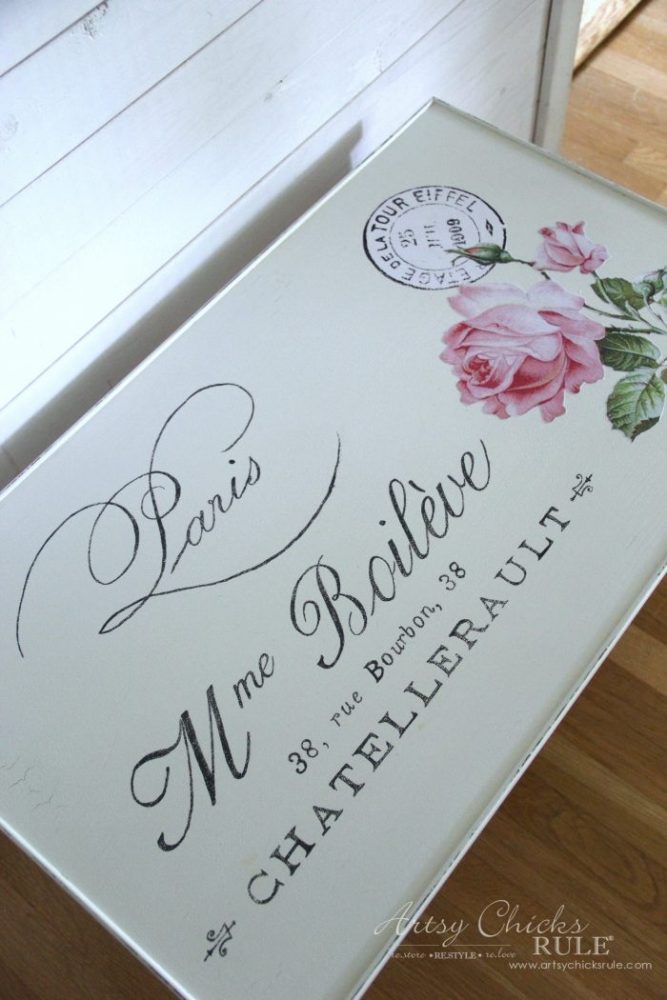
Just so happy with how this turned out. I think this cute, petite coffee table was the perfect backdrop for such a beautiful graphic.
And that rose just makes it, I think! Don’t you?
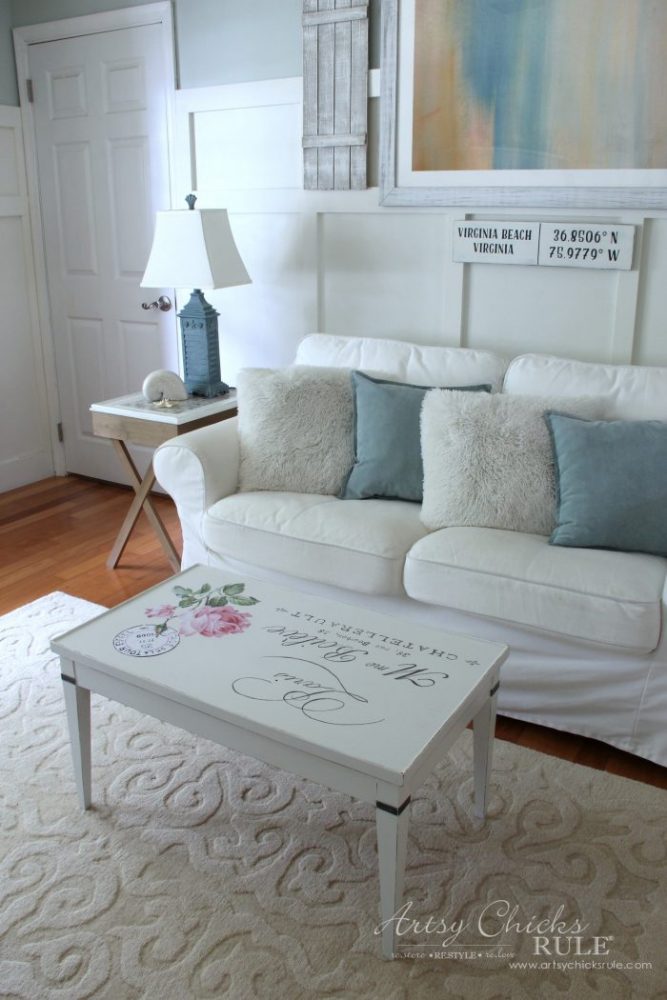
It’s the perfect size for a tight, narrow room like mine. (UPDATE: That’s a flash from the past to our living room, isn’t it?! You can see what it looks like now, here)
I’m really loving the black on each corner, too. So glad I decided to do that.
You may notice a little bit of crackling in the finish above. It did that in a few places and I love it!
I wish it would have done it in a few more. haha! (by the way, it most likely crackled because I was being impatient with a blow dryer, drying the paint)
Sometimes those are happy accidents!
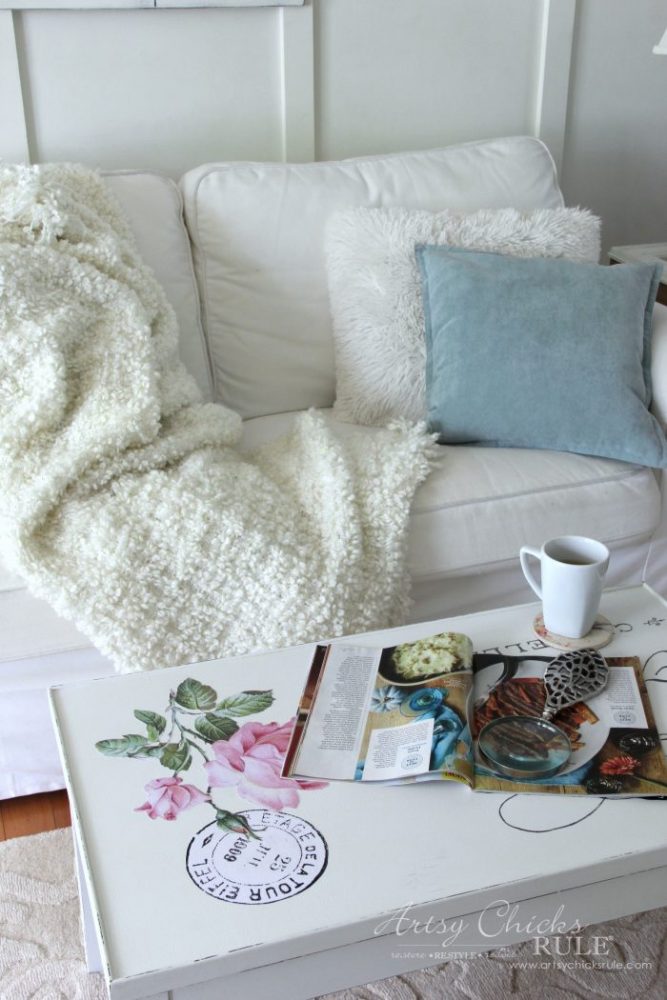
Isn’t this a cozy little spot??
This was a pretty simple project. I did have to make a run to Office Max to print out the rose but other than that, easy!
UPDATE: In retrospect, I do wish I’d put a little dark wax or something to tone down the white postal stamp area. It stands out more than I like!
If you don’t love French style, you could do just about any other design. I love the sweet French look though.
But if you love it, be sure to PIN it to save it!
Before you go!!
Don’t forget to check out my friends’ “trash to treasure” transformations too below:
I can’t wait to see what they did with all of those!
Hope you enjoyed today’s transformations. It’s always fun to see old “junk” transformed with a little love and imagination.
Don’t you agree?
I have never ceased to be amazed by the creativity and beauty that they can become.
Be sure to check back later this week for my latest furniture makeover! (it includes fabric!)
UPDATE!!! See it now, here!!
Have a great weekend, friends!
xo

")


")


Great and beautiful table…thank you for all the info and God bless
Thank you Norma! xo
Love your finished table. I like “anything French!” and you’ve done a marvelous job transforming the old table to this stylish new one. I do love the rose!!!
Thanks Barb! I just love the French style too! :) xoxo
What a gorgeous coffee table makeover, Nancy! I’m a sucker for French typography but the decoupaged postale rose is such a beautiful addition to your table. Pinned
Thanks Marie!
This turned out so pretty, Nancy! Love the unexpected crackling! XOXO
Thanks Christy! :)
I always enjoy your furniture transformations. They give me great inspiration for when I will be ready to start gathering furniture for our future home.
Aw thanks so much Kimberly! :) So glad they provide inspiration for you!! xoxo
What a sweet result, Nancy! Love the addition of the decoupage. Is it laser printed? Do you need to do anything to keep the color from bleeding?
Thanks Marcie! :) I do believe it was laser printed since it was done at Office Max. In the past, I would spray it before hand with a poly sealer, several coats, and then would have no issues with bleeding. But, if you can, get it laser printed because I think the results are better. I’ll edit my post to include this info. :) xo
Just lovely, Nancy… quite perfect… love the colors and the graphics!
Thanks Julie! This is one of my favorites! xo
Love the new look!
Thanks Rose! :)
That sad little table is such a beauty now, Nancy! I love the French graphic next to the pink flower.
Thanks Jen! :) xo
I love the table. Turned out beautifully.
Thanks Kay! :) xo
Poor sad table turned into a beautiful swan! The rose was a great touch. Good job as usual, Nancy!! Have a great weekend. XXOO
That table turned out beautiful, Nancy!!! May be a repeat, but I’ve not seen it, so thank you!
Lovely coffee table.
Question: I would like to paint a mahogany chine cabinet. I have heard mahogany bleeds. Can you recommend a procedure and paint for it. I would hate to ruin it.
Thanks Pat D.
Hi Pat! Yes, use something with Shellac in it as a primer before you paint. Zinsser has a good one or you can use straight Shellac. It comes in spray or liquid can. That works well to stop the bleed.
Love your work. I love all of them, the dresser is my favorite.
Thank you so much! :)