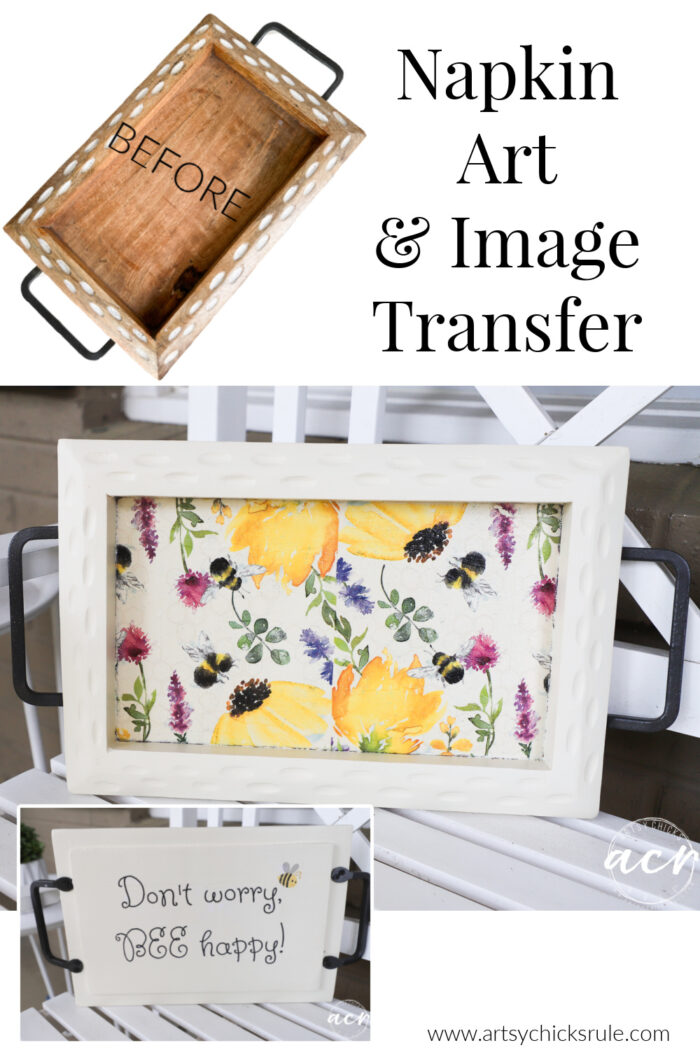
Tray Makeover with Napkin Art and Image Transfer
Tray makeover with napkin art and image transfer too! Super simple technique to transfer printed images to your projects!
Hello sweet friends!
How about that heat wave? I don’t know about the rest of the country but looks like we are getting ready to have one here on the coast of Virginia. These are the times I wish I had a pool in the backyard, right?! Oh well, next house, one day!!
Today I’m still working on this small haul…
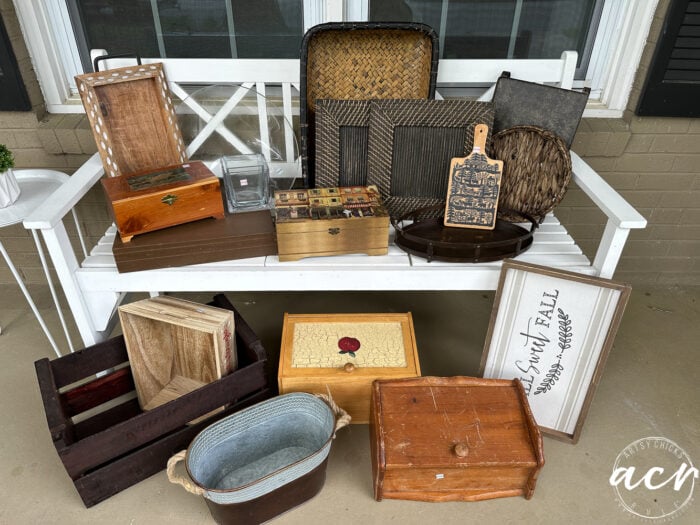
I did the crate a couple of weeks ago. If you missed it, you can see it here >> Old Crate Makeover For An Updated Look
Today I’m making over that little tray in the back left of the photo.
Tray Makeover with Napkin Art & Image Transfer
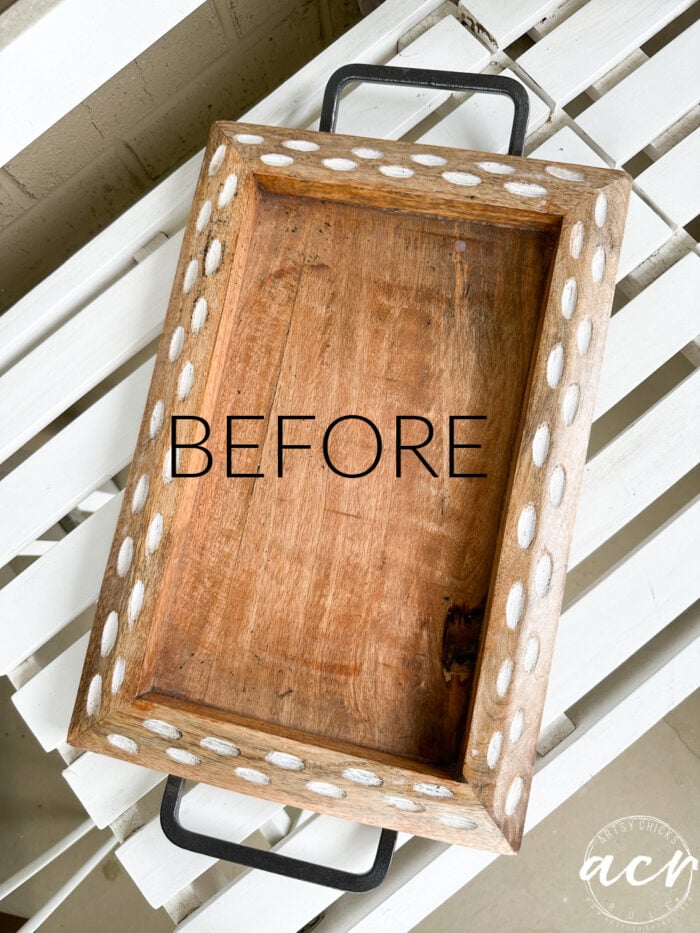
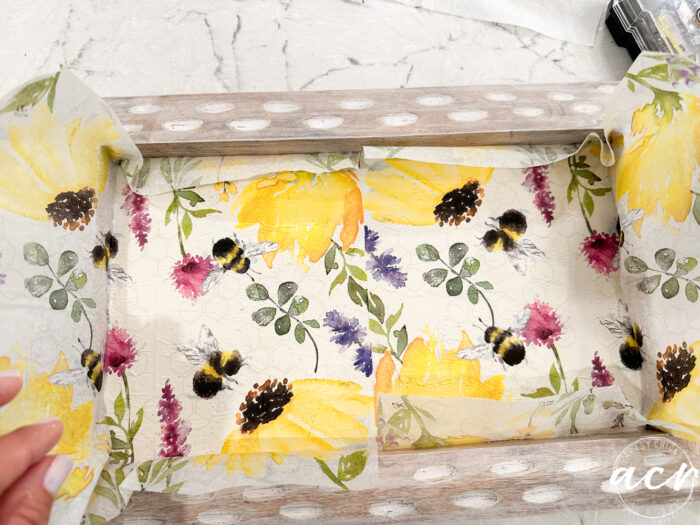
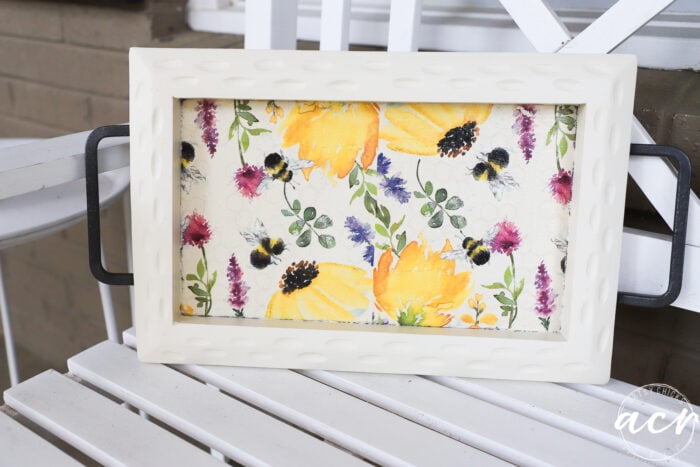
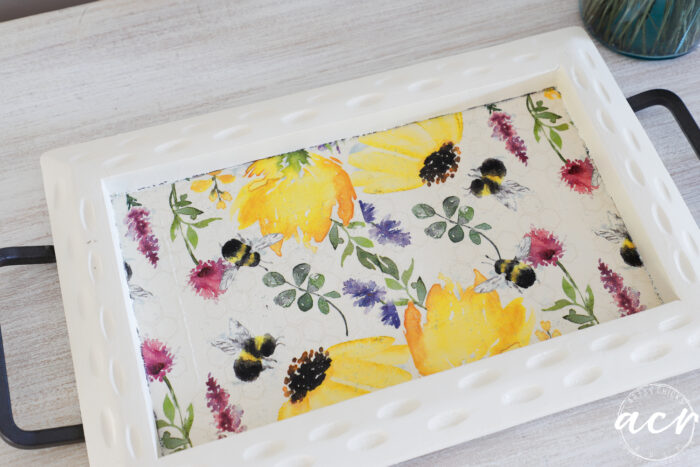
I have been wanting to use this pretty little bee napkin for something and decided to use it on this tray.
It’s perfect for summer!
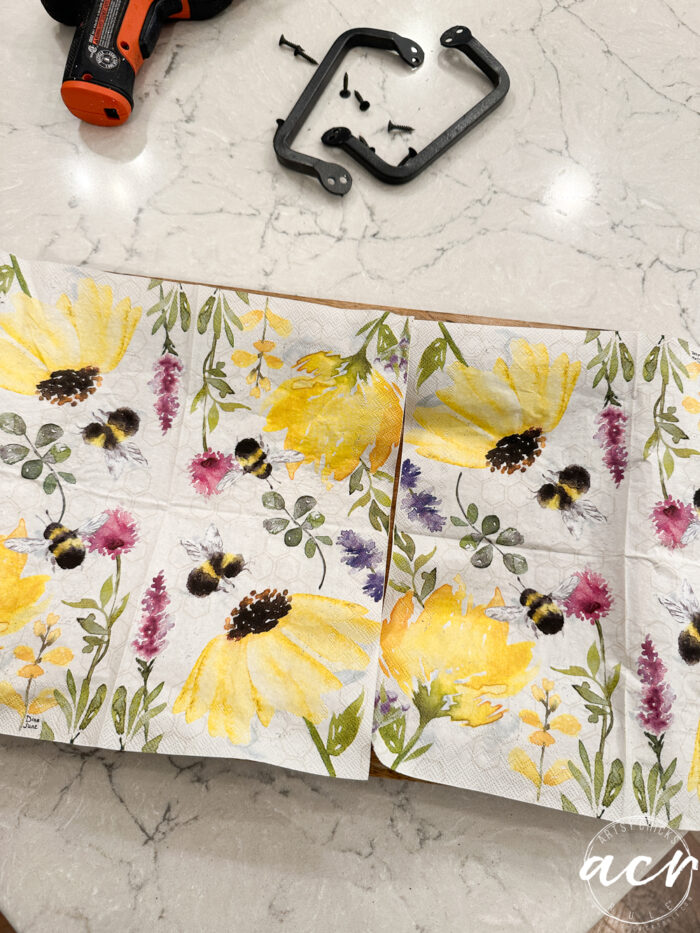
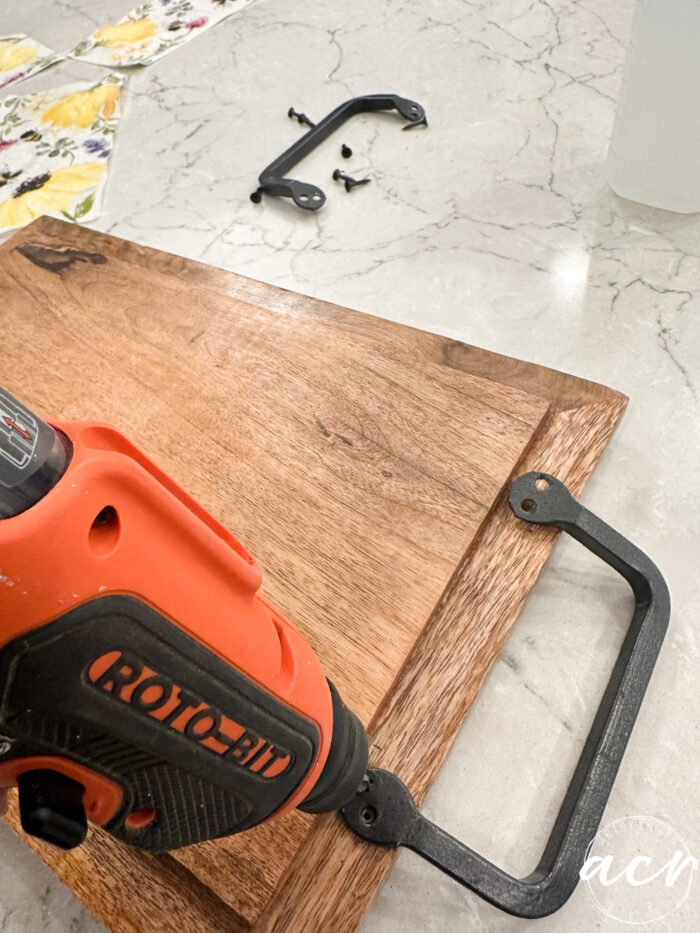
I started by removing the handles from the sides.
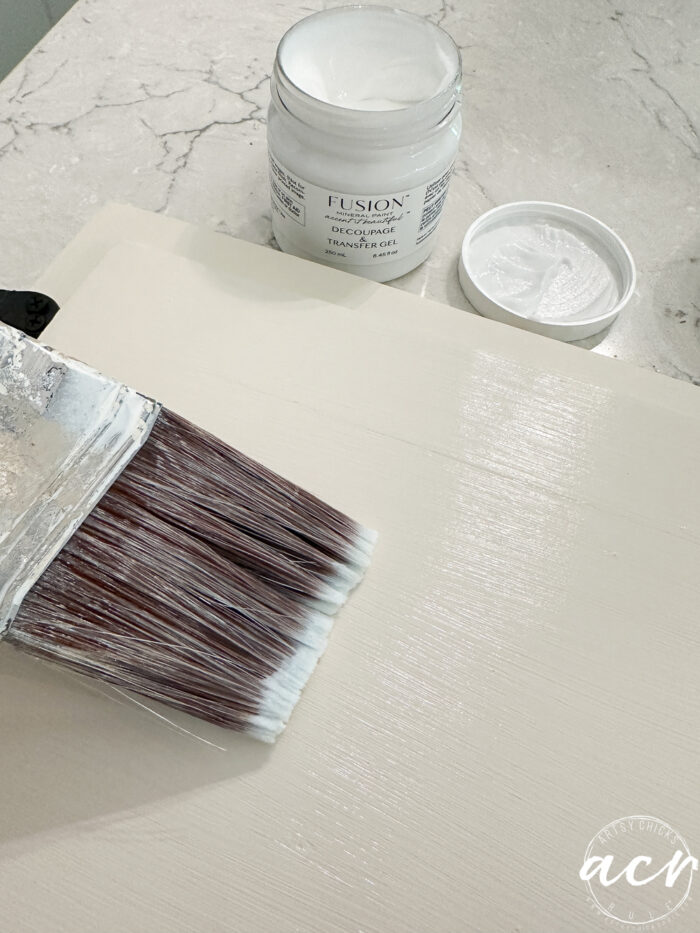
Next, I painted the bottom of the tray so that it would have a similar background color as the napkin.
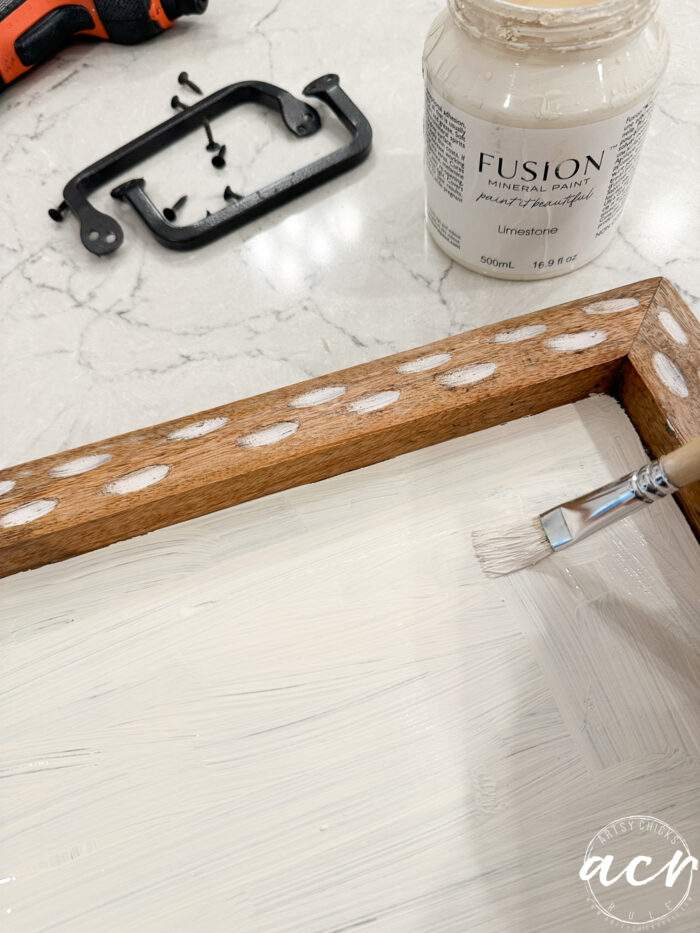
I used the color Limestone because I thought it was a good match.
Then I “whitewashed” the wood frame with the same paint. (I didn’t get a photo of that)
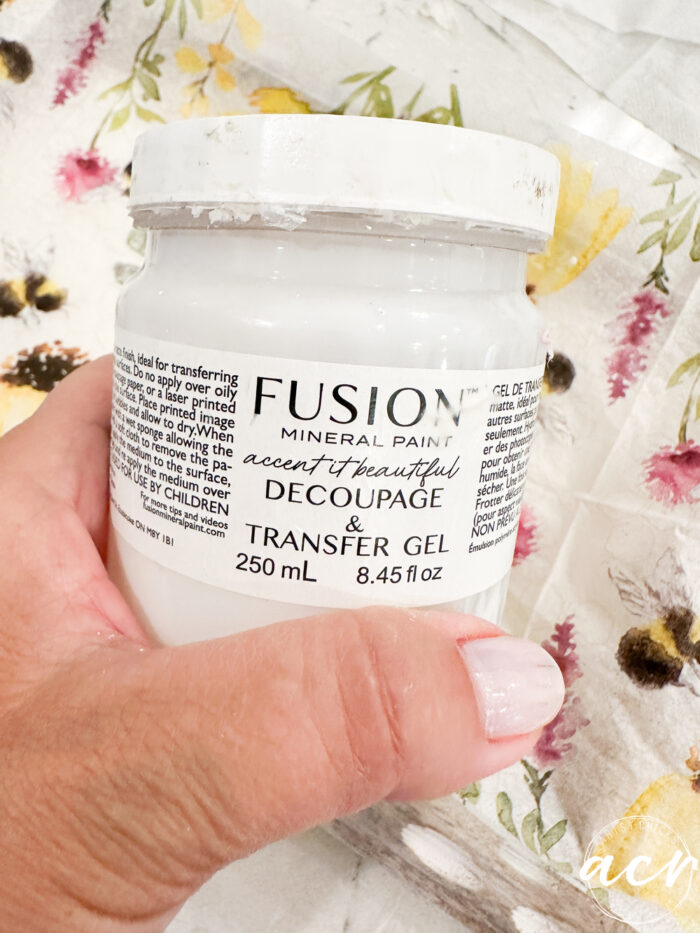
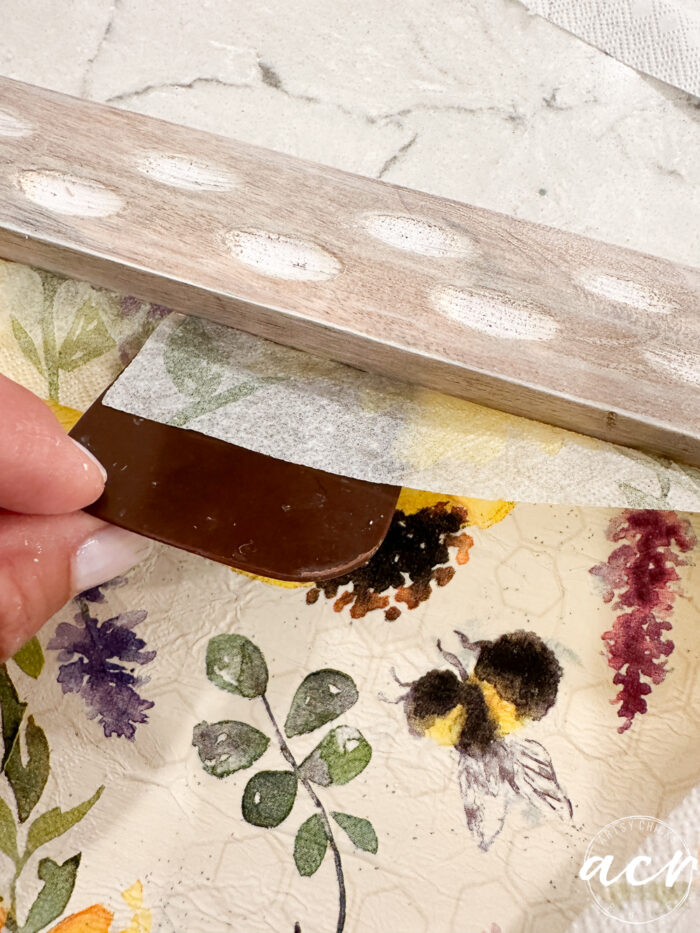
Next, I pulled out my Decoupage & Transfer Gel and applied a thin coat to the bottom of the tray. Be sure to pull the 2 layers off of the napkin before attaching it to the tray. You only want the thin part with the print on it.
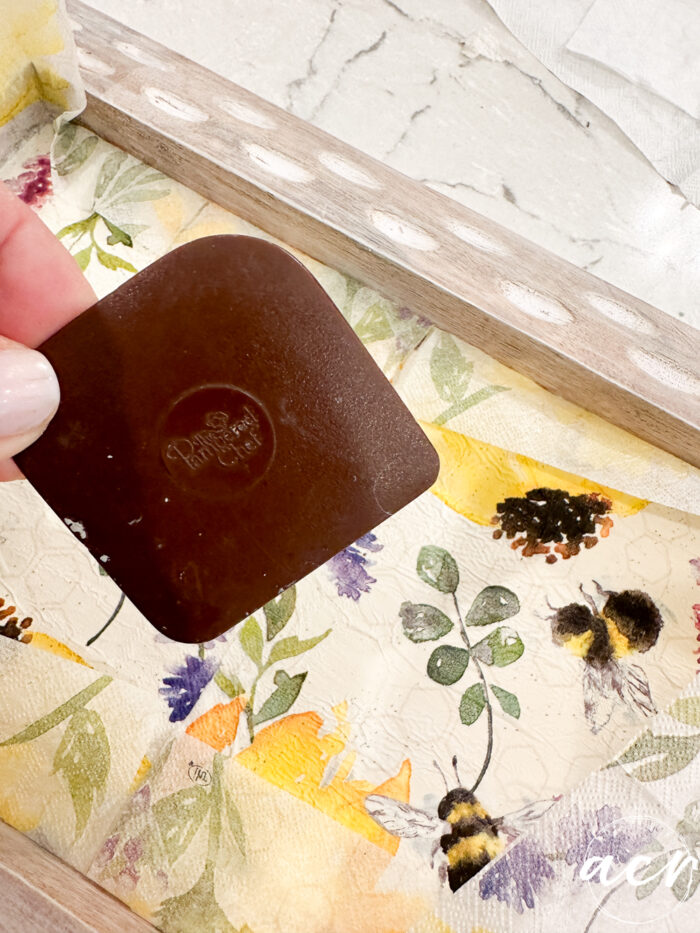
I used this old Pampered Chef scraper to get the paper down into the creases well. Worked great!
And let that dry.
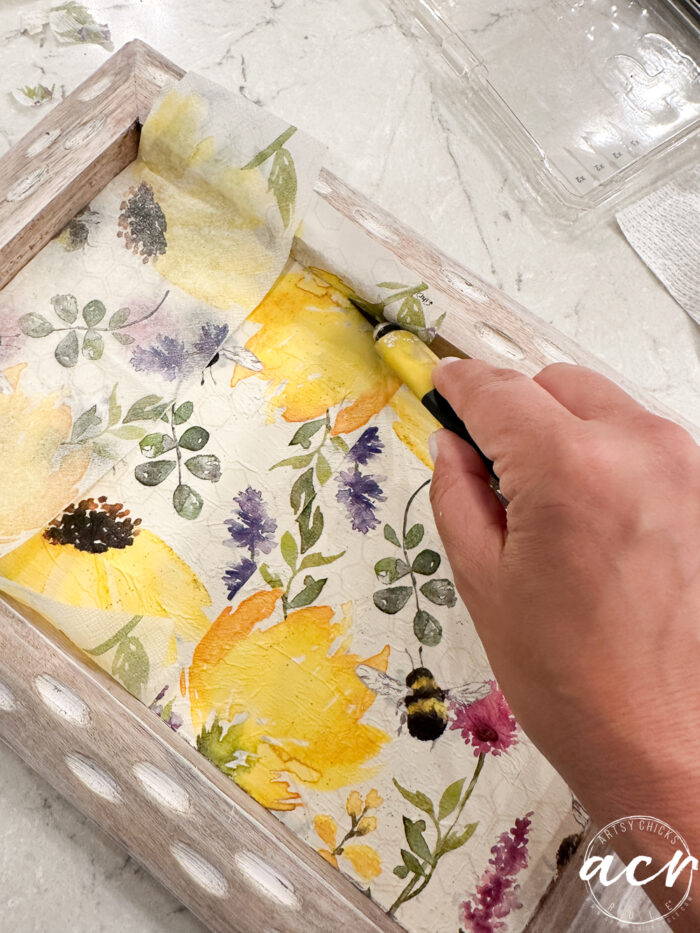
Once dry, I cut the excess napkin off using an X-acto knife.
MATERIALS LIST – Tray Makeover with Napkin Art
- Napkins
- X-acto knife
- Decoupage & Transfer Gel (this just “sold out” today! I have more on order so check back soon!)
- Limestone Paint
- Topcoat
Prefer to shop on Etsy? I have an Etsy shop also, here!
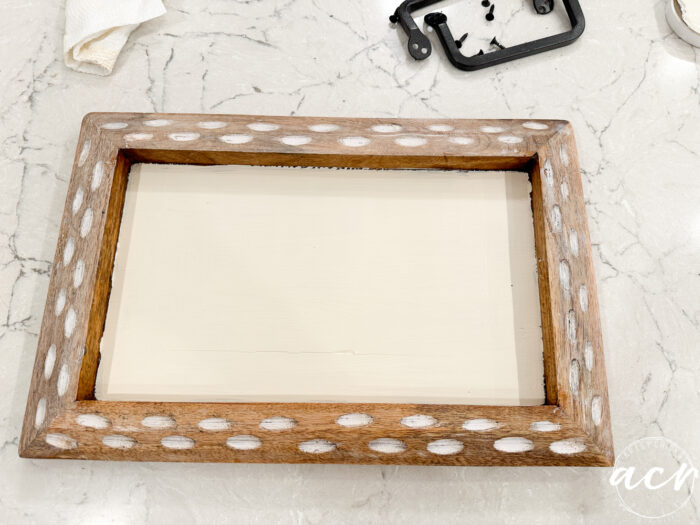
See the whitewash frame of the tray? It doesn’t look bad…but I thought it was a little busy with the print so…stay tuned. ;)
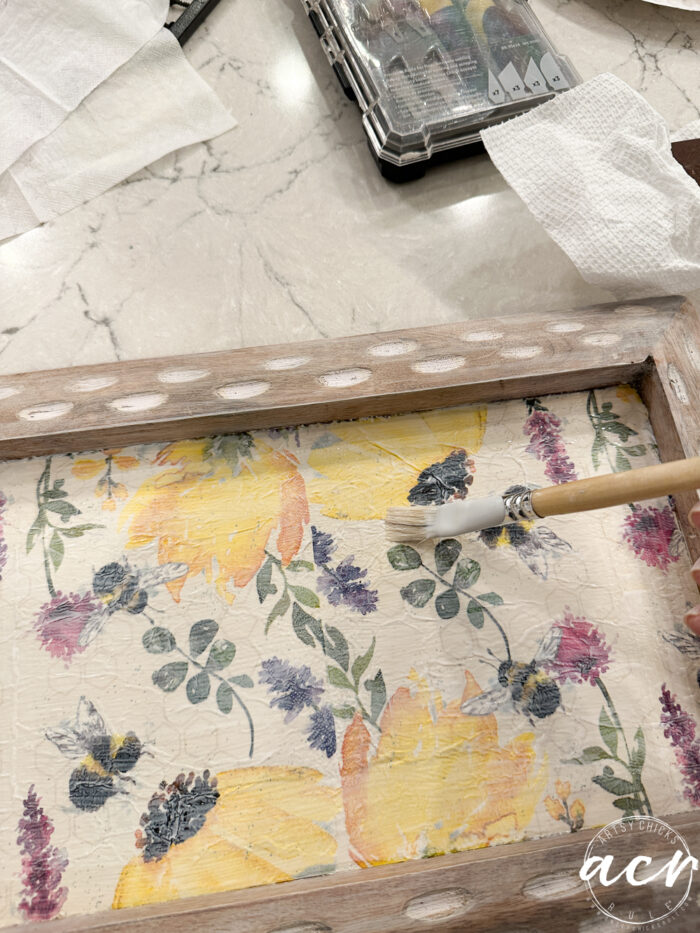
Once I removed the excess napkin, I applied one more coat of the Decoupage & Transfer Gel.
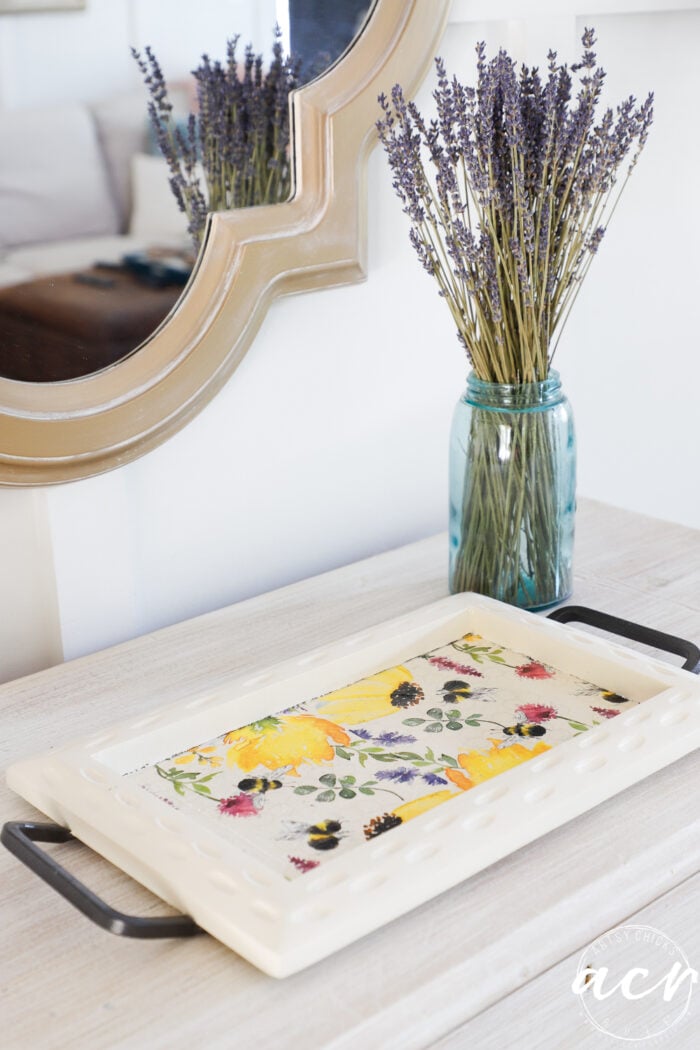
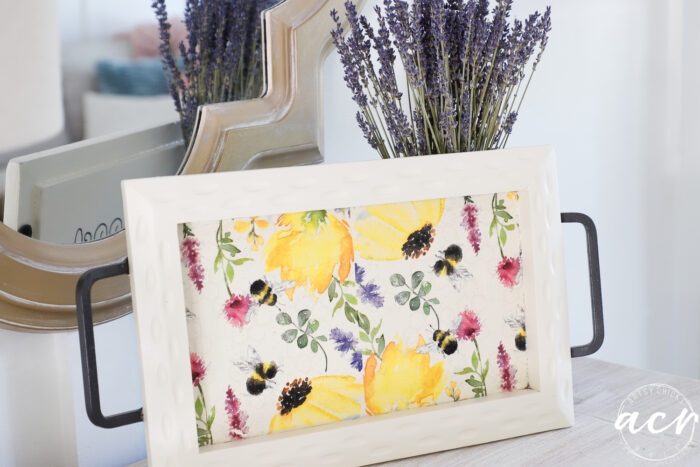
So, yep, as you can see below, I decided to paint the whole tray with the Limestone color.
EASY IMAGE TRANSFER
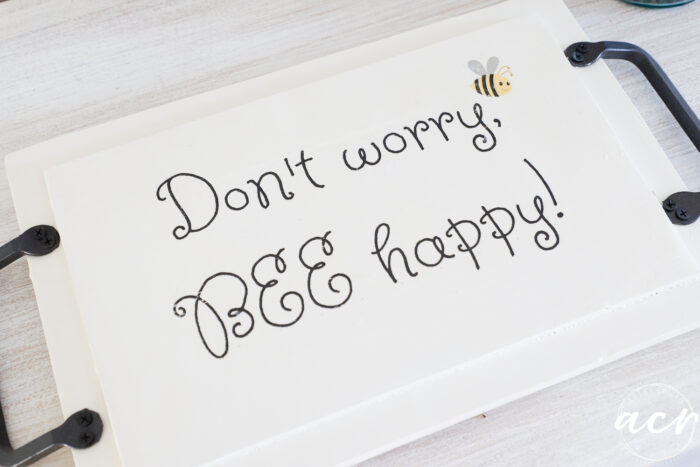
AND I decided to be fun and put a quirky little “bee” quote on the back! haha!!
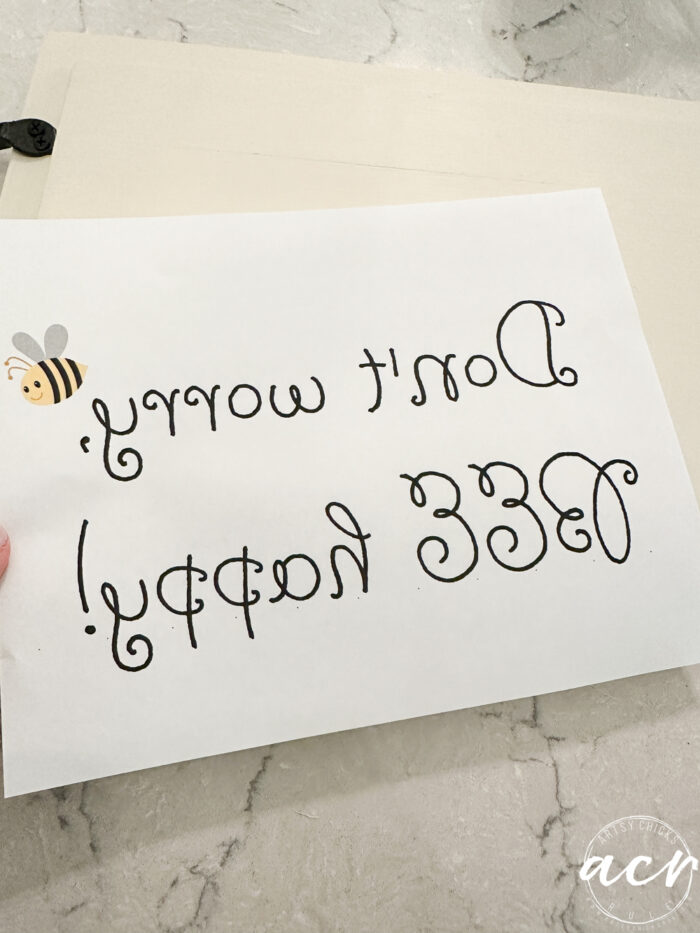
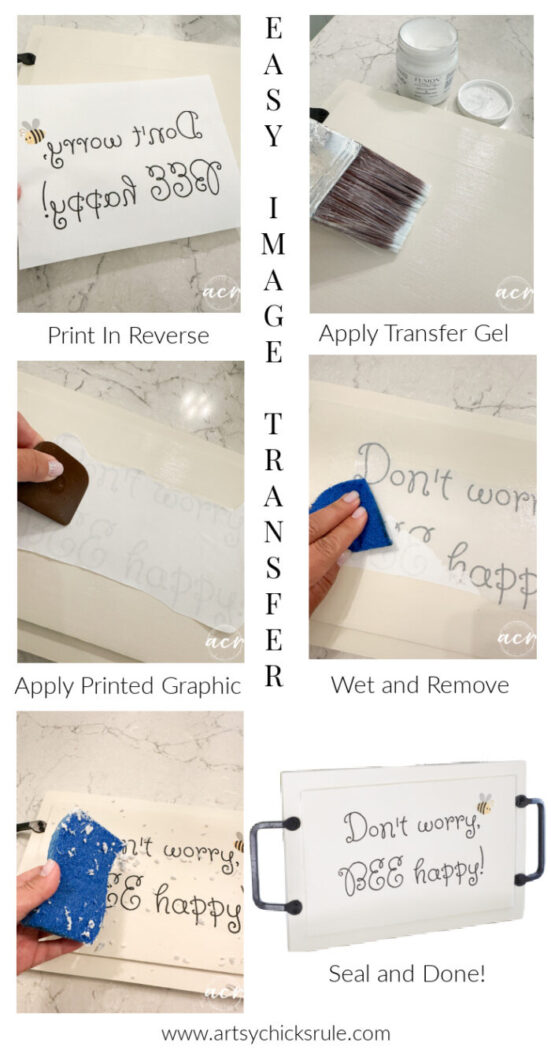
I created this design and printed it out on my laser printer. This is the laser printer I have.
It’s so easy to do! Simply add one thin coat of the Transfer Gel to the back of the tray.
Then cut the excess paper off of the design (be sure to print it in reverse) and place it on the tray.
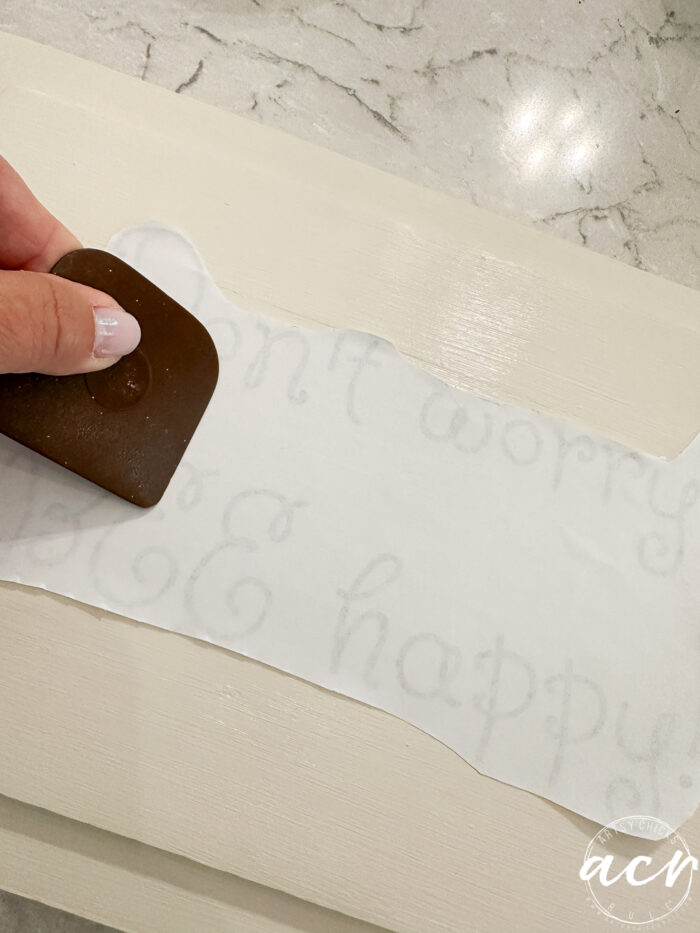
Then I used the same scraper to press any air bubbles away.
Let it dry FULLY.
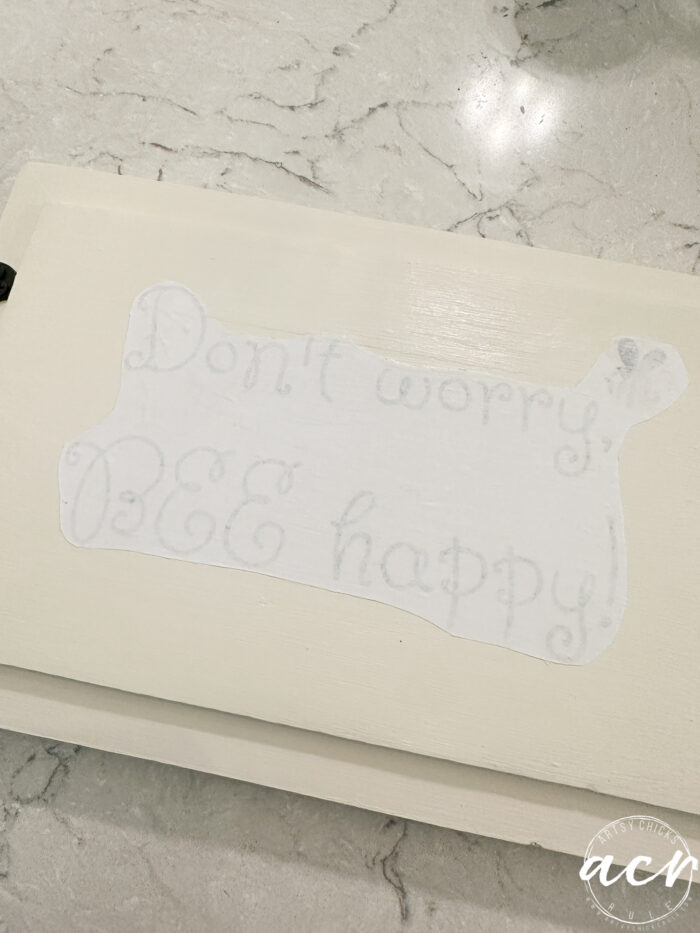
Once dry, use a damp sponge to wet the paper.
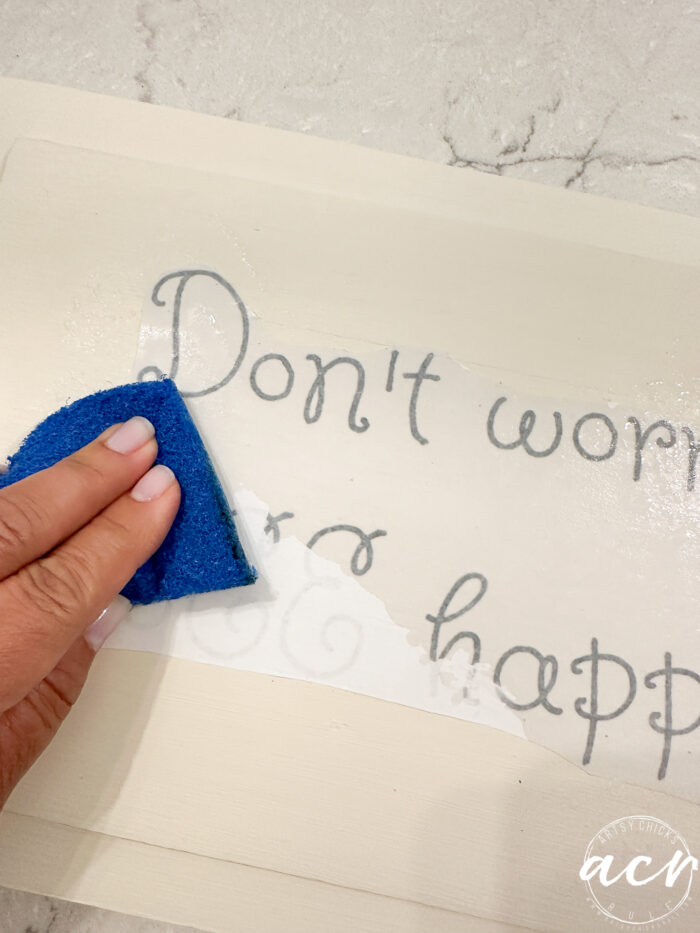
Then gently start rubbing away the paper to reveal the print underneath attached to the tray.
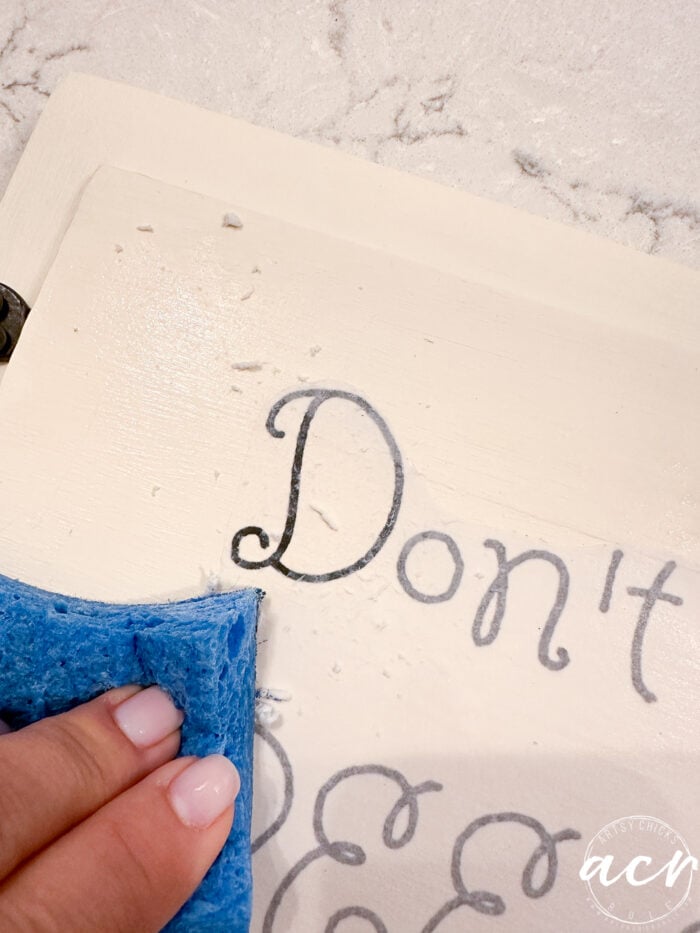
It’s like magic!
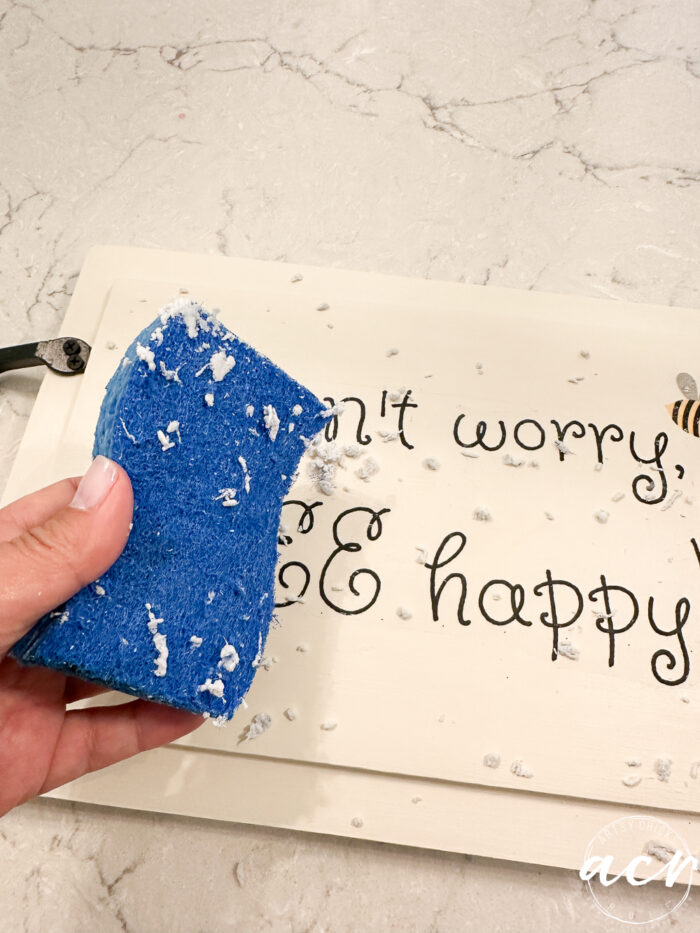
Be gentle, do not rub too hard so that you remove the graphic.
I’ve done a few other image transfers with this same method:
Once that was all cleaned up, I applied a coat of Tough Coat Topcoat to the front and back.
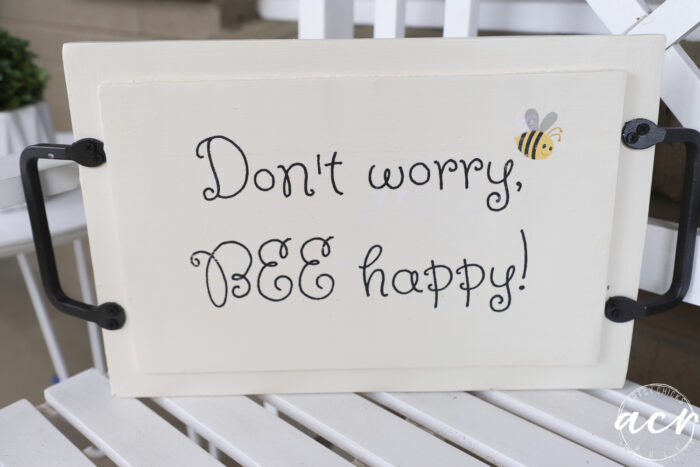
Isn’t that cute?? What a fun surprise on the back.
Sweet little bees for summer!
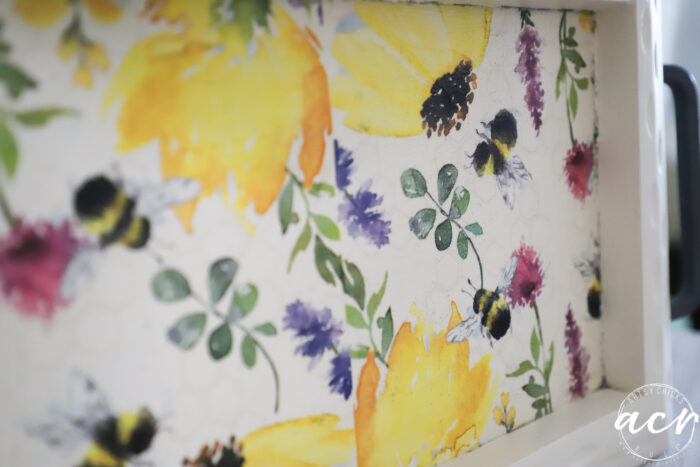
I didn’t mention it before but I decided to line the napkins together in the middle. One was not large enough so there’d be a line somewhere anyway. I tried to make it look like the green leaves were connected. Does that make sense?
Anyway, napkins are fun! So many designs to choose from too.
PIN it to save it!
I hope you all have an amazing weekend! These months are flying by, aren’t they?! It’s so hard to keep up with everything these days for sure! Let’s all try to slow down and take it all in.
xoxo


")

")

")

I love bees and honey decor and this tray is adorable. I think trays work as great accent piece, and my place has plenty of them around the house. I like how it is decorated on both sides of the tray. Very cool.
Thank you, Darlene! I think so too! They are great for so many uses. :)
It is Bee- utiful!!!! Just looking at it makes me happy!!.
Aw, thanks, Lorri!! I love that!! xoxo
So cute! Good call painting the edge! Looks good.
Thanks, Cyndi!! I am so glad I did! xo
Just LOVE what you did. It is so cute! I’m glad you decided to paint the whole tray one color because you were right- it was too busy for the decoupage piece.
This morning I saw a honey bee on the sage plants I have in the garden. A few years ago I had a whole hive of honey bees and I love them. I talk to all living things and have for a good portion of my life (no straight jackets have been offered so far :-) ), so I greeted the honey bee. She was quick to say, “sorry, no time to chat. I’m beesy!” and then flew off. Oh well.
Hi Caye! Yes, I’m so glad I went ahead and painted the whole thing too! And I love that you do that, I’m kind of the same way so I get it completely! lol xoxo
I love this tray! I also like it better with the whole frame painted. It’s adorable! Happy Summer!
Thanks, Debra!! Yay, that was a win it seems, so glad I painted that part too! Happy Summer to you as well!! Are you having this heatwave too?? xo
Oh, Nancy! It BEE adorable!!! I love the way that turned out. What a sweet tray for summertime. I can see glasses of lemonade on that one. Does that decoupage transfer gel make it kinda waterproof “ish”?
Aww, haha, love that, Michele!! And yes, can totally see that too! Yes, the Transfer gel is a “sealer” as well. You can always add a topcoat over it though for extra protection. I do that sometimes depending on what it is. Or I skip the Transfer gel on top and just go with topcoat. :) xo
Soooo cute !! Gotta love bees and flowers.
Thanks
Yes!! I agree! Thanks, p!!