Easy Makeover with Spray Paint, Mod Podge & Wrapping Paper
Here’s an easy makeover with spray paint…a little Mod Podge…and wrapping paper!
Updated 5-8-2024
I’m back with another furniture makeover for y’all today….and no, it’s not BLUE.
Not even a little bit. ;)
BUT it was quick and easy.
Years ago when I first wrote this post, my friends and I got together every month to create a furniture makeover using a specific theme.
This particular month’s theme was BLACK. (see previous month’s themes here –> Themed Furniture Makeover)
I’ll admit, this was a little tough for me since I don’t really decorate with black.
But then I took a trip over to my storage unit (which is completely too full of yet to finish furniture…and then some…there’s an entire right side you can’t see)
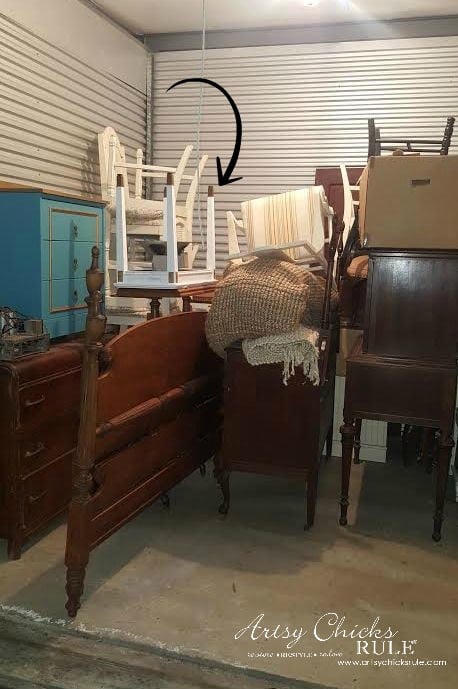
And I remembered I had that little white table you see up there.
I wouldn’t mind painting that little table black so I grabbed it and left.
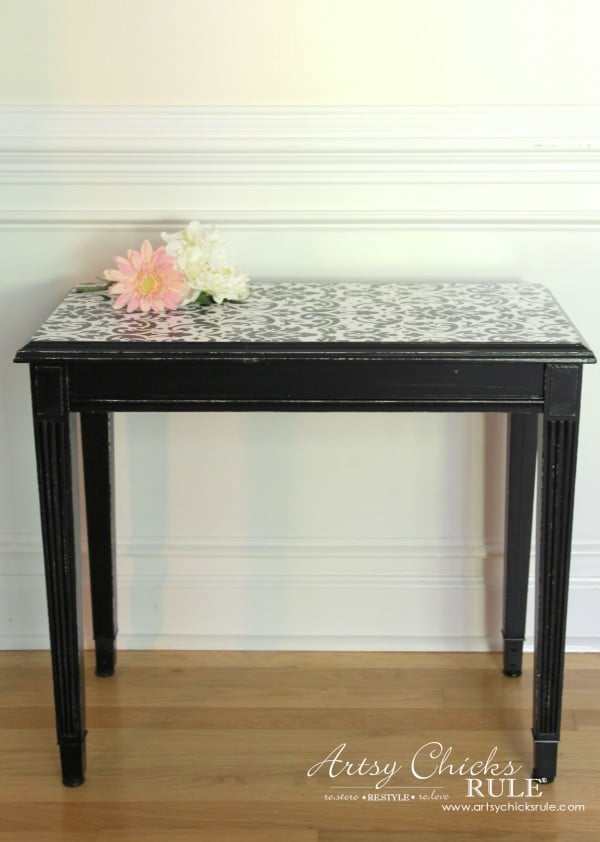
Easy Makeover with Spray Paint & Wrapping Paper
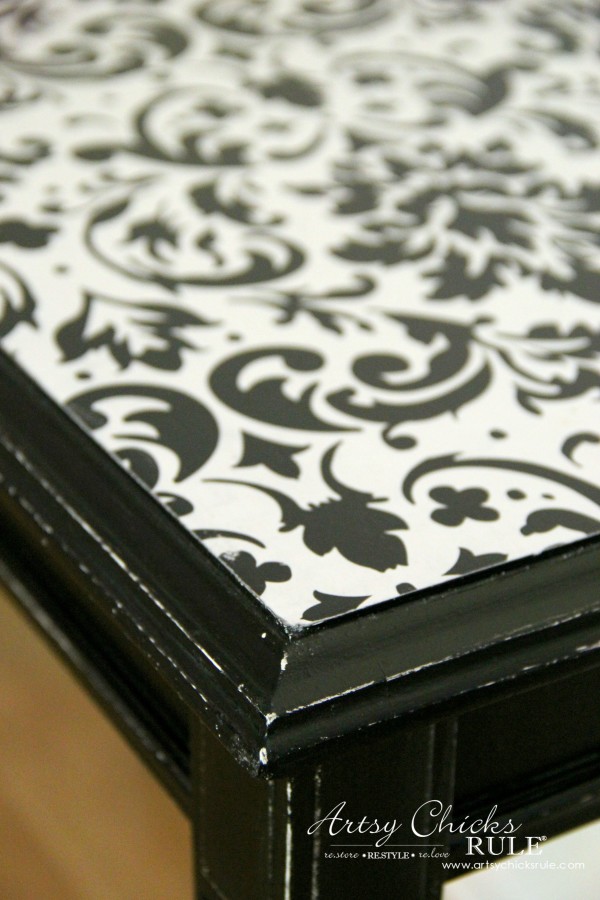
And created this…
No, that little design there did not come immediately to me.
I had originally thought I’d do a two-tone of black and tan with some black French lettering on the top.
I started by spray painting it in flat black and was planning to come back and paint in the tan.
But then I realized I liked it ALL black and didn’t want to do the “two-tone”.
What to do on the top then?
All black with nothing else is a bit …blah for a “themed” makeover like this. Don’t you think?
So I decided to add a bit of fun with some wrapping paper instead.
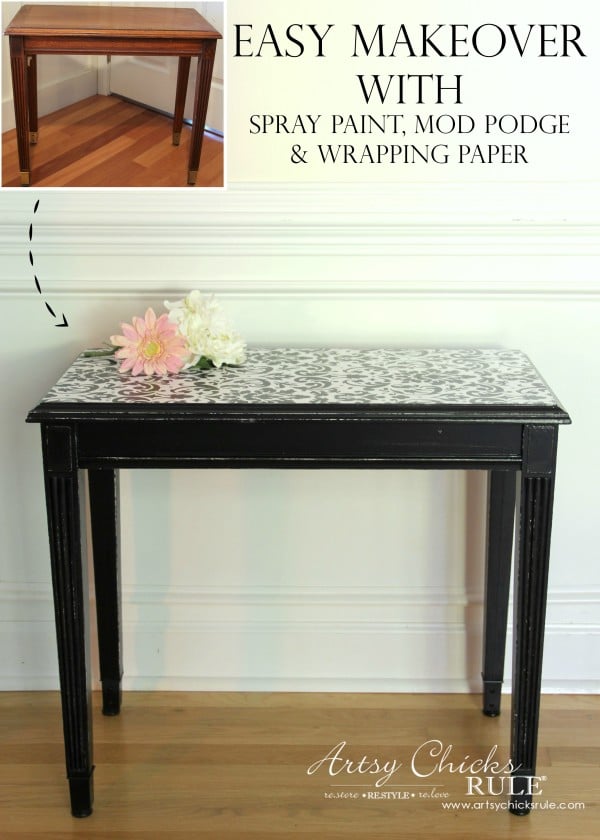
Easy Makeover with Spray Paint “BEFORE”
But first, the table before…
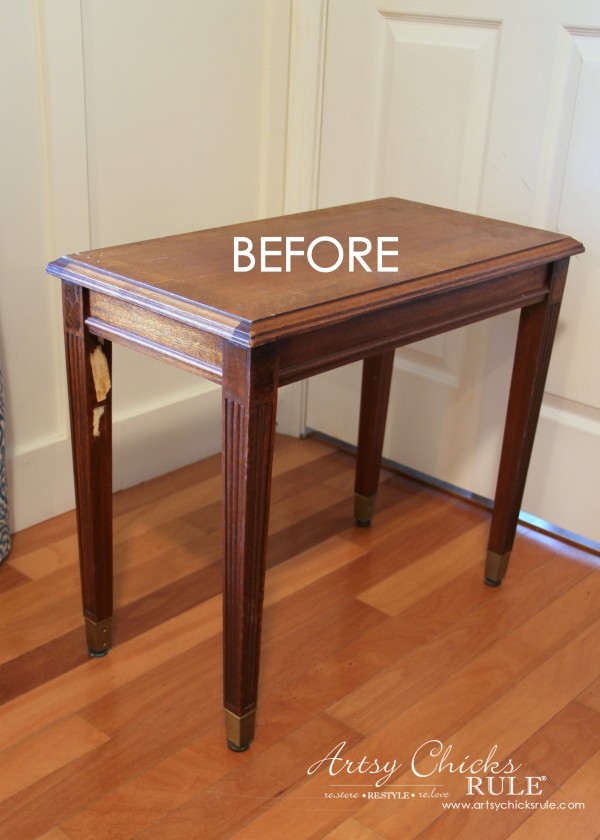
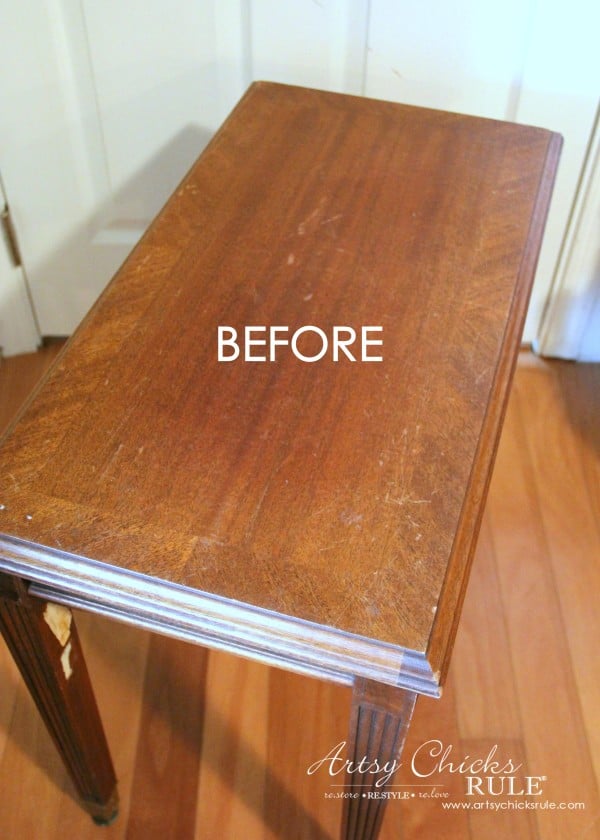
A thrift store find. ($10, I think it was)
And it’s not an antique, it’s stamped May/1974 on the underside. Well, some might consider that antique! Ha!
You are totally confused, I know, right?? I just said I grabbed the white table out of the storage unit.
Let me explain…
I’ve had this for a while and had actually started painting it …
…but it wasn’t turning out like I had planned and I just couldn’t get it together in my mind.
So off to the storage unit it went for a breather!
The white underneath ended up being a happy little surprise in the end. Follow along to see why.
Okay, onto the making of this table.
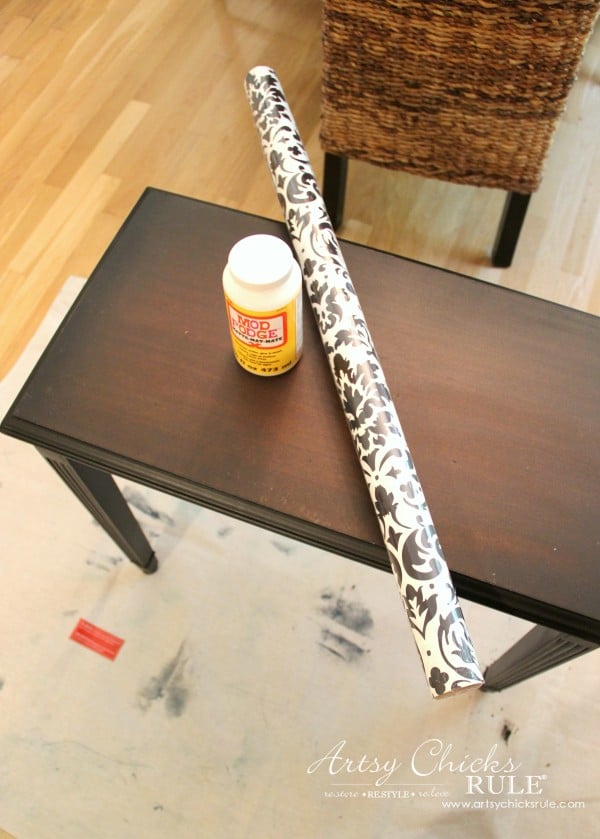
I used Mod Podge![]() to attach the paper. These days I use our Decoupage Gel instead.
to attach the paper. These days I use our Decoupage Gel instead.
Unfortunately, I don’t remember where I got the paper since I had it in my cabinet for a while.
It was probably Hobby Lobby.
First, mix a good bit of water with the Mod Podge before applying it to the table.
The paper can really suck up the moisture quickly making it near impossible to move the paper around in place.
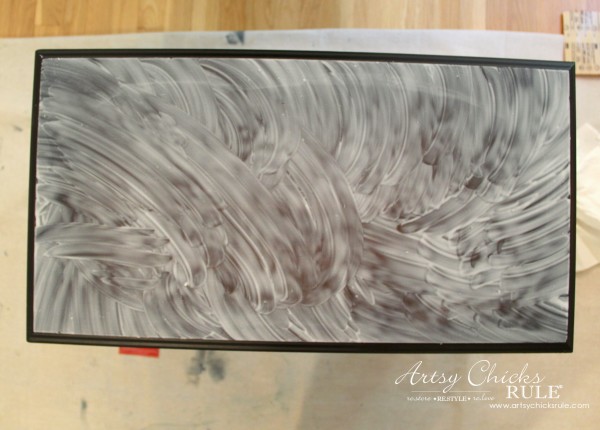
Adding the water keeps it fluid enough to move it until it’s straight but you still need to work quickly. (this is one of the reasons I like our Decoupage Gel, it’s a bit easier to work with)
I started applying with a brush….and ended with my hands as you can see above!
Sooo much easier to spread it about that way…and fun too. ;)
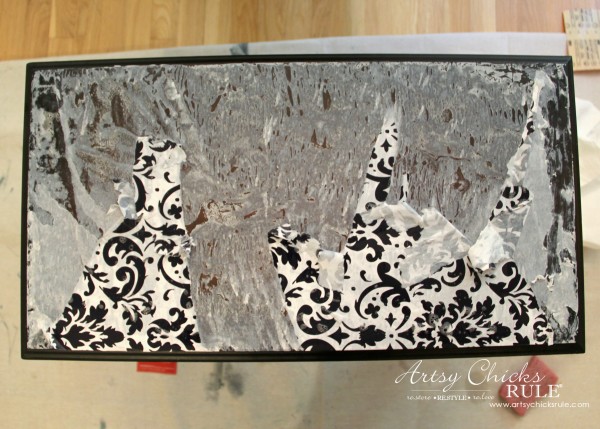
Be sure to have already measured and cut the paper.
I allowed for a little “overage” in the paper and would remove the excess later.
After it is aligned, smooth it out with your hands. (squeegees can be used but can sometimes rip the paper…and so will going over with too much force or too many times, be gentle) It all really depends on the paper and how thick/thin it is. This paper is pretty heavy weight so it held up great.
Until I went one too many times over the same spot and ….rip.
Just a tiny one but enough to make me crazy.
So I thought, I’ll just peel this off and go again.
Haha…
Not so much.
Yea, the tiny rip would probably never have been noticeable but too late now! That was a bit of a job removing the paper and glue.
Told you…that paper sucks up the moisture quickly.
I redid the whole process and laid the new piece down. It’s a bit time-consuming because you want to make sure no air bubbles remain under the paper.
Slowly “move” them out to the sides with your fingers.
Once it’s dry, take a piece of sandpaper and lightly rub the edge where you have excess paper. Be careful not to hit the paper on top or the paint on the sides.
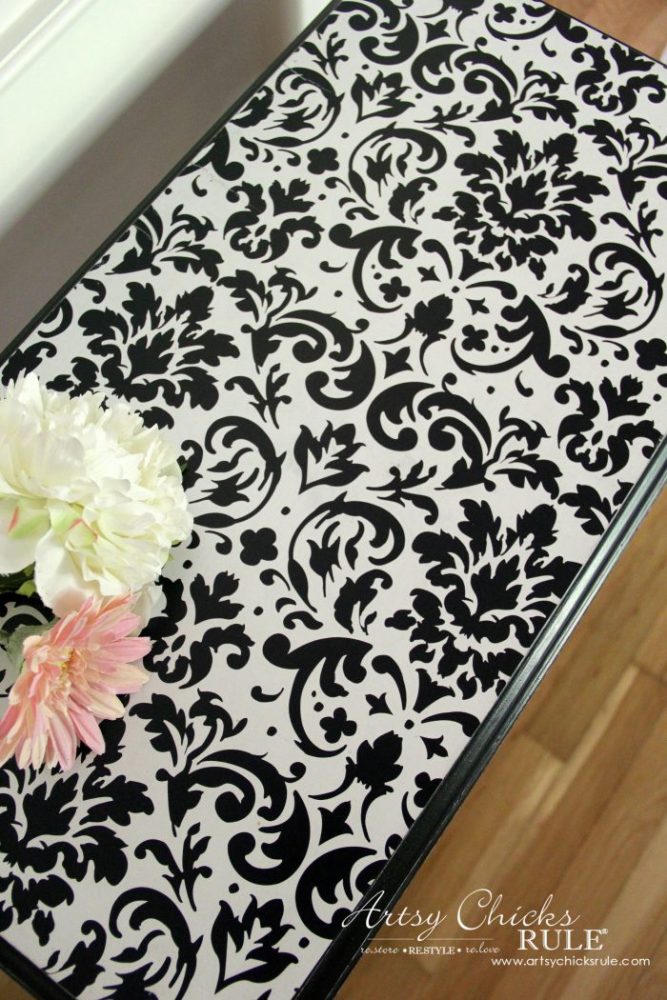
Doing it this way is so easy and gives a nice clean edge….the paper just comes right apart at the perfect place.
See how nice and straight that is?
That’s why I mentioned having a small amount of overlap.
You can see more photos of exactly how I did this process in this post here –> Thrifty French Paper Decoupage
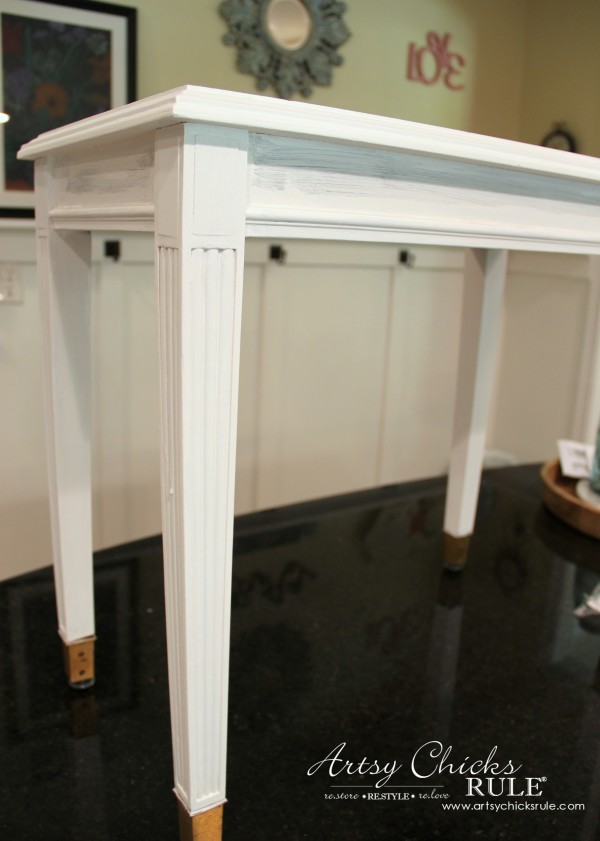
And see that white peeking through the black paint on all the edges?
I hadn’t planned to distress this one but then noticed the white coming through on the top where I was working with the paper.
And it hit me…oh, I like that!
So I distressed the whole thing.
See how these things just evolve??
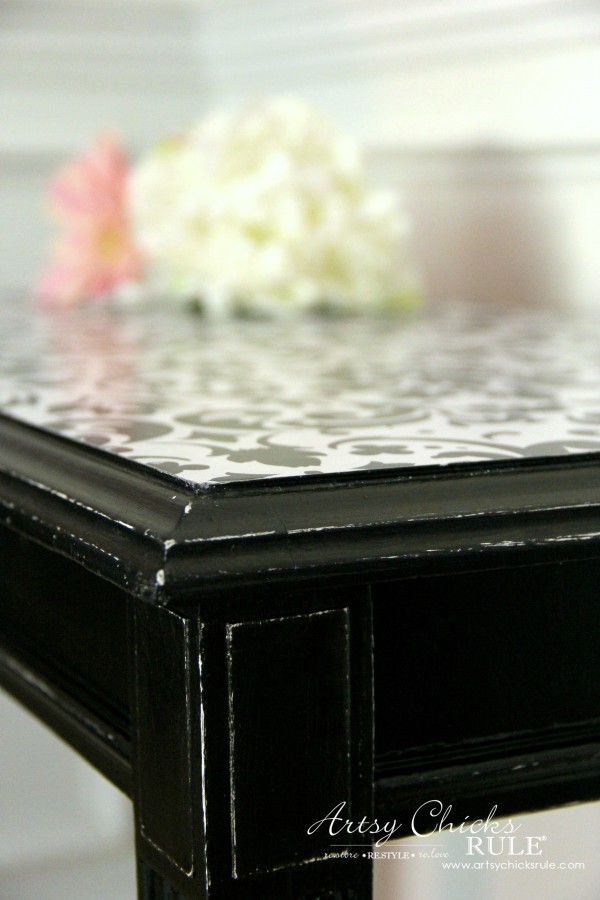
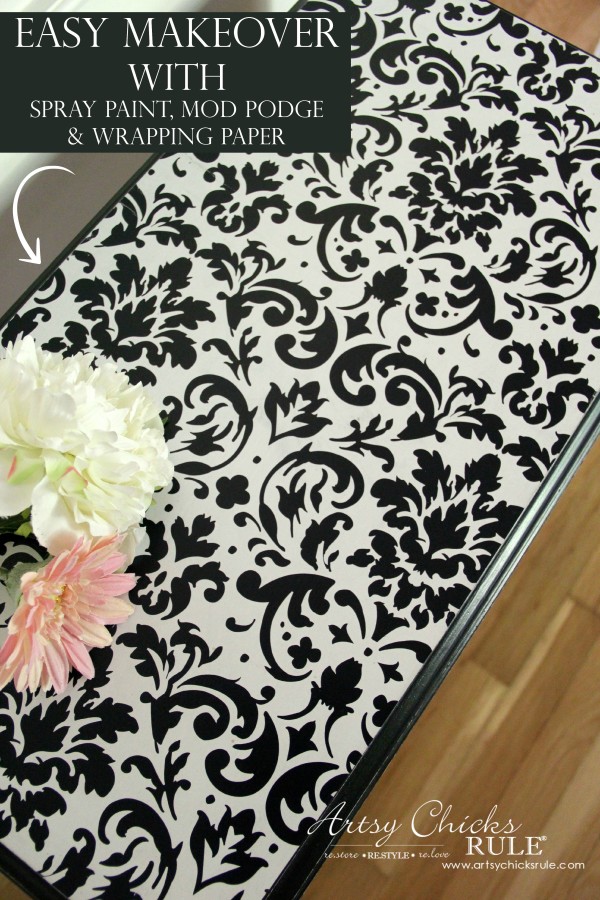
And I love that pretty paper…
So nice and smooth.
And no rips! Yay! lol

For a little more protection, apply a topcoat like Tough Coat Topcoat.
Two coats on the top, one coat everywhere else.
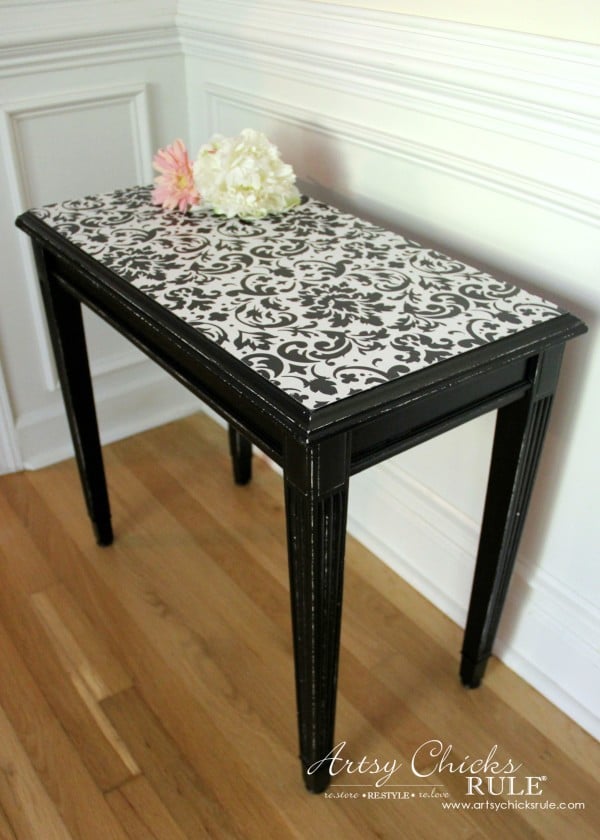
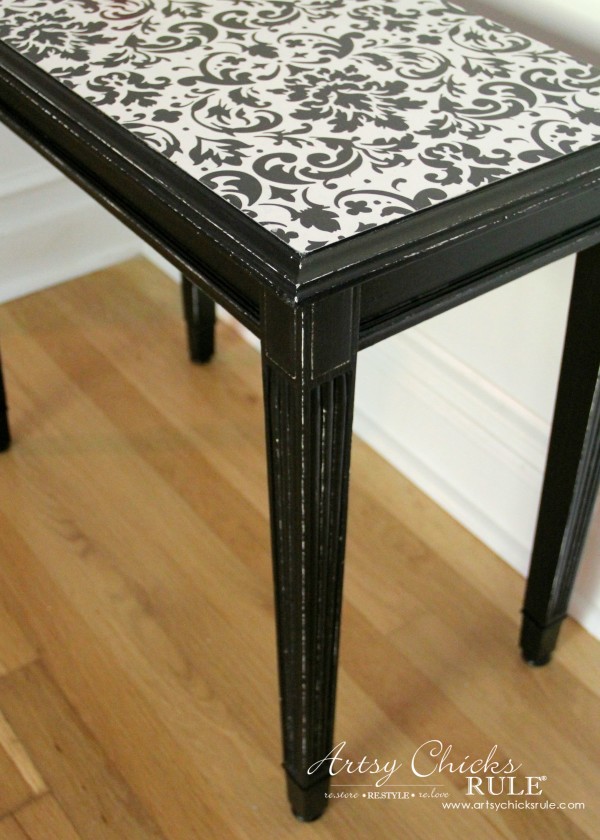
Cute little table/bench.
And it was so easy to do!
The paper can be a bit challenging but if you mess up, it’s fixable.
With so many papers out there, the design possibilities are endless!
PIN it to save it!
Be sure to check back next time for my latest makeover, this old cart! (looks so glam now!)
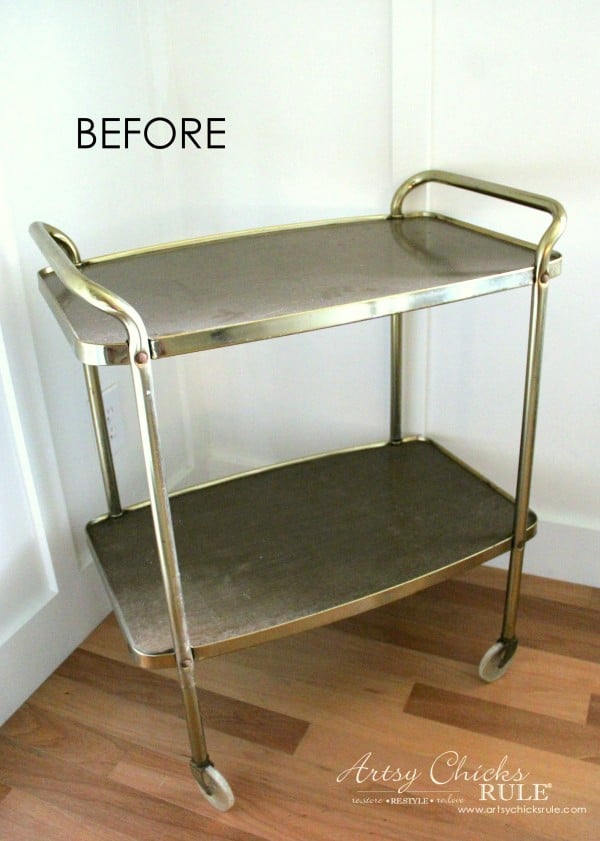
UPDATE!!! See it now, here!!
Alrighty, now it’s my friends’ turn!
See their pretty black makeovers below…

")


")


")

Girl, you’ve got a STASH! :) What a sweet makeover too. I love the contrasting top and that it’s a simple fix.
I know and I want to keep buying more!! lol Thank you! :)
Nancy
LOVE it! Did you have to repair that little missing chunk on the leg before you repainted it?
Thanks Betty! No, that was actually some sort of manufacturing sticker that was never, ever removed! Can you believe it??!
Nancy
I love your makeover and I am drooling over your stash in your storage garage! It is a gold mine in there!
Thanks Lindsay! :) Yes, too much!! ;) I need to paint!
Nancy
Nice Nancy, I like how resolved and pragmatic you are… quick, efficient and the result are alway very interesting , personal and different pieces.
I remember you that my coke and pop corn are still waiting……..
Aw thanks Victoria!!!! And Hahahaha! I love it. ;)
xo
Nancy
I love how the makeover evolved though the process! The final result is so pretty!
Thank you Amy! :)
Nancy
I WANT A STORAGE UNIT, my basement is bursting at the seams! You gotta love these furniture pieces that speak to us. The white peeking through the black is perfect and compliments the wrapping paper beautifully. Kudos to you Nancy for keeping it real! Mine ripped ever so slightly too and yes, I also re-decoupaged the top, but I kept it a secret (bad me). Love your table – keeping or selling?
Thanks Marie! Selling! It doesn’t match anything in my home. :)
That storage unit is a blessing and a curse!! lol I need to get to painting those large pieces!
And yep, that stupid little tear. I was not a happy camper when I realized it was not going to come off easily, lol.
Day in the life! ;)
xo
Nancy
I’d done that exact thing when mod podging paper onto furniture. You think you have it just about perfect and then it rips! It turned out gorgeous and I love the paper you chose.
Exactly! Grr, frustrating! I was so afraid I was going to do it a second time, but didn’t thank goodness! :)
Thank you!
xo
Nancy
Looks awesome, as usual. ???
I was wondering, do you just lay the paper over the glue all at once or did you start on one end and work your way over? Also, would it be easier (for beginners like myself) to apply the glue & paper in sections instead of all at once? I’m a newbie to crafting so I don’t know how quick it dries. ?
Thank you Carey!
I laid it in the general area (not perfect lining up) and then worked my way out from the middle to the edges. As I go, making sure it is covering every edge. Sections would be easier but then you’d have lines where they meet. That could look okay depending on the design you choose. I’d say, practice with some old paper (although all papers are a bit different) on wood scraps etc. That way you can get a feel for exactly how it reacts, etc.
The good thing is that you can remove it (if you do it soon after) and start over if you mess up…as you can see here! ;)
xo
Nancy
So I’m not the only one that has ripped their paper while putting it on? I take comfort in that! I love the paper that you used for the top Nancy. Really like the white distressing on the sides. It completes the look even though you didn’t plan it. It turned out great – especially for someone who normally doesn’t use black!!!
Thank you Debi!
Oh no, you are not alone at all! ;) I’ve had my fair share of mess ups! It’s all part of the process, right? :)
xo
Nancy
I totally would have ripped it off if I saw a tiny tear too! ha. Love this little table and glad you let some of that white show through, so pretty!
Too funny! :) Yep, it would have driven me crazy!
Nancy
Love it, pinned it!
Thank you Debbie! :)
Nancy
Your table looks so nice post makeover. I know it was so frustrating to have to redo the wrapping paper on the top! You have quite a stash!! I think I enjoyed that picture more than any other!
Thanks Paula! Yes it was…especially when that paper didn’t come back off easily! lol But all is well that ends well, right?!
Oh..and I love that enjoyed the storage unit furniture photo…I would probably too!
Nancy
I love it and the distressing is perfect. I have the very same wrapping paper.
Thank you Kathy! :)
Nancy
Love it!! It’s gorgeous!! Love the paper :)
Thank you Crystal! Oh, me too, that paper is fun and goes with so much! :)
Nancy
I love how the distressing shows the white underneath and goes so well with the paper! Very pretty.
Thank you Lucy, me too! :)
Nancy
I just love how that table turned out. so sleek and chic…just like you!
Thank you Laura! You’re sweet!!! Muah!! :)
Nancy
Looks great! I have that same wrapping paper, it’s good stuff! I can’t remember where I bought mine either ;)
It really is! So pretty and goes with so much! :)
Nancy
Wow! It turned out lovely! It was worth the struggle! Well done!
I hope you have a great day!
Smiles!
Terry
P.S.
I’d love it if you would share this at my Making Broken Beautiful Party if you have time to stop in and inspire! :0)
Thank you Terry and yes it was! I’m so happy it’s nice and smooth without any rips! :)
Nancy
Ha – ok so two things: I decorate with black a lot and love this…..and guess who has that exact heavy duty wrapping paper? I may have to try decoupaging it somewhere. I am now going to go see what it became after this. : – )
Do you really?! Yes, put that pretty paper on something especially since you decorate with black! :) xo
oops never mind it was that cool rolling cart duh
Ah, yep!! haha!! I still have this little rolling cart. It’s in storage because I have no where to put it in my home! I love it and don’t want to get rid of it. I have actually brought it home for a small get together we had in our home a year or two ago. So I can say I use it! lol