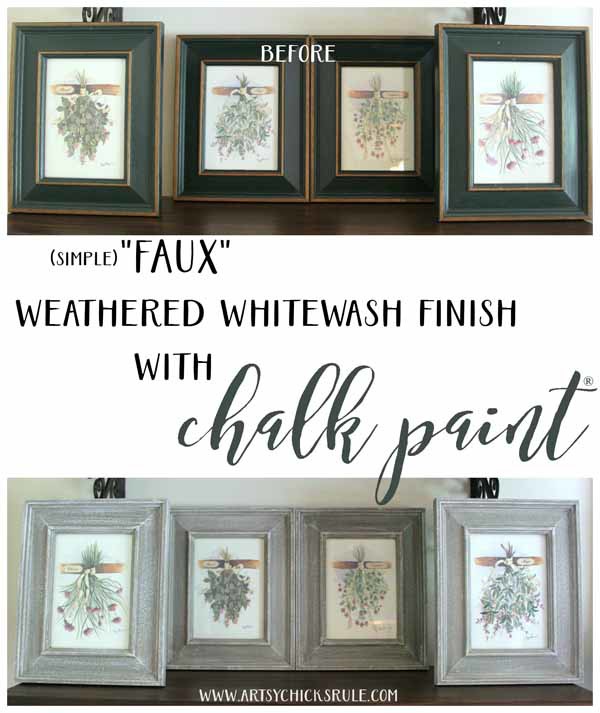
Weathered Whitewash Finish with Chalk Paint (Old is New Again)
Good morning my lovely friends! I’m sharing a super quick little tutorial on how to make “old new again” with a weathered whitewash finish….using only Chalk Paint.
Sort of ….old is new again. Really old is new is “old, worn and weathered”.
But you know what I mean.
I literally did this on a whim as I was decorating my brand new dining room shelves!
Yay!!! They are done too. I can’t wait to share them with you.
I shared a little snippet of them over on Instagram.
I’m really LOVING my “new” dining room decor.
So, since I did these on a whim, what that means is, it was truly a quick and easy little makeover.
My very favorite kind.
And do you know what else it means?
It means you don’t have to go to the thrift store to find something to reinvent, it may be right under your nose already!
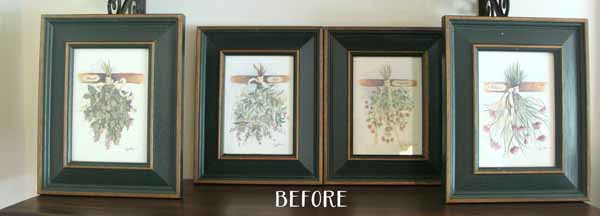
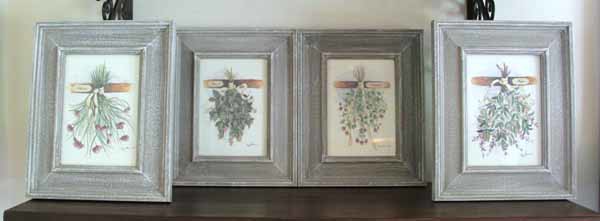
Like these herb framed prints I had……
Can you believe I’ve had them for over 18 years?
I’ve decorated with them in 3 of the homes we’ve lived in.
I don’t think they ever made it into this home’s decor, if so, briefly.
I had them packed away in a box and happened to come across them recently.
As I was decorating my shelves, I knew I wanted a mix of framed prints, pretty decor and dishes, etc.
So I pulled these out but wasn’t thrilled with the dark green frames.
They didn’t really match my decor anymore but I loved the herb prints.
I considered painting the frames white but the prints are not a white-white and didn’t think it would look right.
I then considered spraying them gold.
Nope.
I have a little gold, a little gold/silver, some dark wood and some weathered wood in this room.
I thought a nice weathered whitewash finish might be nice.
There are several ways to do this.
The technique I use mainly depends on the existing finish I start with.
For example, for these I created a “painted” weathered whitewash finish.
For natural wood, I use a “driftwood” stain first.
You can see how I created a weathered whitewash finish on natural wood >>> here.
And another one on already painted wood >>> here.
Okay, so here are the 3 products needed for this project:
Coco Chalk Paint (similar color here)
Graphite Chalk Paint (similar color here)
Pure White Chalk Paint (similar color here)
You don’t have to use Chalk Paint, any similar colors will work.
HOWEVER, I do think the natural properties of Chalk Paint work really well with this technique.
I also didn’t add a finish/sealer. I love the dry weathered look so left them “as-is” once done painting.
They are up on the shelf so no worries of anything getting on them, etc.
Here’s how to make the weathered whitewash finish:
I start out by covering the already colored wood frames with the “Coco” color.
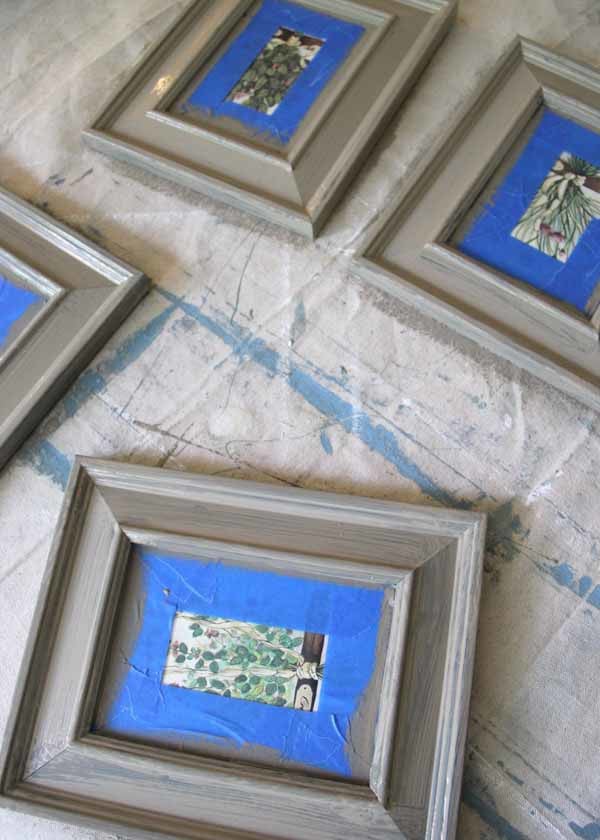
I only did one light coat and you can see the green a bit through the paint.
It actually doesn’t look “green” though, just dark which is perfect.
Variation is a good thing.
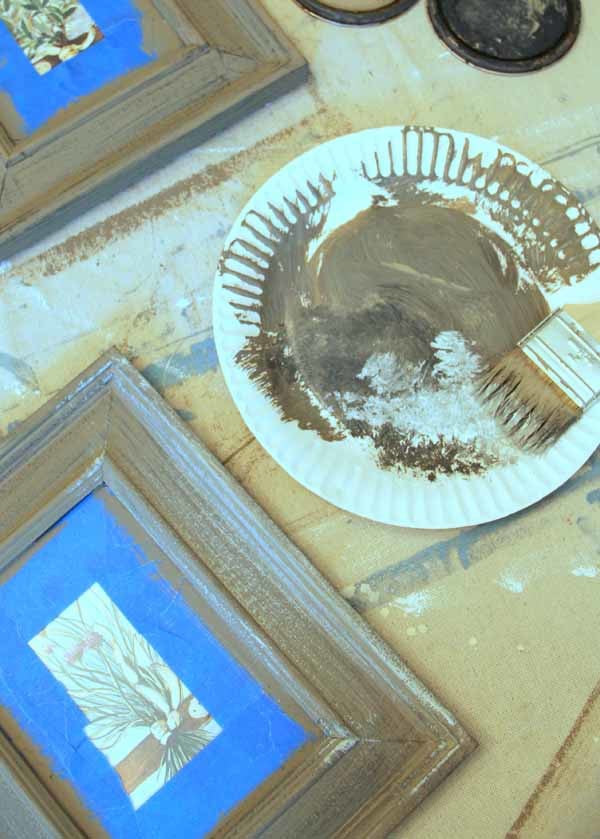
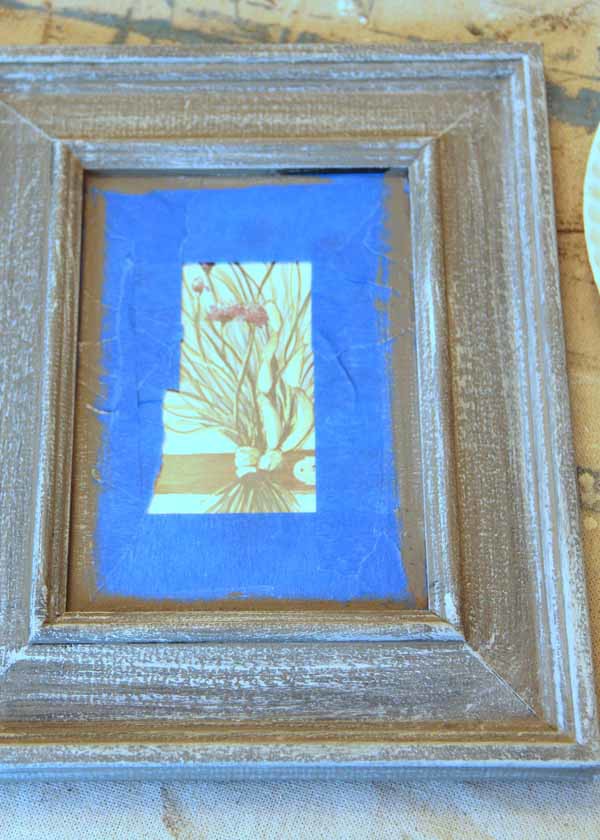
Next, I take a dry chip brush and add a bit of the “Graphite” color.
Light handed (and little paint) is necessary or you will end up with a black frame.
Not the look you are after!

Pay no attention to the already whitewashed one above.
I told you it was a quick and easy project. I got so busy painting I forgot to take photos in steps.
But you can see how I applied a bit of the “Graphite” on the bottom frame.
After that, do the same with the “Pure White”.
Light hand, little paint…..
Start with just a bit and add layers as you decide how “whitewashed” you want it.
I use a paper plate and don’t wash the brush in between colors.
It’s okay if they blend a bit….preferred, even.
Continue to add the white until you have it as you want it.
I ended up adding a lot…
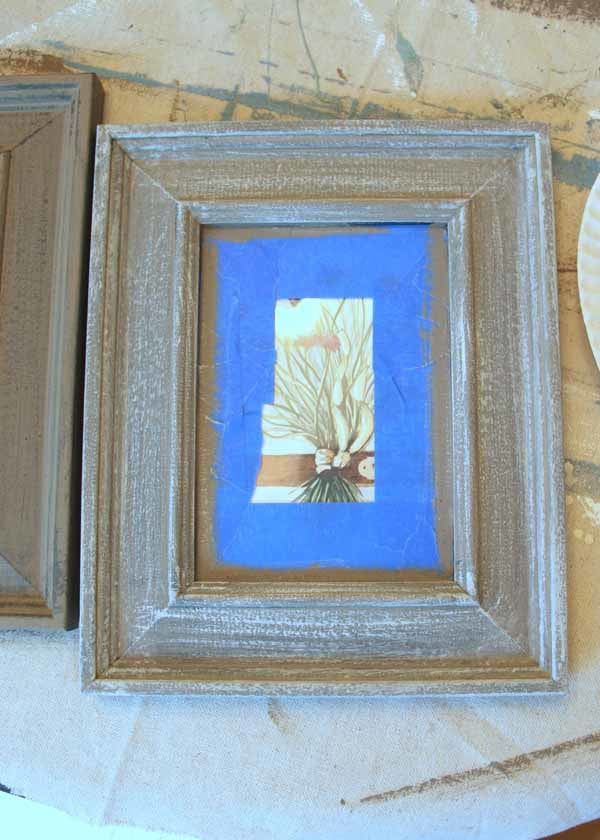
Close up detail….

And finished…..
What a difference, right???
I LOVE them like new again!
Just like my tag line says above, “re.store, re.style and re.love“!
Yes.
Budget-friendly decor. Always.
I think most of what I decorated the shelves with, I already had.
You’ll see soon!
So, remember, take a look around your home, old things can easily be made new again with a little paint…and love.
PIN this to save for later so you can make something old new again too.
Want to see even more ideas on simple updates with Chalk Paint (that aren’t furniture??)
Check out this post, here!
I’ll be back next week with a brand new DIY….for my front porch. (<—UPDATE!! See it here!)
Hope you all have a wonderful weekend!!
xoxo

")


")


")

Beautiful!
Thank you Janie!! :)
Wow!!! Love them!! This color actually made the herbs stand out. I’d have never thought that would happen. I’m sooo close to our ASCP dealer I need to pick up some colors even for jars!!! And frames!!!
Hi Gwen!
Thank you! :) OH yes, you do!! Have fun!!
xo
Nancy
I am planning to use chalk paint in a couple of old pieces. I hope they look as good as your frames. They are big pieces and I am kind of intimidated.
I will let you know.
Cristina Villoch
Hi Cristina,
Oh thank you and I’m sure they will look wonderful! Would love to see them. :)
Nancy
hey girl love the new look!
Thanks Shawnna!!
It’s so much fun making something “new” again! :)
xo
Nancy
Great whitewashing tips, Nancy! Pinning to share on my painting tips board.
Thanks Marie!!! I love this look! :)
xo
Nancy
Great tips for whitewashing. I’m going to try this on some old art that I have in the attic.
Thanks Paula!
Oh yes, do!! It’s fun to make something feel like new again! :)
xo
Nancy
Those look awesome, Nancy! The difference is night and day!!
Thank you Karen! :) xoxo
Read the previous comments and realize there must be another GWEN!
These are lovely Nancy! And really quite simple to do! It’s great that they have followed you from house to house.
Sending hugs for your dad’s move, that can’t be easy for any of you.
I’m having a cracked wisdom tooth removed soon, I’m just glad we’ve finally figured out my pain!
Good luck with yours!
April 2022
Oh funny!!
No, it’s been hard but we are getting there!
Oh no, yes that is no fun. I knew mine was cracked for several weeks but had no pain… until I did. 😳 Then it was excruciating! Ugh! And while we were on vacation of course. Good luck with yours too! So happy to have mine out! xo
I’ve used this technique since I found it on your blog. It’s so easy and can be tweaked for so many variations. I know what you must be going through with your Dad. I recently moved my husband into an assisted living facility and it is exhausting both mentally and physically. Prayers for you and your family. XOXO
Yes, it’s been tough in many ways. I’m so sorry you have had to do that with your husband as well. It’s so hard. Praying for you too, my sweet friend!! xoxo
I can’t believe how quickly you can get that look, Nancy! I love repurposing, and these are much more your style now.
I love quick easy fixes!! 😁
I think that’s fabulous, Nancy! I was a latecomer so I appreciate your digging through the archives for something your readers may have missed. I am so sorry to learn about your tooth ouchy – that is just so not fun….especially this week being so busy!! I hope all goes well for your father’s new place of living. That is a big transition. Blessings for him.
Thank you so much my dear friend!! xoxo
Hi Nancy! This is my favorite look. I have been using Coco alot lately. It is so versatile and I love it with white wax.
Oh yes, it’s great with white wax too!!🥰