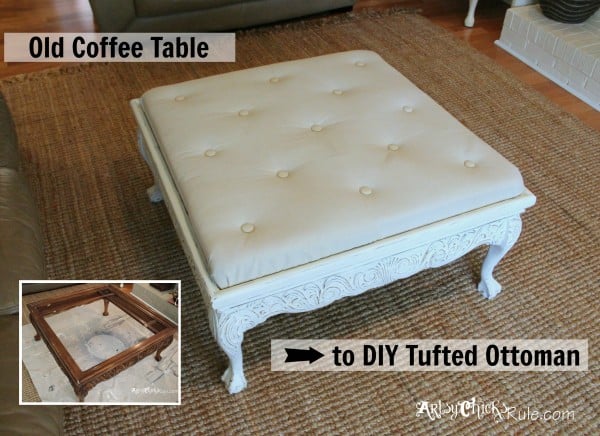
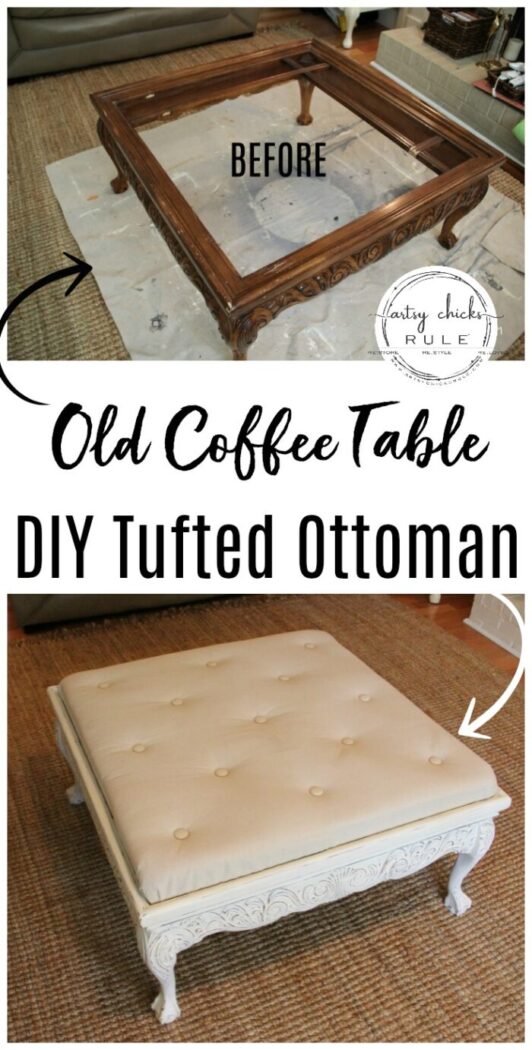
Thrift Store Coffee Table -turned- DIY Tufted Ottoman
Did you know that you can turn an old coffee table like this into a DIY tufted ottoman?? You can and I’m going to show you how!
Coffee table turned DIY tufted ottoman.
Search that on Google and see how many hits you come up with. A lot.
And here’s another to add to the long list.
Except I’m not going to bore you with a full-on tutorial since there are plenty of those out there already.
Coffee Table Turned DIY Tufted Ottoman
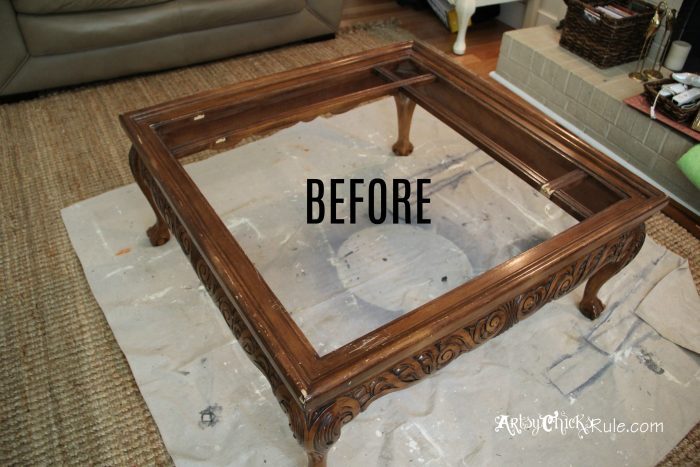
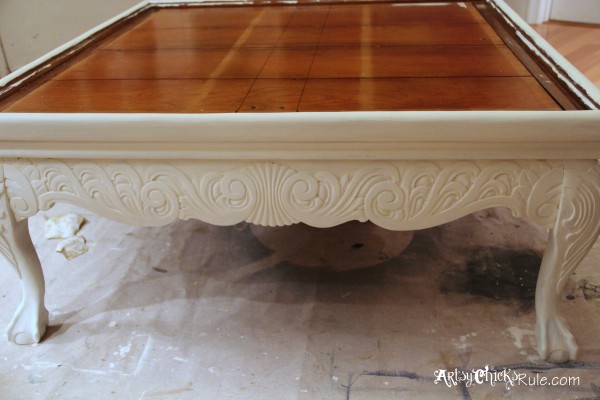
Let’s start at the beginning ….with this…
It came from the thrift store and was pretty beat up but had some gorgeous woodwork detail.
I had been looking for an old table to turn into an ottoman and this one was perfect!
It had glass in it but I’d already removed it and the framework underneath when I took this photo. (you can see some of the old frameworks in the photo)
With all that gorgeous detail I decided not to wrap it around the whole top and instead created an “ottoman” that fits right inside the square.
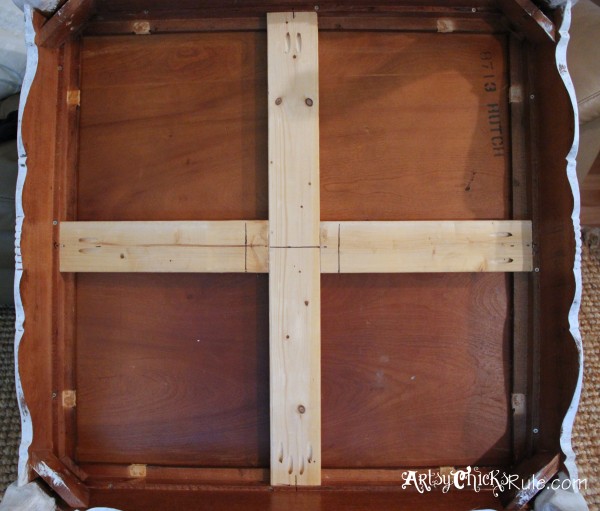
My husband took the legs off and started by creating a sturdy frame for it with his Kreg jig.
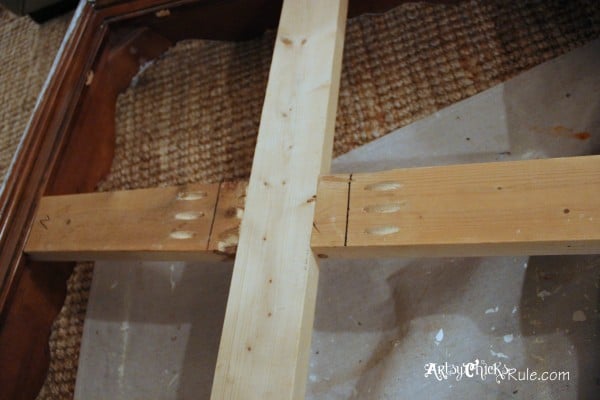
He’s pretty handy like that..and that’s a fabulous tool, the Kreg Jig.
Now it’s got a nice and sturdy base…
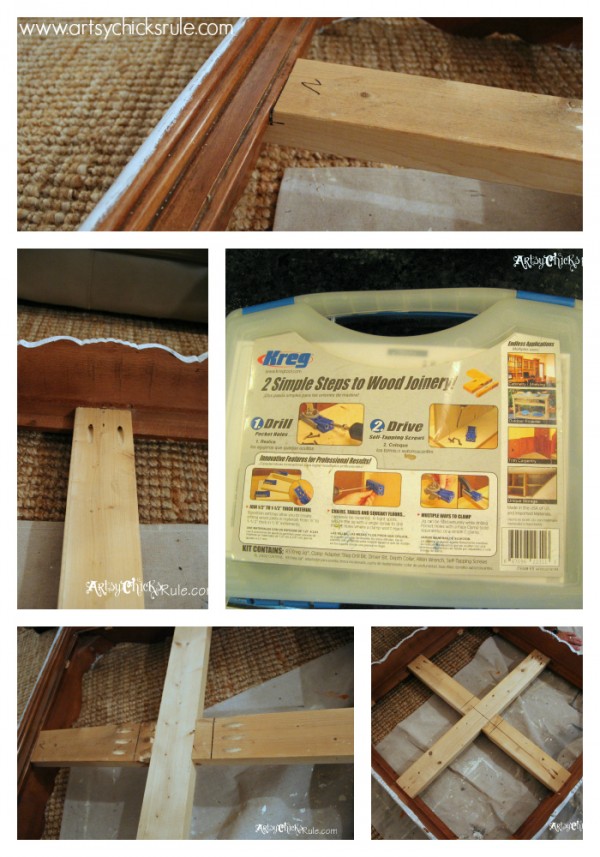
Then we put a top piece on for support.
Which just happens to also be the panel that came out of the back of this “Baker’s Hutch” I created a while back.
(I’m a big fan of saving and reusing anything and everything!)
Underside…
For the paint, I used Annie Sloan Chalk Paint in a mix of Old White/Pure White.
Heavy on the Pure White. (sealed with Clear Wax) Here’s a similar paint and wax or beeswax finish.
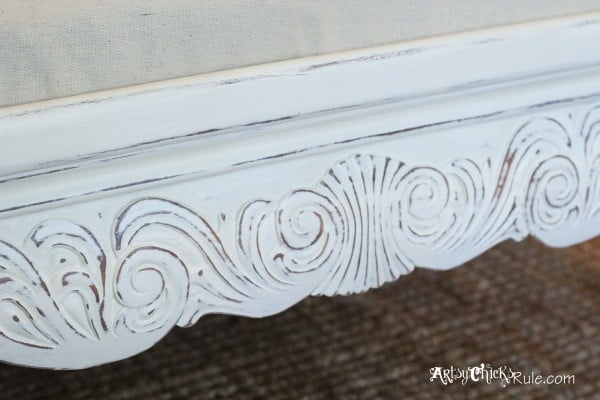
Take a look at that fabulous detail once distressed.
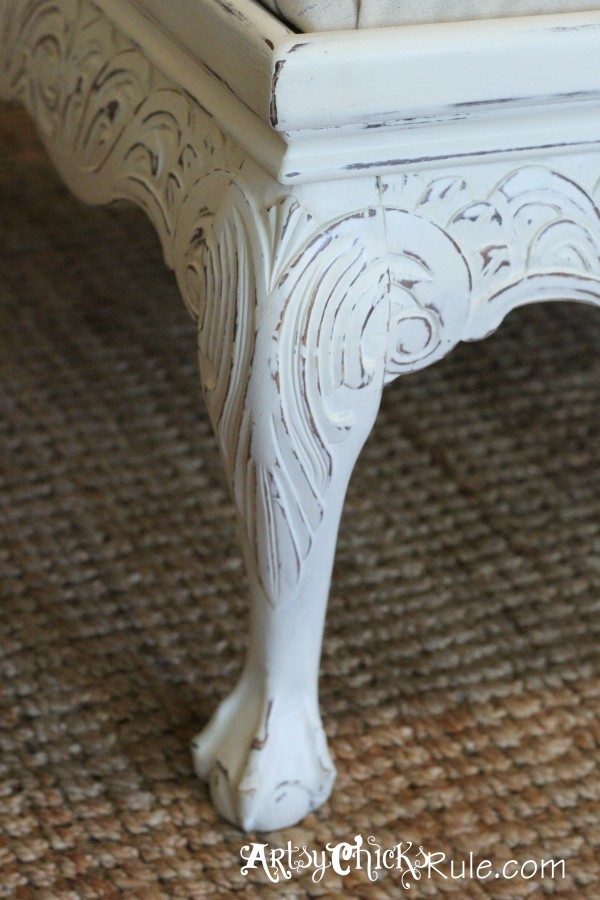
It just pops right out at ya! It was totally lost before, in my opinion.
Creating the buttons for the top……
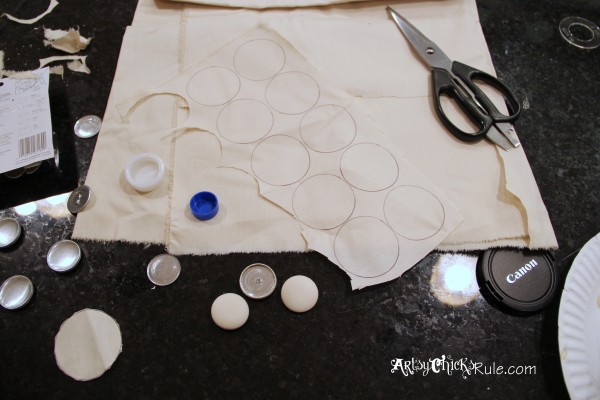
Eh. Not my kind of project. I’m a bit impatient to sit and cut circle after circle.
But I survived it. lol
Next, we created the pattern for the top/button placement.
(on another piece of board that the ottoman will be made on top of)

I used spray adhesive to attach the foam to the board, cut holes for the buttons, and then started on the FUN part. heh heh
Look at that ginormous needle.
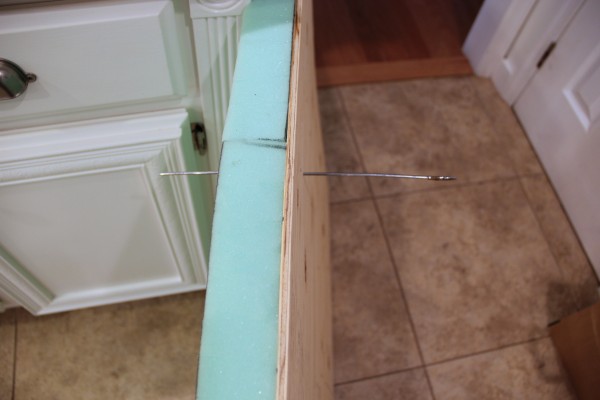
I kid.
It was not fun. It hurt me many times. :(
Stoooopid needle. ouch
And after all that work …I didn’t love it. No, not so much.
The real deal here.
I liked it but it was not as “tufty” as I’d have liked.
But no worries, I have a plan!! Well, it’s not my plan because I didn’t come up with it but I’m going to implement it.
Tell you about it in just a bit. You’re on the edge of your seat, I can tell. haha!
But first…on with the process of sewing buttons on. (Hint: I won’t be doing that again)
The fabric is all laid out and the first button goes in! Yay! Only 12 more to go.
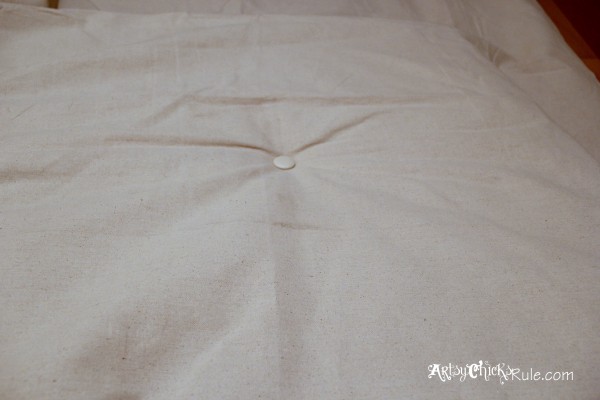
By the way, there is also batting on top of the foam under the fabric.
So there you have it. All finished! Just… like…that.
Um, yeah, not so much.
It was pretty time intensive and I might have said a bad word or two. (remember that needle?)
But it was very doable….and saved me a ton of money.
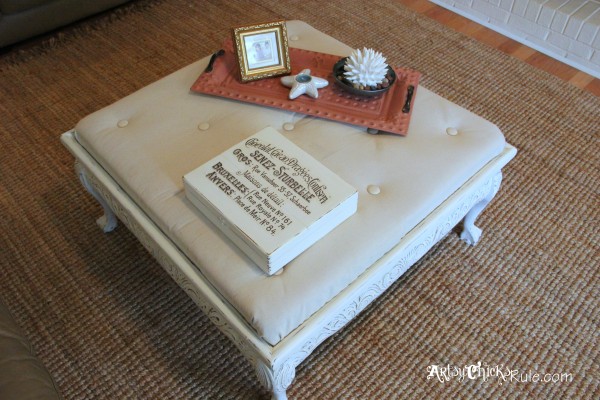
My very own DIY tufted ottoman….even though it’s not very “tufty”, I know.
But it looks pretty nice all styled up a bit, even so.
We use it as an ottoman (feet and all!) and a coffee table. Love that!!
Did I mention that the “fabric” is actually a drop cloth from Lowe’s? $6.99, I think it was.
Look, drop cloth under….drop cloth over.
Not the same one, obviously.
One of them has had some real drop cloth use!

You can see this ottoman “in action” in my Holiday Home Tour …here.
The little box on top is also a thrift store find. I painted and added the graphic with a water slide decal.
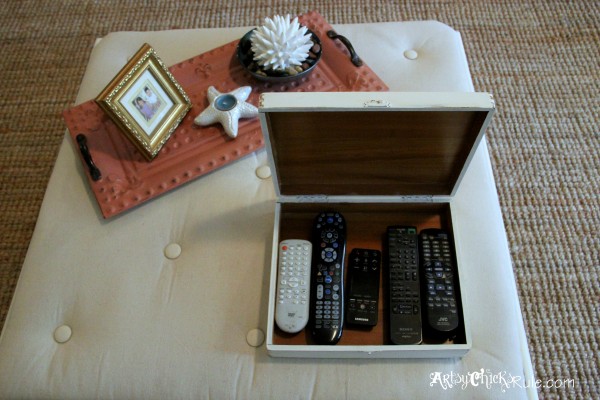
It’s perfect for all those controllers…. that no one ever uses.
You can read about that project here.
Want to know about 26 other chalk-style paints?
I’ve got the low down for you right here! >>> 26 Types of Chalk Style Paint For Furniture
So obviously this tufted ottoman has been completed for a while but I’ve hesitated to post about it.
Why? Mainly because I don’t love it. Those tufts aren’t deep enough for my liking.
But as I said, I have a plan. (my husband is always super excited to hear those words… ha!)
My plan is….new fabric (which isn’t too much of a loss since this was a $6 drop cloth) and a totally new tufting technique here.
Let me tell you, that is a big ole smack in the head right there!
I have had one button “pop” since I did this project. It’s not really noticeable, but I know it, so, therefore, it drives me crazy!
(and yep, I used upholstery thread)
But how super smart of Kristi over at Addicted 2 Decorating to come up with such a fabulous solution.
I will most definitely be doing it that way on the re-do.
It’s a total no-brainer. Except it wasn’t my brain that came up with it! ;)
And no more needles!!!! Hallelujah to that.
So, no, this project didn’t turn out exactly as I’d imagined.
BUT it was still a “win” in my book.
And I did get a sense of accomplishment from doing it myself. (Spoiler alert! I never did it!! haha! But I did change it up, see below.)
UPDATE: Click here to see how I’ve since changed this piece. It no longer has the tufted top.
I removed it and created a weathered wood finish top out of old flooring instead.
PIN it to save it!
I’m sharing what I did with this old end table next!!
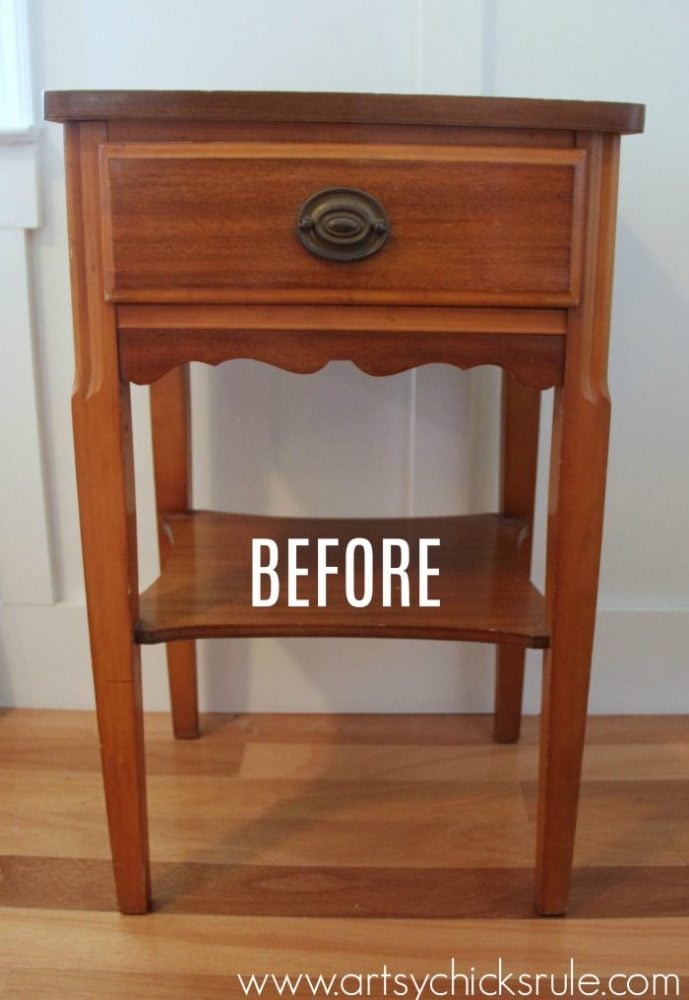
UPDATE!! See it now, here!!
Want to see even more “before and after” furniture makeovers? Click here.
Have a wonderful week, friends!
xo


")


")


")

You have the best ideas for furniture makeovers! I love the end result of this project. I’m going to keep my eye open for a coffee table like yours for a future project.
Aw thanks Paula! :)
Nancy
I think this turned out great, Nancy! You had me chuckling a few time during this post, that IS a ginormous needle!! I bet it inflicts pretty severe pain! I really do think it’s beautiful, but a pretty printed fabric would be great too :)
hah! Yes, that stupid needle!! SOOOO glad I don’t have to use it for the re-do!! ;)
…and thanks!! xo
Nancy
OH, this is so beautiful. IF you could duplicate these you could sell them for hundreds of dollars. You did an amazing job. Love it.
Aw thanks!! :)
Nancy
This turned out so beautifully! I think you did a great job! Did you use a drop cloth for the material?
Thanks so much Shanna :)
Yep, that is a $6 drop cloth!
Nancy
Nancy, this is AMAZING!! You did a simply fabulous job on it! And what a find at the thrift store…. I never find good stuff like that. Or maybe I just don’t have the eye you have! Anyway, great job! I’m envious! xo, K
Thank you Karen! :) Oh it’s always hit or miss at the thrift stores anyway! ;)
xo
Nancy
Love it! I need this, I am an ottoman addict! I can’t sit down without one ;)
Debbie
Thank you Debbie :) We are enjoying it! My husband is LOVING having a place to put his feet! lol
Nancy
I love this project! …But know what you mean when you don’t L-O-V-E it. I have to love my projects too. The painted base is great and using a pattern for the button placement was smart. Thanks for sharing..I learned some new things:)
Thank you Wendi! Yes, so glad someone gets it!! ;) I actually bought a pretty yellow throw at Target this weekend and laid it over part of the ottoman. I’m LOVING it! Just a nice splash of color. I think it may stay that way for awhile!! (I have way too many other projects and will revisit this one some day..for now, it’s good!)
Happy week to you!!
xo
Nancy
It’s beautiful! I love it!! You did a fabulous job!!
It’s lovely! But I’m looking forward to the update. :)
-andi
Thank you Andi! I bought a yellow throw at Target over the weekend that I “threw” over half of the top of the ottoman. I’m loving it! It may just stay this way for awhile as I complete (and start,lol) other projects! ;)
Happy week to ya!!
Nancy
This is awesome Nancy – such a great DIY. Wish we had an ottoman instead of a coffee table… maybe I will have to reupholster my table now… you have got me thinking girl!!!
Thanks Krista! We are really enjoying it! (especially my husband and son!! lol)
Have a great week!
xo
Nancy
This really turned out beautifully and it has got to be super sturdy, what with it being a vintage piece. Even if you are considering re-doing it, it had to have brightened up your room this past dreary winter. Super project, Nancy!
Thanks Amy!! :) It is very sturdy, yep! My husband made sure it was “sittable”. ;) My teenage son sits on the edge of it all the time. (which drives me a little crazy but that’s what we made it for, right? lol)
Nancy
Very nice. Can you tell me the width and length of the coffee table you used? I used a drop cloth to re-cover a slipper chair not long ago.
Hi Lori,
Thanks! The dimensions are approx 35×35.
Nancy
Great job Nancy- love it! Stumbling and pinning. :)
Thanks Jen :)
Thanks a bunch for the Stumble and Pin too!
Nancy
I think it turned out great!!! I’ve been wanting to try this for a while. Thanks for the inspiration!!! XXOO Christy
Thanks Christy! :) I found a yellow throw I like and have “thrown” it partway over top of it…for now! The re-do some day when I get back around to it!lol
xo
Nancy
I did a tufted headboard that wasn’t tufted enough too. I went back with poly fill and my staple gun . The fill gave more poof and the staples gave more depth. Turned out great and the buttons totally hid the staples.
Hi Debbie,
Oh, that is good to hear! I plan to re-do probably in the Fall. :)
Nancy
I just wanted to suggest – to get it to be “tuftier” and keep buttons from popping off – cut out small holes (a small drill bit works to help with that process) where the buttons go. This way you will be attaching the buttons directly to the wood (less movement and play) and the holes will be deeper because of the missing cushion thereby making it appear more tuftier!
Hi Nicole!!
Thanks so much for the tip! I actually did do that a bit (like the tutorial I linked up to) but maybe not enough. :) I haven’t tackled a redo yet!! lol Too many other things taking me away from it so it’s just hanging out until I get back to it! I’ll be sure to cut bigger circles though! I definitely want it tuftier!
Thanks again!
Nancy
Did you happen to notice who made this table? I bought the matching foyer table off of Craigslist a few weeks ago and redid it with a black chalk paint and would die to find the coffee table to match… End tables would be like winning the lottery…
Love your work!!
Hi Linda,
I’m sorry, I sure don’t. It didn’t say and I’ve actually recently sold the table.
Good luck on your search! :) And thank you!!!
xo
love the feet & design of the coffee table/ottoman. You done a great job; it’s absolutely stunning.
I never would had guessed that you used a drop cloth for the covering; great idea
Thank you so much, Colleen! :) xoxo
Way to go girl!! I like the other option of using screws and washers… schmart!
You really made this piece sing with the white paint and light distressing.
While I won’t be doing any tufting work any time soon, I am super impressed with your creativity!!
Thanks, Christina! :) Me too, so smart!! Definitely trying it on the barstools! xoxo
OMG I LOVE this ottoman. You did a fantastic job. It’s so beautiful. Thank you for sharing. Love your posts.
Aw, thanks so much, Carol! So happy to hear that! :) xoxo
An outdated table to a gorgeous ottoman. You are so good!
Aw, thank you so much, Lizzy! I’m excited to get busy on the barstools next AND try that other tufting technique! xoxo
Hi Nancy.
Congratulations! You did an admirable job! Good on you for taking it on. You can console yourself about the tufting by knowing that it is a real dust collector, so you avoided some aggravation by changing it out.
Ohhh, I felt your tufting pain! I have done upholstering on many things and tufting is a real *beach* :-) and it’s not sunny either. NEVER. Ever. Again!! There are people who don’t mind doing it, but I think they are a rarity.
Can you imagine that I got that long needle stuck in my hand once when I was working on chair springs?? NOT fun. It took weeks to heal.
I always used very thick foam on my chairs, hassocks, benches and stools and added cotton batting and some dacron. Everything came out very cushy for the tushy which is what I love.
Just writing to commiserate with you and say again, congratulations on your determination and perseverance.
Thank you, Caye! Oh gosh, I have never done tufting again and don’t think I will! haha! And ouch, I can NOT imagine sticking that needle in your hand. Wow, that had to be so painful! Thanks for commiserating with me!! ;) xoxo