Cigar Box, Annie Sloan Chalk Paint & a Waterslide Decal
I love thrift stores and frequent them often. And surprise of surprises I never have trouble finding something I need.
Ever.
Always something and it’s not always furniture to be painted.
As you may, or may not know, I have decorated a large portion of my home with these kinds of finds…and very inexpensively too. It’s truly amazing the things I am able to find and use.
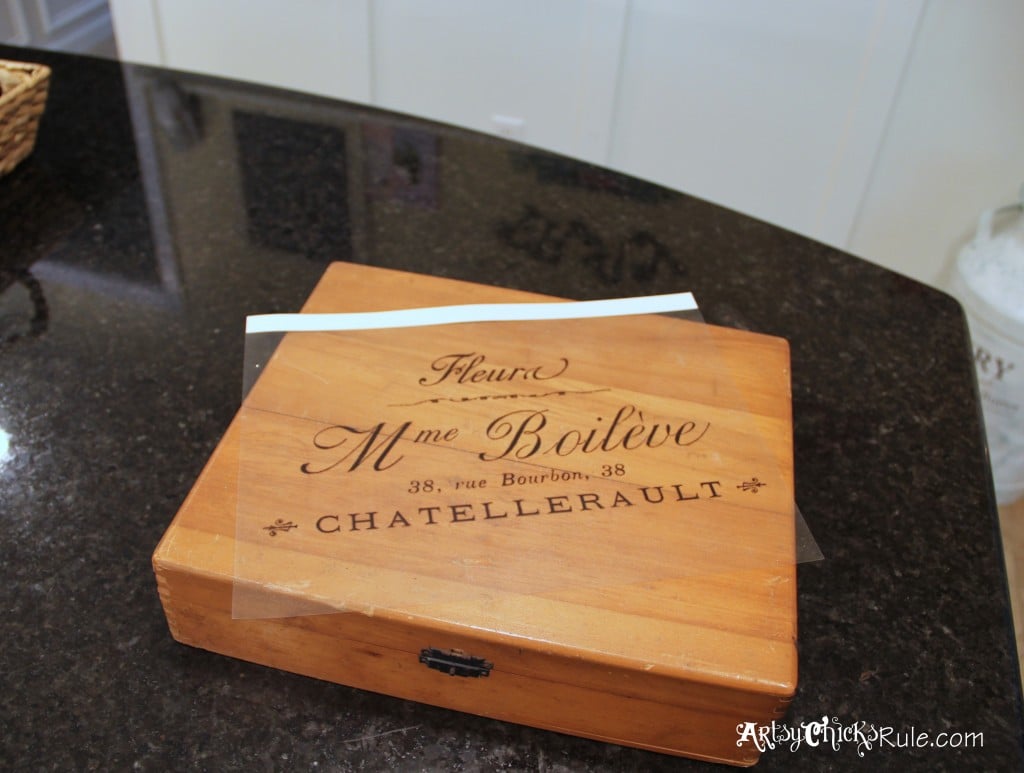
Awhile back I came across this cute little cigar box. I think it’s a cigar box anyway.
Anyone know?
Whatever it is, it was just begging for some words to be splashed across the top of it.
Doesn’t everything?
In my house it does.
I think anyone who reads my blog regularly knows how much I love graphics.
I can’t get enough.
What’s the saying? –> Any excuse will do…for graphics. Well, that’s my spin on it anyway. ;)
I usually use my projector I picked up from Craigslist or one of my other methods of transfer for graphics. But I thought this small box would be the perfect thing to try out the “new” (ok, new to me) Water Slide Decal paper. –>*Water Slide Decal
As you can see from the picture below, I had originally planned to use this other graphic. I had also originally planned to use the transparency and transfer with the projector like I did on this Estate Sideboard. (or possibly just print it out on my computer and transfer the way I did with the Pantry sign I made)
*Both graphics pictured here are from Karen at The Graphic’s Fairy. Not only is she the sweetest person ever (I have met her ‘in real life’ so I can say that! ) but she has the most fabulous FREE graphics & prints. She has a ton to choose from (seriously)….so be sure to stop by and take a look.
I came across the Waterslide paper in my office the other day….that I bought months ago and decided this would be a great little project to try it out on.
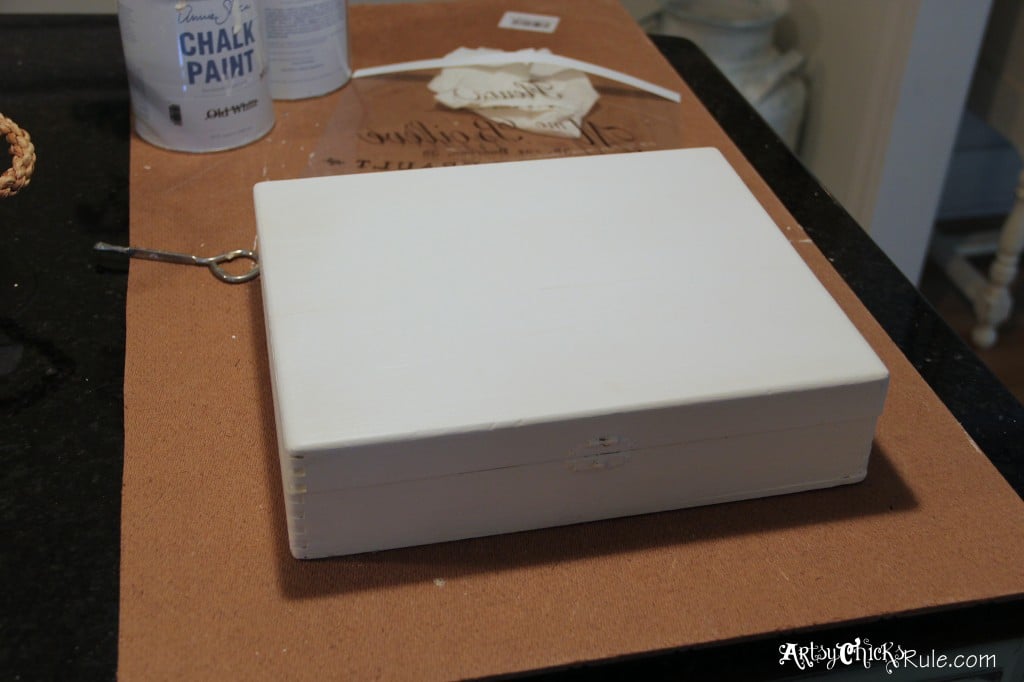
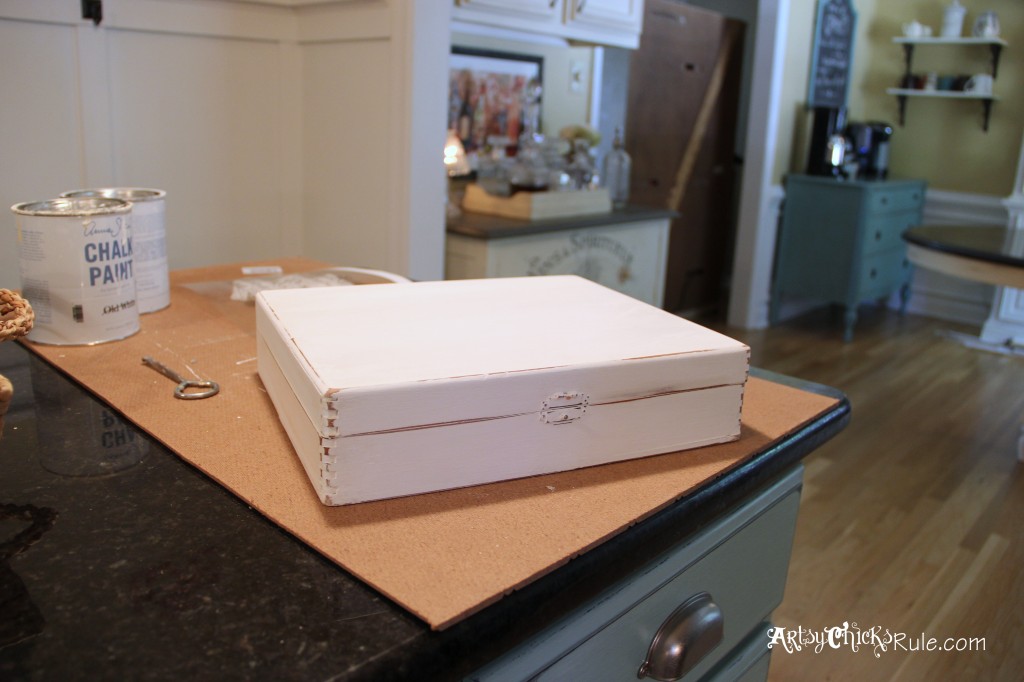
I painted it first with a blend of Old White Chalk Paint & Pure White Chalk Paint…both Annie Sloan colors. Love her paint.
Then did a little distressing with some very fine grit sandpaper……
(did you happen to notice, in the above photo, that my dining table is missing chairs? Yes, I am in the process of doing 6 new chairs…and making new curtain panels for that room…. and did you also notice the back of a cabinet showing in the opening to the other room? Yes, another project going on in there too. Creating an entire bookcase/cabinet on the back wall in the Study. Not to mention an electrical company is here right now wiring us up, as I type this, so we can move the TV over top of our fireplace. “Project central” around here.…as usual.
If you’re interested in catching sneak peeks of things we’re working on, as we go, be sure to follow me on Instagram .
Things get posted there long before they get to the blog. Plus a bit of ‘random’ fun too. )
………………………………………………………………………………
Chalk Paint® is well….chalky and dry once applied (before being sealed). I wasn’t sure how well that would work with this Waterslide decal (clear, thin & film-like). So since it will be somewhat wet when applied to the box and the underneath paper backing would then be slid out from under (hence, the “slide”) I decided to spray the box with Minwax Fast Drying Polyurethane to seal it beforehand. (several coats to seal the paint)
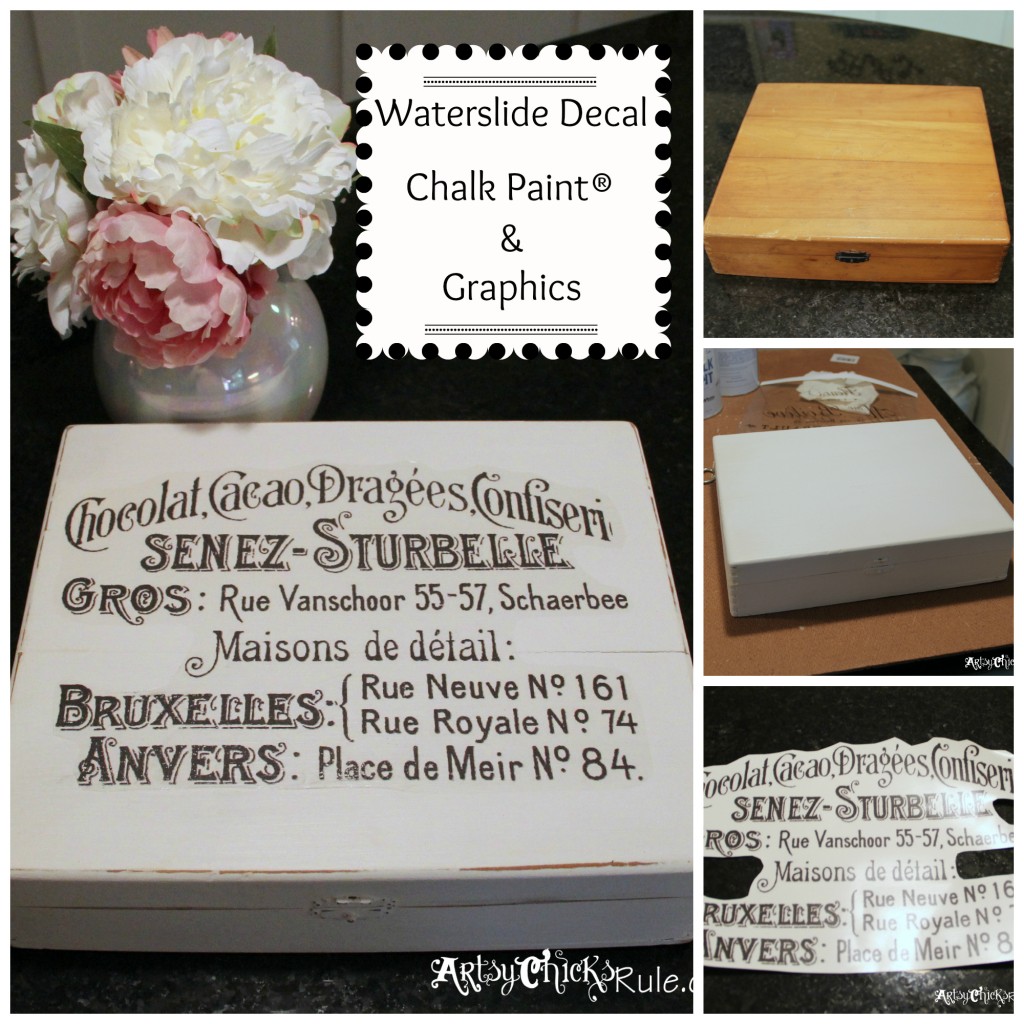
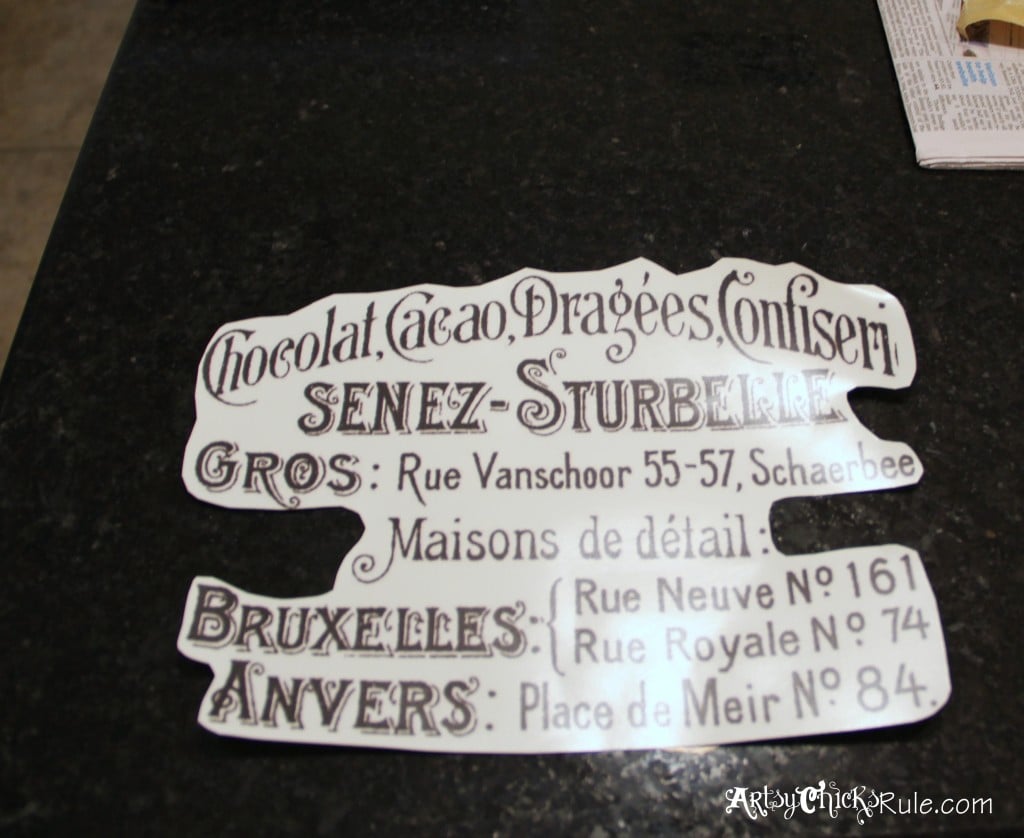
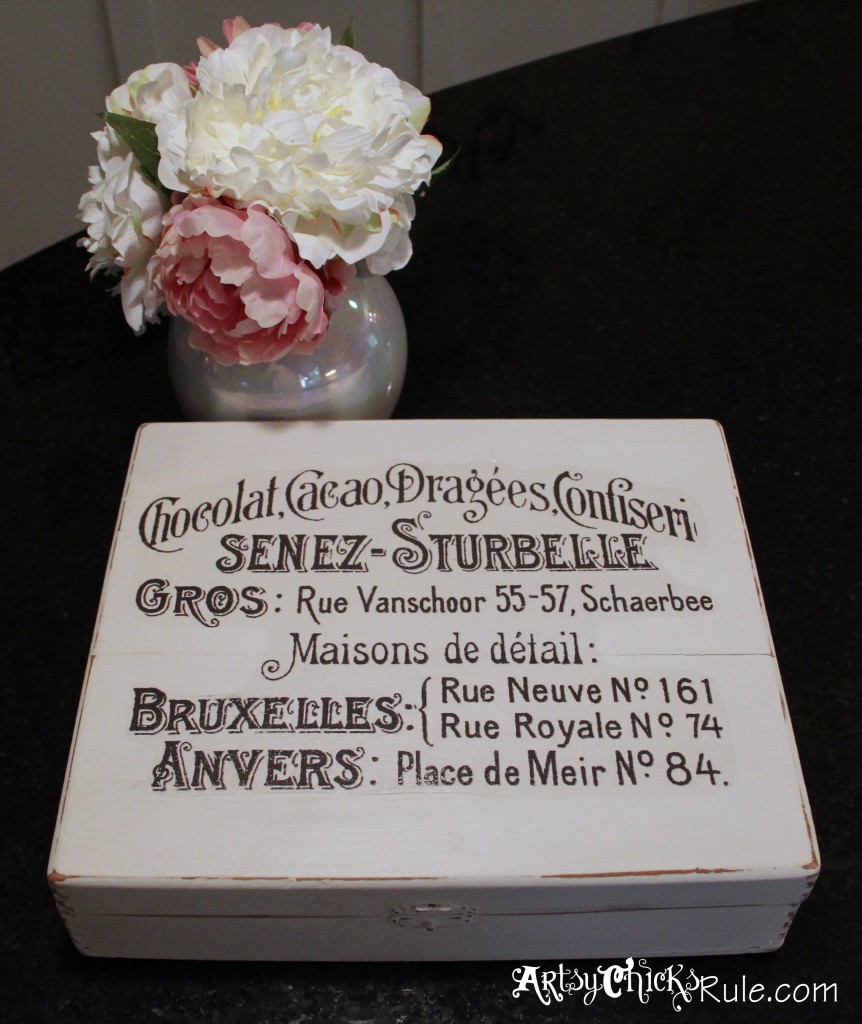
I followed the directions that came with the Waterslide decal paper and printed out this graphic directly from my computer. I then proceeded to spray about 3 coats (waiting to dry well in between) of Minwax Fast Drying Polyurethane over the full sheet to seal it. After that was completely dry I cut around the lettering closely.
I soaked it in warm water for about 30-45 seconds (per the directions). I could see it start to separate from the backing a bit so placed it on top of the box.
Then I slid the white paper backing from underneath. Perfect!! Almost…..
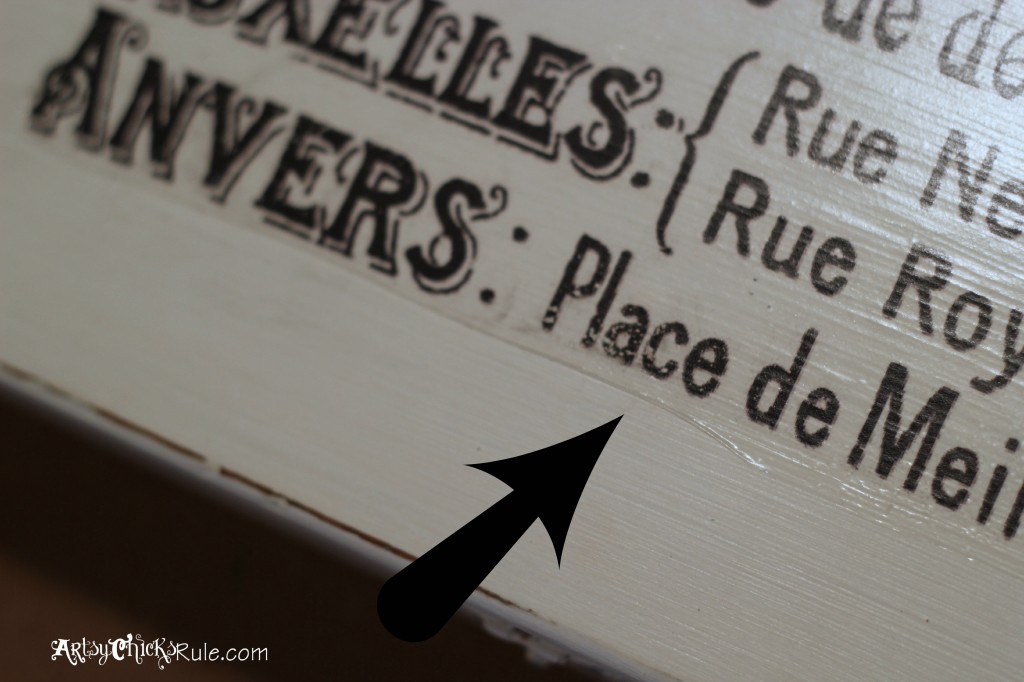
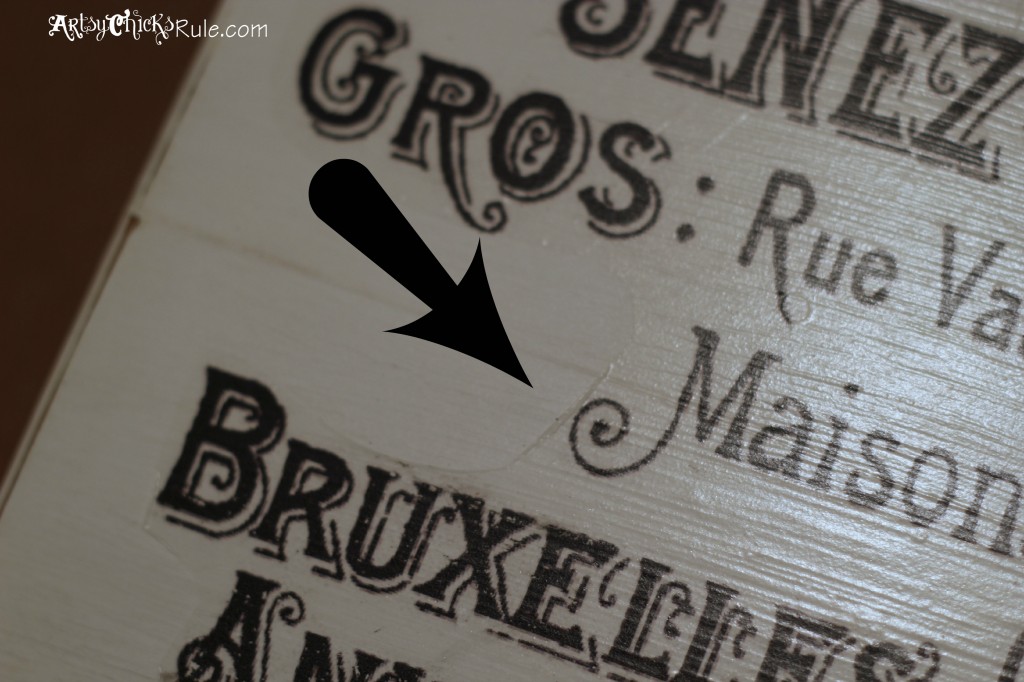
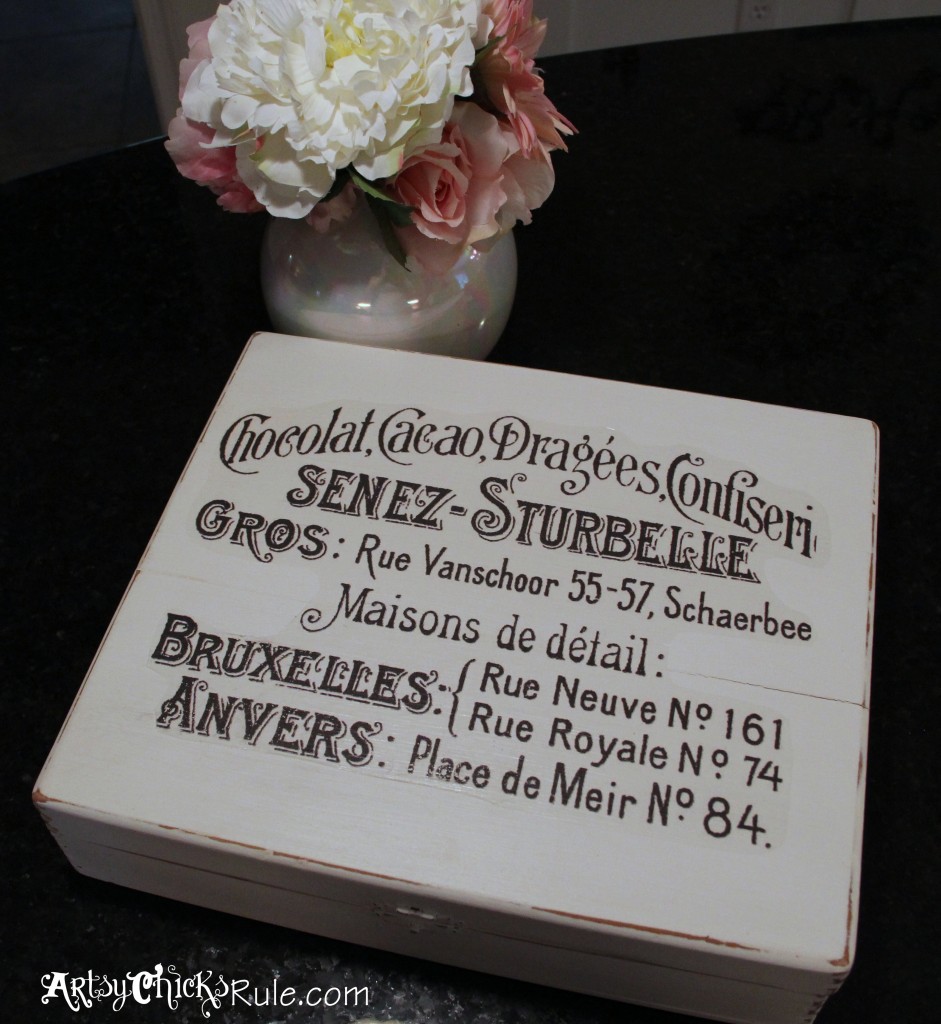
I had a bit of trouble with a few areas of the edge wanting to roll under. I tried repeatedly to get it to straighten with no luck. I used a little squeegee to rub any air bubbles from underneath. As you can see in the photo I went over this area a few too many times trying to smooth it out..I lost some of the black print.
And here…..
Other than those two areas…it was perfect.
Not sure if I did something wrong, highly possible. But I did follow the directions that were sent with the paper.
Maybe I just need more practice with it.
Do I like it?
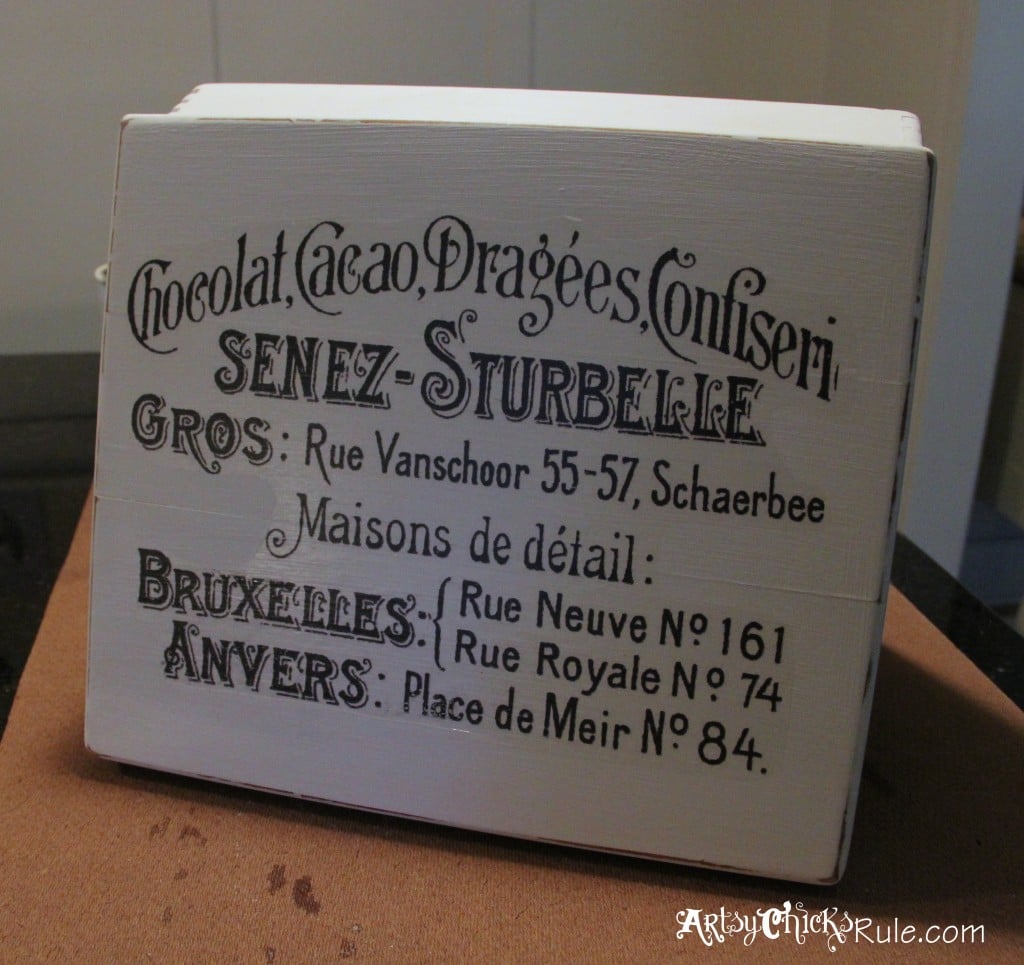
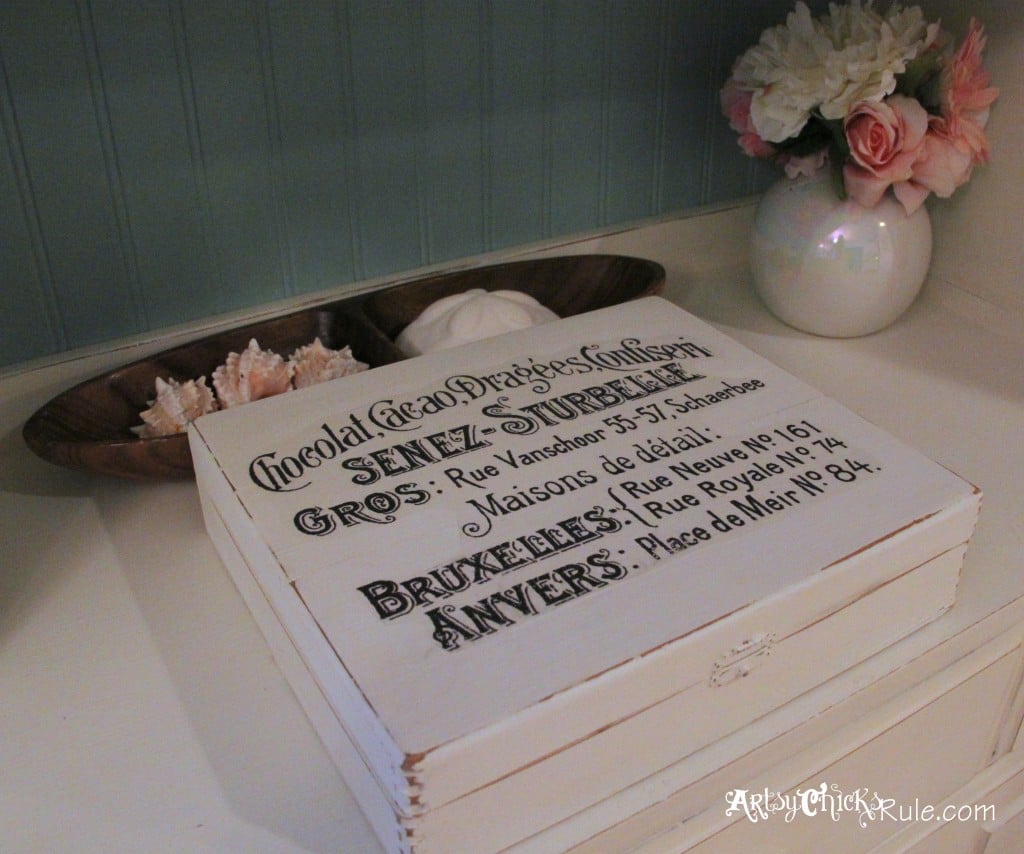
Well, as visible in the above photo….you can see the edge of the film, and the difference in material, in the lighting. That drives me a little crazy to be honest. It’s those little things that my eye jumps to and ruins it for me.
Maybe if I spray the entire thing with a super glossy sealer it may help to conceal that.
Don’t know.
Was it super easy to add graphics to a piece?
A huge YES to that. These graphics would have taken forever to hand paint in.
Instant gratification. Gotta love that!
Unless you look closely you don’t really notice the edge between the decal and the box……….(well, I do)
And yes, I am missing an “e” on the end of “Confiserie”. My lovely printer decided to leave that letter off.
Shhh, don’t tell. If you aren’t French you shouldn’t know the difference anyway, right? I had thought I may go in and hand paint it in.
But nope, probably won’t bother.
I do love this graphic quite a lot, by the way……
I actually used a part of it on this “Coffee Server” I painted/created last year.
And here it is sitting on my $35 Craiglist find….the 70’s dated hutch turned “Baker’s Hutch” …. post coming soon on that one!
Overall I suppose I am semi happy with the Waterslide decals. They sure make the job easier, no question, but are probably not something I would use on furniture.
It’s great and fine for small things like this…and signs, etc.
As a matter of fact, I have 3 signs “in the works”. (which actually means “in the brain” because none of them are even close to being started yet)
One for my “reading nook” in the Family Room, one for above the sink in the Kitchen and one for above the Baker’s Hutch.
I love signs…the older and more “vintage” looking, the better.
Stay tuned to see what I have planned for them. ;)
Have you used these Waterslide decals? What did/do you think about them?
Edited to add: Diana from the blog Dreams Factory has been wonderful enough to help me out with these decals. She mentioned to me that she does not spray to seal the printed film (as I was told to do in my directions) and does not have a problem. I suppose the waterslide paper could vary so just be aware if you try it this way. Also, she doesn’t seal the paint beforehand. She uses a matte spray to seal the entire piece after the item has dried fully for 2-3 hours. This helps to conceal the decal (glossy does not work as well with concealing). If you want to check out her DIY on this (and some of the lovely things she has made take a look —> here.) Thank you Diana!
I will be trying another project this way in the near future…and will post about how it goes here! Keep an eye out for it. :)






Cute!! I have one question about the chalk paint. Do you do any prep to the box (or furniture you’ve painted) before applying the paint? I’ve always spent a ton of time stripping old finishes off before painting & now I’m wondering if that’s even necessary.
Thanks, Aimee
Hey Aimee,
Thanks! :)
No, no prep is necessary with the Chalk Paint and that is one of the reasons I love it (and use it so often). I have stripped and do still occasionally…just depends on the piece. But I will tell you, I reach for the Chalk Paint more than any other now.
There is a bit of a learning curve with it and the wax but once you have it down you will be on your way!
Nancy
Nancy, I must live under a rock, I have never heard of water slide decals. I will have to try them out on a project. Your box turned out great and I would of never noticed the slight imperfections had you not of pointed them out. I do the same thing on my projects, find an imperfection and can’t let it go.
Me too! ;) Only in the past year…before that I had never heard of them. It sounds like they have been around awhile. I must live under the same rock!
Thank you…and yep, once I see the imperfection that is all my eye is drawn to!
Nancy
Hi Nancy: My mom used them in a whole lot of decorating back in the early 70’s! I have a teacart table that a friend of mine did back in the 70’s with an eagle decal – I did not like it when she first gave it to me but it has since grown on me and we put our tv on top of it. Your box turned out great by the way – I admire your gumption to try “new” (!) things!! New to our generation anyway!!!!!!! Have a great day…Trisha
Trisha,
That is so cool, who knew?!!! Apparently not me! lol Well, at least I finally heard of them and tried them out. They sure do make the job easier! :) And yes, I’m usually always game to try new things!! ;)
Hope you have a great weekend!!
Nancy
Great Job…. and thanks for the post on this. I’ve been wanting to use a water slide decal on a bread box that I painted with chalk paint but was hesitant because I wasn’t sure what to seal it with before applying the decal. I’ve been hoping to find info on the process in blog land but couldn’t find anything. So thank you so much!
Thank you! And you are so welcome. I have sealed chalk paint with poly before so figured that would work well…and it did! :) Would love to see your bread box when you finish it!
Nancy
It looks great in the picture, but I know what you mean…I too just redid a little chest that I added graphics to (great minds lol), but I used the mod podge transfer method and you can see the paper. It’s still cute though and yours still looks great! Can’t wait to see the new chairs! Happy Halloween! XO
Thank you Christy! :) Yes, than you totally get what I’m saying about being able to see the paper/film. It does drive me a little crazy,lol. But I can see a use for it in some instances!
xo
Nancy
Love it, thanks for sharing! I appreciate you sharing the process, both good and bad.
Thank you Lori! :)
So pretty! When I first saw your teaser photo, I thought you painted all of that by hand, and I about fell over. I guess I wouldn’t have been too surprised, though– you are amazing like that! I have never heard of waterslide paper. I’ll have to check it out for myself sometime. Hope you’re having a wonderful week, friend!
~Abby =)
Thank you friend :) Yes, lol, that would be quite a lot to do by hand on such a small item!! The decal made it super easy I have to say.
Hope you have a great week!!
xo
Nancy
It turned out great! I have never heard of the waterslide paper! I need to try it Great for smaller projects!! ~Christy
Thank you Christy! I am SO glad to know I am not the only one who had never heard of waterslide paper all these years. ;)
And yes, totally great for small projects!
xo
Nancy
I love the box! I wouldn’t have noticed the oopsies if you hadn’t pointed them out…. or unless it was my box. Then I notice every little flaw… and there are usually many! I’m a perfectionist, but rarely is anything I make or do even remotely close to perfect! So it drives me crazy!
I’ve heard of water slide decals, but never used them. As you know, I am making signs for a friend’s horse farm… one for each horse stall, and a couple of others, as well. I just wonder if she would like them if you can see the actual decal. She’s a little OCD, like me!
Anyway, great job, Nancy… as always! Everything you do always looks so gorgeous!
Hey Karen!
Thank you so much. Ha, yes, like me! Once you know where the flaws are they just continue to jump out at you like crazy, right?
I’m thinking if she is OCD she will not love these, lol. I think that is my problem with them! My OCD-ness. ;)
xo
Nancy
Love this project! I have a similar box in my craft cabinet that I’ve been saving until I had an inspiration for what to do with it. Now I think I’m inspired.
Thank you Paula :) It was a fun, quick (love that part! ;) ) little project.
Nancy
So cute Nancy. I have several cigar boxes that I could do this with for Christmas gifts. Thanks for the inspiration friend.
Thanks Beth! :)
Nancy
OOOHHH this process is new to me too! I want to try this out. Looks kind of fun. I am looking forward to your new chairs :)
Hey Mandy!
Yay, more newbies! ;) So glad I’m not the only one. Yes, the chairs….I’m looking forward to completing them!! lol ;)
Have a great week friend!
Nancy
I’ve never done this. It really looks great, very pretty!
Blessings,
Cindy
Thank you Cindy! :)
Nancy
Hi, Nancy
Really love your box!
I’m such a big fan of decals and all French graphics out there :)
I apply my decals without spraying the painted surface or the decals, let them dry for 1-2 hours and then apply the matte finish spray. This gives both the painted surface and the decals an even look and you can hardly see the decals. Maybe this will work for your decals too :)
Hugs,
Diana
Hi Diana!!
I’m a huge fan of the french graphics too…they are all over my house and furniture!;)
And WOW, fabulous information. Thank you SO much for sharing. I really want to love these..they make it so much easier for small projects.
I am going to edit my post with the info!
Thanks again!
xo
Nancy
Hi! Love your work! I can follow how you did it .. sort of ;o) Wax before waterslide decal? Then do you wax again after you apply the decal to seal it to the painted surface?
Hi Sara!
Thanks so much!! :) I decided to spray the paint (with Minwax Poly) to seal it first before applying the decal. Then I sprayed the decal to seal it. Cut it and applied it per the directions that came with it. I didn’t use any wax at all on this project. I finished up with a spray of poly.
Hope that helps!
Nancy
Nancy I love it and I’m anxious to try the water slide paper… do you know the name of the one you used? I want to order some from Amazon. … Also maybe if you didn’t use chalk paint you wouldn’t have a difference between the shiny paper and the matte paint. Maybe a semi gloss paint wouldn’t show the difference so much…. I like it anyway, it looks fantastic!
Susan
Hi Susan,
I should have linked up where I bought them! I didn’t even think about that. Here ya go…
Water Slide Decal
That’s where I got them, from Amazon.
I haven’t tried another project yet but I will definitely try a different paint next time to see! :)
Thanks!!
Nancy
Love your project. I have similar cigar boxes and have planned on transferring Karen’s graphics for a while now. I even painted some but couldn’t decide on which transfer method would work. I have been eyeing water slide decal paper for so many years now! Somehow couldn’t justify the price. In the mean time, other transfer methods have come along. I have heard that Lazertran water slide decal papers are great.
Thanks! I love her graphics too.
I did enjoy the ease of this product but I will tell you, I’ve not used it since. I just didn’t love the finish. (I’ve actually since removed it from the box because it yellowed)
I do mine with my Silhouette or by hand. There are so many easy ways to transfer…but yes, does require a little bit of hand painting. (or using a sharpie)
I haven’t heard of the other water slide papers. Maybe I should give em another go?!
Nancy
Nancy, this is stunning! I bet all you need now is just some cute stuff for the inside! Thanks so much for sharing, your little project turned out truly fabulous!
Thanks Larissa!!
I love this cigar box. I just bought a box of cigar boxes on Facebook Marketplace. Did you sand the writing off of your box or paint over it> I cant wait to try this idea. Thankls so much,
Oh my gosh, I did this one a long time ago, I don’t remember! BUT I am quite sure I would’ve just painted over it. :) xo