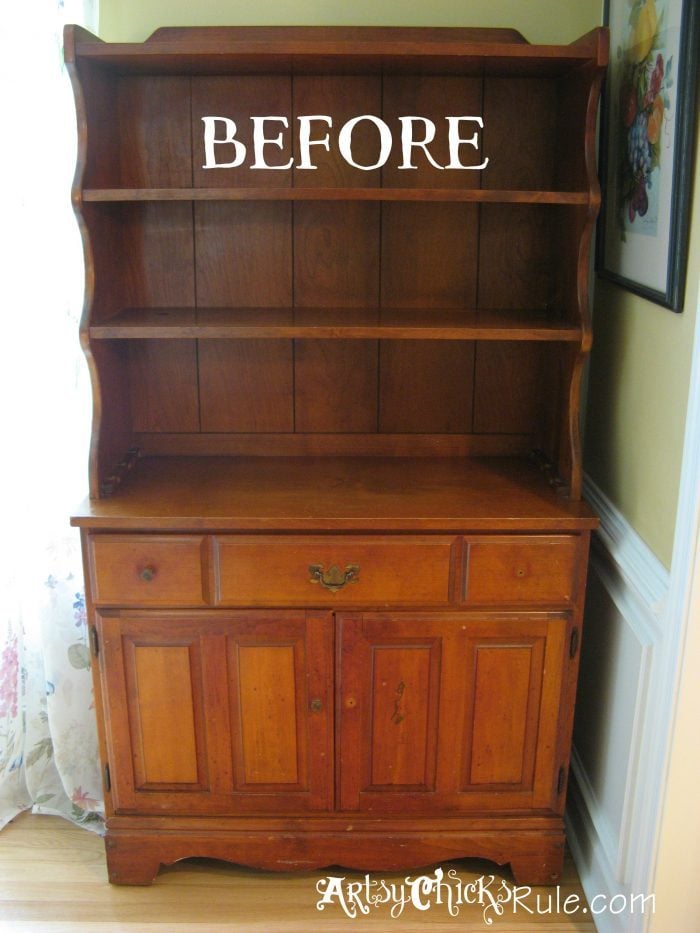
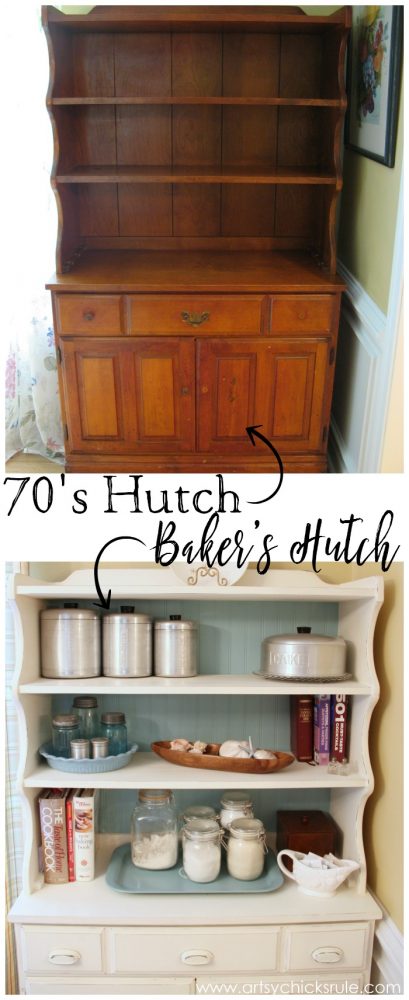
Remember this? My super attractive 1970’s bakers hutch I found on Craigslist…for just $35?
…from the Luckett’s Spring Market post here. (by the way, you must click over and take a look at that post….you won’t be sorry, I promise. ;) )
It’s a beaut, I know. ;)
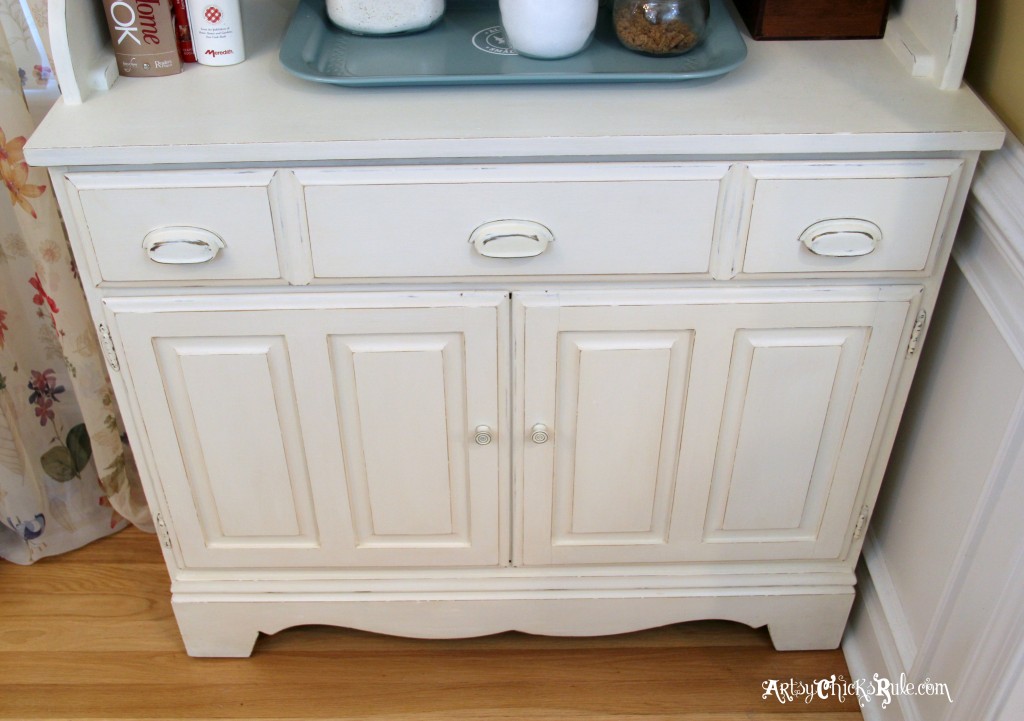
But now it really is and looks like this……….. my bakers hutch.
“Muy bien”….very good, much better…yes, yes and yes.
I have no clue where I learned that term…but I say it all the time. (Spanish class, perhaps?) ;)
Anyway….first things first.
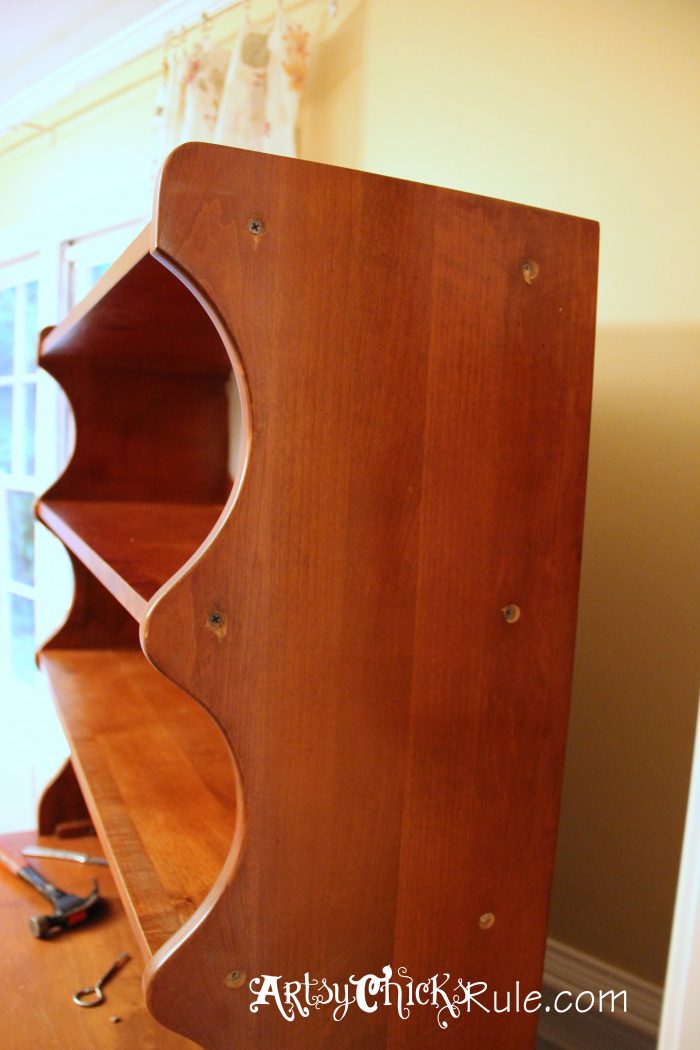
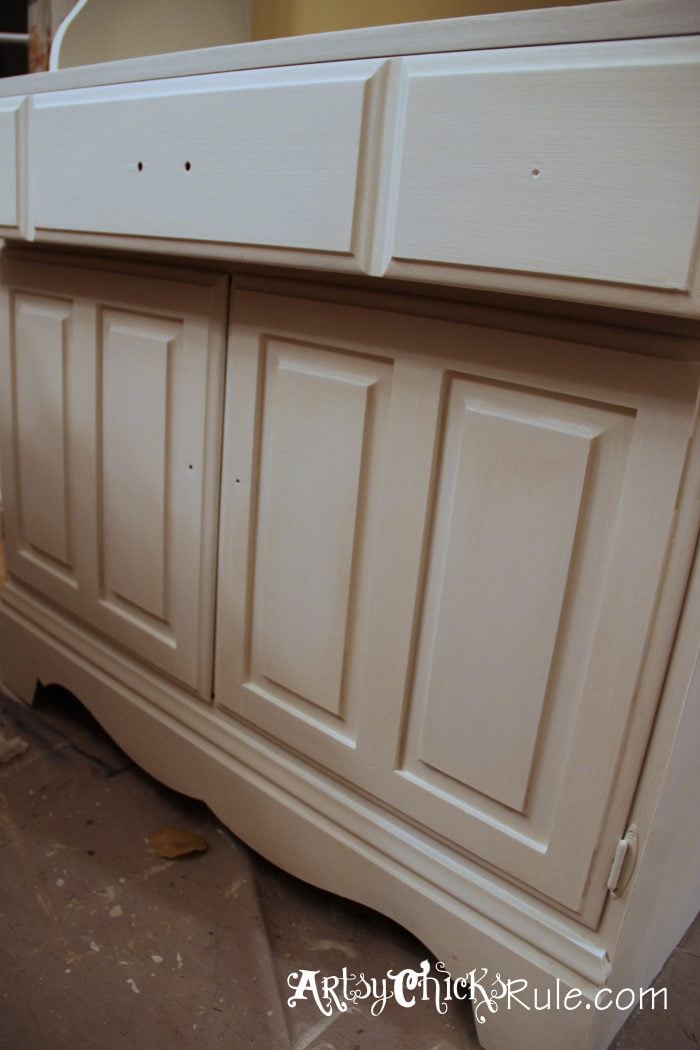
I removed all those nobule thingies that covered the screws.
They just screamed 1970’s to me and had to go.
There were so many….
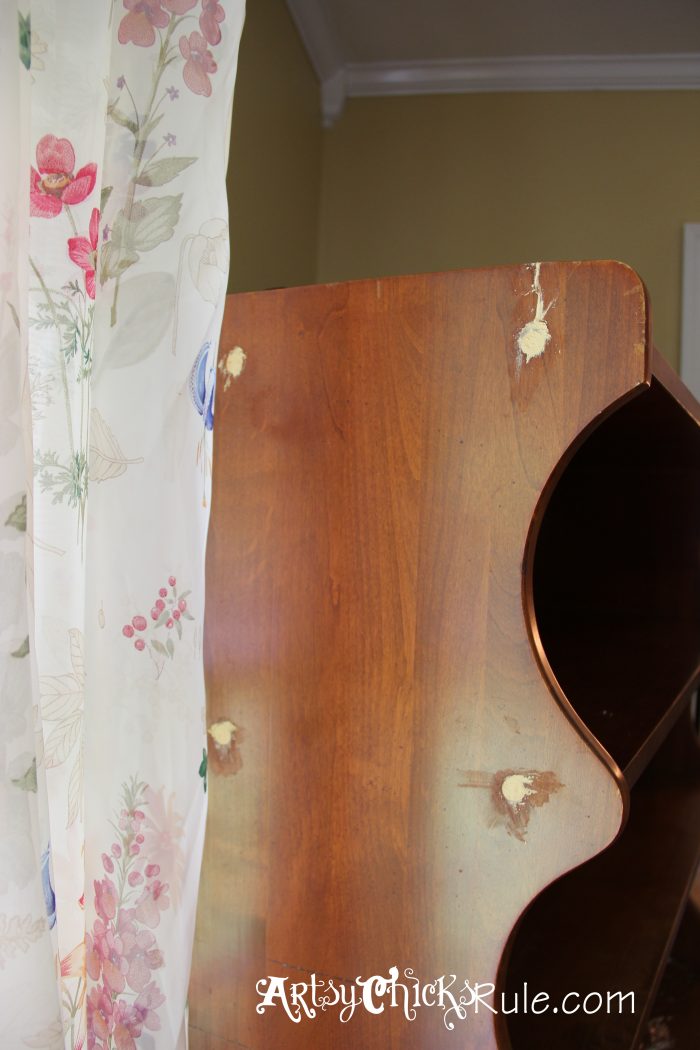
But I got em all out and filled them in with wood putty.
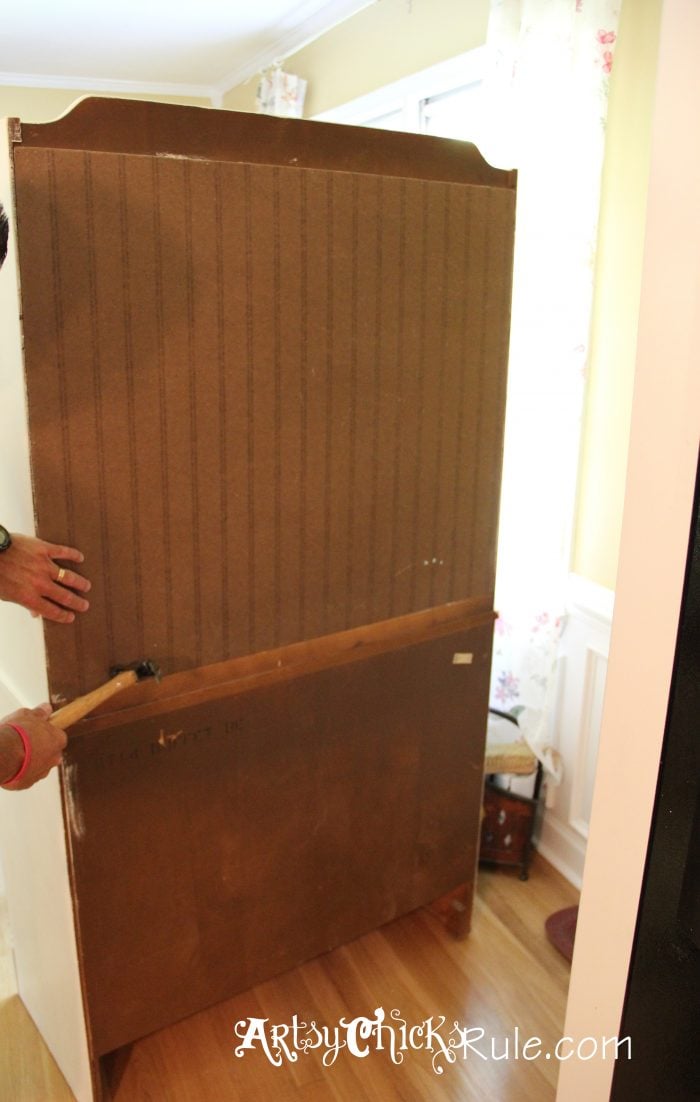
Then I decided to replace the paneled back with regular bead board (in place of the larger lined paneling that was there…that also screamed 1970’s)
My husband cut and attached it for me. (I painted it first)
I am not one to throw anything out that can be used elsewhere.
The paneled board that was on the back of the hutch got used in another project I’ll be sharing with you all shortly.
I painted the hutch with a blend of Old White/Pure White Chalk Paint. (my favorite “white” as of late)
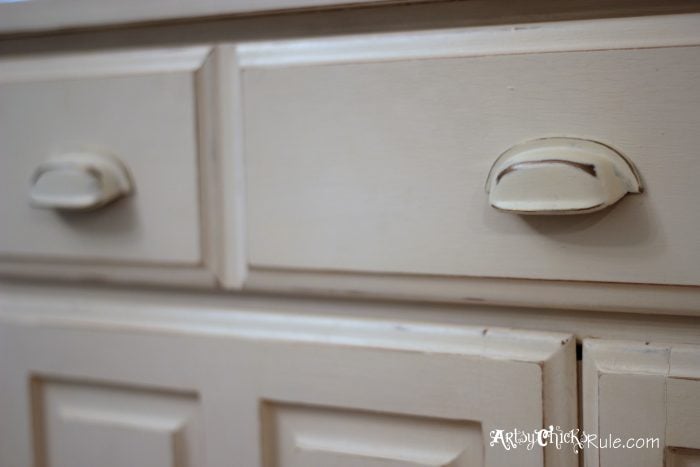
It also got new hardware on the top drawer. (original on the doors)
All painted and distressed.
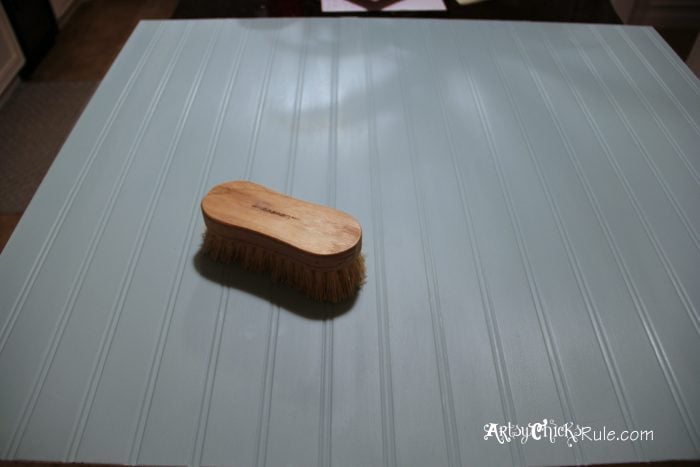
I decided to go for some contrast and painted the back bead board Duck Egg Blue.
I sealed the entire thing (beadboard and hutch) with Clear Wax. I then buffed it to a nice sheen with one of my favorite tools….
…this wax brush. LOVE.
Makes the job so much easier. Works great on spindles, detailed areas and such.
Great job Nancy. It looks fantastic and inviting. I just finished my cupboard that is very similar to yours with AS Chalk Paint in Chateau Grey and Paris Grey, finished off with a dark wax. It was my first go with AS Chalk Paint and I loved the ease of it. I’ve had my cupboard for about 20 years and I’ve used it in almost every room of the house at different times. They are so versatile. I know you’ll love yours for as many years. Thanks for the tip about the brush for buffing the wax.
Thank you Vickie :)
Oh yours sounds lovely too! So good to hear you had a great experience with it on your first go at it. It can take a little getting used to so that’s really good! I do love the “new” hutch and am really enjoying it (and the extra storage it provides!) :)
Nancy
Nice work! The distressed finish looks great! For an even more distressed look, you might consider a tinted wax. Briwax has a number of wax colors that will add a lot of character to a finish.
Thank you Seth! Oh yes, I have used dark wax, paint and glaze to “distress/age” a piece or two. ;) I wanted a more “clean” look to this one so I chose clear wax.
Thanks for stopping by!
Nancy
Love it Nancy and the painted/distressed hardware is fab too. Looking forward to seeing the sign you’re making for it. I found a fabulous hutch at a thrift store on Saturday and I’m hoping it will still be there tomorrow when it goes on sale.
The hutch looks fabulous! And I LOVE the blue bead board backing! Adds just the right amount of color! What a steal for $35.00. Just another great piece by Nancy! xo, K
Oh, and I forgot to mention…. I really like the way you styled it. Those vintage pieces look great! My mother used to have very similar pieces. I wish I had them today, but they are long gone. :(
Thank you so much Karen! We are building our built in bookshelf wall unit in the Study and I am going back and forth on the color for the backing! I can’t decide but I know it will be colored something other than white. I’m really loving this one…maybe a shade or two lighter? We’ll see! ;)
xo
Nancy
Nancy, this is great!! Now why did I not realize you were so close to me?? Where do you live if you live so close to Luckett’s? I’m in Silver Spring, MD, and I’m from Hagerstown, so I pass by that way often! Anyhow, great job you did on this! The colors are so fresh and makes it feel very “country” but chic :)
Thanks Serena! :) I don’t live close to Luckett’s…we went for a day trip. ;) It’s about 3 1/2 hours from me. I live in the Hampton Roads area of Virginia. I loved Luckett’s though!! What a great place…can’t wait to go back. :)
Thanks Krista! :) Yes, that is my favorite right now too. It’s no wonder I love your home and everything you do! :)
I am with you…I haven’t painted in too long (I painted this a few months ago and just now posting about it)…and am getting ready to do some painting today! Yay!!
xo
Nancy
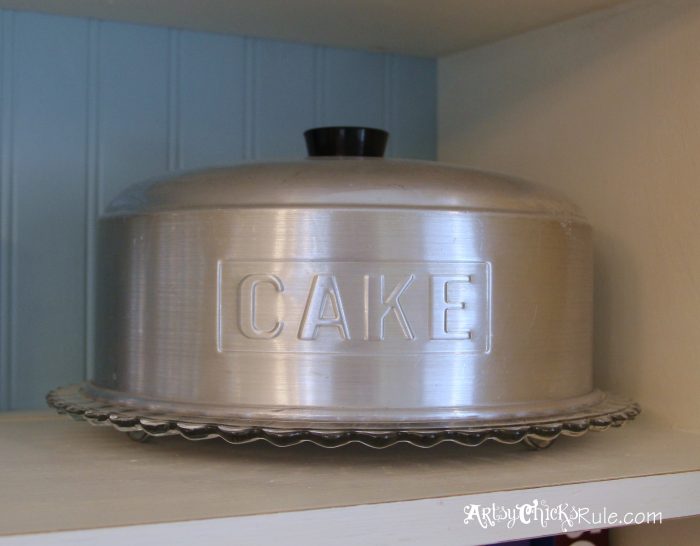
What an awesome makeover! I love the color that you chose for your hutch. My favorite thing about this project is your styling. I love, love vintage and couldn’t stop looking at your great canisters and cake carrier.
Thanks Paula!:) Aw thanks on the styling. That is so great to hear. I’m always moving and changing things because I feel like I can’t get it “quite right”! ;)
Nancy
Love, love, love!!! Where did you get the brush? It looks like what I used to brush my horse with. ;) I also might have to burgle your home for those tin pieces. I have a flour and sugar canister that belonged to Phil’s mom. I love them. Want more.
Thanks Andi! :) I have no clue where I purchased the brush now…it was online a couple years ago. But it works great for the wax. (kind of is like a horse brush, yes lol)
I know, I love my tin pieces…I keep looking for more every time I go out. (like I have room) ;)
Hi Janella!
For this piece I did not sand it prior to painting because I used Annie Sloan Chalk Paint which does not require sanding/primer. That is one of the great things about that paint! :)
Thanks!!
Nancy
Love what you did to the hutch! I just ordered my first cans of Annie Sloan paint and can’t wait to try it…a little nervous but excited at the same time! Had to tell you too, I have that exact canister set (I have a tea one also). It belonged to my mother who received it as a wedding gift. It has to be at least 60-70 years old! It is the only thing of hers that I have and I treasure it!
Thanks Kathy,
Oh yay, you are in for fun with the CP! :)
That is so great, yes, someone mentioned there was a tea one that went with it. I hate that my set is missing that one but this was all they had when I purchased it.
I do love mine too although it does not hold the sentimental value that yours does! :)
Very, very cute! I wish that I was better at refinishing furniture. I just don’t have the patience anymore! Maybe I will give it another go this summer!
Great job Nancy… I just painted one myself that was very similar… your decision to replace that back panel was genius. I painted ant then waxed mine but it didn’t turn out well… because the old panel absorbed so much paint the wax job looks blotchy. I am going to now remove the panel and repaint a new one. Thanks for the advice. Also I painted my kitchen in a blend of pure and old white… great color!
Thanks so much Susan! :) Yea, had to replace it! That wide line spacing just had too much of a 1970’s feel for me!
And Oh fun! Yes, that blend is the perfect shade, I love it! :)
Nancy
I love this and it’s exactly what I needed to see before taking the plunge to paint my mother’s 1970’s hutch that looks very much like this one. Mine has a nice, slick finish. Will I still not have to sans or prep it before painting? Also, how did you apply the paint? Brush only? Roller and brush? What should I get? And how much paint does it take? Again, mine is the same size. And why do you wax it instead of varnish it?
Hi Joy!
That’s great!! I agree, it’s always easier to see something before taking the plunge! If it is very slick, it wouldn’t hurt to go over it all with a fine piece of sandpaper to rough it up a bit.
I always do that if I have slick surfaces. Be sure to clean it well after, before painting. I use mainly brushes because that is what I prefer. It is a personal preference only. You can also use rollers.
I like Purdy the best.
You would be fine with one can.
Wax is made to “seal” the Chalk Paint and works best. However, with that said, I have also used Polycrylic and Polyurethane to seal Chalk Paint with good results.
Hope that helps and good luck!! :)
Nancy
It turned out really nice!! I am glad I found a piece with the hardware painted.. doing cabinets and not being able to replace the outdated ugly hardware right now so I can see it will turn out great anyway!!
Want to be inspired, learn new skills, discover all the tricks to furniture makeovers, creating new out of the old and more? You'll also receive my FREE ebook "Creating Fabulous Finishes" PLUS access to my private Printables Resource Library, too!
Sign up to get the Weekly Newsletter! Our emails include an unsubscribe link and you may opt-out at any time. Your information will *never* be shared or sold to a 3rd party.

 There were so many….
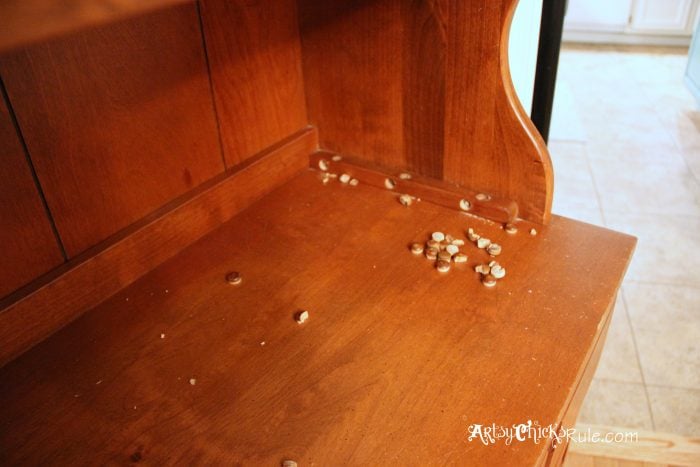

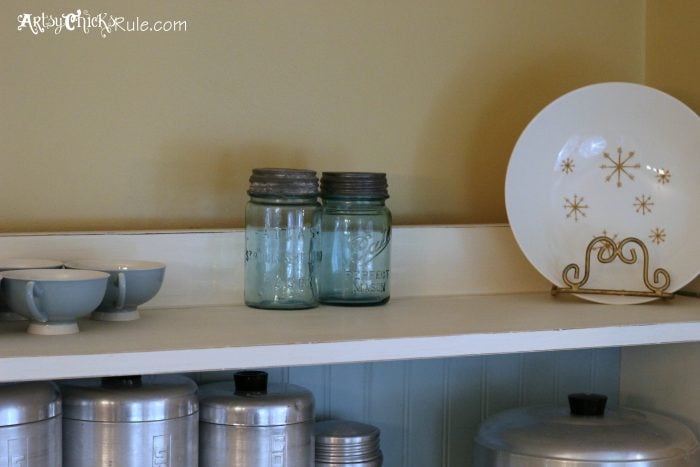

 My baking items. Tray and canisters came from IKEA.
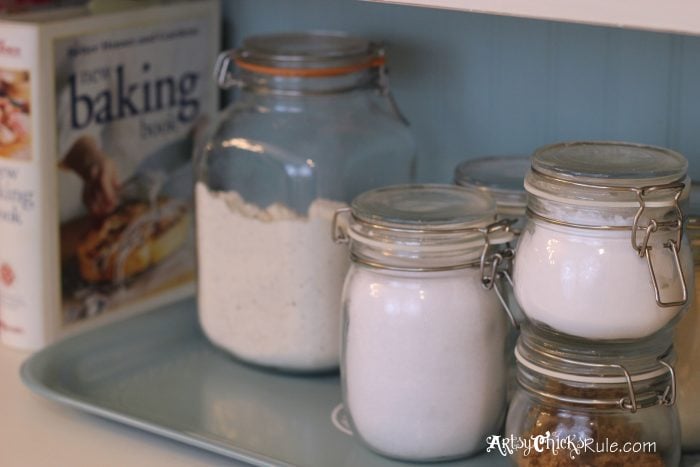


")
")
")


")

")

Love the new hutch Nancy. The bead board and new knobs really give it a modern look. Have a great week!
Thank you Kathy :) I love the new pulls (well..they really aren’t! I “stole” them off of one of my other thrifty finds ;) )
Nancy
Great job Nancy. It looks fantastic and inviting. I just finished my cupboard that is very similar to yours with AS Chalk Paint in Chateau Grey and Paris Grey, finished off with a dark wax. It was my first go with AS Chalk Paint and I loved the ease of it. I’ve had my cupboard for about 20 years and I’ve used it in almost every room of the house at different times. They are so versatile. I know you’ll love yours for as many years. Thanks for the tip about the brush for buffing the wax.
Thank you Vickie :)
Oh yours sounds lovely too! So good to hear you had a great experience with it on your first go at it. It can take a little getting used to so that’s really good! I do love the “new” hutch and am really enjoying it (and the extra storage it provides!) :)
Nancy
Oh, Nancy!!! I just love it. Great call on adding the bead board! Amazing transformation. Love all of your baker’s finds as well!!! ~Christy
Thanks Christy! Those finds are some of my favorites! I’m loving the retro ones lately!! ;)
xo
Nancy
What a beautiful transformation! I love how it turned out. I pinned this to my Before & After Furniture board.
Thanks so much Bonnie! :)
and thank you so much for the pin!
Have a great day!!!
Nancy
Nice work! The distressed finish looks great! For an even more distressed look, you might consider a tinted wax. Briwax has a number of wax colors that will add a lot of character to a finish.
Thank you Seth! Oh yes, I have used dark wax, paint and glaze to “distress/age” a piece or two. ;) I wanted a more “clean” look to this one so I chose clear wax.
Thanks for stopping by!
Nancy
Love it Nancy and the painted/distressed hardware is fab too. Looking forward to seeing the sign you’re making for it. I found a fabulous hutch at a thrift store on Saturday and I’m hoping it will still be there tomorrow when it goes on sale.
Thank you Marie :)
OH yes, go back and get that hutch!! I hope it’s there too…it was a lot of fun transforming this one into something “new”!
Nancy
bead boarding and painting the back blue was muy bien….. the whole project is muy bien love it xx
Aww thank you Chris! ;)
Hope you are having a fantastic week friend!
xo
Nancy
Love it, Nancy!! I love your cake plate and canisters too, what a great find:)
Thank you Christy! :) Oh yes, I am just loving those too…in my “retro”, farmhouse, coastal chic, eclectic phase! lol
xo
Nancy
Another beautiful piece.
Thanks so much Marlia! I picked up some new pieces this weekend and can’t wait to get started on them…ideas are rolling all around in my head! ;)
Nancy
Looks fantastic!!
Thank you Shelly! :)
Nancy
The hutch looks fabulous! And I LOVE the blue bead board backing! Adds just the right amount of color! What a steal for $35.00. Just another great piece by Nancy! xo, K
Oh, and I forgot to mention…. I really like the way you styled it. Those vintage pieces look great! My mother used to have very similar pieces. I wish I had them today, but they are long gone. :(
Oh thanks Karen! I am really loving all those fun older pieces…and I now have the perfect place to display them all. :)
Thank you so much Karen! We are building our built in bookshelf wall unit in the Study and I am going back and forth on the color for the backing! I can’t decide but I know it will be colored something other than white. I’m really loving this one…maybe a shade or two lighter? We’ll see! ;)
xo
Nancy
Nancy!! I love, love, love it! It’s simply gorgeous. And, I need that wax brush ;-)
xoxo
Denyse
Thanks Denyse!! ;) Yes, that wax brush is super handy. ;)
xo
Nancy
Nancy, this is great!! Now why did I not realize you were so close to me?? Where do you live if you live so close to Luckett’s? I’m in Silver Spring, MD, and I’m from Hagerstown, so I pass by that way often! Anyhow, great job you did on this! The colors are so fresh and makes it feel very “country” but chic :)
Serena
Thanks Serena! :) I don’t live close to Luckett’s…we went for a day trip. ;) It’s about 3 1/2 hours from me. I live in the Hampton Roads area of Virginia. I loved Luckett’s though!! What a great place…can’t wait to go back. :)
Nancy
So pretty Nancy- and I LOVE the color combo!! Blue and white is my favourite go-to right now. I feel like I need to get painting again…
Thanks Krista! :) Yes, that is my favorite right now too. It’s no wonder I love your home and everything you do! :)
I am with you…I haven’t painted in too long (I painted this a few months ago and just now posting about it)…and am getting ready to do some painting today! Yay!!
xo
Nancy
What an awesome makeover! I love the color that you chose for your hutch. My favorite thing about this project is your styling. I love, love vintage and couldn’t stop looking at your great canisters and cake carrier.
Thanks Paula!:) Aw thanks on the styling. That is so great to hear. I’m always moving and changing things because I feel like I can’t get it “quite right”! ;)
Nancy
Beautiful Nancy! I love what paint can do! I wish I had some room in my kitchen for a hutch!
Thank you Mandy :) Oh me too…it’s amazing how different things can look!
Nancy
Love, love, love!!! Where did you get the brush? It looks like what I used to brush my horse with. ;) I also might have to burgle your home for those tin pieces. I have a flour and sugar canister that belonged to Phil’s mom. I love them. Want more.
-andi
Thanks Andi! :) I have no clue where I purchased the brush now…it was online a couple years ago. But it works great for the wax. (kind of is like a horse brush, yes lol)
I know, I love my tin pieces…I keep looking for more every time I go out. (like I have room) ;)
Nancy
Nancy! This is SO gorgeous!!! You always amaze me– you can hardly tell it’s the same piece! LOVE! Have a wonderful week, friend!
~Abby =)
I found your blog when doing a little research on staining old furniture.
I’m new to this so, did you have to sand the hutch prior to painting?
It looks great
Hi Janella!
For this piece I did not sand it prior to painting because I used Annie Sloan Chalk Paint which does not require sanding/primer. That is one of the great things about that paint! :)
Thanks!!
Nancy
Love what you did to the hutch! I just ordered my first cans of Annie Sloan paint and can’t wait to try it…a little nervous but excited at the same time! Had to tell you too, I have that exact canister set (I have a tea one also). It belonged to my mother who received it as a wedding gift. It has to be at least 60-70 years old! It is the only thing of hers that I have and I treasure it!
Thanks Kathy,
Oh yay, you are in for fun with the CP! :)
That is so great, yes, someone mentioned there was a tea one that went with it. I hate that my set is missing that one but this was all they had when I purchased it.
I do love mine too although it does not hold the sentimental value that yours does! :)
Nancy
Wow, stunning! It really looks like an entirely different piece!
Thank you so much! It really does…it was not in such great shape before!:)
Nancy
Very, very cute! I wish that I was better at refinishing furniture. I just don’t have the patience anymore! Maybe I will give it another go this summer!
Thank you Kim!
Oh yes, do! :)
Nancy
Great job Nancy… I just painted one myself that was very similar… your decision to replace that back panel was genius. I painted ant then waxed mine but it didn’t turn out well… because the old panel absorbed so much paint the wax job looks blotchy. I am going to now remove the panel and repaint a new one. Thanks for the advice. Also I painted my kitchen in a blend of pure and old white… great color!
Thanks so much Susan! :) Yea, had to replace it! That wide line spacing just had too much of a 1970’s feel for me!
And Oh fun! Yes, that blend is the perfect shade, I love it! :)
Nancy
voce não lixou antes de pintar??
No, typically with Chalk Paint, no sanding prep is necessary.
Nancy
I love this and it’s exactly what I needed to see before taking the plunge to paint my mother’s 1970’s hutch that looks very much like this one. Mine has a nice, slick finish. Will I still not have to sans or prep it before painting? Also, how did you apply the paint? Brush only? Roller and brush? What should I get? And how much paint does it take? Again, mine is the same size. And why do you wax it instead of varnish it?
Yes, I’m full of questions!
Hi Joy!
That’s great!! I agree, it’s always easier to see something before taking the plunge! If it is very slick, it wouldn’t hurt to go over it all with a fine piece of sandpaper to rough it up a bit.
I always do that if I have slick surfaces. Be sure to clean it well after, before painting. I use mainly brushes because that is what I prefer. It is a personal preference only. You can also use rollers.
I like Purdy the best.
You would be fine with one can.
Wax is made to “seal” the Chalk Paint and works best. However, with that said, I have also used Polycrylic and Polyurethane to seal Chalk Paint with good results.
Hope that helps and good luck!! :)
Nancy
It turned out really nice!! I am glad I found a piece with the hardware painted.. doing cabinets and not being able to replace the outdated ugly hardware right now so I can see it will turn out great anyway!!
Thanks, Toni! Yes, it’s so much easier to just paint the hardware on. (and cheaper than replacing!) Good luck with your project! :)