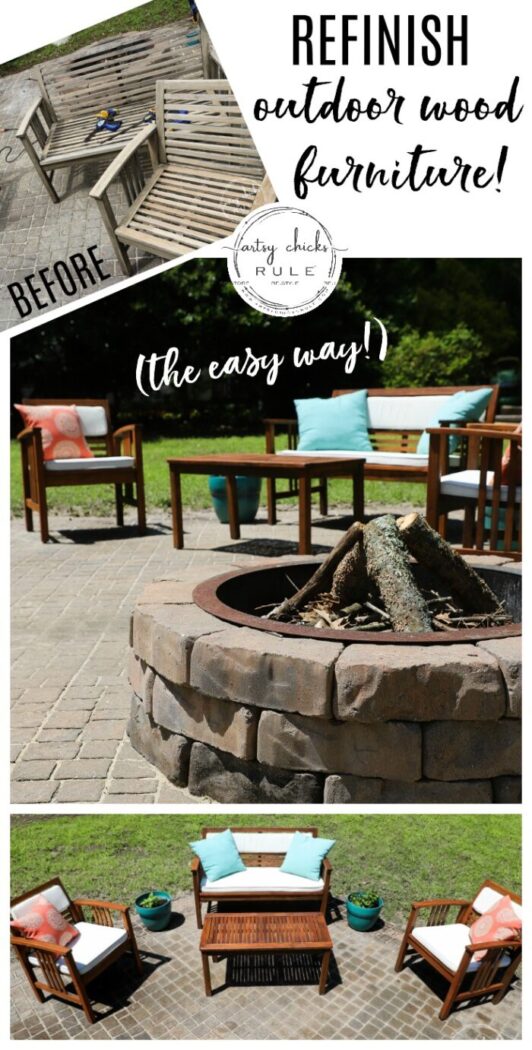
Refinish Outdoor Wood Furniture (easy with stain!)
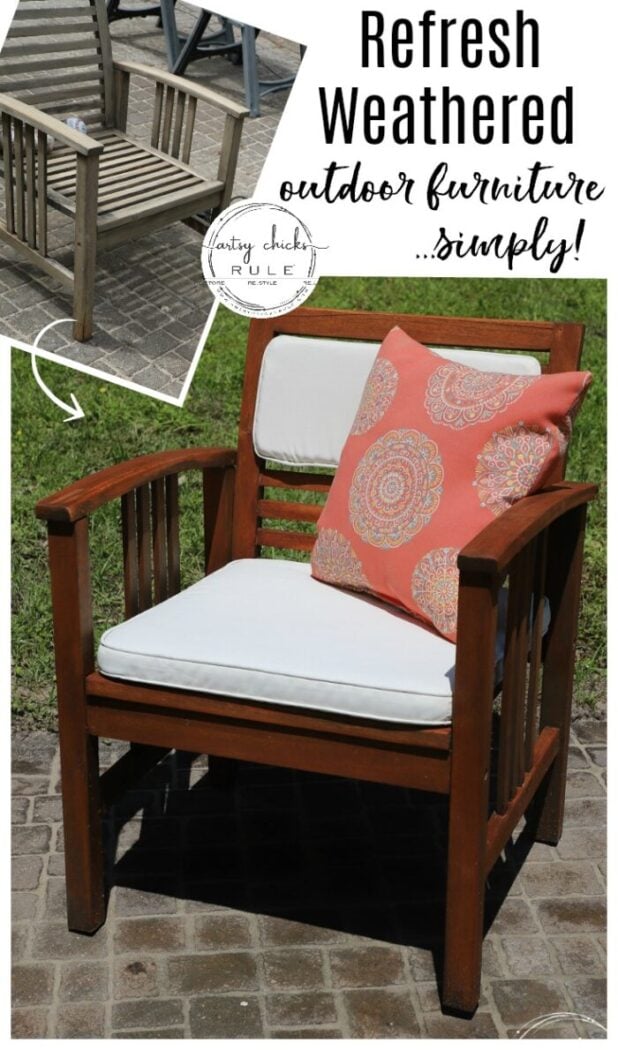
Learn how to quickly, and simply, refinish outdoor wood furniture with just one product! Make your patio furniture look better than brand new.
Hey there friends! I thought I’d share a little outdoor post today. And an easy way to refinish outdoor wood furniture.
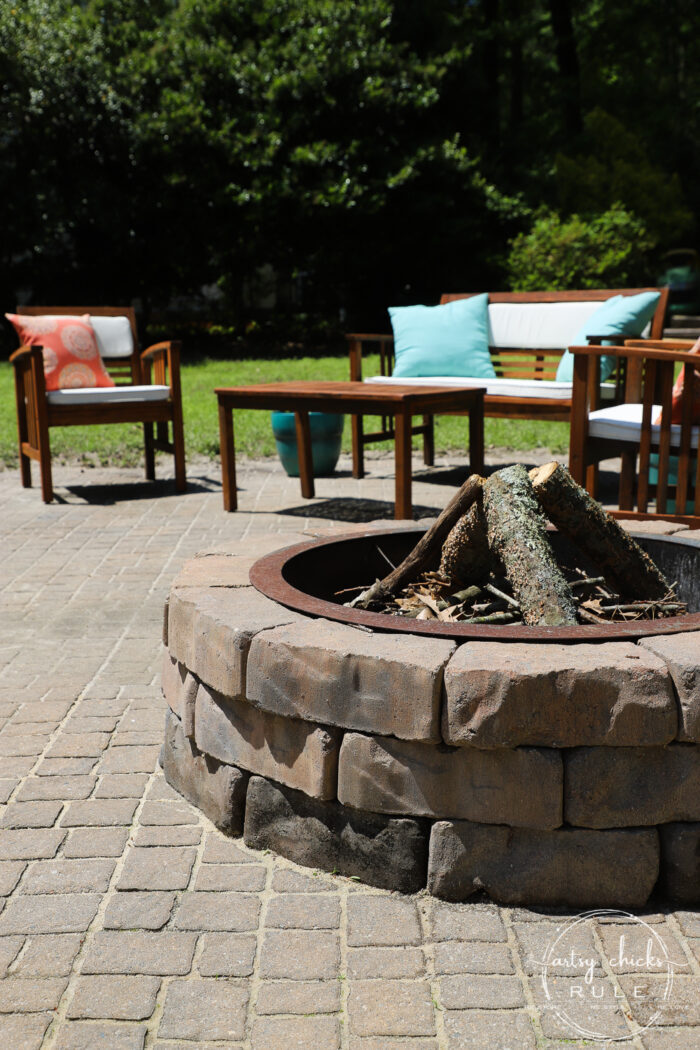
I hadn’t planned to post about this when I began the project so I didn’t get the before “before” shot of the furniture. I was simply working on our outdoor areas to make them nice so we can enjoy our summer out here. If you follow along on Instagram, you might have seen some stories I shared while I was refinishing the furniture. AND on our patio that my husband also was working on. (it was already there, we just re-do the “grout” with polymeric sand every few years…we last did it in 2016)
But as I finished up sanding the furniture, I thought, “hey, this might be helpful to my readers…I might ought to share it on the blog!”.
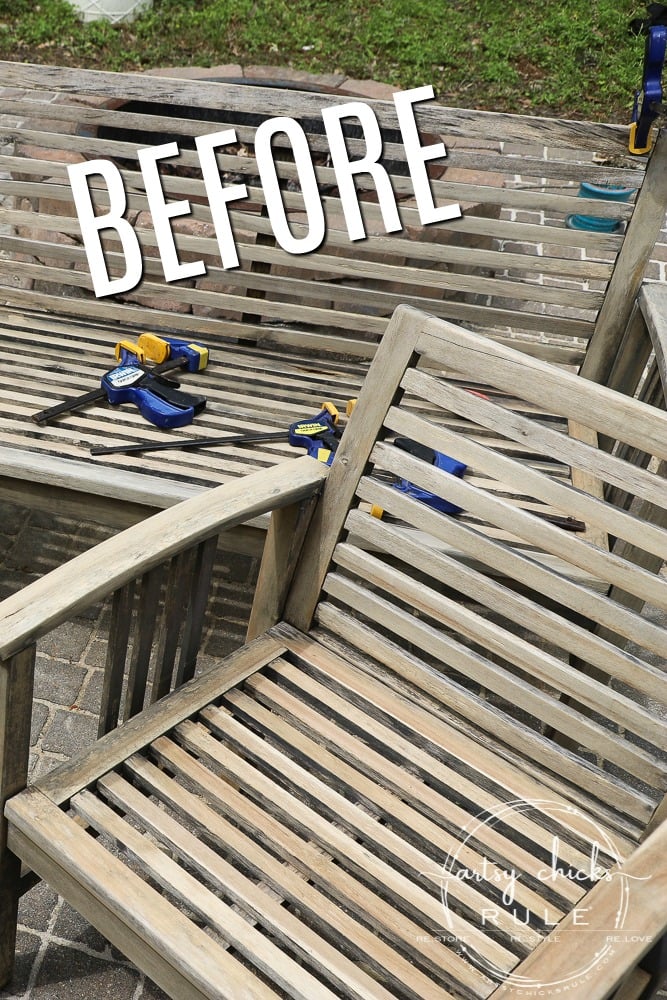
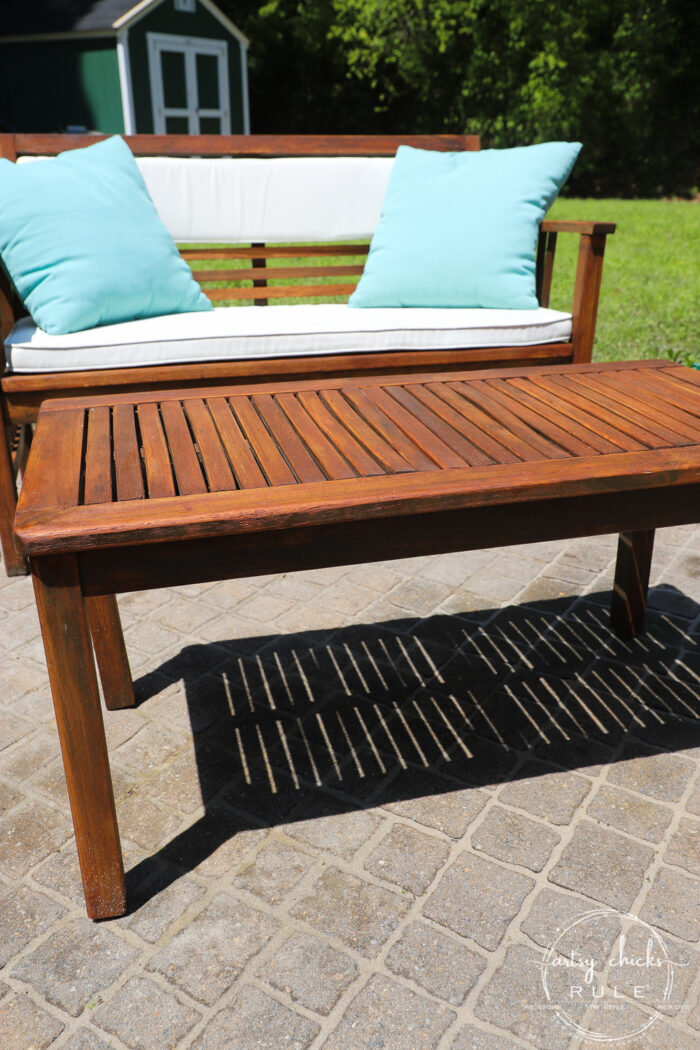
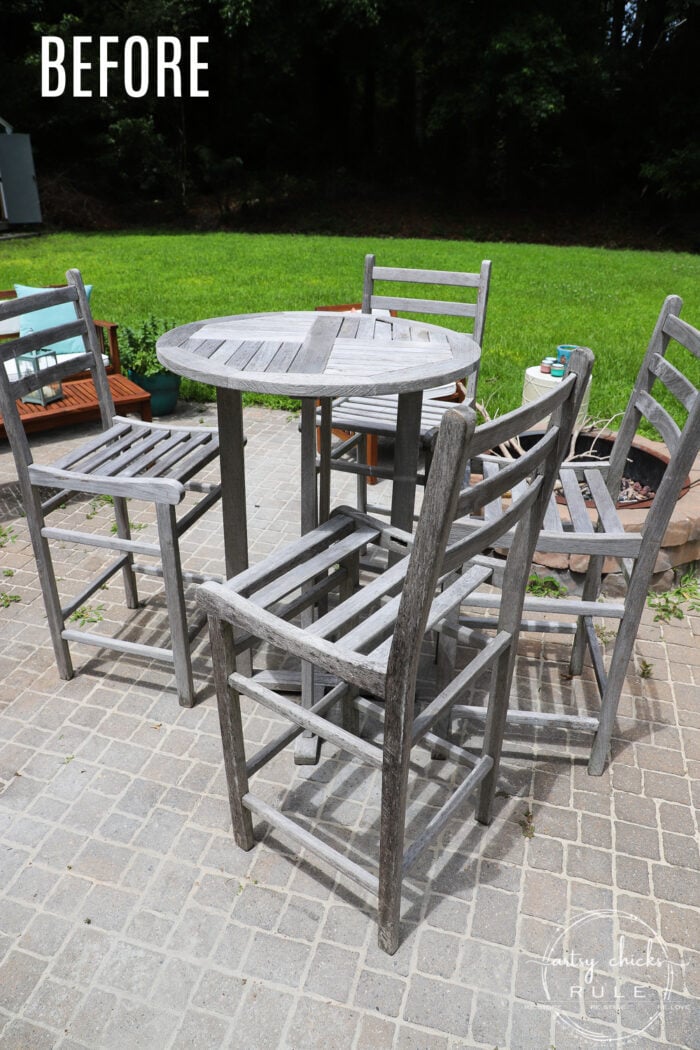
And so I took this “before” photo…
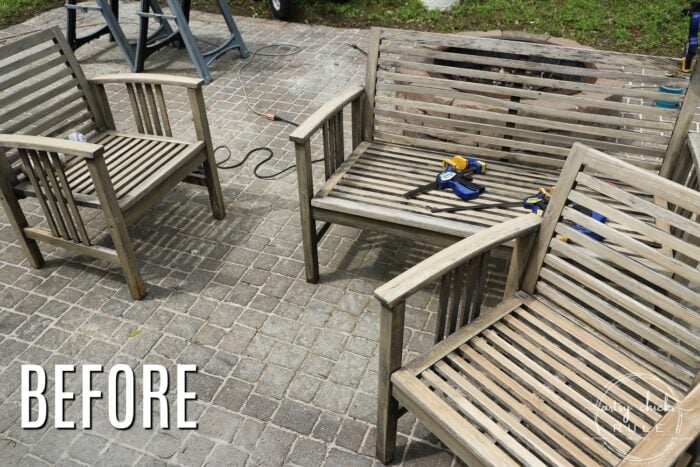
This was after my son pressure washed them for me and I did a light sanding on them.
As you can see in the photo, I did have a crack in the piece of wood on the bench back, so glued and clamped it before staining.
How To Refinish Outdoor Wood Furniture (with stain, so easy!)
And it was easy, y’all. So easy! (and quick too)
BUT…before we get started on the makeover, let me show you how this furniture looked when it was new in 2016.
I haven’t done one thing to it since then. (you can also see what our grass usually looks like too…we’ve had so much rain it’s just a mess right now)
Anyway, hop over to this post to see it when it was new >>> “Screened Porch & Patio Makeover“
I had considered giving them a whitewash and leaving them at that. But in the end, I really wanted to put something on them that would protect them better.
Step 1
Before beginning, you will want to make sure you don’t have any loose or rough wood areas. If you do, sand them to smooth them out.
We pressure washed ours because there was old brown paint still on parts of the wood that needed to be removed. You can skip that though.
Once the wood was dry, I sanded it to smooth everything out.
As you’ll notice in the photos, I wasn’t too worried about getting all of the old brown color off but I did go back and sand some more areas to make sure it was smooth and porous as to accept the stain.
I moved the chairs up onto our screened porch so they could dry out completely by letting them sit for a few days. Then I began staining.
Step 2
Stain the wood.
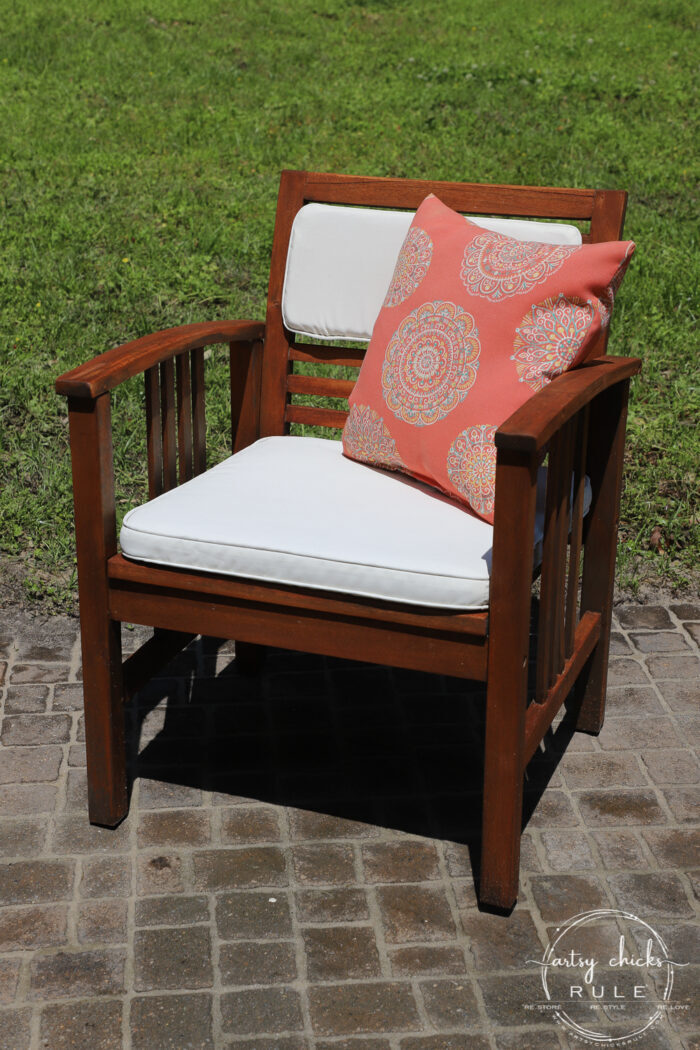
I used Cabot Australian Timber Oil in Jarrah Brown. You can find it >>> here.
The can recommends using a lambswool applicator but I didn’t have that so just used an old washcloth instead. It worked just fine.
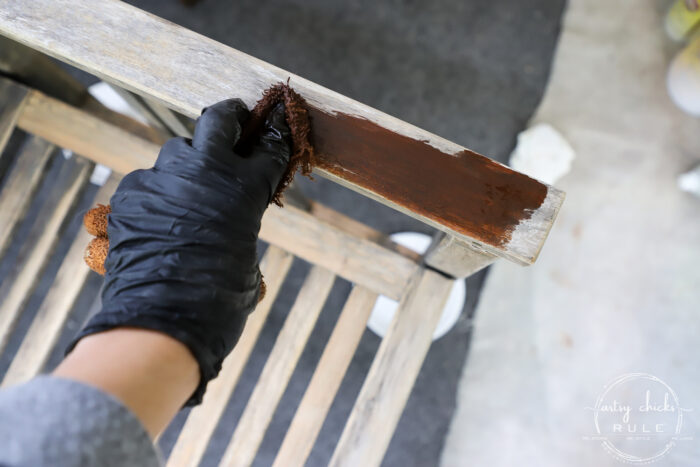
It also says to try not to overlap and that it’s best to do the application all at one time, if possible.
Which I did and it took no time at all.
This was truly one of the easiest DIY projects ever.
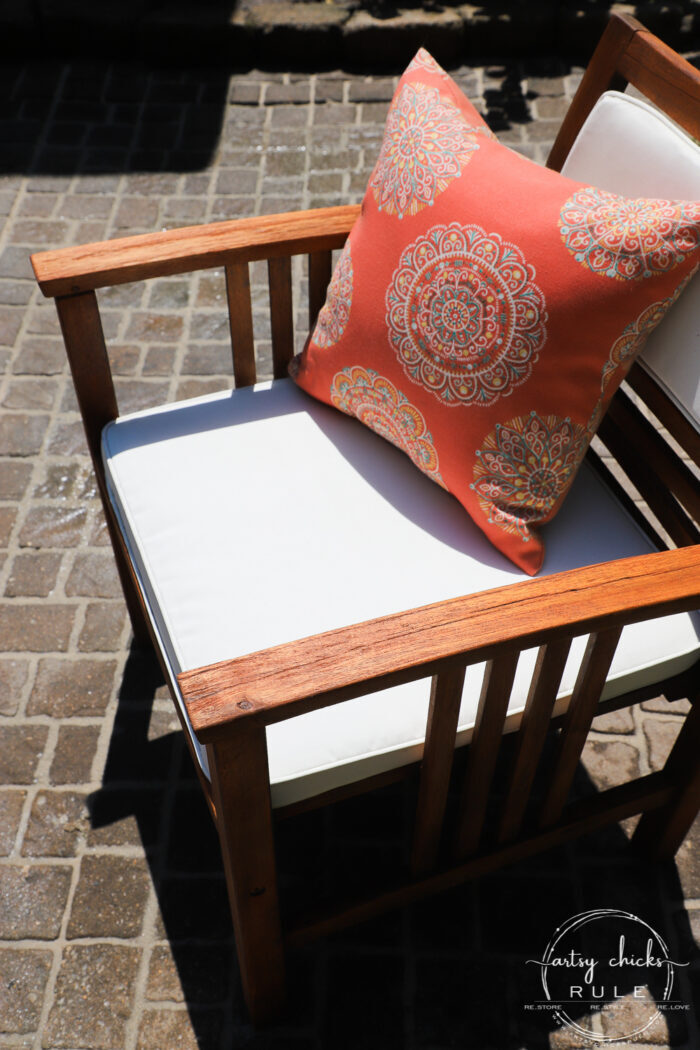
Just look at that gorgeous color…I actually like it better than the original brown shade it came in.
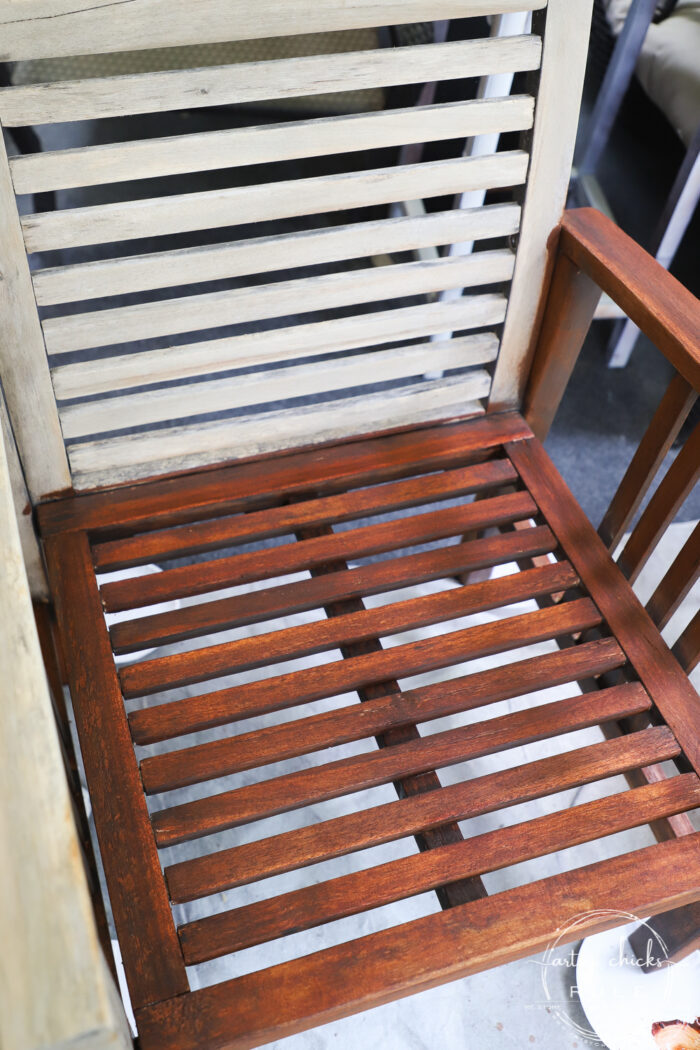
What a difference.
It’s like watching this furniture come back to life!
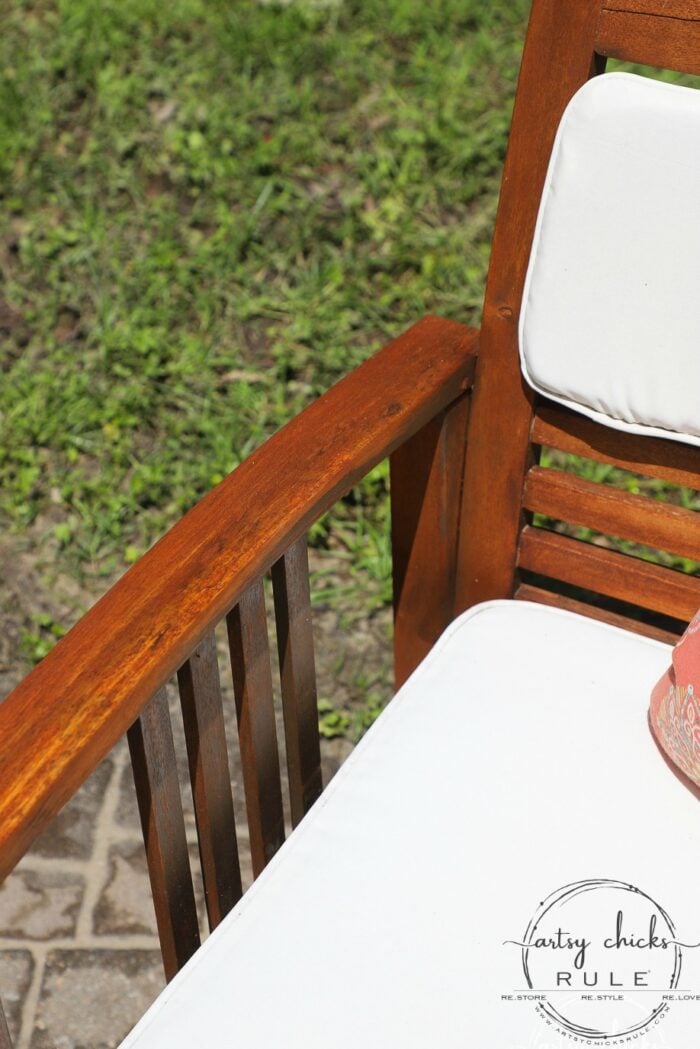
You can see here some of the old original brown shade from before. As I mentioned, I didn’t bother with going so far as to try to remove all of that brown…only smoothing it out with some sanding beforehand.
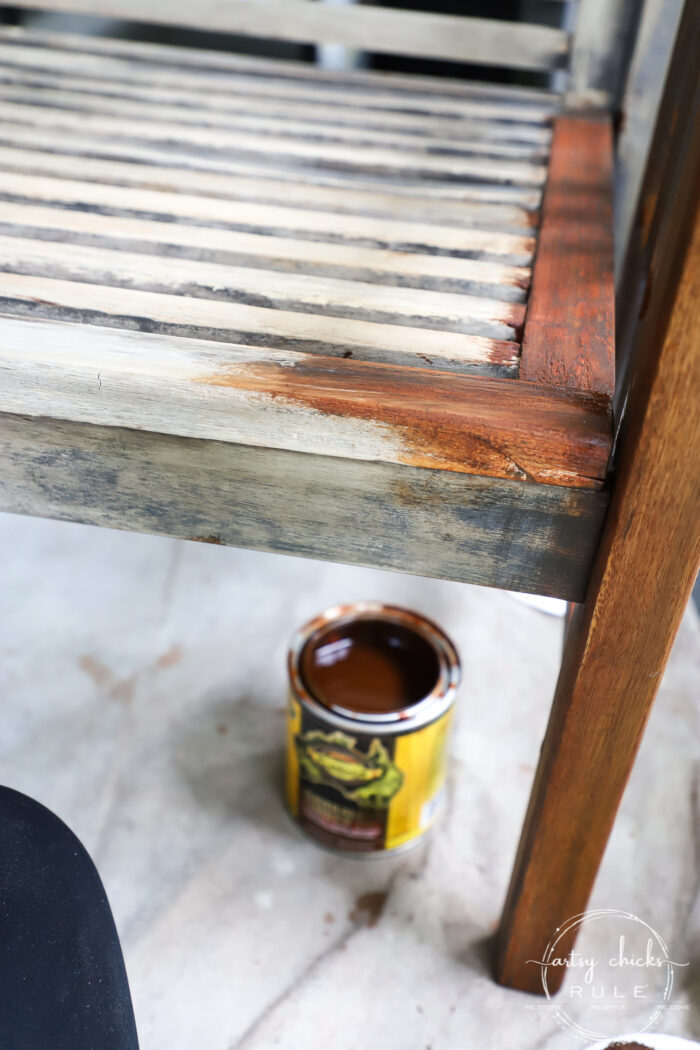
If it bothers you, you can sand all the way down though.
I didn’t mind the variations.
Since I hadn’t really done anything to this furniture since we bought it in 2016, we did end up having a broken piece of wood here and there.
My husband cut this small piece from some old pallet wood hoping it would match well.
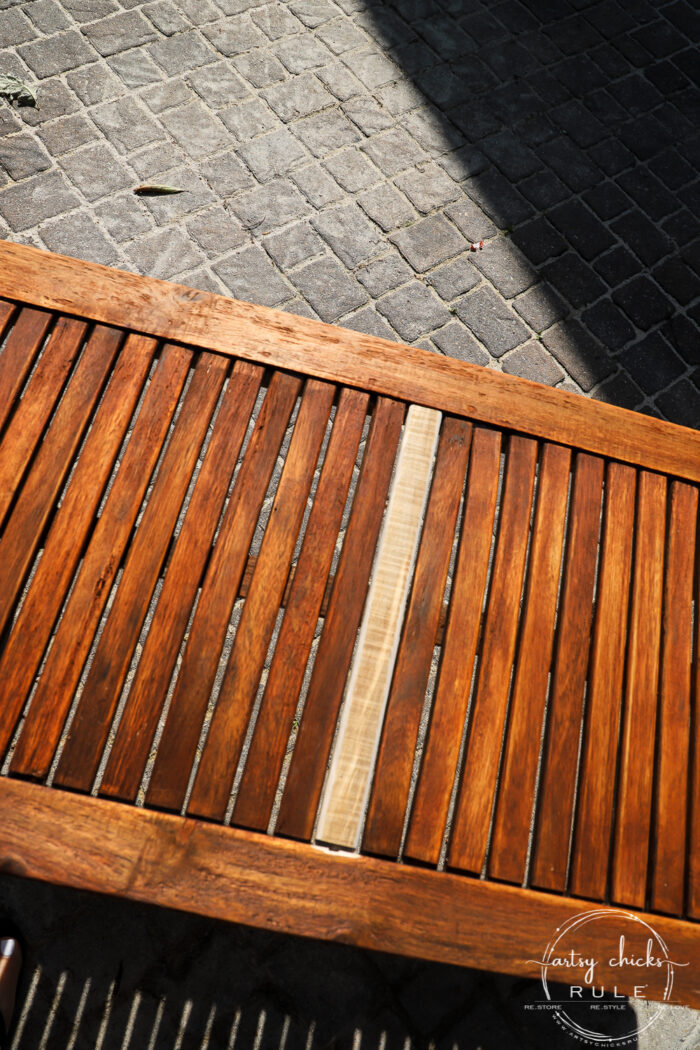
And it ended up matching pretty good.
After I was done with all of the restaining, I let them sit inside our screened porch for about 3 days.
I wanted to make sure they were good and dry before putting them in our crazy weather. The can recommends 24-48 hours.
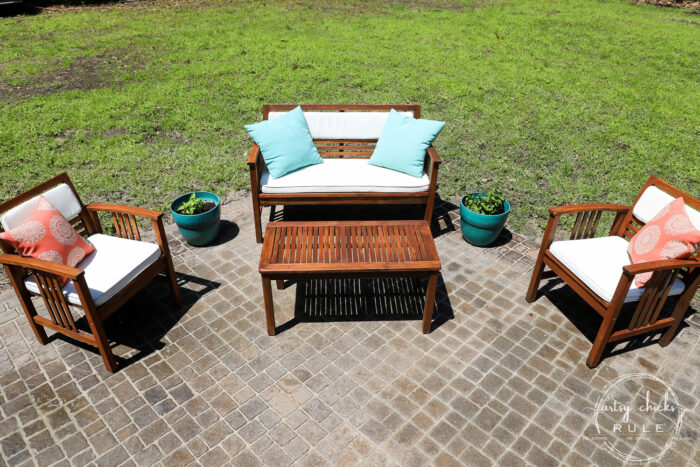
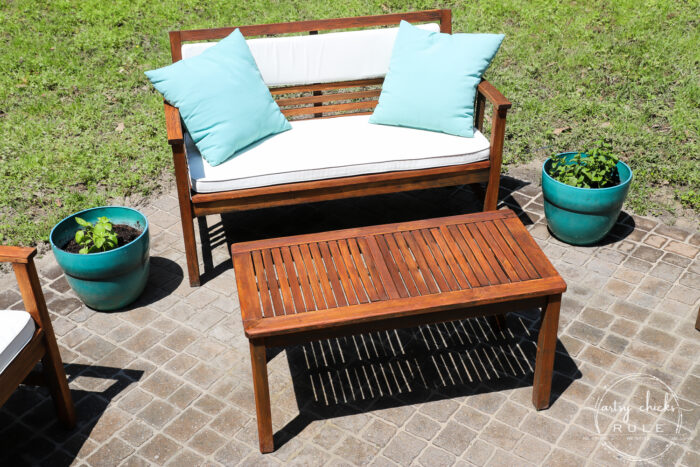
I am SO thrilled with how they turned out.
They look like brand new to me!
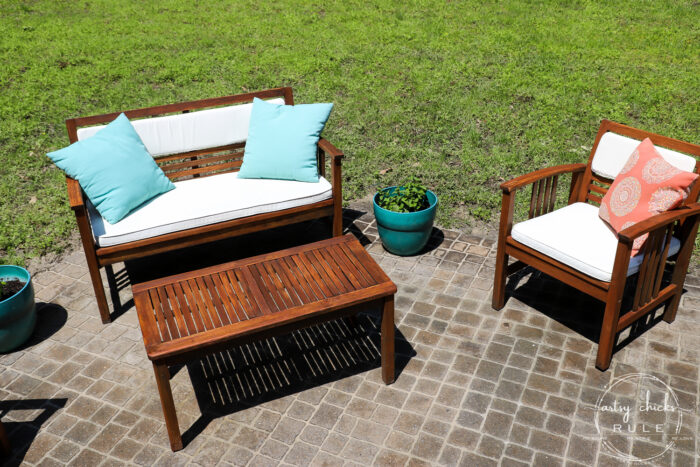
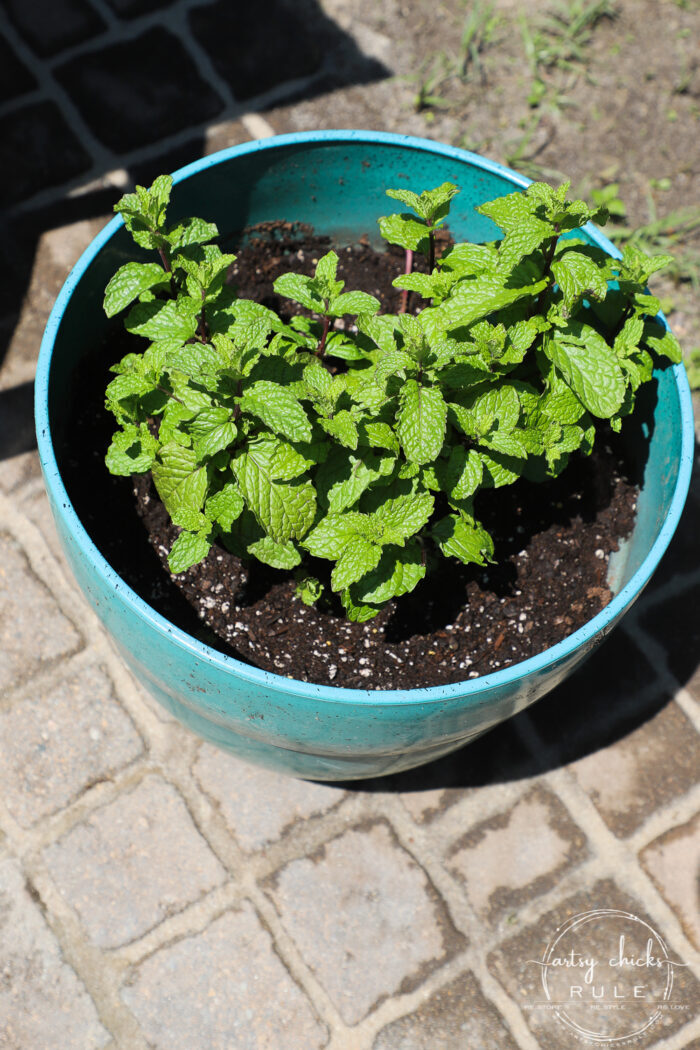
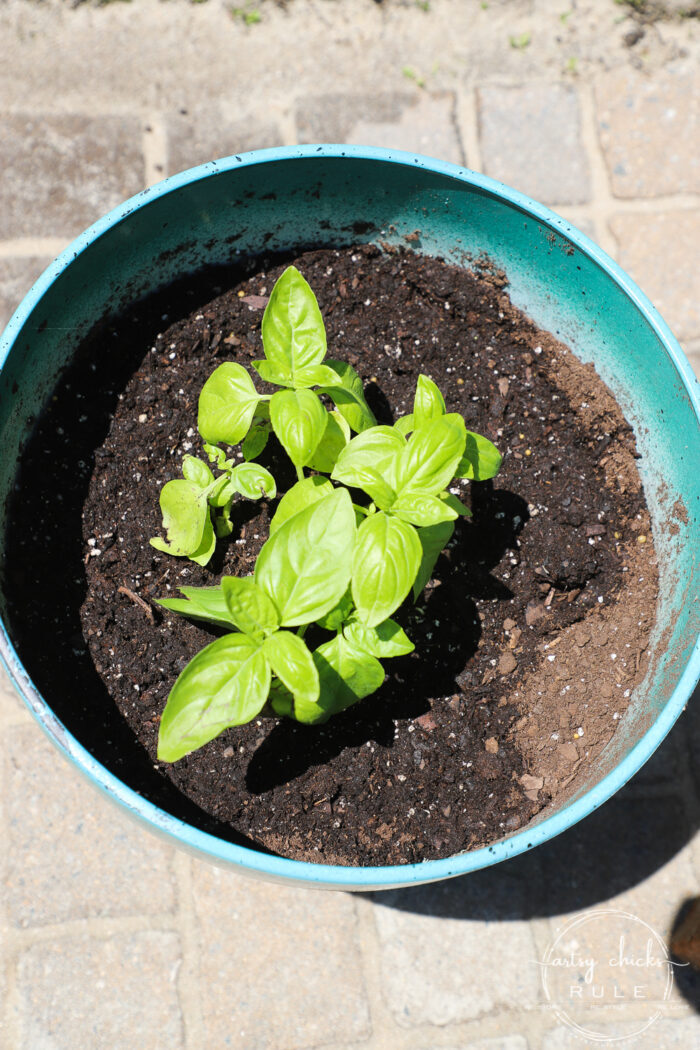
Oh! And the planters that I bought also back in 2016 originally had a blend of flowers in it. I considered planting some new flowers in them but thought they would be perfect for herbs instead.
So this one got Mojito Mint… (that’s what it was called…is that really a thing? lol)
And this one got Basil…
We are also planning a raised garden bed on the other side of this patio for vegetables. We are getting started on it now so I hope to share that with you all too.
Just add that to the crazy list of ours over here. ;) Keep an eye out on my Instagram stories because I am sure I’ll share the progress over there!
Who knew this was all it took to refinish outdoor wood furniture and have it look so good? I sure didn’t.
PIN it to save it!

I hope you enjoyed today’s post and you found it helpful. I had never really refinished outdoor wood furniture in the past so I was surprised at how simple (and quick) it was to do. I am completely thrilled with the results.
Guess what? I have a brand “new” set to makeover next! I’m going to give it that brand new teak look in a completely different way than I did on today’s outdoor furniture…
UPDATE!! See how it turned out now, here!
Have a wonderful and safe weekend, friends!
xoxo


")


")


Wow it is beautiful now. I used that same stain on our deck a few years ago and I used it in a different color, but I love that stain, it works so good!! Your patio is looking awesome! Good job!
Thank you, Mary! We are really enjoying it! xoxo
Nancy, you saved this beautiful furniture and it looks gorgeous! Great job!!
Thank you, Christina! We are definitely enjoying our patio! Now the weather just needs to cooperate more often! ;) xo
Very nice! Thanks for posting and the motivation to get outdoors and DIY.
Thank you!! And yes!! Hoping the weather finally stays nice here! We have much more to do! xo
How did you attach the back pillows?
Oh yes, those came with the chairs when I bought it. They have a little flap on each side that goes through the backs of the chairs and attach with velcro. Pretty neat, actually! xo
Great job! It does look brand new. This is a very timely post, because I have an outdoor bench that I need to refinish. I will now that I know the results can be this good!
Thanks, we love how it turned out! Good luck with yours too!! xo
Wow it looks so good…like brand new! I can’t wait to get outside and take the pressure washer to everything! XOXO
Thanks, Christy! Yes, so much fun to bring things back to life! xo
The darker color is much better than whitewash for this set, it really stands out on the pavers. Beautiful job, Nancy, and impressive that you were able to complete it between all the rain showers!
I think so too!! SO glad I went in this direction and not that. And yes, hoping our weather starts staying nicer now. :) xo
How nice the set looks! The seat and back cushions look nice too. I’m debating whether to get teak wood or the outdoor wicker this year. My stuff is so beyond hope and it’s a big expense so I want to get the best BANG for my bucks! Stay safe and be strong! Enjoy the beautiful weather!
Thanks, Cecilia! Oh…decisions!! Both are nice!! Same to you…and yes, hoping the weather has turned a corner and will continue staying more seasonable! xoxo
Great job. It looks like an awesome place to hang out.
Cynthia
Thanks, Cynthia! We are definitely enjoying it! It’s amazing how different a space feels when it’s been refreshed. :) xoxo
Awesome job! I love it! How much stain did it take to do all of the pieces?
Billie
Thanks, Billie! It only took about 1/4 to 1/3 of the (quart) can to do all the pieces. :)
Everything looks brand new! Great job!
Thanks so much, Lizzy!! We are really enjoying it! xo
What an incredible makeover! I like the half cushions on the back of the bench & chairs. Would you mind sharing where they came from?
Thank you, Tammi! Oh yes, they came with the set. (which came from World Market) I don’t think they have the set any longer, unfortunately.
is the sanding necessary for the stain to absorb? beginner here :)
No, not necessarily. Mine was probably worn enough that I didn’t need to do much. (and I didn’t really) But I did want to smooth out the wood somewhat as it had gotten a bit rough over the years in places. If you have a very good finish still attached (shiny, etc) then yes, you would want to sand it to make it possible for the stain to absorb into the wood better. :)
Thank u for the reply😍❤️
I stained our dining table and chairs, u inspire me so much!
You are very welcome!! And that’s great!!! xoxo
Gorgeous re-do!
Thank you, Rose! :) xo
Your furniture does look brand new! Beautiful! Does this stain protect it from rain, etc. or do you need to apply a sealer? Thanks! Judy
Thanks, Judy! Yes, this is all you need to do. No sealer as it acts as one as well. xo
Thanks for the info and post!
Judy
Did you sand the wood by hand? Or use power? Could you use a palm sander or something?. The sanding sounds like the hard part. 😝
A little with a sander and a little by hand. You can absolutely do it either way! :)
How do you get the stain between the slats on the chairs and the table??
Hi Sue! I didn’t worry too much about some of those parts I couldn’t get to like that. BUT you can use a small (skinny) chip brush or something similar to reach those areas. For the slats, I just soaked the rag I was using and tried to get as much as I could with it. :)
Wow!! Nancy, this furniture looks amazing now! What an awesome job!!! My sister picked up a rocker that matches your set on the side of the road last year. I’m gonna share this with her. Thanks so much!!!
They look amazing :)
Thank you! :)
Wow they look brand new. I wish I had done this to our teak table set but it now has rotted areas on the table and benches.
Thanks, Debra! Yes, I couldn’t believe how well it worked. Aww, yes, if you can replace those pieces easily, you could still give this a try! Have a great weekend! :) xo
Do you know what type of wood the patio set was?
No, I’m sorry, I don’t remember!