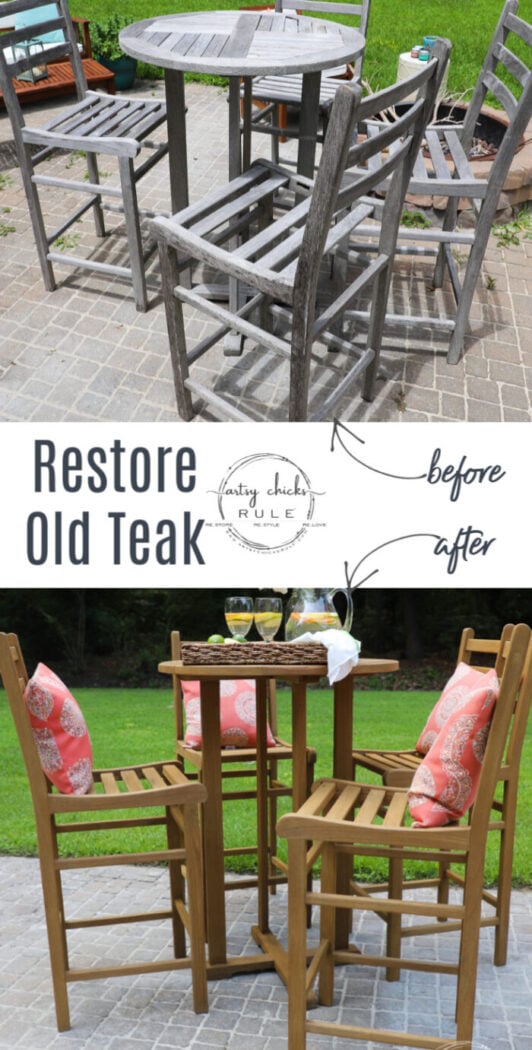
How To Restore Teak Furniture (plus tips I learned along the way!)
Ever wondered how to restore teak furniture to its old glory? I never really thought about it until I lucked upon this old set. Today I’m sharing how I made it look like brand new!

What the?! Right?
I mean just look at that. How in the world? I’ll tell ya how, a lot of sweat, blood, and tears, that’s how!
Haha, kidding. Kind of. ;)
I mean if you were following along on Instagram with me as I was sharing this makeover in my stories, you know it wasn’t quick and done! lol
In all honesty, it was quite a bit of work and took me about oh, 6-ish hours from start to finish. BUT it was so worth it. ( <<< I say since I’m finished, haha)
It was definitely more work than how I refinished this other wood outdoor set of ours. (that set was not teak though)
Missed that post? You can check it out right here >>> “Refinish Outdoor Wood Furniture (easy with stain!)“
Anyway, as I say with most everything I do because it’s true, it was doable. And that is the important part. OH! And it saved me money!
The most important part.
So, how did I restore this teak furniture?
Keep reading because I’m going to share how I did it and how I’d do it if I did it again. This is important because yes, I’d do things a little differently.
Also, I’m sharing a few tips I figured out along the way.
Let’s begin…
How To Restore Teak Furniture
First, let me just say that I have been scouring the Marketplace on Facebook and Craigslist for some nice pub height outdoor furniture. I really wanted the Polywood Adirondack style furniture but dang that stuff is pricey. I kept hoping I’d come across a deal like several people I know have. But no such luck…so far anyway.
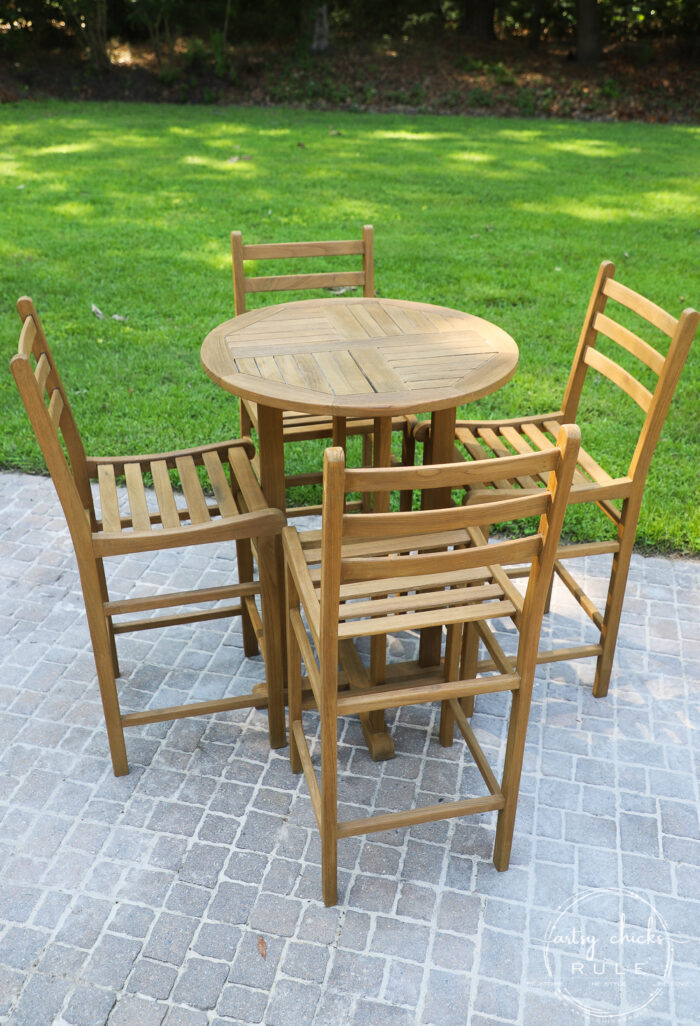
What I did come across, however, was this awesome teak set.
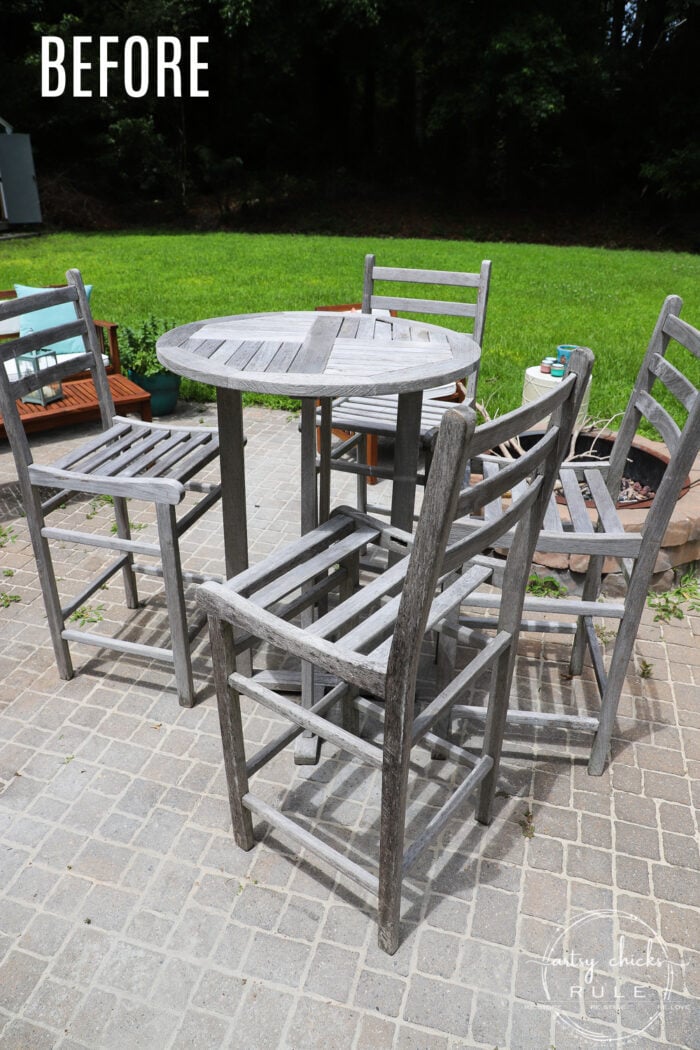
All grayed and weathered … for $125!! Deal! Sold!
Oh, and it was also missing a slat on one of the seats. But still, what a deal.
So I brought it home and started researching on how best to restore it. Lots of varying opinions out there, let me tell ya.
I sifted through it all and came up with a plan.
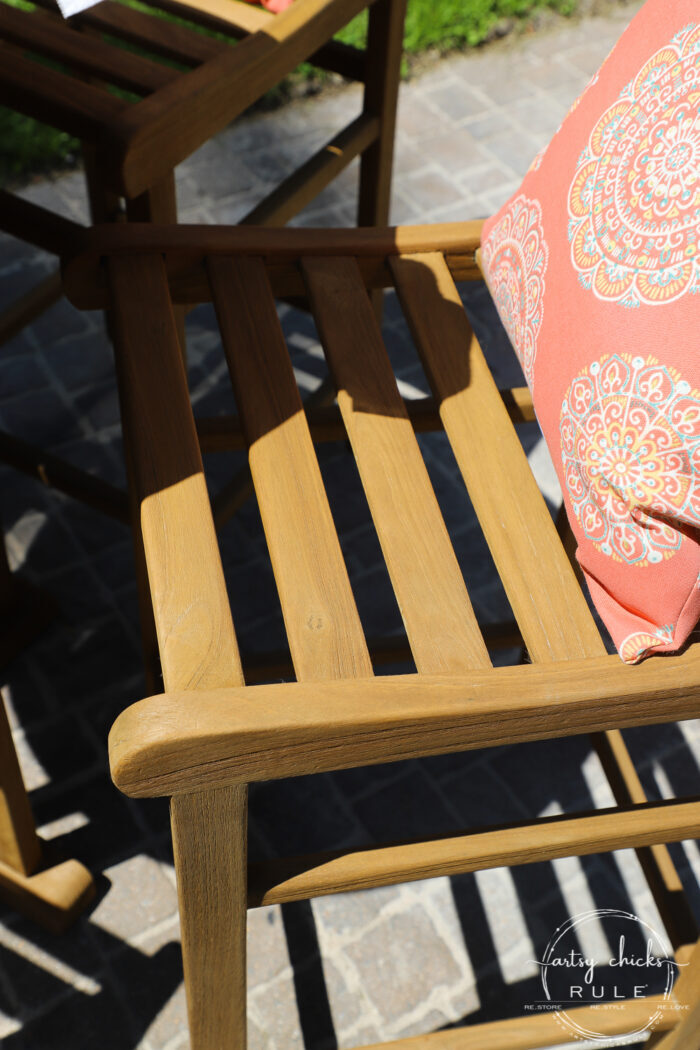
I will say this before I begin talking about the makeover, I know some people probably love that silvery gray color teak turns as it ages. And that is really a beautiful thing but wasn’t the look I wanted. Plus, this set did have some black/mildewy sections too that I did not like. (see on the side of the chair above?)
Below are the links to the products I used to do this makeover.
MATERIALS LIST
I began by applying the Teak Cleaner to one small section at a time.
Then I scrubbed first with the scouring pad and then the brush. Sometimes vice-versa.
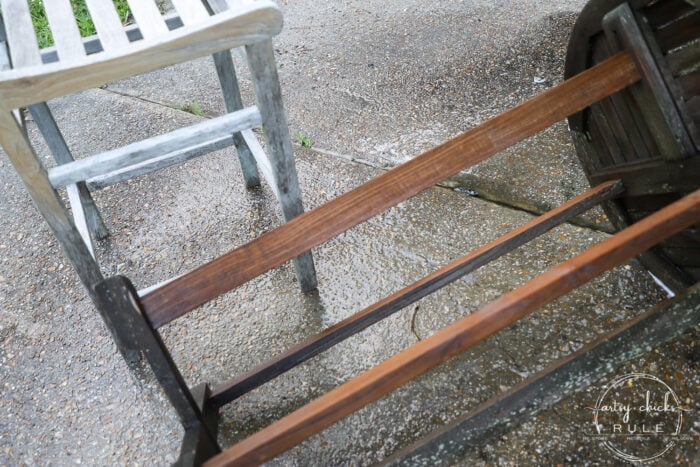
And wow, the color of the teak came peeking through. Just look at that gorgeous wood color compared to the black/gray.
(if you look closely in the photo above, you can see the side of the chair where I first thought I’d sand all the gray off…nope! Yes, it was also working, but can you imagine all those sides, small spaces, etc?)
I originally only started out using the scouring pad but then added on this stiff bristle brush. Game changer!
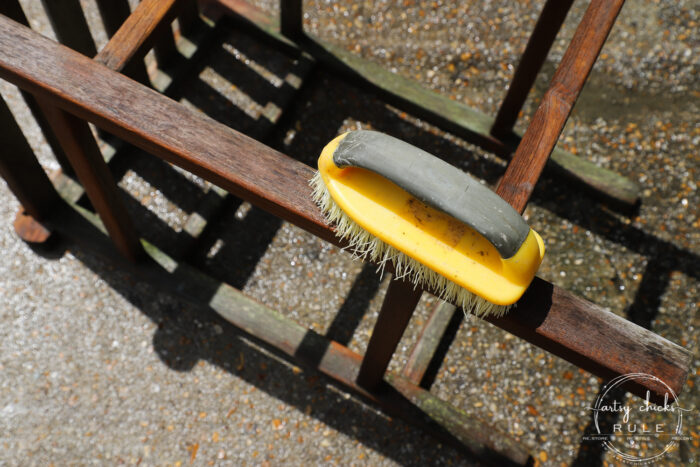
Look at all the gunk that came off when I scrubbed. Yuck.
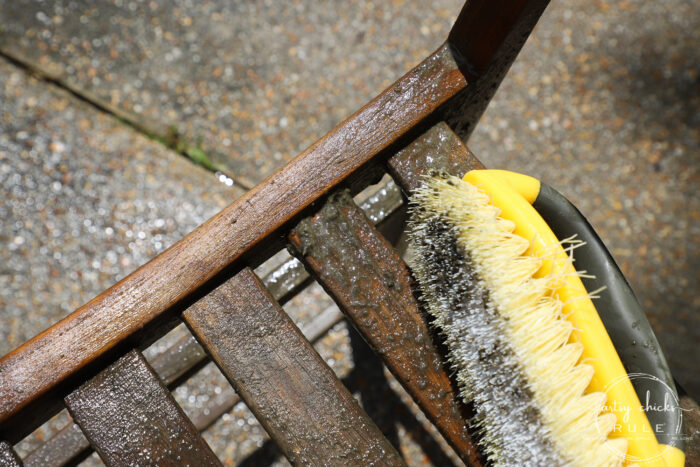
That Teak Cleaner worked wonders.
TIP #1: Use both the scouring pad and the bristle brush. They come at it at different “angles”, so to speak.
Rinse, rinse, rinse.
TIP #2: The bottle says to apply to dry wood but I found that it actually worked a little better if I spritzed the wood with water beforehand. Then when I applied the cleaner it didn’t dry up so fast and seemed to get deeper in and do a much better job.
I continued this until I had done every last section of the table and chairs. (I didn’t spend a lot of time on the underneath sections though)
TIP #3: Be careful where you put this bottle as you are using it. Ask me how I know. lol I had it “out of the way” so I wouldn’t knock it over. (as it’s tall and narrow anyway). And guess what? I knocked it over with the darn hose!! Ugh…almost an entire bottle, gone. I bought it on Amazon but was able to find it at my local hardware store, thankfully, cause I was finishing this job asap!
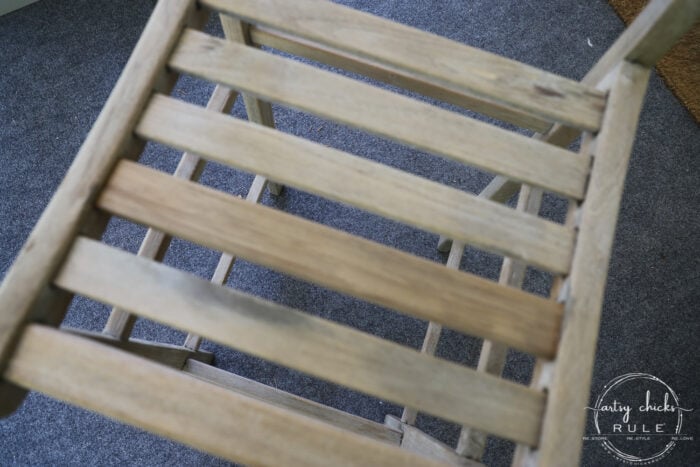
Once it was done and dry, I lightly sanded the entire set to smooth it out. It tended to get a bit rough from the bristle brush and just being wet and scrubbed.
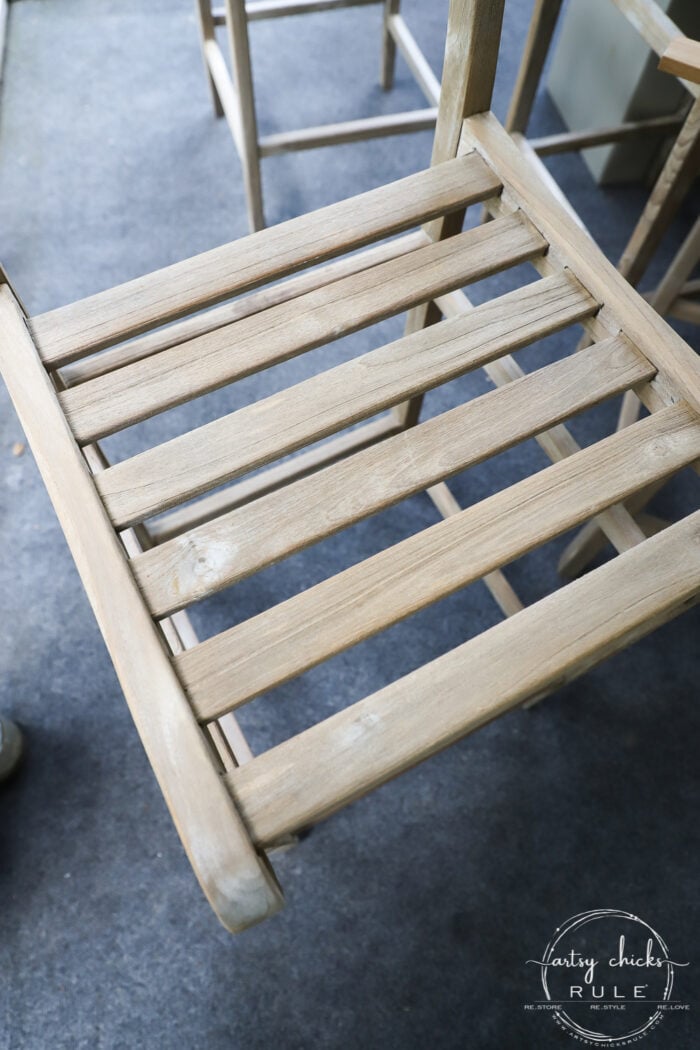
How about that missing chair slat?
I ordered a teak wood plank from Amazon but it was brand new and did not match exactly.
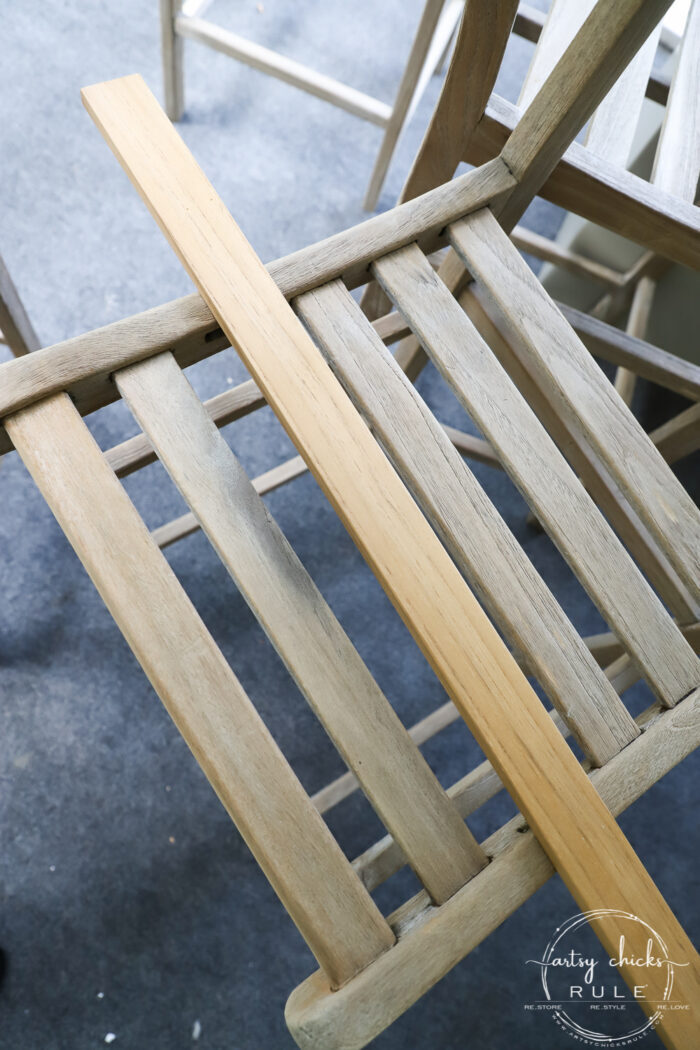
My sweet hubby cut and glued it in for me. I lightly sanded it to round the edges a bit to match the others.
**And because I will probably get this question, let me just explain it the best I can right here.
How did we put the chair slat in without taking the chair apart?
The size was basically perfect so that helped. Now, as for getting it in on both sides without taking the chair apart, that was a little more work.
He chipped away both insides of the “holes” where each end sits a little. But he mostly chipped out the inside of just one side. That way he could put one end in that deeper side and push it as far back as possible to allow for the other side to be tapped down and into place. Then he gently slid it over a little so both sides are sitting well inside each “hole”. He didn’t cut it so short that it plopped right down and in though. He left it as long as possible so it would be well into each “hole” on each side. (so he had to tap, tap, tap on the top until it went down and he slid it in if that makes sense).
He also used wood glue to help them stay nice and tight. It’s very sturdy, probably sturdier than the original ones.
Okay, to show the color of it compared to the original one, here they both are with just some water applied.
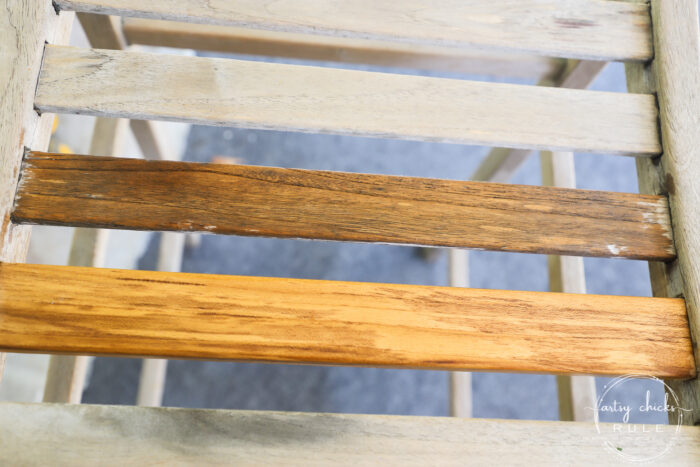
Do you see how that dark, rich teak color comes through when wet?? But the new one below it lacks that depth.
But what to do about it not being exactly the same?
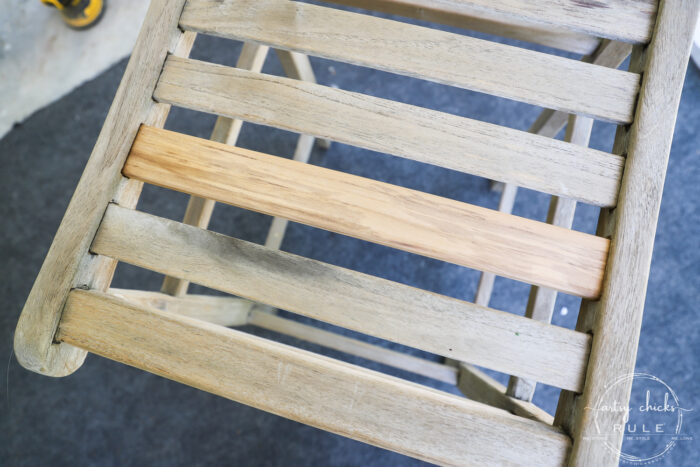
I pulled out my handy “weathered wood” powder (also linked above with the rest of the supplies) and used just a tiny bit as I didn’t want it to go too dark.
I only wanted it to age slightly to match the rest.
And I think it worked pretty darn well. Wait till you see it finished further down, you will not even be able to tell it was ever replaced.
Here is where tip number 4 comes in.
TIP #4: Teak oil, you’ve heard of it right? Kind of a no brainer right? Well, that’s what I thought until I did some research and I read in more than a few places (many, actually) that teak oil causes the wood to turn gray/black due to mold and mildew feeding on the oil. It looks good right away but is not really a long term solution.
And considering all the work I had just done on this set, I certainly did not want to ruin it with the wrong product.
So what to put on it to protect it then?
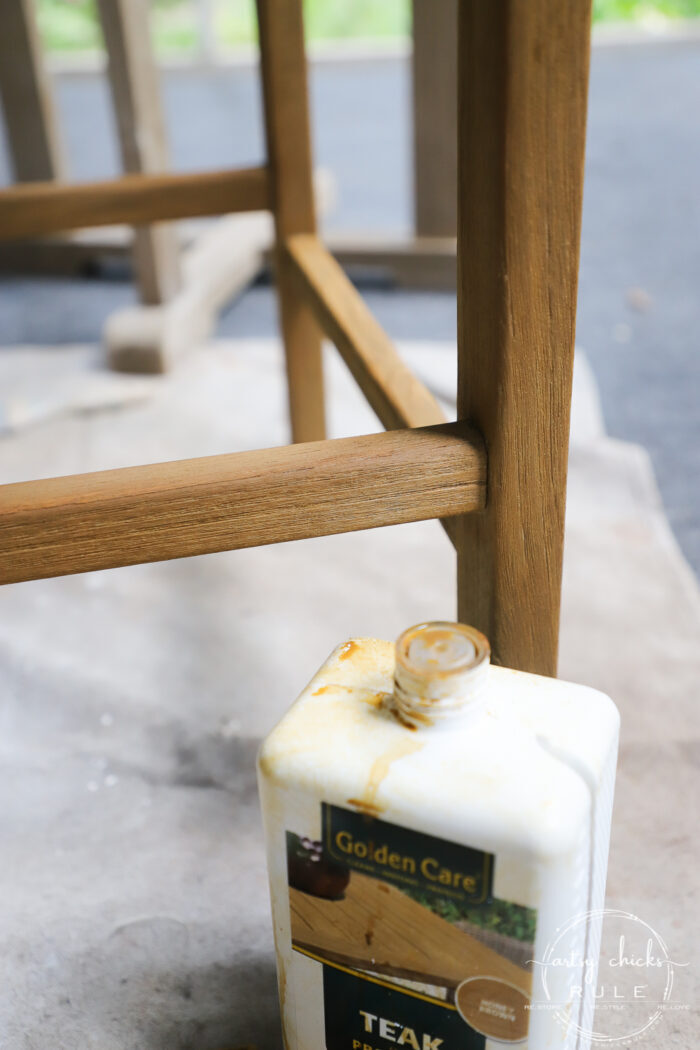
Well, a Teak Wood Protector, of course. (linked above!)
I chose the lightest color (it comes in colors and clear, I used Honey Brown) because I wanted the natural color of the teak to mainly shine through.
Love!
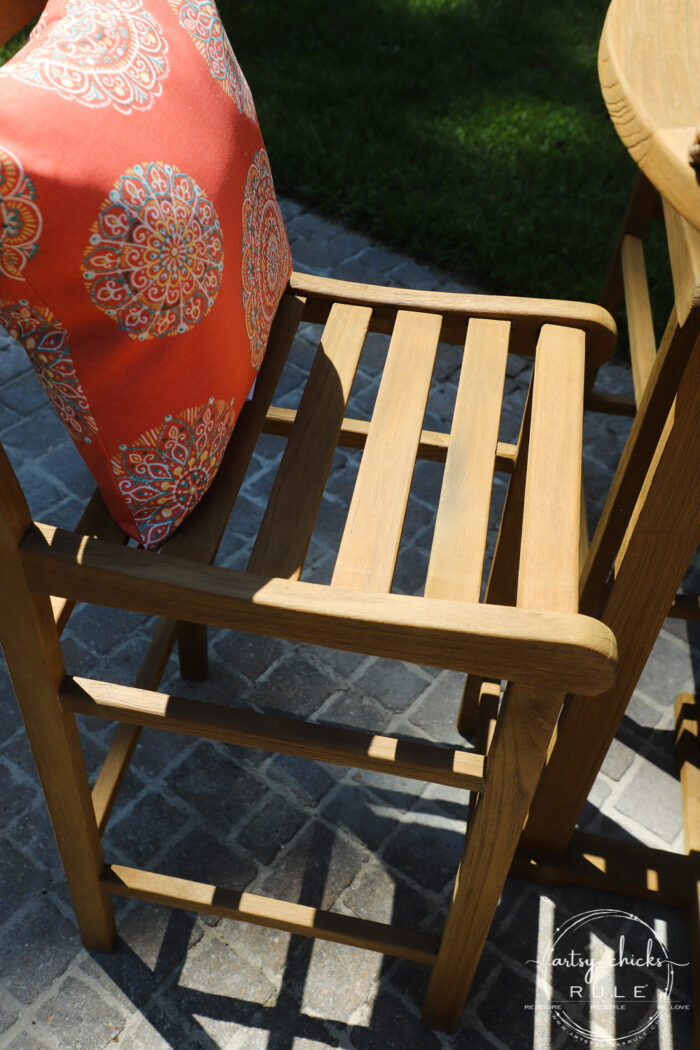
Oh and here is how that chair slat turned out with the Teak Protector applied.
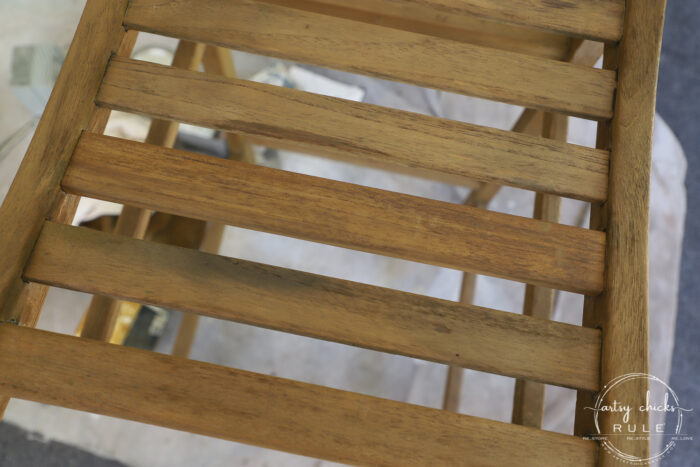
You can not even tell it was replaced. So happy with how it turned out!
I applied 2 coats per the instructions.
TIP #5: Even though I lightly sanded beforehand, I ended up lightly going over the whole set again once it was dry from the Protector to make it nice and smooth feeling.
Now, here are some things to know about this Teak Protector. It does not stop oil stains from food, etc. It’s not really a “water repellant” but from my understanding, you don’t really want to do that as you this type of wood has natural oils so you wouldn’t want to seal it up.
They do have a teak “sealer” (same company as the protector) that does that somewhat but I am not sure I want or need to apply it. I think I will just roll with this and see how it does. I will probably need to apply a coat of the protector each year and it’s supposed to stay this color. We’ll see!
I will definitely keep you updated as this set is going to the beach house deck.
And my final tip of the day on how to restore teak wood furniture.
TIP #6: If I had it to do over again, I’d use a pressure washer on the absolute lowest setting to do the cleaning part.
Can you imagine how much faster and less back-breaking that would be?? lol
I would’ve spritzed the whole set to get it wet, then applied the Teak Cleaner to once piece at a time. Let it sit for a minute and then power wash every inch. And done! (I think, anyway) Much quicker and easier than all that scrubbing. But the scrubbing most definitely works too as seen here. I did have my hubby bring the large table around the front where I was working (the table I shared in Tuesday’s email) to put the chairs up on so I didn’t have to keep kneeling or bending over. What a difference!
And that is when I came up with the idea to give that table another new lease on life. It’s getting the same makeover I gave these…but with the power washer.
Now, there is one caveat to this. You must be very careful that you don’t ruin the wood and why I mention using the lowest setting. It is not often recommended to use a power washer on teak and why I didn’t. But after I was done, of course, I did come across several folks who said it was okay if done on the lowest setting. Your mileage may vary so don’t take my word on that. ;) BUT do stay tuned because I will report back once I’ve done the table in this way and then I can say firsthand.
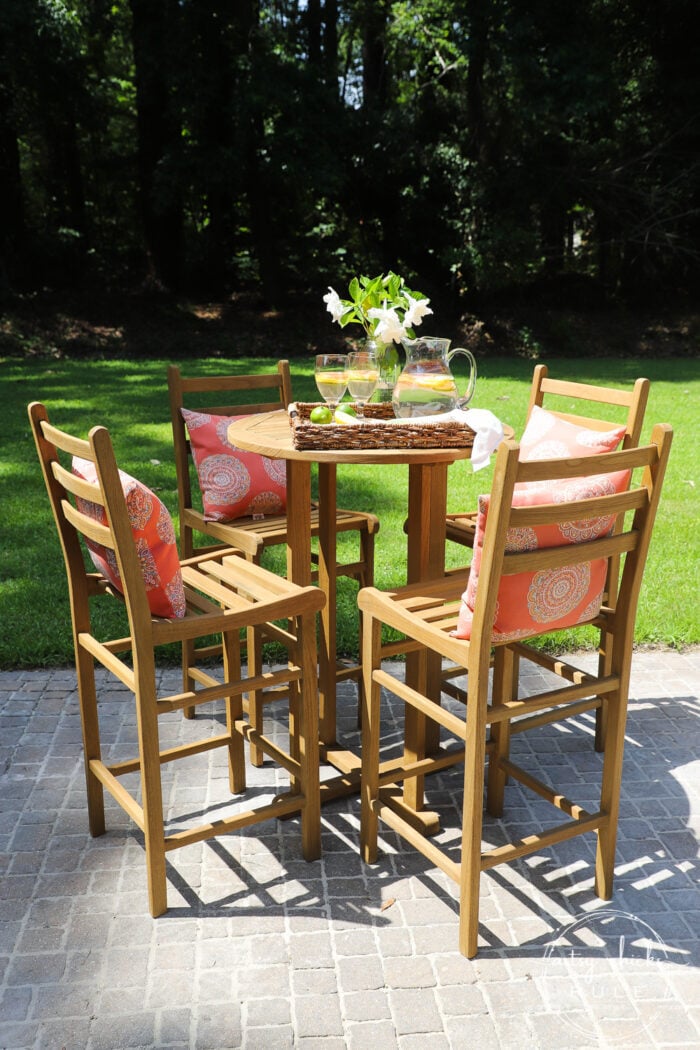
Now for the pretty “after” photos…

Looks like a brand new set of teak furniture.

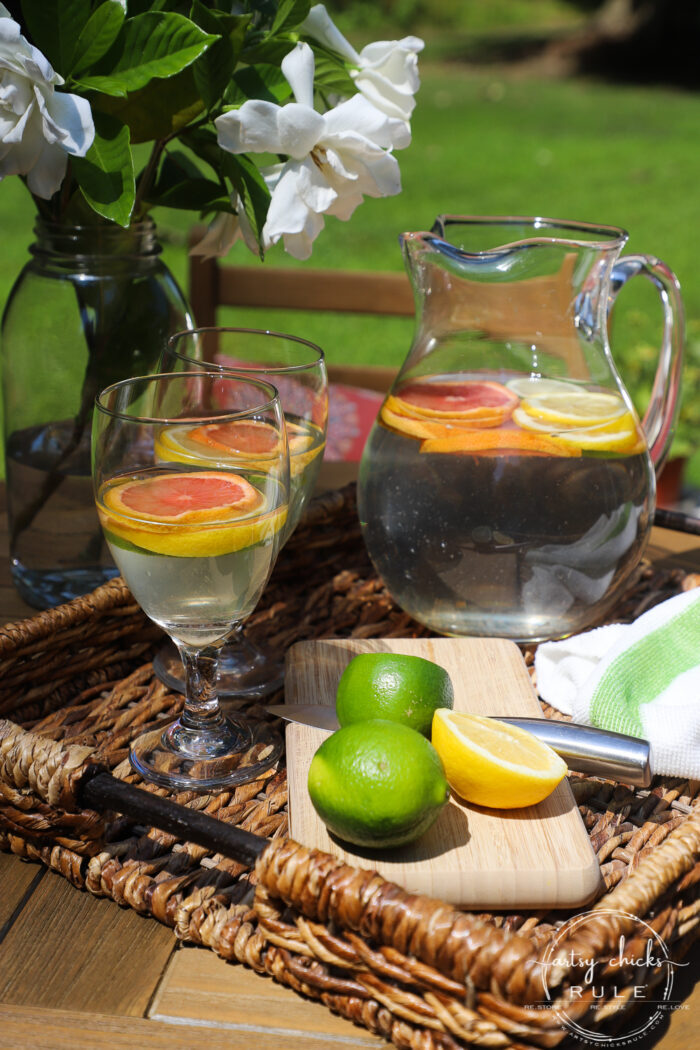
My pretty Gardenias from my yard that I also shared on Instagram wishing it had smell-o-vision!
Oh my, do these smell intoxicating.

You might recognize my little $4 basket from my latest haul….yep, I brought it home!
I mean $4 and in perfect condition? I have yet to decide if I will even do a thing to it.
And one last shot of that replaced chair slat…wouldn’t know if you didn’t know!
The whole set cost me $200 (including the supplies needed to restore the teak) and I have plenty more of the Teak Protector for next year’s refresh, if needed.

I’d say that’s a pretty great deal considering that’s less than just one of the Polywood chairs I was looking for.
PIN it to save it!
I hope you enjoyed seeing this makeover. No, it was not “easy” but it was doable and I also shared another way with y’all that would make it easy. Well, quite a bit easier anyway. As I also mentioned, stay tuned because I’m going to work on that table doing it in that method so we will see. :)
Talking about wood finishes…do you love that “bleached” look? That’s what I’m doing to this one next!
UPDATE!! See it now, here!
I hope you have a wonderful weekend, friends!
xoxo

")


")


W O W ! ! This is a gorgeous makeover Nancy! What missing slat? :) Beautifully done! It was a lot of work and I wish I could pat you on the back. :)
Aw, thanks, Christina!! Haha, yep there was and I sure do appreciate the virtual pat on the back! ;) xo
What a beautiful make-over. Well worth you blood sweat & tears!
Thank you, Cyndi! :) xo
Did you whitewash your brick patio?!!
Hi Lynn! No, it was probably still wet in some of the other photos. I will say though, that we touch up the “grout” every few years and this year we had issues with it and it left a slight haze. So that might also be what you are seeing. :)
Very nice! Would love to see pics of it on the beach house deck!
Oh yes, I hope to post those once it gets there and we are done decorating etc! :) xo
Huge improvement! I feel ya on the work. Just had a fit with a table set too. Ugh! It’s beautiful!
Thanks, Larissa! It’s so fun, isn’t it!! But they can’t all be easy, right? lol xo
It looks so great! I hope it lasts for many years of enjoyment!
Thanks so much, Rose! :) I hope so too! xo
Oh my! Beautiful job you and hubby did! Looks brand new! I wish this had been a couple of weeks ago just finished sanding a teak bench and it’s sitting in the garage waiting to be finished up! I am wondering could I just stain the teak? Seems you have done way more research than me since I never saw the wash and protector you had used! But am interested in making my bench look a little darker! Suggestions?
Thank you, Vicki! You can stain teak but most people don’t recommend it. It has such a pretty natural color but sometimes that color is not what someone wants. So, you can stain it, if so. I will tell you, the teak protector I used has color in it. They have a lighter color and a darker color (I used the lighter) and if you are okay with either of those, that could be one way to go instead of stain. (take a look at the link I shared to it in the post…in the gray box). :)
Hi, Nancy
You have done it again, made something, not so pretty into a Beauty!!! Love it!!!
Thank you and keep enjoying your summer!!!🌞🏖
Thanks so much, Glenda! I hope you are enjoying summer so far too!! xoxo
This is amazing! You get a high five for all that back-breaking work (in the heat too). It’s obvious how hard you worked. It looks beautiful.
Thanks, Kimberly! And thanks for the high five! Yes, I like to tell it like it is around here… no fluffing! lol This one was more work than I thought it was going to be but I love how it turned out. And I’m so glad it’s done!! ;) xo
WOW!!!! AMAZING redo!!! A LOT of work. You really hunted down an answer to make that slat work perfectly….I think I would have put a chair cushion over it and call it a day!!!
Good Job!!! Have a good weekend!!! xxoo God Bless!!!
Thank you, Addie! Yes, but in the end, it was worth it to have it looking like this, right?! Haha, funny you say that… I did consider the cushion thing! ;) xoxo
It really does look new again! I was waiting for this post because I need to restore some outdoor teak chairs. They have some intricate detailing which I am not sure how to sand. You gave some excellent suggestions as far as how to clean and what products to use. Thanks a bunch!
Thank you, Margaret! Oh yes, trying to sand all those areas would be a nightmare. The good thing about the cleaner (and a brush) is that you can get all in those areas easily. Good luck with yours! :) xo
Perfectly beautiful job, Nancy! Looks fabulous!
Thank you, Nancy! :) xo
I love how it looks now! I am not a fan of the silvered look myself. It looks beautiful now!
Thank you, Jennifer! xoxo
Beautiful refresh! Enjoy!,
Thank you, AJ! :)
It looks amazing!! Sounds like it was a lot of work, but it totally looks brand new now! I’m very impressed with how great the new slat blends right in too! XOXO
Thank you, Christy! It was and I’m so glad it’s done! I’m hoping my next one is easier! ;) xo
At your Amazon link for the Teak Cleaner they have a product video where the Teak Cleaner is called Step 1. Right after rinsing it off, they apply a second product from the same company called Teak Brightener as Step 2. Did you use that or have you got any ideas about it?
Yep, they do also have a brightener you can use after the cleaner. They also have that product as a 2-in-1 (cleaner and brightener together) but I decided to just go with the cleaner. My budget-friendly set was getting expensive! ;) I played it by ear and decided after I finished cleaning that I didn’t really need to use the brightener for my purposes. I am sure it might’ve brightened or lightened the wood a bit but I was very happy with how the cleaner alone worked. You could go either way! :)
A pressure washer works amazingly! Highly recommend it, if you do something like this again! Beautiful!
Oh, good to know! I’ll be redoing the other table soon! xoxo
Girlfriend! You make me tired! Beautiful job and such a rewarding set of high quality furniture. You did a great job detailing your steps.
Haha!! You and me both! ;) Thank you, Cecilia!! xoxo
Amazing job!
Thank you, Melissa! xo
You’re email had me at ‘teak!’ On Sunday I was looking out on our patio at alllll the teak furniture that needed attention – 6 big chairs, a big table, 4 side tables and 2 steamer chaises – and thinking, “Maybe it’s time to retire these…” Then I read through your whole experience with the teak cleaner and your thoughts on how you’d do it differently. Thank goodness for you (and Amazon!) – I ordered the cleaner and the protector right then and it arrived the next day. Used your tips (pre-wet, light pressure washing and no scrubbing), and BAM! I was done with half the pieces in about an hour (all 13 pieces took me 5 days just to clean last time). I’m headed outside now to finish them up. Thanks for sharing! 🙂
Oh, that is so awesome, Michelle!! Thanks so much for letting me know! This makes me so happy. :) YIPPEE!! I can’t wait to get busy on my table that I’m going to do this way. Glad to hear it did indeed work out so well!! xoxo
Great job with your teak table and chairs! I have a suggestion the next time you sand and paint chairs that might save your back. I picked up (on the side of the road)an old TV stand on casters that had a turn table. I added a larger piece of plywood on the top which gave me a great base for sanding and painting a set of dining room chairs. I also used a mechanics stool that I bought at Harbor Freight for $20. ( I will tell you that is the best investment – I use it for anything where I have to bend over.) Let me know if you what me to share a picture of my setup. I am really impressed with all your projects!!
Ellen from South Carolina
Oh, this is great information, especially the mechanic’s stool. I need to get one of those! Thank you again, Ellen! :) xo
Looks nice! My friend gave me her old set that is pretty identical to yours. I’m hoping it looks this great when I’m finished with it! How is the Teak Protector holding up? I jumped the gun and bought teak oil, but I’m going to get the teak Protector you suggested.
Thank you, Erin! So far so good on the protector. Now keep in mind, water doesn’t bead up on it like it would with an oil protector. But I think that is the reason it seems to be better in the long run as teak as it’s own natural oils and the oil protectors interfere with that.
I am so very happy you posted this story this morning. I have to teak lounge chairs (think vintage cruise ship loungers) that are in need of cleaning and resealing. When I also read that a pressure washer shouldn’t be used, I ignored the project. So, my question is: How long do you anticipate this cleaning will last? I will go ahead and leave the chairs alone if it will be just a year as my chairs live outside. Great post!
Hi Susan, I think you could maybe use the pressure washer on its lightest setting. Otherwise, you will eat into the wood and that would not be a good thing. You know, honestly, I do not know but it’s so far so good! I would imagine at least a few years. :)
Is there a reason why you used one brand for the cleaner and a different brand for the protector? I noticed there is a protector by the same brand as the cleaner as well.
No, just what I found in my research and went with it! I am sure the other would work similarly. It has held up wonderfully.
This came out amazing! I would love to see a video on how he got that slat into place. Your description is amazing, of the process.. but visuals really help me. my neighbor has an old teak table top that I am trying to fix up. the slat is very bowed.. I am afraid to take the bowed slat out and put a new one in. Your husbands technique sounds great! Just not sure I trust my beginner skillset. Was it a mortise and tenon type ? thank you
Oh, I am sorry, I do not have a video of that…but yes! That is exactly what it was. And the description is exactly how he did it. :)
You can produce your own teak cleaning at home if you’re concerned about the components in the commercial products. To make a teak cleaner, combine 75% detergent and 25% chlorine.
That’s good to know, thank you!!