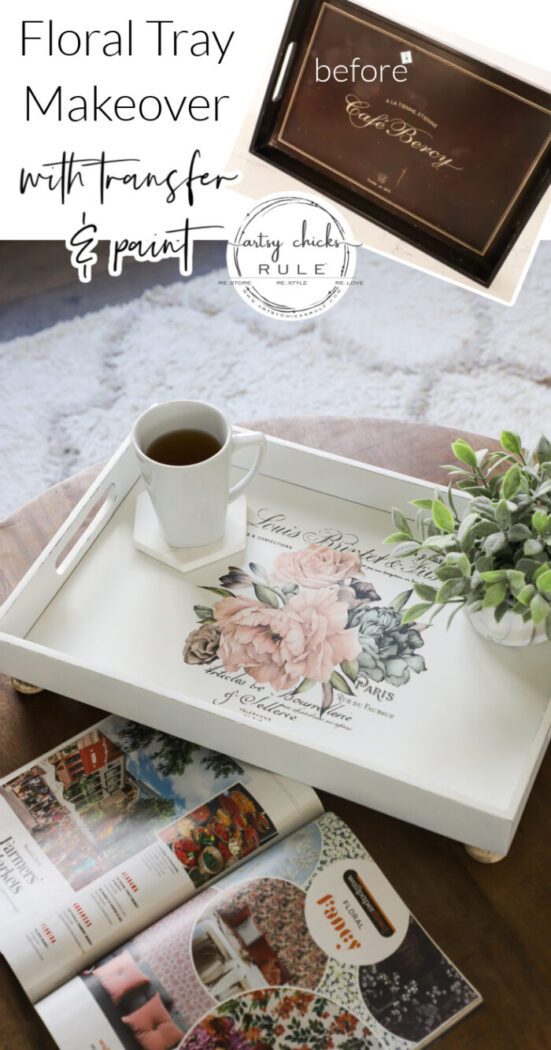
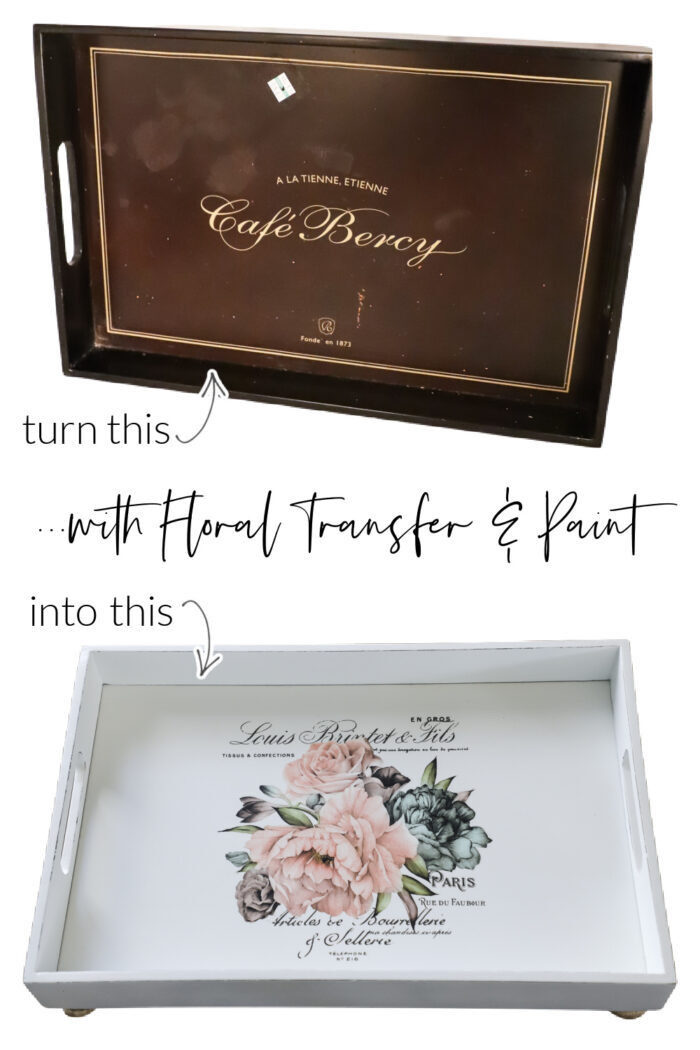
Floral Tray Makeover (with transfer)
A floral tray makeover, this old thrift store tray got a new look with paint, a floral transfer, and knobs for feet!
Hello, and happy Trash to Treasure Transformation Tuesday, my wonderful friends!
If you are new around here you are probably wondering what in the world that is. Well, it’s sort of self-explanatory but here is it…a few friends and I get together every second Tuesday of the month to share our latest “trash to treasures” with all of you. Fun fun!
So be sure to scroll all the way to the bottom so you won’t miss theirs!
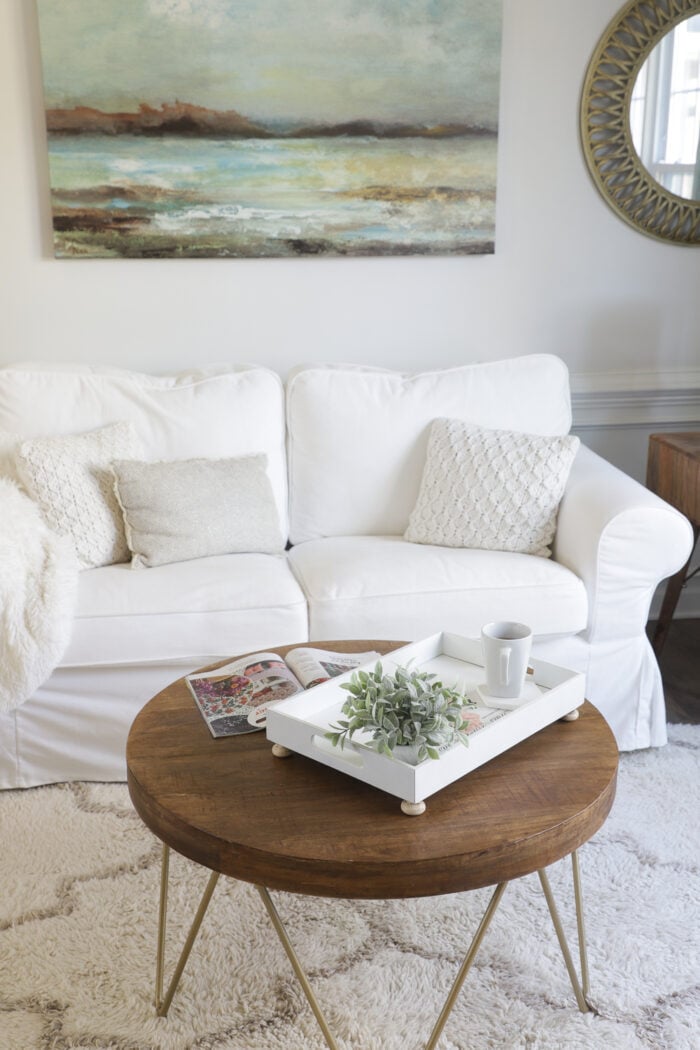
Floral Tray Makeover
I’m sharing a recent thrift store find today…
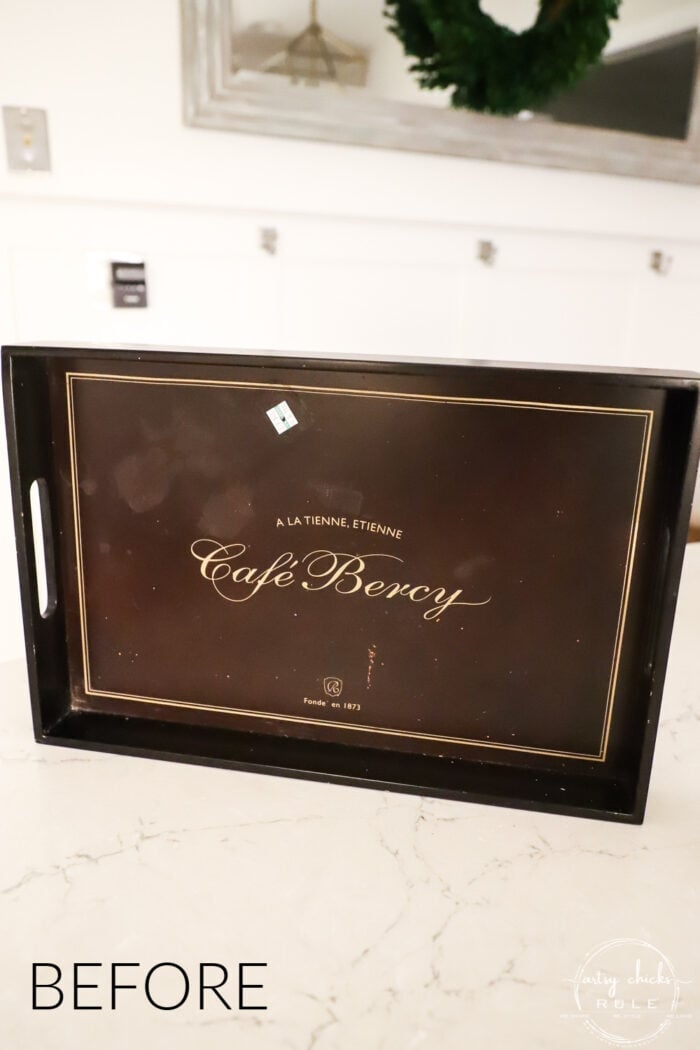
Basic but nice and sturdy tray.
This was a really quick and simple makeover. But I just love how a little paint and a pretty transfer can transform a piece like this.
MATERIALS LIST
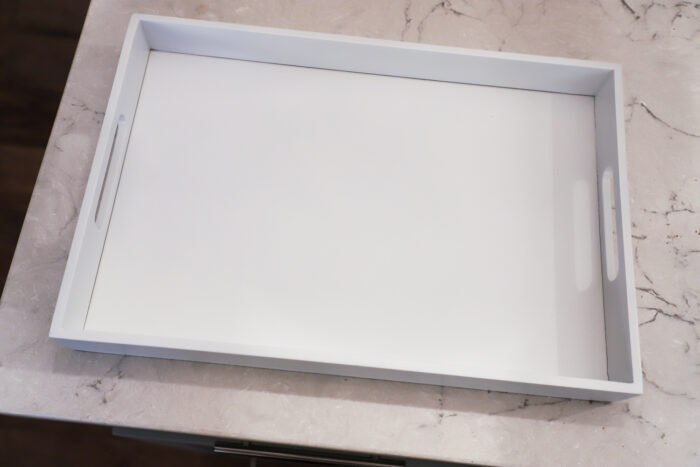
- White Spray Paint in Satin
- Fusion Matte Top Coat
- Rose Transfer
- E6000
I started by cleaning it and rubbing some fine sandpaper quickly over the whole thing. You probably don’t have to do that but I wanted to since it was sort of slick.
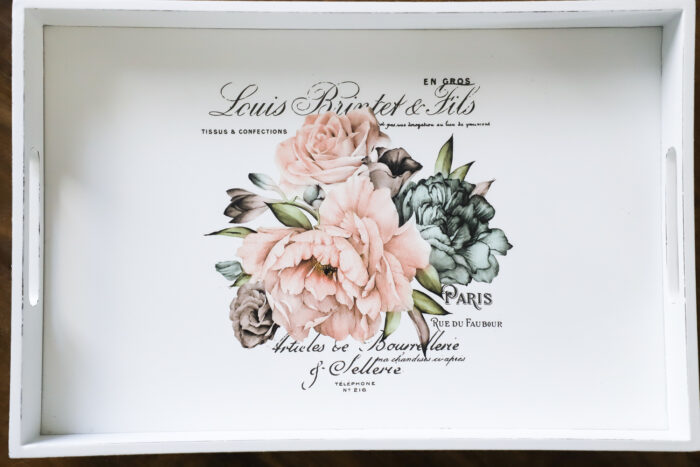
I had already pulled this transfer out of my stash.
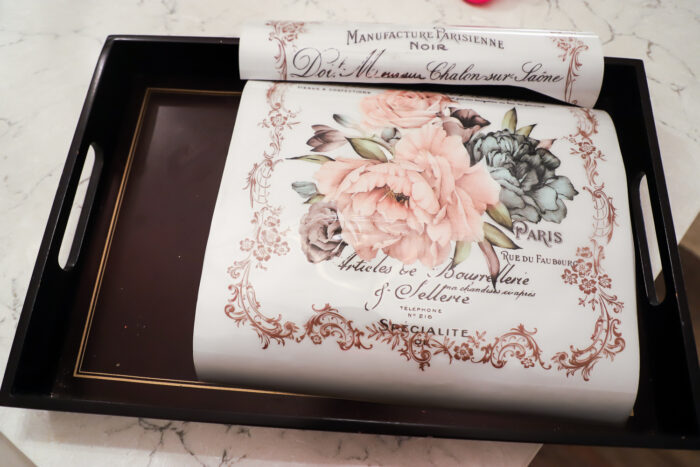
And cut off the frame area so that all that was left was the rose and writing. (I also cut off that top writing too)
This is a set of transfers and I’ve used another from this set already. You can see it on this project here >>> $2 French Floral Bucket Makeover
Once the paint was dry (I left it to sit overnight), I applied the transfer.

You simply peel off the white protective backing, lay it where you want it, and rub it with the wood stick that is provided to transfer the image.
Simple!
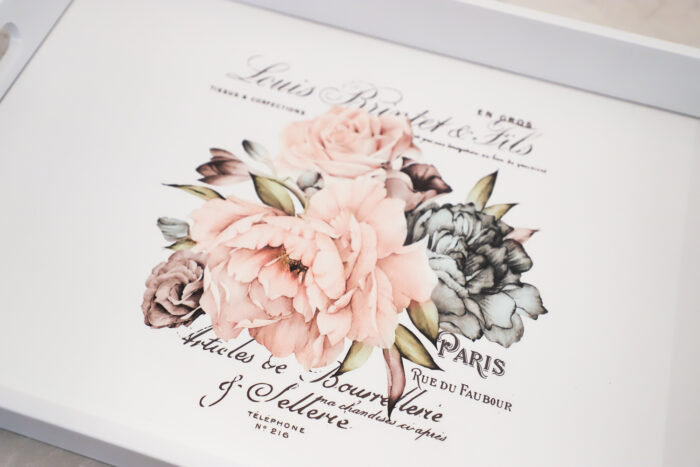
I love these transfers. They are SO very thin and look like they are part of the piece once done.
Nice and smooth.
I lightly sanded the edges to “distress” a little. Then applied a coat of the Fusion matte poly sealer.
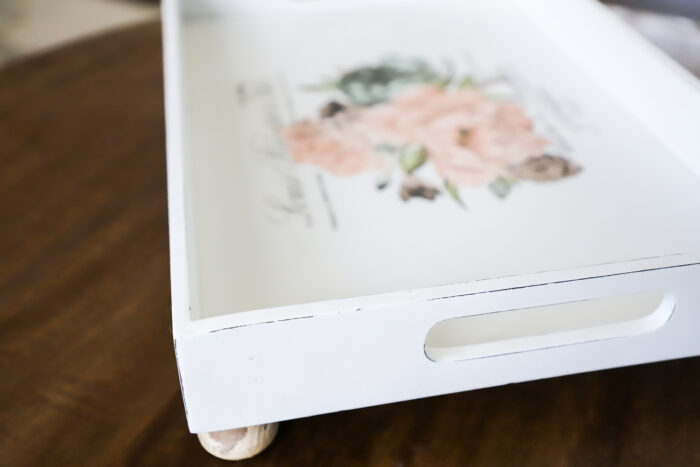
And added some wood furniture knobs for the feet with some E6000 glue. (everything is linked above in the gray box)
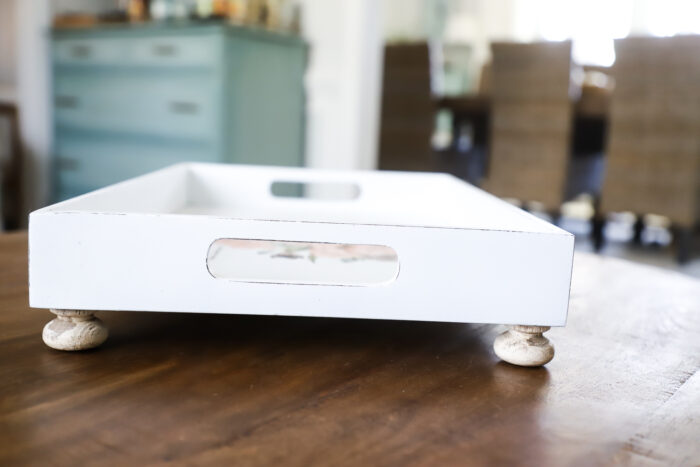
I had originally planned to paint them gold but I loved the variated wood color with the white tray.
They are actually the knobs that came off of the furniture makeover I’m sharing on Thursday. (the entry table a the beach)
So they came in handy! And in perfect timing too.
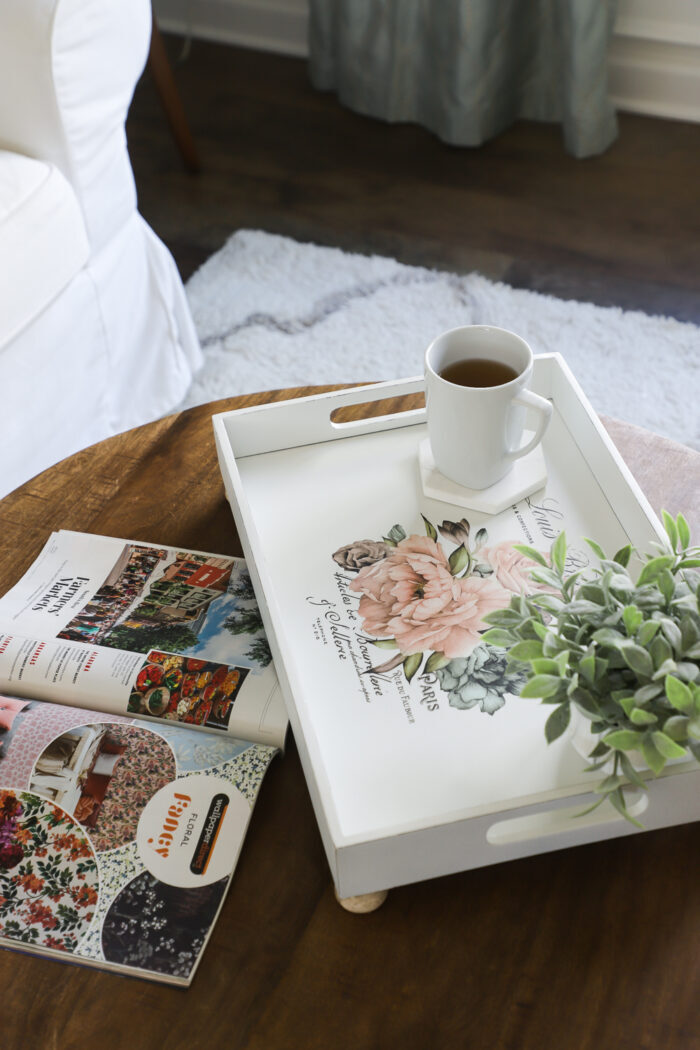
Up close…
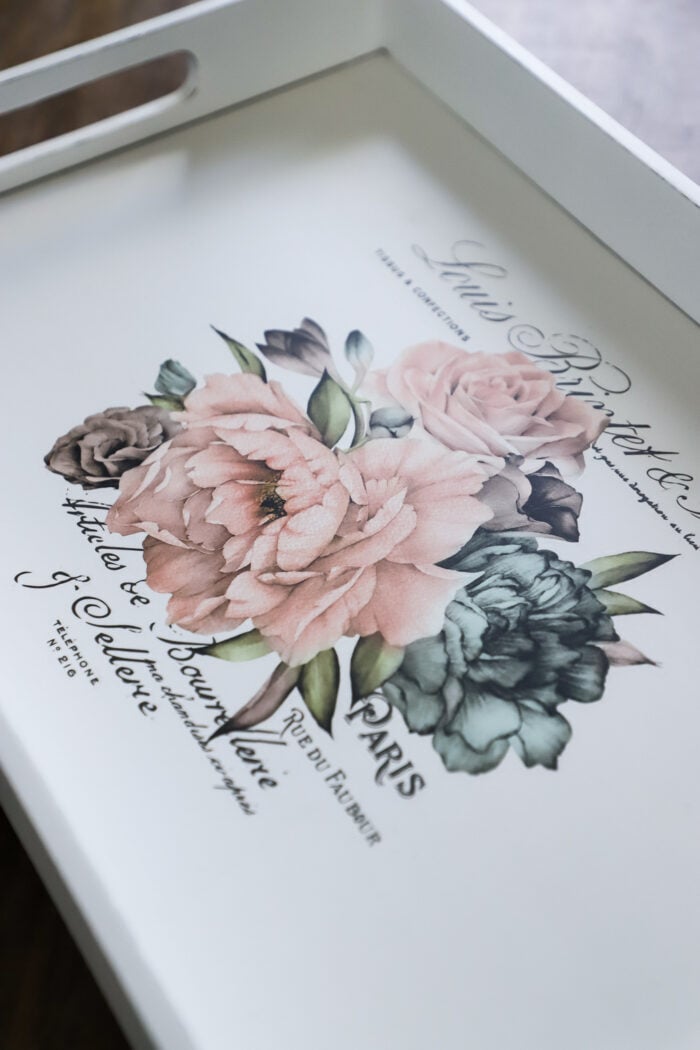
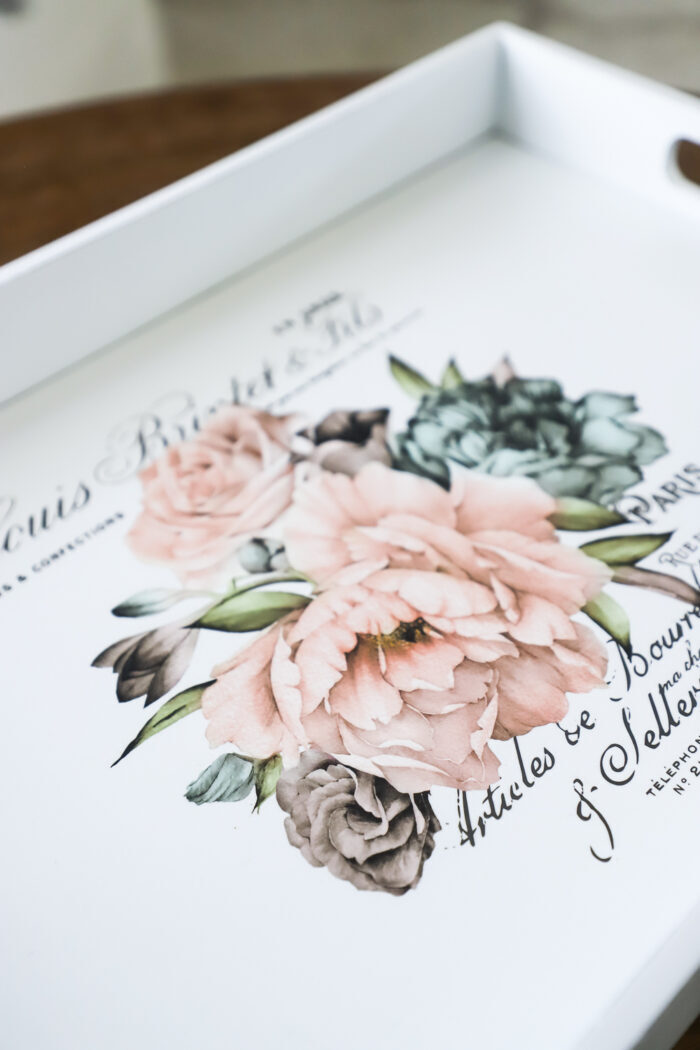
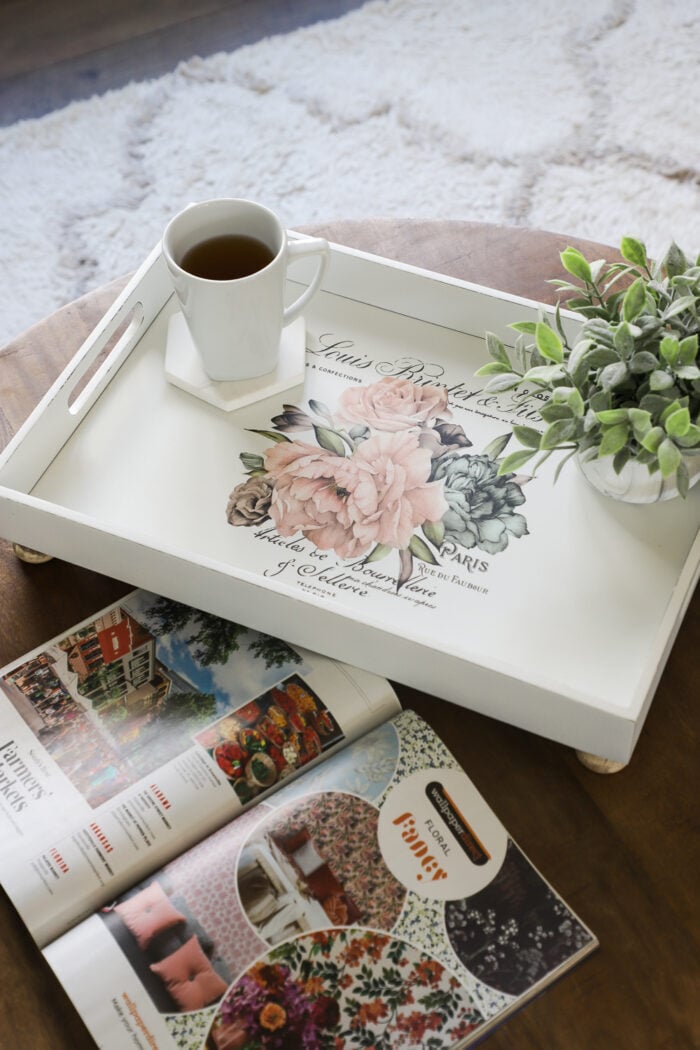
So pretty, I love how it looks now.

And the only photo I got of Ryder today is this one…
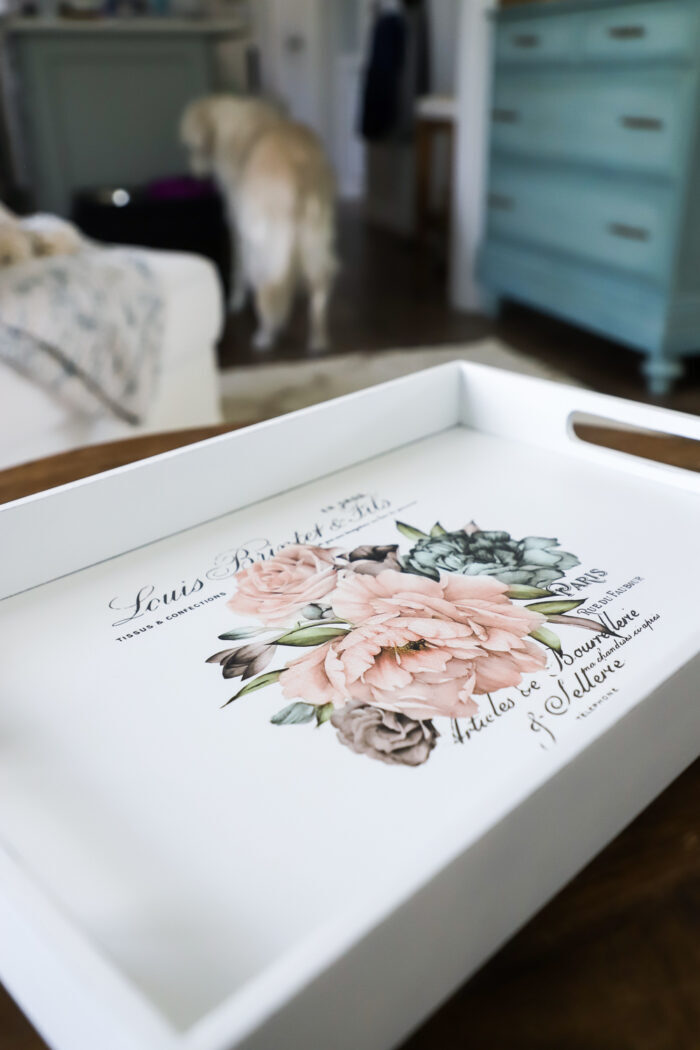
…his backside, haha, he was too busy snacking to get in my photos today. ;)
(If you follow along on Instagram, you might have seen him later in the day in my stories though)
PIN it to save it!
Don’t forget to check out my friends’ makeovers today too! The links to each are below the photo…
Want to see more of our Trash To Treasure series? Click here >>> Trash To Treasure Makeovers
Have a wonderful week, friends! Come on by to see what I did with this one!

UPDATE!! See it now here!!
xoxo

")


")

")


Absolutely gorgeous.
What a beautiful difference! So pretty, Nancy. 🌷
Thank you, Larissa! xo
Thank you, Denise! xo
Hi Nancy, Love the tray. Very Pretty!!!! I’m wanting to redo a sign I have above my cabinets in my kitchen, that say’s KITCHEN. I’m wanting to paint it and cover the word kitchen (it came from Hobby Lobby) the lettering is block style and I’m wanting to change the lettering as I don’t like block lettering. Anyone have any ideas? Is that a slipcovered Ektorph sofa from IKEA I see in the picture? I have one and I LOVE IT!! I was going to order another slipcover for mine only to find out they discontinued the Ektorph, and was supposed to add a new model. I don’t have an IKEA close to where I live. Anyone know what they replaced the Ektorph with? Love the concept of IKEA, but it’s hard to get answers from them.
Hi Ellen! Thank you!! Yes, you can just paint right over it. I’ve done that many times! Then you can either create your own wording and print it out or check in my free printables library to see if there is something you like there. (transferring images info is here)
And yes, that is discontinued, bummer. I managed to snag the tan/beige covers for our living room before they were gone. (and the last sectional at our store for the beach condo!) It looks like they replaced it with something called Uppland. (very similar) You can check out bemz . com for covers. Plus try Etsy too. :)
Nancy this is a beautiful transformation! You know I love the white paint and so glad there are no bleed through issues! :) The rose is perfect. You have me wondering where you will use the frame part of the transfer.
Ryder is so adorable, even from behind. :)
Have a great week and I’m looking forward to the next piece you transform!
Thank you, Christina! No, no bleed-through at all. Oh yes, who knows!! lol And thank you, he’s so much fun. xoxo
Oh my gosh that is absolutely gorgeous!!!!!! WOW! No kidding what paint and a transfer can do!!! That is such a perfect tea time tray, I’d snatch it up in a second!
I have a small wooden tray I painted last year and was thinking I would mosaic it so it is water proof-ish – but I think your transfer idea is much better – just use my heavy duty top coat Gator Hide that I bought from Christy/Dixie Belle maybe?
Your tray is perfect to welcome spring and summer! Bring it ON, Mother Nature!! We did it!!!!
Aw, thanks so much Michele!! :) Yes, it’s amazing how different things can look!! And it’s so much fun to transform them too! Oh…the mosaic would be pretty too! Either way. And yes, you could certainly use Gator Hide (love that too) but I’m really liking the “tough coat” by Fusion as well! I’m with you…bring it on…now!! lol xoxo
Gorgeous!! Transfers are so amazing and this one really brought this simple tray to life! XOXO
Thank you, Christy!! I love transfers so much…they make everything beautiful!! xoxo
I love this lighter brighter look and the transfer you used is so gorgeous!💕
Thank you, Denise! xo
Prudy!!!! Love it!!!
Thanks sweet friend!!! xoxo
Hi Nancy! So pretty. I love this.
Thank you, my sweet friend! xoxo
Stunning. So fresh and just adorable. Anyone would love to have this piece. I love the feet as well. They look as if they have always been a part of the tray! Wish I lived closer to you or I would snatch this one up! (LOL) Thanks for sharing. Have a wonderful week.
Thank you, Sue! Don’t the feet just make it? I just love adding little feet to these trays. :) Hope you have a wonderful weekend!! xoxo
It’s lovely, Nancy! And nice to see a project that didn’t take a week to finish 😄
Oh my gosh, yes, Marcie!!! Haha Too bad they aren’t all like that!! xo
This turned out so pretty, Nancy! The tray looks like it was originally made this way! xo
Thanks so much, Jen!! I think so too! :) xoxo
So pretty! I have some vintage wood trays that need an update. The knobs for feet really “elevate” it, lol! Thanks for sharing, as always!
Thank you, Vicki! Haha, they sure do that!! ;) Have a wonderful weekend, my sweet friend! xo
I LOVE this adorable tray! I would love one like it!!! Beautiful!
Thank you, Rose! :) xo
I love how you styled this tray! Absolutely love the transfer you put on there! Where did you buy the transfer? I am new to your channel, so not sure if you are an affiliate for the transfer. Thank you so much for sharing your craft!
Thank you, Kathy!! That transfer is so pretty, I agree! And yes, I do sell that exact transfer in my shop but it is “out of stock” and on order. I am expecting that order with that transfer in it, next week. Also, welcome!! So happy to have you here. :) xo (also, here is the link to the transfer, it shows out of stock right now but I will update it next week when it’s back in stock)