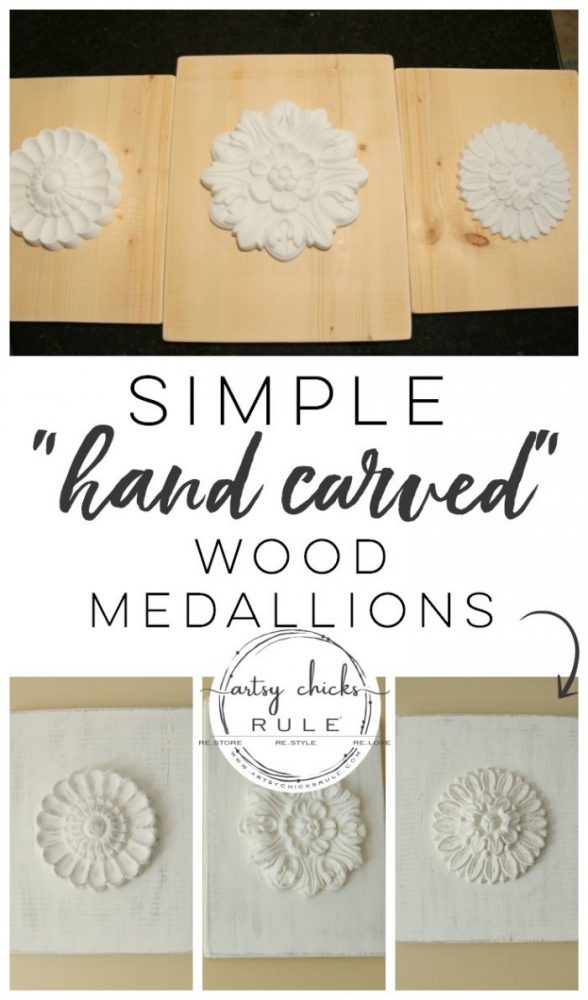
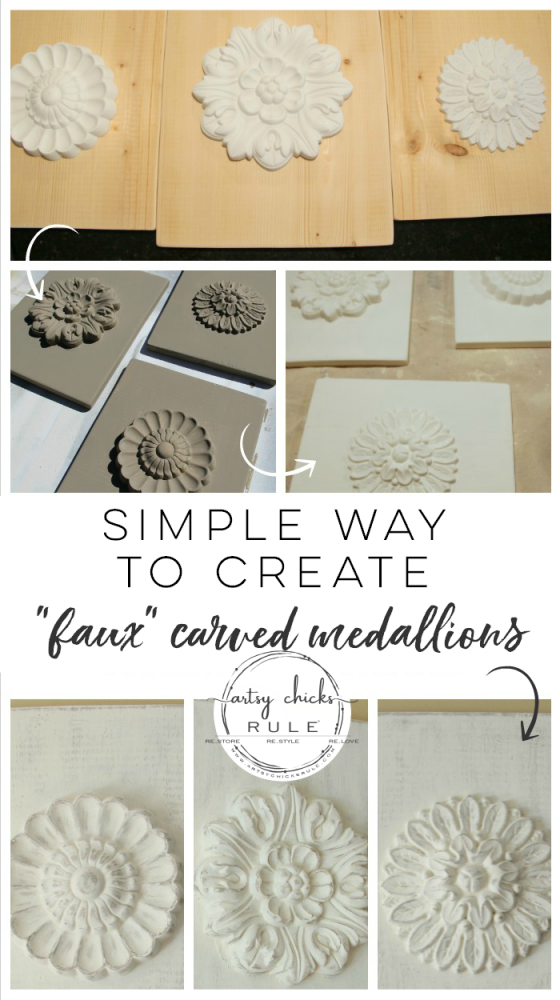
Home decor doesn’t have to be expensive….or hard to create. Today’s DIY “hand-carved” wood medallions are the perfect addition to any decor! (and won’t break the bank!)
Post updated 3/2023
I have a super fun (and super easy) project to share with you all today.
And you can make your own too. Really. Because did I mention how EASY it was to make them?
And no, they are also not actually “carved” but I’m okay with that too. Since I have Amazon Prime, I always start my search there for items I need (most of the time anyway!)
I found these… (listing them here in case you’d like to make a set of your own) …
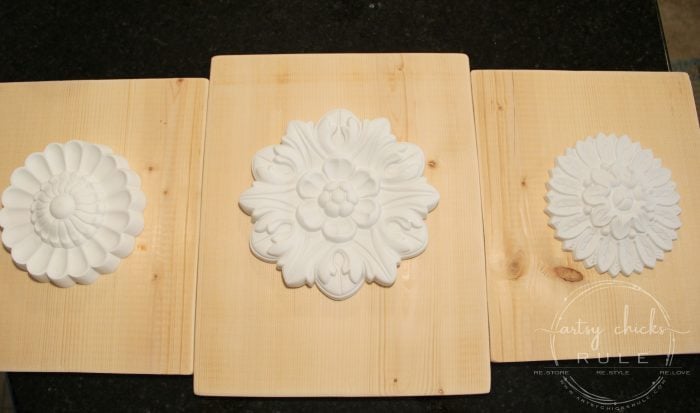
But here’s what they looked like this when I received them. (minus the wood, of course)
(EDITED TO NOTE: The size of each is as follows: They are 3/4 inch thick. (so, 1 by)
The 2 smaller ones are 12 x 10 and the middle one is 14 x 11)
My husband cut the pieces of wood per my specified measurements.
We had the wood left over from another project so that was easy (and inexpensive) too.
He even did the sanding for me (I hate sanding but will do it if I have to).
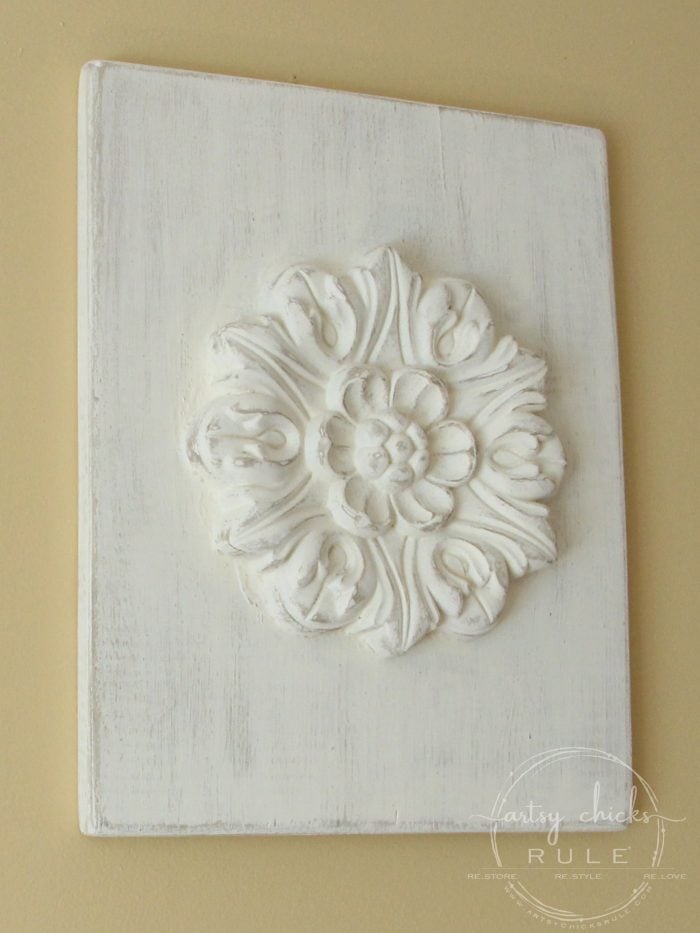
I had him ’round’ out the corners and edges for a softer, hand-made look.
The “inspired by” ones are very square edged but I wanted mine a little softer looking.
That’s the beauty of making your own. You can create them how you want them.
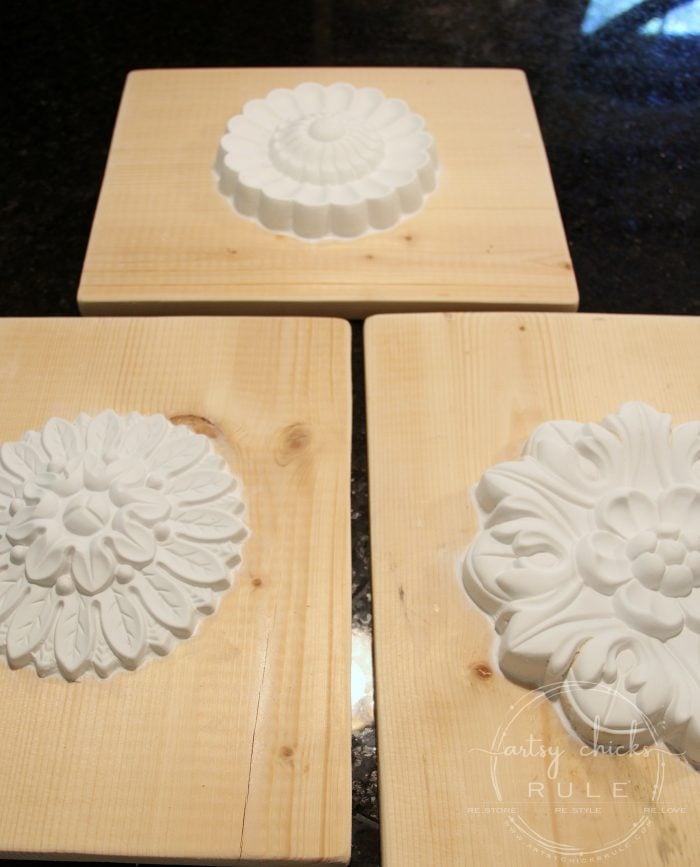
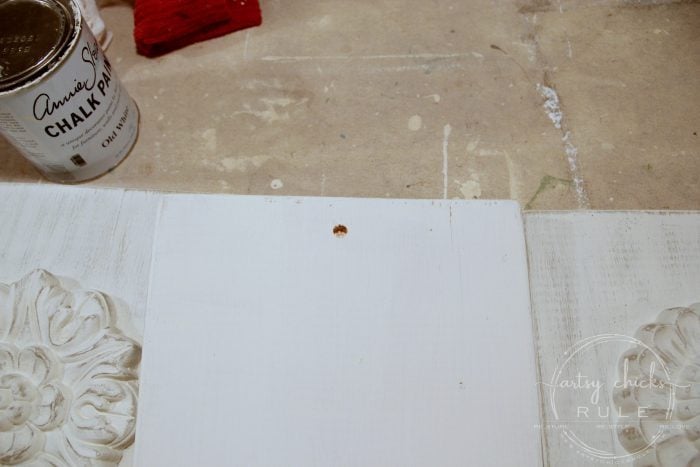
I glued the medallions to those boards with this wood glue.
It worked great, once dry, they were SOLID.
After the glue was dry, I caulked around the edges to seal it to make it seamless.
**Be sure to use paint-able caulk for this step.
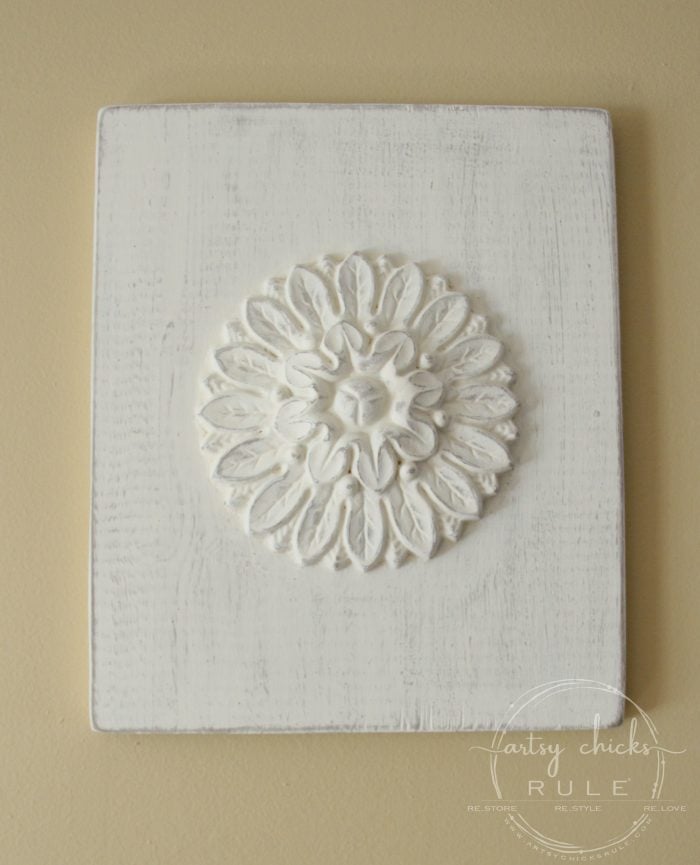
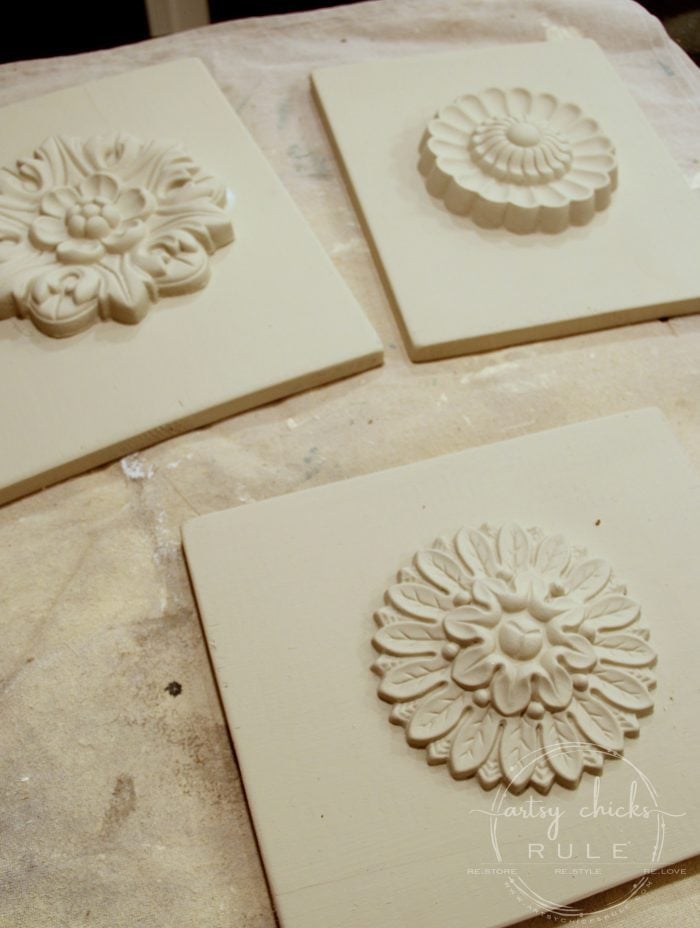
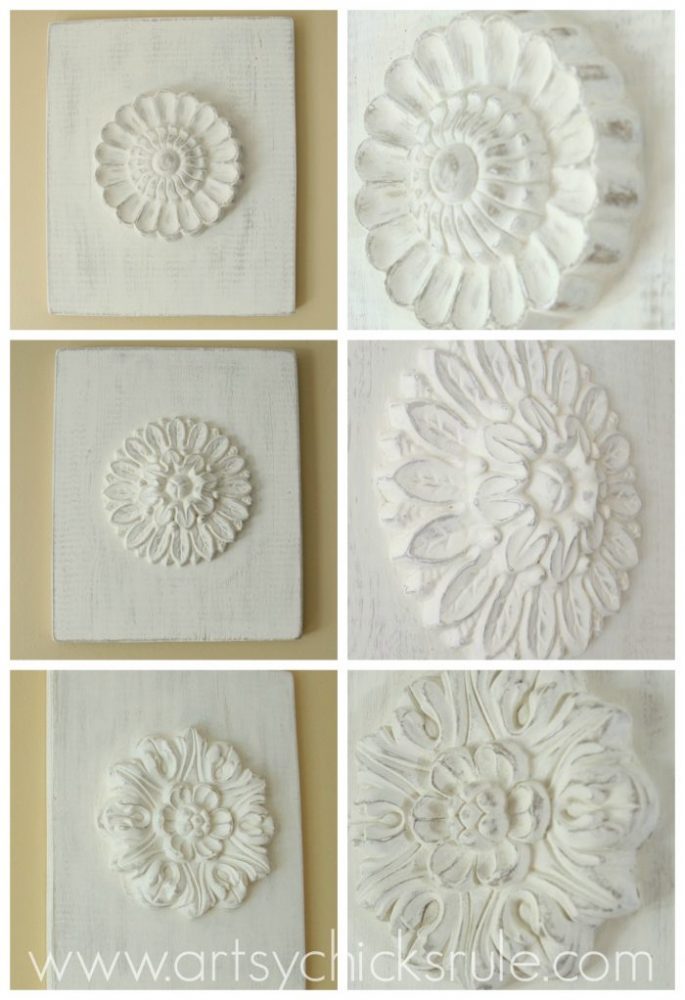
Once that was dry I originally painted them with one coat of Chalk Paint. A similar color is this one.
Next, I painted one coat of medium shade over that…
Then over those 2 paint layers, I painted one coat of off-white.
I wanted a nice layered effect with these colors.
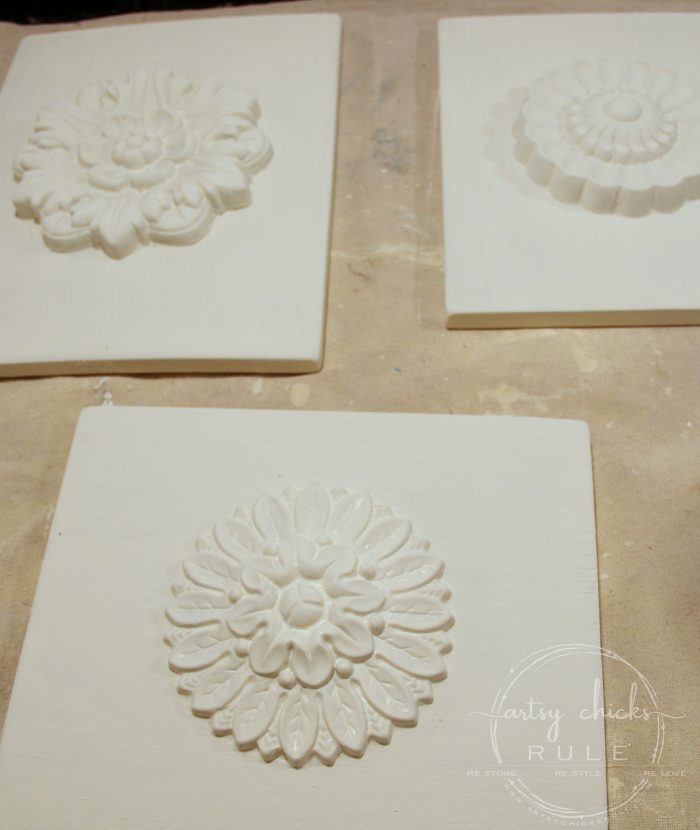
Once distressed, I wanted to be able to see a touch of each color.
You don’t have to use the same paint I used, but try to find similar colors to get this same effect.
They created dimension…and depth.
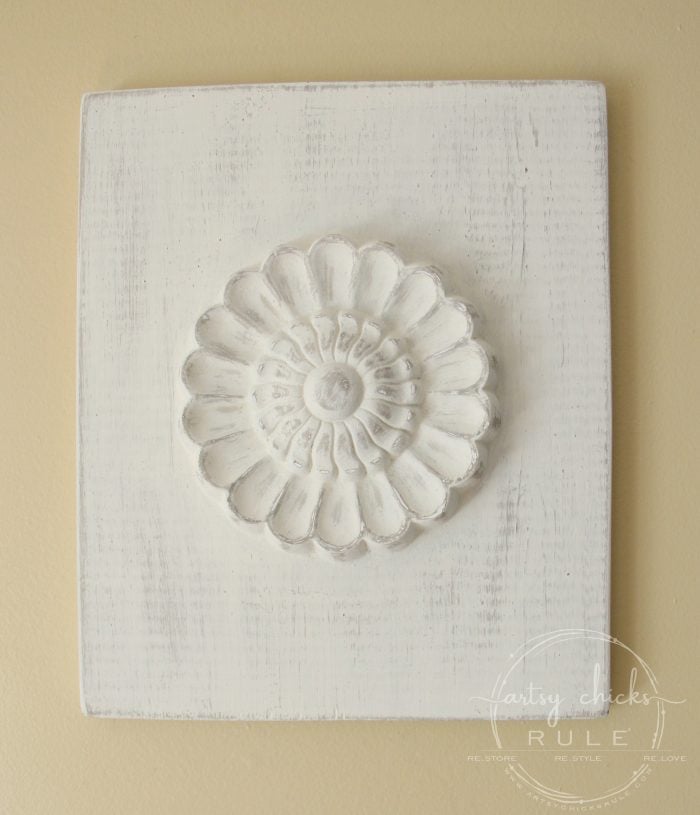
You can see how different they look once distressed….. (from above to below)
It’s hard to tell in the photos but you can see a bit of each color, which I just love.
It really does add to the depth and dimension.
To seal them, I simply sprayed them with a flat sealer. I didn’t want them to have a shine to them.
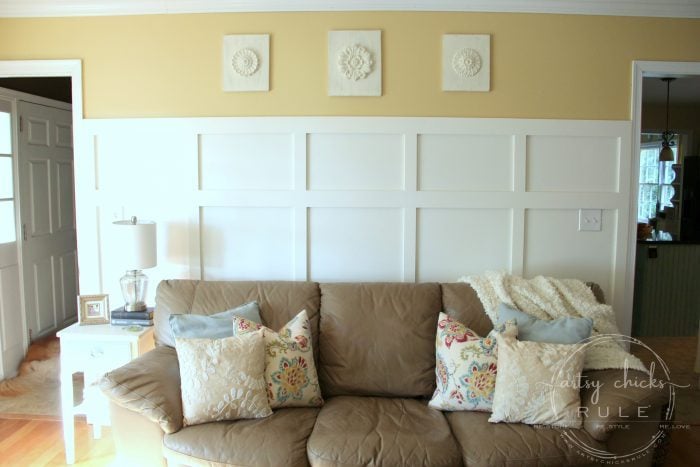
And since I wanted these to hang flush with the wall, I had my husband drill holes in the backs for me, like so…
This is where they were originally hung in my home…
But I’ve since taken them down. (Wish I still had that old leather couch! I’d paint it now!! See my post on painting leather here)
I just pulled them out of the garage and hoping to use them in my decor again after the home remodel.
Our sweet girl Lexi was “guarding” the door over there on the left of the photo. Can you see her? I sure do miss her!
Here are a few more photos of them in our family room. (and how our family room used to look…here’s a recent updated peek)
Gosh, my style sure has changed since I took this photo. But wow, it’s been almost 10 years!
It’s amazing what different paint, furniture, and curtains can do to a room.
With my light tan IKEA furniture and Sea Salt walls (and the dark brown foyer is gone too), this room is so light and bright.
Even more so than it was here.
And would you believe this room used to have dark brown wall paneling?
Oh my, it was so dark in here, I called it the “cave”. You can see that whole remodel (and those DARK walls) >>> here.
So what do you think? Would you tackle a project like this?
I say “tackle” but it really wasn’t much to tackle!
If you don’t mind that they are not actually ‘carved’ wood pieces then I think you will love them.
Now, just to note, this project cost me just under $26 because we had the wood and paint I wanted to use on hand.
BUT you could purchase small bottles of acrylic paint in similar colors from the craft store along with several pieces of wood and recreate this look for still well under $50.
It was definitely fun to do! And crafty! But even better, thrifty decor that doesn’t look thrifty!
Pin it to save it for later!
Have a great week friends! I’ll see you next time with this! (blue and white tiled tray)
Hi Nancy-
What a beautiful job. I love them –
Also one question – do you have a post on how you did the walls?
Thanks so much – Have a great day..
Rose
Hi Rose :)
Thanks so much! And no, I sure don’t…yet. It’s one that has been “in the making”. I’ve had quite a few questions about the walls over the last year and yours is one that pushed me to get it done! ;)
It is “faux” board and batten. I will hopefully post about it in the next month or so!
Hope you’ve had a fabulous week so far!
xo
Nancy
I love love love these Nancy – so pretty and shhhh (nicer than the originals). A few years ago I bought some seashell medallion placques and had them hanging in my bathroom but one fell off the wall and broke. You just ended my unsuccessful attempt to find a replacement. Thanks for the inspiration!
Thanks Andi!!! And yes, girl, absolutely!!! It’s just TOO easy with that 2 day free shipping. I can order today, tomorrow..the next day. I can’t stop myself sometimes!! lol
xo
Nancy
Thanks Jen! I am really enjoying them..and they are such a surprise (last minute choice for our tour) and now I’m so happy I have them! Love how that works out sometimes! :)
Nancy
So cute, Nancy! And easy enough that I think even I could “tackle” these! I’m with everyone else… I like yours better than the originals. The way you have done them, you can’t even tell they aren’t carved wood.
I love them! All those separate coats of paint were really worth it. Very nice distressed look.
What do you think of your doing two more and laying them horizontally on each side of the original three, all even at the bottom? Or make the two new ones of a narrower design and laying them horizontally? I love your white paneled walls and the splash of color above.
These are so pretty, Nancy!! I was looking at something a bit similar to recreate from PB I think, but I was pricing ceiling medallions, and quickly decided that was NOT a thrifty project. Yours turned out fantastic!! Pinning and sharing XO XO
Thanks Christy!! :) Oh too funny!! Yes, it can be pricey but I happened to find these very reasonably priced! But the options are surely limited in this size.
Had fun today! We should make it a regular! ;)
xo
Nancy
I love your medallions and your savings too! You always work majic with paint and imagination my friend:) I’m loving your room too :) Good job on your project!!
Nancy that is an unbelievable knock off and I cannot believe the money you saved. These are beautiful, just like all of your projects. Love everything you do!
Hi Christina,
You can use a sanding sponge or a small piece of very fine sanding paper. After painting, and drying, lightly rub over the edges where natural wear would occur.
It’s pretty easy and forgiving! :)
Nancy
Beautiful, yet simple project. I love the medallions. I just happened to see medallions in Michaels this past week. It’s a new product that’s located with home decor stuff and quite inexpensive too. Not sure if it’s artminds brand but your project is making my wheels turn in my head. As always, I love your projects, their beauty and simplicity and most of all, your generosity in sharing the “how to”!
Thanks Rupa! This was a really fun project. I’ve actually removed these and put a large art piece in it’s place.
I need to find a new spot for these though because I love them! :)
xo
Nancy
I am thrilled to see this DIY! I actually ordered the ones from BD, but they cracked with a couple of weeks. They sent a new set and they cracked as well. I was heartbroken because I LOVED them. Now I can make my own!!! Thank you!!!
Well, that sucks, really! But that’s great you found mine since you loved them so much and they didn’t work out for you! I really love how they turned out. I know you will too. :) Have fun! xoxo
Hi Nancy! Better late then never. That’s me! I love these. Thank you for sharing. I’m looking forward to your Spring wreath blog. Your wreaths are always so pretty.
Want to be inspired, learn new skills, discover all the tricks to furniture makeovers, creating new out of the old and more? You'll also receive my FREE ebook "Creating Fabulous Finishes" PLUS access to my private Printables Resource Library, too!
Sign up to get the Weekly Newsletter! Our emails include an unsubscribe link and you may opt-out at any time. Your information will *never* be shared or sold to a 3rd party.


")
")


Great project. Loving the end result. I would totally take this one on! lol
Love them!
Hi Hope!!
Thanks so much!! Yes, it was so easy!!!
I was even surprised at how simple of a project this one was! ;)
Nancy
Hi Nancy-
What a beautiful job. I love them –
Also one question – do you have a post on how you did the walls?
Thanks so much – Have a great day..
Rose
Hi Rose :)
Thanks so much! And no, I sure don’t…yet. It’s one that has been “in the making”. I’ve had quite a few questions about the walls over the last year and yours is one that pushed me to get it done! ;)
It is “faux” board and batten. I will hopefully post about it in the next month or so!
Hope you’ve had a fabulous week so far!
xo
Nancy
Beautiful! I like your version even MORE than the Ballard ones!
Thank you Melissa! :)
Nancy
As always Nancy – your creativity is awesome! I agree with Melissa – I too like them better than the Ballard ones!
Aw thanks Lilli! :) These were so super simple!! I could make them all day long…not that I’d want to! ;)
Nancy
I love love love these Nancy – so pretty and shhhh (nicer than the originals). A few years ago I bought some seashell medallion placques and had them hanging in my bathroom but one fell off the wall and broke. You just ended my unsuccessful attempt to find a replacement. Thanks for the inspiration!
Thank you so much Marie! :) Oh that is so great! Yes, yes make one!
xo
Nancy
I’m loving these Nancy! I like yours better than the original!
Thank you Shanna!! :)
Nancy
Love how they turned out! Hey…I have Amazon Prime too….does that mean I can go shopping now????
-andi
Thanks Andi!!! And yes, girl, absolutely!!! It’s just TOO easy with that 2 day free shipping. I can order today, tomorrow..the next day. I can’t stop myself sometimes!! lol
xo
Nancy
These turned out so pretty! I love the simplicity of them – and your layered paint technique. They look really good with your decor :)
Thanks Jen! I am really enjoying them..and they are such a surprise (last minute choice for our tour) and now I’m so happy I have them! Love how that works out sometimes! :)
Nancy
Wow! Yours look awesome! Amazing job!
Thanks Leslie!! :)
Nancy
So cute, Nancy! And easy enough that I think even I could “tackle” these! I’m with everyone else… I like yours better than the originals. The way you have done them, you can’t even tell they aren’t carved wood.
Good job! xo
OH you can so tackle these Karen!! They are stupid easy. ;)
Thank you!! That is exactly what I was hoping they’d look like!
xo
Nancy
Beautiful! You inspire me! :)
Aw thank you Jayne!! :)
Nancy
I love them! All those separate coats of paint were really worth it. Very nice distressed look.
What do you think of your doing two more and laying them horizontally on each side of the original three, all even at the bottom? Or make the two new ones of a narrower design and laying them horizontally? I love your white paneled walls and the splash of color above.
Thank you Gwen!! :)
Oh yes, I think there are all kinds of variations that you could create! That’s the fun part right?! Love your ideas! :)
Nancy
These are so pretty, Nancy!! I was looking at something a bit similar to recreate from PB I think, but I was pricing ceiling medallions, and quickly decided that was NOT a thrifty project. Yours turned out fantastic!! Pinning and sharing XO XO
Thanks Christy!! :) Oh too funny!! Yes, it can be pricey but I happened to find these very reasonably priced! But the options are surely limited in this size.
Had fun today! We should make it a regular! ;)
xo
Nancy
I love your medallions and your savings too! You always work majic with paint and imagination my friend:) I’m loving your room too :) Good job on your project!!
Thanks Wendi! :)
xo
Nancy
Wow Nancy I have seen these in Ballard Designs and loved them! You did such an incredible job knocking this off!!
Thanks a bunch Dria!
Nancy
Nancy,
I love these!!! What a great idea. They are perfect over your couch! ~Christy
Thanks Christy! :)
Nancy
Nancy that is an unbelievable knock off and I cannot believe the money you saved. These are beautiful, just like all of your projects. Love everything you do!
Aw thanks so much Jeanette! :) Right back at ya! …and I know, crazy how much is the price difference. And these were SO easy to make.
Nancy
Could you give some detail on how you distressed the wood?
Hi Christina,
You can use a sanding sponge or a small piece of very fine sanding paper. After painting, and drying, lightly rub over the edges where natural wear would occur.
It’s pretty easy and forgiving! :)
Nancy
Beautiful, yet simple project. I love the medallions. I just happened to see medallions in Michaels this past week. It’s a new product that’s located with home decor stuff and quite inexpensive too. Not sure if it’s artminds brand but your project is making my wheels turn in my head. As always, I love your projects, their beauty and simplicity and most of all, your generosity in sharing the “how to”!
Thanks Rupa! This was a really fun project. I’ve actually removed these and put a large art piece in it’s place.
I need to find a new spot for these though because I love them! :)
xo
Nancy
Okay… LOVE this! These will show up in a MWA room, very soon! ;-)
Thanks Julie! :) They were a fun build! xo
Hi Nancy I just love these and am gathering the stuff to make a set of my own. Do you remember if you used 1/4 inch plywood?
Hi Kathy,
They are 3/4 inch wood (so 1 by) (I didn’t use plywood but you should be fine with that!) Have fun making these! :) xo
I am thrilled to see this DIY! I actually ordered the ones from BD, but they cracked with a couple of weeks. They sent a new set and they cracked as well. I was heartbroken because I LOVED them. Now I can make my own!!! Thank you!!!
Well, that sucks, really! But that’s great you found mine since you loved them so much and they didn’t work out for you! I really love how they turned out. I know you will too. :) Have fun! xoxo
Hi Nancy! Better late then never. That’s me! I love these. Thank you for sharing. I’m looking forward to your Spring wreath blog. Your wreaths are always so pretty.
Yes, lol!!! Thank you, Cheryl! :) xoxo