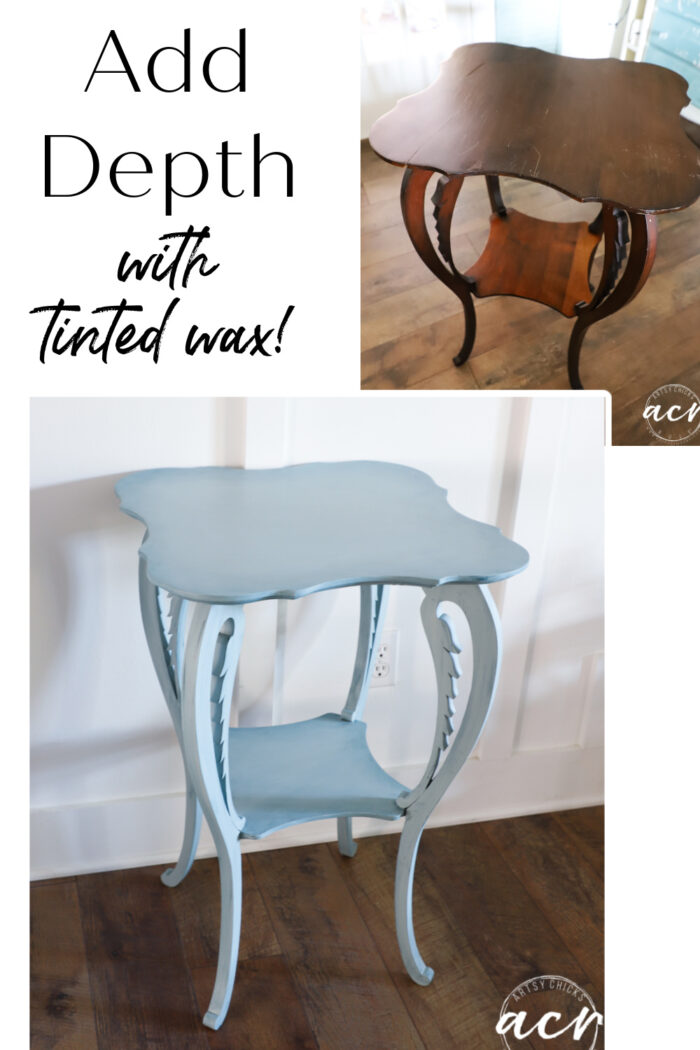
Add Depth To Furniture With Tinted Wax
How to add depth with tinted wax! Simple and quick but adds so much!
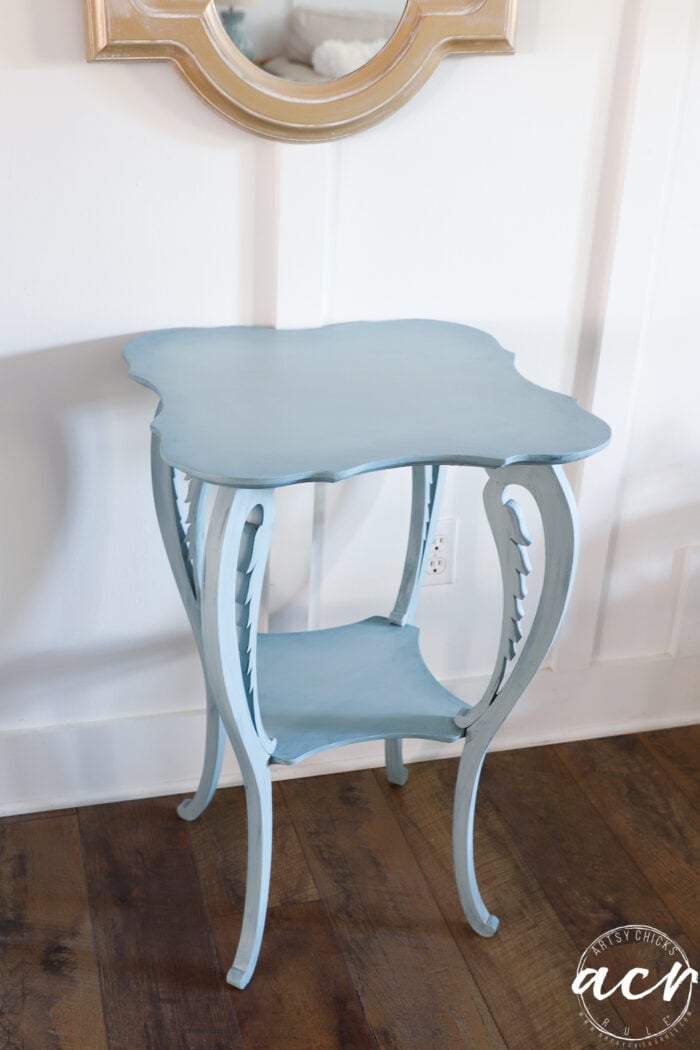
Hello sweet friends! I’m back today sharing a brand-new furniture makeover.
This is a special piece as it was one of my mom’s. We are going through things over at my parent’s house still and I loved this little table of hers. I knew I wanted to take it home and make use of it. I think I will use it in my office for plants, etc. Which is perfect as my mom (and my dad too) were Master Gardeners for many, many years.
I thought it’d be fun to do a little “something-something” instead of just painting it and done.
So I decided to add some depth with tinted wax. And today I’m going to show you how simple it is to do!
Add Depth To Furniture With Tinted Wax
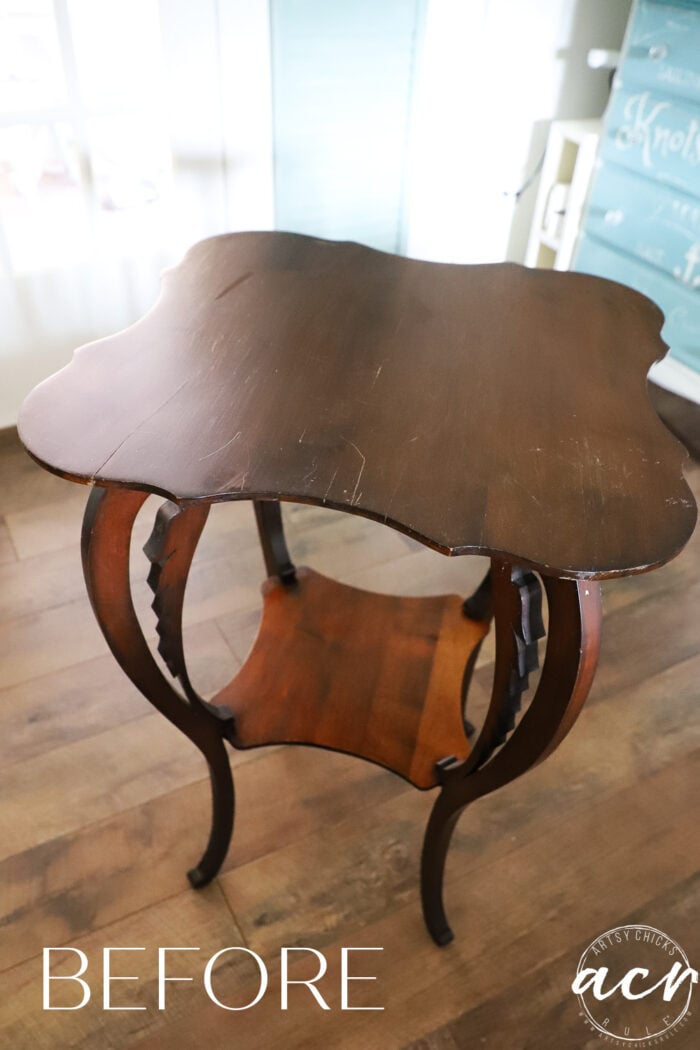
This is how it looked before.
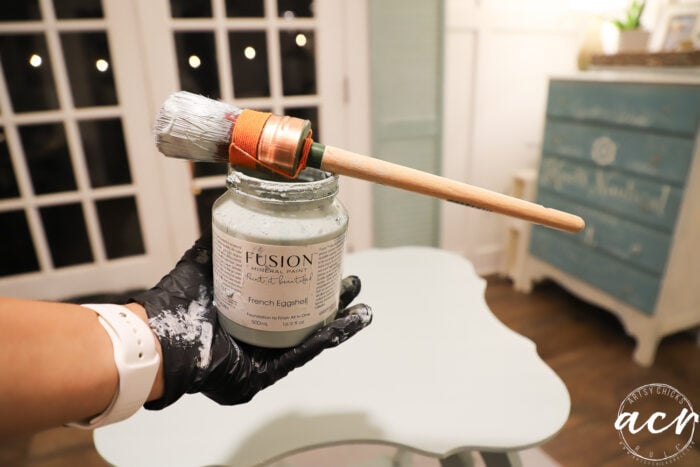
MATERIALS LIST FOR ADDING DEPTH WITH TINTED WAX
- TSP Alternative
- French Eggshell Paint
- Paintbrush
- Seaside Paint
- Fields of Lavender Wax (smells SO good!)
- Soft Lint Free Cloth or Wax Brush
Prefer to shop on Etsy? I have an Etsy shop also, here!
I cleaned it up with some TSP Cleaner before I did anything.
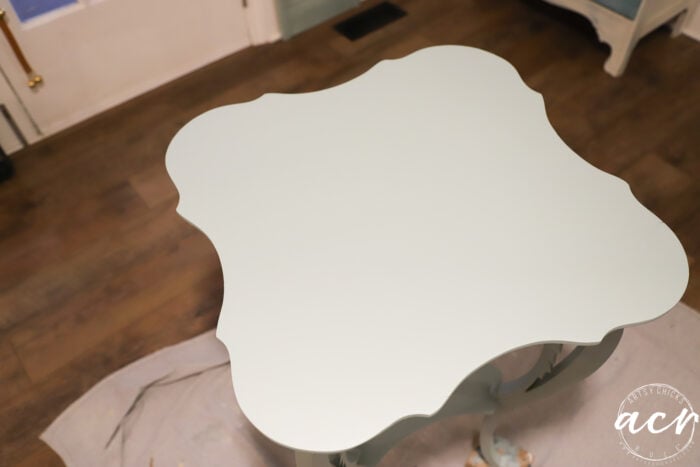
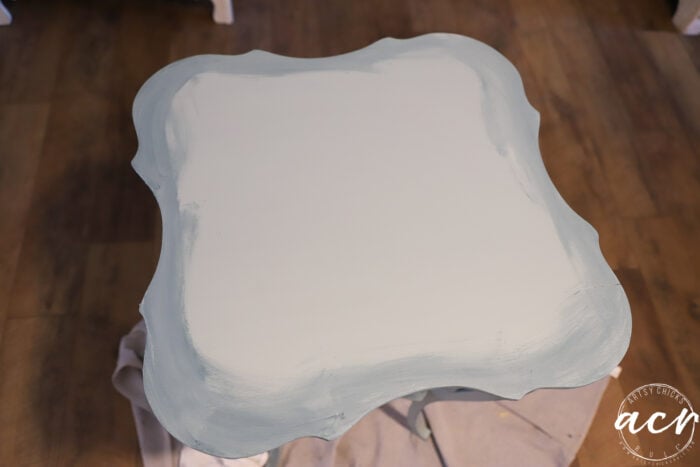
Next, I decided on the base paint color which is French Eggshell. One of my very favorites!
I used two coats, drying well in between, for full coverage.
That’s nice. But…we can do better. ;)
Let’s add some depth with tinted wax.
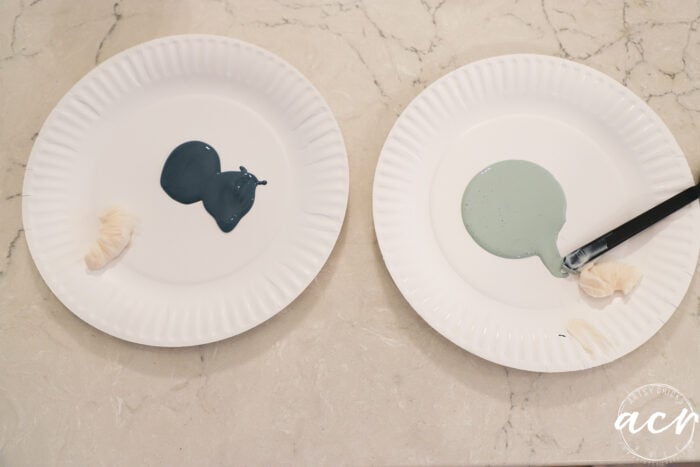
I used our Fields of Lavender and mixed up some of that with French Eggshell and some with Seaside.
It smells divine and is a joy to use. Buttery soft!
TIP: You can use either a round wax brush or a soft cloth to apply and blend the wax.
And it’s kind of as simple as rubbing it around the edges…then blending, blending, blending.
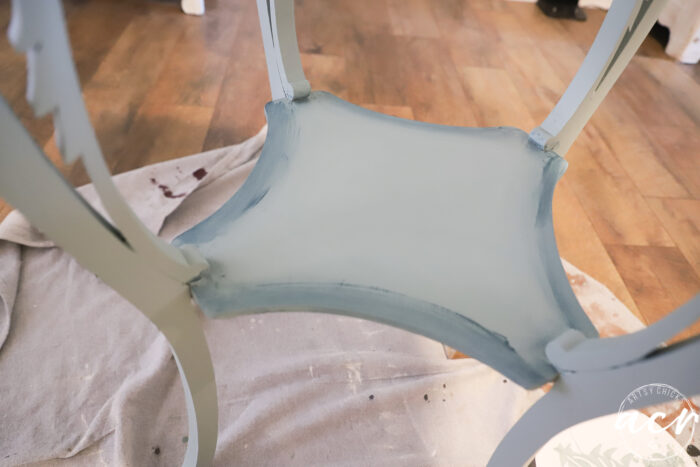
Be sure to only apply the darker wax around the edges of your piece.
That’s why I also mixed up some of the French Eggshell, the same as the base coat, to help blend, blend, blend.
TIP: When adding depth with tinted wax, make up some tinted wax with the base color you painted. This way you can blend and “fix” heavy areas and make the depth and dimension look seamless by blending it into the main areas of the piece.
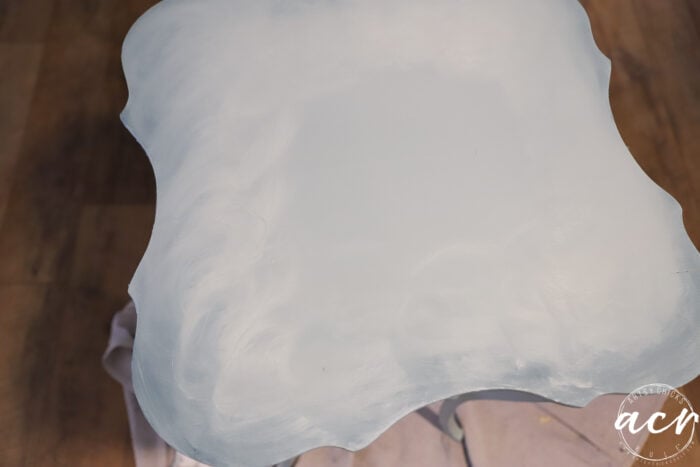
Remember: Less is more. You only need a little to add dimension and depth. You’ll have less to blend out this way too.
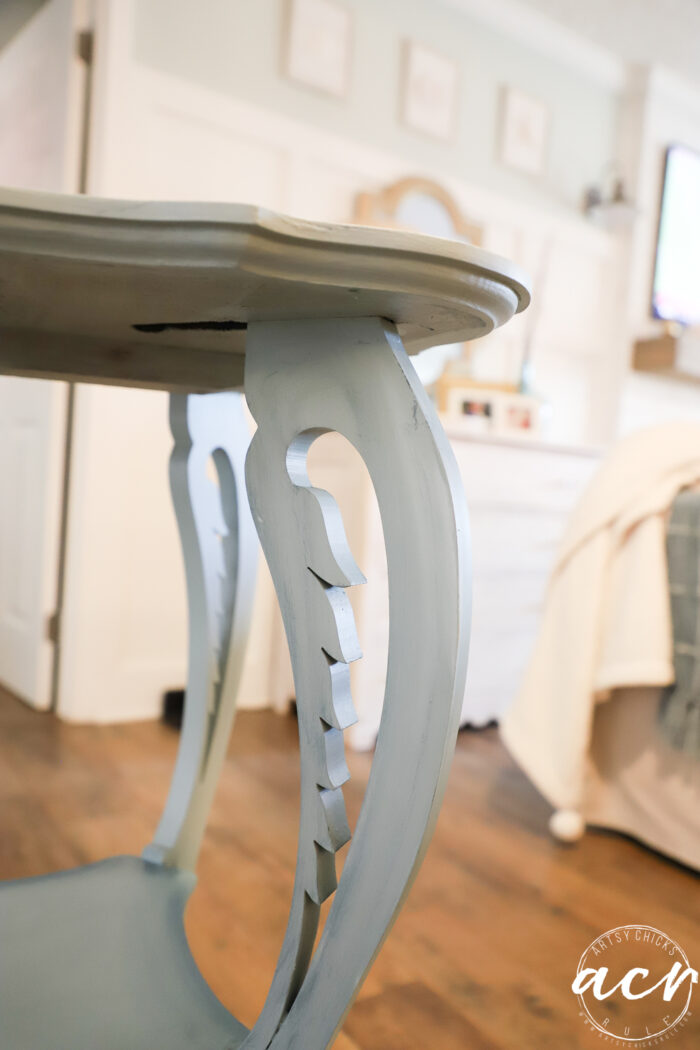
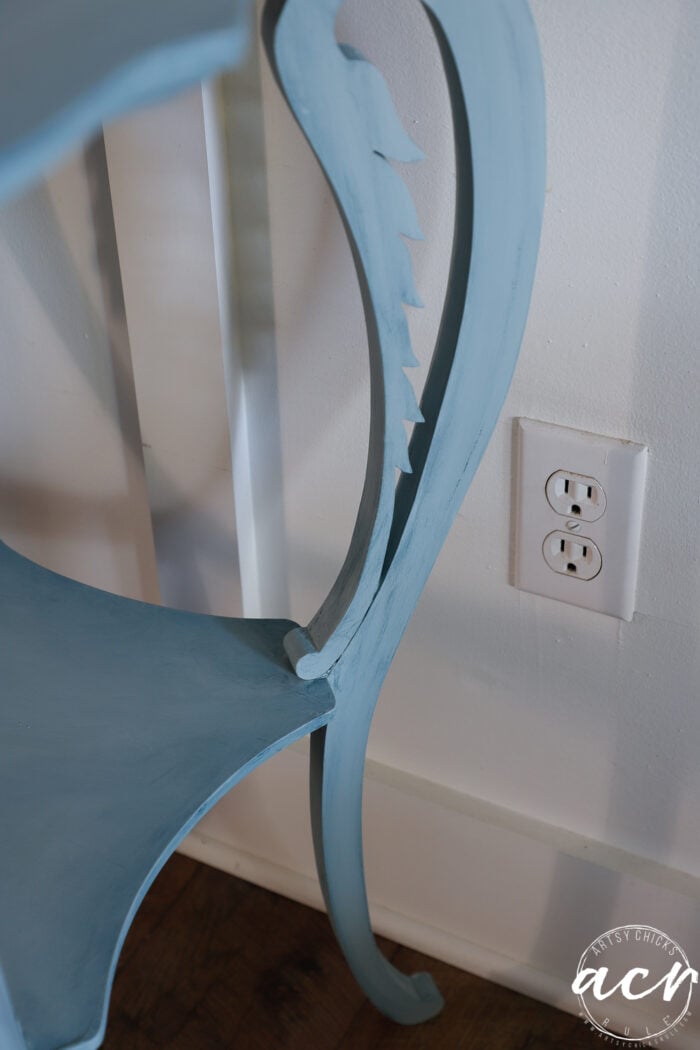
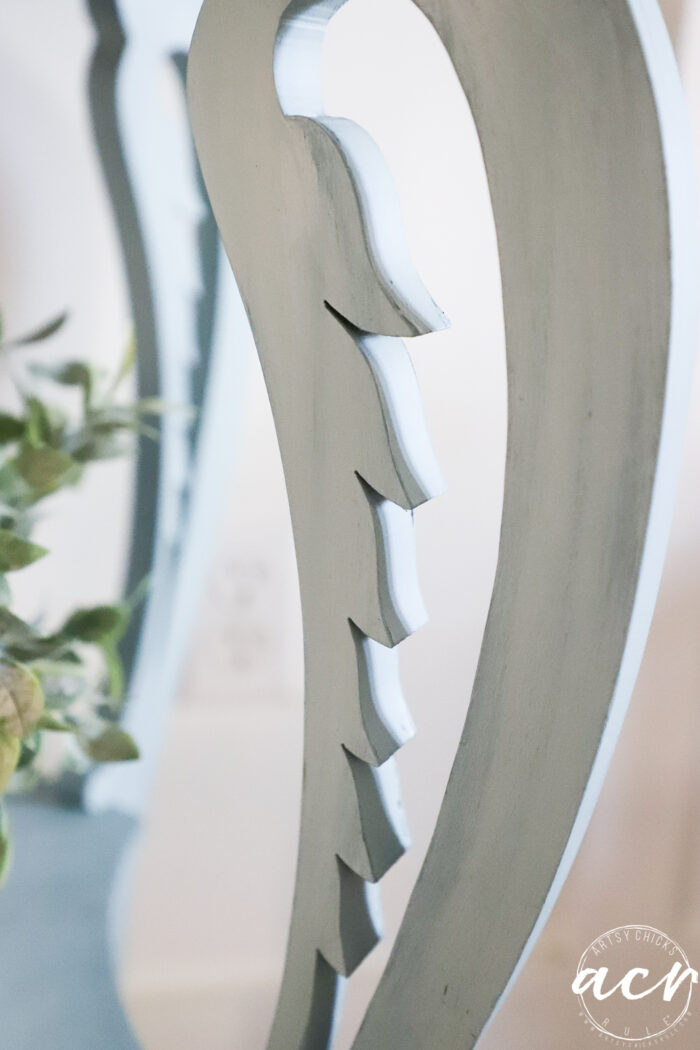
For the legs, I simply applied it sort of like “dry brushing”, and then blending.
TIP: You can watch a video I made on dry brushing here >>> How To Dry Brush
And that’s it!
Since Fusion Mineral Paint is self-sealing (no topcoat needed) I don’t have to make sure I cover every inch with wax. I’m simply adding dimension and depth with it instead.
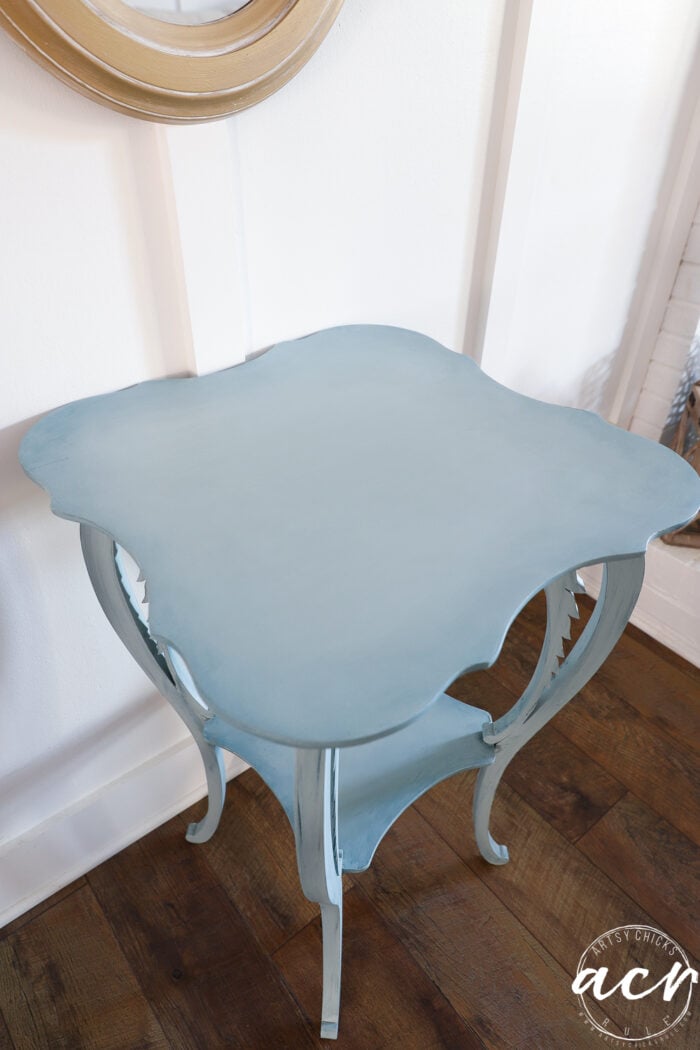
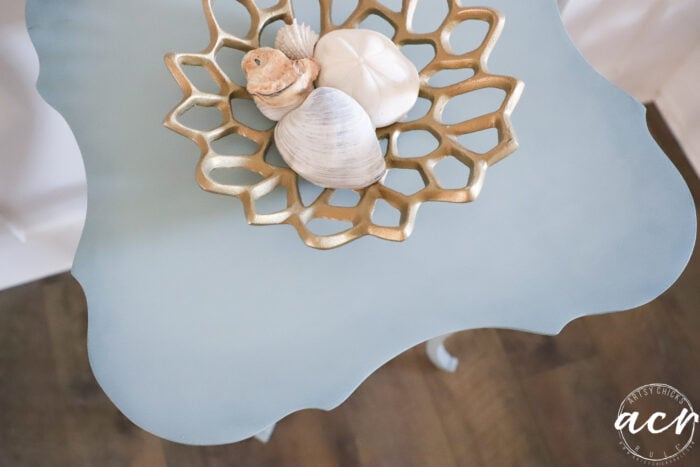
And I just love the depth and dimension it creates.
Things To Avoid:
- Using a heavy hand – Otherwise, you will wipe away all that you have applied. Be careful to gently blend in each section.
- Making the tint too dark by using too much paint. Less is more.
- Leave blotchy areas.
- Applying the darker tinted wax to areas other than the edges.
And here it is styled up a bit.
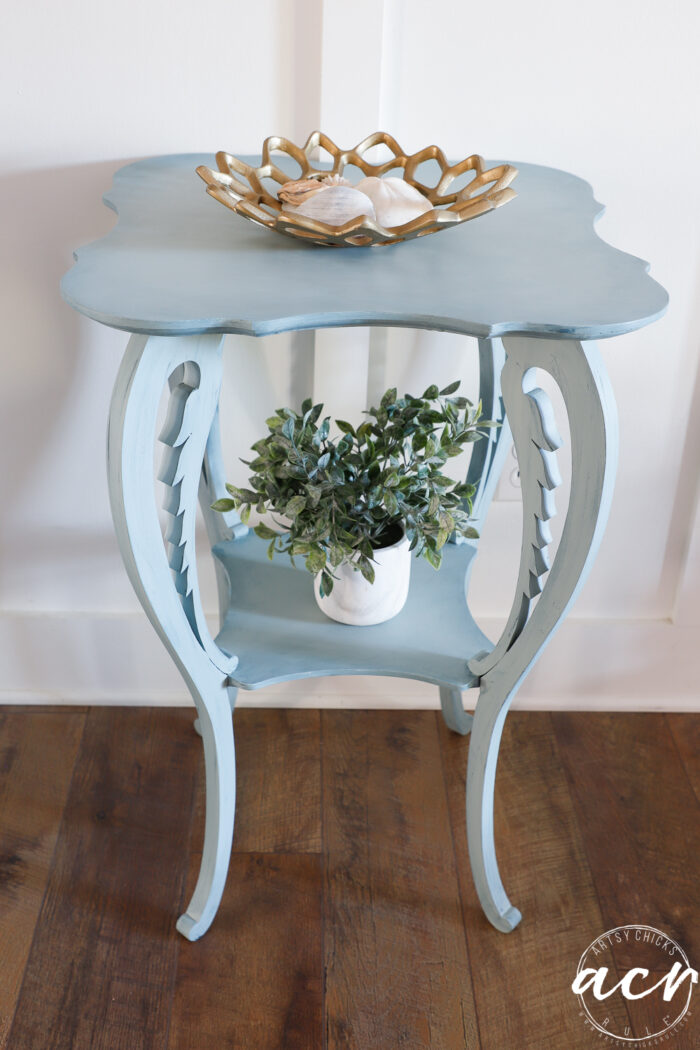

I think my mom would love it!
It was definitely a labor of love…with her in mind the whole time.
Have you added dimension this way before? With tinted wax? Or maybe tinted glaze, etc.? That’s another way you can do this.
You can also just use paint.
Here’s one I did something similar to but with paint, not wax >>> Aqua Dresser.
PIN it to save it!
Let’s get ready for December! Holiday time commenced!
I hope you have a wonderful weekend.
xoxo


")


")


so pretty! I’ve never seen a table with those ‘angel wings’ legs! Love it!
Thank you, Karen! I love that description!! :) xo
Hi Nancy, This table is so very lovely. I like your style very much.
Thank you, Sue! So happy you love it too! :) xo
Beautiful work, Nancy! At the beginning I thought the table looked like an early 20th century piece but now it looks like something you’d find at a contemporary furniture store. Funny how paint changes it up completely and the tinted wax definitely takes it up a notch. Now you can enjoy it for a long time and continue to pass it along in the family.
Thank you, Marcie! Oh yes, I can see that! it’s definitely a unique table with the legs, etc. And yes, I love how paint transforms! xo
I have never seen a table that looked like that. What a great size and “architectural interest” that piece has. You certainly transformed it into something perfect for your beach place, huh?
Me either, Michele! It’s definitely a unique one! Would look great at the beach but I am using it in my office with plants. Love looking at it all day, every day! :) xo
I’m a sucker for a cute antique table! I love the detail on the table legs! So unique! Adorable!
Thanks, Audra! Me too! The legs make it, I think! xo
This table came out beautiful! I love the color and the softness. You blended it perfectly. I was going to say I also love the cut outs in the legs but then saw someone called them angel wings and yes that is exactly what they look like. How perfect!
Thank you, Debra! Isn’t angels wings the perfect description. I just love that too! xoxo
How unique! The shading and colors are magnificent. I’m a blue freak. Did you have to sand at all to rough it up prior?
Thank you, Dawn! I’m a blue freak too, as you probably already know!! lol And no, I just cleaned it up well!
I love how it turned out!
Thanks, Carla! xo
What a beautiful and unique table Nancy with special meaning. I love the way you updated it to make it your own!
Thank you, Ann! Yes, very unique and definitely special. :)
Such a cute table. Perfect as a plant stand.
Paint / w wax is not something I’ve seen. The blended look is so nice.
You made it sooo pretty ! I’m sure seeing it will always give you a smile – thinking of your mom. :)
p
Thanks, p! I am looking at it in my office as I type this, with one of my pretty plants up top! I love being able to look at it every day. :)
Perfect colors! I love it!
Thank you, Rose! xo
The legs on that table are amazing and the color you applied with the wax is just stunning!
Thank you, Janet! :) xo
I love this table and the unique shape too it. I am very tempted now to try the tinted wax method like you did on this. I have an antique secretary desk I’ve been waiting to refinish and I think I will try it on there! You always are inspiring! So talented! Merry Christmas to you!
Thank you, Michele! Yes, do give it a go! It’s a great way to add shading, depth and interest to a piece. Will look fabulous on the secretary! And you are so kind, thank you so much, Michele, I am so happy to hear that I have inspired you! :) Wishing you a very Merry Christmas! xoxo