Upcycled Framed Print Set
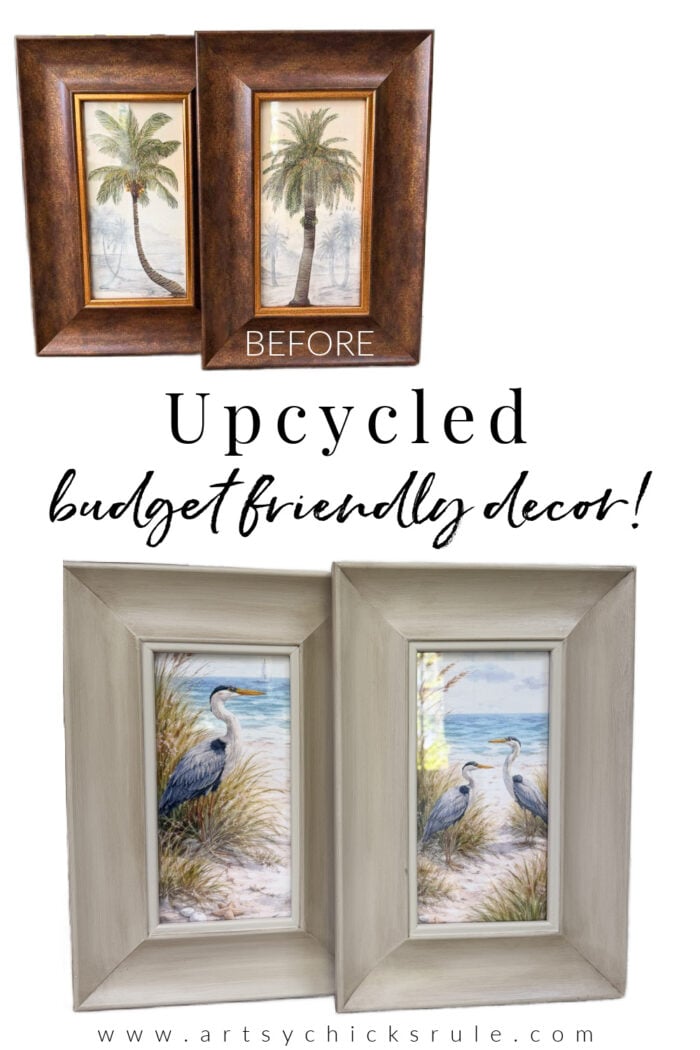
The upcycled framed print set is a great way to create budget-friendly decor for your home!
Hello friends, and happy Trashy Treasure Tuesday!
It’s that time again. When a few friends and I get together and share our latest “trashy treasures”. Be sure to scroll all the way down to check out their makeovers, too!
I hope you all had an amazing weekend. It was gorgeous here. Well, I wasn’t here here, I was several hours away at a wedding for the weekend, and it was gorgeous there too. I think spring is finally here to stay. I mean summer. Haha, we never seem to get much of spring around here anymore, but I’ll take the hot weather over this wacky winter weather any day!
I’ve got a super simple makeover for you all today. Made even simpler using ChatGPT. Crazy, really. But I thought I’d give it a go, and it worked out quite well. And as per usual, a great way to create inexpensive decor for your home.
Upcycled Framed Print Set
My favorite place to find things lately is actually my two local ReStore stores. Lots of furniture, knick-knacks, decor, etc. I can almost always find something. Rarely do I walk out of there empty-handed. Thrift stores, well, I often walk out empty-handed these days. I don’t really visit like I used to, sadly. I miss the good ole days of thrifting!
Anyway, here is what I found.
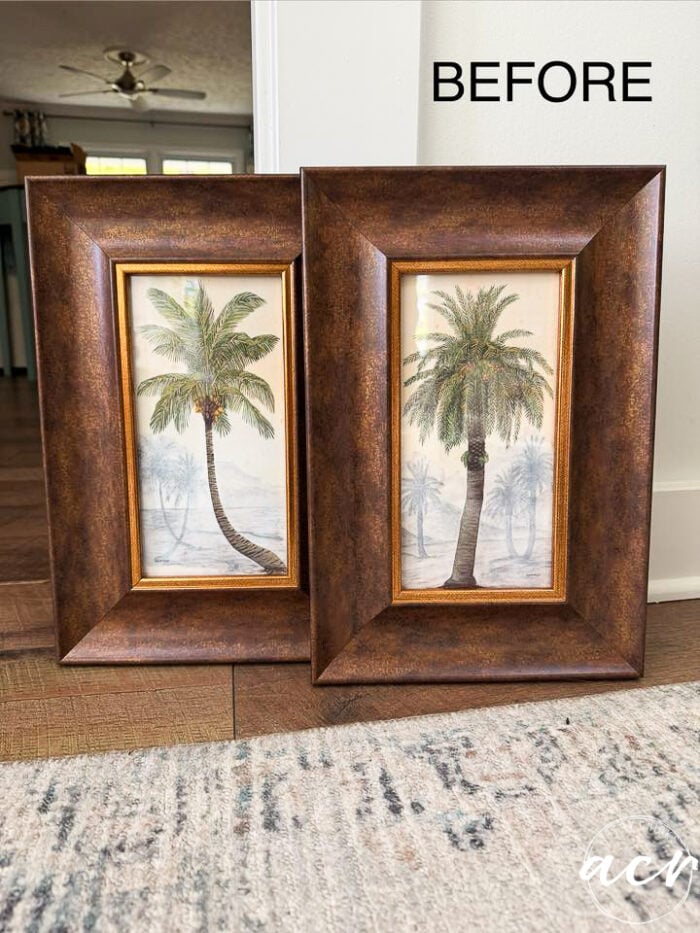
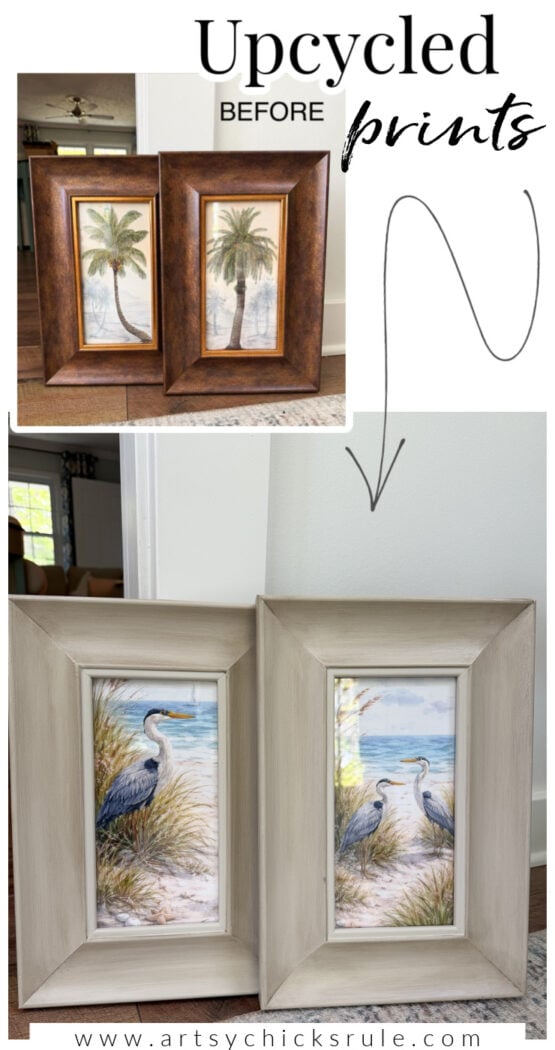
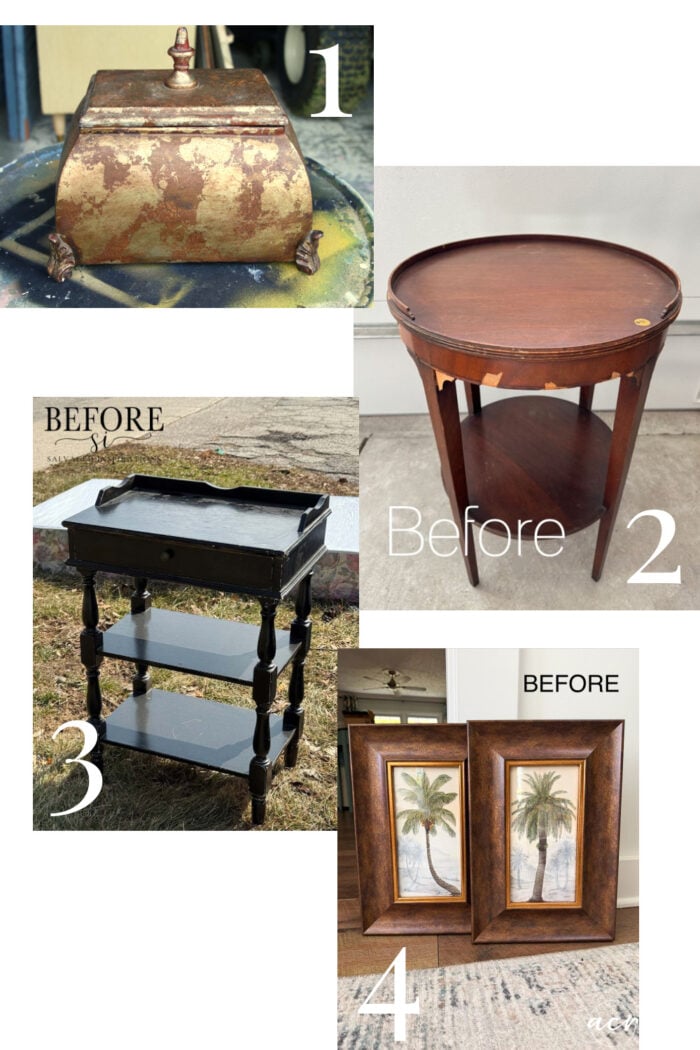
A nice, framed set of palm prints. Not bad, but not my style. If this were your style, you would have to do nothing at all to them. Just bring them home and hang them up. And the best part, they were only $5 for the set!
MATERIALS SUPPLY LIST
I took them apart…
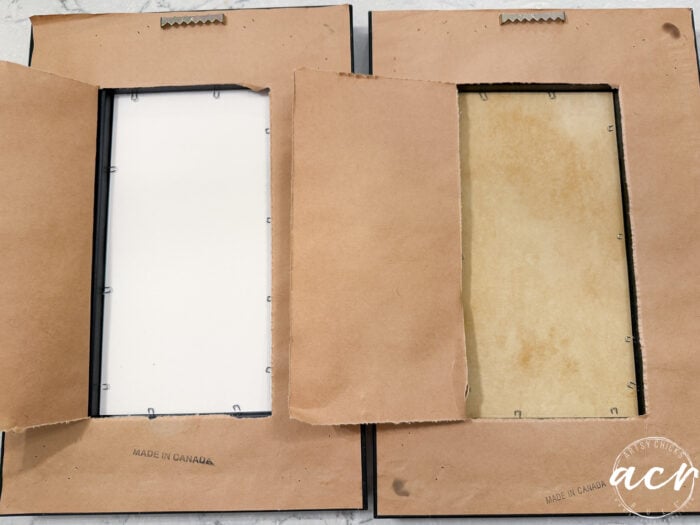
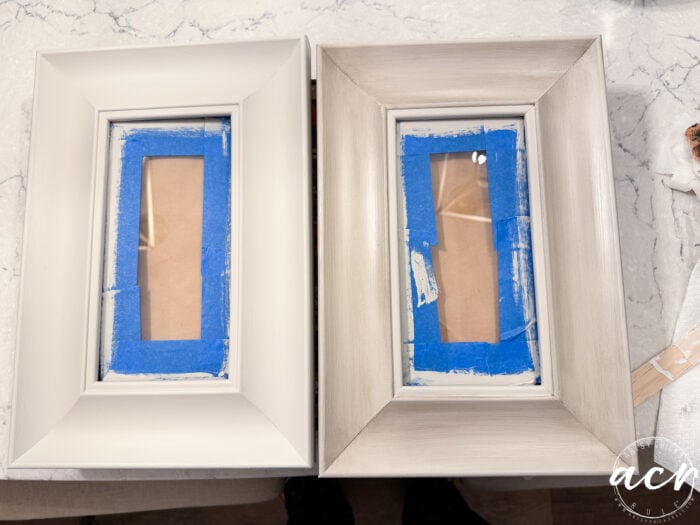
I ended up having to leave the glass in because I couldn’t get them past the staples. And I really didn’t want to have to remove the staples just to put more back in, so I left it in.
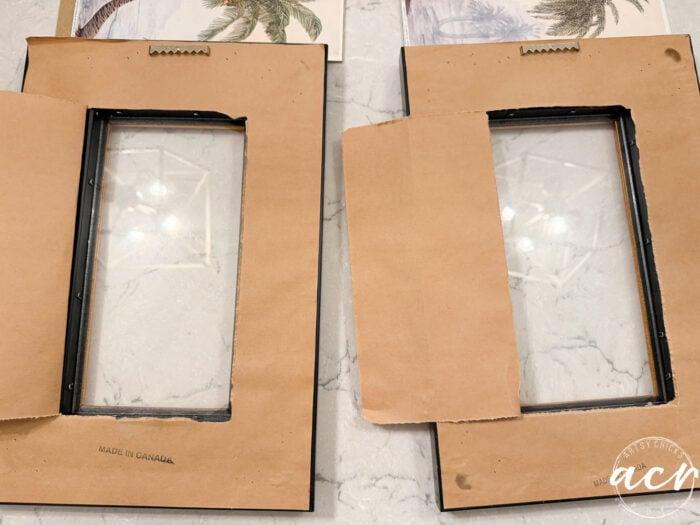
No worries anyway, I’ll just tape it on the front to protect it from the paint.
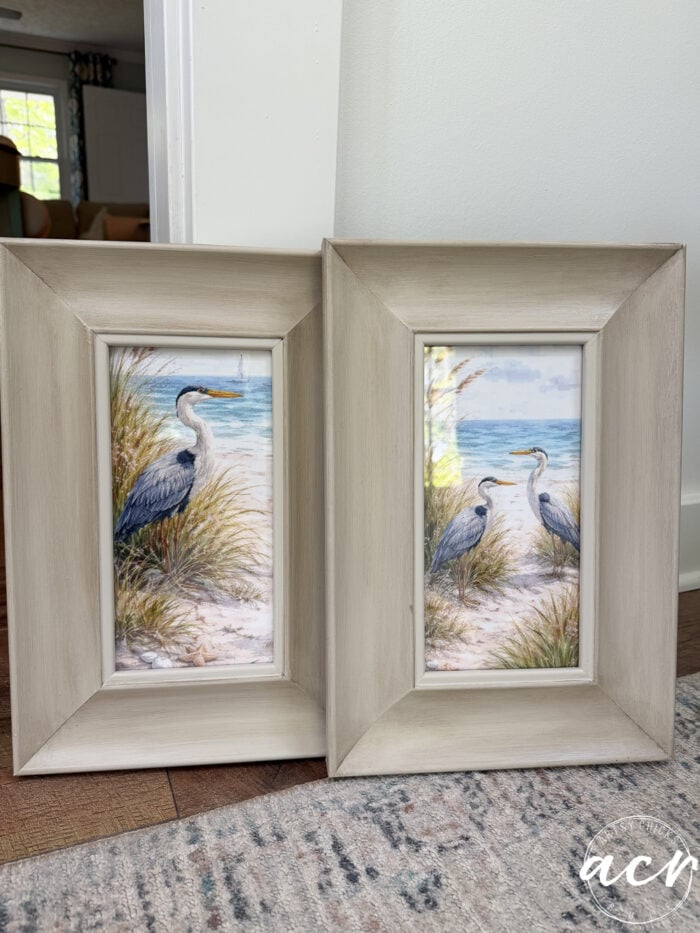
I wanted to give them a driftwood look, so I started with this paint color.
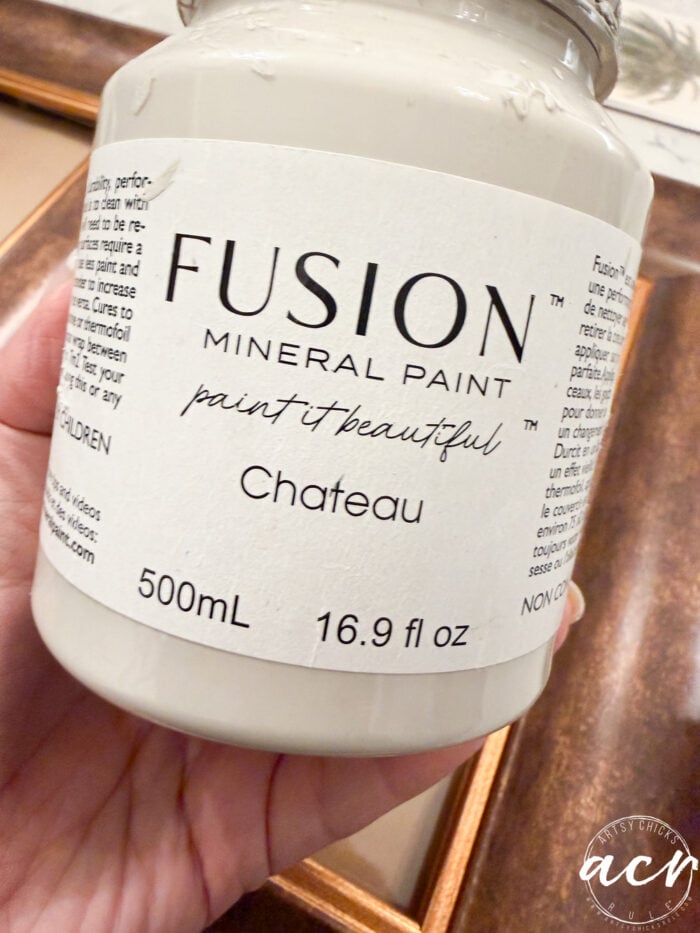
It’s a nice neutral base for the wood-look.
I’ve done several other wood-look projects like this with different-colored stains for a deeper, “wood”- like look.
You can see them here:
- Paint a Wood Look Finish (antique cabinet)
- Wood Look Floating Shelves
- How To Use a Wood Graining Tool
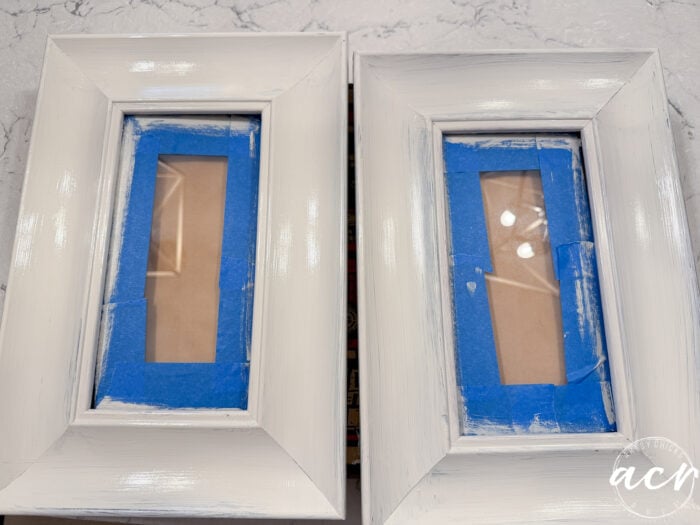
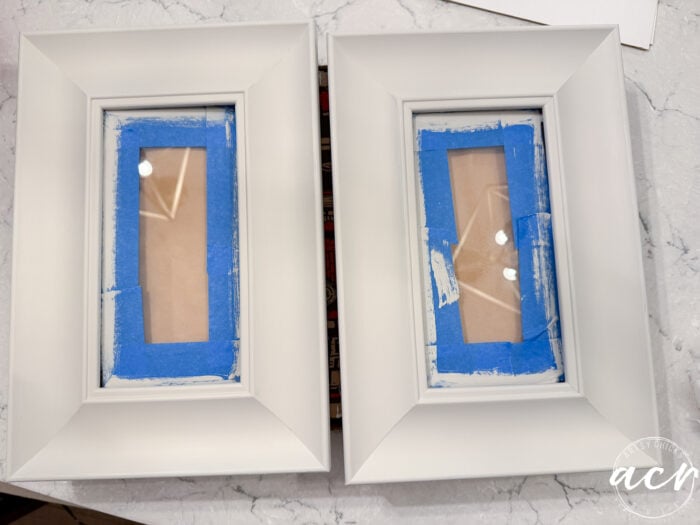
I painted two coats on…
I let it dry overnight, then applied the stain. As you can see below, one side has the stain, and the other side does not. I also decided to leave the inside detail (closest to the mirror) unstained.
You simply rub it on using an old cloth and wipe away with a clean cloth. (for this one, I used several different techniques in the other posts I shared above)
So easy!
Now for the fun part.
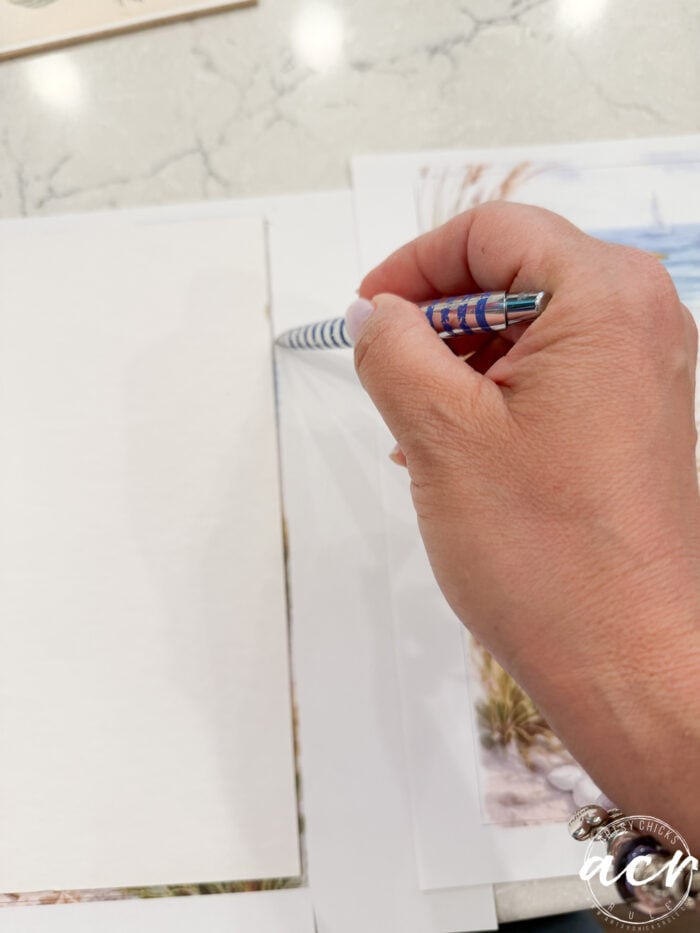
I told ChatGPT in great detail exactly what I wanted it to create for me. And it got it right on the first try. The key is to be extremely detailed. I asked for something like a matching set (but not exact matches) of Blue Herons on the beach, with sea grass, in a watercolor style, etc.

ChatGPT can be wacky sometimes, though, haha, but these turned out pretty. I printed them out on my laser printer.
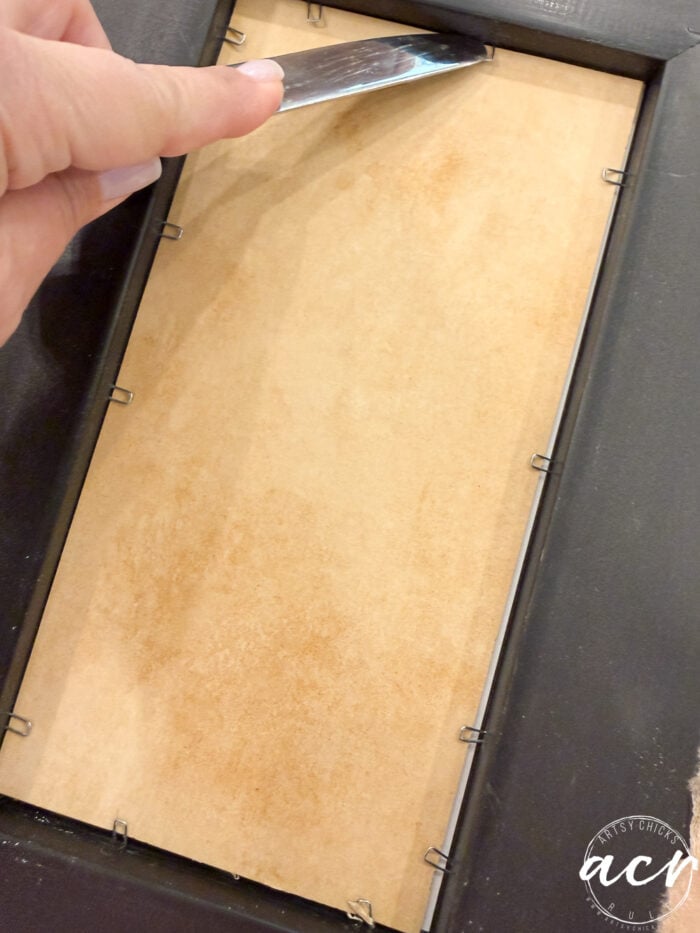
I used the pieces from the back to line up around the prints for cutting.
Once they were cut, I put them in and pressed the staples back down to secure them.
And lovely new artwork for your home!
 ‘
‘
I live in a coastal town, so this is my style for my home, but you could do anything.
I was thinking I would hang them here. However, I’m not sure, as they may be too small.
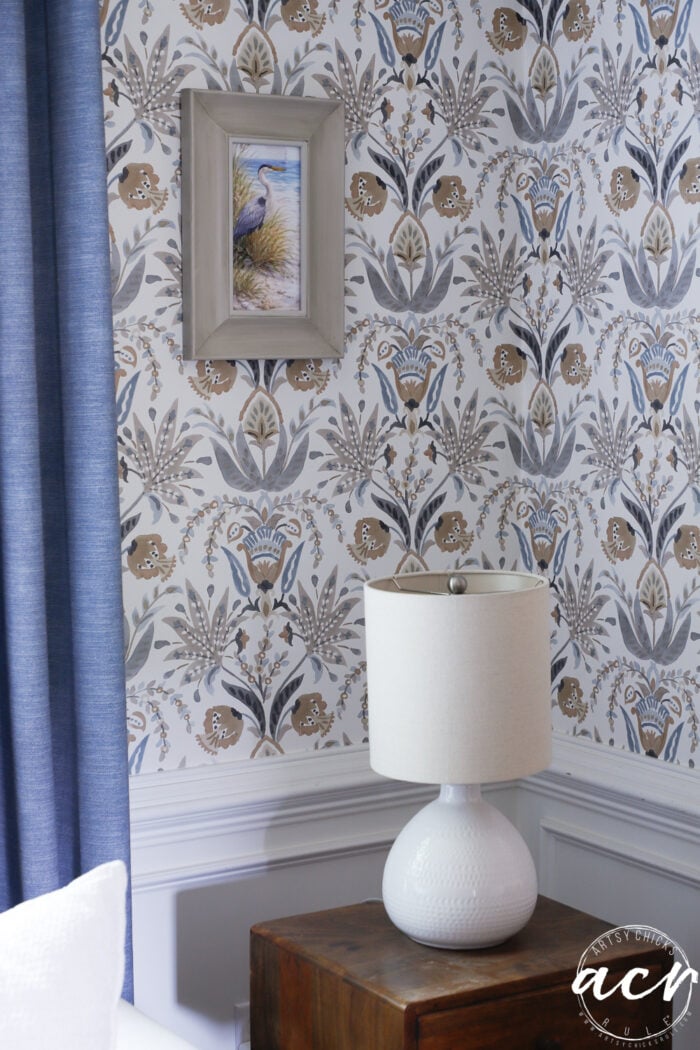
On each side of the couch in this room.

Have you played around with ChatGPT for artwork for your home? It’s pretty amazing what it can do.
PIN it to save it!
You can check out my friends’ makeovers below:
Have an amazing week, friends!
xoxo


")


Hi, I don’t think I’ve ever written you. I love these. Great idea and I’m going to have to try it. I think you’re right–they’re too small to put one on each side. How about one over the other on one side? Nice job!
Hi Jeanne! Yes, do try it! And yep, I have already taken them down and chosen another place to put them (I think) and something else to go up in this space instead. I’ll update next week about that! xo
OMGOODNESS I’m in love with that wallpaper! Please tell ne how/where I can find it!!! I have a ton of frames and I love Fusion paint but it is so hard to find near me!! (NE of Houston, TX) The prints are beautiful! Do you have the free version of ChatGPT?
Hi Nadyne!! Isn’t it so pretty?? I fell in love with it when I saw it too! It also comes in about 4-5 different color variations as well. I tell all about it in this post here. (there is a direct link to the wallpaper in that post too)
That’s a bummer you can’t find the paint easily. Online would be your only go to then. Most places has free shipping over a certain amount so maybe that would help. And thank you, I started with free but ended up doing the paid because it limits you daily on how much you can do.
These turned out amazing Nancy! What a fun way to upcycle dated art! XOXO
Thanks, Denise!! Yes, fun and simple, too! xoxo
Wow! A work of art…..no pun intended. I love these, Kathy (pinned)
Ha! Thanks, Kathy!! xoxo
These turned out great! I’ll have to try the “stain-over-paint” trick.
Thanks, Cyndi!! Yes, do give it a try, it’s super easy and adds so much!! xoxo
These turned out amazing, Nancy! ChatGPT did such a fantastic job, and so did you! I would hang these in my home in a heartbeat!
Thanks, Christy! Yes, it sure did, haha!! I never for a second planned to use them in my home, but I loved how they turned out, so here we are!! lol
Love this idea! What size were the printed pictures?
Thanks, Mary!! The prints were 5×10 inches. :)
They’re so CUTE now, Nancy! Well done!
Thanks, Michele!! Fun and easy! xoxo
I LOVE Herons! For me they are such spectacular birds that it’s hard to make them look bad. You did a great job with ChatGPT! I agree that they are way too small to be singular.
Good job, as always.
Me too, Caye! Thank you!! They are my favorite! Yes, I already took them down and have decided on another place to put them (I think!! lol) BUT I’ve also found something else to go where they were instead! Stay tuned…I’ll share that next week and the new spot for these. xoxo
They’re lovely, Nancy! I vote for hanging them one above the other and putting something else on the other side.