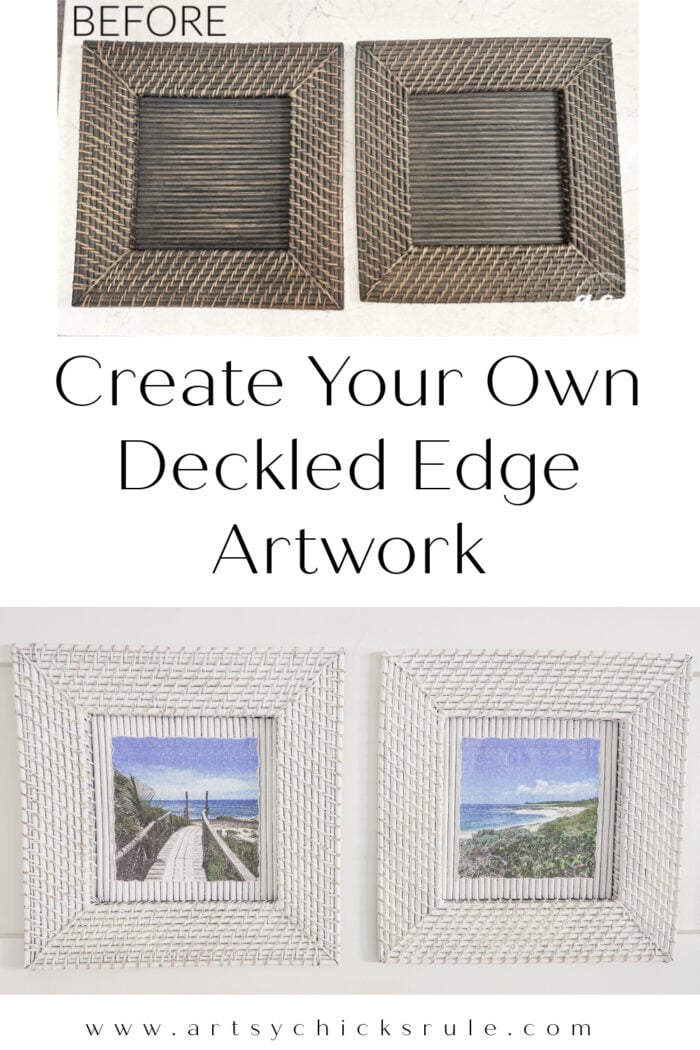
How To Create Deckled Edge Artwork
Learn how to create deckled edge for your paper and crafts! SO easy with this simple tool!!
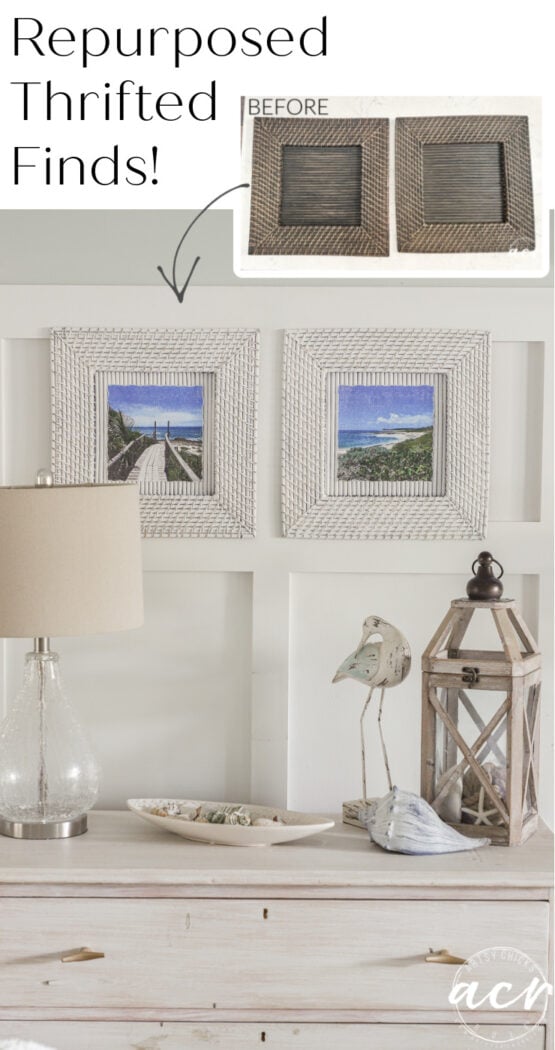
Hello friends! I’ve got a crafty and fun makeover for you today! You all know how I love to thrift and repurpose (and just make over, too) all my finds.
Well, I did just that today. I pulled these chargers out of my stash and gave them a whole new look.
I also found a fun new tool to create a very cool look, too. So, I’ll be sharing that too!
How To Create Deckled Edge Artwork
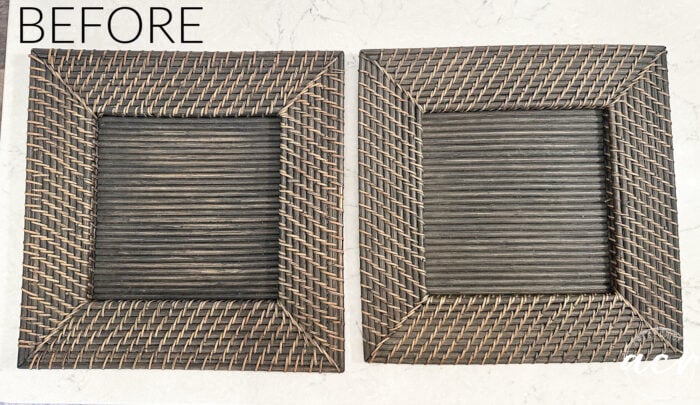
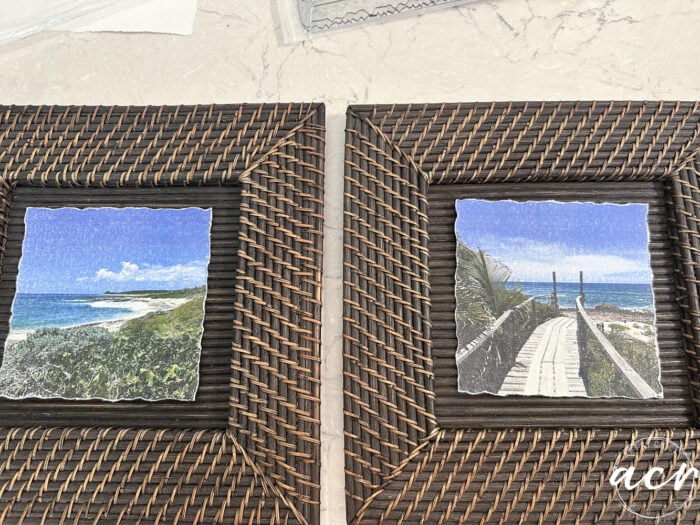
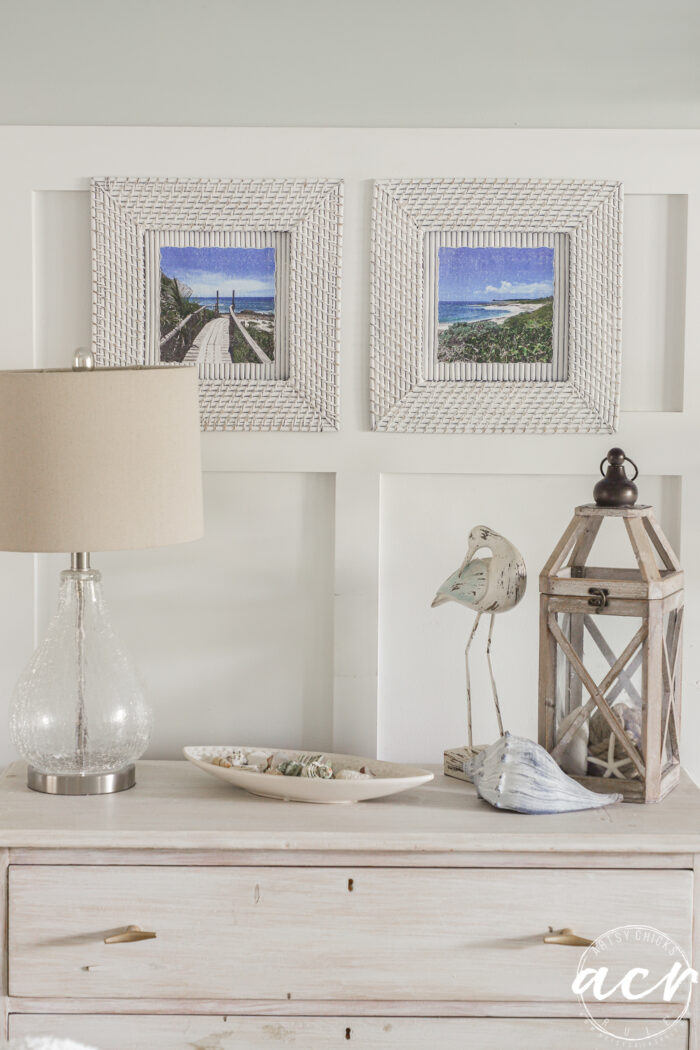
These chargers would be the perfect “coastal” styled makeover. I originally thought I’d paint them and place starfish or shells in the middle.
But I went in a different direction instead.
I began by painting them white.
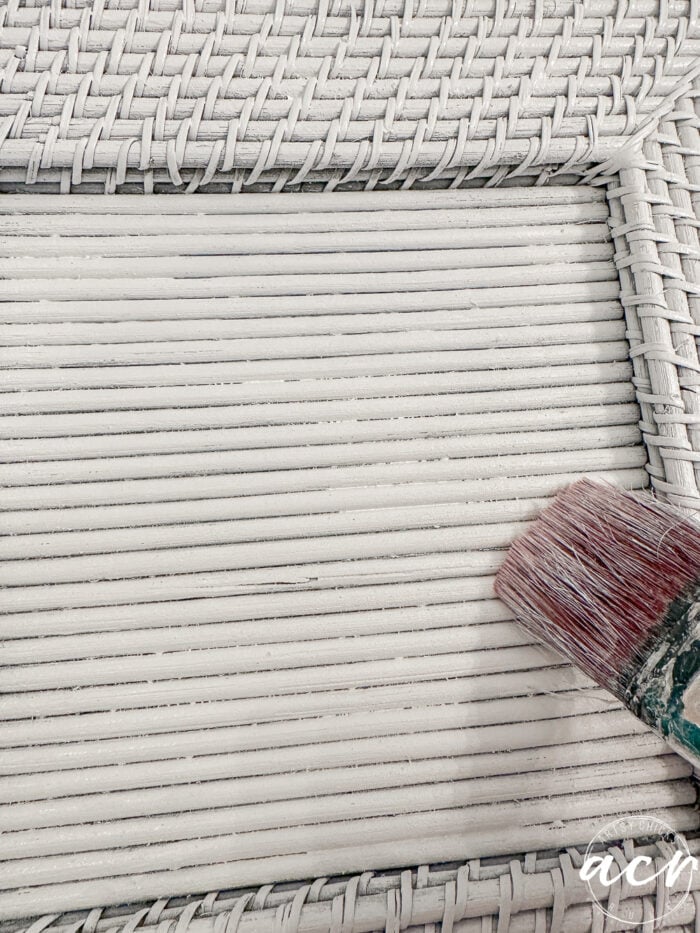
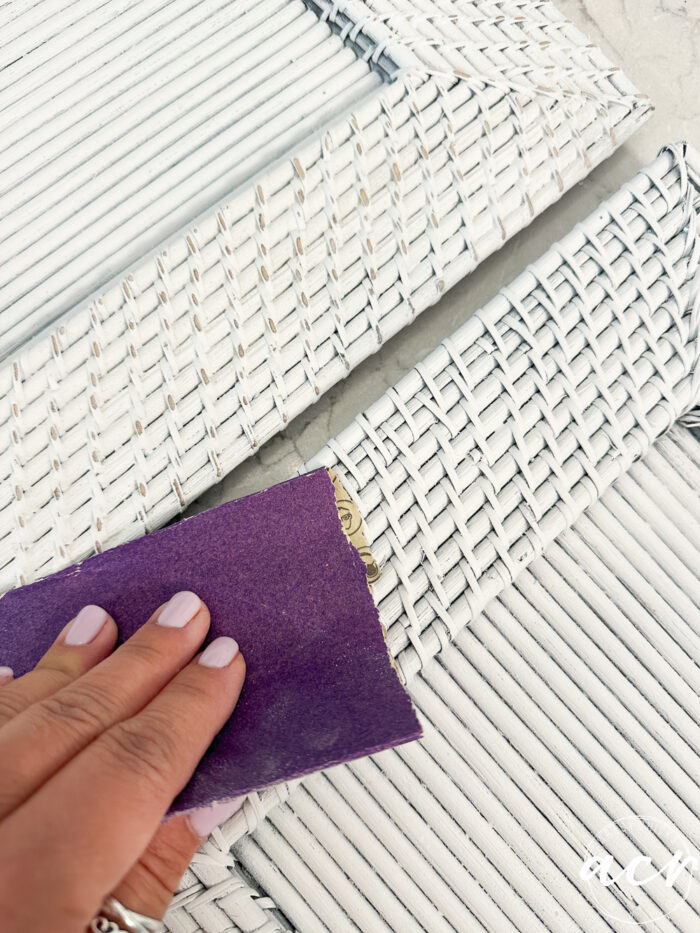
Let them dry and then lightly sanded all over.
Pretty simple and a nice backdrop for the artwork portion of this makeover.
How to create a deckled edge…
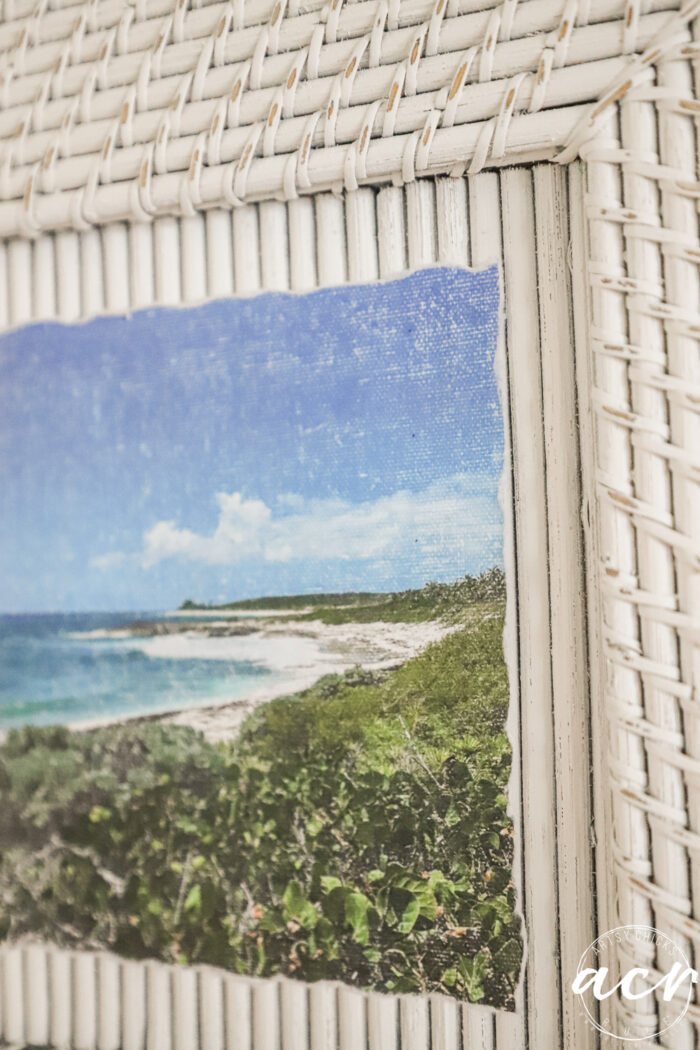
I found this deckled-edge paper on Amazon.
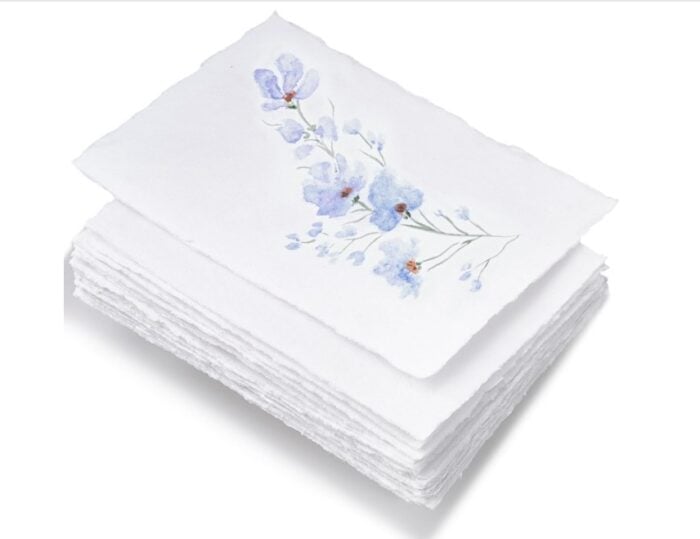
While great, it wasn’t the size I needed. I love the paper texture and quality, so I decided to use it anyway.
However, I needed to create a similar deckled edge since I was going to be cutting the paper down.
That’s where these little tools come in.
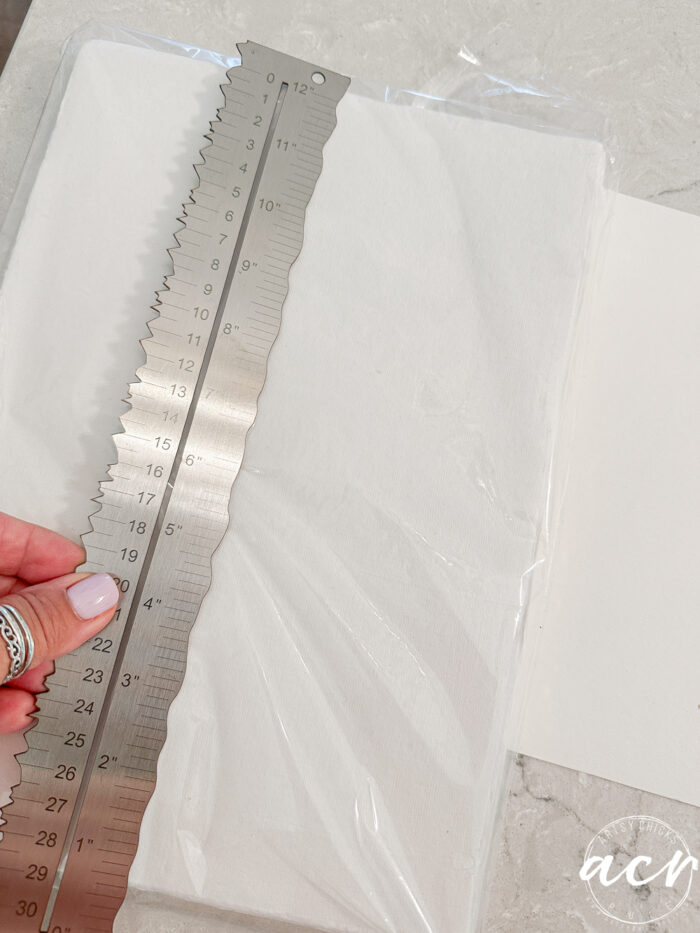
You can get this one and a few others (different edge shapes, this is just the one I chose for this project) >>> right here.
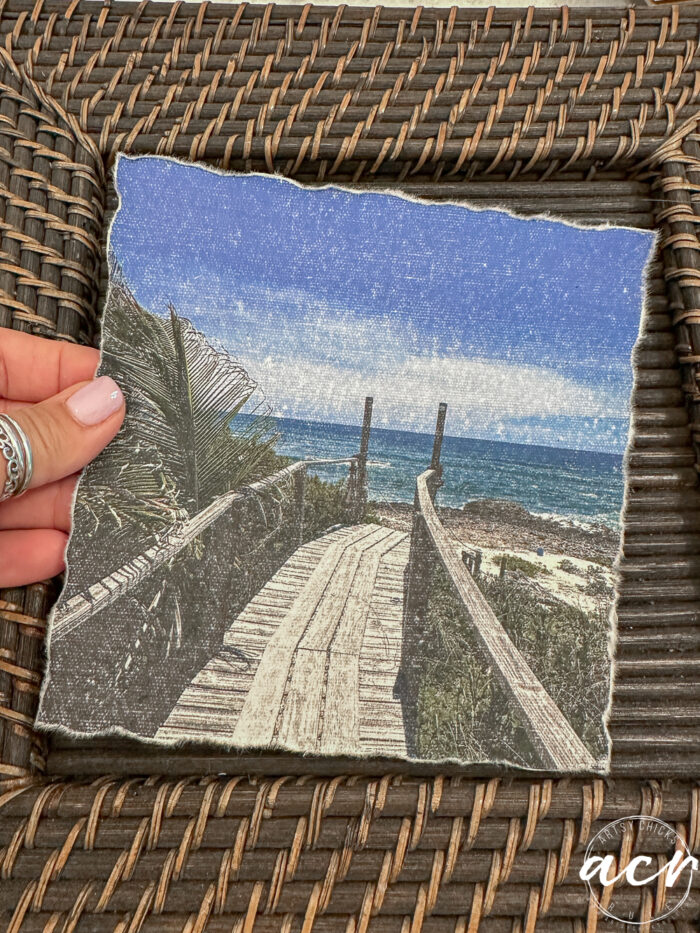
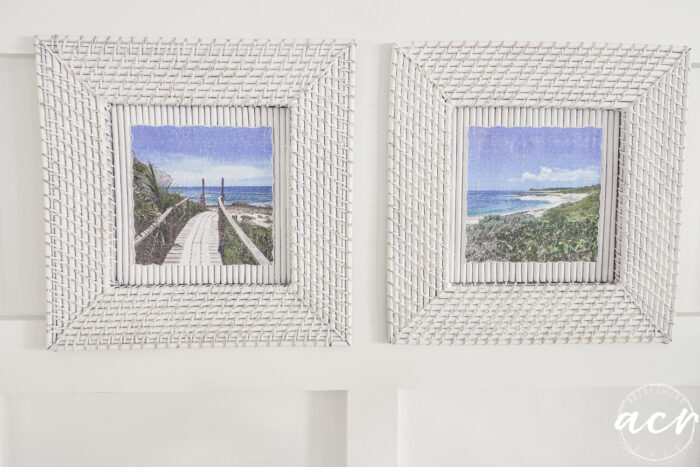
I printed out two photos I took when we were in the Abacos, Bahamas, a couple of years ago.
You can see all about that amazing trip here. So much beauty!
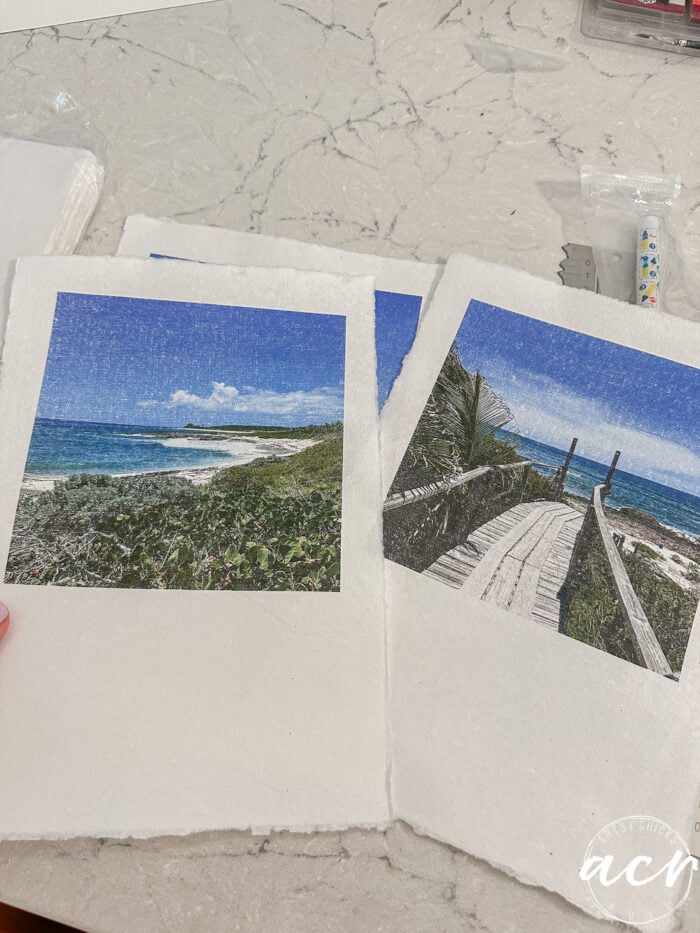
I used my Canon laserjet to print these out. Love that thing! SUPER FAST and so beautifully printed. I have the 750; this is the next closest model to it.
My old inkjet would’ve taken forever to print those, and they wouldn’t have looked half as nice. This one printed each one out in seconds. Wild!
The paper is very textured, so this is how the printing looks.
Which I just love. Especially for this project.
This is the edge I chose to go with for these photos. I simply lined it up…
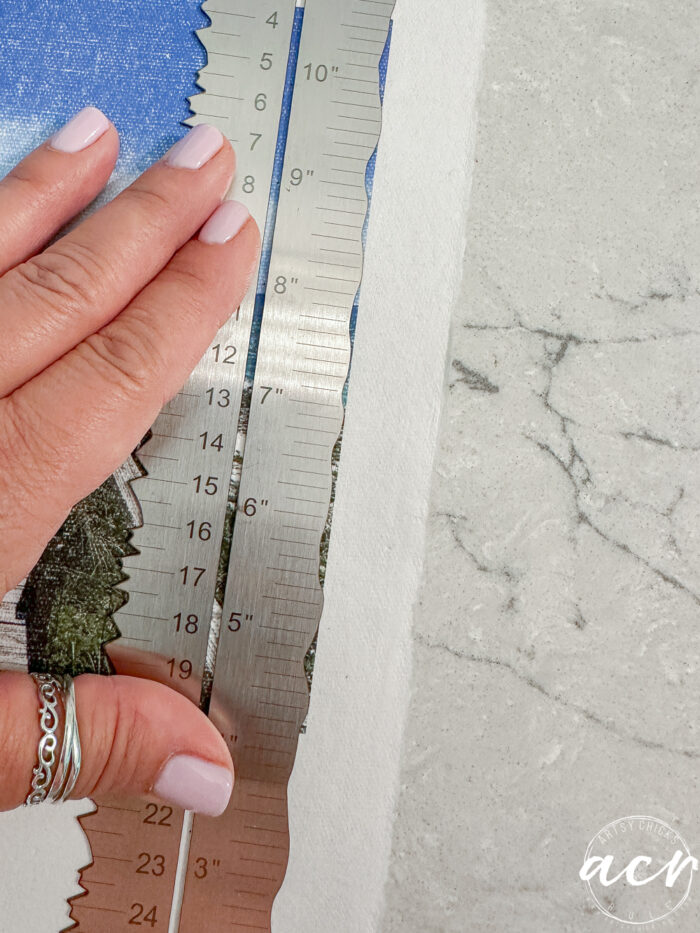
…and ripped away! I did this to all 4 sides.
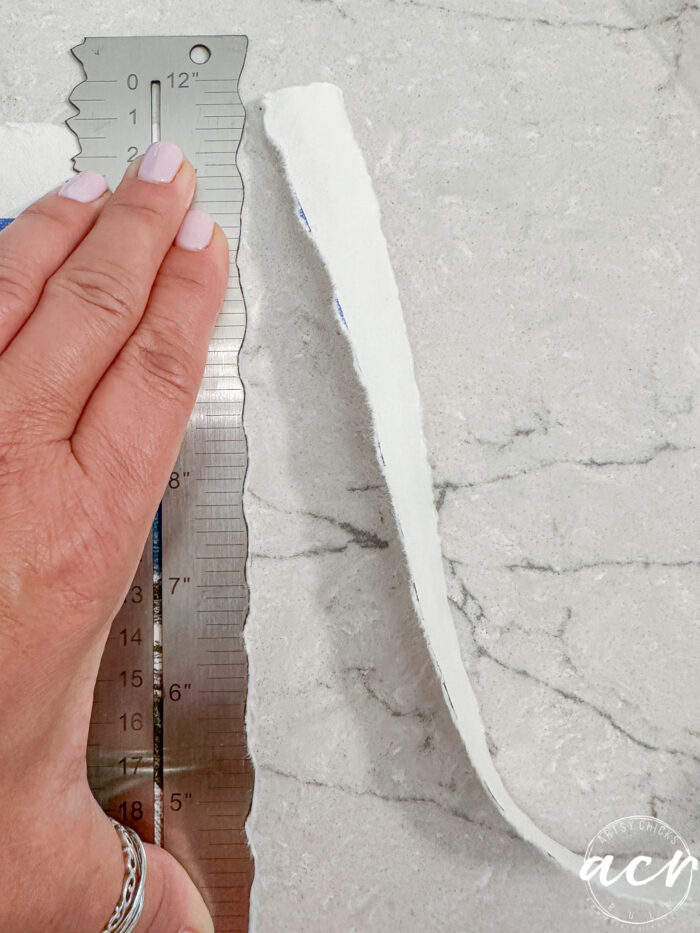
It really could not be any easier.
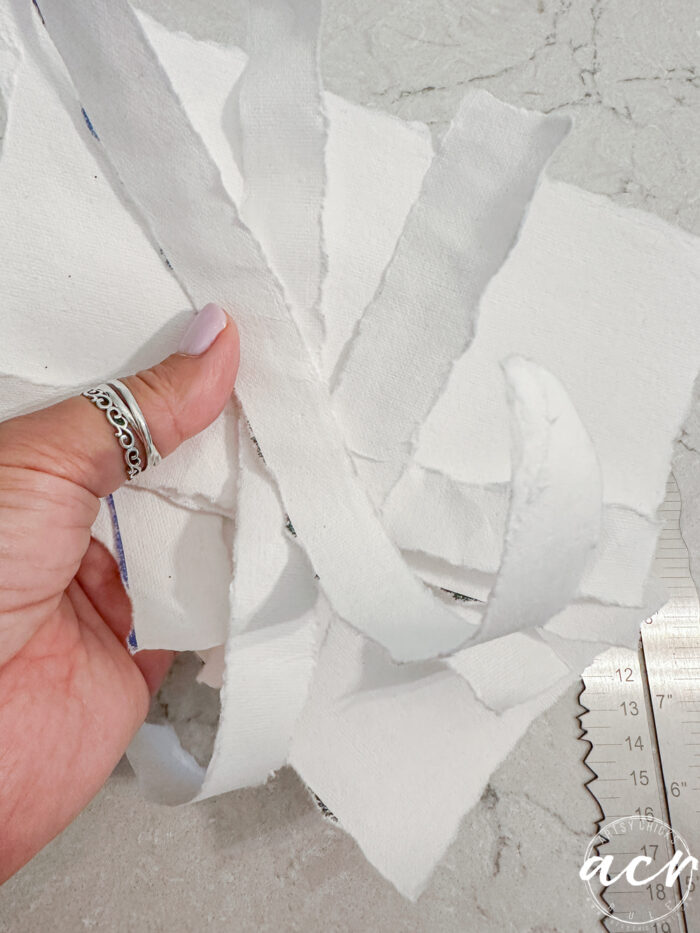
Just look at those amazing deckled edges now.
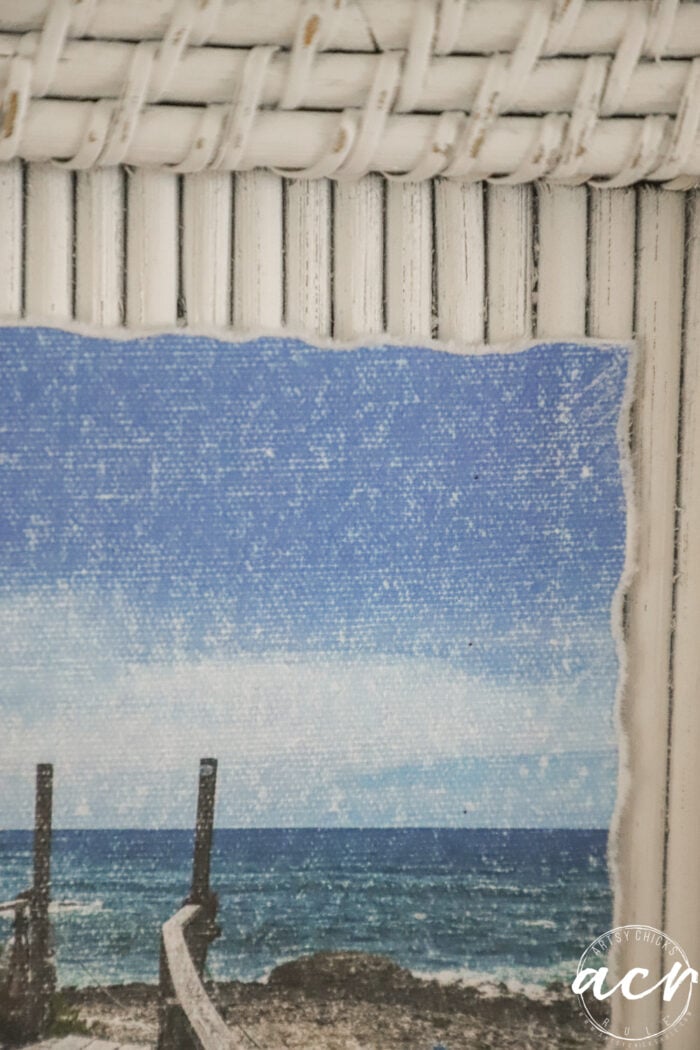
And up close…

I considered several ways of attaching it, but decided on regular ol’ glue. I was afraid that hot glue might be too thick and show through. I lightly spread the regular glue out thinly on the corners, sides, and middle.
Since this was printed with a laserjet, I’m not really worried about protecting it with a sealer, etc. Plus, it’s hanging on a wall, so there’s no worry about being touched, moved, etc.
I love how easy it was to get that look. I’ll be doing more of that for other projects, for sure!
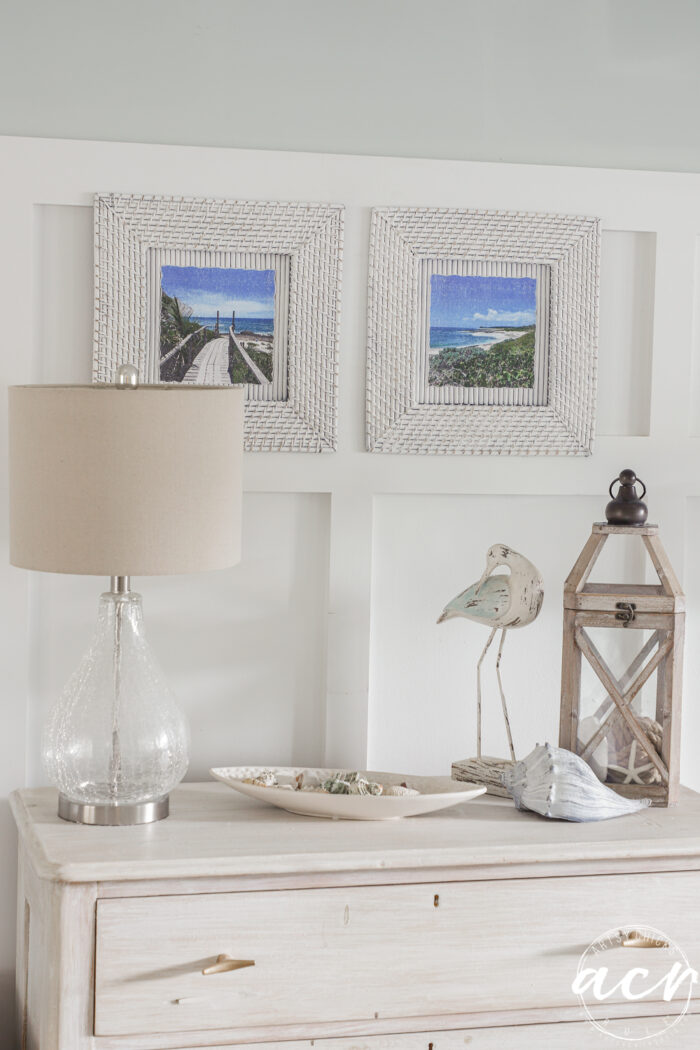
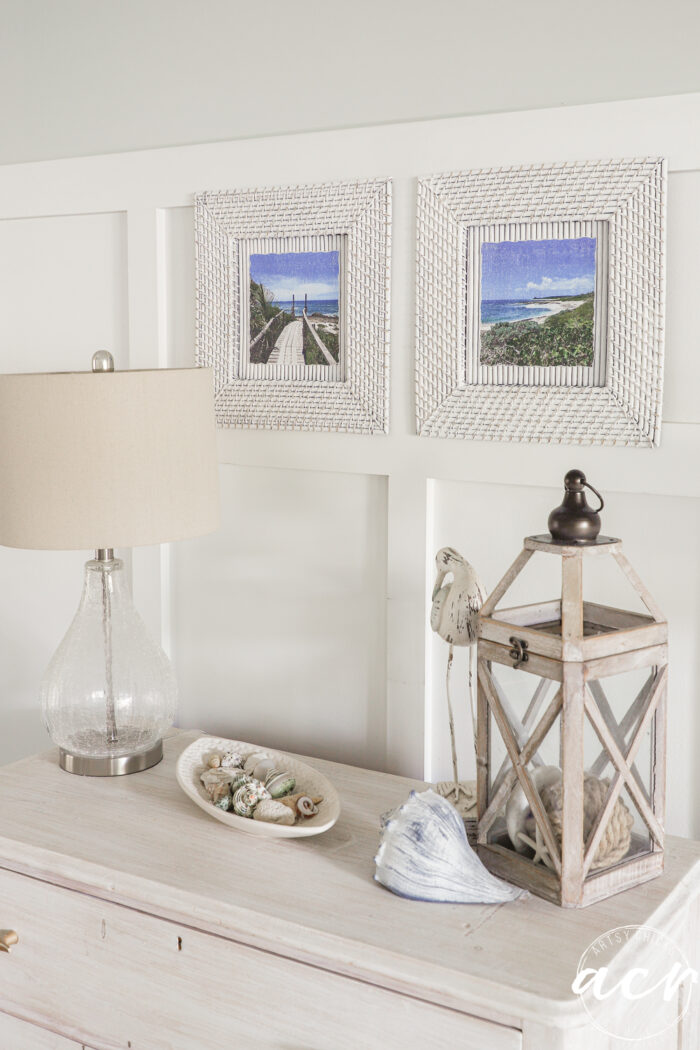
Aren’t they fun?? Who would ever realize they were chargers?
Lots of ideas for using this paper (or other paper) and creating this cool deckled edge swirling around in my head!
PIN it to save it!
Have you ever created a deckled edge like this? These metal craft rulers sure make it easy! If you haven’t yet, give it a go!
Have a great weekend, friends!
xoxo


")


I love how you turned the chargers into darling wall decor! How did you attach the pictures onto the uneven surface and did you seal the pictures with anything! Thanks for this idea!
Hey Marjie! Thanks so much! I’m so sorry, I completely left that out! oops! I edited my post to update that info. But basically, I use regular glue (like Elmer’s etc) and lightly spread it (thinly) in a few areas of the back. And I didn’t seal it with anything since it’s printed with a laserjet. Not really worried about damage since it’s to be hung on the wall, etc. :)
You are so clever Nancy! Love the transformation to picture frames – the textured paper and deckled edges are perfect. I’m definitely inspired to try it. Peggi Rink Aitken
Thanks, Peggi!! I am so glad you are inspired by this one! xoxo
Fabulous and what an excellent idea.
Thanks, Renee!! xo
Wow! Those are fantastic!
Thanks so much, Cyndi!! xoxo
Well unto today I had never heard or seen the word, “deckled”, so thanks for the education! It’s an effect that I really have loved over the years but never knew just how to obtain it.
Your pictures are just lovely! That’s a GREAT idea, Nancy! Kudos on reusing, recycling and recreating!
Thanks, Caye!! Yes, it’s a newer word for me too! I loved that edge type and went searching. I know I’ll use it often now!! xoxo
Hi Nancy, just love your work and you have given me inspiration to try & transform some items I have. I do not have a Laser printer but a canon pro 200. What would you recommend to protect the picture?
Thanks
Julie
🇨🇦🐕🦺
Hi Julie! Thank you so much!!
To protect it, I would get something like this and give it a quick spray. :)
That is such a fabulous clever idea, Nancy. They look GREAT too – so great to remake those into something so awesome.
Thanks, Michele!! It’s fun to repurpose things. You never know what you can come up with, right?! xoxo
I love how your pictures invite me to take the Boardwalk and then, not to be disappointed, I get to see the view!
An excellent design that promises and keep its promise. Simply beautiful.
Aw, I love that and didn’t even think of that, Marietta! So lovely stated. Thank you so much! xoxo
I’ll be honest, I was skeptical to begin with but this couldn’t be more perfect! I truly think the deckled look made the whole thing look and feel 100% beachy. You achieved that beautifully!
Thank you, Shirley!! And love that it surprised you! I am sometimes surprised myself! :) xo
very nice! Those are fantastic!
Thanks!!
I’d also not heard of deckling… ? But seen it.
This came out sooo cute !!
Thanks for sharing.
Thanks so much, p!!