I wasn’t able to share with you all that went into repairing in that post but thought I’d do that today.
Mainly because….it’s easy to post a pretty after photo…but sometimes the work that goes into repairing an old, broken, forgotten piece is the magic.
The paint, stain and the “pretty” take all the glory though! ;)
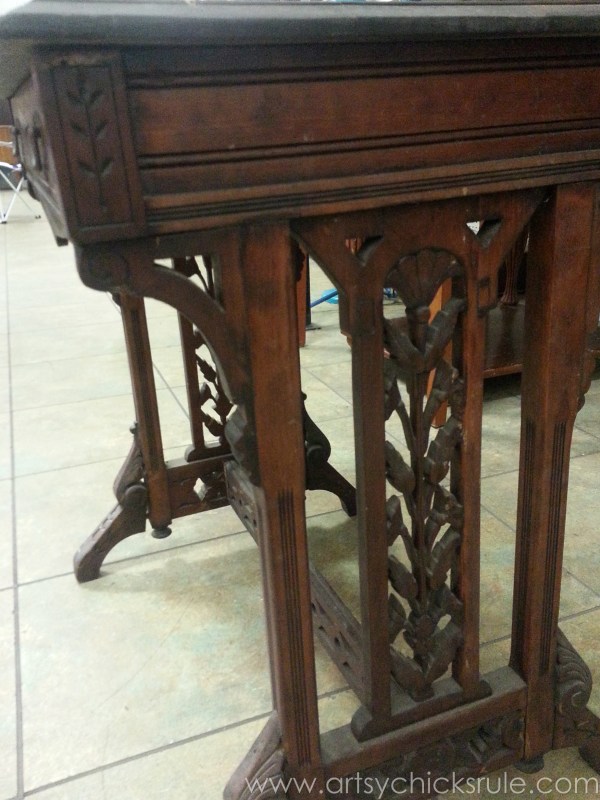
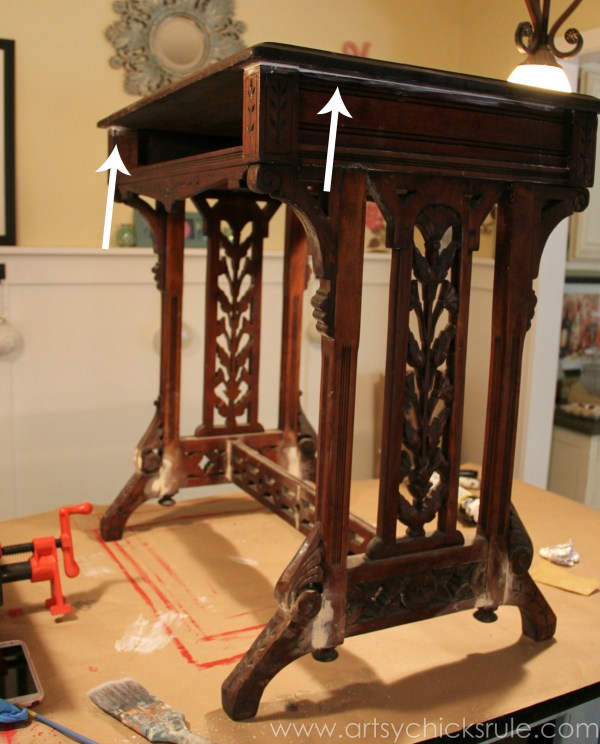
But take a look at the lovely bones.
At first glance, in the thrift store, it looked just fine.
That was until I moved it. Then I knew.
She needed work and lots of it. She was a wobbly ole mess.
And I’m guessing one of the reasons someone let her go.
(and yes, she is a “she”….she’s too pretty to be a he ;) …sorry fellas, but you know what I mean!)
I’ll be honest and tell you, as of late, I often leave the really broken pieces behind. I just don’t have the time to repair anymore.
UNLESS it’s a fabulous, one of a kind, can’t live without, can’t pass by, kind of piece.
Just like this one.
It was all of the above.
It’s almost like they twinkle at me when I look at them. Ha..sounds silly but it spoke to me…and twinkled. ;)
So I brought the poor, broken, sweet thing home.
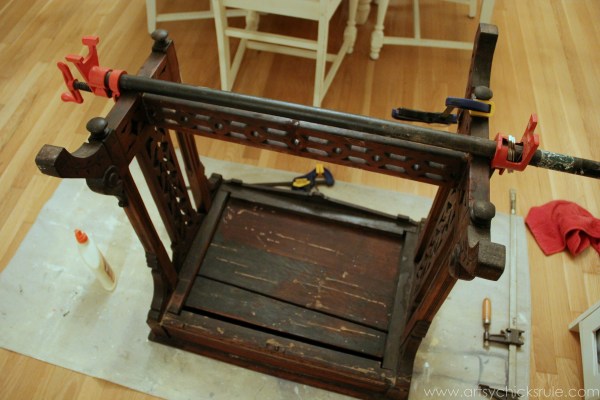
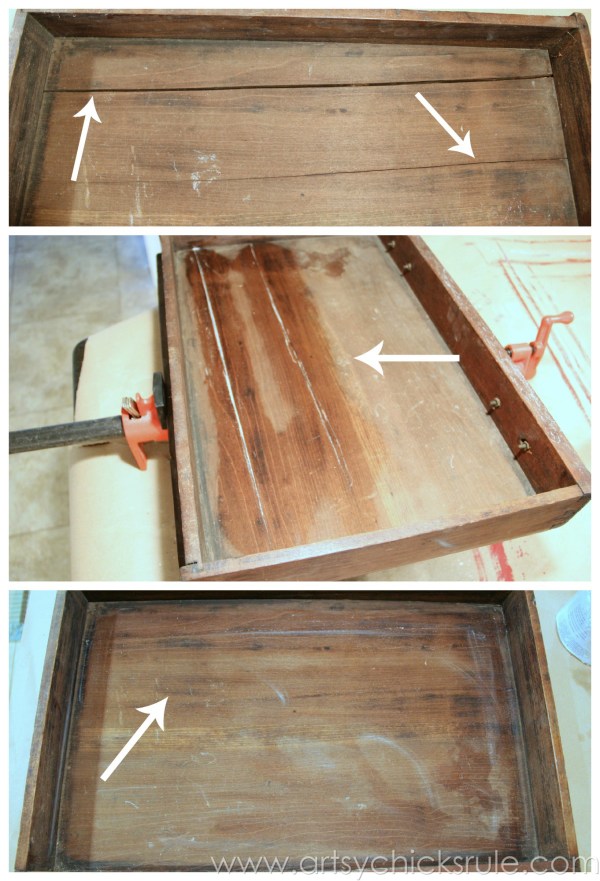
…and got to work right away. (take not of the bottom of the broken drawer there)
Tried to glue and stabilize the bottom piece there.
Hoping that would sturdy it back up.
It didn’t.
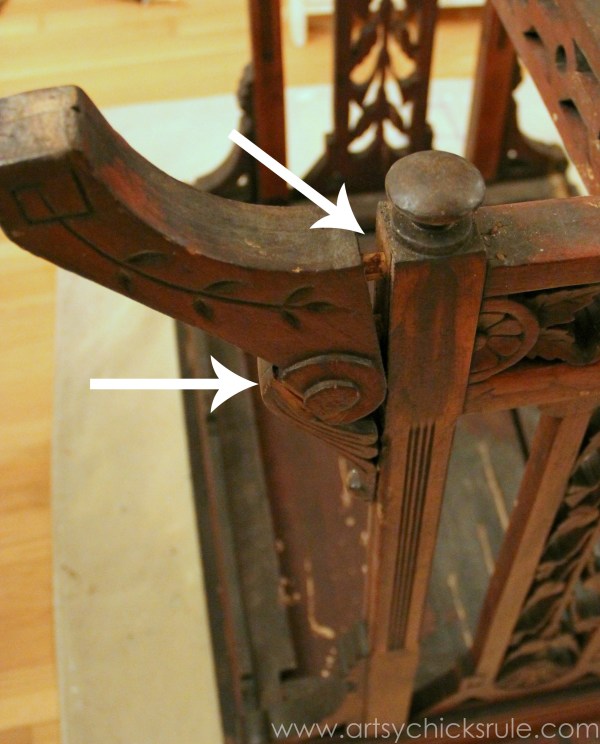
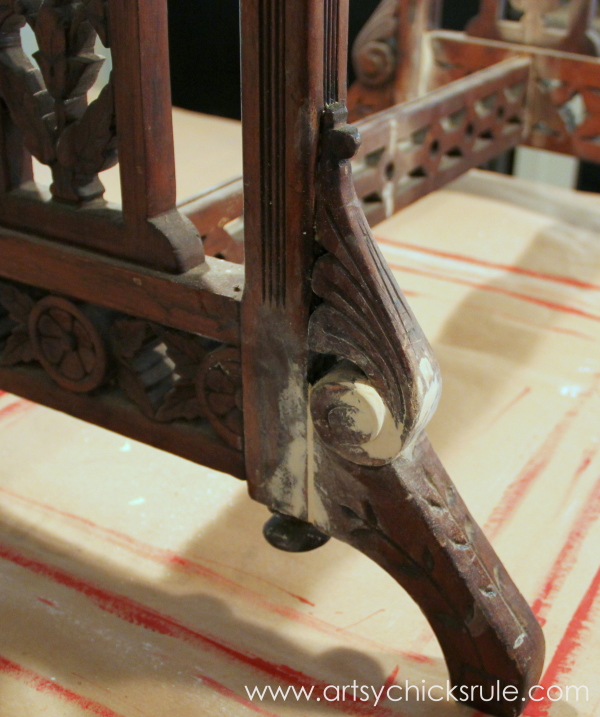
Then had to remove a leg because someone had glued and nailed it back on incorrectly.
(it was coming off anyway but I needed to repair the part that did not fit together correctly-you can see the bottom arrow below)
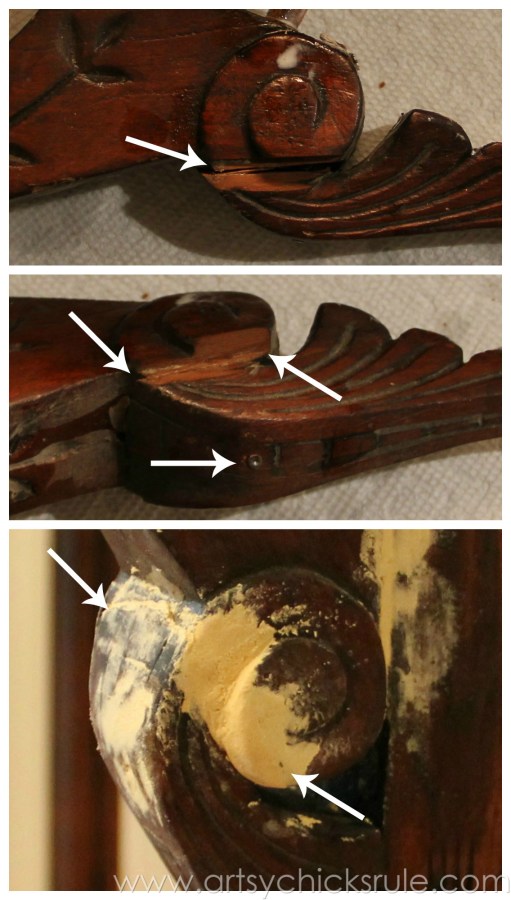
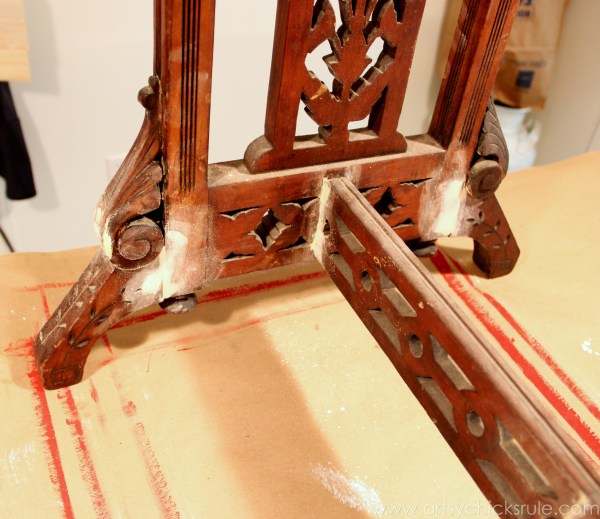
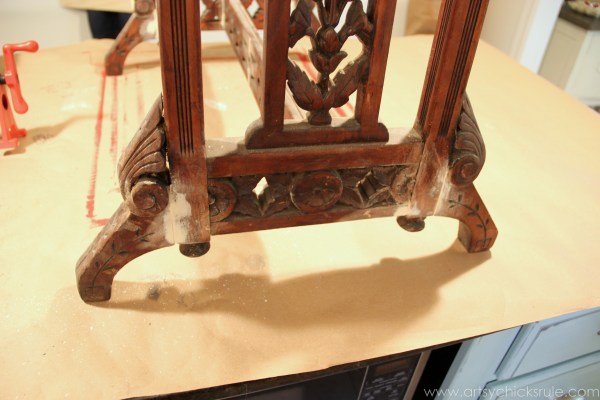
I “made” the missing curved detail with wood putty after it was put back together properly.
The broken area back together where it belongs and new detail created to match the missing.
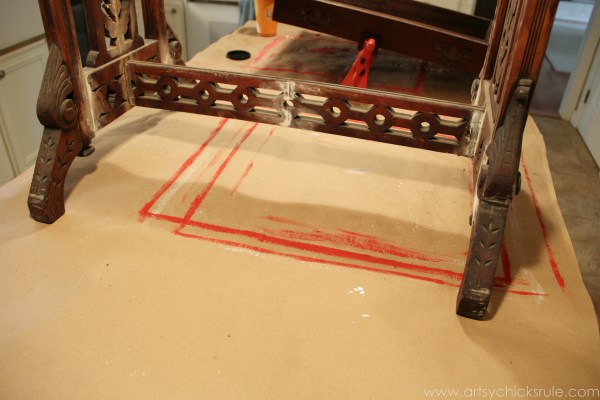
Lots of glue and clamps on the other areas….
All legs needed glue….well I glued just about everything. :)
And/or caulked and wood puttied….
Well, after all that….still wobbly as heck.
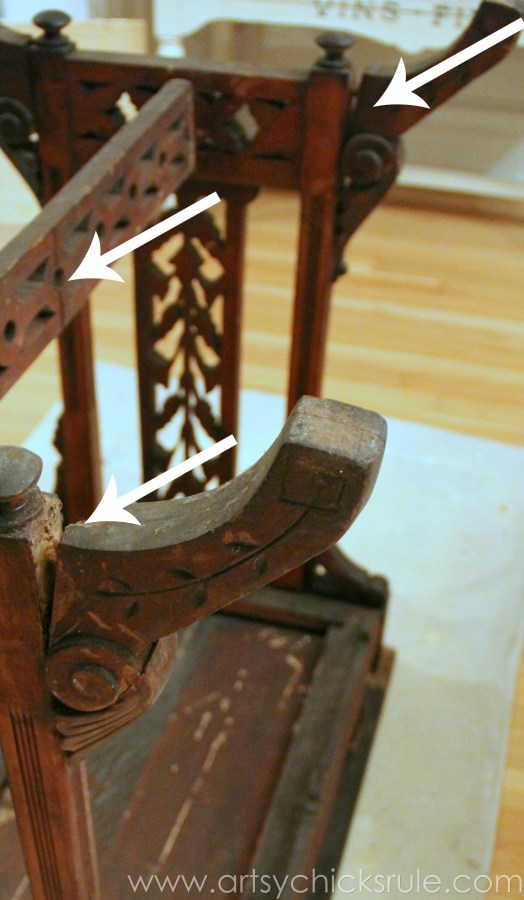
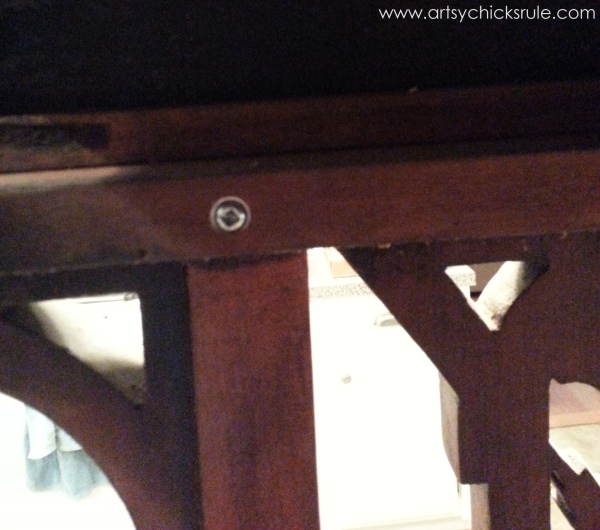
So my husband pulled out his Kreg Jig and fixed that problem once and for all…..
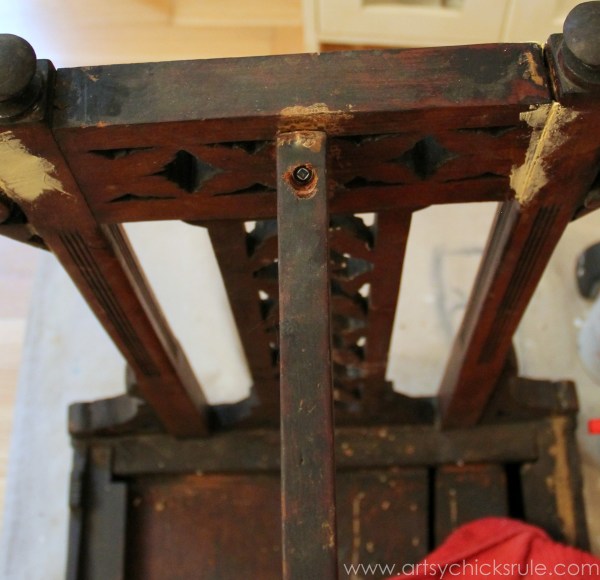
And more screws here….at the top.
Both sides, top and bottom….NOW it is very sturdy.
The drawer even needed some gluing and clamping. (remember that photo above?)
The gentleman who helped me moved it to my car picked it up and the drawer fell out.
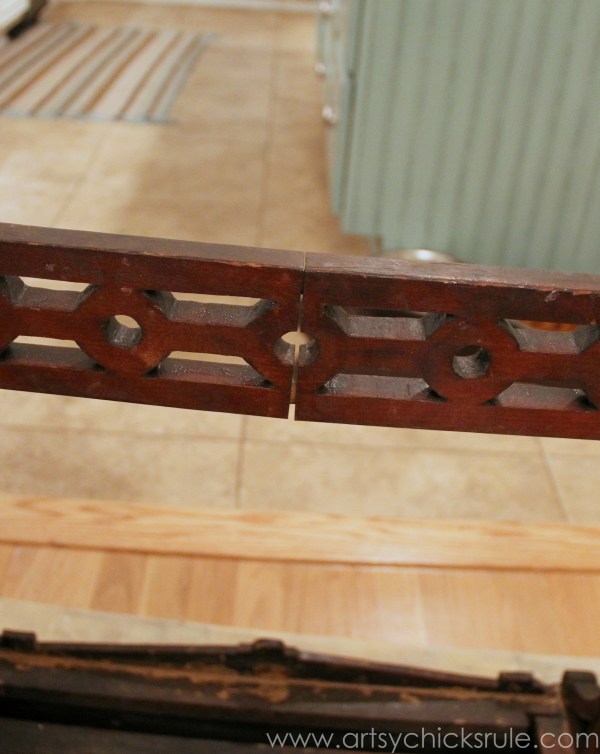
I think it was already split…but that back piece almost fell completely out of the track.
So I glued and clamped that too. (there were two splits, one complete one-the one that fell out the backside- and one partial one)
All fixed, good as new! ;)
Cleaned up and painted so you’d never know.
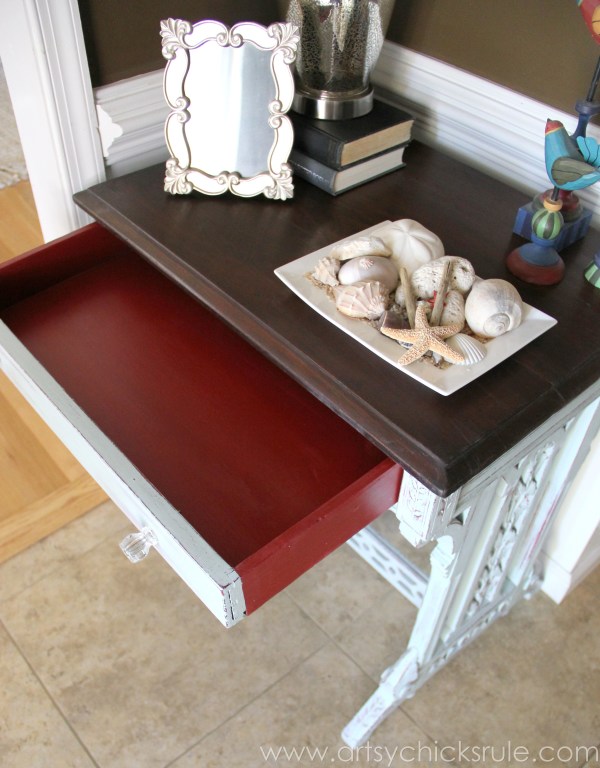
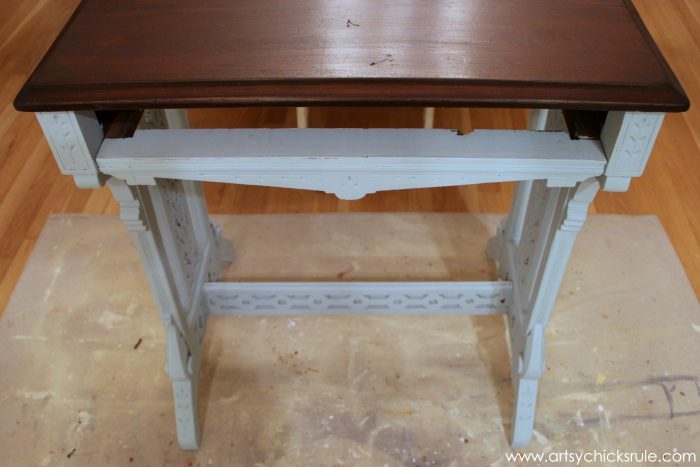
I knew the rest of this needed to be painted with all of that repair work but I really wanted to stain the top.
So I very lightly sanded and applied General Finishes Java Gel Stain. (after cleaning well)
That stuff is the bomb. Really.
I am just loving it. It is SO easy to apply….and with great results.
After that had cured for a few days I applied a coat of General Finishes Gel Topcoat Satin.
Let that dry a day or two, lightly sanded and applied a second coat.
Loving that as well. It’s also a delight to apply.
Just rub it on…and it looks fabulous.
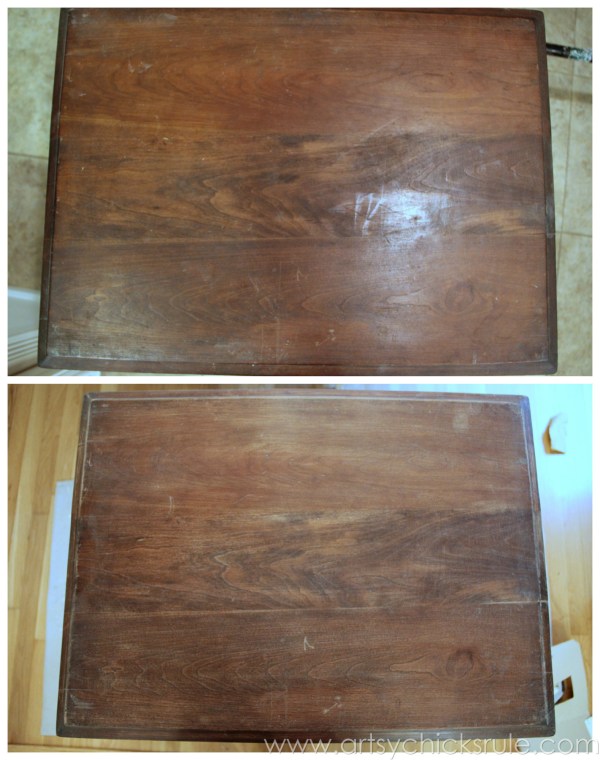
Before and lightly sanded.
…and done.
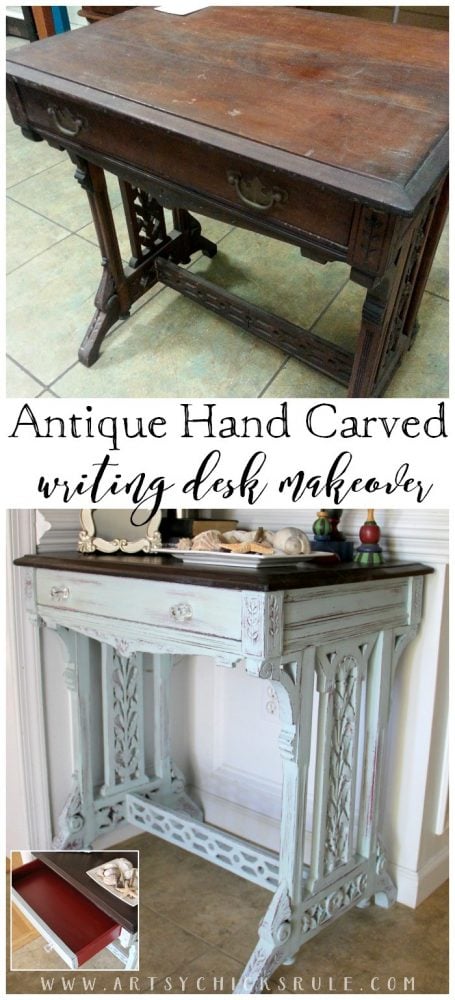
PIN this writing desk makeover to save it for later!
I painted this table with Teal and Red Annie Sloan Chalk Paint.
I didn’t use wax to seal, for one, because I think I might have gone a little crazy trying to get into all those crevices.
(I almost did with the paint brush! ;)…as you saw if you read the other post about this table I linked above)
So I decided to use the same sealer I used on my Chalk Painted kitchen cabinets…..Varathane Floor Sealer (in semi-gloss).
I love it and it’s held up beautifully on my kitchen cabinets….and it’d be sooo much easier to seal this way.
I know this little table/desk was a ton of work….but she was so worth it!
So much so, that I had originally intended to sell this piece once finished (I am out of room in my home ;) ) but have decided to keep her.
I’ll find a permanent place for her…but for now she is here in the foyer.
Check back in next week to see how I transformed these night stands! (it involves fabric! ;) )
Aw thanks so much Lynn! Yes, it was quite a bit more work than I had planned on. But once my eyes were set on it, it was mine!
That’s when it becomes a labor of love. :)
Happy weekend to you!
Nancy
LOVE!! I do not have any experience with furniture repair and have only
purchased pieces that needed transformation via paint only but you’ve
made it seem doable (with hubby help).
Thanks so much! Yes, some are more do-able than others. ;)
I have a beautiful waterfall dresser that I found last year that needs several drawers repaired. I haven’t tackled that one yet but hopefully soon!
Patience (sometimes short! ;) ) and a little love gets you through.
Have a great weekend!
Nancy
Nancy, Question about Varathane Floor Sealer on your kitchen cabinets painted w/ chalk paint. Nancy, my old cabinets are Harvest Gold! I am too old and weak to strip sand etc. so chalk paint is my only choice, but for the kitchen!? If I use a shade of white, does the Varathane turn yellow like I have seen it do in the past? What do you recommend??? I have a small kitchen w/ 4 tops and 5 bottoms (cabinets). Dishwasher white. Stove black. Refrigerator stainless steel. HELP ME!!!!! Thank you. Vicki (a subscriber for a long time). I sure do hope you read these and will answer, I know you are busy.
Hi Vicki! :)
I think all polys have the tendency to turn a tiny bit yellow-ish. Some more than others. With that said, I’ve not had much yellowing at all with the Varathane I used. Maybe a teensy, tiny bit. Water based will be your best bet. Oil based will turn yellow. Older water based would yellow but they’ve come out with many now that claim no yellowing.
One thing you can do to counteract it a bit is paint your cabinets maybe a shade whiter than you’d like them.
Hope that helps and thanks so much for being a long time reader! :)
I’m very appreciative of those that take the time to comment so try to answer every single email/comment I get here.
Hope you have a great weekend and good luck!
Nancy
Wow! All of the work that you put into this piece was well worth it. I love all of the detail but the entire time I was reading what you did, all I could think about was how hard it had to have been to clean it before you could paint. Glad you are keeping this!
Thank you Paula! Yes, there were a lot of little crevices! ;)
To clean, paint in and around and seal. But I’m so glad I brought this one home, even with all of the work it required.
(and I’m glad it’s done!)
Nancy
This desk is GORGEOUS. I can’t get over the carving!! What a great find. Looks like you put a lot of love into this and its no surprise it turned out stunning. Well done.
Just beautiful. They just don’t make furniture like that anymore. That must have been hand carved wouldn’t you guess? Yikes! i worked for a little old lady a number of years ago that had a lady’s writing desk. I have never seen anything like it — it was exquisite and this little table reminds me of that desk.
Thanks Barb :)
You are so right about that. And yes, I am quite certain is was hand carved. What a treasure….just dumped off at the thrift store. Can you imagine?! I had to bring it home with me but who knew it was in such need of repair. Either way, I am so very happy I rescued it and did not leave it behind. :) xoxo
Want to be inspired, learn new skills, discover all the tricks to furniture makeovers, creating new out of the old and more? You'll also receive my FREE ebook "Creating Fabulous Finishes" PLUS access to my private Printables Resource Library, too!
Sign up to get the Weekly Newsletter! Our emails include an unsubscribe link and you may opt-out at any time. Your information will *never* be shared or sold to a 3rd party.


")

")


")

Beautiful piece and you’ve given it such a gorgeous new look. I’m glad this piece found someone like you to restore it’s beauty!
wow, Kudos to you. This was a ton of work, But, It all paid off. Great Job.
You must be proud, because we are.
Aw thanks so much Lynn! Yes, it was quite a bit more work than I had planned on. But once my eyes were set on it, it was mine!
That’s when it becomes a labor of love. :)
Happy weekend to you!
Nancy
Thanks, Nancy, for all the details on how you made this piece so beautiful! I’m in love with her!! :) xo
Thanks Karen! Me too! And to think, she was headed for sale originally. No way I could let her go now. :)
Hope you have a great weekend!!
xo
Nancy
Great piece, beautiful job!
Thank you so much!
LOVE!! I do not have any experience with furniture repair and have only
purchased pieces that needed transformation via paint only but you’ve
made it seem doable (with hubby help).
Thanks so much! Yes, some are more do-able than others. ;)
I have a beautiful waterfall dresser that I found last year that needs several drawers repaired. I haven’t tackled that one yet but hopefully soon!
Patience (sometimes short! ;) ) and a little love gets you through.
Have a great weekend!
Nancy
Nancy, Question about Varathane Floor Sealer on your kitchen cabinets painted w/ chalk paint. Nancy, my old cabinets are Harvest Gold! I am too old and weak to strip sand etc. so chalk paint is my only choice, but for the kitchen!? If I use a shade of white, does the Varathane turn yellow like I have seen it do in the past? What do you recommend??? I have a small kitchen w/ 4 tops and 5 bottoms (cabinets). Dishwasher white. Stove black. Refrigerator stainless steel. HELP ME!!!!! Thank you. Vicki (a subscriber for a long time). I sure do hope you read these and will answer, I know you are busy.
Hi Vicki! :)
I think all polys have the tendency to turn a tiny bit yellow-ish. Some more than others. With that said, I’ve not had much yellowing at all with the Varathane I used. Maybe a teensy, tiny bit. Water based will be your best bet. Oil based will turn yellow. Older water based would yellow but they’ve come out with many now that claim no yellowing.
One thing you can do to counteract it a bit is paint your cabinets maybe a shade whiter than you’d like them.
Hope that helps and thanks so much for being a long time reader! :)
I’m very appreciative of those that take the time to comment so try to answer every single email/comment I get here.
Hope you have a great weekend and good luck!
Nancy
She is so gorgeous! You did wonders with her! I am glad you did. She might have ended up in the trash!
Thanks Rose! She was a true labor of love! :)
Happy Weekend!
xo
Nancy
Wow! All of the work that you put into this piece was well worth it. I love all of the detail but the entire time I was reading what you did, all I could think about was how hard it had to have been to clean it before you could paint. Glad you are keeping this!
Thank you Paula! Yes, there were a lot of little crevices! ;)
To clean, paint in and around and seal. But I’m so glad I brought this one home, even with all of the work it required.
(and I’m glad it’s done!)
Nancy
You put a lot of work into that desk and the out come is beautiful, Nancy! That gorgeous detail would have sucked me in to.
Hey Denyse!
Thanks so much! That detail is amazing. No way I could pass it up. :)
Nancy
Looks wonderful, I love teal hues.
Hey Darlene! :)
Thank you !
Wow– so much work, but it turned out great!
You should join my link party, http://www.carissamiss.com/2015/01/outside-box-no-18.html
Love your stuff!
Hey Cassie!
Thanks so much!
Nancy
This desk is GORGEOUS. I can’t get over the carving!! What a great find. Looks like you put a lot of love into this and its no surprise it turned out stunning. Well done.
xo Ashley
Thank you Ashley :)
The carving is amazing! It is in it’s forever home for sure! ;)
xo
Nancy
Just beautiful. They just don’t make furniture like that anymore. That must have been hand carved wouldn’t you guess? Yikes! i worked for a little old lady a number of years ago that had a lady’s writing desk. I have never seen anything like it — it was exquisite and this little table reminds me of that desk.
Thanks Barb :)
You are so right about that. And yes, I am quite certain is was hand carved. What a treasure….just dumped off at the thrift store. Can you imagine?! I had to bring it home with me but who knew it was in such need of repair. Either way, I am so very happy I rescued it and did not leave it behind. :) xoxo
Un escritorio precioso , gran trabajo y el acabado es muy bonito.
Thank you!! :)
I know I’m a few years out of date on this one, but ……..Thats some amount of work that went into restoring this piece. Well done. Simply amazing !
Thank you, Paul!
Love the inside of the drawer…not a fan of red but love it how you used it! I would do this even!!
Thanks, Lesley!! Yes, that’s about as much red as I was willing to do at that time! ;) xo