Easy, DIY Snowflake Wall Hanging
Want to make a really unique, sparkly Snowflake Wall Hanging?
It’s really fairly simple and easy to do.
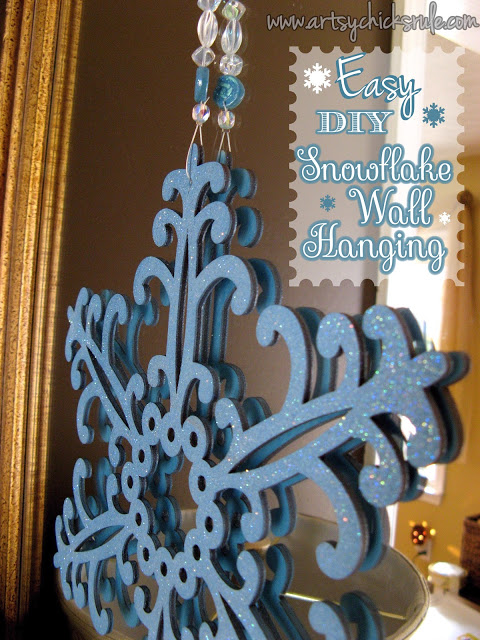
Isn’t it pretty??
And sparkly. I love anything sparkly. :)
And can be made in less than an hour…….
How cute are these snowflakes???
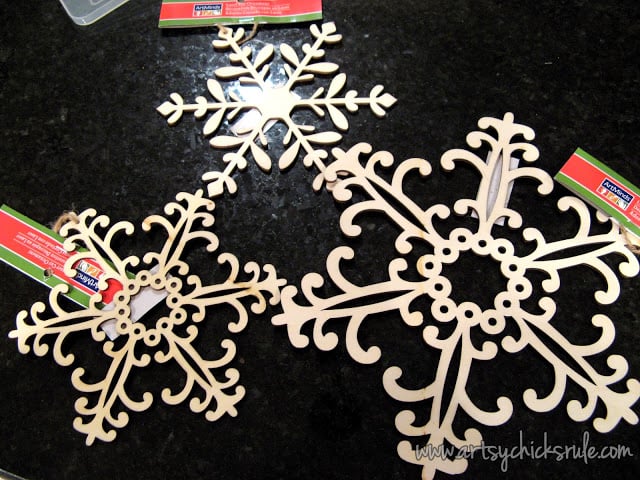
I just love them. Very delicate and lacy….much like a snowflake.
I snatched these up at Michael’s. They had all of their Holiday items 50-60% off.
I decided to make a really sparkly wall hanging out of them.
But I didn’t want to just hang them together, to each other, and be done.
I wanted some bling in between.
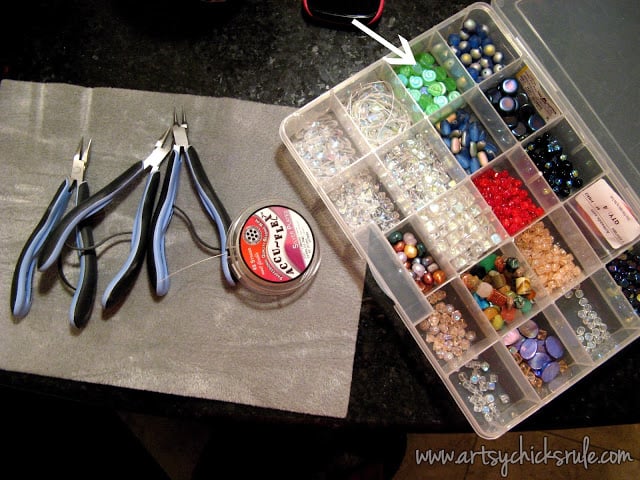
So I pulled out some of my beads and jewelry making items. If you don’t have jewelry making items, no worries.
There are only a few items you need and they can be found at Michael’s or most other craft stores.
Beads of your choice, crimp beads and beading wire.
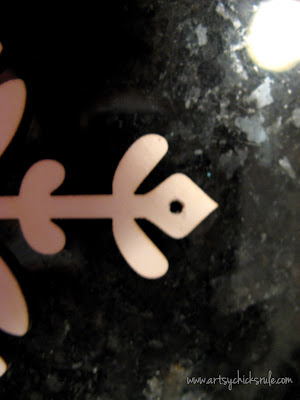
The snowflakes come with one hole already pre-drilled on the top of each flake. I needed two so I could connect them to each other.
I happen to have some tiny files that worked perfect for this.
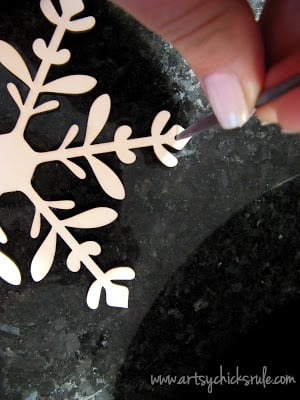
I just twirled it around and made a nice little hole.
If you don’t have these, I am sure you could do the same with a nail or screw. ( by twisting it gently)
Or a drill would do the job too.
They are very thin so it wouldn’t take much. Just be careful….because, like I said, very thin.
After the extra holes were made, it was time for the pretty paint.
Turquoise and white.
Turquoise, and shades of blue in general, are my most favorite colors and I have them sprinkled throughout my entire house.
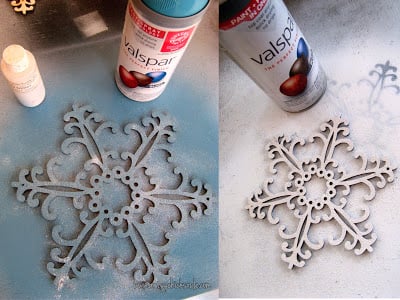
While the paint was still wet I sprinkled them with glitter.
VERY liberally….I like lots of sparkle!
They are quite fragile so don’t tap the edges to get the extra glitter off…..
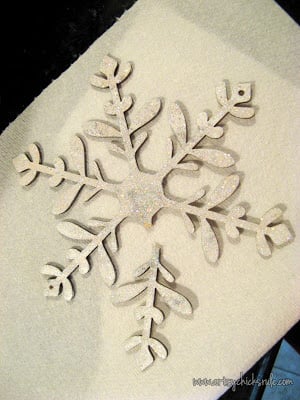
….or this will happen.
OOPS
I had to glue it back together with wood glue. And that means I had to sit and twiddle my thumbs waiting for it to dry.
And I’m not good with that. Plus it was hugely frustrating to break my little pretty I had just created.
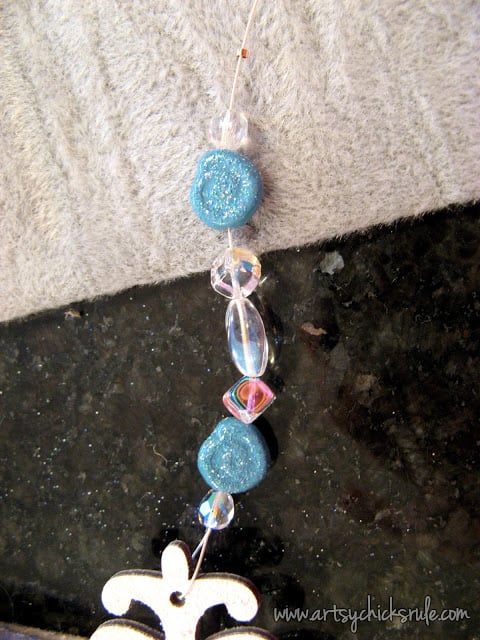
For the beads I chose to use the green ones you see in the picture. Unfortunately they would not match the turquoise and white spray paints I had chosen to paint the snowflakes.
So I painted them too.
I also used a variety of those clear iridescent beads.
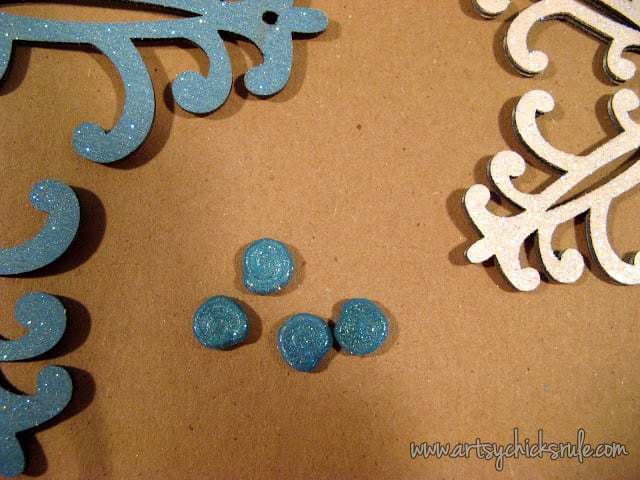
The green beads sprayed with the same turquoise paint…..with sparkles too, of course.
Next comes the beading. This is super easy, I promise.
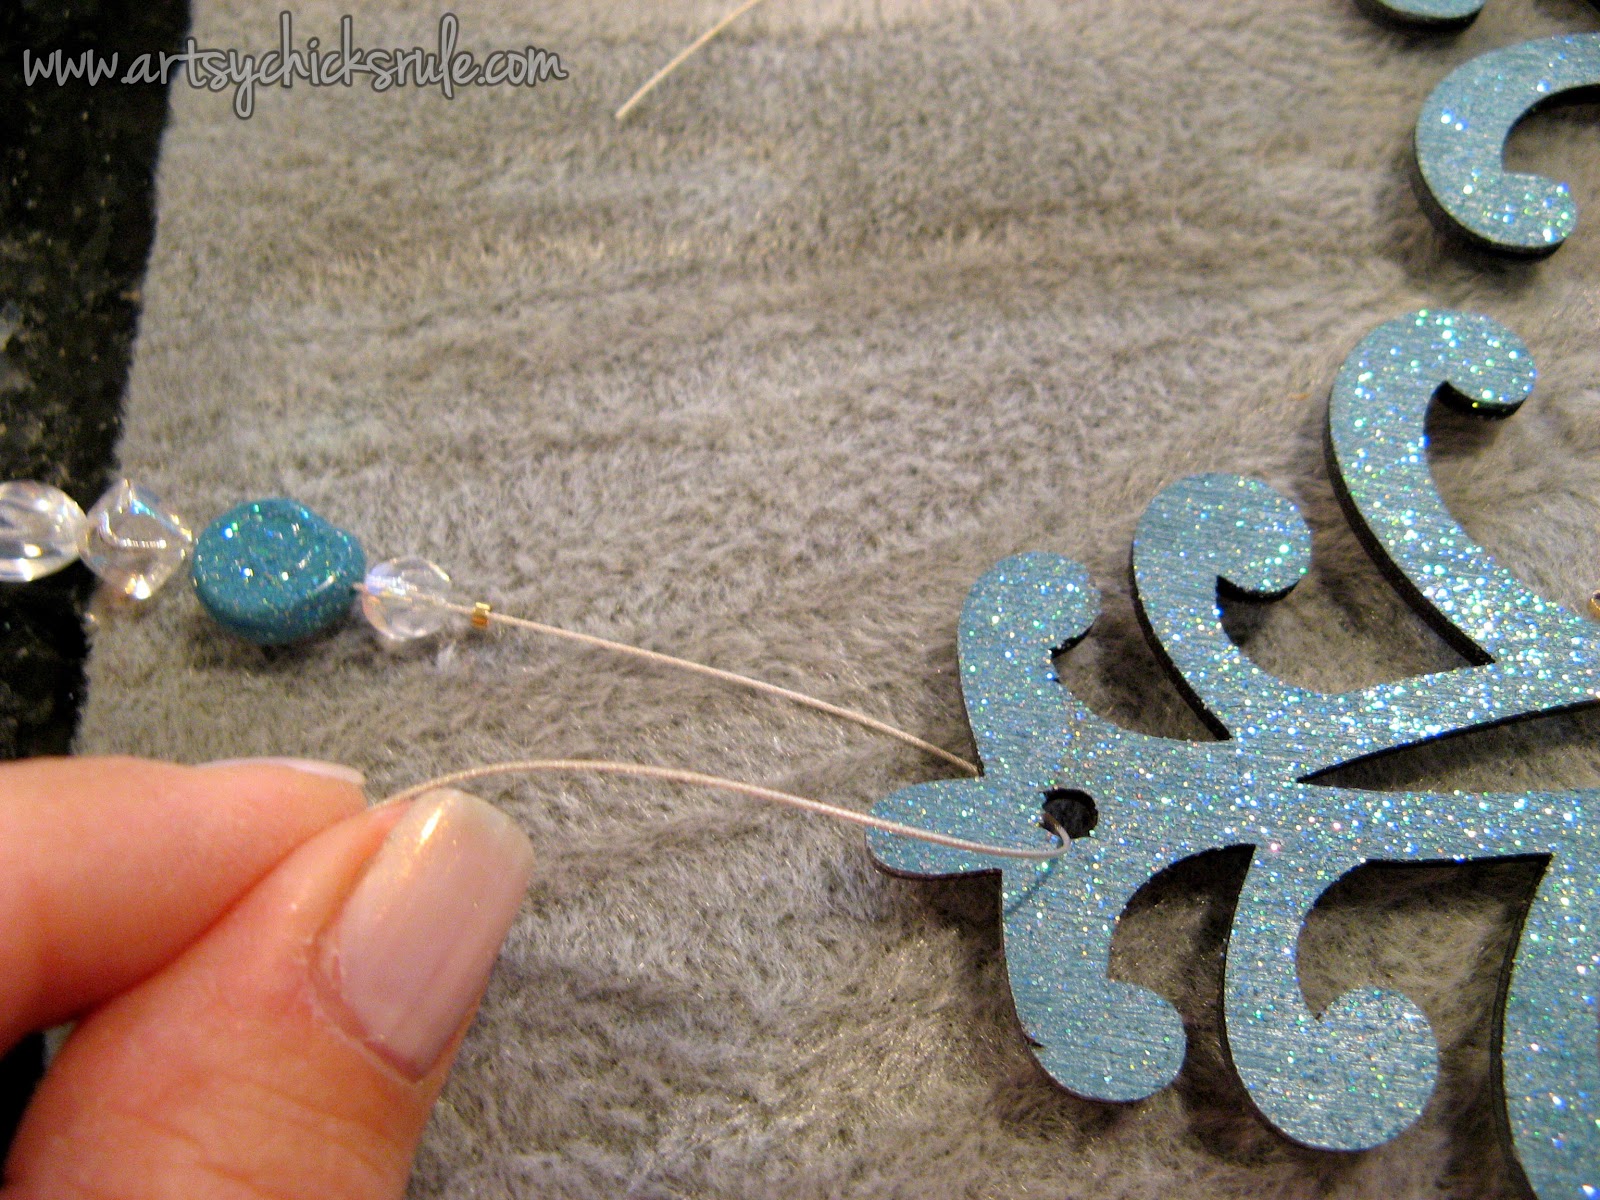
Here are the two items you need (besides whatever beads you choose)
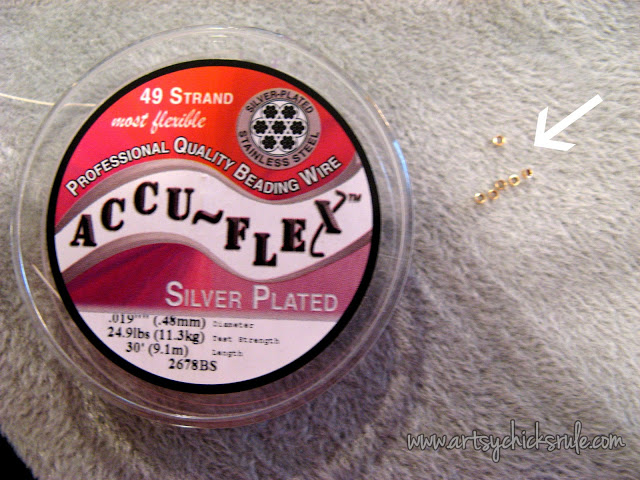
Beading wire and crimp beads. Those are the tiny little things there.
They are sterling silver but look gold in the picture.
You don’t have to get silver plated and definitely not sterling…any type will do.
That is just what I had on hand, so I used it.
You could even just use a thin, metal wire and loop it the same way and skip the crimp beads. Just loop the wire through the hole and twist it around itself on the other side.
But I wanted mine a little more “fluid” looking so I went with this.
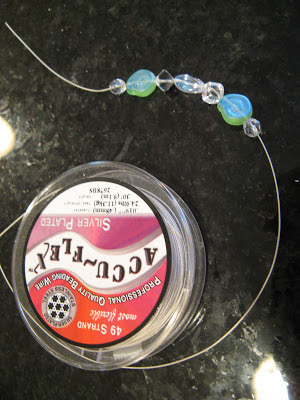
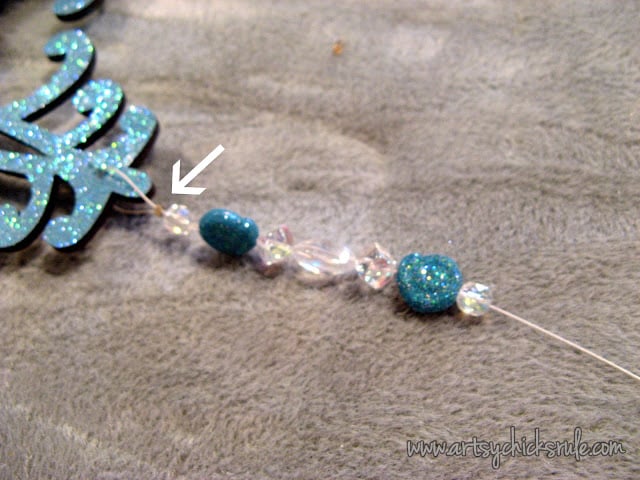
Next you will string the beads.
Easy! (ignore the green…that was before I sprayed them turquoise)
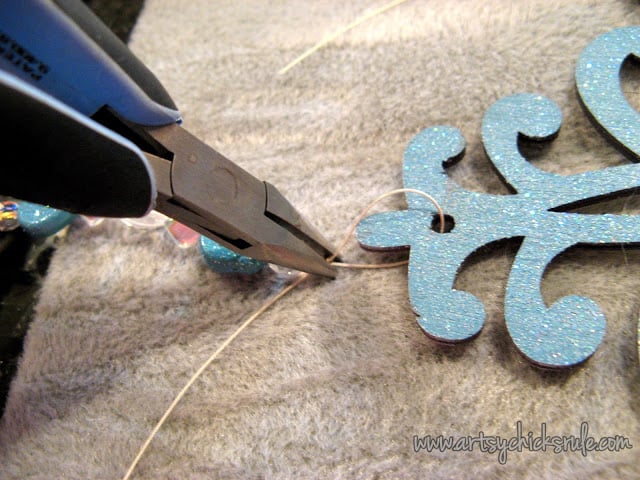
Then loop the wire through the hole…..
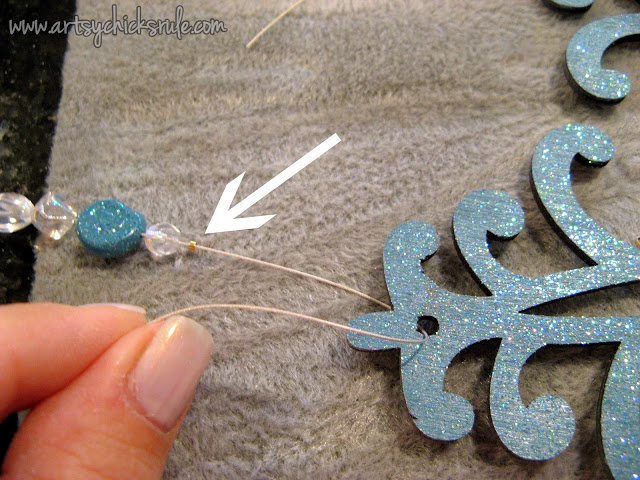 …be sure to add the crimp bead to the wire before putting it through the hole, as shown.
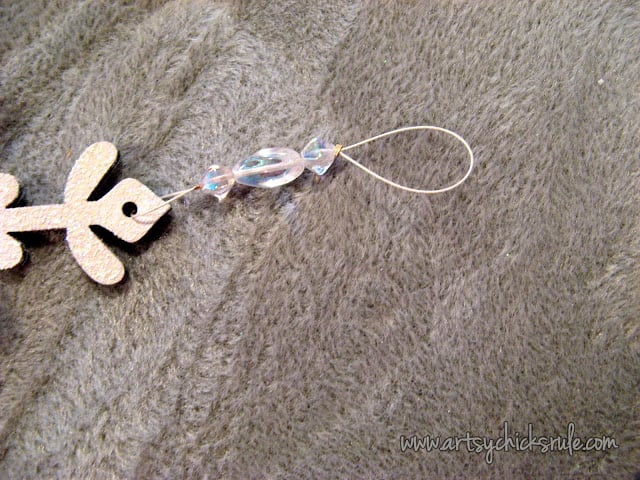
Then thread the wire back through the crimp bead…
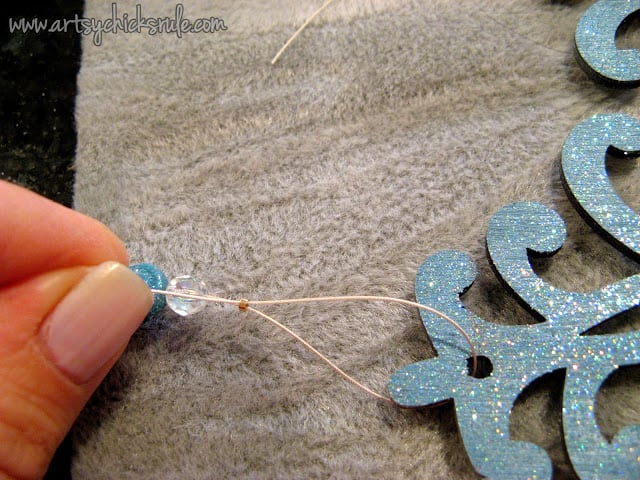
Pull just tight enough so that it will dangle….and crimp.
You can use any kind of needle nose pliers for this. Just hold the wire and crimp bead in place and squeeze tightly with the pliers.
And you end up with this….
Take some scissors and trim the excess wire left over after crimping.
Now repeat the same process for the other one.
I made a big loop at the top so I would have room for a ribbon to go through it.
Or so it could be hung on something.
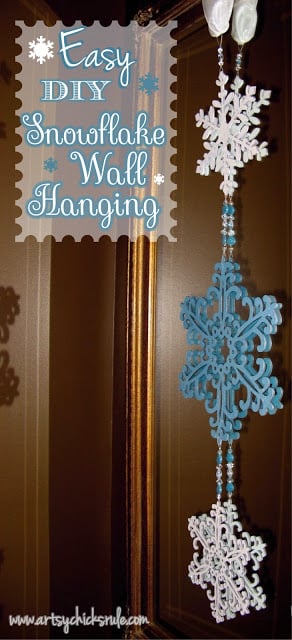
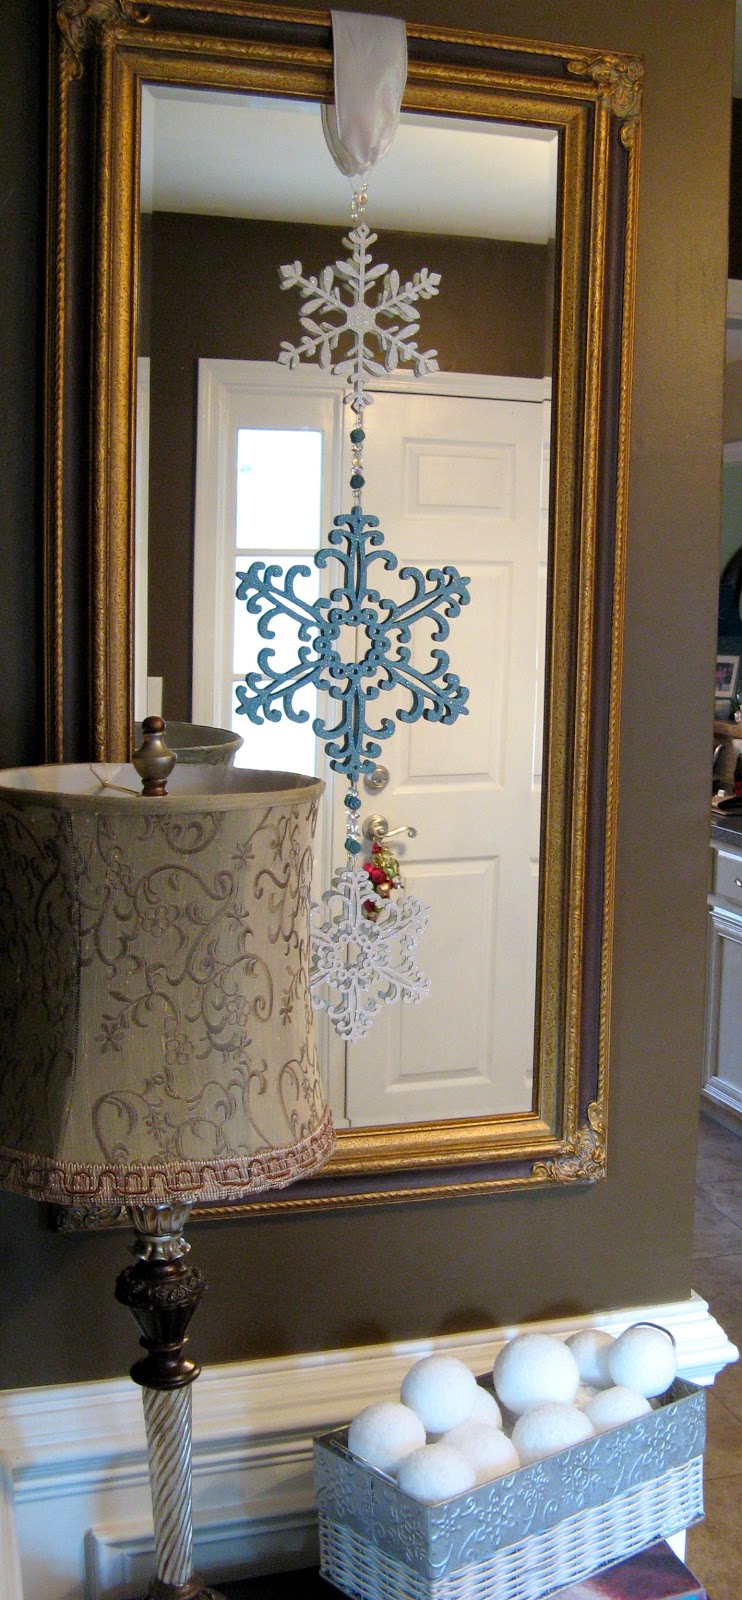
And here it is finished hanging from a big, white, iridescent ribbon draped over the long mirror in my foyer.

Sparkly, Turquoise Heaven….ahhh, love
Easy!
Honestly, if I hadn’t broken that one snowflake, I think I would have finished this in less then an hour.
It was really fun to do.
The options are truly endless….you could make them green, red, silver, gold.
Any color snowflakes, any color beads.
I usually hang ribbons or wreaths over my mirrors but wanted to do something different this year.
This is perfect! I love how it turned out.
I’d love to hear about new crafts you’ve tried for the Holidays. Do you decorate with red and green only?

You might also like these projects:


Follow along! –> Instagram ~ Facebook ~ Pinterest ~ Bloglovin


")


Absolutely beautiful Nancy! You’ve done it again :) I’m going to try this too, maybe 3 of them also, to tuck into my mantle decor or to hang in a window in staggered heights. Thank you for sharing!
Thank you Heidi :) Yes, you can use it in any of those places! I might make another one this year in different colors. It was so easy to make!
Nancy
So, do cute, Nancy! xo
So, so cute, Nancy! xo
Thanks Karen!! I still love it, 3 years later! :) It is hanging on my foyer mirror as I type! ;)
Nancy