Decoupage Pumpkins with Napkins (and more!)

Decoupage pumpkins with napkins…so many pretty designs to choose! Easy and fun to create your own fall decor!
Hello friends!
Let’s makeover basic pumpkins for our fall decor today!
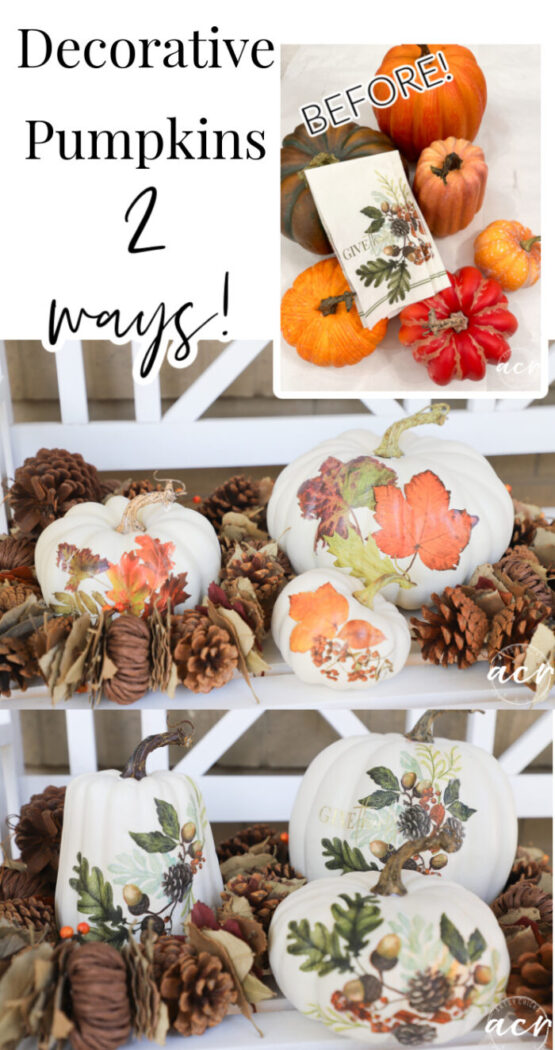
I picked up these pumpkins for 50% off at Michael’s …
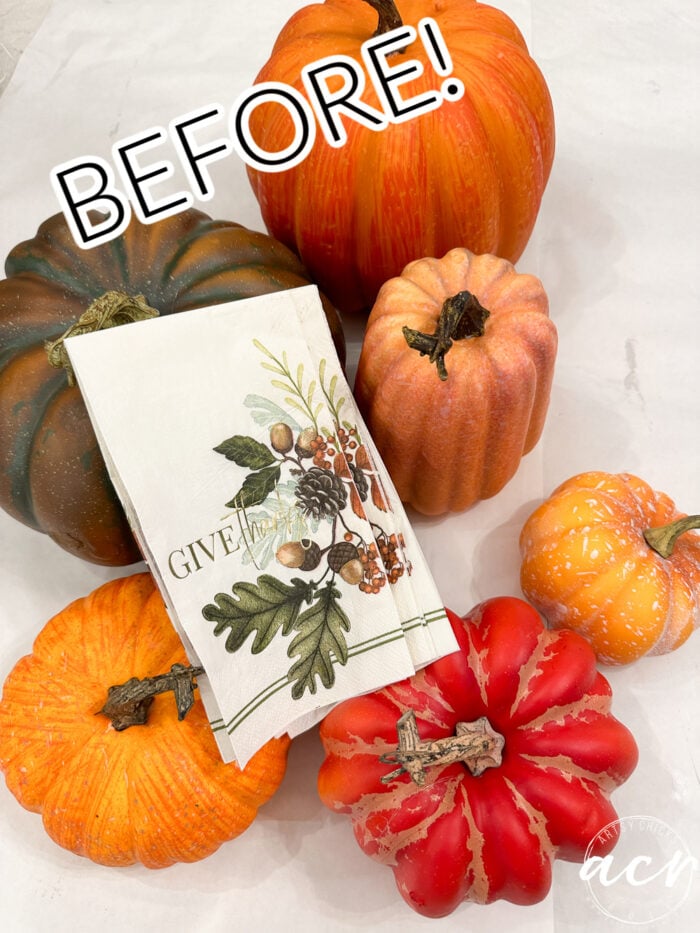
…the pretty napkins came from Bible study. Actually, I saw the pretty napkins that went with our snack for that day and thought I’d do something fun with it! Then one of my friends said put it on a white pumpkin…so I did! lol
But I also used one of our transfers for another set of pumpkins too! I’ll share both makeovers below.
Decoupage Pumpkins with Napkins (and more!)
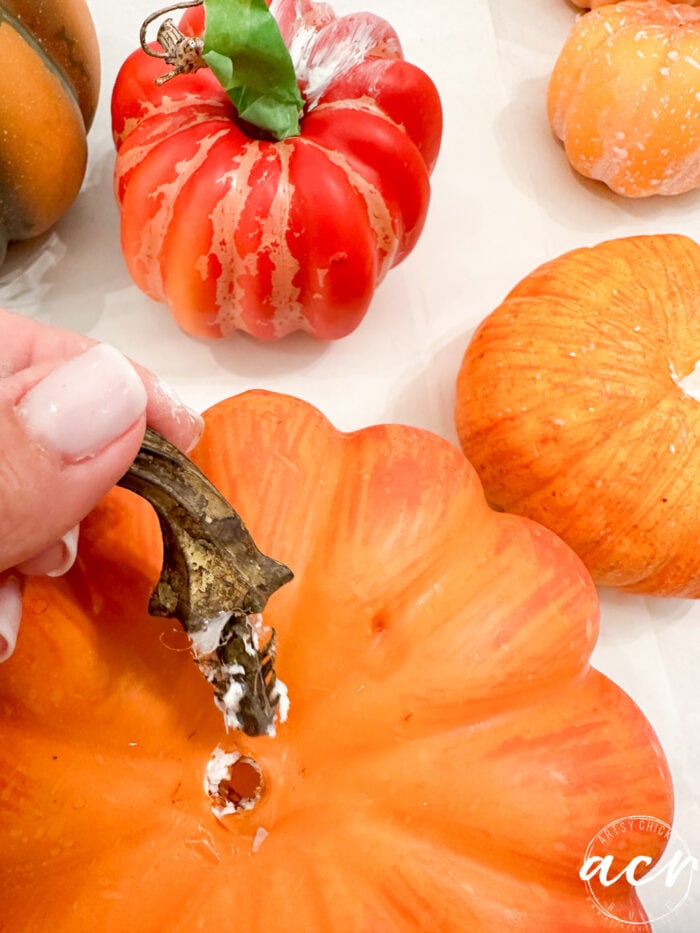
I began by pulling whichever stems out that I could. Some were just stuck in and were pretty easy to come out. Some were not so I just taped those up.
PAINT
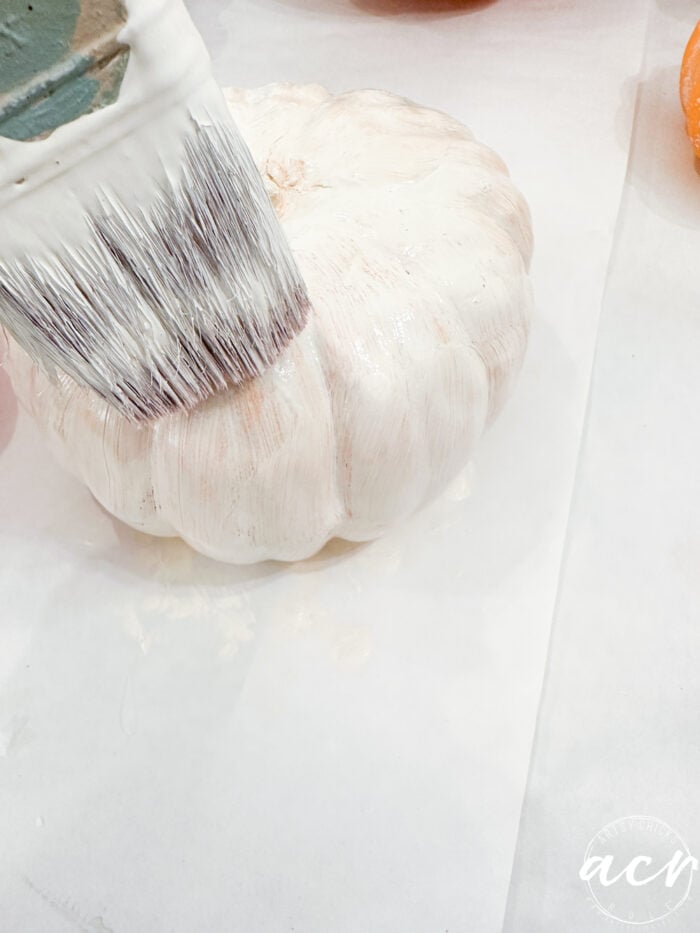
I applied several coats of a blend I created using Victorian Lace and Limestone paint colors.
You see that little bugger in the back that kept bleeding through. I ended up having to take it outside and spraying it with Shellac spray primer before proceeding further. (that fixed the bleed-thru…always does!)
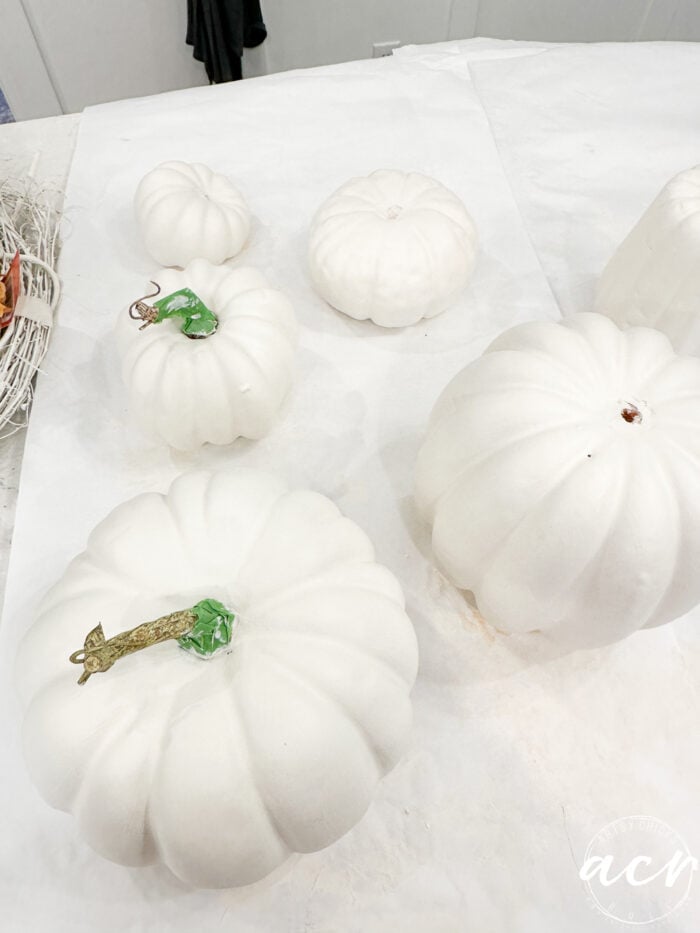
Then I glued the stems back in place and left them overnight.
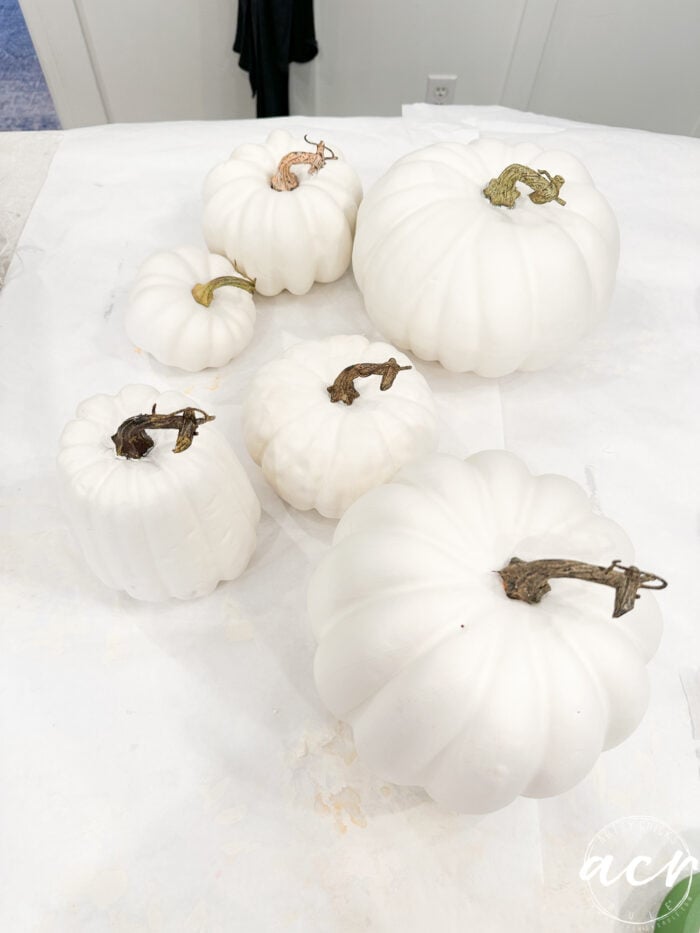
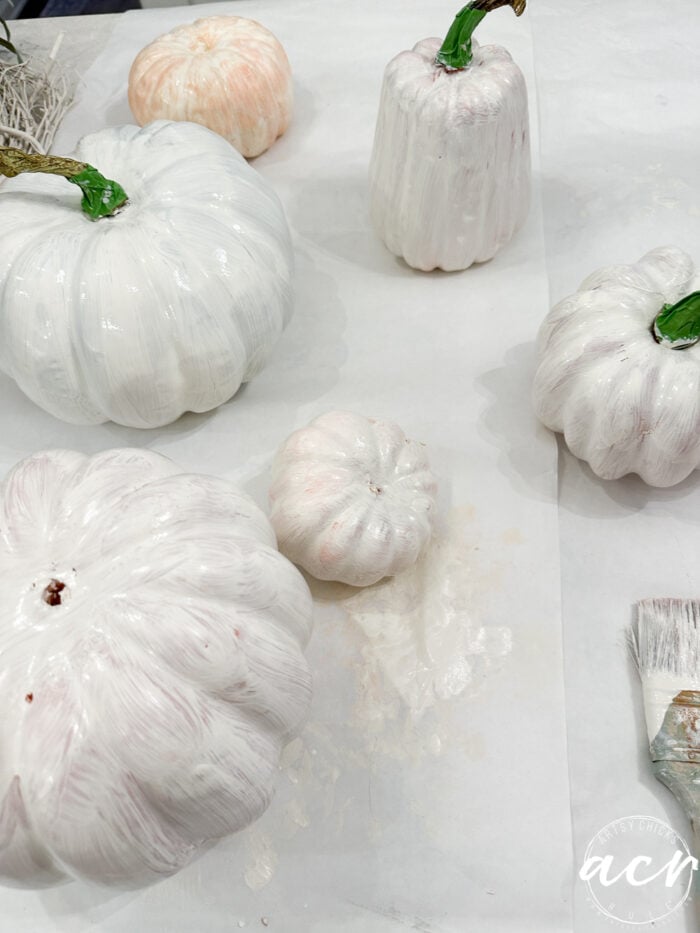
Aren’t they cute already? I love white pumpkins!
MATERIALS SOURCE LIST – Decoupage Pumpkins with Napkins
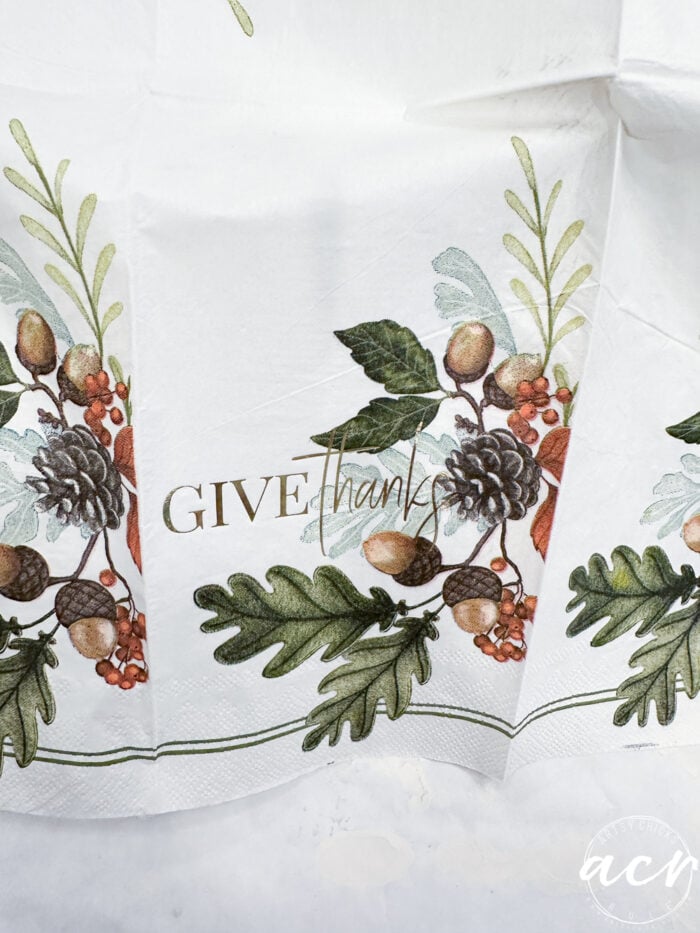
- Napkins of your choice (this one has a pretty design)
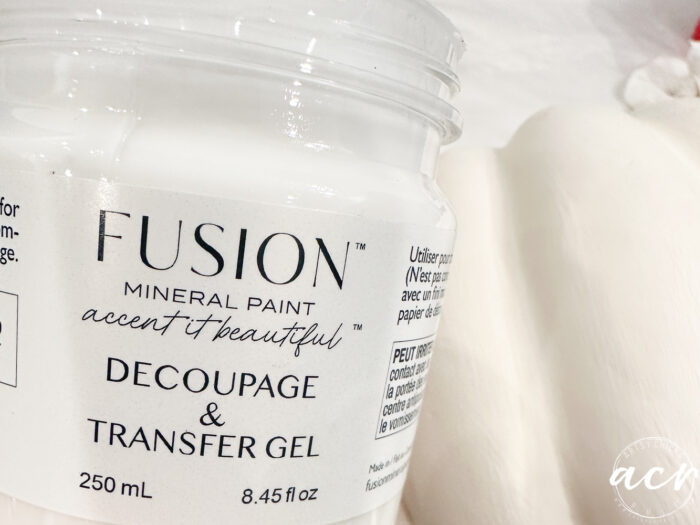
- Decoupage & Transfer Gel
- Paint to paint pumpkins, if desired
- Crunchy Leaves Forever Fall Transfer
DECOUPAGE
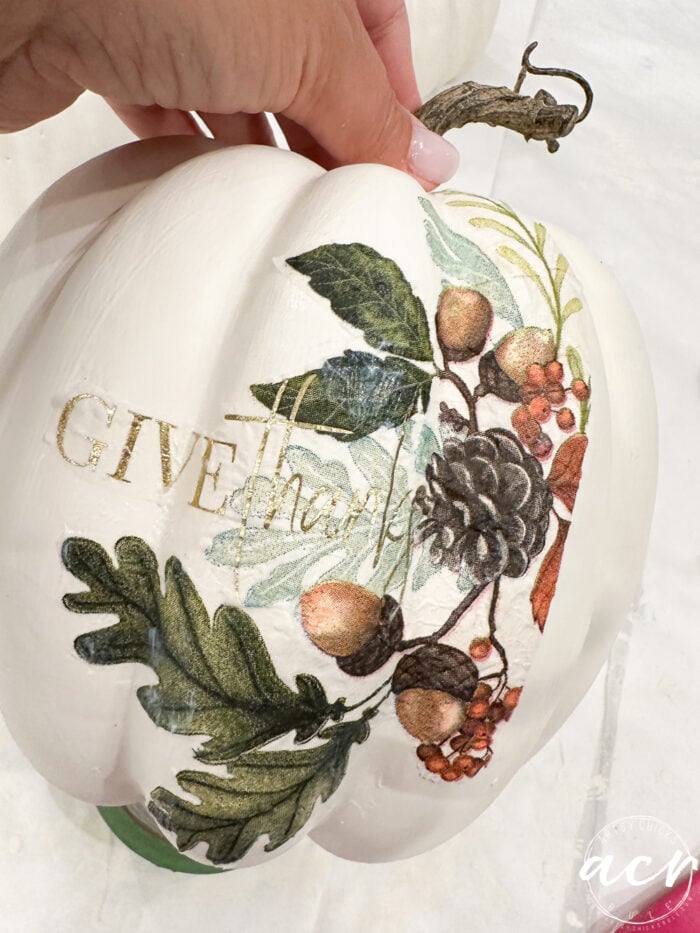
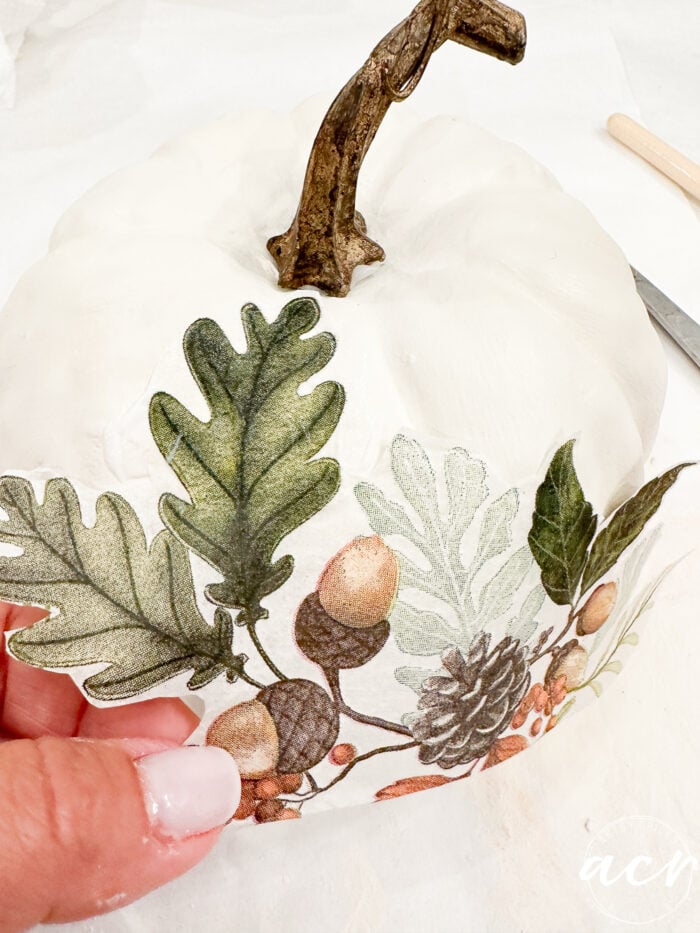
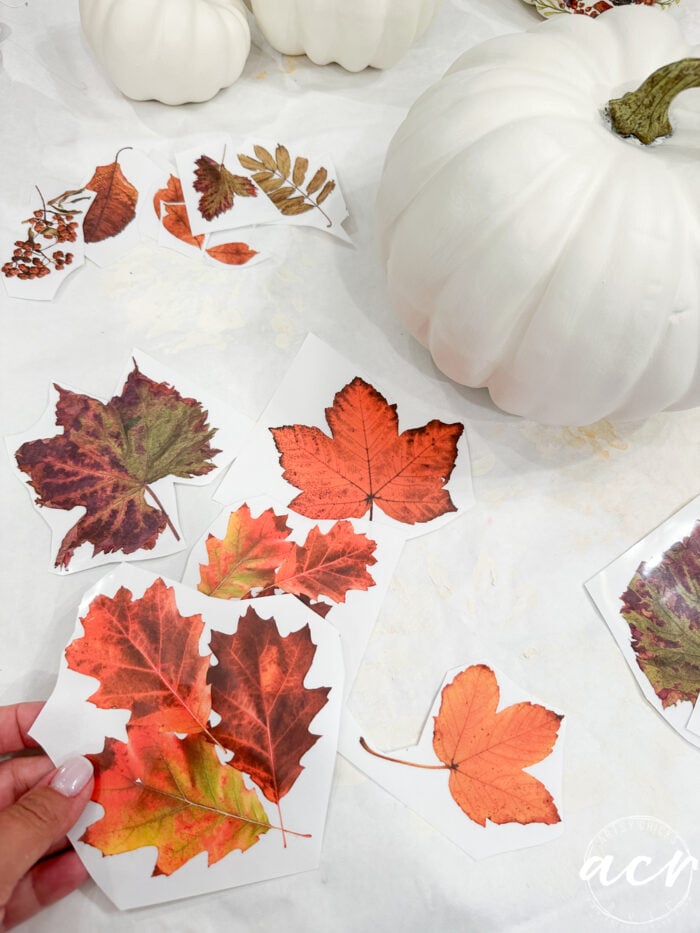
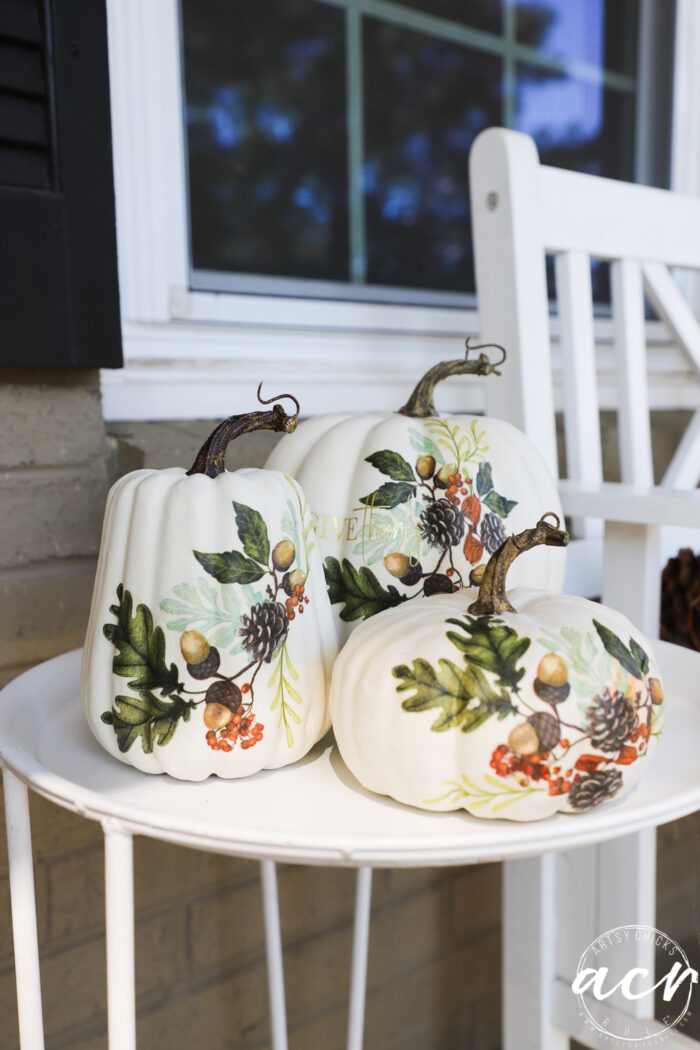
Aren’t these napkins so pretty?? I just knew I’d have to do something with them when I saw them!
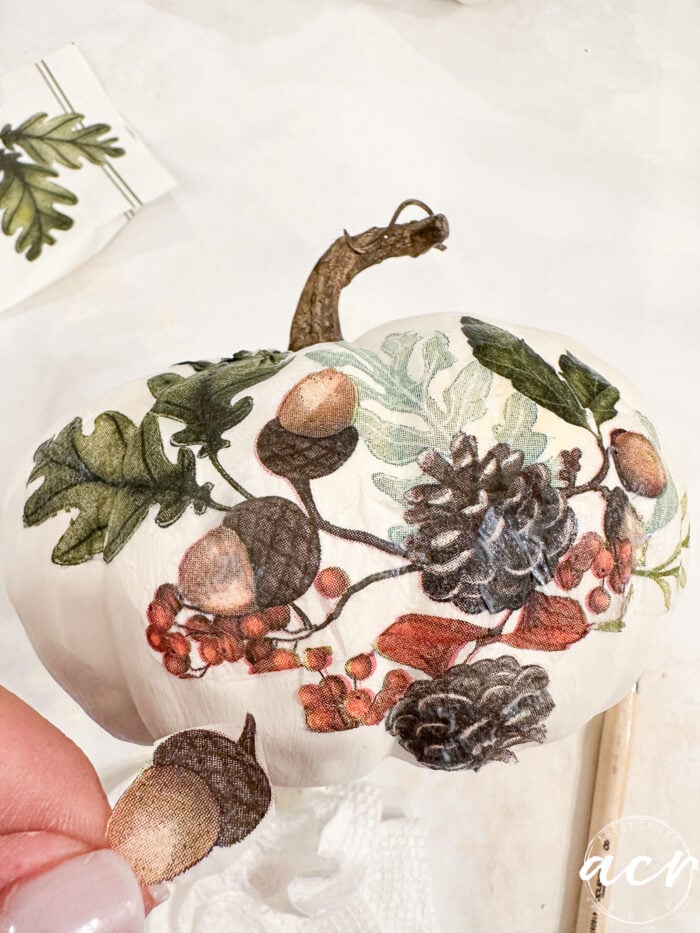
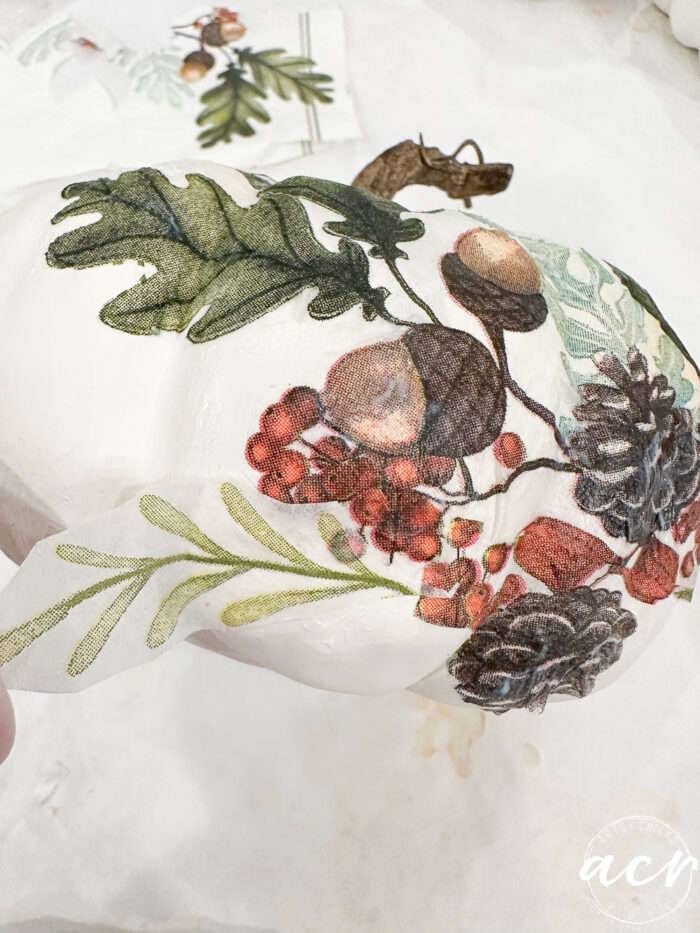
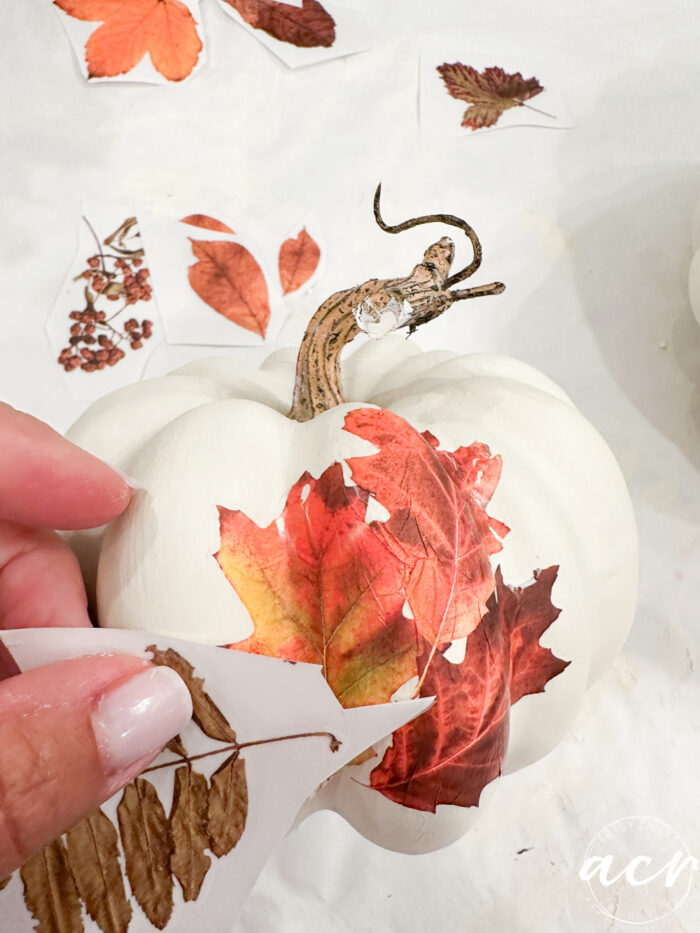
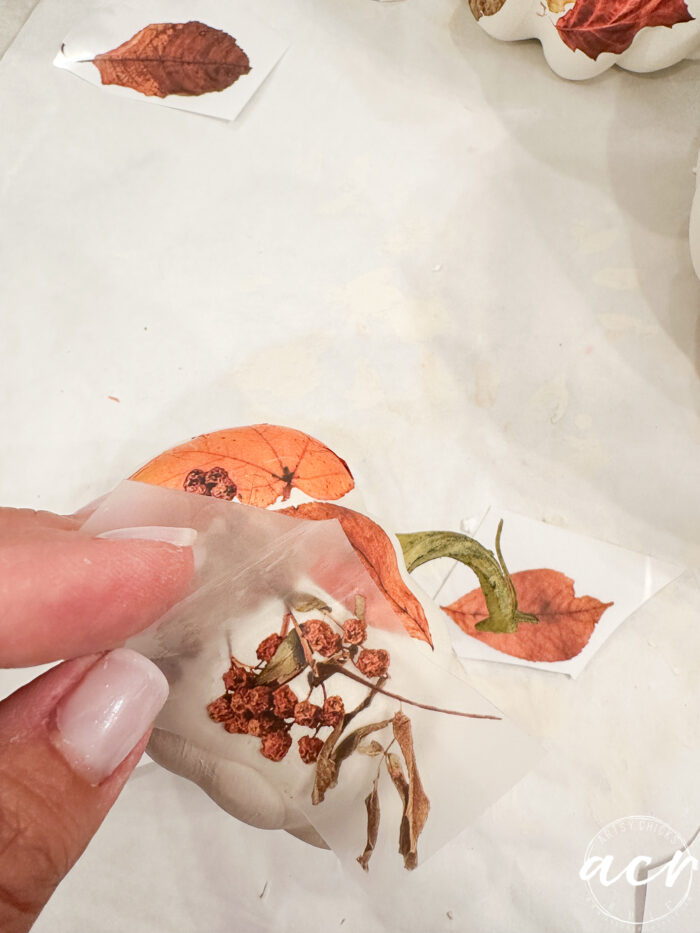
See how that edge just stops the design right there on the crease?? Well, here’s a tip, cut part of the design on another area of the napkin and piece it together to make it look more like a finished design.
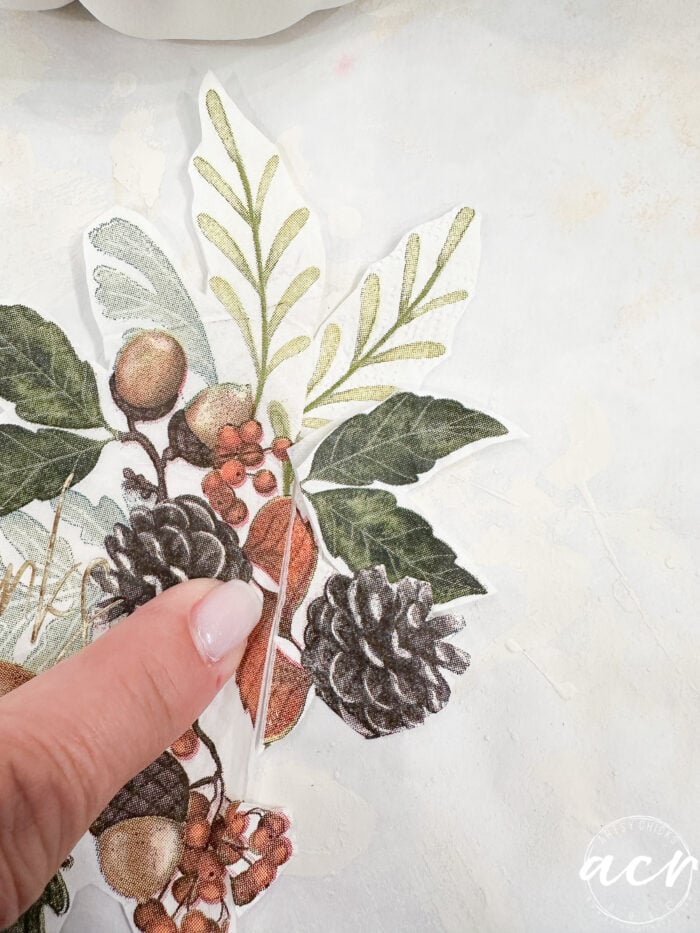
See how I added berries below, the other side of the leaves and a pinecone, green leaves and the sprig at the top?
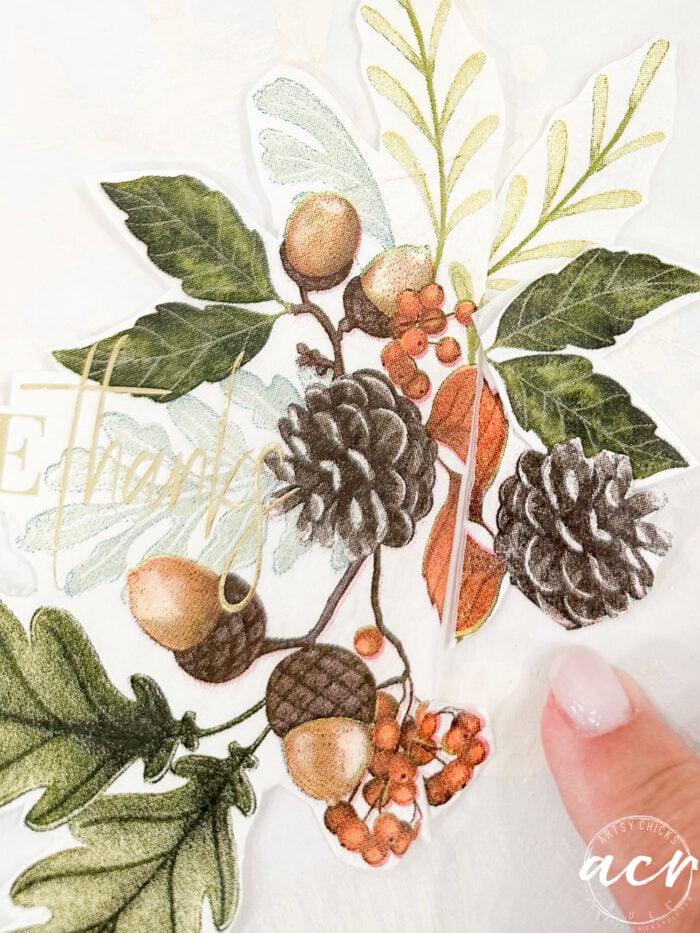
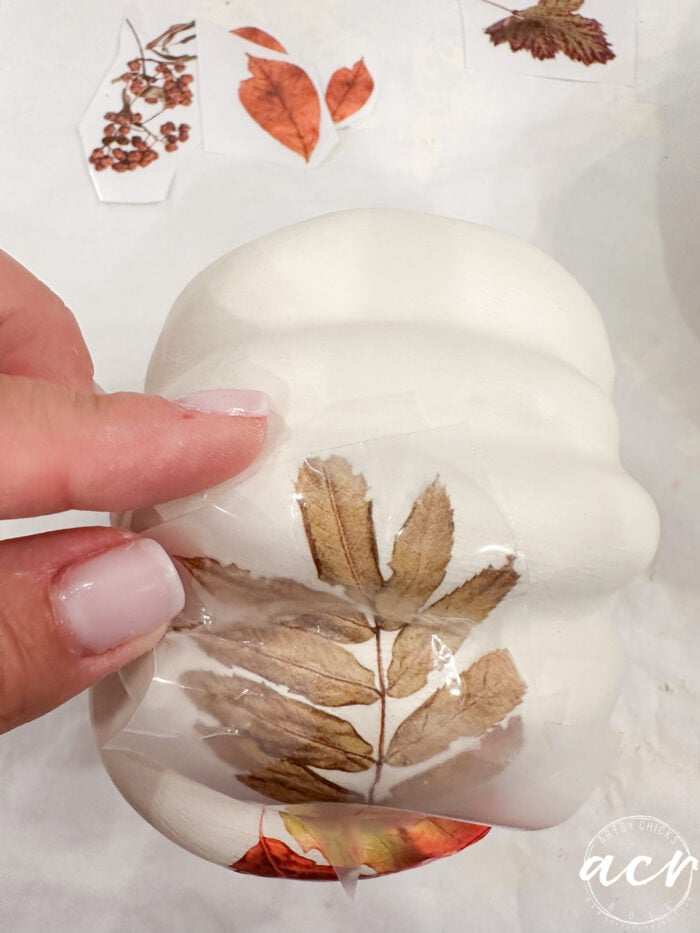
I used our Decoupage & Transfer Gel to apply these.
Remember: napkins are 3-ply, you’ll need to remove both of the bottom layers before attaching them to your project. You want to use the thinnest top layer with the design, discard the rest.
So that’s how it would look if I did not add any of the additional pieces along that straight edge. (you’ll see what it looks like now in the finished photos…apparently I didn’t take one of the “in process” phase!)
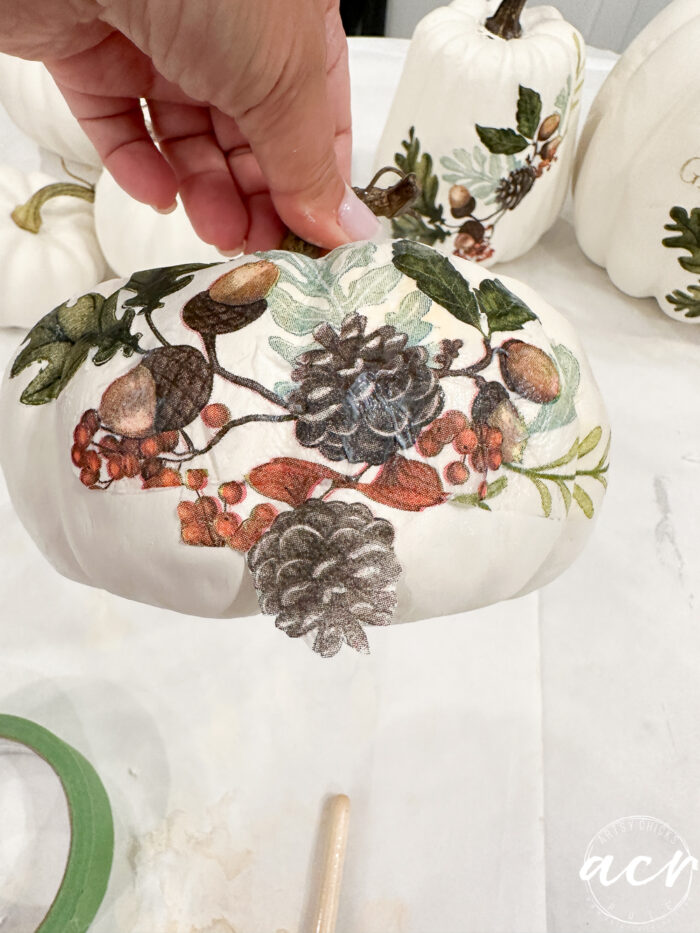
And this is the part I decided to use on one of the smaller pumpkins.
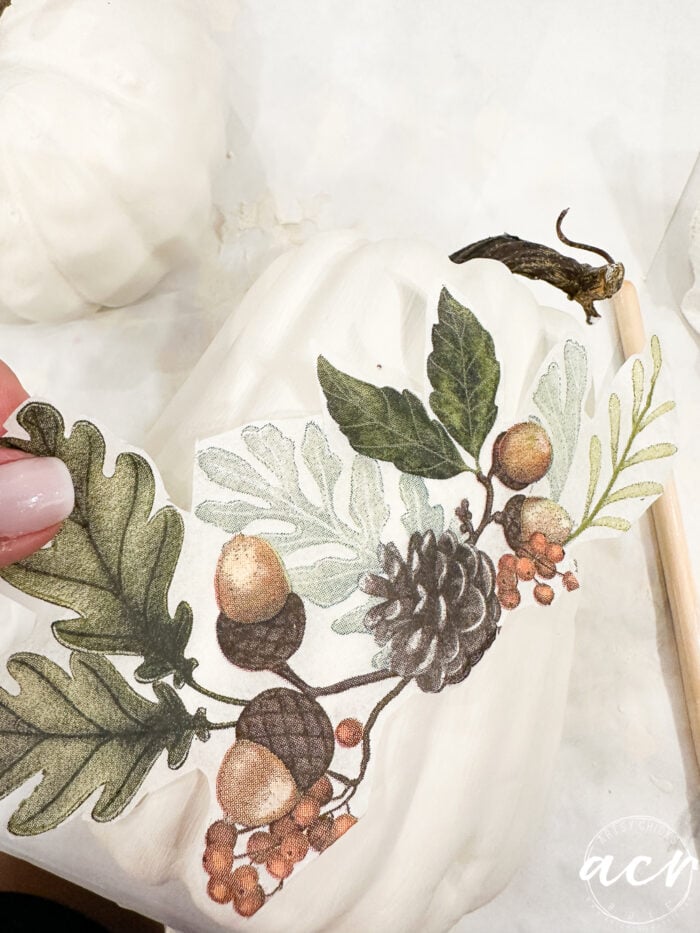
Again, I added a bit to this one too.
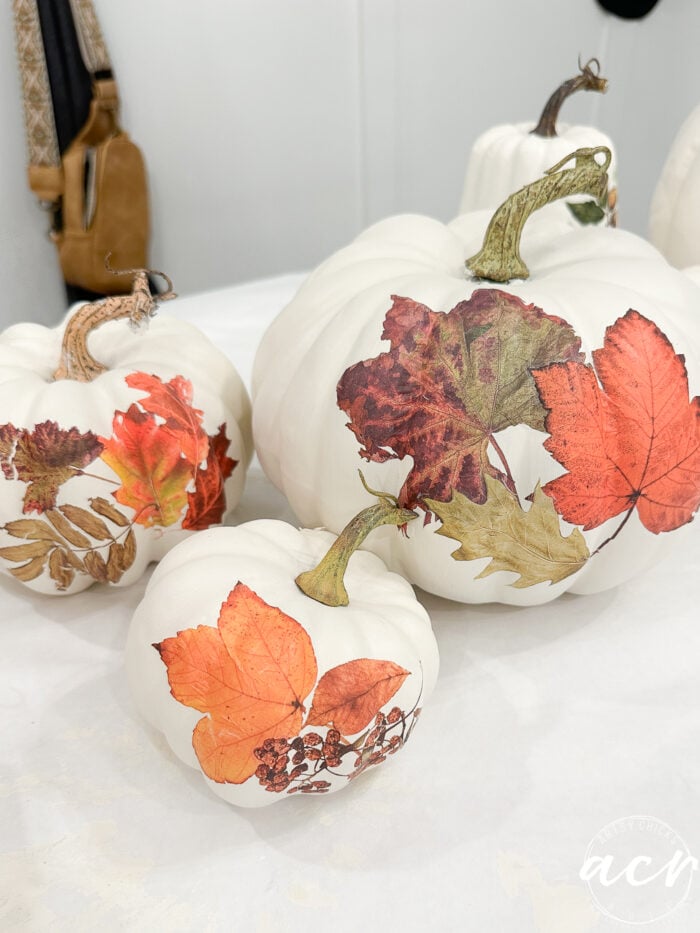
There is only one design on the napkin. I used the “Give Thanks” wording portion on the large pumpkin. Then, I used other parts of the napkin design and arranged them differently on the smaller two so they wouldn’t identical looking.
See the bottom section I added below?
And this…
And this…
It’s great fun to do! You can just let your creativity go!
Once they were dry, I added a coat of the Decoupage Gel on top for added protection.
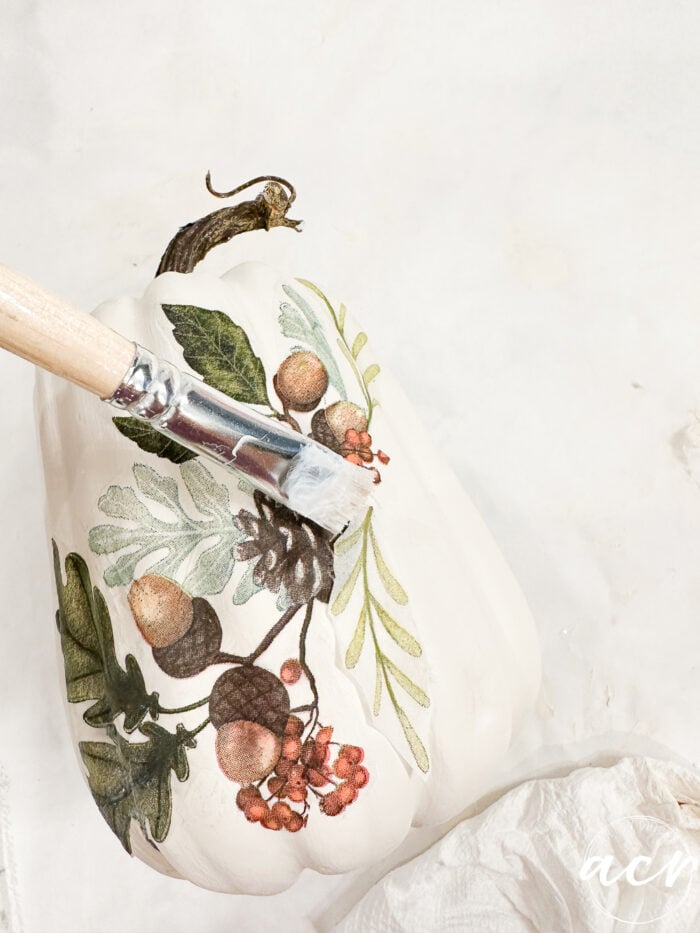
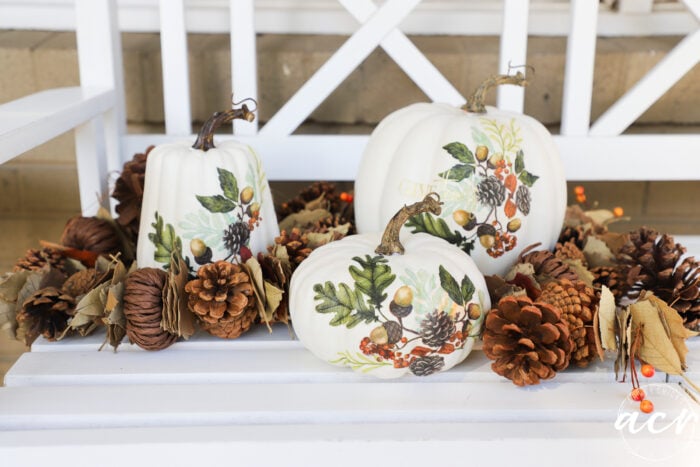
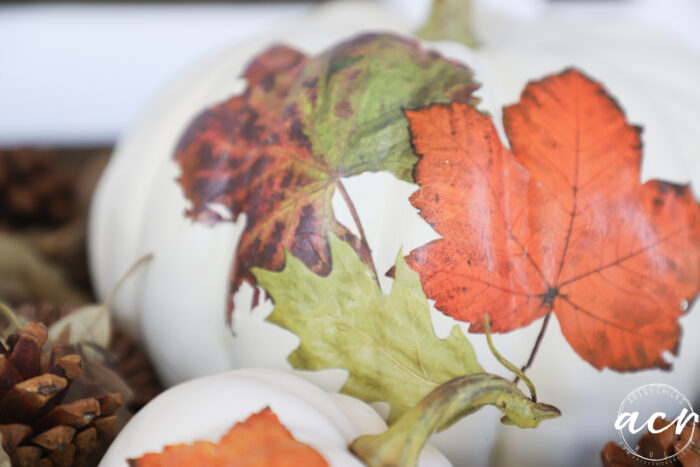
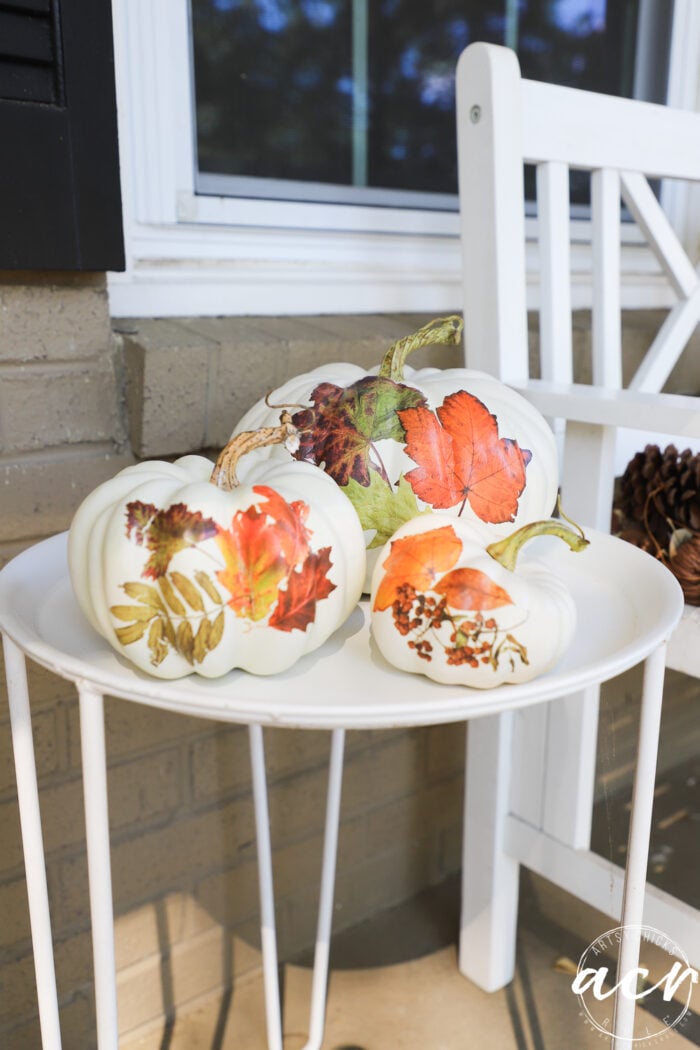
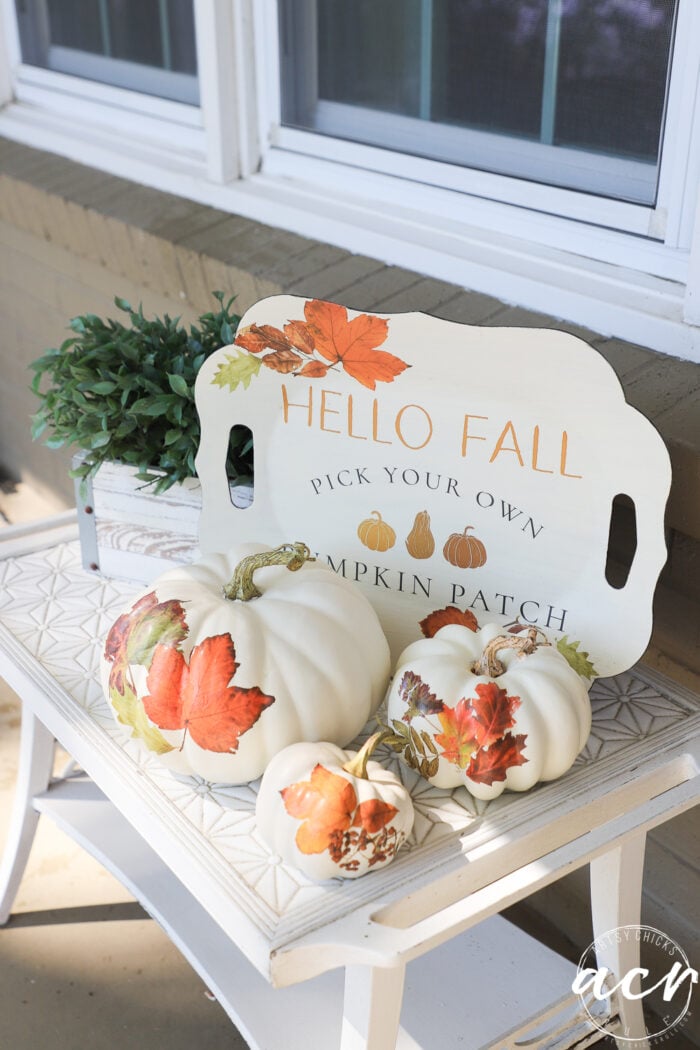
ADD TRANSFERS
So this is the “and more!” part of the project. Adding transfers.
I had these transfers left over from my tray project here, in case you missed it! >> Hello Fall Decor Idea
I simply decided which ones to use on each and applied them accordingly.
The pumpkins were a little bumpy so I had to carefully work the transfers in and around those.
Want to learn all the details about applying decor transfers?? Check out this post here >>> How To Use Rub On Decor Transfers
Aren’t they festive for fall??
A totally different look! But both so quick and simple to do.
DECOUPAGE PUMPKINS NAPKIN REVEAL
I love how elegant these are.
You’d never know the design just stopped, would you? Simply add to the other side to camouflage it!
See how easy it was adding extra pieces of the design to “finish” the edge on all three pumpkins? All three are done just a little differently than the others.
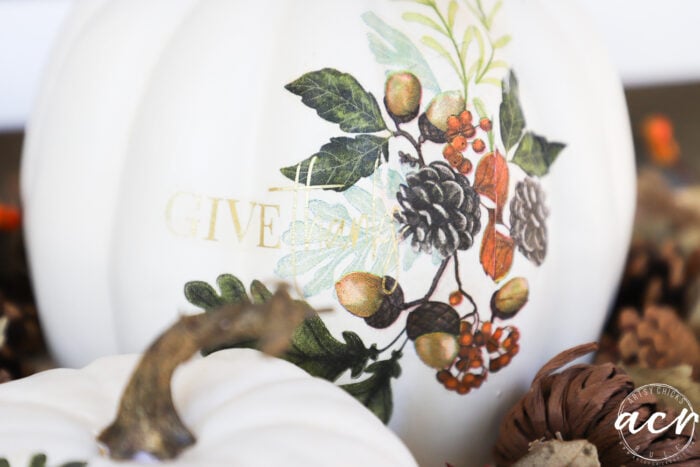
TRANSFER PUMPKINS REVEAL
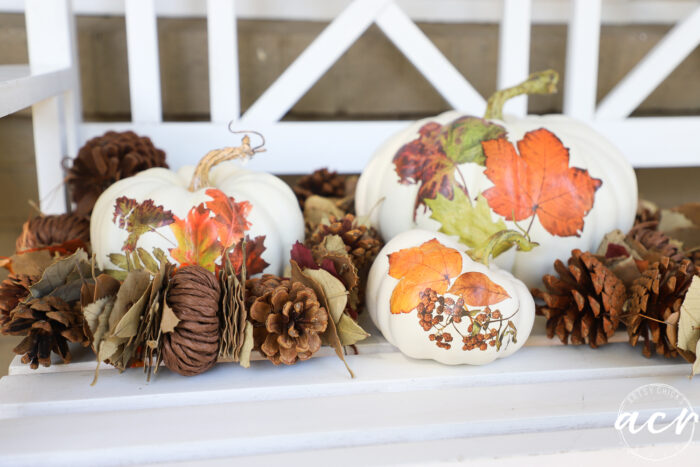
A more traditional coloring and style for your decor.
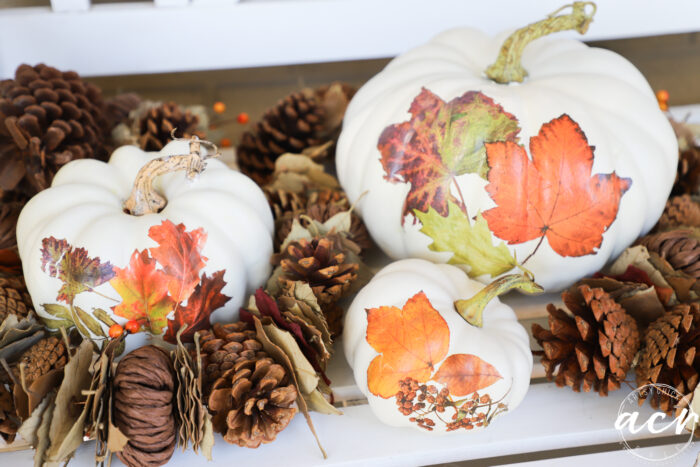
Looks extra cute with the tray I made using the some of the same transfer set.
Go find some pretty fall napkins and make yourself some pumpkins! Or a transfer makes things easy too!
PIN it to save it!
Have a wonderful weekend!
xoxo


")
")

")

These are so elegant! Thank you for the great instructions.
Thanks so much, Rebekah!! xo
Both ideas are great, Nancy. I especially like that it extends the life of pumpkins beyond Halloween. I decoupaged a paper mache pumpkin with old book pages years ago and it’s still one of my favorite things. It might be time to up the look with napkins now. I love how the napkin backgrounds disappear and it looks like they’re printed on. I guess I need to buy some more pumpkins now 😁
Thanks, Marcie! Yes, it really does…sort of beginning of fall straight through to Thanksgiving. And yes, I tried to match the paint to the napkin! So glad to see it blends right in! :) xo
Just beautiful!!
Thanks, Maria! xo
I LOVE these! I’m glad you shared about the spray-on primer for bleed-through. Good to know.
Thanks, Cyndi! Yes, that stuff works great! xo
As always, G…G…GORGEOUS!
Well done chicky-poo!
I agree with above, it will extend the season from early fall thru Thanksgiving.
Now that I’m inspired, sunflower napkins would be the perfect cross-over from late summer thru fall too.
All so beautiful and storable. Thanks for the inspiration (and great tutorial)!
Can’t wait to see what you’ll be making for Winter!
Mic
Aw, thanks Michelle! Yes, sunflowers are perfect for that!! xo
WOW! That’s amazing how great those same generic all-too-orange value priced pumpkins look now. You totally took them to a whole new level. Nice, Nancy!! Hope you have a wonderful weekend.
Thank you, Michele! Yes, I like painted pumpkins better than orange! There are times I like traditional colors but mostly I like white! xo
These are so pretty!!
Thank you, Debra!! xo