I am SOOO happy it’s finally spring and today happens to be 75. I do not care that it says it’s going to be in the 50s again next week because today is beautiful! And I also know your time is fleeting, winter. Move on out! ha!
Okay, so we are still working on redecorating our beach condo. And I do realize that I never shared a full reveal after all the original renovating work we did. What in the world? I have no idea how I missed doing that. But no worries—I will share all the “before” photos, what we did to renovate it, the first decorated version, and our now updated version once we are done.
Sorry about that!
Such is life. Right? And with that, we had planned to update the kitchen area last year…and then this year… and well, you get the drift. We have now had to push it to this coming fall/winter which brings me to today’s post and the reason for it.
Granted, there has been a lot going on in our lives in the last several years. This age of life is tough. Tougher than I imagined. Losing parents is tremendously hard, the constant in life as you knew it, going through years and years of memories, clearing out “things” (all the things that hold memories too), and selling the home you grew up in since a child. It’s tough! And that’s a complete understatement.
We lost both my dad and my husband’s mom in the last 2 years. They were the last of our parents to go. We are now in that “new” phase of life without them all. So all that to say, it’s been tough to keep up with the blog here and life in general lately. But I’m thankful you have continued to follow along with me!
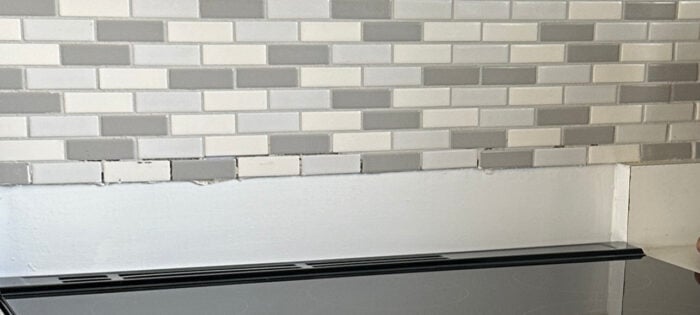
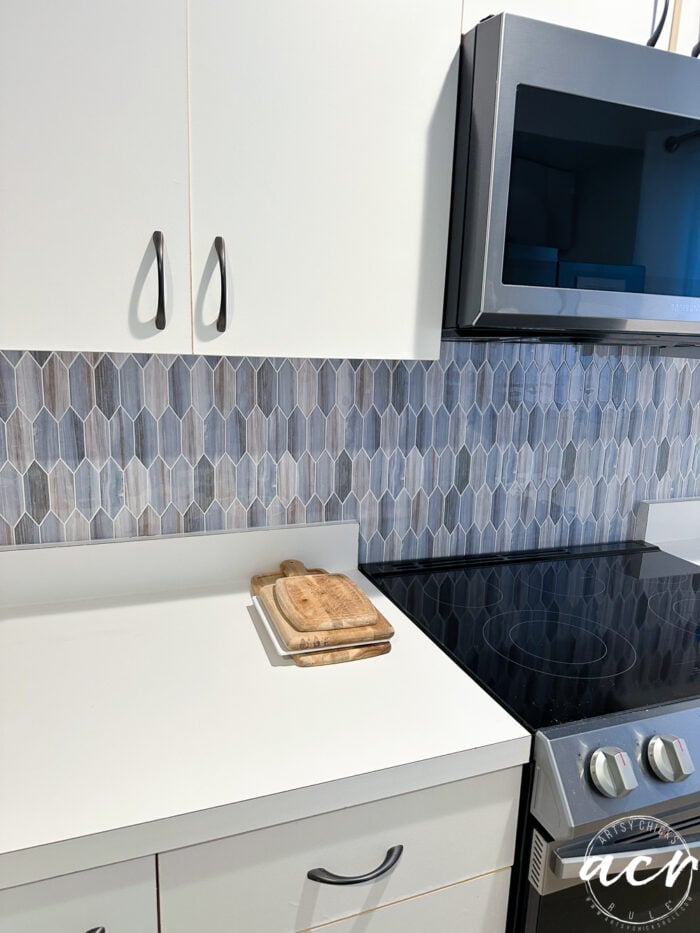
Today’s post is a, well, a “make-do” until you “can do” sort of thing. I really disliked the tile that the people who owned our condo threw up to sort of “flip” it from the 80’s look it had to make it sell. And it ran short under the cabinet which kind of drove me crazy as well.
See what I mean here…
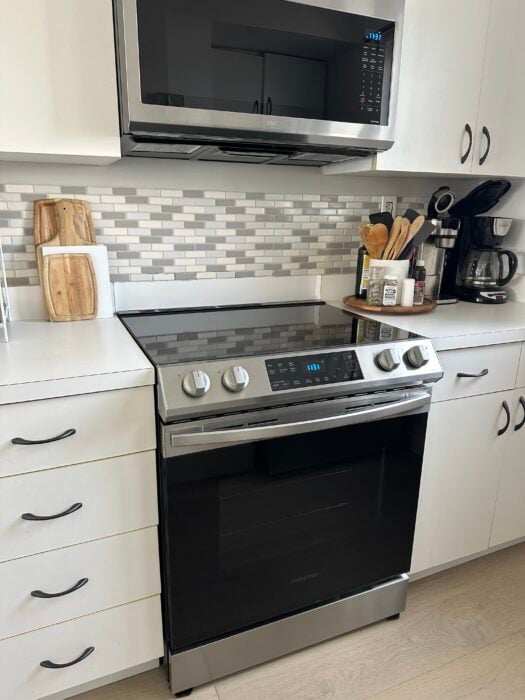
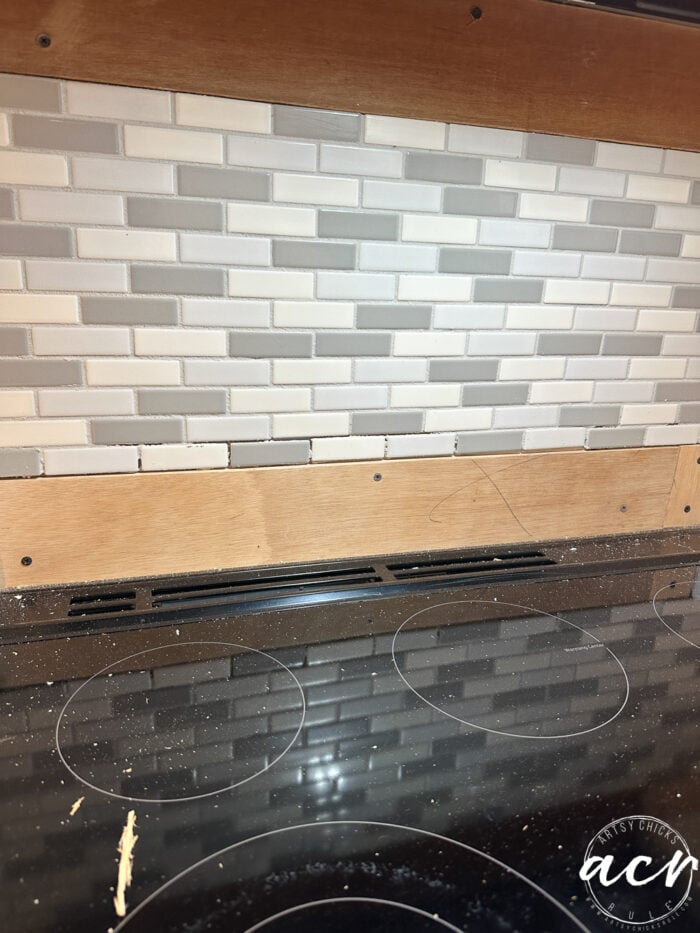
We did put in new appliances this last November though. So I’m thrilled with those! But see the tile?? It doesn’t go all the way up to the cabinet. And see where we changed the style of the stove? The old one had a back area so there was no need for the tile to go down below. Now it’s a huge gap. And on top of that, they didn’t even bother to grout the tile that was behind the raised stove area. (which you can’t see it in this photo but it’s the area right above the blank spot and back of the stove) So that looked pretty bad in person.
Plus, to be honest, the blah gray, tan and beige tile was not doing it for me!
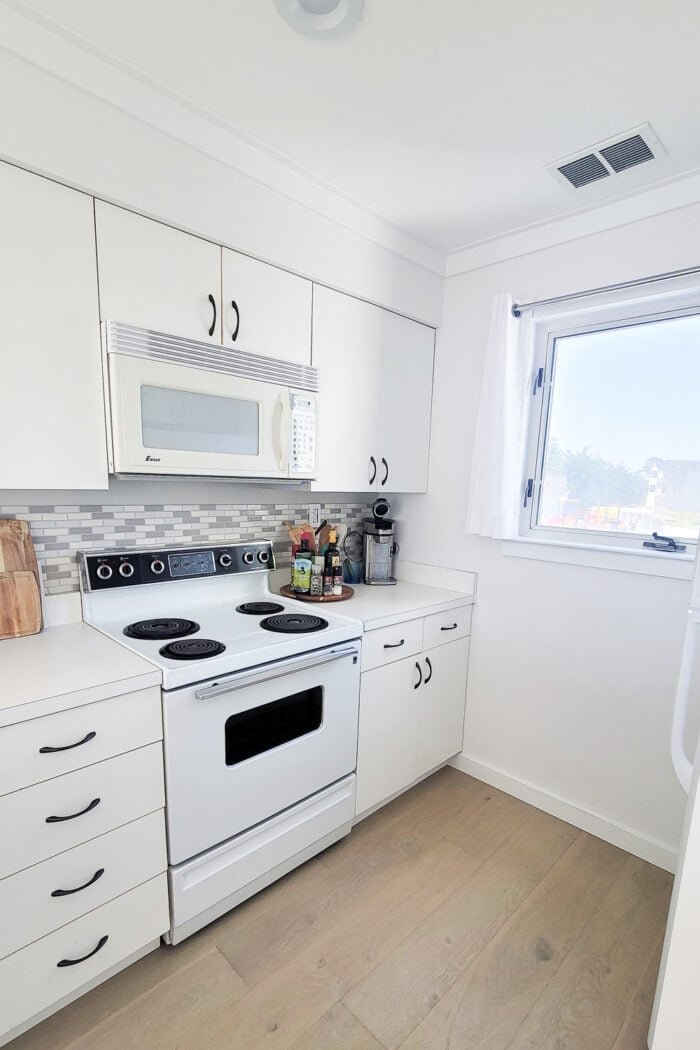
Here is the old stove to show what I mean.
And the close-up of what I was talking about.
Yuck. That looks awful.
SO.
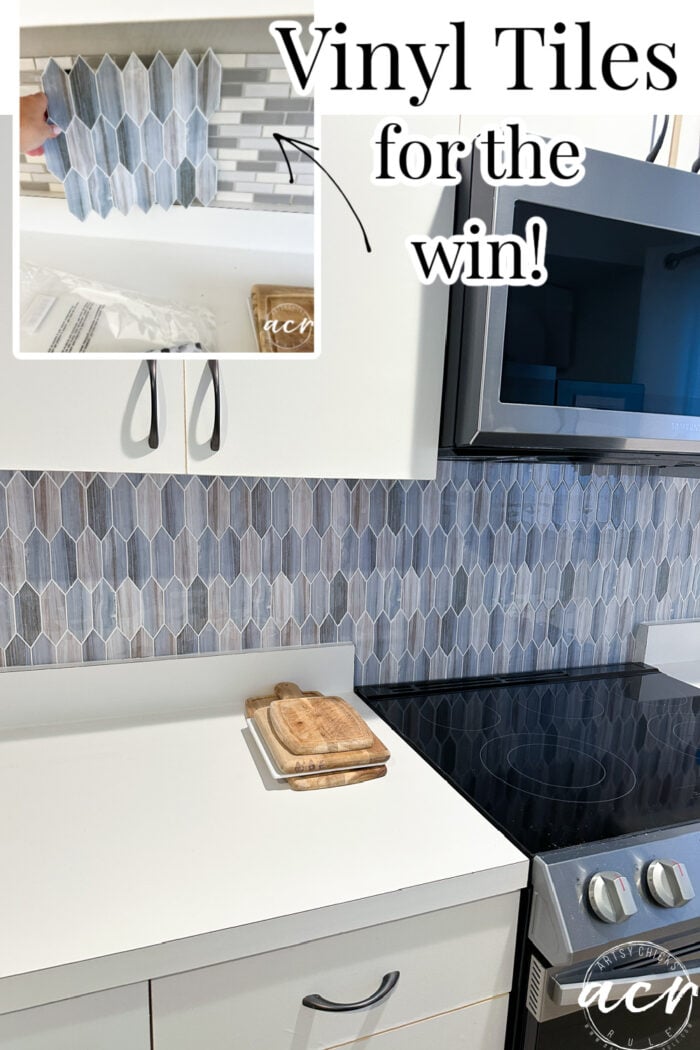
I decided to throw up some vinyl tile to make it look so much better and to hold us over until the fall when we tackle the whole kitchen re-do. Which includes new cabinets, moving the fridge around to the front (you’ll see what that means later), a flat counter area, not raised where the sink is with a new countertop, and a new, real tile backsplash.
What I mean by “not raised”…see the bar top there? We are going to make that all the same level, flat. No raised bartop area.
But until all of that happens…this.
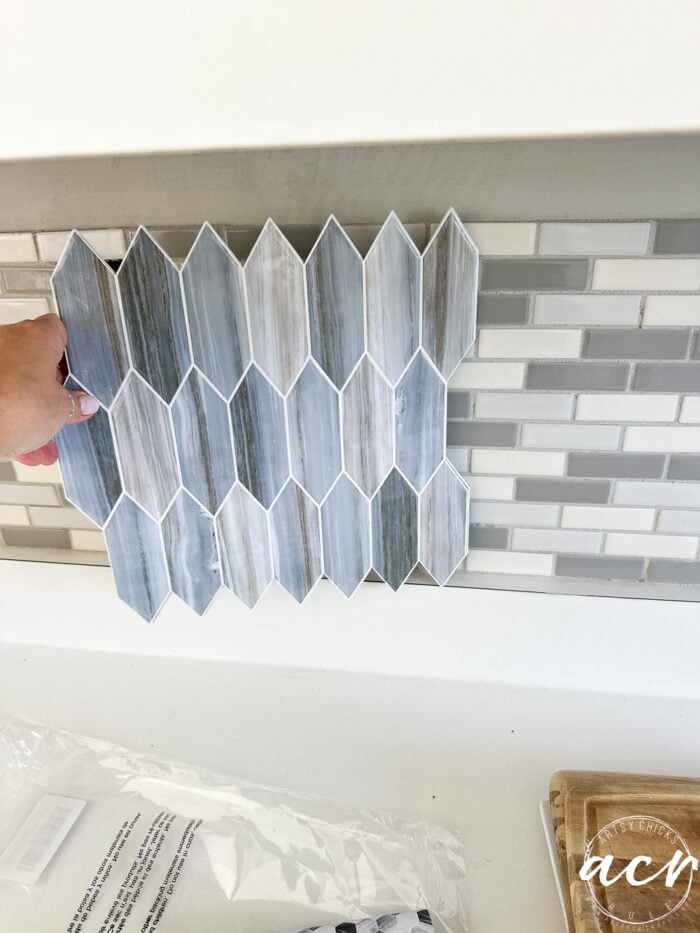
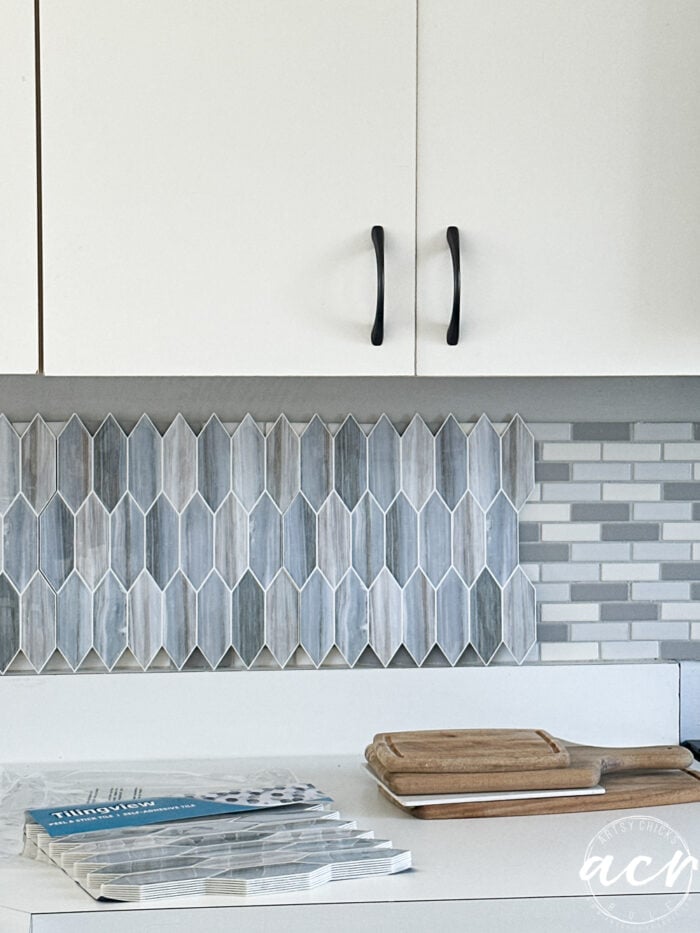
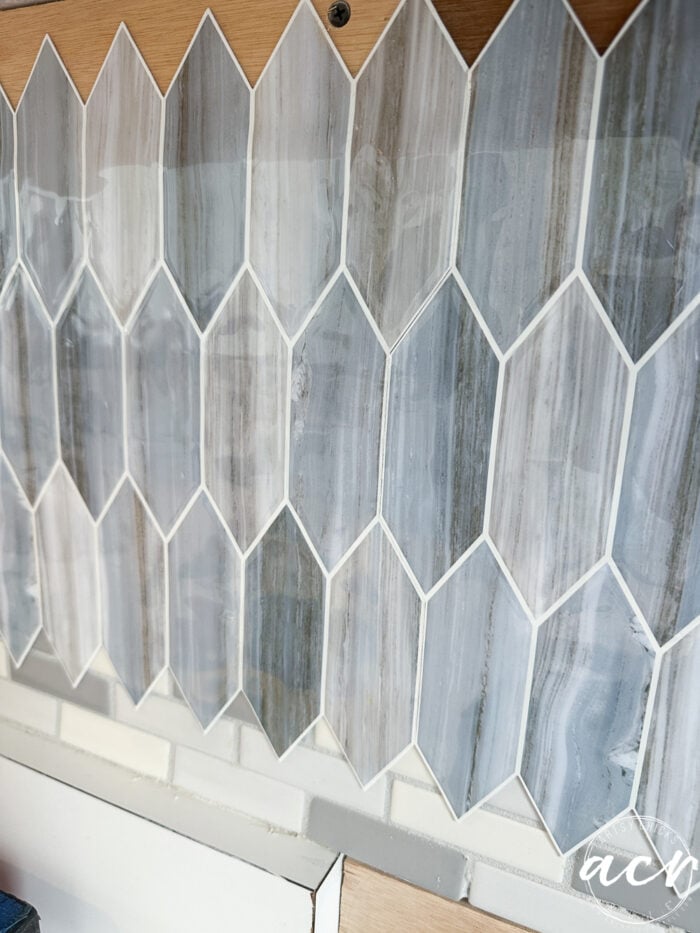
I found this vinyl tile on Amazon and loved it! I would actually love something just like this when we do real tile. But we’ll see what we end up with. Might find something I love even better.
Just to give you an idea of how it will look compared to what was there.
Since the tile didn’t cover the entire area, we were working with varying depths so my husband cut and attached some boards to fill those gaps.
I’m not overly concerned since I know this will be very temporary. However, I do want it to look as nice as I can make it for guests who stay.
So as you can guess, nothing is square! The cabinets, walls, counters, ugh. I did my best with that.
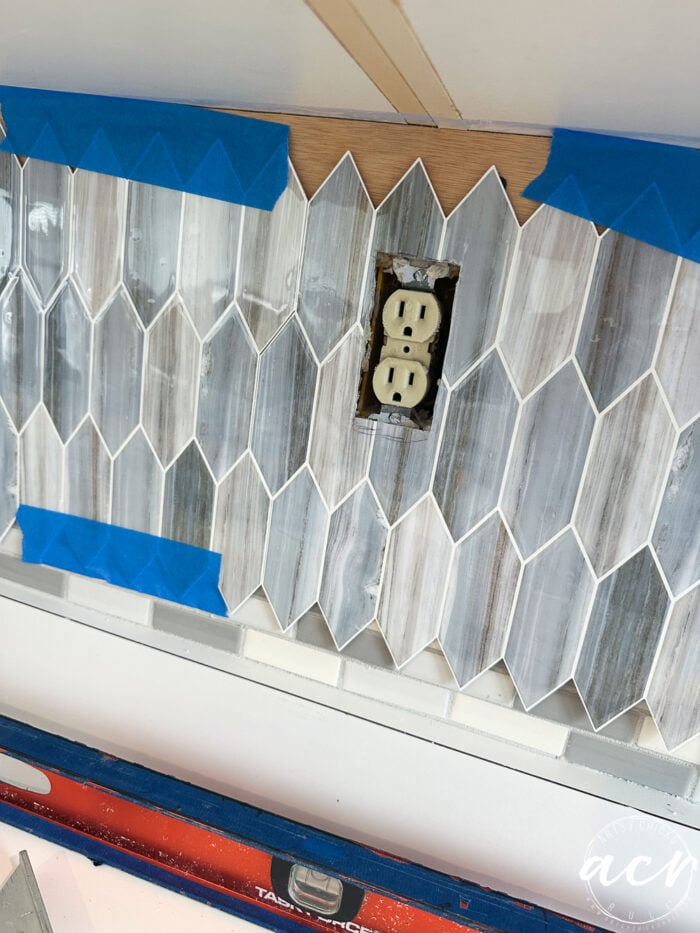
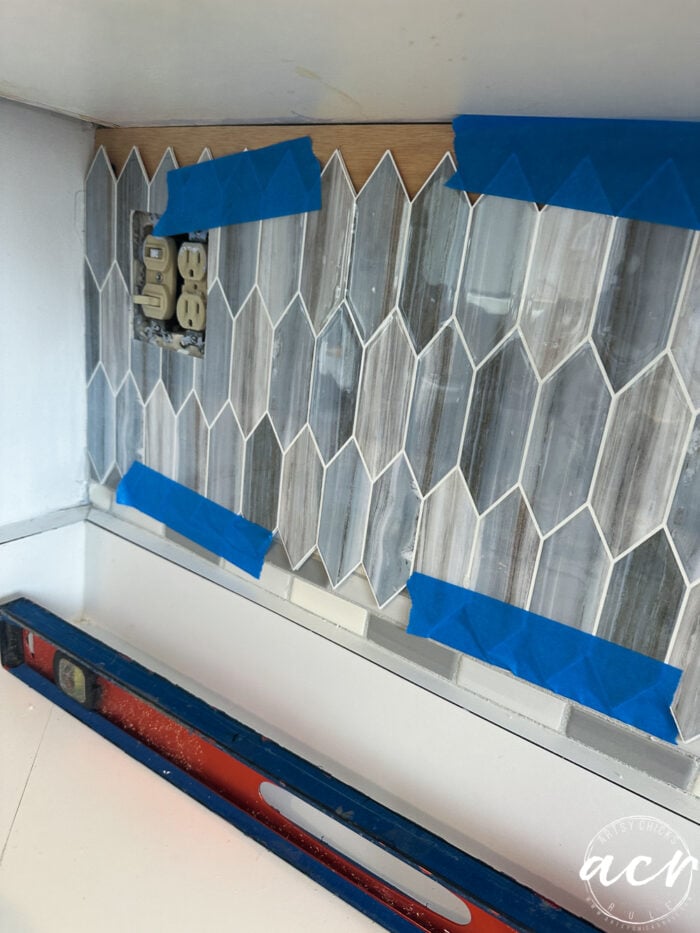
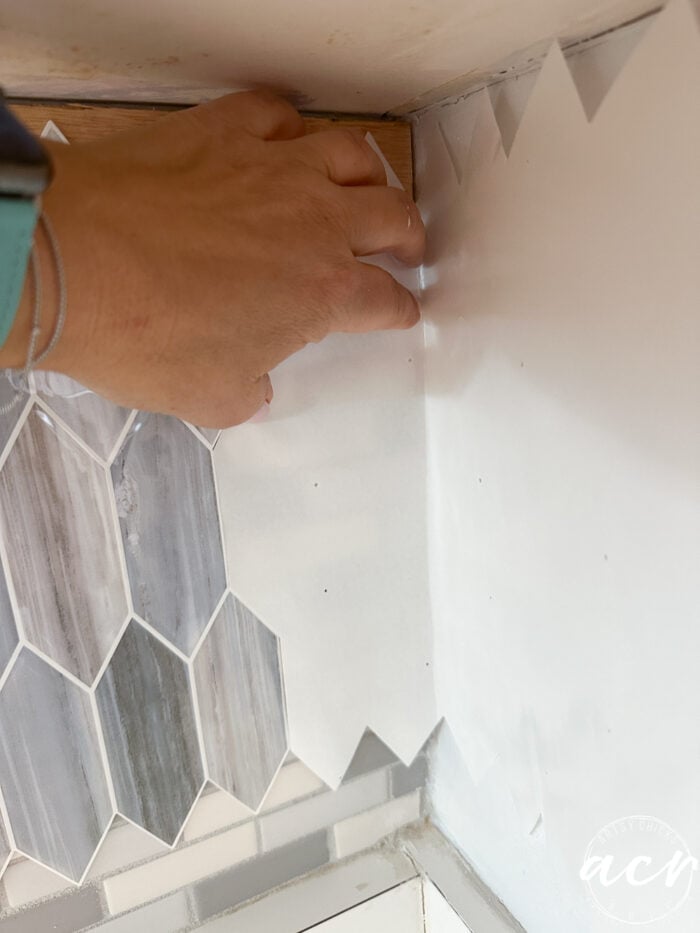
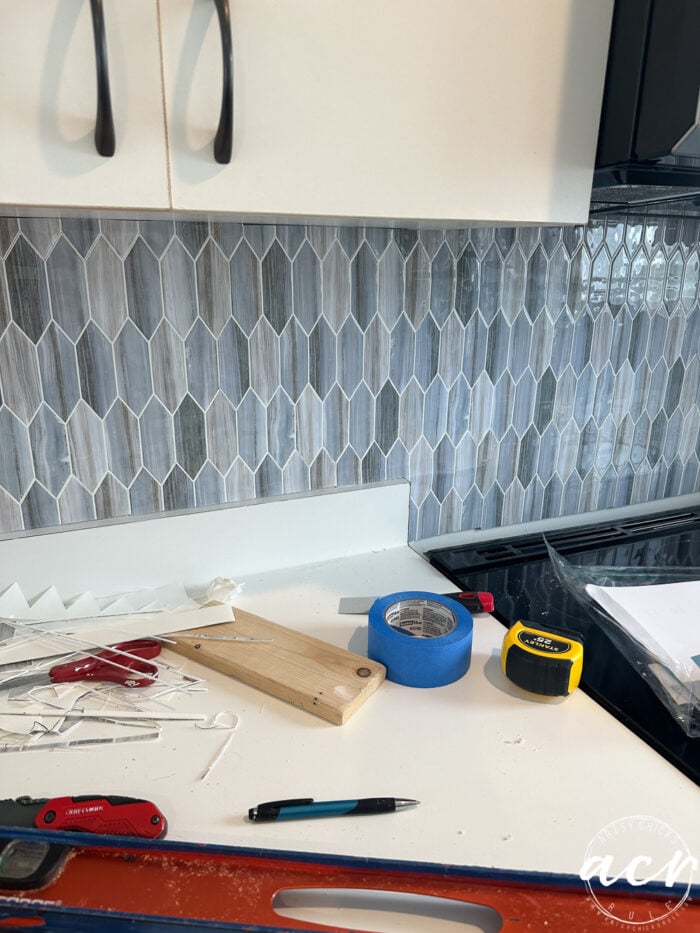
I actually taped them all up all the way across first before “sticking” anything to the wall permanently.
Like so…
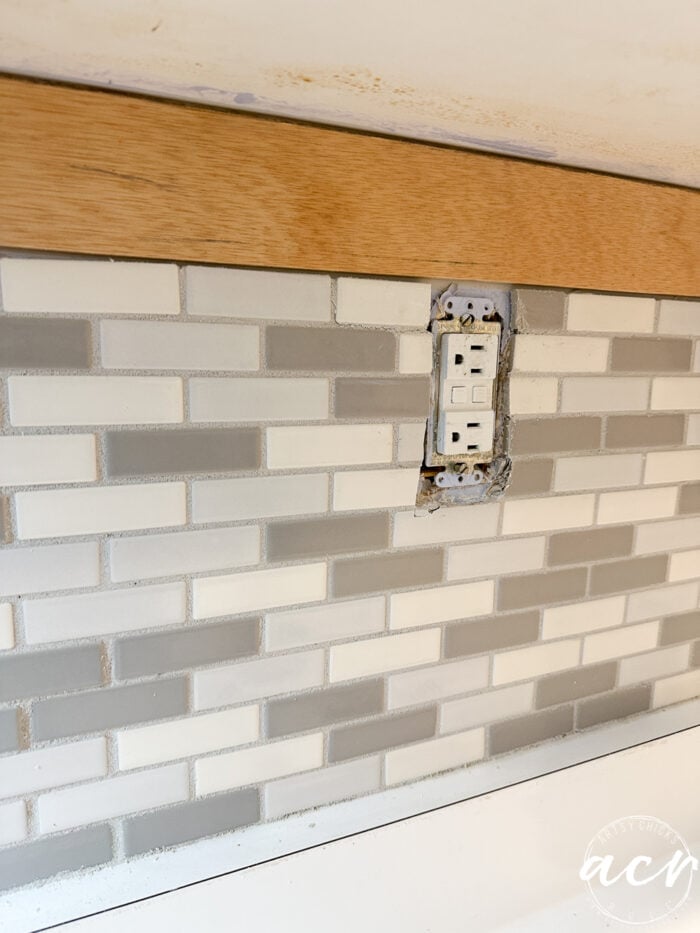
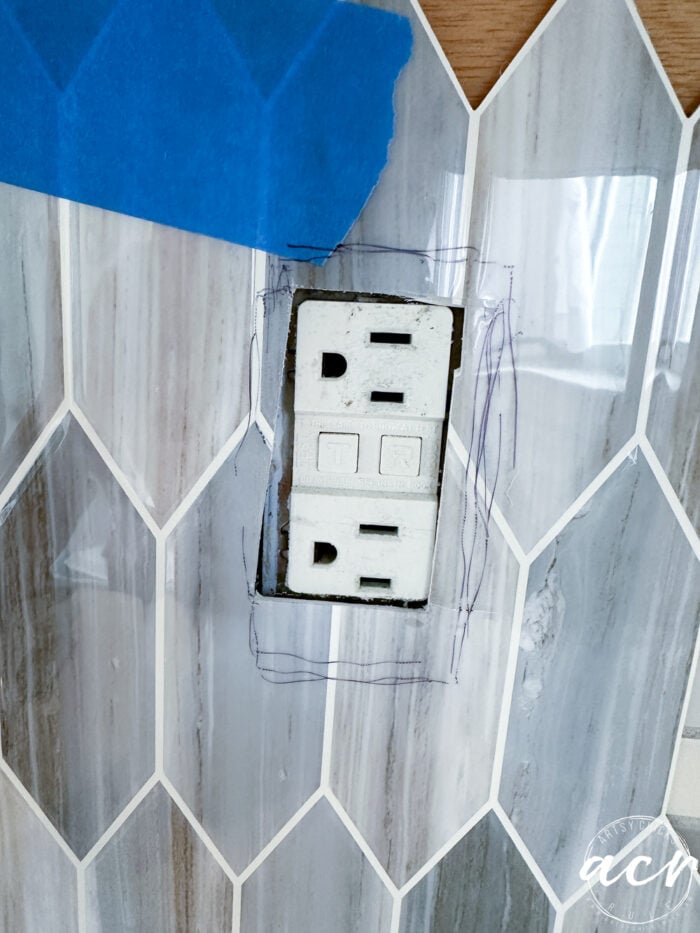
Then once I started “sticking” it to the wall/tile I had to figure out how to cut these electrical receptacles out. Well, I will tell you I am not MATHY!! Haha!! I just am NOT. So, I did start by trying to math it out. Well, you can guess how that went, haha! So, instead I just sort of held it up and made a small mark where the outlet was and cut out a tiny area to begin with. Then held it back up and cut again, and again, etc. I’m sure that took longer but honestly, it was pretty easy and straightforward (foolproof) this way!
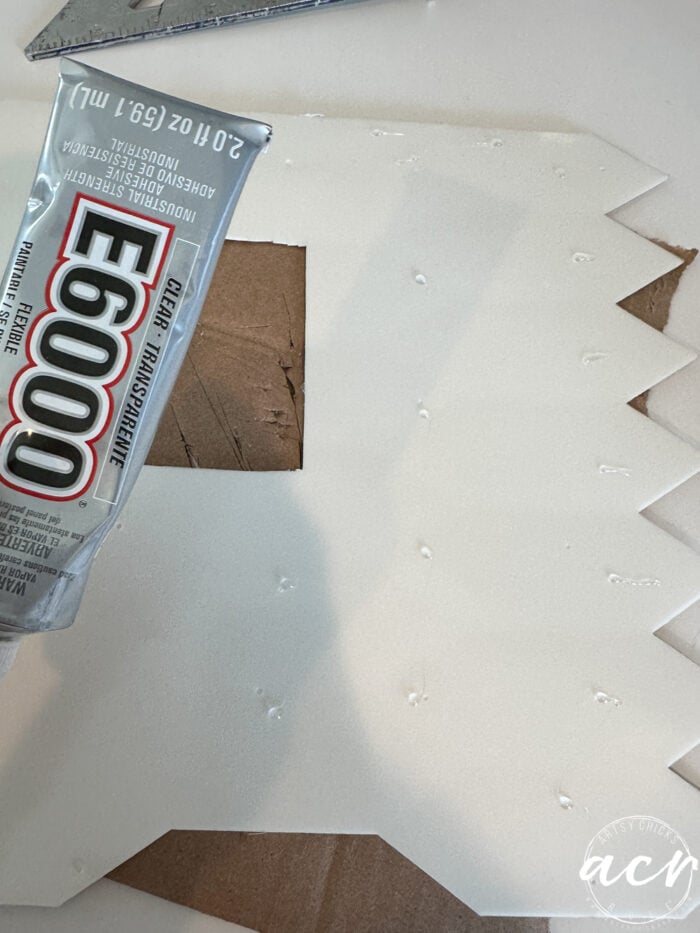
Yes, these are SUPER STICKY but I don’t trust that. Nope.
So I pulled out my trusty, super strong, E6000 glue and added tiny blobs of it here and there on the backs of the tile to just hopefully help hold it up better.
Then attach it to the wall. They fit really nicely together so it is pretty easy. There is a seam there if you look closely you can see it.
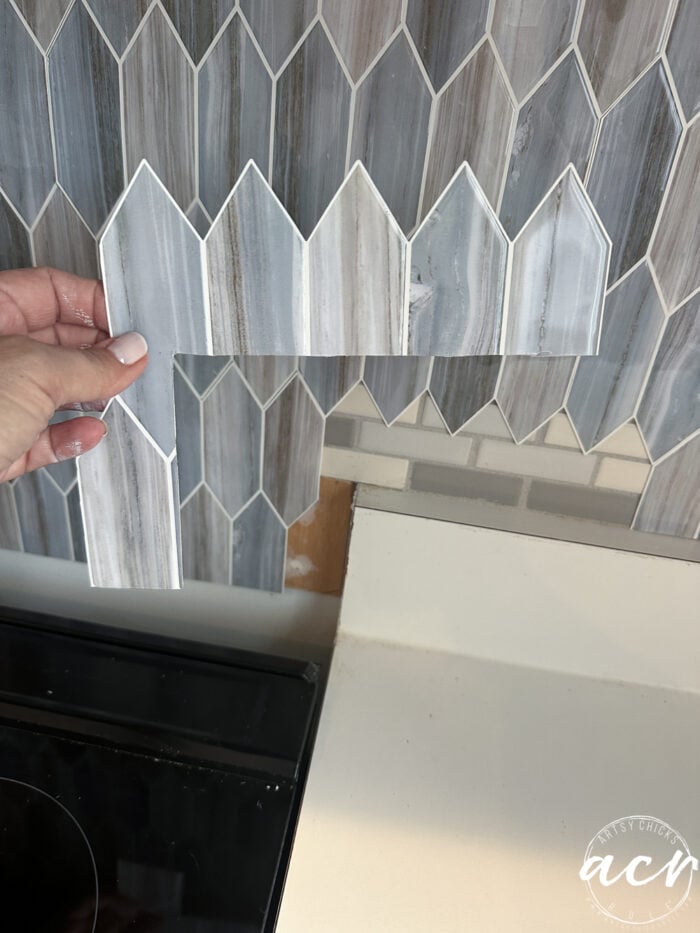
When I got to the corner I held up the white backing which is the exact same cutout pattern, and used that for my pattern to cut the next end piece. I hope that makes sense.
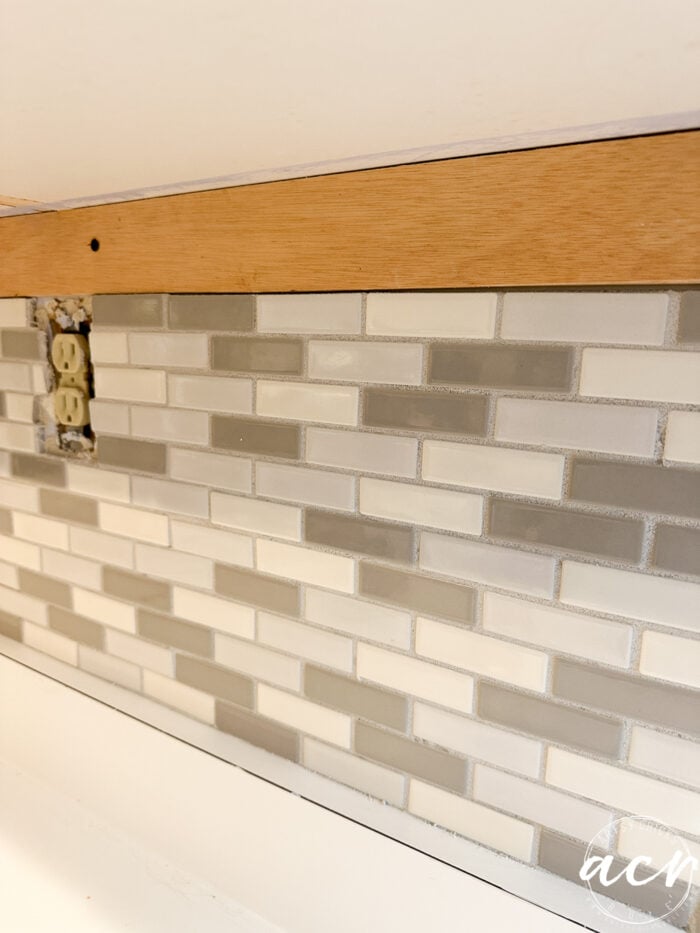
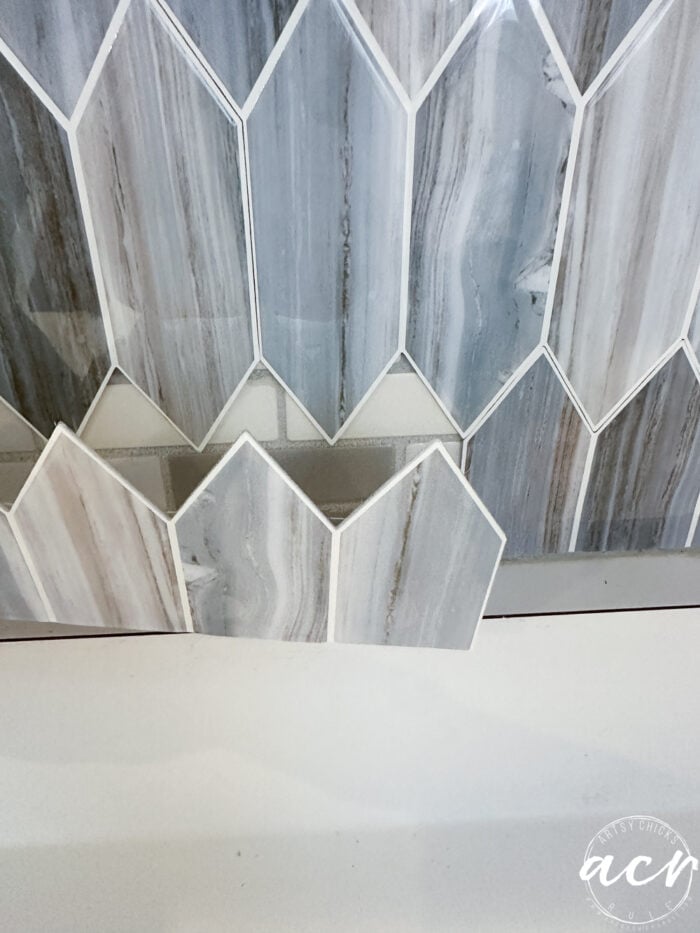
I ordered 2 packs for this project which came up short with the cuts. But I had a lot left over but unfortunately not with factory cuts. So I decided to try to cut carefully a few pieces that I needed by hand. Worked out okay! Again, temporary, so it’s okay!
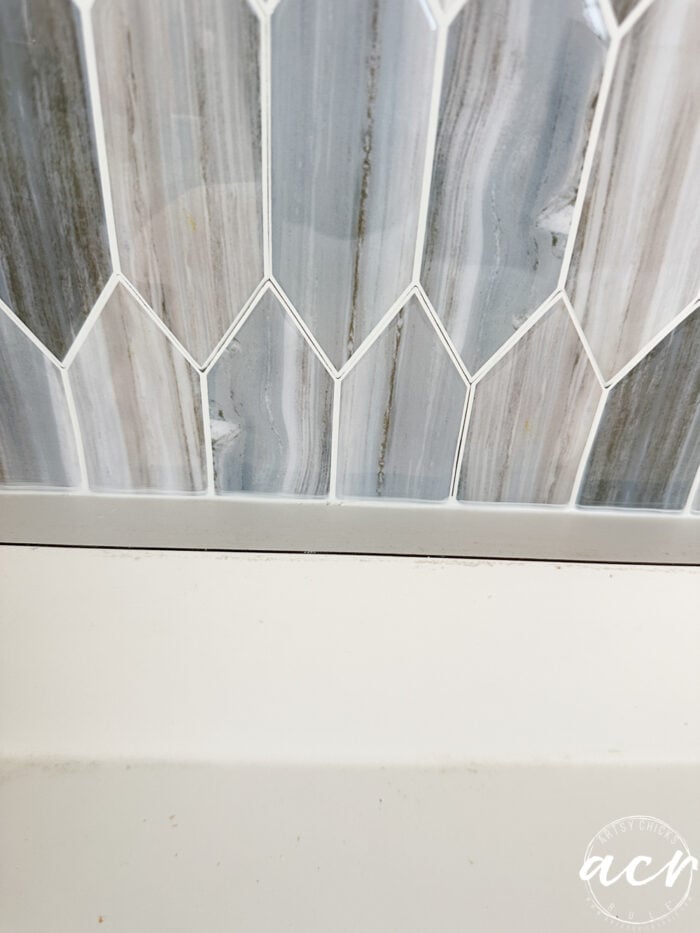
I cut that piece by hand above from a larger piece. Thankfully it fit well enough. (see below)
See how it’s not exactly perfect though?? Not enough to make me care though! TEMPORARY!
Plus, I’m going to bring something back down this weekend to hopefully “fill in” those areas so they don’t show well. I’ll update this post with that if it ends up working out well.
Measure and cut!
It’s truly not as hard as it seems. It did take me most of the day to do…but it’s DO-ABLE!
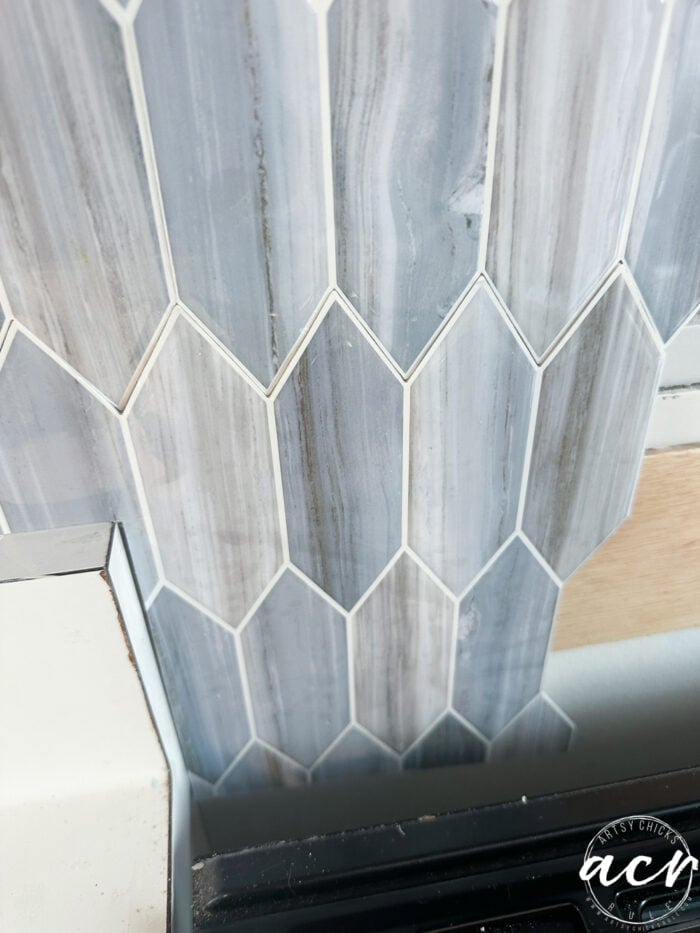
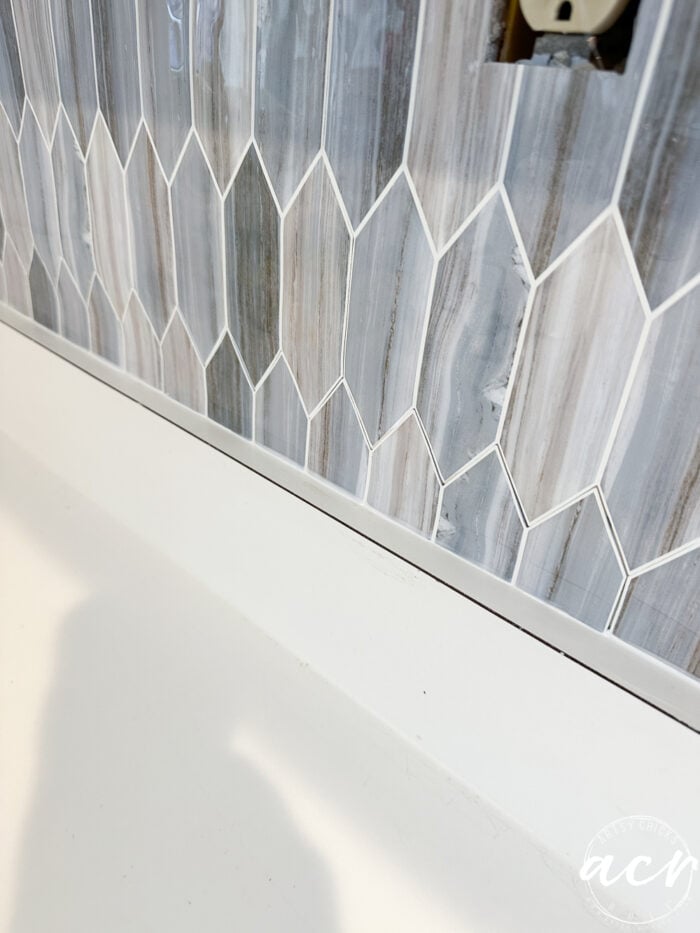
Look at that. SO much better! So pretty.
And like I always say, caulk makes everything perfect and finished looking. I love me some caulk!
Ignore the gaps in the “tiles”. Remember, I’m bringing something down to address that this coming weekend. Hopefully, it will work to fill them in too. Stay tuned, you know I will tell you the real deal on that. (by the way, I tried filling in those areas with the caulk…no, didn’t cover well enough)
But the caulk on the seams… yessss. Good stuff!
How pretty is this now??
I LOVE it! So very happy with it.
Like I mentioned above, we are redecorating the condo. Here are a few shots I took of what we have done so far! Not finished, so keep that in mind. I’ll share it all when I am. Pretty photos then!
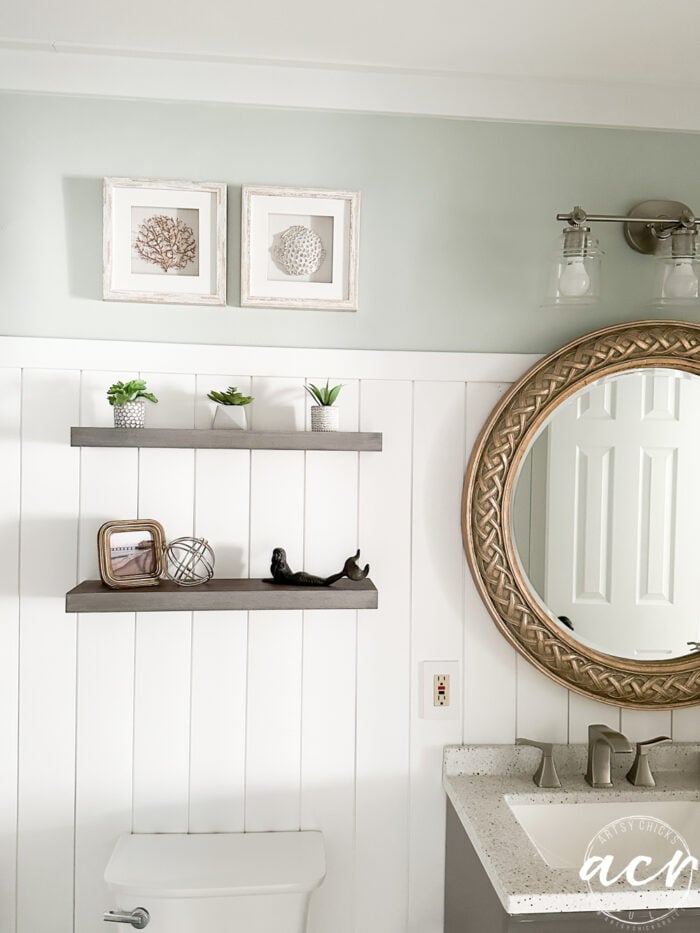
You might remember we thrifted this gold mirror in the OBX and put it over the blue console table we found at the Home Goods down here right after we bought our condo…see it here.
Well, we decided to remove the stock mirror that went with this bath cabinet and put this gold mirror here instead. I also added a beautiful sunset photo I took of Jennette’s Pier to the shelf and new photos above the shelves too.
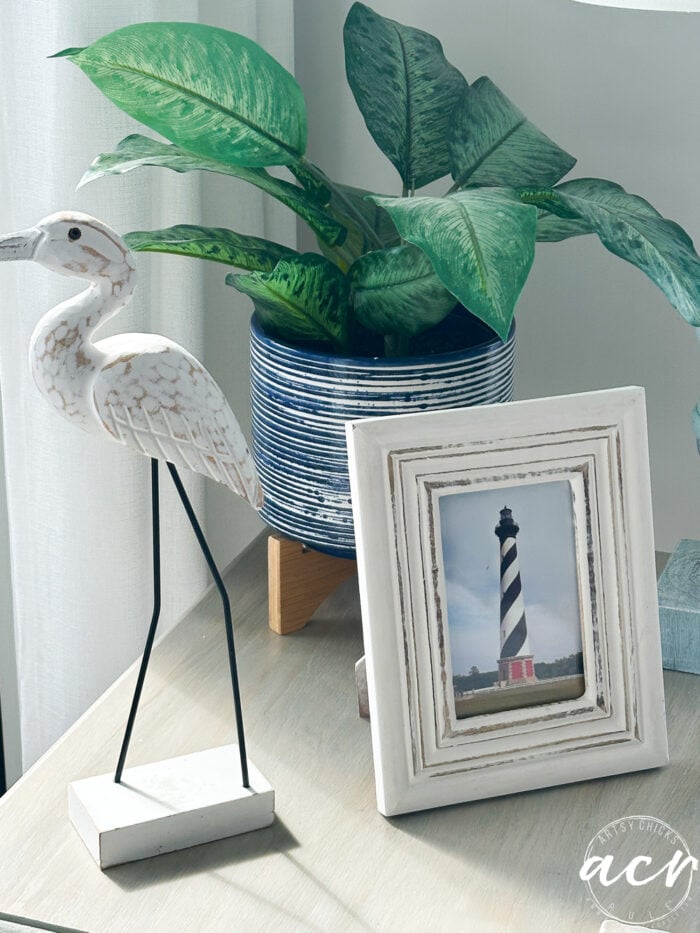
Added more photos of the OBX that I’ve taken over the years…the one of the Cape Hatteras Lighthouse.
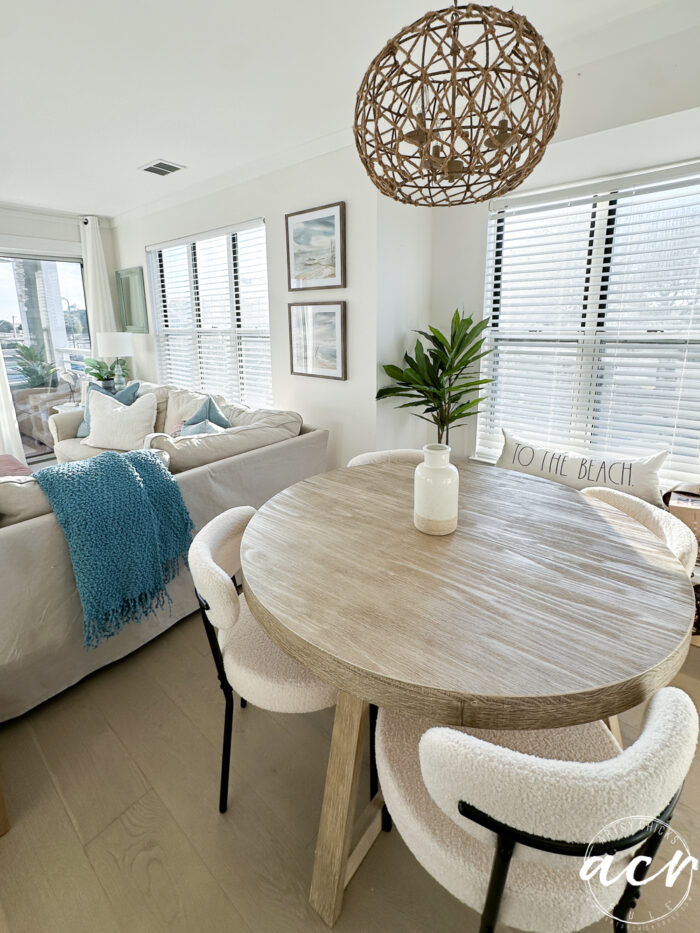
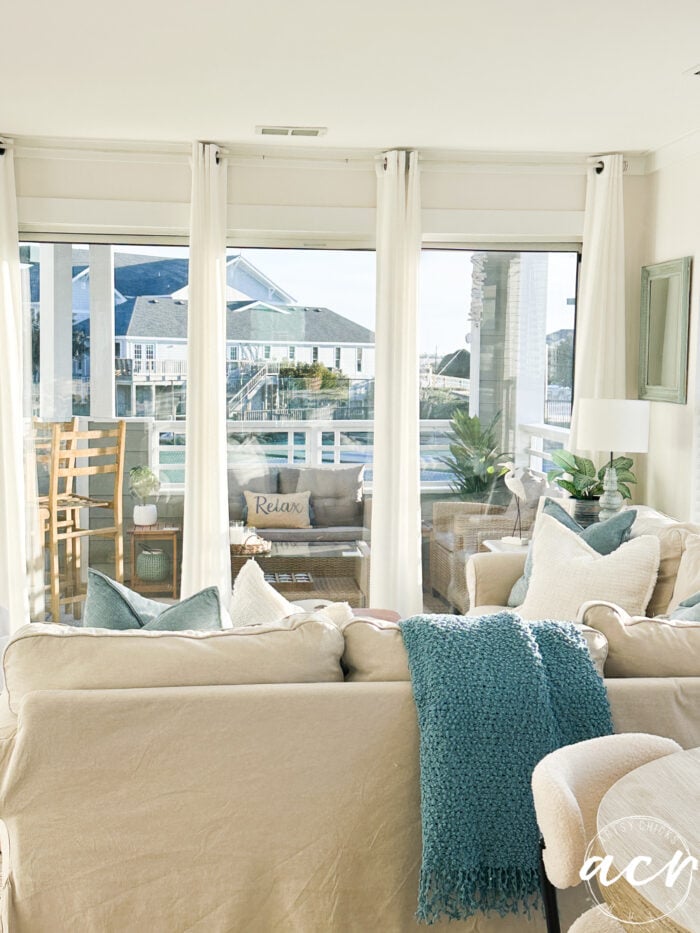
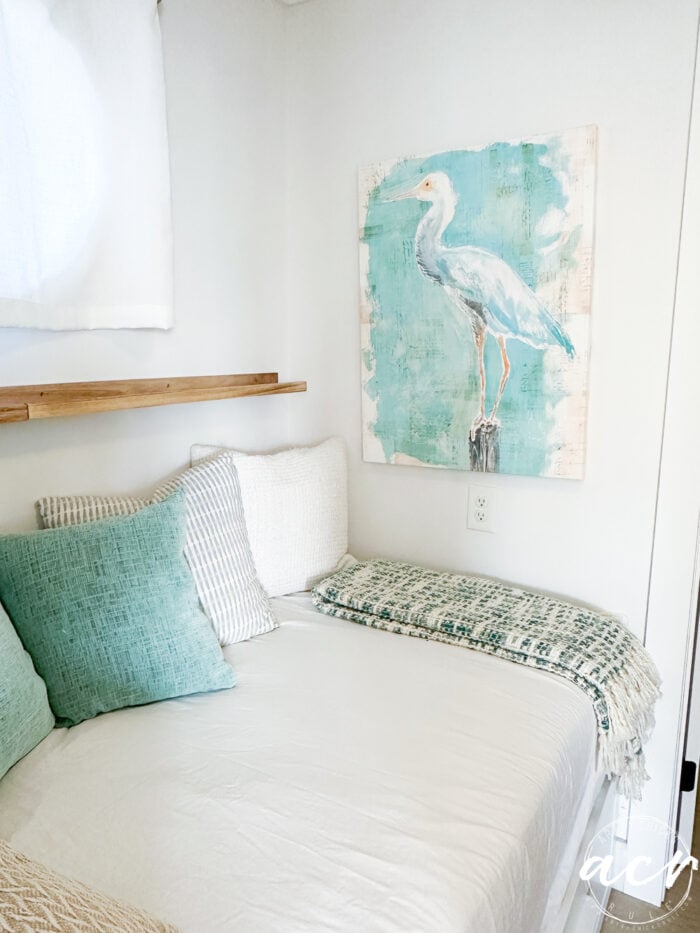
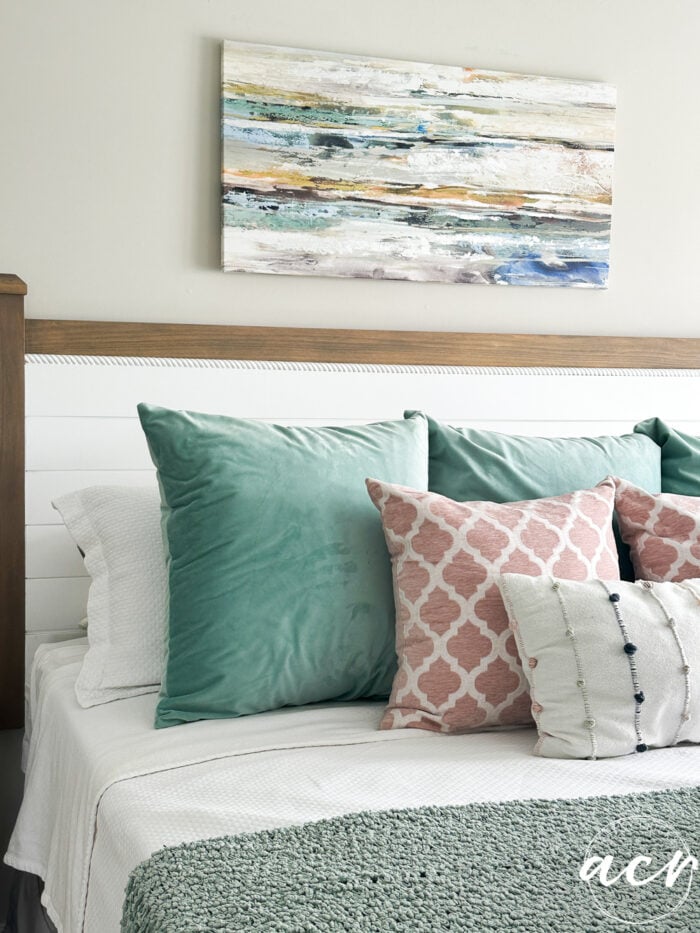
Added new watercolor photos to the wall, new table and chairs, and new pillows on the sectional.
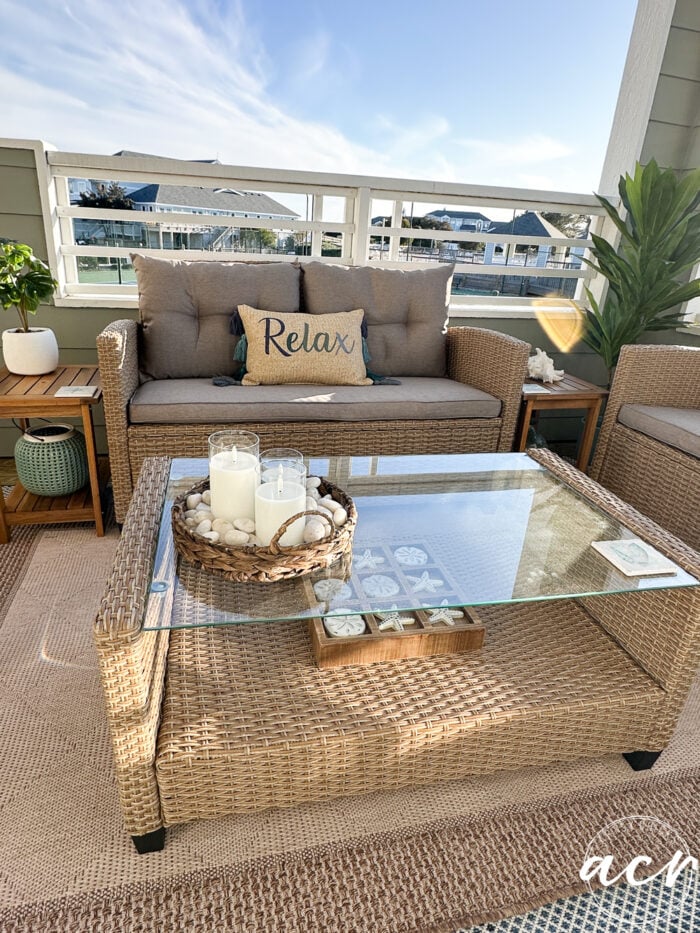
We also decided to make the deck a little more cozy with outdoor furniture and candles (remote-controlled, of course).
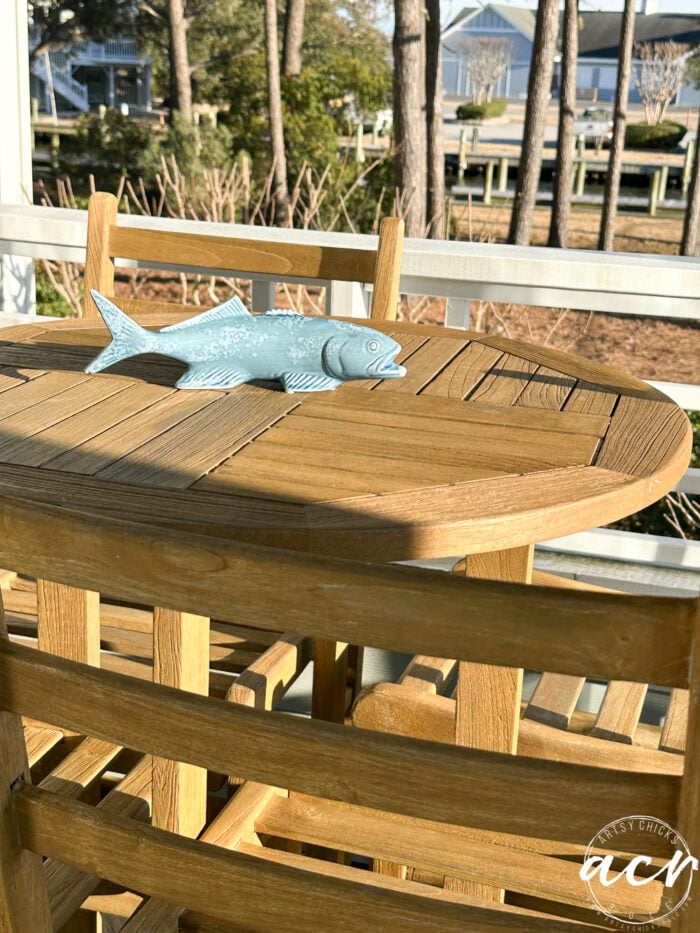
We were even able to still fit the teak table I refinished for out here years ago when we first bought.
I have a new white fluffy comforter coming soon too.
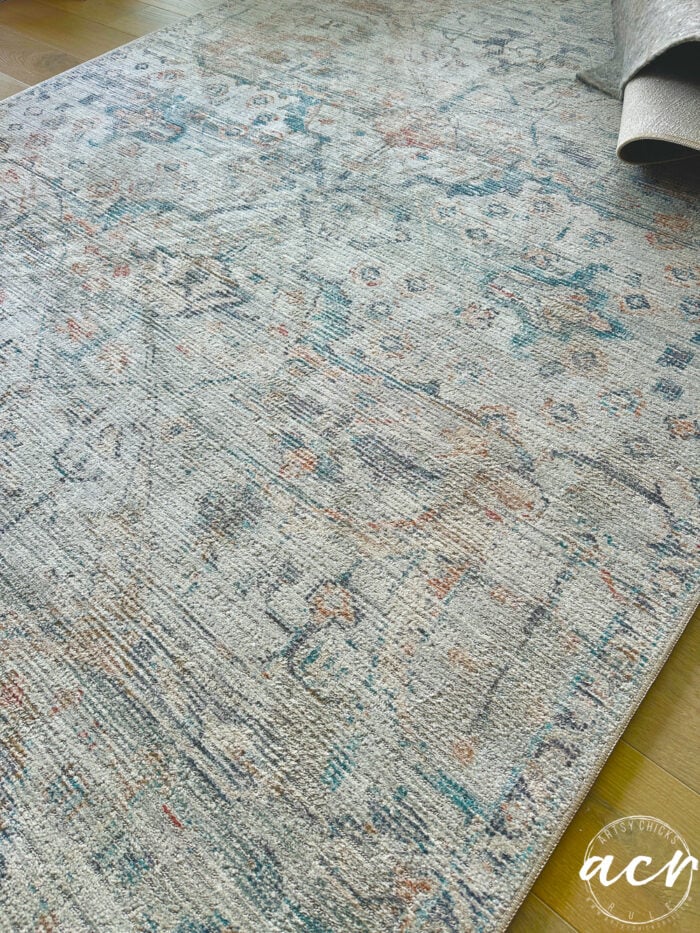
New rugs in the bedroom and living room (and foyer and kitchen too).
Living room…
I adore those colors! You can find it here. (it’s almost out of stock everywhere) One left in this size! If you like it, you better snag it!
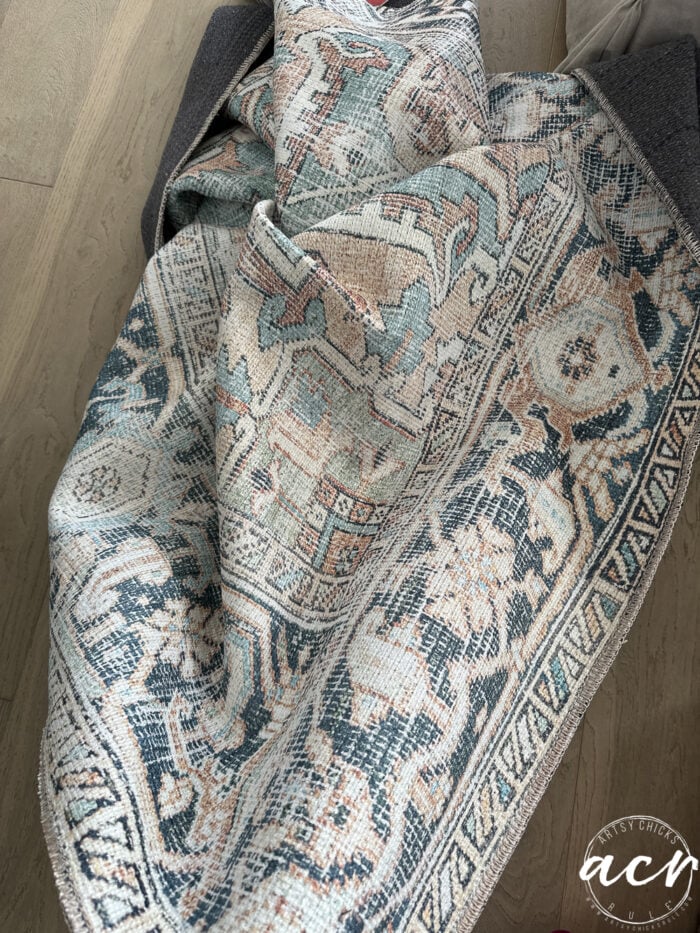
This one is not down yet and it’s big, 9 x 12, so this all I can share of it at the moment.
You can find this one here. (this one is not out of stock!)
The colors are GORGEOUS in this one too!
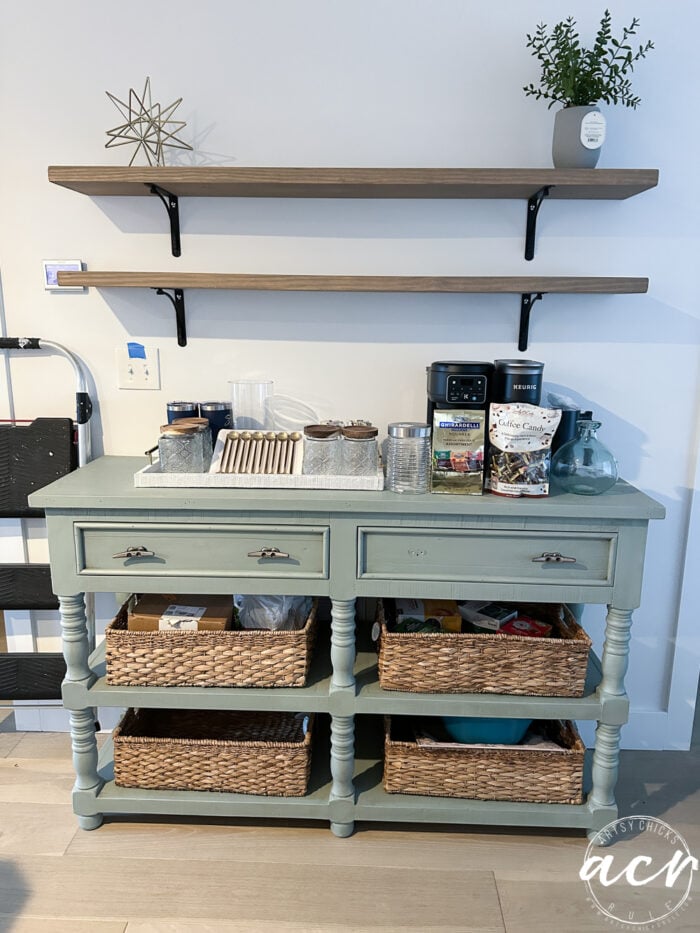
And the one I’m most excited about!
The new coffee/tea bar!! Woohoo!!
I am SO excited to be turning this console table into a coffee bar! I will have treats, chocolates, biscotti, coffee flavorings, coffees, teas and more! I can not wait to style this one all up!
Hubby cut the 2 x 10 boards and I stained them with my beloved Driftwood stain and he hung them up with brackets we found at Lowe’s. I’m loving it so much already! The baskets came from At Home. I’ll have links to everything once it’s done!
And that is it for now! Stay tuned for the full reveal soon.
I hope you consider using the vinyl tiles, they are easy to work with, stick well and are just beautiful!
PIN it to save it!
Have an amazing weekend, friends! I’ll try to post some updates as we go this weekend on our Instagram stories. If you don’t already follow along there, you can right here!
The tile looks gorgeous, definitely an improvement and a great temporary fix. Looking forward to seeing the kitchen after the remodel, as well as the new coffee bar. I’m sure the guests will love that! Middle age with aging parents (and losing them) is tough for sure, along with learning to transition from parenting to guiding our young adult children (who still need us) at the same time. We are right there with you! Thanks for sharing!
Hi Vicki! Thank you so much! I’m hoping the guests will love all the changes too.
Yes, so true! Parenting to guiding. And transitioning into those roles ourselves. It is a different world, for sure. Hoping you have a wonderful spring weekend, friend! xoxo
At first I thought why bother with the tile change if redoing it all in the fall but when I saw the end result and it only taking a day…wow. Looks so nice and worth it. Love your condo. Beautiful deck. Wondering what area in OBX it is in? The coffee bar already looks awesome. Love all the changes you made. Only thing I missed were the two fluffies missing, the big one and the little one Haha. Losing parents and dealing with all that is so sad and stressful. Begins a new chapter in your life and certainly different from all the others. I’m sorry for your losses.
Yes! Such a big change for a small $ and time exchange. Win win. Thank you, Debra! We are loving the changes we’ve made so far.
Our condo is in Pirates Cove Marina, in Manteo near South Nags Head. And yes, Piper is there but we leave Ryder home with our son when we go down.
Yes, losing parents really is and definitely a new chapter in life! Thank you so much.
Have a wonderful (and hopefully spring-like) spring weekend, Debra! xoxo
Thanks, Cyndi! There are a few more things/additions that we are going to have to probably wait until fall to do now. We just ran out of time to get them done! Boo! ha! And yes, we feel lowering the countertop will open up the space a bit with more of an “island” feel. xo
Hi, Nancy I love the tile, was just wondering how it will do behind the stove. I have a question for you about the window treatment in the livingrm/family rm condo. I have pretty much the same setup in my familyrm. 4 fixed windows across the back wall. I would love your setup for mine. Can you tell me how you accomplished this look. The rod, attachment, curtains, etc. Right now I do not have anything on my window and as much as I like it, I think what you have would soften the look. I hope this all makes sense.
I also, lost my Mother, it was 1 year on March 17th. It’s so hard when our parents are gone, the people we thought would be with us forever.
Thank you, so much for all your projects. I enjoy your post and look forward to seeing what you have come up with each time.
Glenda
Thanks, Glenda! We actually tested that out because I was concerned too and it does get warm without anything on the eye…however with a pot at full boil on high heat, doesn’t get warm hardly at all. Quite a huge difference. I think having the pot on the eye blocks most of the heat in that direction. So should be totally fine!
The curtain, it’s literally just one long rod. I carefully placed the grommets on the curtains around each support bracket so that I’d be able open and close the curtains. That’s it! Simple! And I love the look too as all you see are the pretty curtains and outside. It hides the trim from the door frames so well. I actually did the same exact thing in our dining room at our home here. I put curtains where the window breaks so all you see are curtains and windows, not frames in between.
I’m so very sorry for your loss! Yes, so hard.
Thank you for being here! I appreciate you, Glenda and I’m so happy to hear that you enjoy the projects I share! xoxo


")
")

")
")


")


I love it all, but I wouldn’t take down the counter over the sink. I like it the way it is!
Thanks, Cathy! Yes, I understand but I do want a more flowing, open look. :) xo
The new tile looks amazing!! What a fantastic retreat! XOXO
Thanks, Christy! You and I should go down for a weekend and shop all the thrift stores down there! Would be fun! xoxo
The tile looks gorgeous, definitely an improvement and a great temporary fix. Looking forward to seeing the kitchen after the remodel, as well as the new coffee bar. I’m sure the guests will love that! Middle age with aging parents (and losing them) is tough for sure, along with learning to transition from parenting to guiding our young adult children (who still need us) at the same time. We are right there with you! Thanks for sharing!
Hi Vicki! Thank you so much! I’m hoping the guests will love all the changes too.
Yes, so true! Parenting to guiding. And transitioning into those roles ourselves. It is a different world, for sure. Hoping you have a wonderful spring weekend, friend! xoxo
At first I thought why bother with the tile change if redoing it all in the fall but when I saw the end result and it only taking a day…wow. Looks so nice and worth it. Love your condo. Beautiful deck. Wondering what area in OBX it is in? The coffee bar already looks awesome. Love all the changes you made. Only thing I missed were the two fluffies missing, the big one and the little one Haha. Losing parents and dealing with all that is so sad and stressful. Begins a new chapter in your life and certainly different from all the others. I’m sorry for your losses.
Yes! Such a big change for a small $ and time exchange. Win win. Thank you, Debra! We are loving the changes we’ve made so far.
Our condo is in Pirates Cove Marina, in Manteo near South Nags Head. And yes, Piper is there but we leave Ryder home with our son when we go down.
Yes, losing parents really is and definitely a new chapter in life! Thank you so much.
Have a wonderful (and hopefully spring-like) spring weekend, Debra! xoxo
It all looks nice Nancy, I especially like the color of the console table . I like the beachy vibe.
Thank you, Teresa! I love that blue too and feel like it’s the “standout” piece for the room. :)
Sooo much better! Really pretty! And I agree with you on leveling that counter. It will give you so much more room there!
Thanks, Cyndi! There are a few more things/additions that we are going to have to probably wait until fall to do now. We just ran out of time to get them done! Boo! ha! And yes, we feel lowering the countertop will open up the space a bit with more of an “island” feel. xo
Hi, Nancy I love the tile, was just wondering how it will do behind the stove. I have a question for you about the window treatment in the livingrm/family rm condo. I have pretty much the same setup in my familyrm. 4 fixed windows across the back wall. I would love your setup for mine. Can you tell me how you accomplished this look. The rod, attachment, curtains, etc. Right now I do not have anything on my window and as much as I like it, I think what you have would soften the look. I hope this all makes sense.
I also, lost my Mother, it was 1 year on March 17th. It’s so hard when our parents are gone, the people we thought would be with us forever.
Thank you, so much for all your projects. I enjoy your post and look forward to seeing what you have come up with each time.
Glenda
Thanks, Glenda! We actually tested that out because I was concerned too and it does get warm without anything on the eye…however with a pot at full boil on high heat, doesn’t get warm hardly at all. Quite a huge difference. I think having the pot on the eye blocks most of the heat in that direction. So should be totally fine!
The curtain, it’s literally just one long rod. I carefully placed the grommets on the curtains around each support bracket so that I’d be able open and close the curtains. That’s it! Simple! And I love the look too as all you see are the pretty curtains and outside. It hides the trim from the door frames so well. I actually did the same exact thing in our dining room at our home here. I put curtains where the window breaks so all you see are curtains and windows, not frames in between.
I’m so very sorry for your loss! Yes, so hard.
Thank you for being here! I appreciate you, Glenda and I’m so happy to hear that you enjoy the projects I share! xoxo