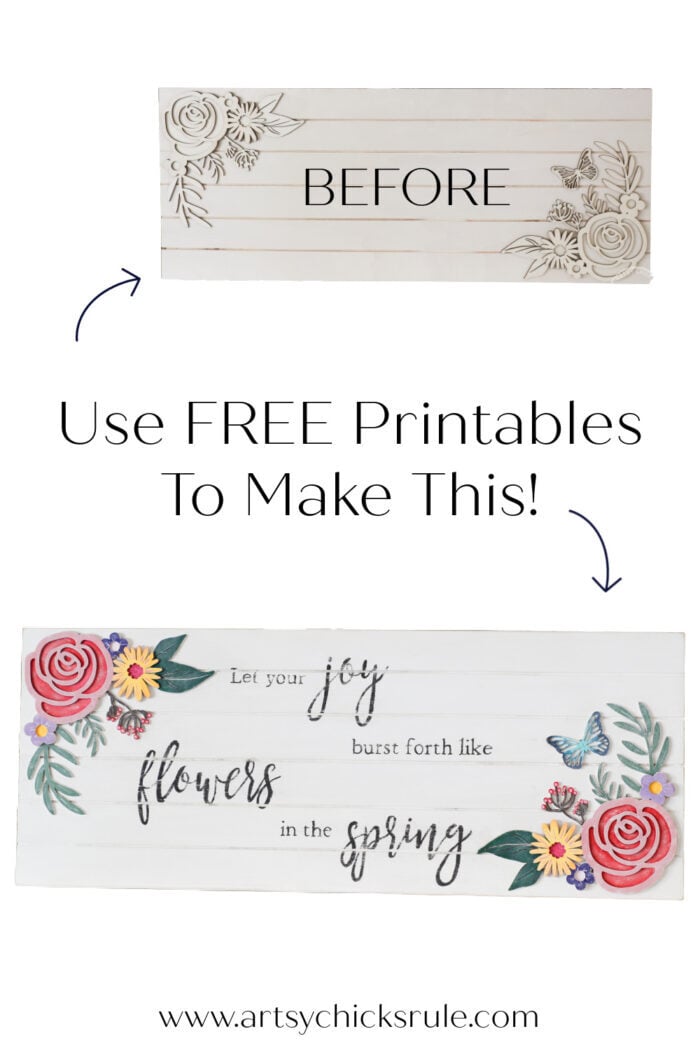
Create this spring sign with printable. Use my free printables for this and more!
Hello friends!
I am so feeling the spring thing! How about y’all?? I am so ready for this warmer weather. We have had a SUPER mild winter (love that!) but I’m still ready!! haha!
So I wanted to make something pretty (and spring-ish) for our home. If you follow along with me on Facebook, you might have seen my recent trip to Michael’s. If not, you can see it here.
And by the way, if you are not following along with me on Facebook, you can right here! I hope you do! I have some fun stuff planned coming soon.
If you watch the video above you will see what I bought to do today’s project below.
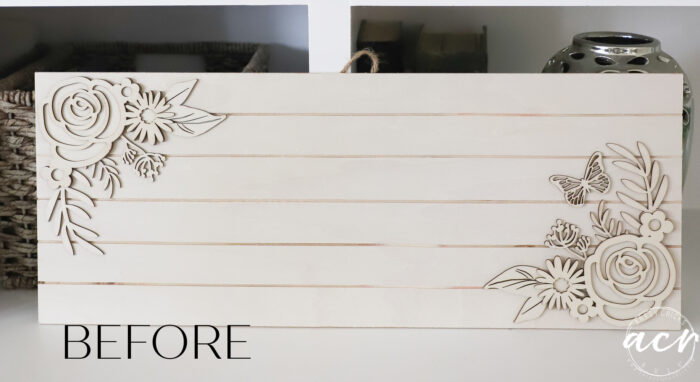
Spring Sign with Printable
I saw a bunch of stuff I wanted to bring home with me that day I went shopping. But I only brought this one home.
I knew it would be just perfect for one of my printables.
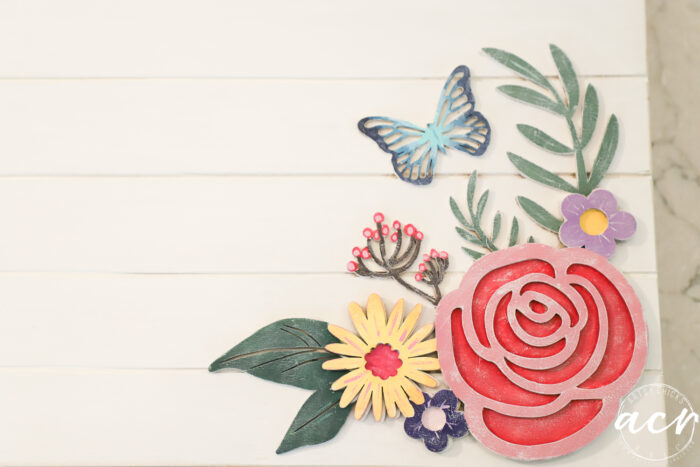
And I just loved the floral sides and couldn’t wait to paint them all colorful for spring.
But, I must first tell you I had another fail (As a reader here mentioned, a learning experience, right?! Thank you, Laura, love that!).
Oops. Well, I think it really wasn’t a fail, I just learned what I need to do better/differently next time.
And I’m going to share that with you here today.
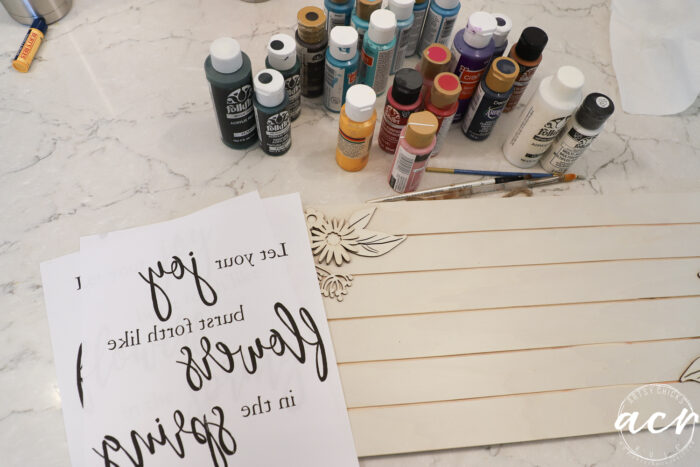
So, I knew what I wanted to do and which printable/graphic I wanted to use so I got started.
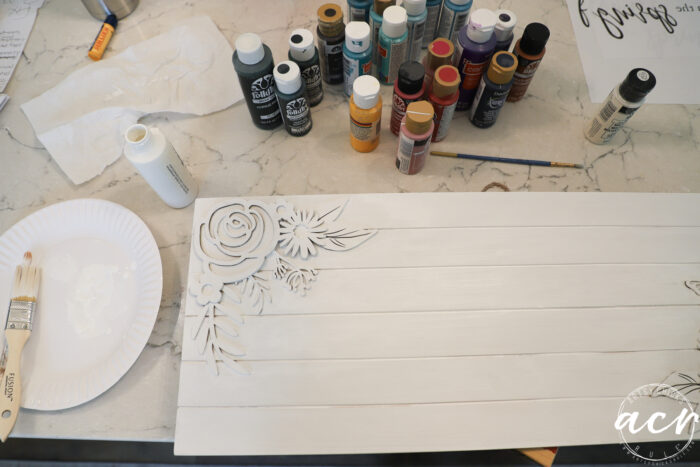
I began by painting the whole thing white. I just used regular craft paint for this project.
Easy!
Here’s where I made the first mistake.
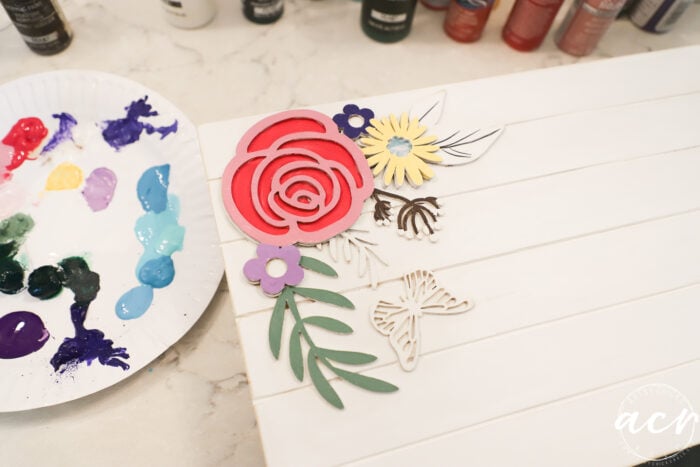
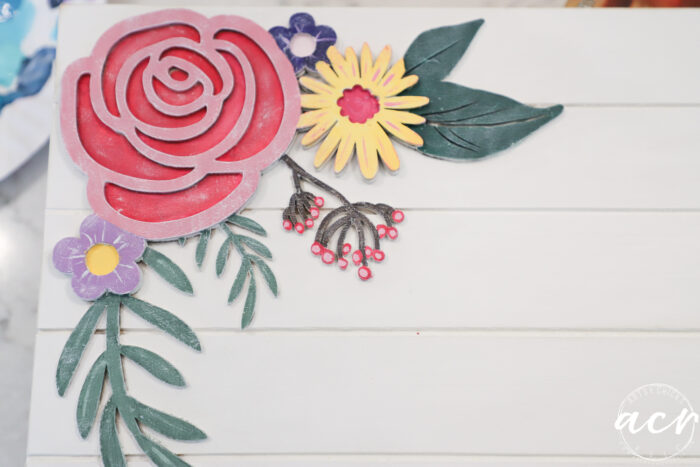
I began by painting the flowers in. Well, dang, because I was excited to get painting those!!
I couldn’t wait to bring them to life.
BUT…
I should’ve done the lettering part in the middle FIRST.
That way if something went awry I could fix it easily by painting the whole thing white again.
I ended up doing just one coat of white for a more “washed” look so having to re-do the middle would’ve been a problem.
Do you know when I realized that I made this mistake??
Oh, about right here…
…haha! I was really hoping my plan for the lettering worked as I wanted it to!
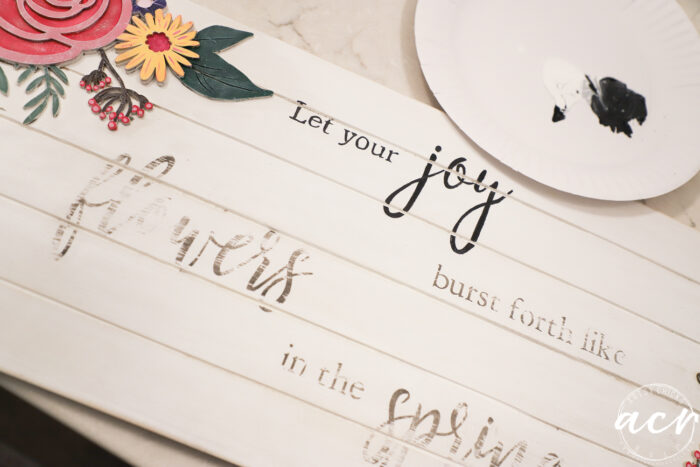
By the way, I had painted it all and it looked SO flat to me. So I added a few extra flourishes to it as you see above and below. Plus, I did some dry brushing with white all over it and I think that really added a lot.
Which is to use this printable over in my FREE Printable Library.
It’s backward but this is the one I’m using.
I thought it would be perfect for this sign.
And I thought I’d do the “transfer” method using our Decoupage and Transfer Gel.
Did you ever wonder why it was called that?? It’s because it will also transfer images.
Want this printable and about 100+ more??
>>All of my graphics are free to my subscribers. Not a subscriber yet? No worries, you can become one right here. >> Welcome!
>>Then hop on over here to download! >>> Download printables
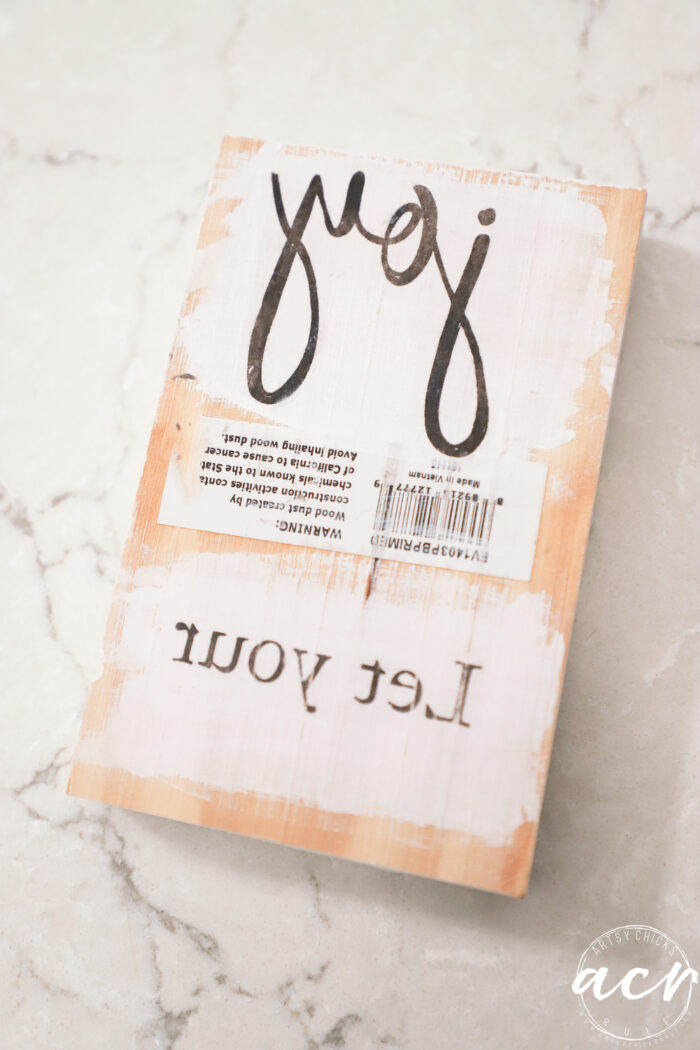
So, since I realized I can not mess up on this I thought I’d do a practice run on this scrap wood piece.
I painted it with the same paint and then applied the transfer gel and printouts.
And yay!!! It worked GREAT!!! (yes it’s backward, I used another printout I did by accident that was the wrong way)
I thought I was good to go!
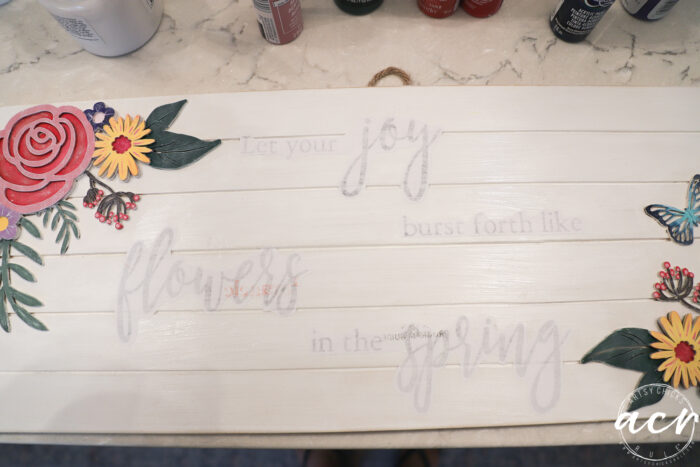
So I applied my Transfer Gel to the board and the cutout pieces of paper as you see above.
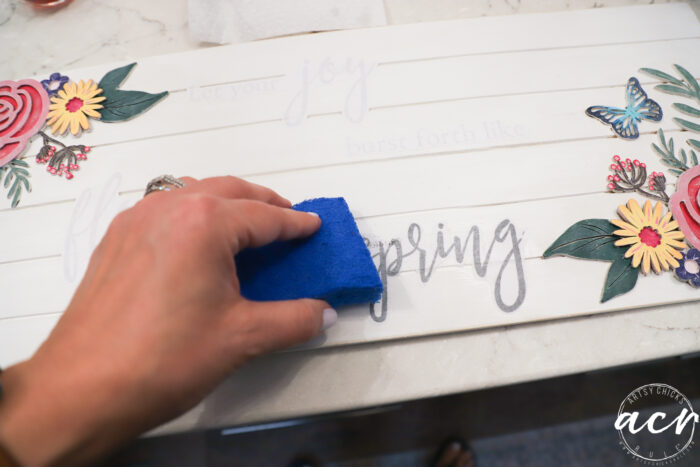
You need to let it dry very well. Then use a damp sponge to wet it and rub off the paper on top.
What is left behind is the ink and it’s like magic!
But after it dried this is what happened.
Looking good at first…
…then whomp, whomp, whomp. Boo.
Well, as you can see it does work.
Here’s where I went wrong.
I didn’t put enough of the Transfer Gel on the board. ONE, because I needed enough to somewhat saturate the paper, and TWO because it started drying before I could place all the paper pieces. You can totally see above how there wasn’t enough of the Transfer Gel in places.
So, I will for sure do this again with those 2 things in mind.
I considered for a moment just printing it out again and layering it right over the top of this. Instead, I decided to just hand paint it in since I had a nice outline to go by, etc.
NOTE: Inkjet is not the best for this method from what I can tell. Laserjet printables might be a better choice. I did run a hot iron over my printable to hopefully “set” the ink though. I think that helped as far as the ink running.
I think I will try this again with another inkjet printable AND laserjet printable to test it out. Stay tuned for that.
I kind of liked the distressed look so lightly sanded it after the paint was dry.
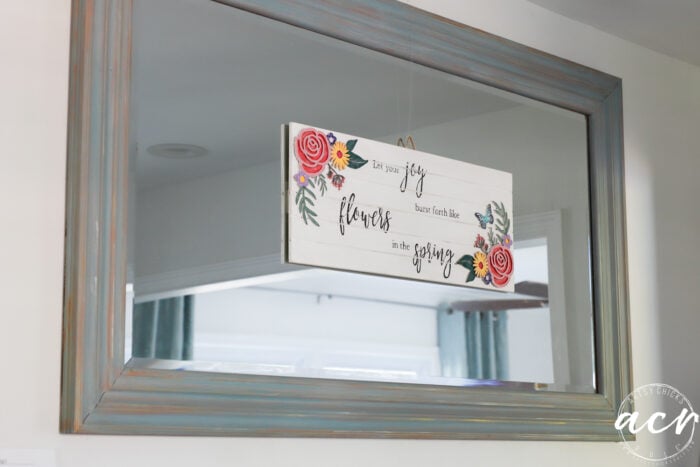
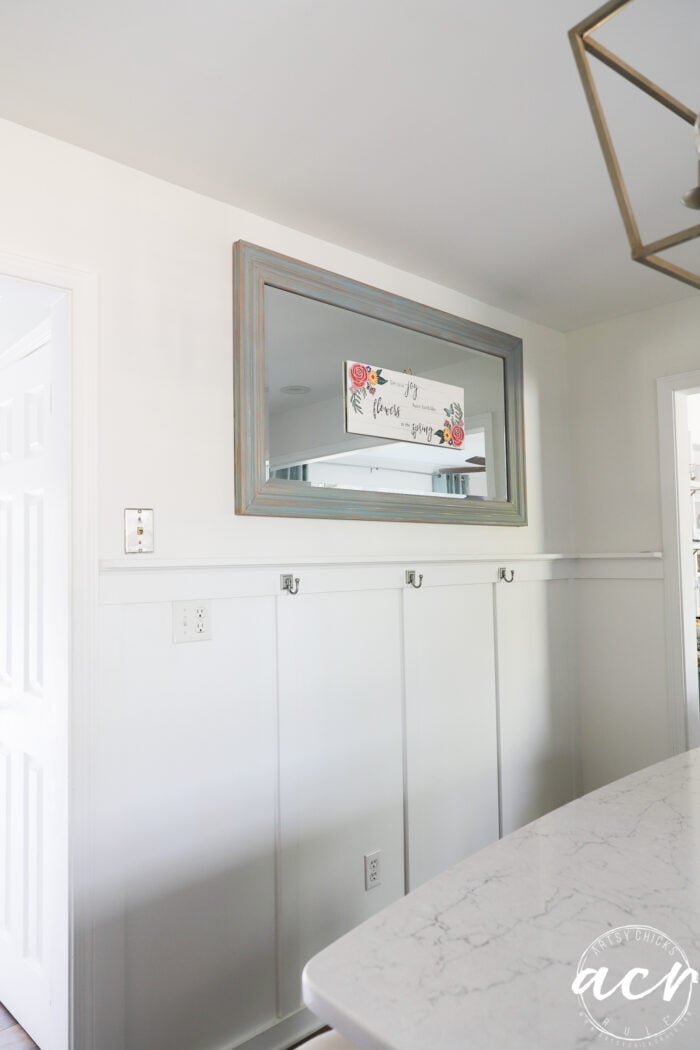
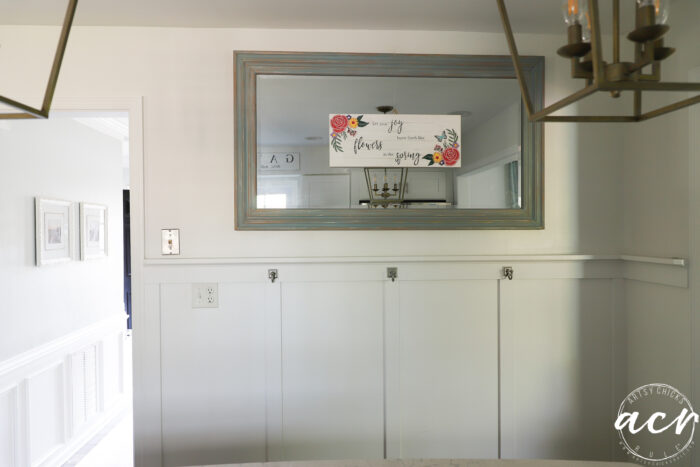
I thought about hanging it in the kitchen here…
I want to move that mirror at some point. I have just not decided what I want to put up there instead??
Any ideas??? I’ll take ’em!
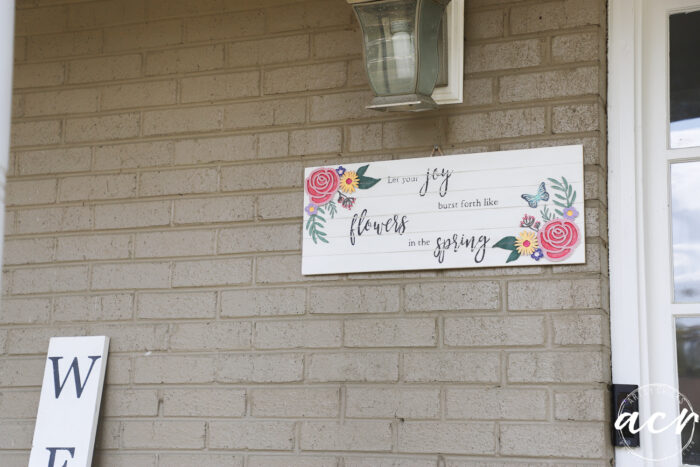
Although I liked it here I decided to put it somewhere else instead.
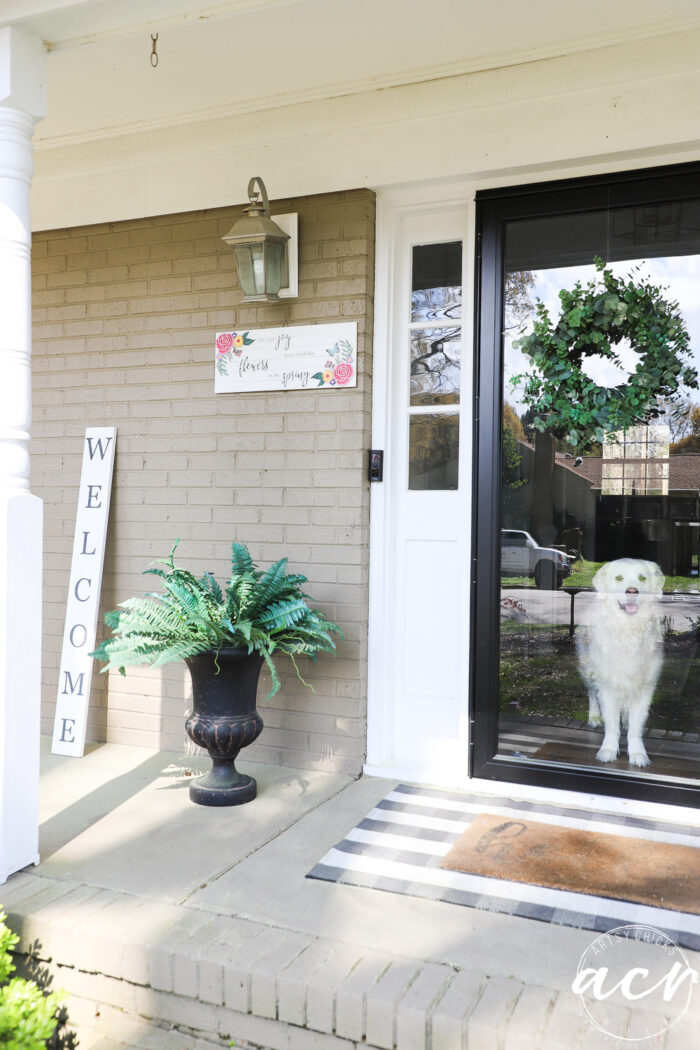
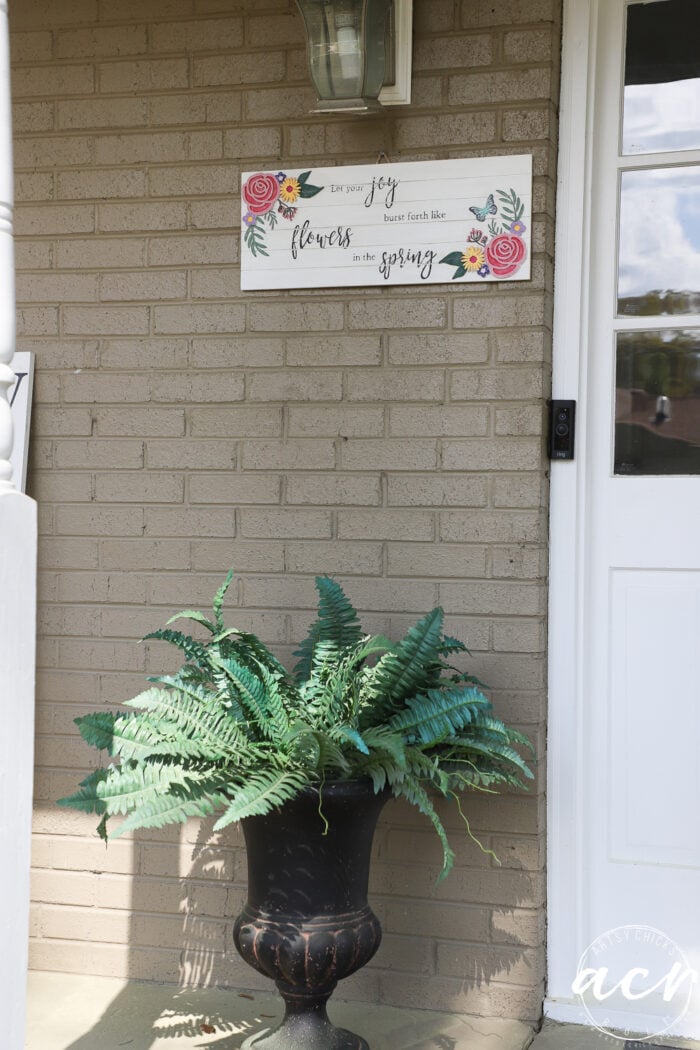
Here on the porch…
I love it here!
Ryder says, “whatcha doing out there, mom?”. lol
Don’t mind the pollen, please. It’s everywhere!
Look at that sweetie.
You are the bestest boy ever!
I hope you enjoyed this one! I was feeling a little crafty…and spring-ish.
Absolutely LOVE it on the porch! and Love Ryder too!
I follow another crafter who does this type transfer all the time and she says laserjet print is only way to go. You have such a steady hand with the paintbrush you made it work out perfectly though!
She applies chalk paint then on the actual transfer puts the thin layer of mod-podge on reversed graphic and places it. Dry for 24 hours then light wet and rub off paper with fingertips.
I want to go to a place with laserjet and get some copies made and do one. Until then, will admire all your work and hers. Keep it up, your emails always cheer me up!
Aw thanks so much!! Yes, I forgot that I had done this already!! Haha!! Whoops, there goes that mind! ;) https://www.artsychicksrule.com/merry-christmas-printable-tray/
Totally forgot!! But yes, came to that exact same conclusion. Oh well, at least I tested it twice so I know for sure it’s the way to go!! Wish I had a laser jet! My printer is NOT playing nice with me lately so might have to look into it.
And thank you also for the kind words, that makes me so happy to hear!! xoxo
Your piece is beautiful and I love it on the porch. It will make everyone smile when they walk by. I saw a large round mirror yesterday at Hobby Lobby that was distressed on the outside edge. I’m going to replace my rectangular mirror for that one. It would also look amazing on your wall. Ryder is magnificent!
Do you know where your kitchen lights were purchased – the brass square ones? I need 2 of those.
I think vintage plates on your wall would look great – many styles and colors to choose from.
Want to be inspired, learn new skills, discover all the tricks to furniture makeovers, creating new out of the old and more? You'll also receive my FREE ebook "Creating Fabulous Finishes" PLUS access to my private Printables Resource Library, too!
Sign up to get the Weekly Newsletter! Our emails include an unsubscribe link and you may opt-out at any time. Your information will *never* be shared or sold to a 3rd party.


")
")
")


")


Absolutely LOVE it on the porch! and Love Ryder too!
I follow another crafter who does this type transfer all the time and she says laserjet print is only way to go. You have such a steady hand with the paintbrush you made it work out perfectly though!
She applies chalk paint then on the actual transfer puts the thin layer of mod-podge on reversed graphic and places it. Dry for 24 hours then light wet and rub off paper with fingertips.
I want to go to a place with laserjet and get some copies made and do one. Until then, will admire all your work and hers. Keep it up, your emails always cheer me up!
Aw thanks so much!! Yes, I forgot that I had done this already!! Haha!! Whoops, there goes that mind! ;) https://www.artsychicksrule.com/merry-christmas-printable-tray/
Totally forgot!! But yes, came to that exact same conclusion. Oh well, at least I tested it twice so I know for sure it’s the way to go!! Wish I had a laser jet! My printer is NOT playing nice with me lately so might have to look into it.
And thank you also for the kind words, that makes me so happy to hear!! xoxo
You get an A for perseverance on this one! Turned out cute and a great fit for the porch.
Why don’t you hang a collection of vintage plates or vintage floral painted trays where the mirror is? It’s a great look for a kitchen.
Yes! That’s for sure, Gayle! Thank you and thank you for that suggestion, love that idea! xo
Your piece is beautiful and I love it on the porch. It will make everyone smile when they walk by. I saw a large round mirror yesterday at Hobby Lobby that was distressed on the outside edge. I’m going to replace my rectangular mirror for that one. It would also look amazing on your wall. Ryder is magnificent!
Thank you, Lisa! I hope so! Thanks for the suggestion too! And I think he’s pretty magnificent too. :) xoxo
Do you know where your kitchen lights were purchased – the brass square ones? I need 2 of those.
I think vintage plates on your wall would look great – many styles and colors to choose from.
Yes, absolutely, right here.
And thank you for that suggestion, Judy! I really like that idea! xoxo
This is so pretty and I love it on your porch. Ryder is the best photo bomber ever!
Aw thanks, Debra!! And I think so too!! haha!! xo
Oh, that is so cute! You did a great job, Nancy.
Thank you, Michele!! I’m so ready for spring!! xo