Simple & Thrifty DIY Coastal Wall Art Tutorial
Decorating your home doesn’t have to cost you a fortune. So today I’m sharing this DIY wall art tutorial so you can recreate these simple coastal prints yourself…on a dime!
I’m so excited to be sharing something really fun (fun to do!) with you all today.
Fun & easy on the budget.
And that’s always a good thing. :)
It’s a DIY Coastal Wall Art Tutorial
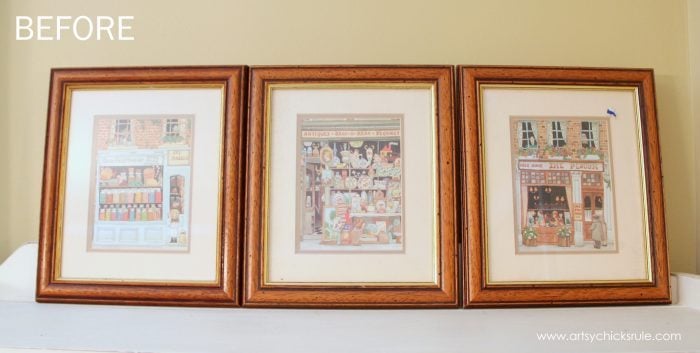
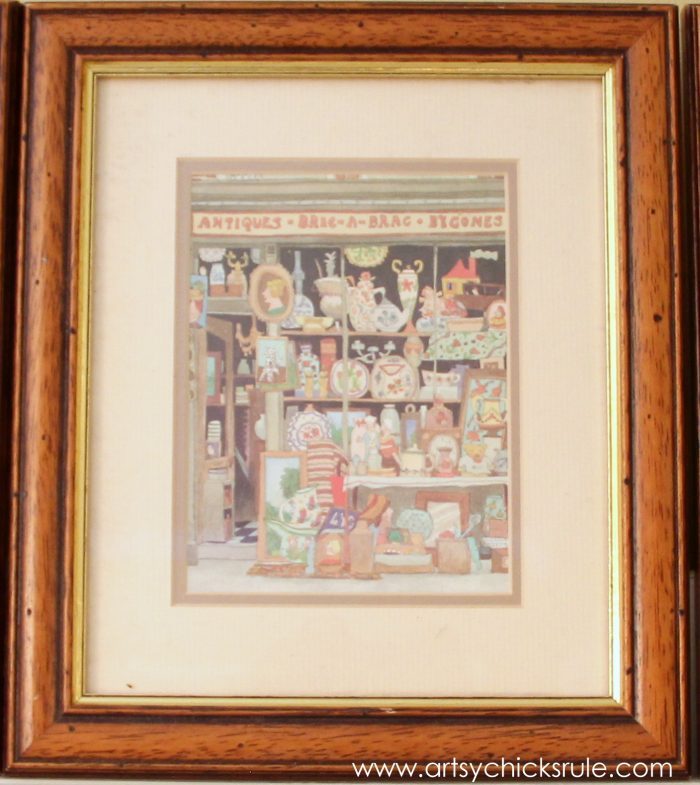
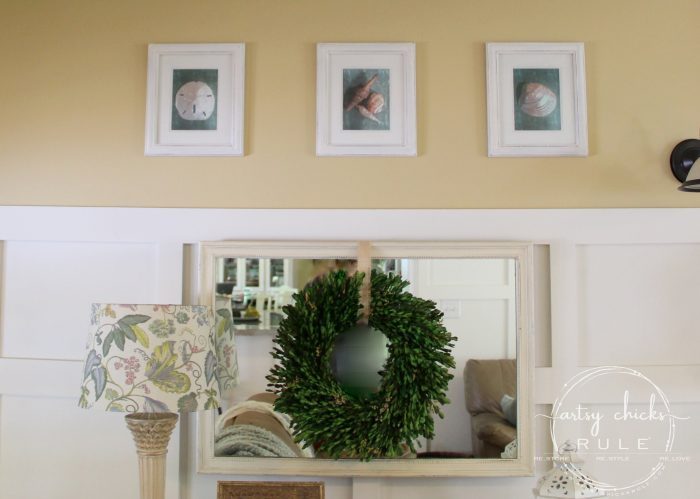
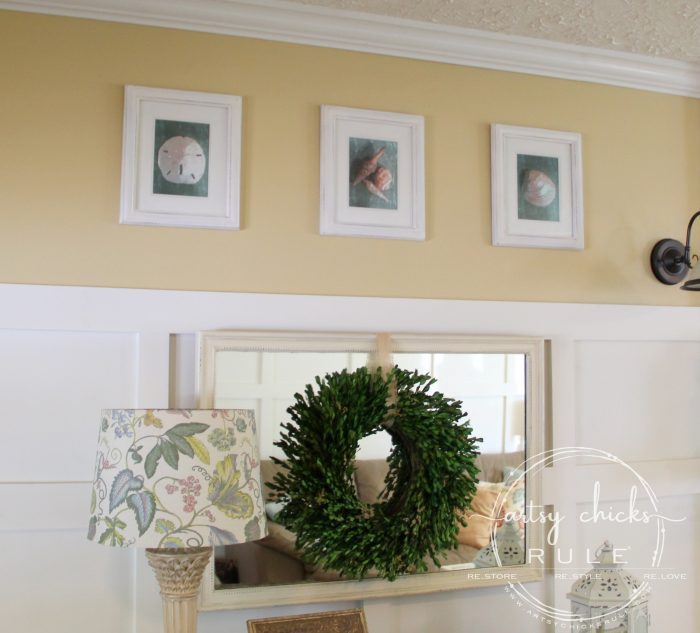
I found 3 old print/frames at the thrift store awhile back and had considered drawing/watercoloring shells like you see above to put into the frames.
But I never got around to it.
I bought the watercolor pad, more watercolor pencils,etc….but no, who has time for that?
I don’t but wish I did. :)
So I decided to just create something to make it “look” like watercolor instead.
There are so many apps out there nowadays to do all these things more simply, so why not?
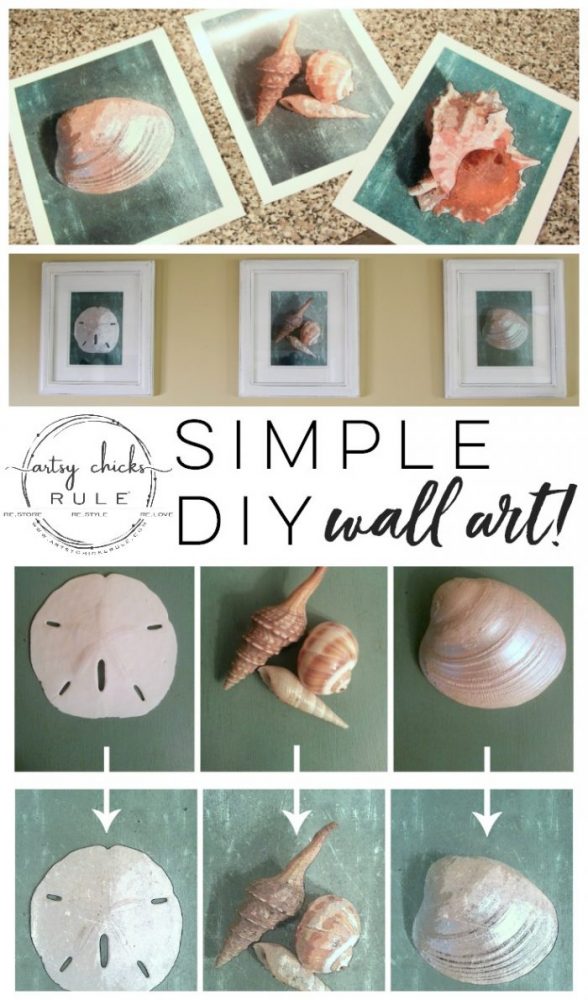
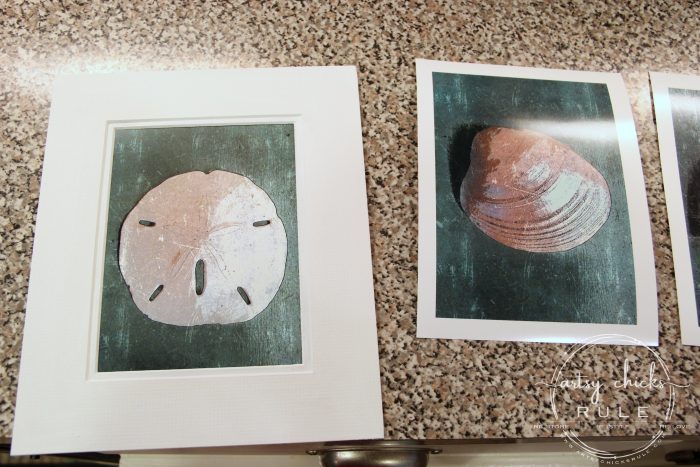
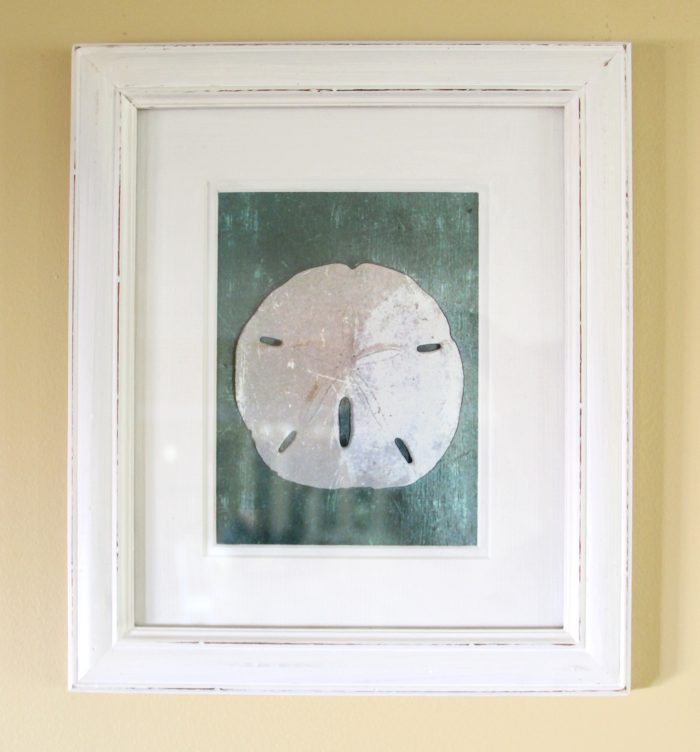
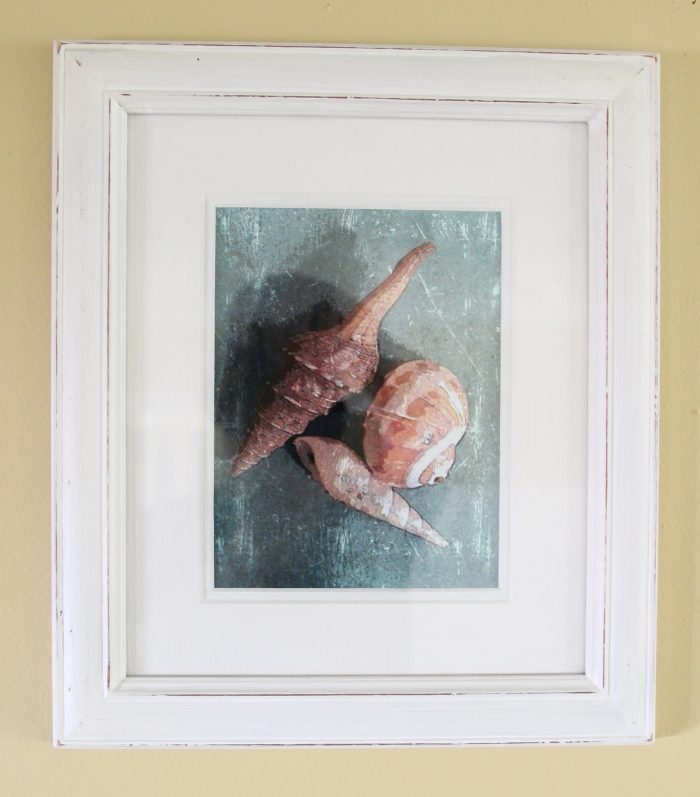
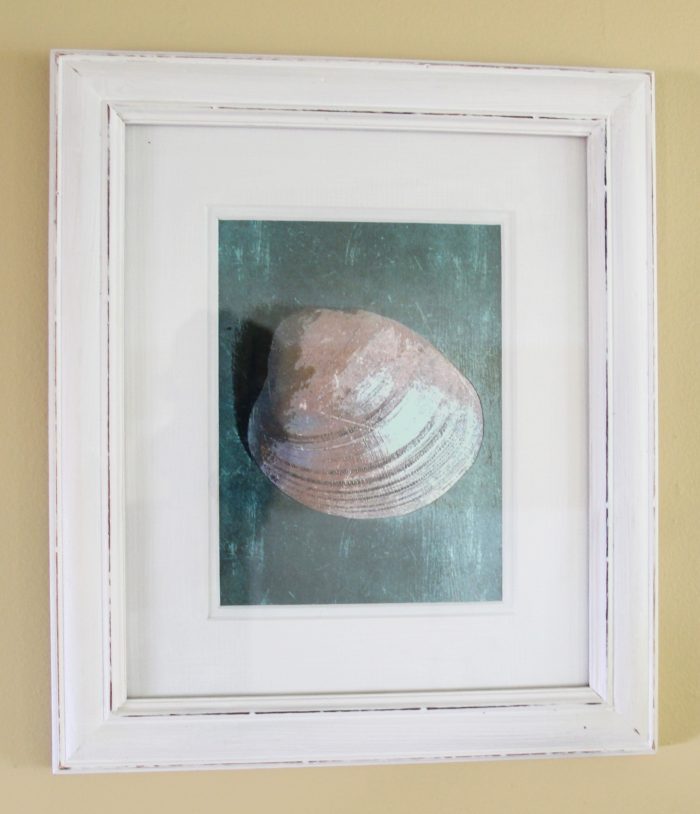
First, I took pictures of shells, sand dollars, etc, that I already had.
I placed them on the colored background that I wanted for the prints (which just happened to be the “Coffee Bar” I created some years ago).
You can read about that –> here.
It was the perfect shade for the background and I’m so happy with how these look.
You can do any color or patterned background of your choice.
See below how they looked before I used the app to change them into the “watercolor” effect … and after.
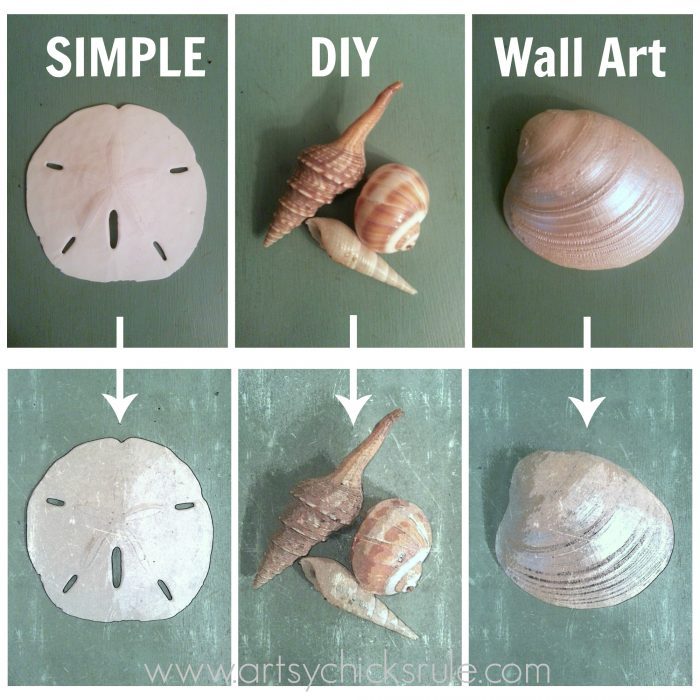
Crazy cool, right? I LOVE how it changed them.
I have a Samsung Note 8 now but I did this when I had the Note 2. I used an app that came on that phone.
It was in the editing area of the photo gallery and called “Paper Artist”. (It’s no longer automatically on the phone, but you can find it in the Play Store and download it)
So, to recap, I took the photos with my phone, created them in the app and sent them to myself through email.
I saved them to a thumb drive and printed the “photos” out at Target.
Next, I removed the mats from the frames….
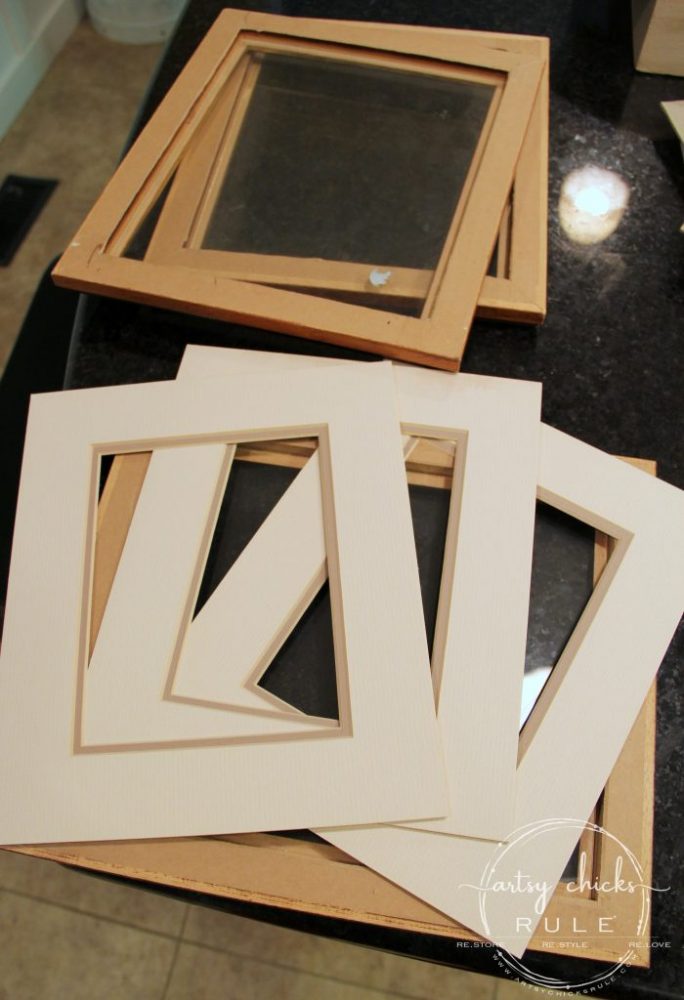
…and painted them with Pure White Chalk Paint. (you can use any white paint you have)
I didn’t seal the mats because I wanted them to have a “matte” look and also because they would be protected by the glass anyway.
I also painted the frames with same Pure White and sealed them with a quick spray of Minwax Polycrylic.
The mats were beige with a tan trim border and the frames were wood and gold trimmed.
And made just like new with a little paint….
I put them back into the newly painted frames….
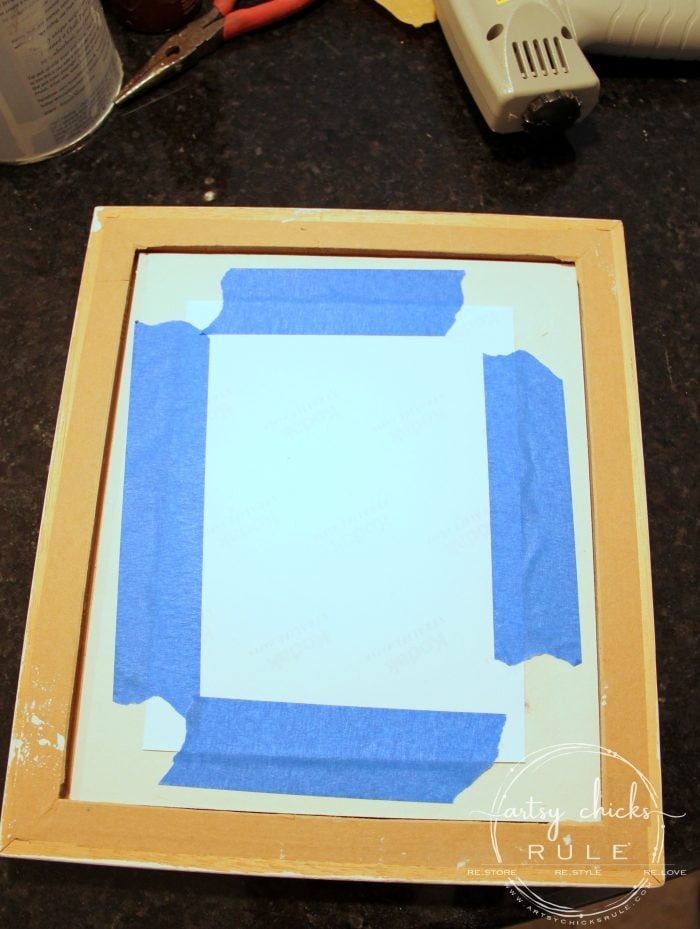
..and then stapled the cardboard backing over that. (the cardboard backing that was originally there, not shown in the photo)
Such an easy and inexpensive way to get really pretty and unique wall art….cheaply! ;)
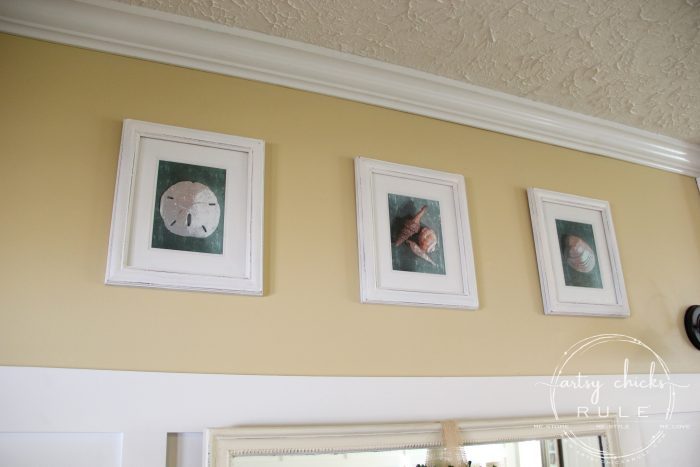
But it doesn’t look cheap! :)
I’ve always really enjoyed them!
Amazing how they looked before…and now, right?
What a difference.
Up close of each….
I love to reinvent things.
Old things with “no value” given away at the thrift store….can always be made “like new” and wonderful again with a little paint and imagination.
Just like these.
Easy, fun and super budget friendly. Perfect.
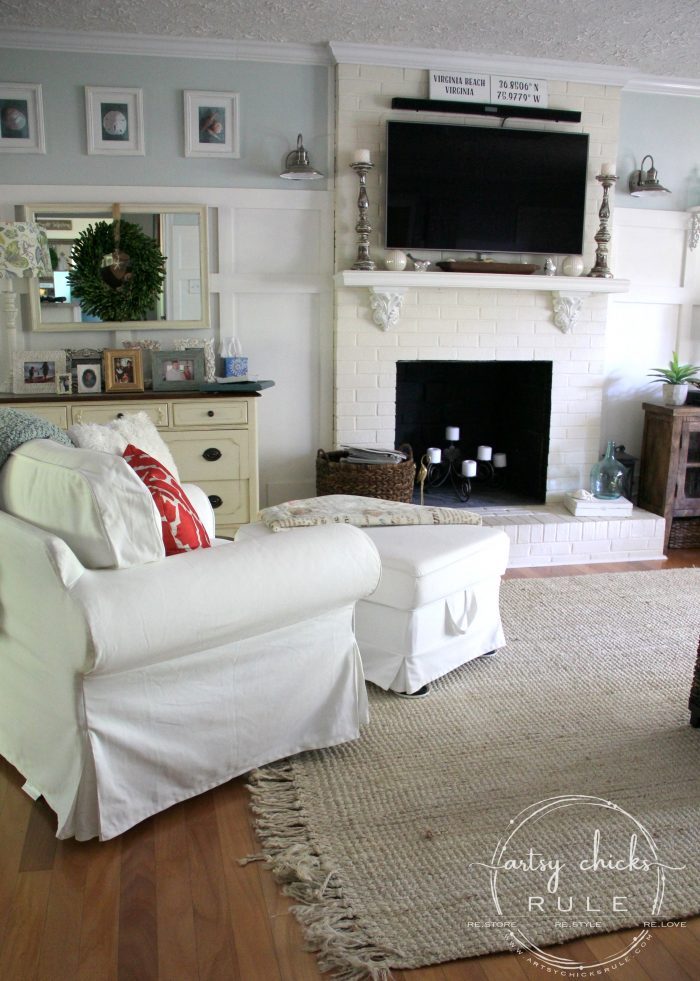
And most recently in my home with my favorite Sea Salt painted walls. :)
I hope you enjoyed this DIY coastal wall art tutorial.
Think you might give something like this a try? I hope you do!

Check back in next week to see what I did with this old cabinet door!
UPDATE! You can see it now, here!!
Have a wonderful weekend, friends! :)
xoxo

")
")


")
")


Love these Nancy – what a great idea! They look so pretty above your mirror too. I’m definitely pinning this! Question: where did you get your boxwood wreath? I’m having a heck of a time finding one.
Thanks so much Marie! :)
The boxwood came from one of my favorites….Target! ;)
Nancy
This post gave me lots of ideas. Thanks
You are welcome! :)
Nancy
Ooh, I love this, how creative and I love how you reuse things to make them fresh and new! I’ve got to check out these watercolor apps, they are so cool.
Thanks Sharon! That’s a good thing since I hate to throw anything away! ;)
Nancy
What a smart idea! I’ve been wanting to try this my Waterlogue app for iPhone. You have really inspired me to try this! Great job! ~Christy
Thanks Christy! It’s fun playing with those apps and photos! This one is my favorite! :)
Nancy
Adorable! I LOVE seashells! x
Thanks Danielle! :)
Nancy
These look great! Awesome idea!
Thank you! :)
Nancy
They look lovely Nancy… like everything you do!!
Aw thank you Cynthia!! :)
Nancy
I love that you used the watercolor app and framed them! I use my Waterlogue and Glaze app alot on Instagram pics, but have only tried printing a few at home ( that were only so-so in quality ) Did yours have the white border around the edge because you did something special to get that? Also, did they come glossy or matte? I’m curious because I’ve been saying I need to do this, too. Love your seashell prints!! Always a pretty touch :) Visiting from Blogtalk ( Funky Junk Interiors post! ) http://instagram.com/thepaintedchandelier
Hi Melanie!
I printed these out at Target and they came out with the white border from there. They were sort of glossy. (I don’t think they have an option for that..if they did I didn’t see it ;) )
Thanks so much for stopping by! :)
Have a great weekend!
Nancy
Simple and thrifty – that’s my kind of art and they are so pretty, too! Another awesome idea Nancy!
Thanks a bunch Jeanie! :)
Have a great weekend!!
Nancy
These are amazing, Nancy! I have an iPhone, so I’m gonna have to see what app works on mine! When I first saw your pictures, I thought you had just painted the background…. Not until I read your post did I realize they were watercolor pictures! Love them! xo
Aw sweet Karen! :) Waterlogue is an iPhone app you can try that is very similar. Look it up!
Have a great weekend friend!
xo
Nancy
This is such a great idea, Nancy. I love it! Pinning :)
So wonderful and easy, got to dig around in my collection of old frames now. Pinning!
Hey Laurie!
Thanks so much! :)
Nancy
Simple ideas are always the best.
I’m visiting from Catch as Catch Can.
Hi Linda!!
Thanks…I so agree! :)
Nancy
So Pretty! I appreciate your tutorial.
My guest bathroom is “Ocean” themed.
Mermaids, seahorses and seashells.
Thank you for a beautiful idea for decor.
I have MANY old frames for painting and seashells for photos. Thank you!
Thanks Colette! :) Oh yes, something like these would look really pretty in there! You can use any color background that works best in there, too. Have fun! I think I’m going to make some more of these too! xo
So cute and creative! It inspires me to do something like that with photos of my bulldogs.
Btw, I have the same rug in my living room. :)
Thanks Lizzy! :) Oh yes, pet photos would be great too! You should definitely do it. And I love that rug, one of my favorites! xo
These look great and so easy! Perhaps you’re like me, I got tired of buying color cartridges for my printer since I seldom printed in color. I switched to a black & white printer and just send my color prints to Walgreens when I need one. SO much cheaper!
Thanks Gwen, and yes, that is the much smarter way to do it, for sure! (they sure are pricey!) And yes, these were ridiculously easy and cheap! Even better! ;) xo
I like the look! I am helping my boyfriend redo and decorate his beach cottage and this is good idea.
Thanks Rose! Oh yes, this is a great idea, how fun! I know you are loving helping him do that. I would be! :) xo
See… this is why you bring back older content (I forget what the proper name is for it… do you know?) Love this, Nancy! At first I was like, “Those shadows…” But then I saw the watercolor application and it really adds to the look! ;-)
Yes, exactly! Many of these oldies are missed or looked over, for sure! :) xo