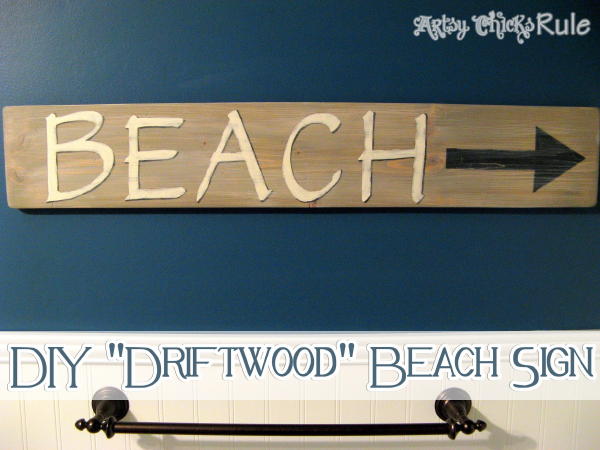
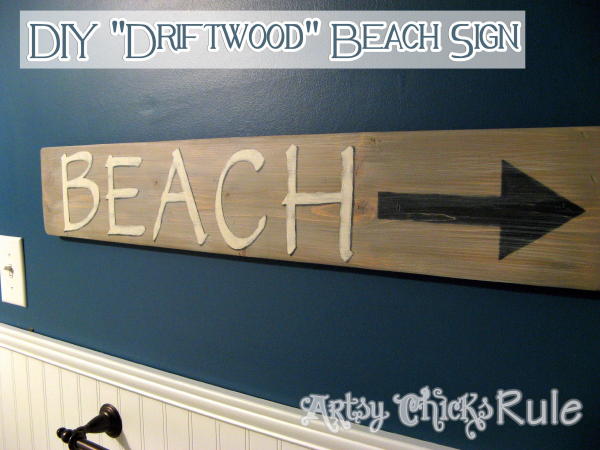
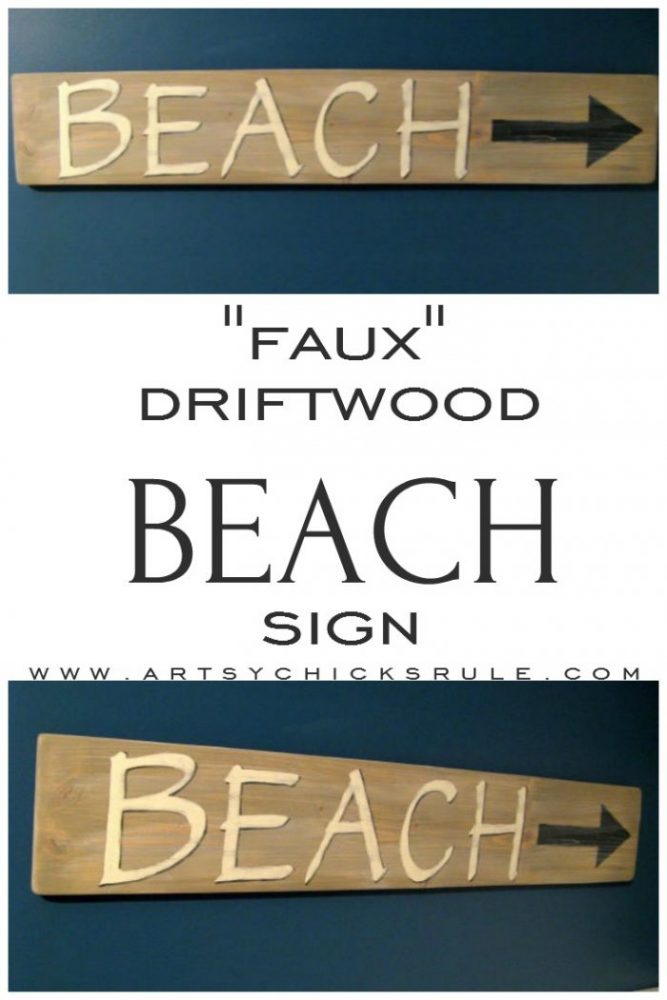
Ready For Summer?? DIY “Driftwood” Beach Sign Tutorial
DIY Faux “Driftwood” Beach Sign!! Simple finish creates the look of old wood and a super cool sign for your beach styled house!
I don’t know about you but I am ready for it to be warm enough to visit a beach.
I am SO excited to have that extra hour in the evenings. I LOVE when it stays lighter longer.
Love, love, love it!
So until it gets warmer (here anyway) I have a fun little project for you to try that’ll
have you dreaming of the beach.
I love signs & I love to make signs and I’m going to show you how to make this beach sign easily
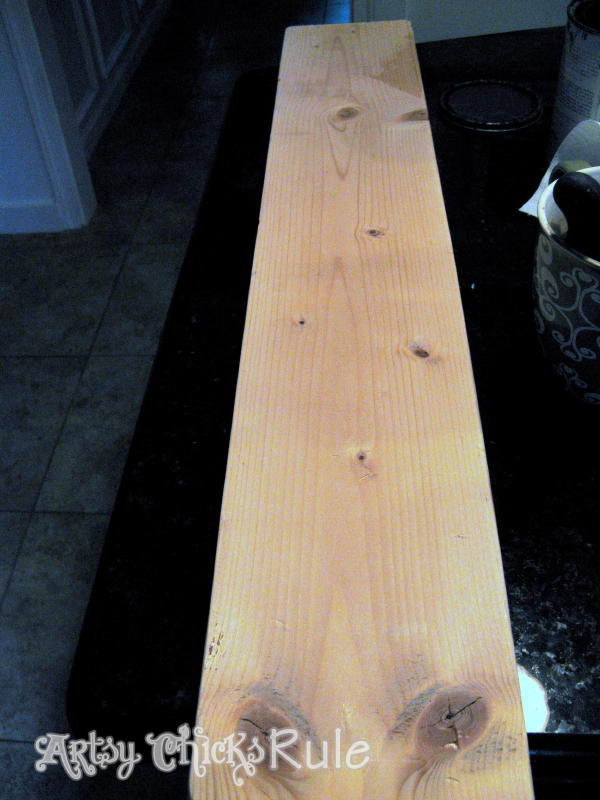
and inexpensively…out of this old scrap wood…
….and into this…
Pretty basic really.
I made this one from a piece of wood we had laying around. Scrap.
So this is a mega cheap project.
My favorite kind!
DIY Driftwood Beach Sign
Steps to Paint a Driftwood Beach Sign
- Cut The Wood
Cut the wood to the desired length and sand the edges smooth.
- Mix The Paint
Mix the paint colors shown (or similar) and add water to create a “wash” that will create the look of driftwood.
- Dry Brushing
Dry brush white paint over top.
- Transfer The Lettering/Design
Transfer the lettering or design in your preferred method.
- Paint The Letters
Hand paint the letters by “filling in” what you transferred.
- Add Shadows For Depth
Add shadows to each letter for depth.
- Sand To Distress
Sand the dry finish to distress. This will make it look “aged”.
- Wax or Poly Finish
I applied a wax finish but you can also use poly.
So, first the wood.
The “saw master”, that would be my Mr., cut it to the length I wanted and sweetly
sanded the edges smooth for me.
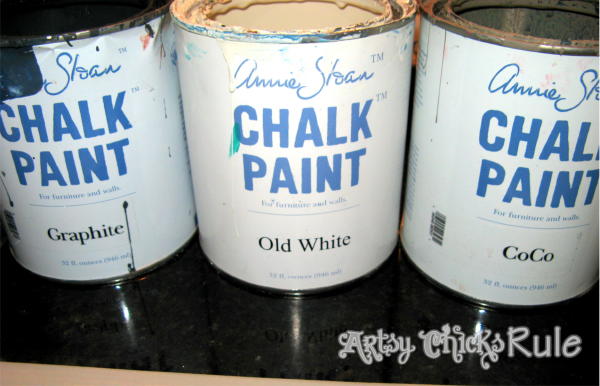
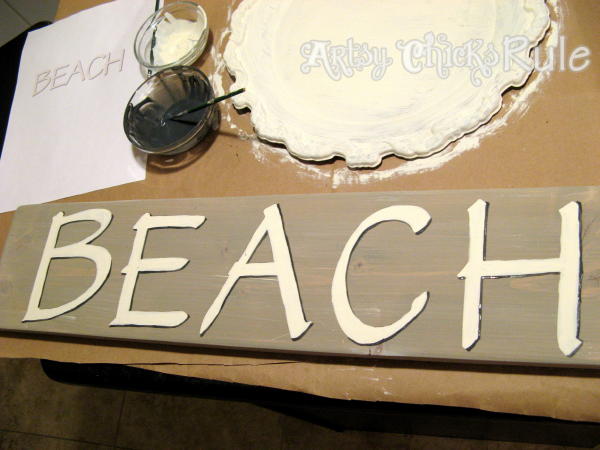
I then mixed up some Chalk Paint in the following colors to achieve
a “weathered driftwood” look.
Coco, Old White & Graphite
I watered it down to make it into a “wash” and brushed it all over the wood. I wanted
it thin enough to still be able to see the grain underneath the wood for that worn, weathered look.
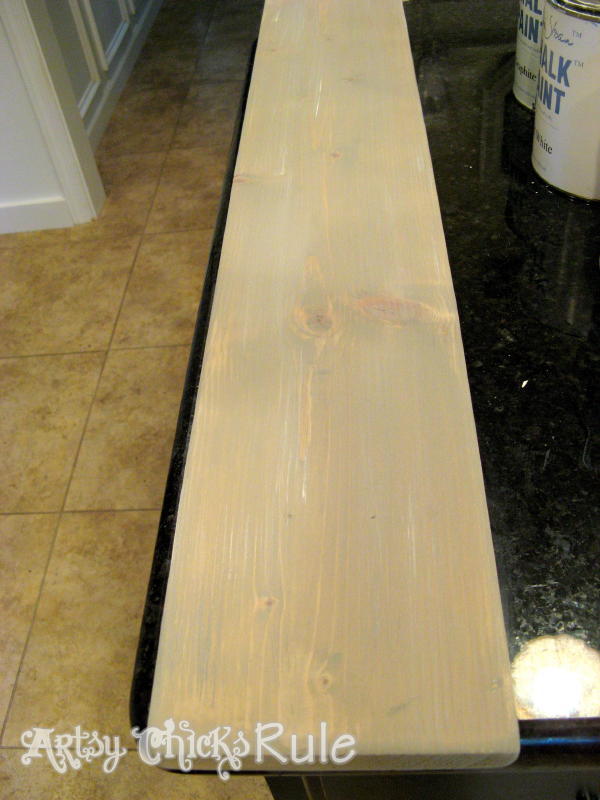
I think it turned out the perfect shade of “driftwood”. What do y’all think?
I then took some of the Old White & Graphite and dry brushed ever so lightly
across the wood. (click here to watch my video tutorial on “dry brushing“)
You can see it a bit in the picture above and in some of the closeups below.
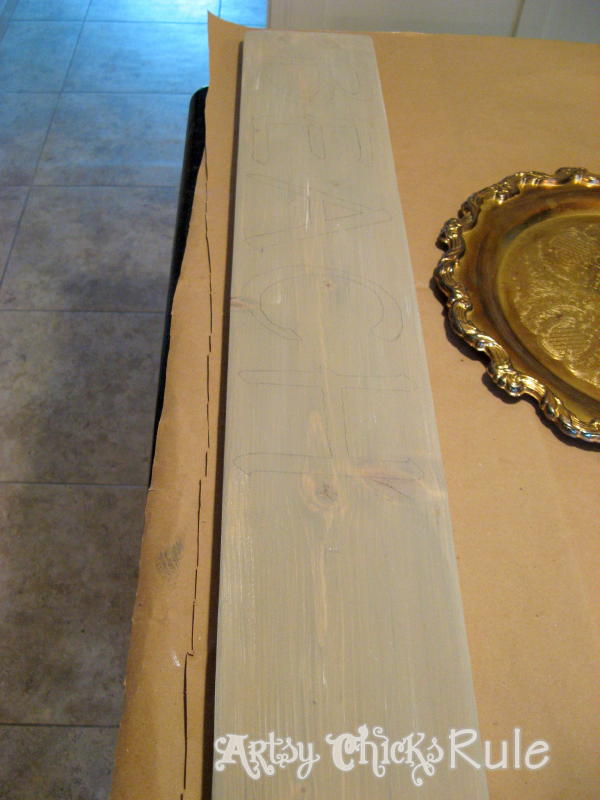
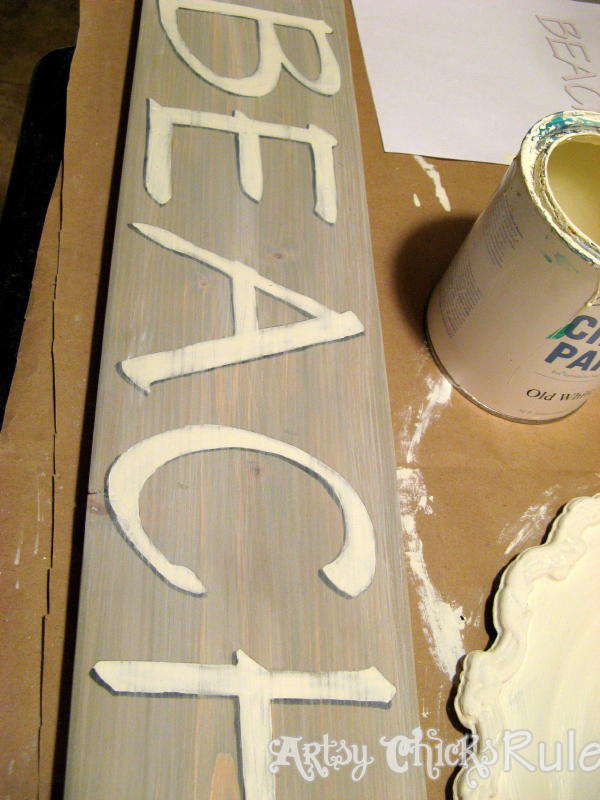
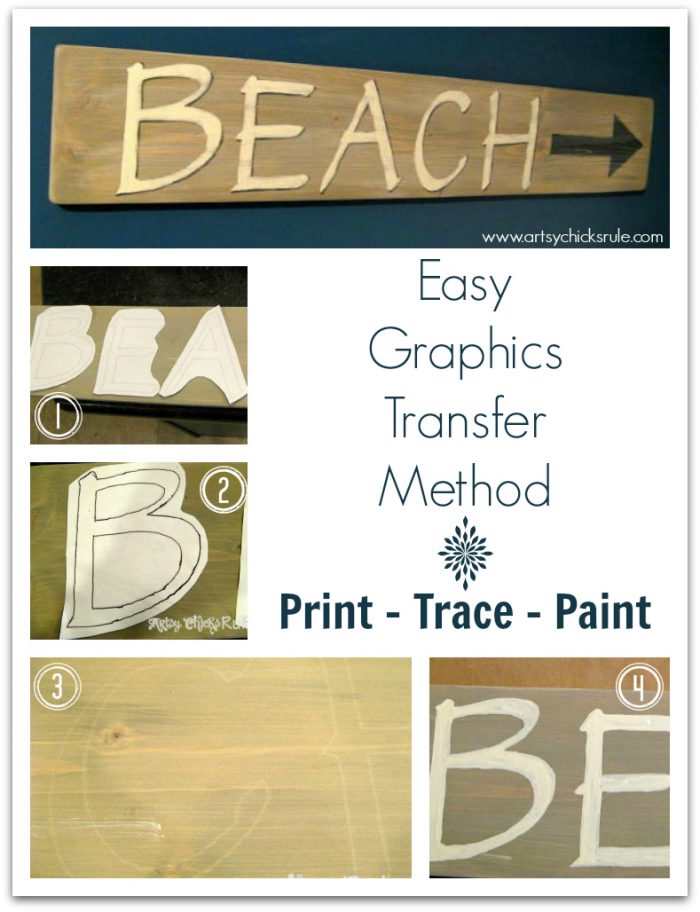
I printed out some lettering to the size that I had chosen for this beach sign.
This is a super easy transfer method I’m going to show you.
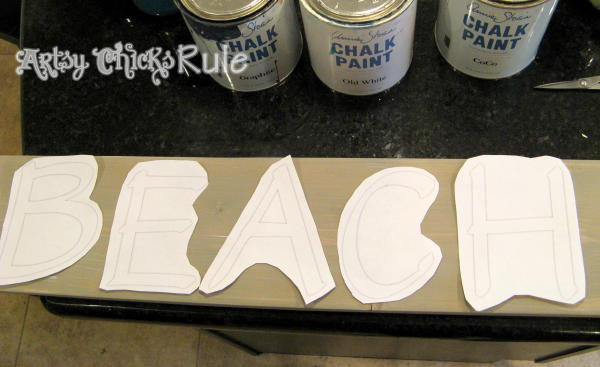
I cut out each letter closely around the print so I could place them where they
needed to go on the board.
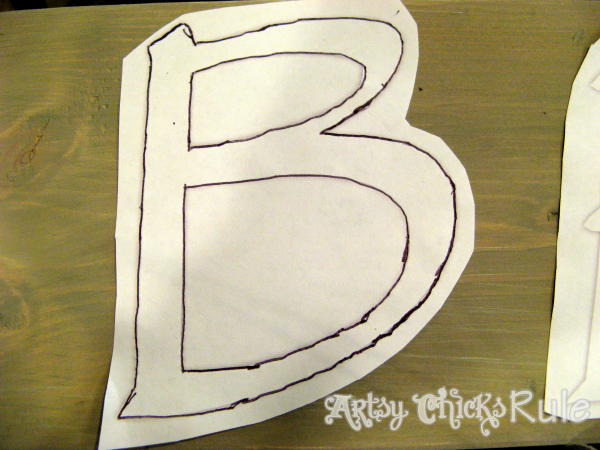
Then I took a ballpoint pen and traced each letter with a bit of pressure as you
can see above.
Be sure to keep the paper still. You can also tape it down to keep it stationary.
I didn’t bother.
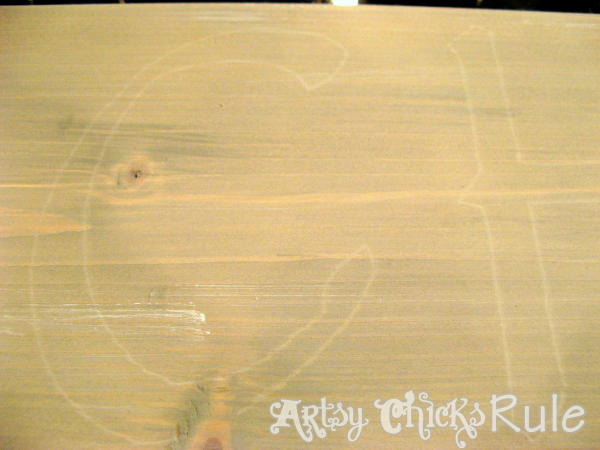
Once you do that you will see there is a slight imprint left on the wood underneath.
Easy right??!!
This works well with softer woods, like pine.
You now have an outline to paint inside.
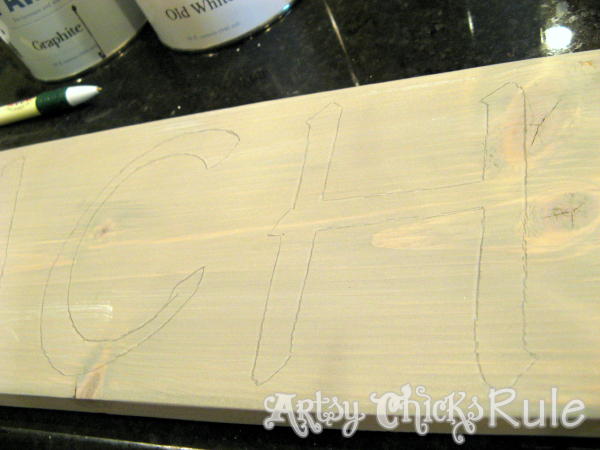
I took a pencil and lightly traced the letters so I would be able to see the
outline better as I painted.
You don’t have to add that extra step, however.
(Edited to say: Want even more graphics transfer technique ideas? I’ve since written a post that gives all of my favorite transfer methods in full detail. You can find it, here: My Favorite Transfer Methods)
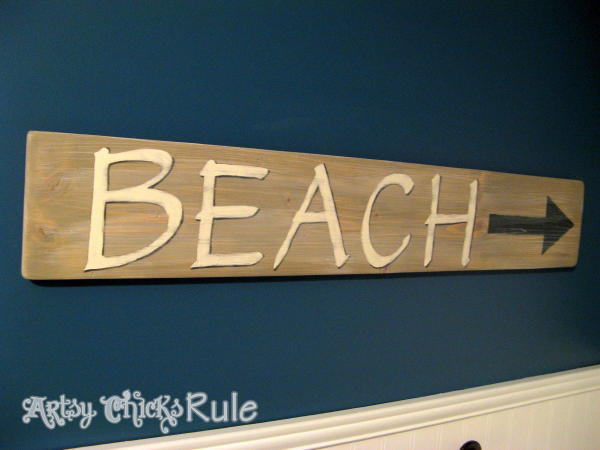
Now time for drawing on the arrow…
I just used a ruler and made a simple arrow.
Fairly simple arrow.
Lots of other things you could do here. You could print out a super snazzy one
if you like.
I wanted something simple looking….like it was hand done…which it was!
So I started painting it in with watered-down “Old White” Chalk Paint.
(Excuse the platter, I had a couple of projects going at once..which is typical)
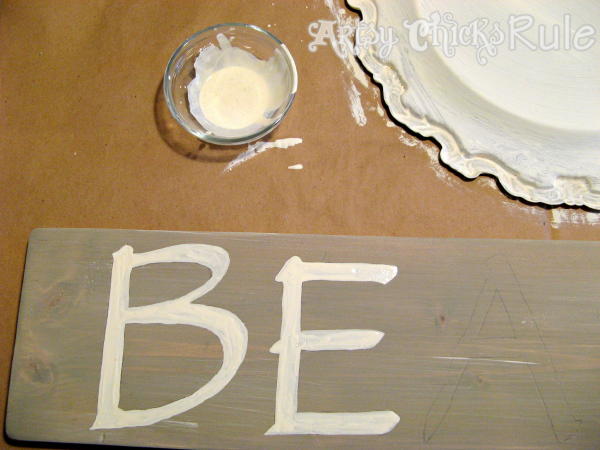
After I finished with the white I went on to paint the arrow in “Graphite”.
You could also use acrylic craft paint for this too.
I don’t have white paint on the arrow..it’s just wet and reflecting light in the picture.
How simple is that?
Simple.
But……
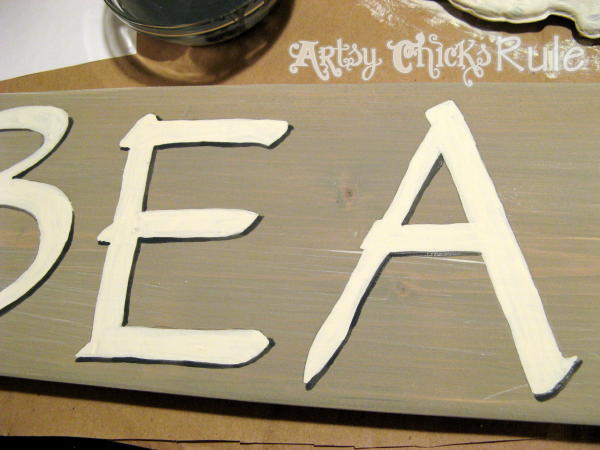
I decided the whole thing was a little flat looking …blah…so I added shadow to
the letters to give it some dimension.
Simple easy trick-
I printed out a copy of the word BEACH with a shadow added.
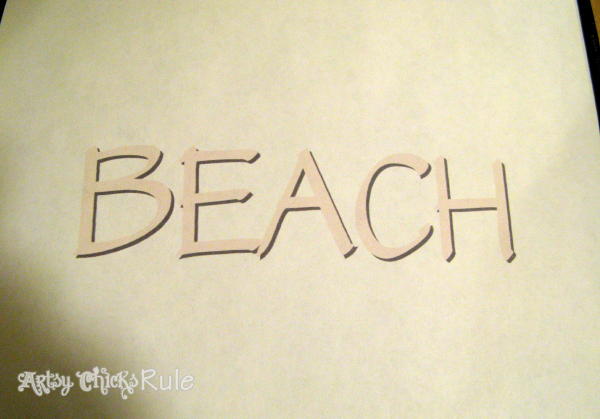
And then painted the shadow onto my sign using the printout above printout as a guide.
Want to see some of these projects in “live” time? Hop on over and follow along with me on INSTAGRAM. I’m always sharing in my stories as I’m doing projects, finding new furniture, fun finds….just all the day to day behind the scenes.
See this newer post for another tip that involves Google! ;)
MUCH better!
After that was dry I took some sandpaper and distressed the lettering on my driftwood beach sign quite a bit…
…and the arrow.
I finished it up with a coat of clear wax.
I am actually very happy with how this turned out.
It was a day project.
Actually, it only took a couple of hours to complete…not even an entire day.
Truly easy and really kinda fun!
I do have to admit something though….the beach is in the opposite direction.
And not far at all…as in across the road. So if anyone goes into my bathroom and thought about it for a sec they’d realize this.
But I didn’t really want my sign pointing the directionally correct way for decor
reasons.
Who cares about correctness?? Pretty decor is what matters most!! Don’t you agree? ;)
PIN it to save it!
A totally do-able, easy & quick “driftwood” beach sign.
Think this is something you’d try? Do you have some scrap wood laying around?
Pull one out and give it a shot! I’d love to hear how it goes and what you do.
Be sure to check back later this week to see the sign I made out of this old thrift store find!
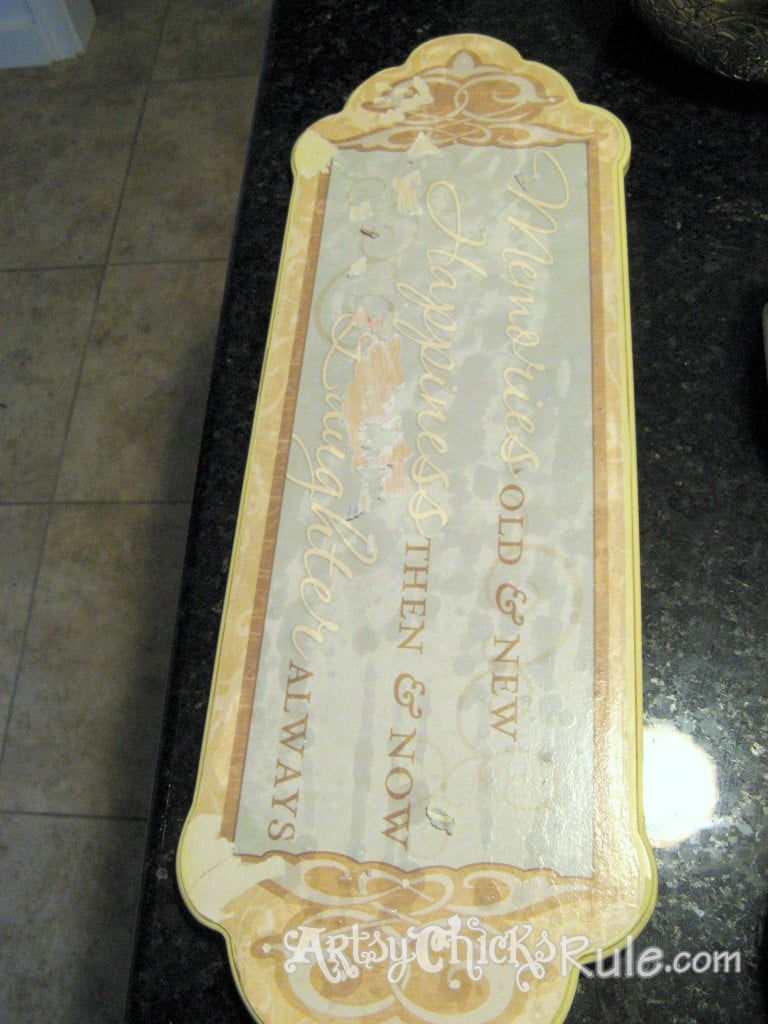
UPDATE!! See it now, here!
xo

")


I love it! That is so creative how you painted it and all the great tips on how to make that are great! I love that you added the shadowing to it too. That made me laugh about the beach being in the opposite direction. LOL! Oh well, it’s the sentiment of the sign that counts and it looks pretty, so there! :)
Hey Sharon,
Thanks so much!! I love making signs….I’m going to end up with them all over my house! ;) And yes, the beach is completely in the opposite direction but that sign needed to be pointing out…towards the window, in my opinion, so that’s how I made it! No one who’s used my bath has said anything… yet.lol ;)
I so so dig this sign!!!! It is wonderful!!! I am thinking of the spot right now!!! i have a couple spots in mind! Thanks for this tutorial…I will let you know when I get one done….hmmmm now what should mine say?!??
Hi Nicole!
Thanks so much!! They are addicting, I tell ya! I have another to share soon that I’ve done. Plus a few more in the works! Can’t wait to see what you do!! :)
Great idea to trace with a pen and allow the pressure to make the mark!! You did a great job!
Thanks Sonya! It works great on soft wood like pine. Some other woods, not so much. ;) But I do that method when I can!
Nancy: So many great tips in this one project. The finished sign reminds me of our trip to NC. Ahhh. Gonna follow you on twitter and pinterest and tweet and pin this, too! Have a lovely day!!
Neighbors About Town Blog
Thanks so much Kris! :) And thanks so much for all the shares!!
I hope you have a wonderful weekend! :)
I have never tried the technique you used for the lettering. I think I need to just try it.
thanks for the inspiration.
Hi Carol :)
Yes, you should, it makes it really easy! Just keep in mind that it might not work as well on harder woods. But there are many different transfer methods besides this one. :)
I hope that arrow is really pointing to the beach because if it is I’m coming to your house. :-)
LOL, well it’s not…but it is just across the road from us so come on! You are always welcome! :)