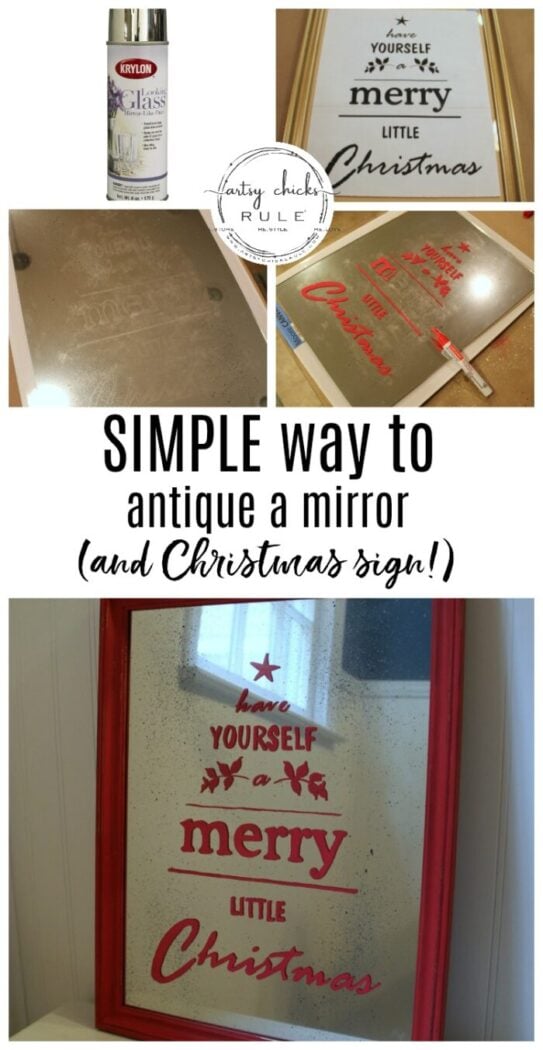
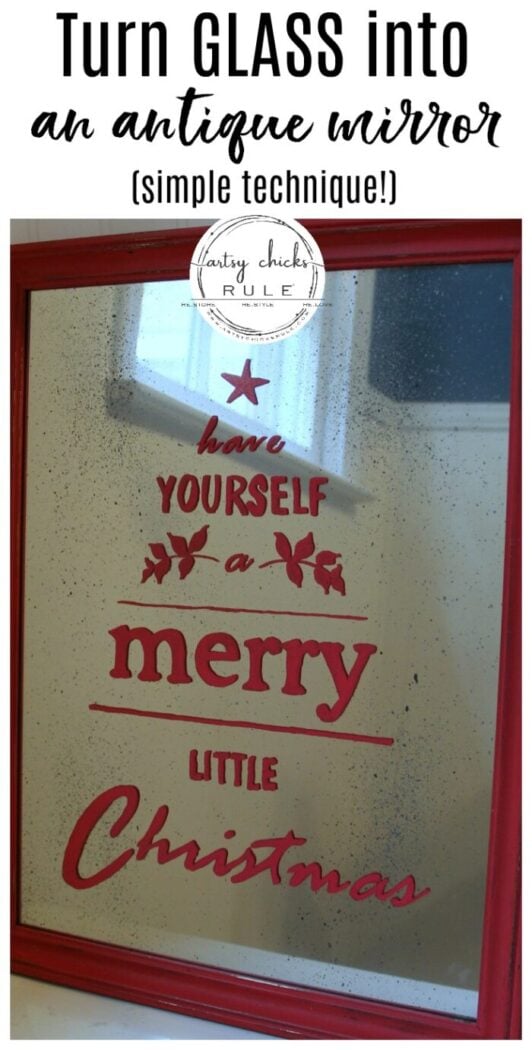
How to Make an Antique Mirror Tutorial (and Christmas sign!!)
Ever wondered how to get that cool “antiqued” mirror look ….without having to actually find an old, antique mirror?
Well, today I’m going to share with you a DIY aged, antique mirror tutorial.
AND it’s so simple and easy you’ll be wanting to make one yourself!!
Here’s what inspired me to make it…Pottery Barn’s sign, here.
And with a $3.98 thrift store glassed frame, $7.99 Looking Glass spray ( of which I still have plenty leftover), I’d say I saved a ton.
Not to mention, this sign is no longer available on the Pottery Barn website.
Here’s the antique mirror tutorial (in all it’s crazy simplicity!)
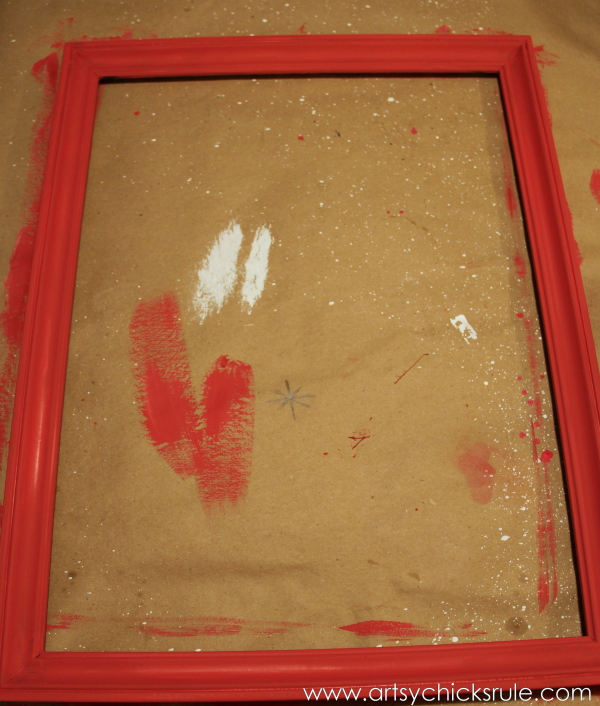
I know, it doesn’t look like much.
But when I went searching for “how to’s” for this project, I wasn’t thrilled with the results.
Muriatic acid? No thanks.
That’s all I could find.
So I came up with my own, less toxic, way to create the look.
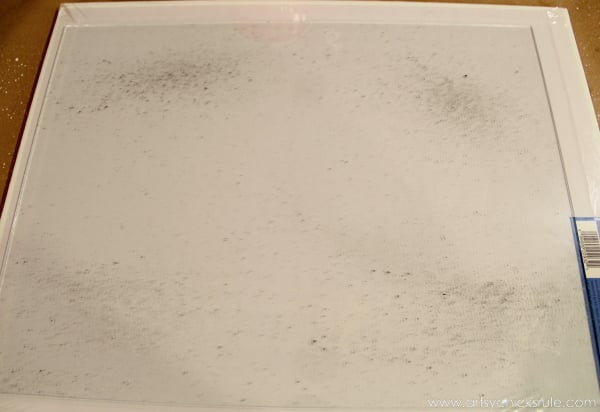
I took the glass out of the frame and mixed a bit of Graphite (black) Chalk Paint® and water. (make it watery-ish)
Then I took a small paintbrush and filled it with the watery paint mixture and “spritzed” the glass with it.
(basically, run your nail over the bristles while pointed towards the glass)
I did that until I thought it was “enough”.
Then once that was dry I started spraying thin coats of this over top of it.
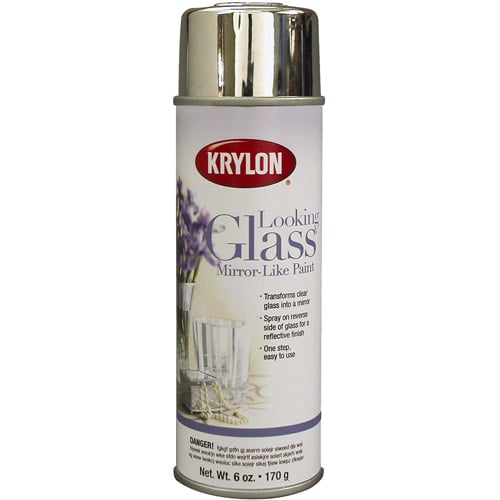
*Looking Glass Mirror Spray Paint. I would look for it locally but it is sometimes hard to find. I did find mine locally on my most recent purchase.
If you can’t find locally, Amazon does sell it.
I’ve made a mirror before with it…you can see it HERE.
It’s really awesome stuff!
It also makes really pretty “mercury glass” too.
It took several passes to get it fully “mirrored”. Just be patient and take your time here.
Isn’t this the easiest antique mirror tutorial ever? Yep!
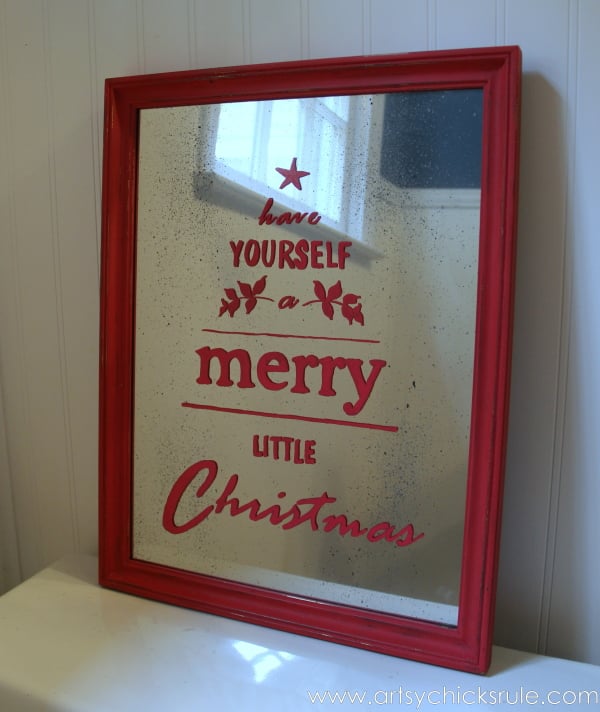
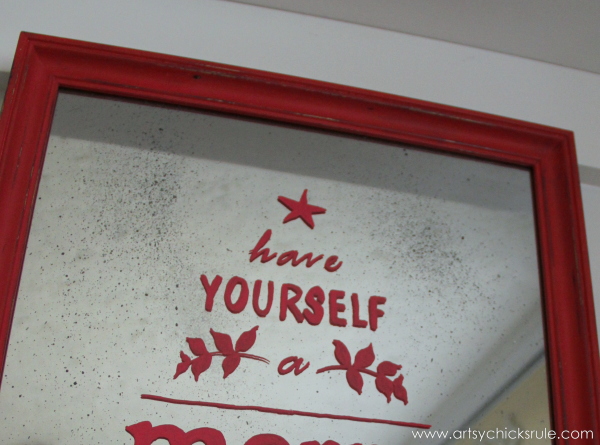
Once done, I transferred the graphic.
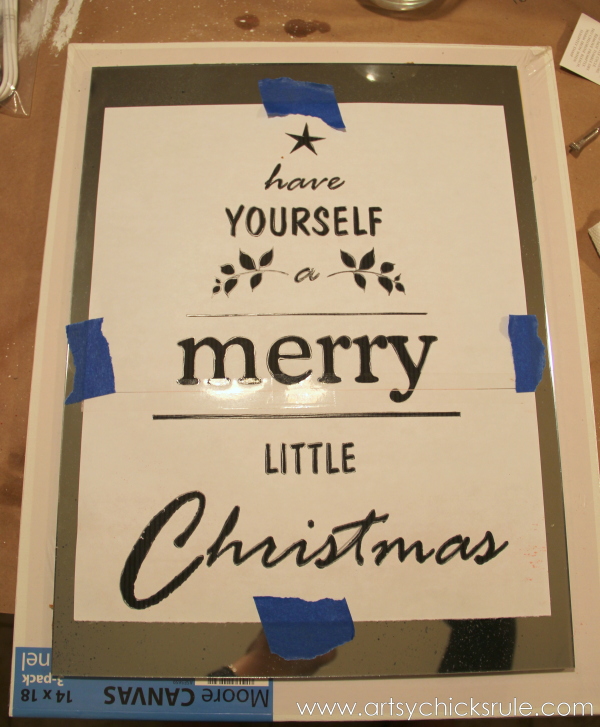
Please tape it down! You do not want it moving.
Trace over it with a pencil and voila…
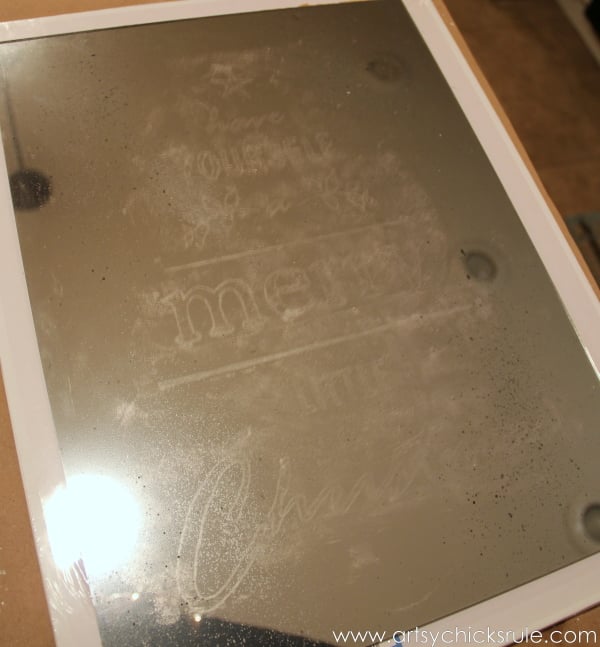
Since this was a mirror I was transferring onto, I used the “chalk transfer” method as I used in this post here–> “Thrifty Tray Turned Coastal Chalk Art”
It’s very faint but visible enough to “paint in the lines”.
I decided to try a paint pen for this project. It’s water-resistant but removes with alcohol.
Which basically means it’s sort of temporary if I want it to be.
I don’t normally do that…it feels wishy-washy to me. ;)
But I wanted to try it out.
I didn’t love it.
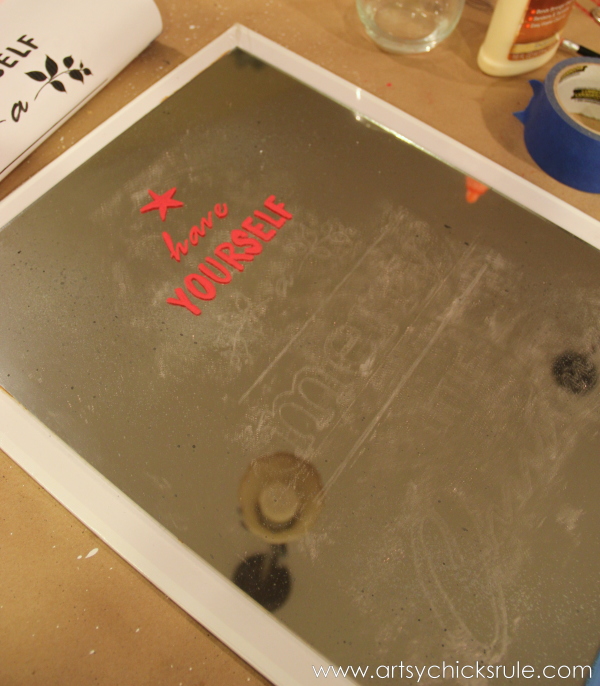
What I did love was how easy it is to paint it in verses painting with a small brush.
I am guessing the problem lies with the shiny glass surface more than with the pen itself.
I’ve used *Chalk Ink Pen with great luck. I’m thinking this paint pen, on a more porous surface, would be brilliant and much loved.
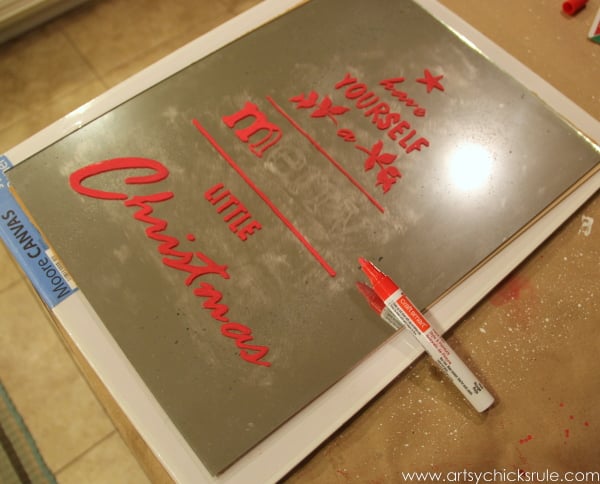
Quick and easy! That is definitely true.
They also have oil-based paint pens…but the “to be used with adequate ventilation” kept me away.
I didn’t want to breathe that the whole time I was coloring it in.
The less chemical exposure, the better.
(and yes, I spray paint quickly outside, while holding my breath, and then run back inside… I know I am a sight to behold! )
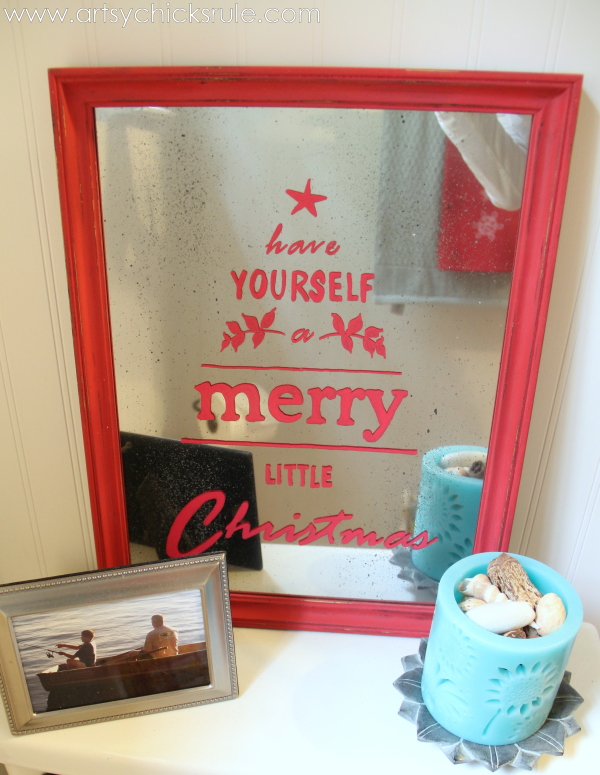
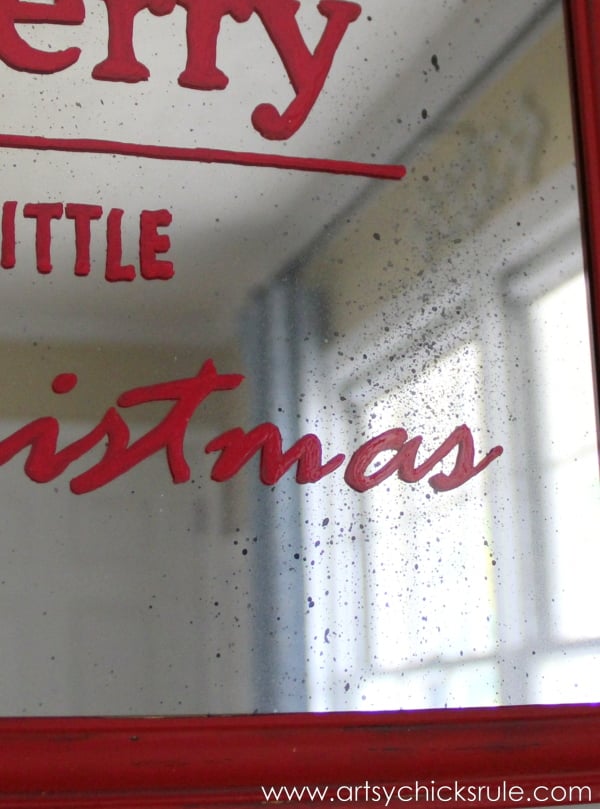
Since this was an antique mirror I wanted the frame to look antique as well.
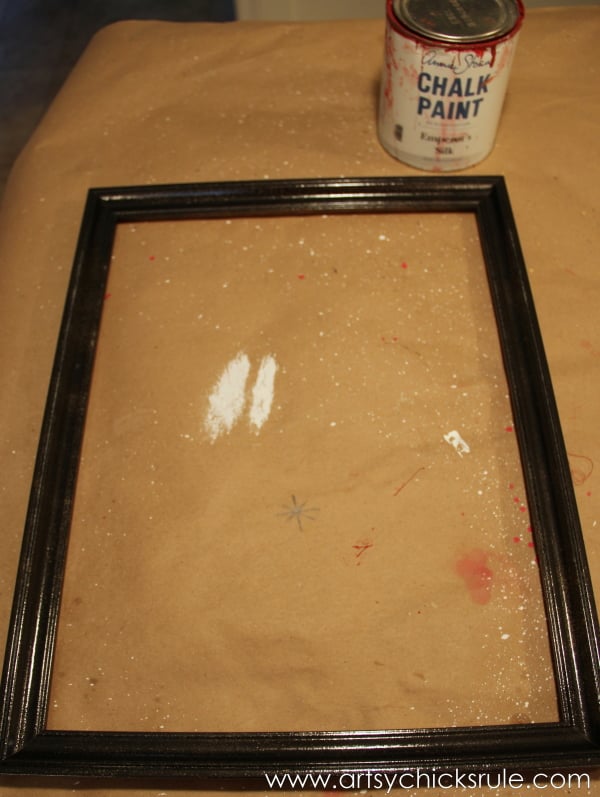
It started out gold but then I sprayed it with Oil Rubbed Bronze (black would work too).
And since the red color on the pen was so bright…I decided to mix a little white into my Emperor’s Silk Chalk Paint to lighten it up a bit to match. (and wow, it ended up being a perfect match!)
After that was dry, I took a wet cloth and rubbed through all over to reveal the two underneath layers.
Waxed and done.
Can you believe this used to be clear glass?
Isn’t this antique mirror tutorial and technique the coolest?
I think so!! I was thrilled that my vision panned out. It doesn’t always.
It actually turned out exactly like I was hoping.
LOVE when that happens.
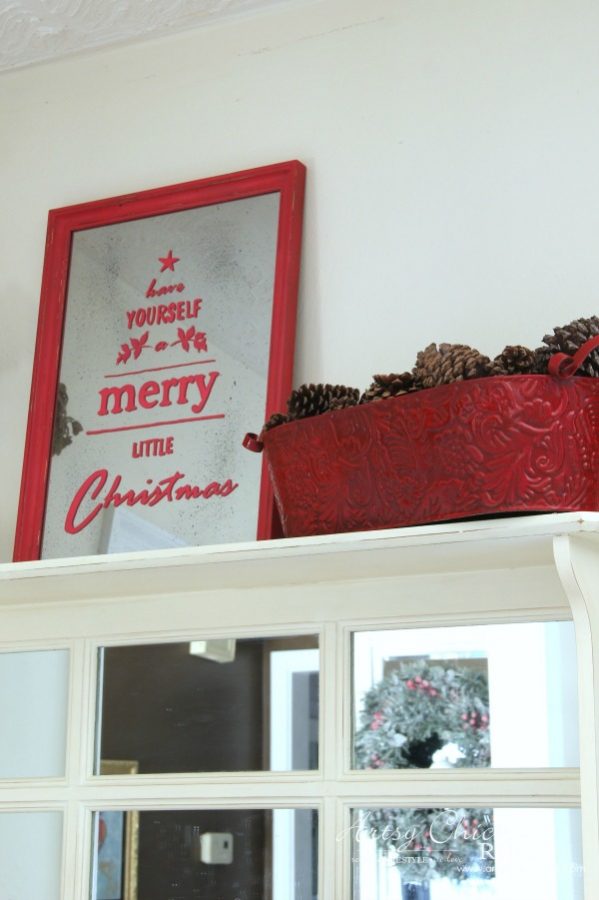
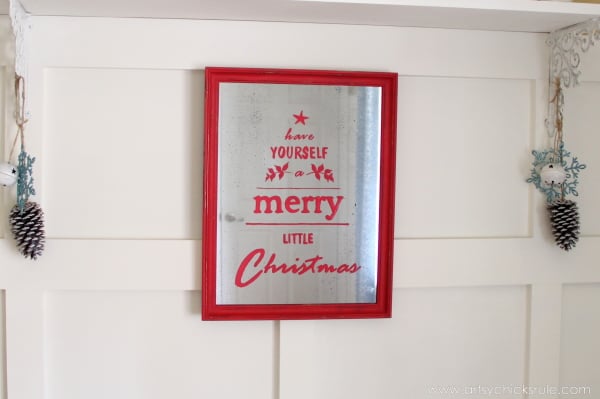
And yes, indeed, it is on the back of my guest toilet.
Because I would like to wish my guests a “Merry Christmas” every time they visit the loo.
It’s really hard to photograph a mirror….without getting in the mirror. (as you can see…my arms)
That’s my son and husband fishing in the photo. Isn’t he cute…he’s taller than me now.
Time sure does fly!
I created this graphic in Picmonkey so it’s easily recreated with the fonts of your choice.
Just be sure to make it into a “Christmas tree” shape as you go down.
Or …you can use the one I created.


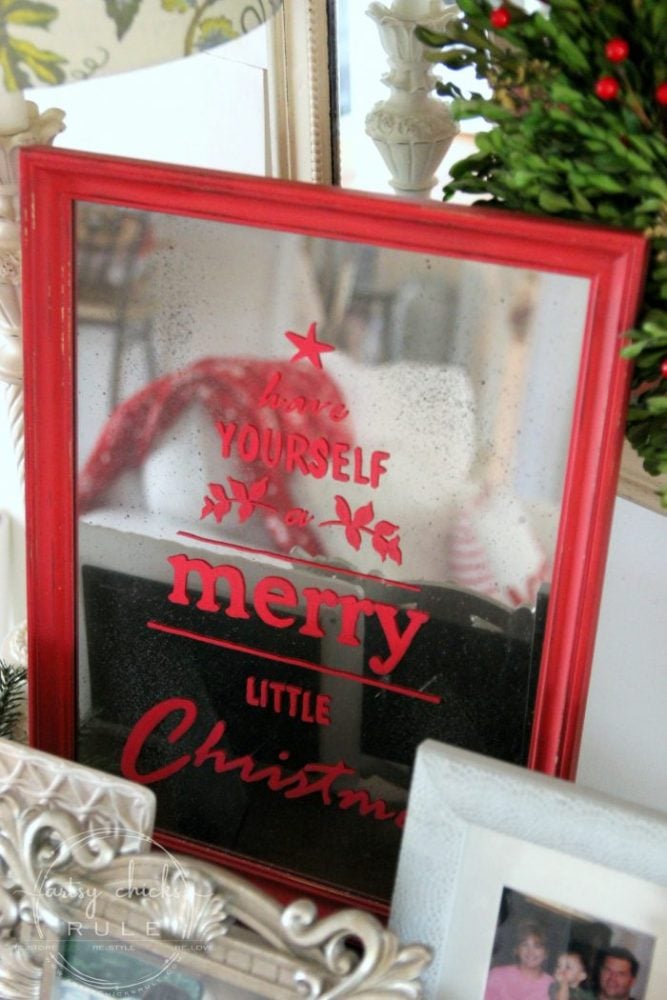
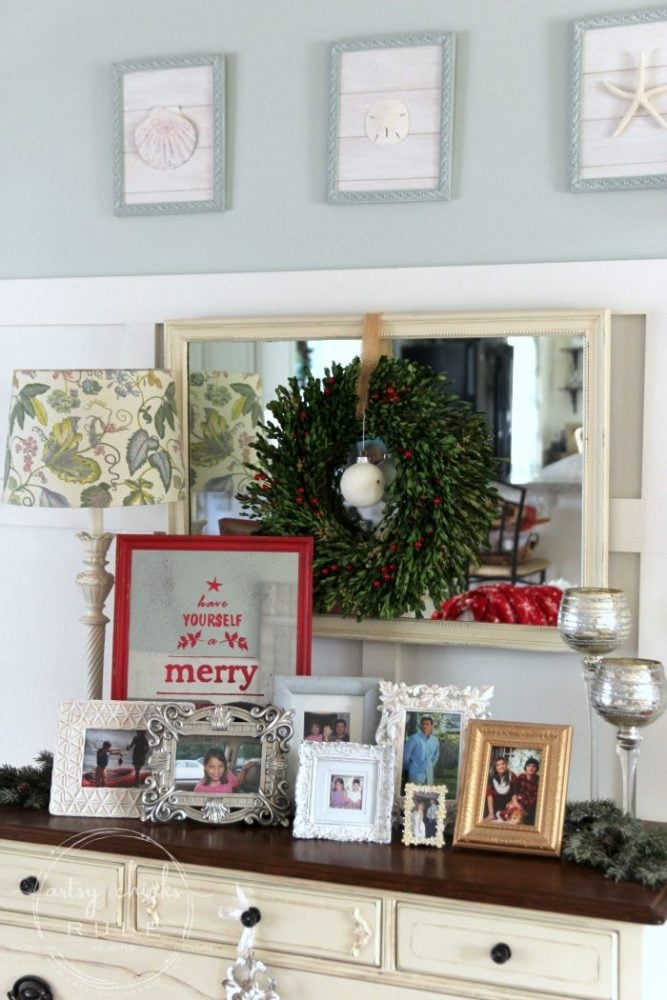
Here it is in another spot.
A few close-ups of the antique look…
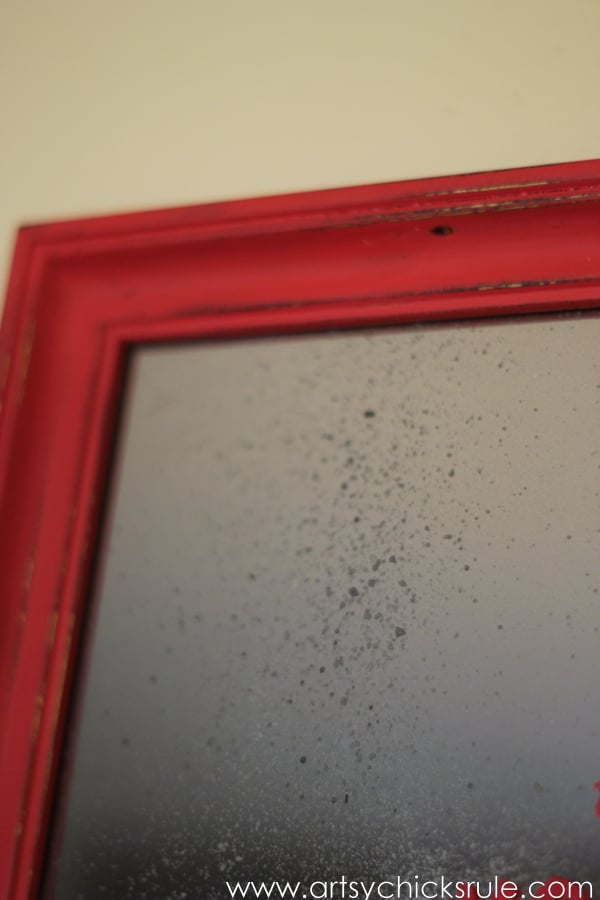
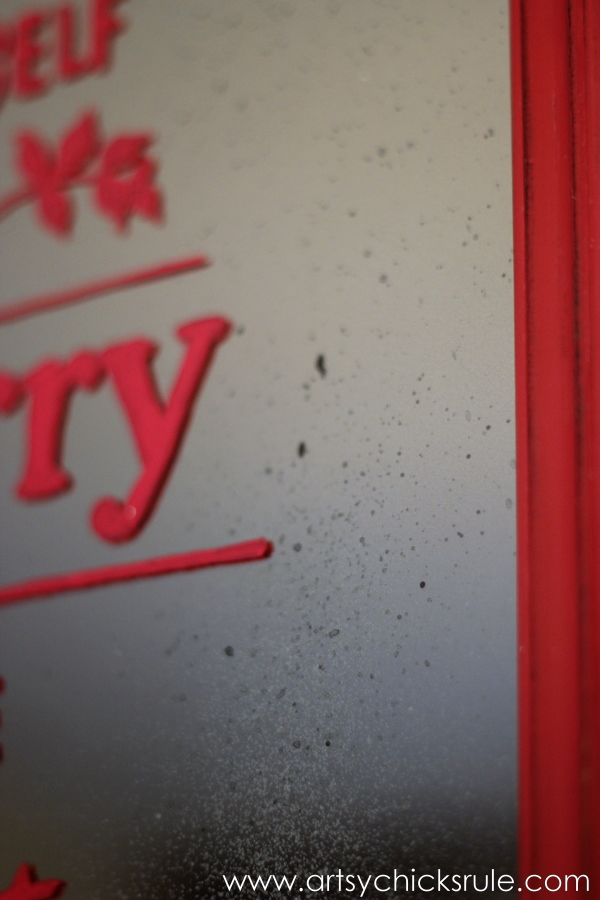
Okay, more than a few…but I am just thrilled with how it turned out and I can’t wait to use this technique again.
Hanging in a different spot…
Something else is hanging in this spot. It’s something I painted and rhymes with Fanta.
I’ll be sharing him soon. He’s my fave.
But for now…one last look…
Hope you’ll give it a try!! Let me know if you do.
It’s ridiculously easy and much safer than using chemicals to create the look! I will surely use this antique mirror tutorial again.


")


Thanks for this. Love it!!
You are welcome! and thank you!! :)
Nancy
Love the mirror. Thanks for sharing!
Thank you, Patty! :)
Great project. . .as always from you! You must breathe creativity :)
Question. Chalk pens that you refered to. . .what brand name and where can they be found? I have a customer who wants me to put her girls’ names on black chalkboard-like signs and I can’t decide if I want to paint or use a chalk pen.
Thanks bunches!
Lois
Hi Lois!
Thanks so much! :)
The chalk ink pen I used (and have) I got from Amazon. I edited my post and linked to the exact one I ordered.
You can see it in use on this project here… https://www.artsychicksrule.com/2014/04/thrift-store-tray-coastal-chalk-art.html
Hope that helps!
Nancy
That one I love! I may steal that for a different idea when I redo my daughter’s bedroom. Thanks Nancy!
Thanks Ellen! :) Oh yes, steal away!!! Enjoy!! :)
Nancy
Love it Nancy! I’ve made a mirror with Looking Glass Spray Paint but I love your idea of splashing Graphite chalk paint on first. I’m making mercury glass trees at the moment and so my can of Looking Glass is out on the workbench. I happen to have the perfect frame too. I think Mama needs to make one of these today to add to our holiday decor (which I’ve already put out – earliest EVER). Thanks for the printable graphic and the inspiration!
Thank you Marie! :)
I just love the Looking Glass spray! Mercury trees sound so pretty!!
I just finished putting up our decor too! All except the front porch and the tree. (live)
Will do both the weekend of Thanksgiving. It’s actually nice to know the house is done though!
Nancy
nancy what a great tut doing it this way is so much easier than any other i have ever seen,you was really using the old noodle on this one xx
Thanks Chris! Yes, it really is…no brainer!! lol Sometimes mine works well….sometimes not! ;)
xo
Nancy
Could this graphic also be cut out with a cricut to use as a stencil? How did you trace it on the mirror? I’m new to this but love your blog!!!!
Hi Donna,
I don’t know about the cricut, I don’t own that machine, sorry!
For transferring, just shade the back of the paper with chalk and tape it down to the mirror. Trace along the edges of the letters with a pencil firmly and the chalk will transfer there to the mirror.
Then you will have an outline to paint in. :)
Hope that helps! :)
Nancy
Great tutorial and so easy! I absolutely love seeing how people replicate Pottery Barn items and you have done a beautiful job! Thanks for this.
Thank you Tamara! :)
Nancy
I love it! On the lettering: Is there a reason one can’t just trace the lettering through the clear glass, let it dry, THEN do the mirror part? That would save having to do the chalk transfer stuff in mirror image, etc. But maybe there’s a reason my clear-glass lettering idea wouldn’t work and you already troubleshot it. :)
Thank you Vicki! :)
Nope, you could do it from the backside too (so it would be “under” the glass/mirror). The transfer method would work the same though. You could even use a silhouette or similar machine and cut the letters out(even easier!) and place them on the back or front. If on the back, just spray over the painted or vinyl letters.
I wanted it to look like an old antiqued painted mirror so did mine on the front. :) But lots of options for sure!
Nancy
Nancy, you are BRILLIANT! I never would have thought to use black paint on the glass first! I have had a can of the Looking Glass for quite some time… actually since before LAST Christmas. I was intending to use it to make the mercury glass ornaments. And, as always, your design is awesome! I definitely saved it for future use! Thank you for giving us the printable! Looking forward to seeing the thing that rhymes with “fanta”!! xo, K
Haha! Thank you Karen! :) I am actually excited to make more things with the “antique” mirror look!
“Fanta” is coming soon!! ;)
xo
Nancy
This turned out fantastic!! Your version is absolutely perfect!! I want to try this mirror technique. Pinning! XOXO
Thank you Christy! :) I LOVE the mirror technique and want to do it on something large next!
xo
Nancy
Love this! I’m not very good at drawing or painting small areas, so could I just use a stencil and paint it that way? I would think it’d have the same effect.
Oh, I forgot, what kind of paint did you use for the red stencil part? Did you have to coat the entire “mirror” with a sealer?
Thanks so much!
LOVE, LOVE, LOVE your blog!
Christine
Hi Christine and thank you! :)
Yep, you could absolutely use a stencil! That would work fine. Also, any craft paint would be fine too.
I actually used a red paint pen though. I didn’t seal it afterwards.
Hope that helps!
xo
Nancy
I LOVE this!!
I do have a couple questions I beg you to answer :)
1. How many coats of looking glass paint do you use?
2.Do you spray it with water/vinegar mix to give it a mercury glass effect in addition to your black “spray”?
3. Is the writing in red done on the front of the glass (not on the “silver” side)?
Thank you SO Much!!!
Christy
Hi Christy,
I don’t recall how many but I know it does take several passes to cover it well and to give it the “mirror” finish.
I know that is an alternative technique but I didn’t need to use the vinegar, just the black watery spray only.
It was SO easy this way. I highly recommend this technique. :)
The writing is done on the outer side, front, non painted side.
Hope this helps!
Nancy
Happy Thanksgiving Nancy to you and yours!!!
This is a beautiful makeover! Positively holiday goodness. Love how the letters have a shadow effect due to the mirror.
Thank you so much, Christina! I hope you had an amazing Thanksgiving too! And thank you, I need to revisit this project and make another! xo
I just looked at your inspiration mirror from Pottery Barn, and must confess that your mirror looks 1000 times better!!!! ♥️
Aw, thank you so much, Cat, that is so kind of you to say! xo
Nancy that is brilliant!! Great tutorial! Thanks so much!
Have always wanted to learn how to use my husband’s Cricut machine and try my hand at something so cool.
Thanks so much, Michele! This is an oldie and it’s making me want to revisit and make another! :) xo