DIY Gold Dipped Jars (Super Thrifty DIY!!)
Find something you love in a store, like these DIY gold dipped jars, but didn’t love the price? Create your own, even cheaper!
Updated August 2023
I have a super thrifty DIY for y’all today. Really, this one is a no-brainer. I love super simple DIYs, especially those that save me money, don’t you?
DIY GOLD DIPPED JARS
I can always find these kinds of glass jars at the thrift store.
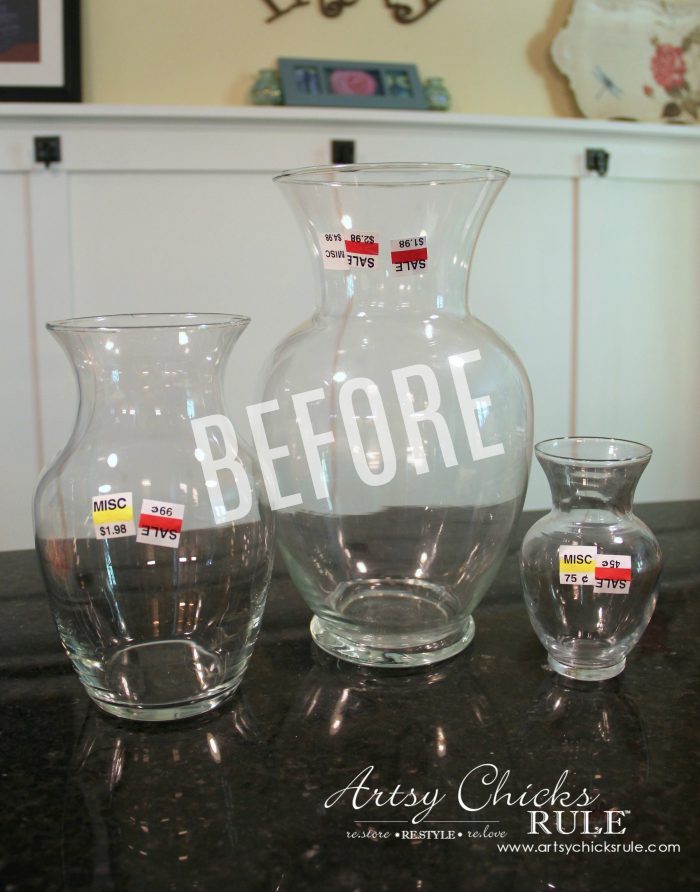
And if you follow along on Instagram, you might remember these.
I shared a photo of them right after I finished painting. (which took all of about 10 min!)
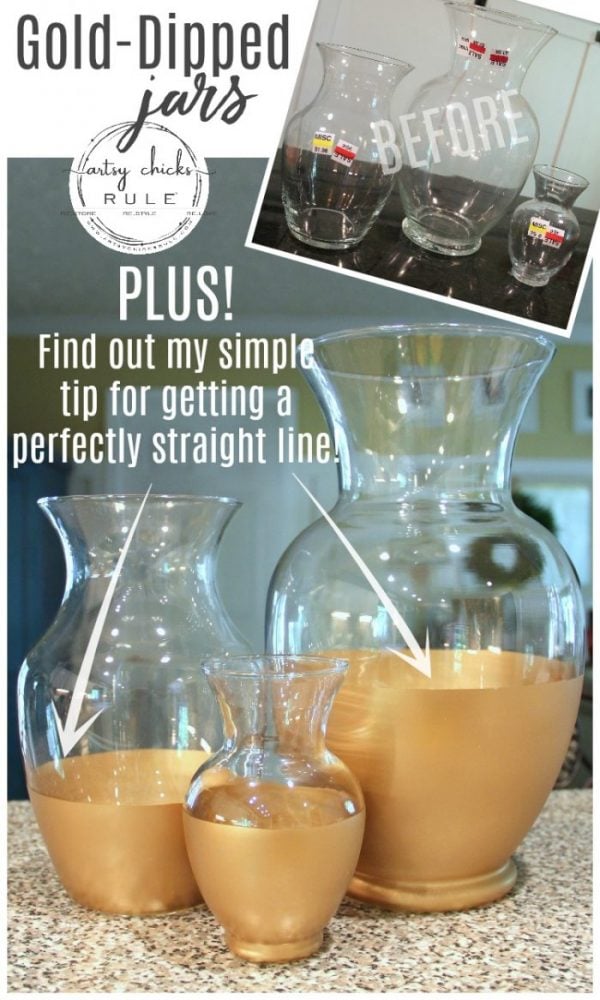
I was over at Hobby Lobby a while back and saw these gold-dipped jars…
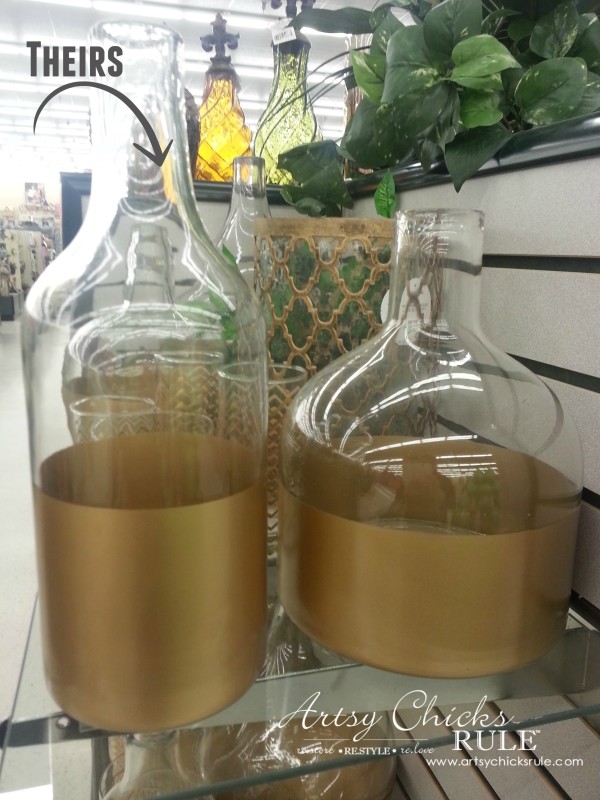
Aren’t they pretty?
But they were each around $30. Ouch.
They do have coupons and sales quite often but even with a 50% off sale, you’d still spend that for the two.
I spent $3.50…and also got this gold spray paint.
(of which I still have a lot left in the can after doing this project)
It’s the same paint I used on this project…
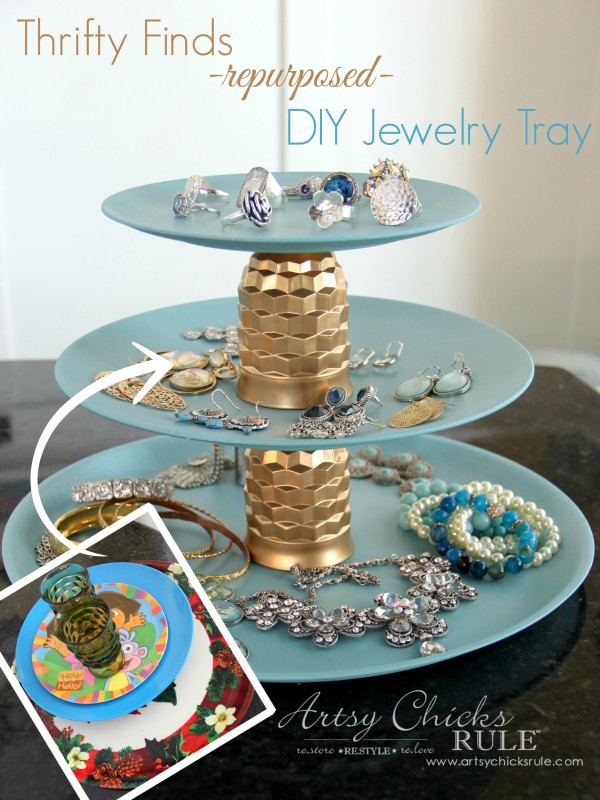
You can read all about it here >>> Thrifty Makeovers Repurposed
It’s a beautiful shade of gold. I just love it!
So again, here is what I started with.
I found all of them at the same thrift store. But as I mentioned earlier, you can find these pretty much everywhere.

As you can see, they were on sale, $3.42 to be exact….not including tax.
Tutorial for the DIY Gold Dipped Jars
I began by taping off where I wanted the “line” to be.
I realized it’s not so easy to go around a round item with tape…in a straight line.
So… I decided to fill it with water so I’d have a fill line to follow. And that is the way to go!
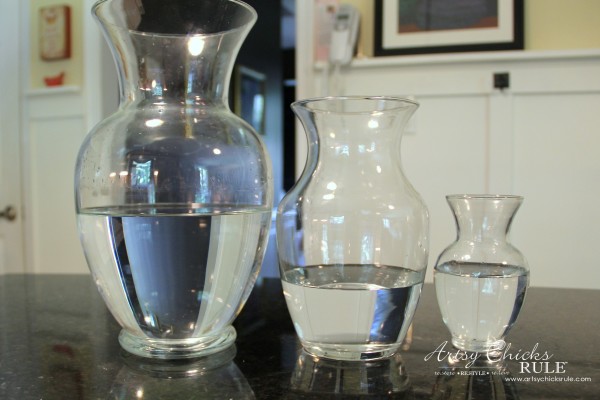
I wanted the gold to vary on each so filled them each at different levels.
This worked PERFECTLY, by the way!
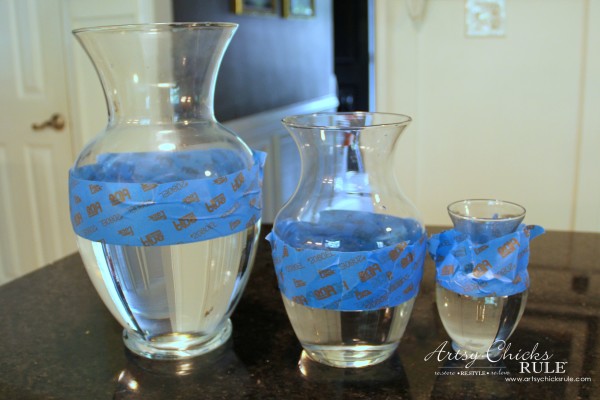
So perfectly that y’all need to pin this for later! (in case you forget, like me!)
Then I applied a plastic bag to the above area so the paint wouldn’t get where I didn’t want it.
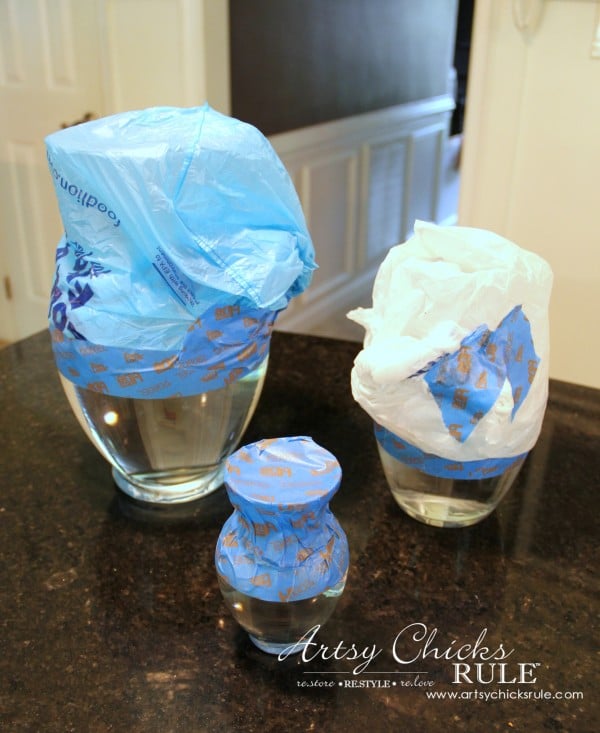
I took them outside and sprayed them.
Voila!
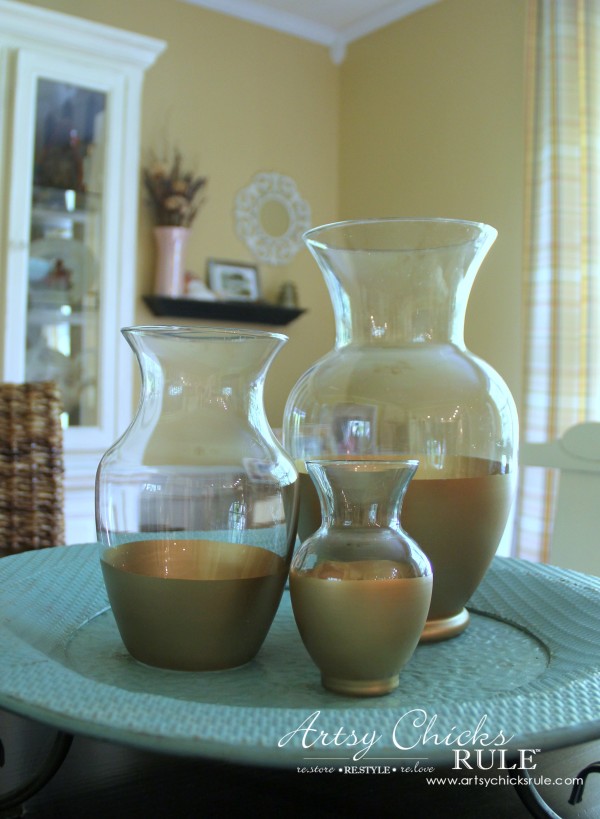
Perfectly painted gold-dipped jars.
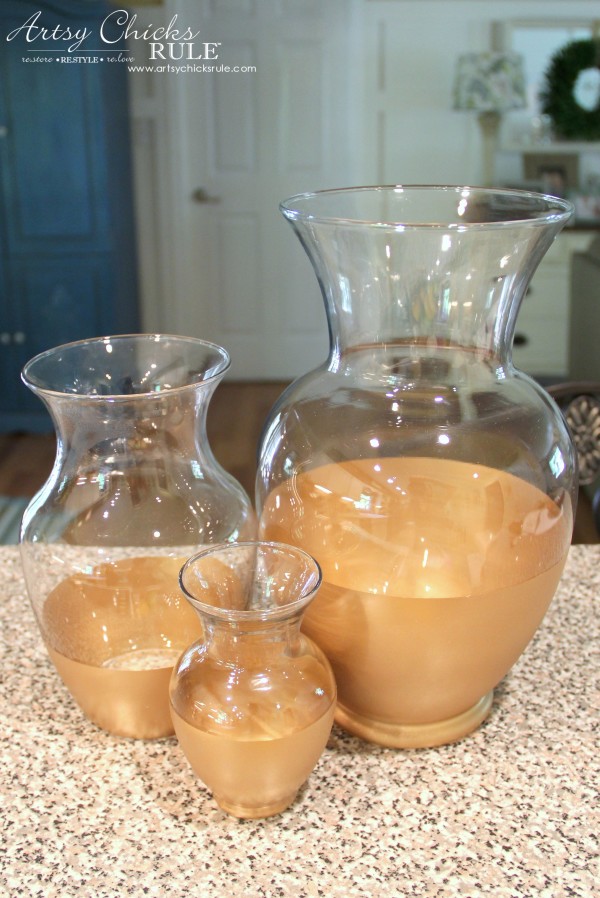
Don’t they look like they came from a retail store like that?? I love how they turned out!
And it was super easy. Even better.
A few coats of paint and done. That’s my kind of project!
That’s a substantial price difference on these gold-dipped jars…
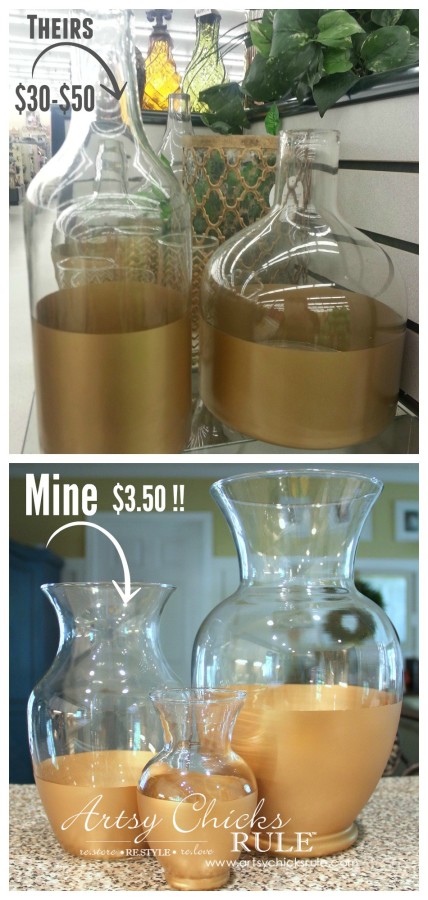
…especially considering the ease of this project.
Aren’t so elegant looking? Just ready for some pretty flowers.
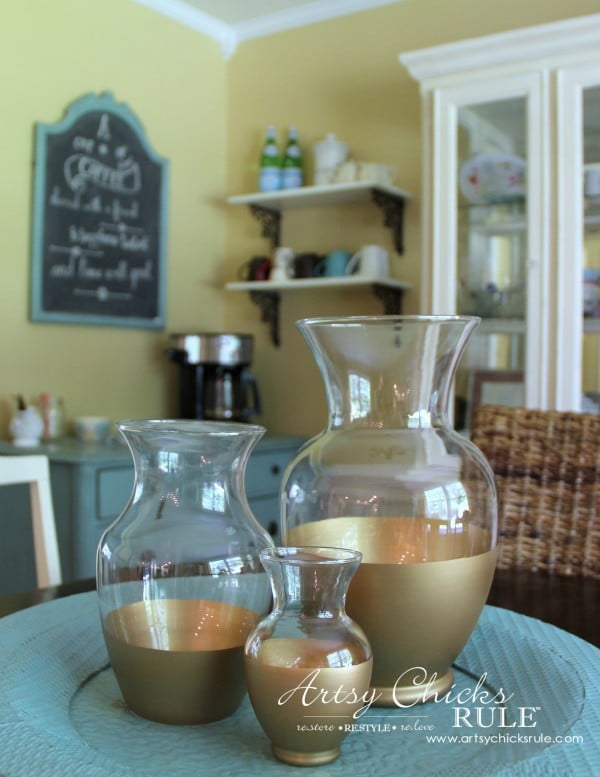
It’s been 8 years since I did this project and first wrote this post (wow!) and I can tell you, I use these all the time for flowers.
I still love and use them all these years later.
Amazing savings and such a simple DIY, truly!!!
PIN it to save it!

My husband brought me these pretty roses last week and I had to take a shot and show you how they look inside of one of these gold-dipped jars.
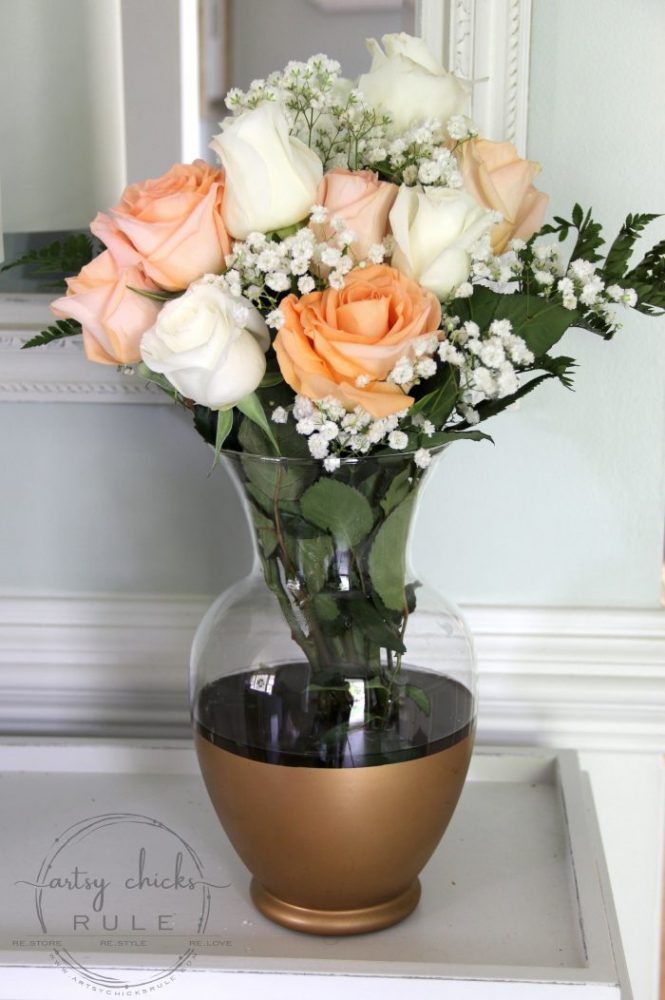
Isn’t that just lovely?
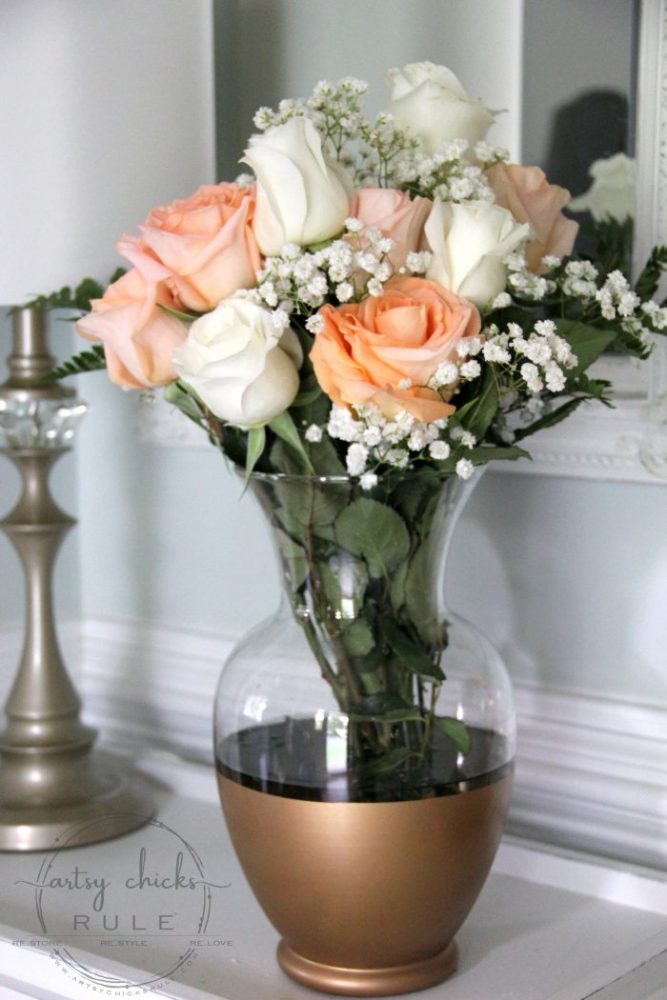
Now…do you need some pretty (and inexpensive) new jars?
Give this one a try!
If gold is not your thing, use silver…or bronze, any color will work. The sky is the limit.
Makes sense to DIY this one, for sure.
Hope you’ll give it a go!




They turned out great! I love the tip of filling the vases with water. It is a great temporary visualization, so you can know what you are going to get in the end.
Thank you Cari! :) Yes, that really worked out very well!
xo
Nancy
Very nice, easy and fun…. I’d like to have those Thrifty stores here ¡¡¡ even in the chinese crafts stores it costs 3€ the smaller…you can do many supa cheap things¡¡¡¡ Perhaps I move to the states, jajajaja ( just for the thrifty stores and garage sales)
Thanks Victoria!
Yes, we have lots around here! ;)
I do love shopping them!
xo
Nancy
Thanks for your ingenious idea of filling the jars with water to get a straight line. I can just imagine how hard I would have worked trying to get it perfectly straight without your tip! Duh?! Great thinking!
You are so welcome, Mary! :) xo
Nancy you smarty pants! I recently spray painted some round vessels and had a heck of a time lining up the painters tape. I never would have thought to fill the darn jars up with water to get my line – brilliant! Love your gorgeous table centerpieces for a wedding/anniversary. Pinning this for inspiration for my daughter’s wedding in 2016.
Thank you Marie :) lol
It just came to me as I was trying (and failing!) to tape a straight line around the jars.
Thanks for pinning! (how exciting to be planning a wedding!)
xo
Nancy
Very nice, Nancy! I would never thought of using water for my line guide….. what a genius idea! :) xo
Thanks Karen! I had never thought of it before either…but it worked out great! ;)
xo
Nancy
These are fabulous! So beautiful and simple. Can’t wait to try :)
Thanks Georgia! :)
They really are simple but don’t look it!
xo
Nancy
Oh, please! The water trick – INGENIOUS! I’m doing this for sure. Thanks!
Haha! Thank you Linda! :)
xo
Nancy
Love this idea. Planning on doing this before I move into college to have some dorm decorations, and storage. Thank you so much for the inspiration and for sharing!! Cant wait for the next post.
Thank you Erin! Yes, this is a great, inexpensive way to create pretty decor! :)
Have fun!
xo
Nancy
Brilliant!!!!!! Picking up spray paint today….can’t wait to try this…..and I have tons of flower vases…..silver would be beautiful also!!!!
Thanks! :)
Have fun!!! And yes, I agree, silver would be beautiful too!
xo
Nancy
Such a great idea! I will have to try this soon, I actually have a few of those glass jars sitting around and I’ve been looking for ways to spruce them up!
Yay, yes do! So easy! :)
I just received this post. This is just too damn easy and such fun!! I had one of those ‘why didn’t I think of this’ moments. I am going straight away, not kidding, and do this! So very cool! Thank you.
Hi Linda! Oh yes, this is a fun little project for sure! And an inexpensive one at that! :)
Hello! I’m wondering if this paint will chip or scratch off? I’m wanting to make some to give and sell and don’t want people to have a bad product.
Thanks,
Donna Hopson
Hi Donna,
I haven’t had any issues with that. I even use them for flowers every time my husband brings them to me. :) You could always stop by the thrift store and grab an old vase, etc, spray and see what you think. Do the scratch test and see how they hold up. I’m pretty happy with mine! :)
I was wondering what to do about a center piece for our tables. Perfect project for me to do for our 50th anniversary that will coming up next June.
I do think that I will spray them with a clear sealer before using.
Love your tip/suggestion about putting water in first and then taping off. Brilliant idea. Thank You
Have an enjoyable day
OH nice!! Congratulations on 50 Colleen! :) Our anniversary is also June (22), and we’ll be 27 years this year! And yes, you could do the clear sealer for extra protection but I haven’t had any issues with mine. (they’ve been up on a shelf when not in use though) xoxo
June 7th for our anniversary. Congratulations on your up-coming 27th.
I do plan on using the gold dip vases by having white roses in the vases and displaying them on the 9ft. long picnic tables. Now, all I need to do is find me some/ several vases that are similar.
I have also spray painted some wine bottles in gold for added decoration.
Me thinks I will be doing some thrift shopping this weekend.
That will look amazing Colleen! Sounds beautiful. And yes! Check all the thrift stores. I can find these almost every time I go. Good luck! xo
I absolutely love this idea! I’m definitely giving this a try! Thanks for always sharing such awesome inexpensive and practical ideas!!
Laura
So glad you like it Laura!! :) xo
Hi Nancy, I had a thought too about embellishing with transfers. Christmas ones with the gold would be interesting. Just a thought. I’d have to experiment with it. I like this idea! (Yours!)
Oh I love that idea, Fran! Yes, I’m going to try that after this month and share it here on the blog. Wonderful idea. So pretty. I had thought of doing some under a pretty glass platter too. Wouldn’t that be pretty too?
Great up-cycling! I have done this too with Mason jars. SO, SO many vases at Goodwill! Prayers for Ryder. He’s such a beautiful boy. Glad Piper is fitting in so well with your beautiful family. What lovely Roses from your hubby. He is a keeper. We celebrated 56 years this past February.
Thanks, Joanne! Oh, I love Mason jars too! Thank you for the prayers, so appreciated! Piper and Ryder are becoming fast friends. Congrats on 56!! xo
This is absolutely genius, girl. I like the paint on bottom too so you don’t have to look at so much stems showing……AND it’s a great way for a faux bouquet to look more real not seeing the very fake looking plastic wrapped wire stems, too. Well done. I never saw this post so it is new to me!!!! : – )
ps
My elder daughter and her hubs chose to not have children. Years ago they were part of a dog rescue. They named their sweet 4 legged baby of theirs Derby and had her many many happy years. Yesterday was that daughter’s birthday…..and the day they lost our sweet grand dog. They are in deep mourning. If you think of it and would send up some prayers for their sadness to lessen, I’d sure appreciate it. Give your pups some pet-pets from me.
Aw, thanks, Michele!! Yes, I hadn’t even thought of that, no stems showing, perfect! So glad you are seeing this one for the first time! Yay! (however I edited it a bit and then sent the old version out!! haha!! old brain doesn’t work like young brain used to…it’s all fixed now though! ;) )
And oh my gosh, I am so, so sorry!! I will pray for them, I understand completely how hard that is. I will tell you, we lost our Lexi girl (our golden mix rescue that grew up with our kids) also on my birthday. That seemed so hard to have to lose her on that day but over the years I have come to treasure that timing, a day we now both share, with my sweet, sweet girl. I celebrate my birthday and remember the life of my best girl every year. Big hugs to you and your daughter. xoxo
Prayers for sweet Ryder!
Thank you, Karen! xoxo
Hi Nancy! I’m so sorry to hear about Ryder. I just know everything will be ok. My Gracie has 6 tumors removed that were cancerous but they were low grade. I will say a prayer for him. That little puppy is probably making him feel souch younger! Well I absolutely am going to try this DIY and the water trick in genius. Have a good month and keep us posted.
Thank you, Cheryl! Yes! Everything will! That is encouraging about your Gracie. I pray that if it is cancer, that it is caught early and low grade too. And yes, Ryder has always been such a happy go lucky dog with a puppy personality (still 7 years later) and so they are getting along fabulously! They love to play together, it’s so sweet to watch. Thank you for the prayers, I will definitely keep y’all posted! xoxo
What a great idea. I have several glass pieces like this I’ve been saving to do something with. I am so sorry to hear about Ryder’s tumor. I’m thinking inconclusive biopsy results might be a good thing. I hope all goes well with his surgery! I love your Ryder!
Yes, do this! So easy too. :)
Thank you, Debra. Yes, I’m thinking so too!! I will let you all know how it goes! xoxo
Love the vases, but I just came to say that I’m saying a prayer for Ryder. We found a tumor on our dog’s chest last year, and it was inconclusive too. We had it removed and she is right as rain, no more issues!
Thank you so much, Audra. I appreciate that more than you know! And wow, that is awesome!! So happy to hear that and that is so encouraging. xoxo
Hi Nancy: I hope that precious Ryder is doing well. So good that he has a little buddy to distract him.
These vases are just great. I love the idea of filling them with water so you get a straight line–I would never have thought of that. Such a clever Lass you are! Thanks for the tip. Have a great week, and don’t forget to give Ryder and the baby boy each a smooch for me.
Thank you, Caye! :) He is doing great but hasn’t had his surgery yet. And yes, it really is, they are having a ball! xoxo